# Blocks
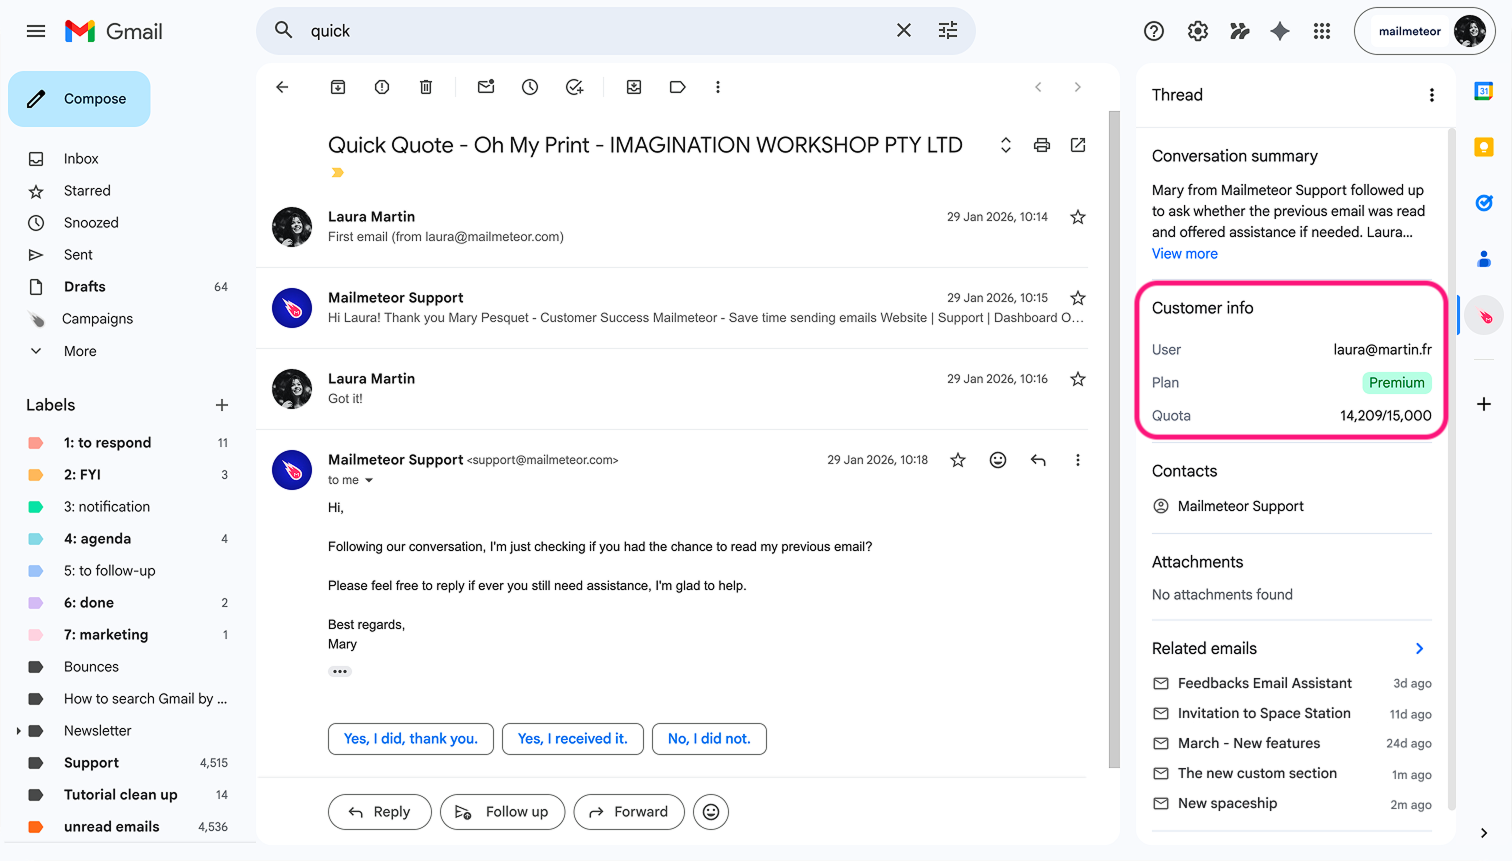
The panel in Mailmeteor lets you add blocks, small piece of information powered by your own API endpoints. This makes it possible to display any data alongside your emails: CRM records, invoices, support tickets, or anything your backend exposes.
Extension displayed in the panel
{% hint style="info" %}
This feature is currently in private beta and is available to a limited number of accounts. Your account may not have access to it at this time.
{% endhint %}
## Add a custom section
1. Open the Mailmeteor Chrome extension in Gmail. The panel appears on the right side of the screen. If it doesn't appear, click the Mailmeteor icon in the side panel.
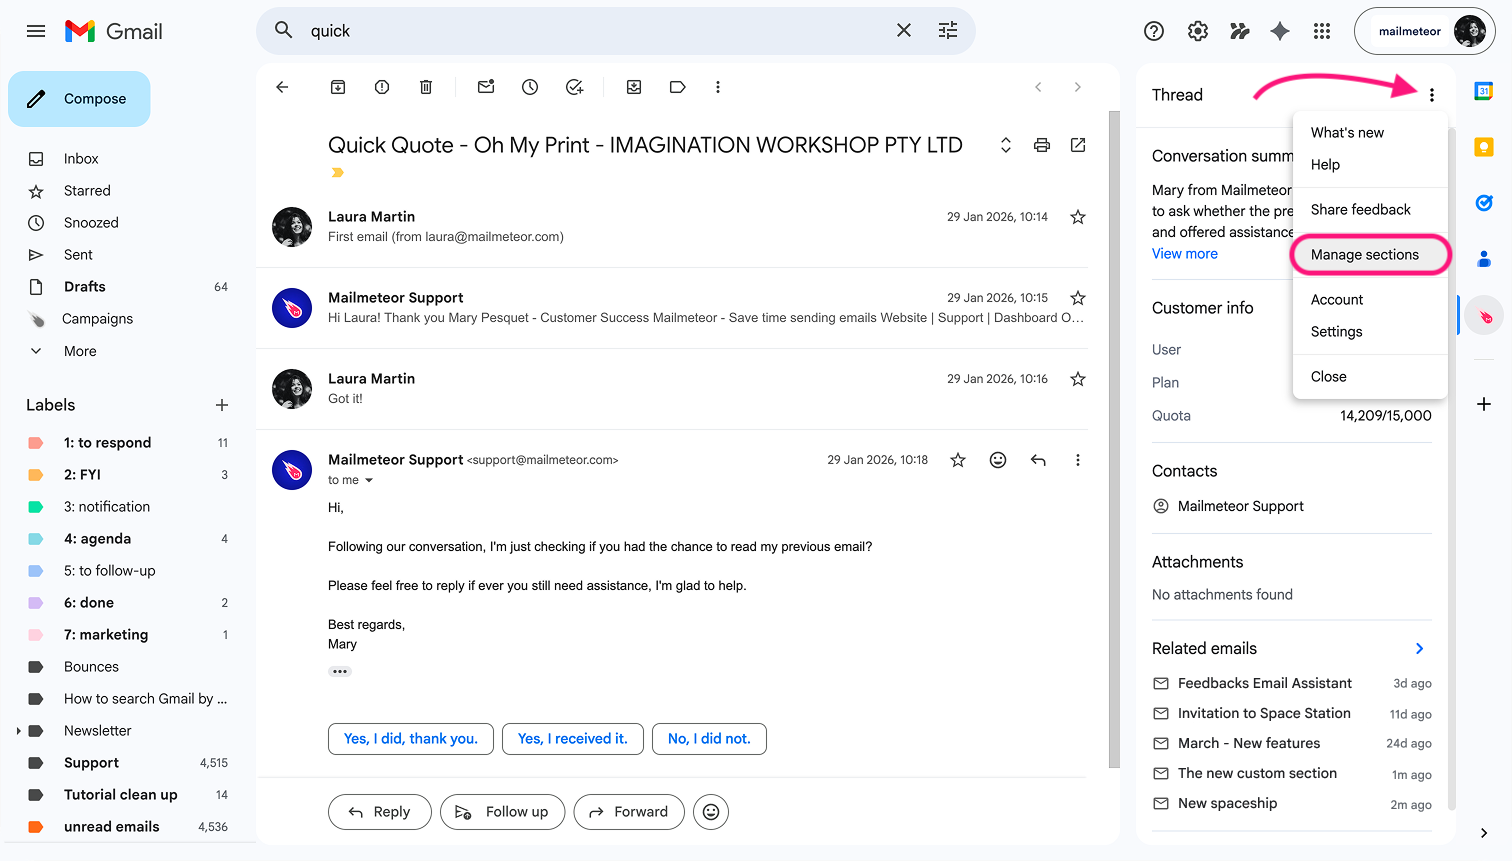
2. Click the three-dot menu (**⋮**) at the top right of the panel, then select **Manage sections**.
Menu
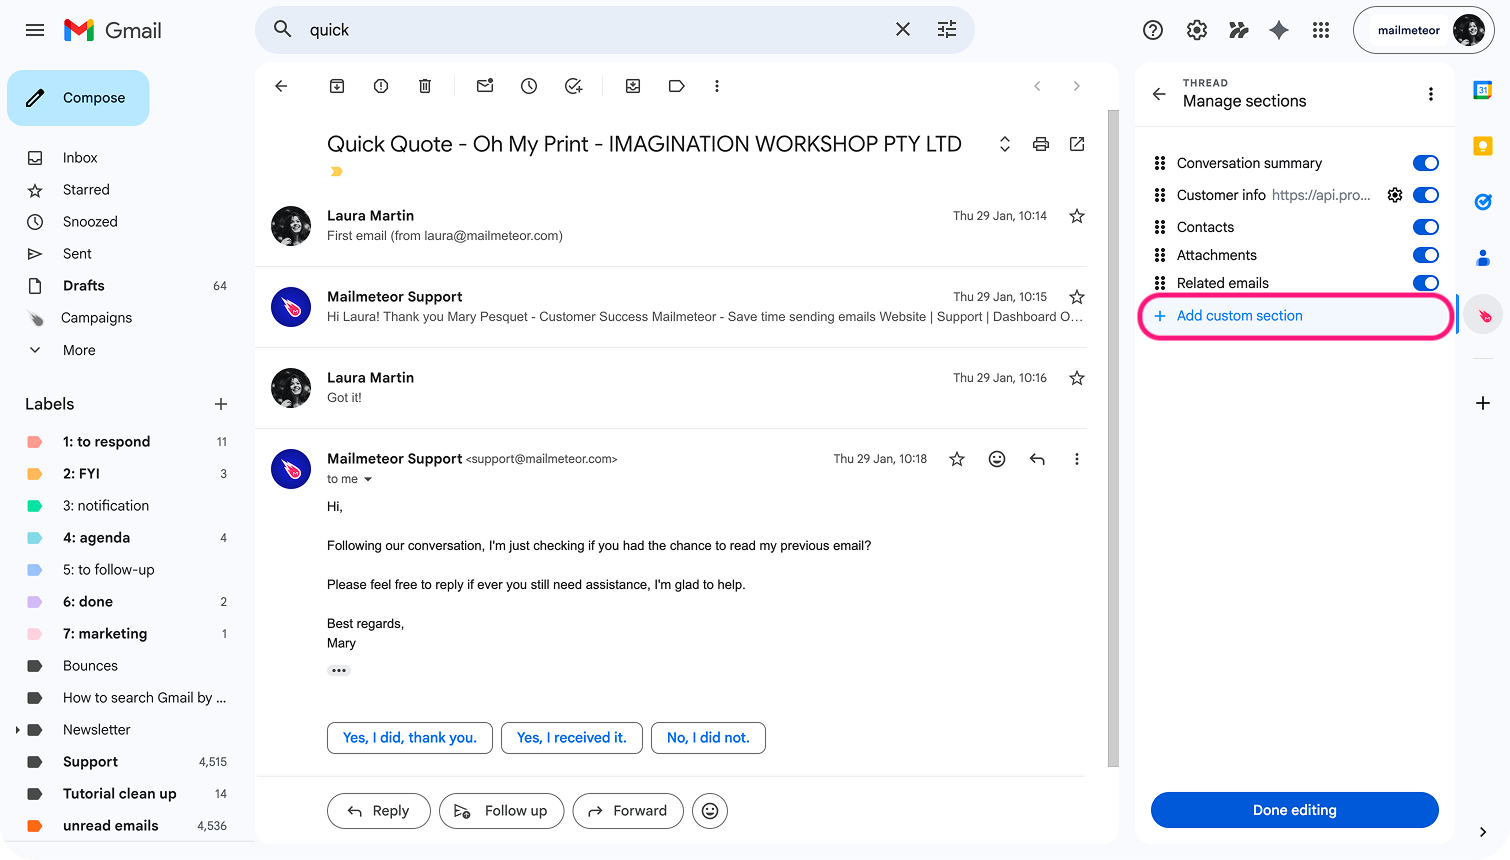
3. Click button **+ Add custom section** at the bottom of the list.
Menu
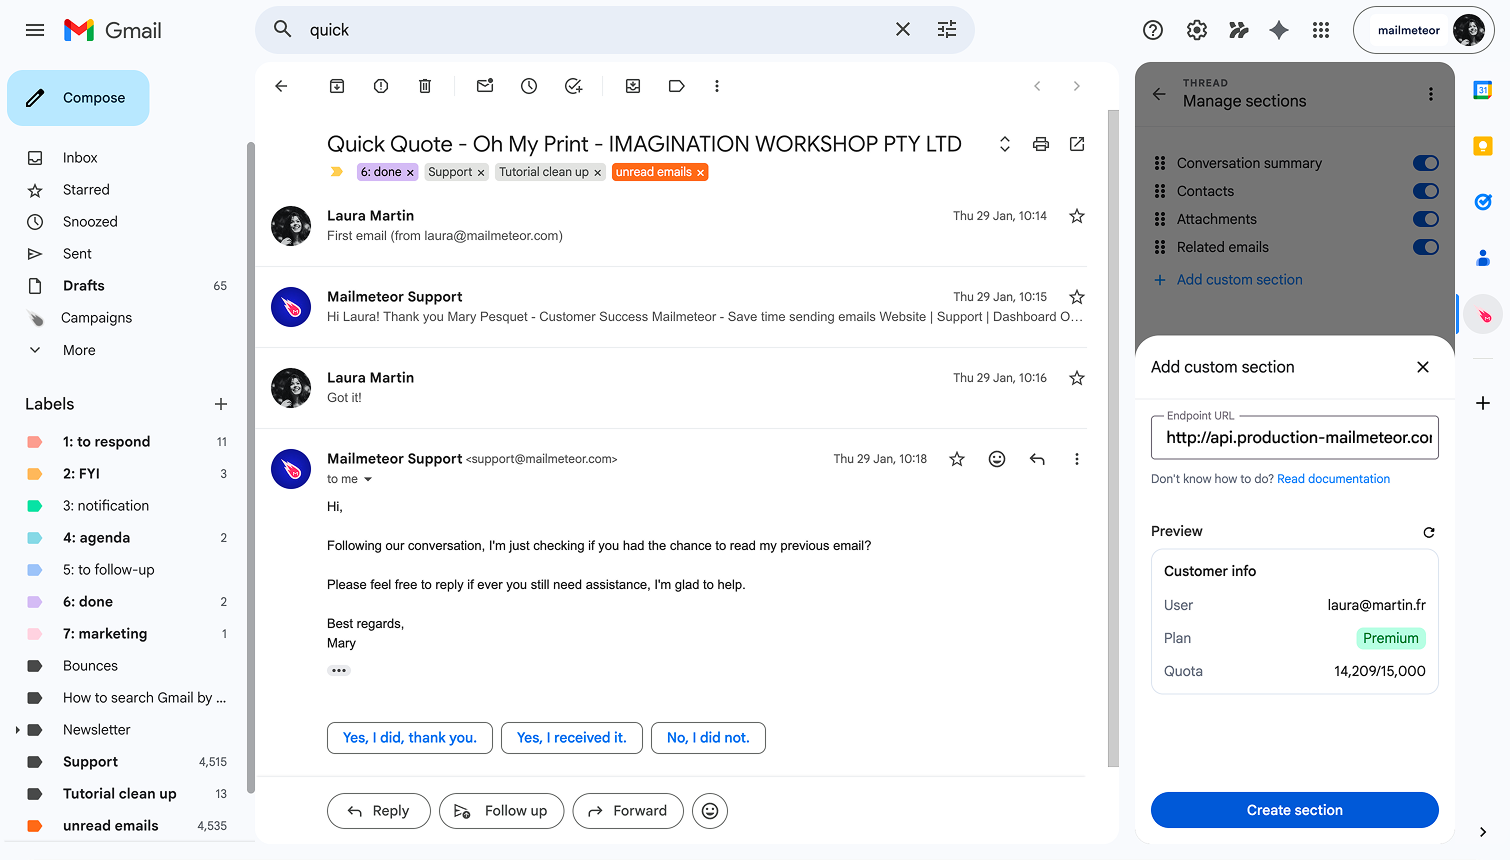
4. In the modal that appears, enter your endpoint URL (e.g. `https://api.example.com/customer-info`).
5. Check the **Preview** area below the URL field. If your endpoint is reachable and returns valid data, a preview of the section will appear.
Entering an endpoint URL and previewing the custom section
6. Click **Create section**. The section now appears in your panel.
{% hint style="warning" %}
If the preview shows **"Could not fetch data."**, verify that your endpoint is publicly accessible and returns the correct format.
{% endhint %}
## Update a section
**Option A — from the Manage sections menu**
1. Click the three-dot menu (**⋮**) at the top right of the panel, then select **Manage sections**.
2. Find the custom section you want to update and click the settings icon (**⚙**) next to it.
3. Update the URL and click **Done editing**.
**Option B — directly from the section**
1. Find the custom section you want to update in the panel.
2. Click the three-dot menu (**⋮**) on the section header.
3. Find the custom section you want to update and click the settings icon (**⚙**) next to it.
4. Update the URL and click **Done editing**.
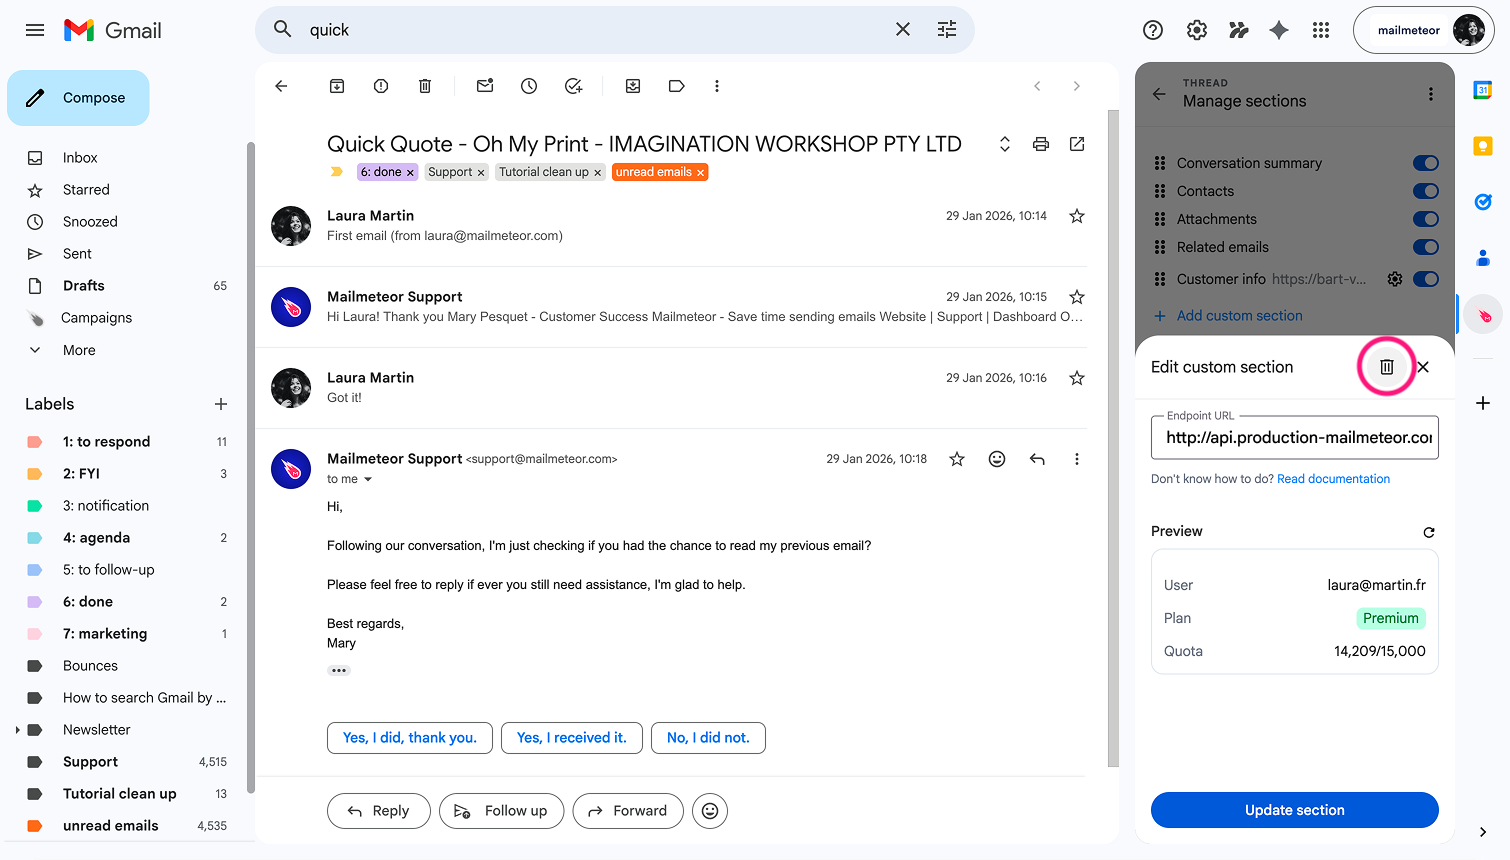
## Delete a section
**Option A — from the panel**
1. Click the three-dot menu (**⋮**) at the top right of the panel.
2. Select **Manage sections**.
3. Find the custom section you want to remove.
4. Click the settings icon (**⚙**) next to it, then click the bin icon to delete it.
5. Click **Done editing** to confirm.
Deleting a custom section from the Manage sections view
**Option B — hide without deleting**
In the **Manage sections** view, toggle off the switch next to the section. The section is hidden but not removed. You can re-enable it at any time.