New campaign
Let’s see how you can send emails with Mailmeteor inside Excel:
- Install Mailmeteor for Excel.
- Create a new spreadsheet in Excel or open an existing one.
-
Name your columns by adding text on the first row of your spreadsheet. Each column represents a piece of information about your contacts. In the example below, we’ve added 3 columns: firstname, email, company, and postscriptum.
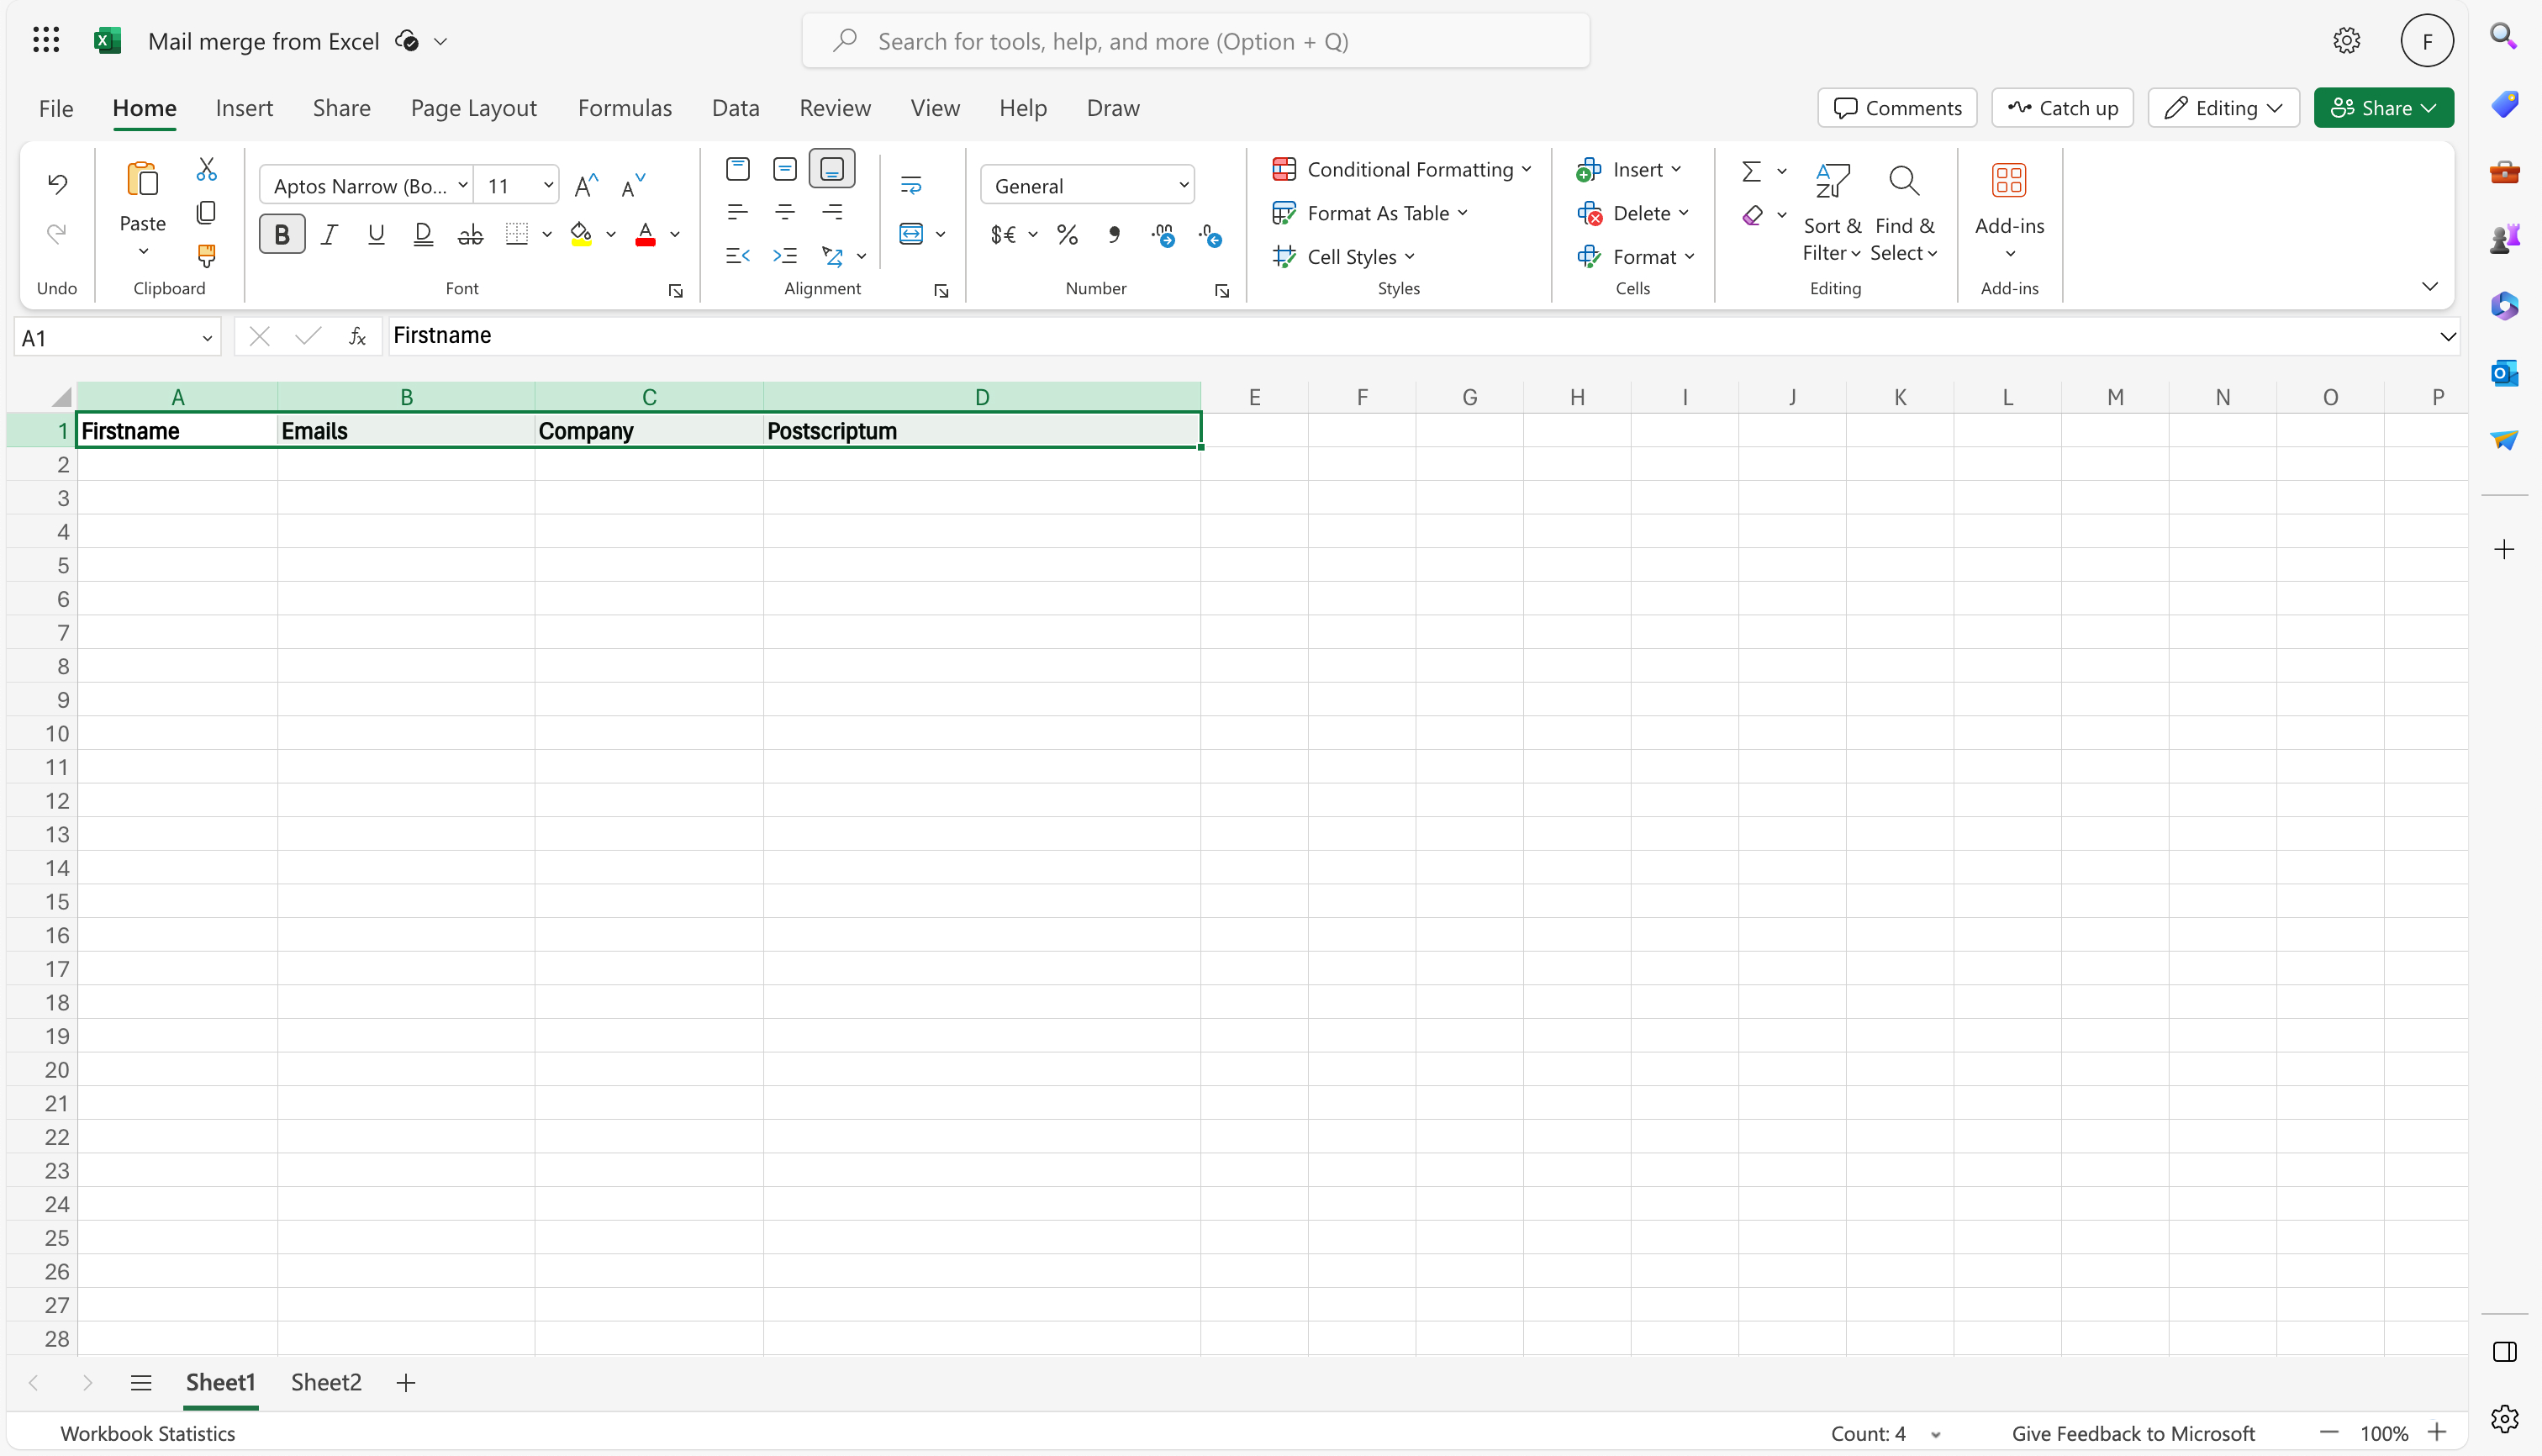
You can add as many columns as you want and pick any column header name you want. The only thing to keep in mind is that headers must be placed on the first row (#1).
-
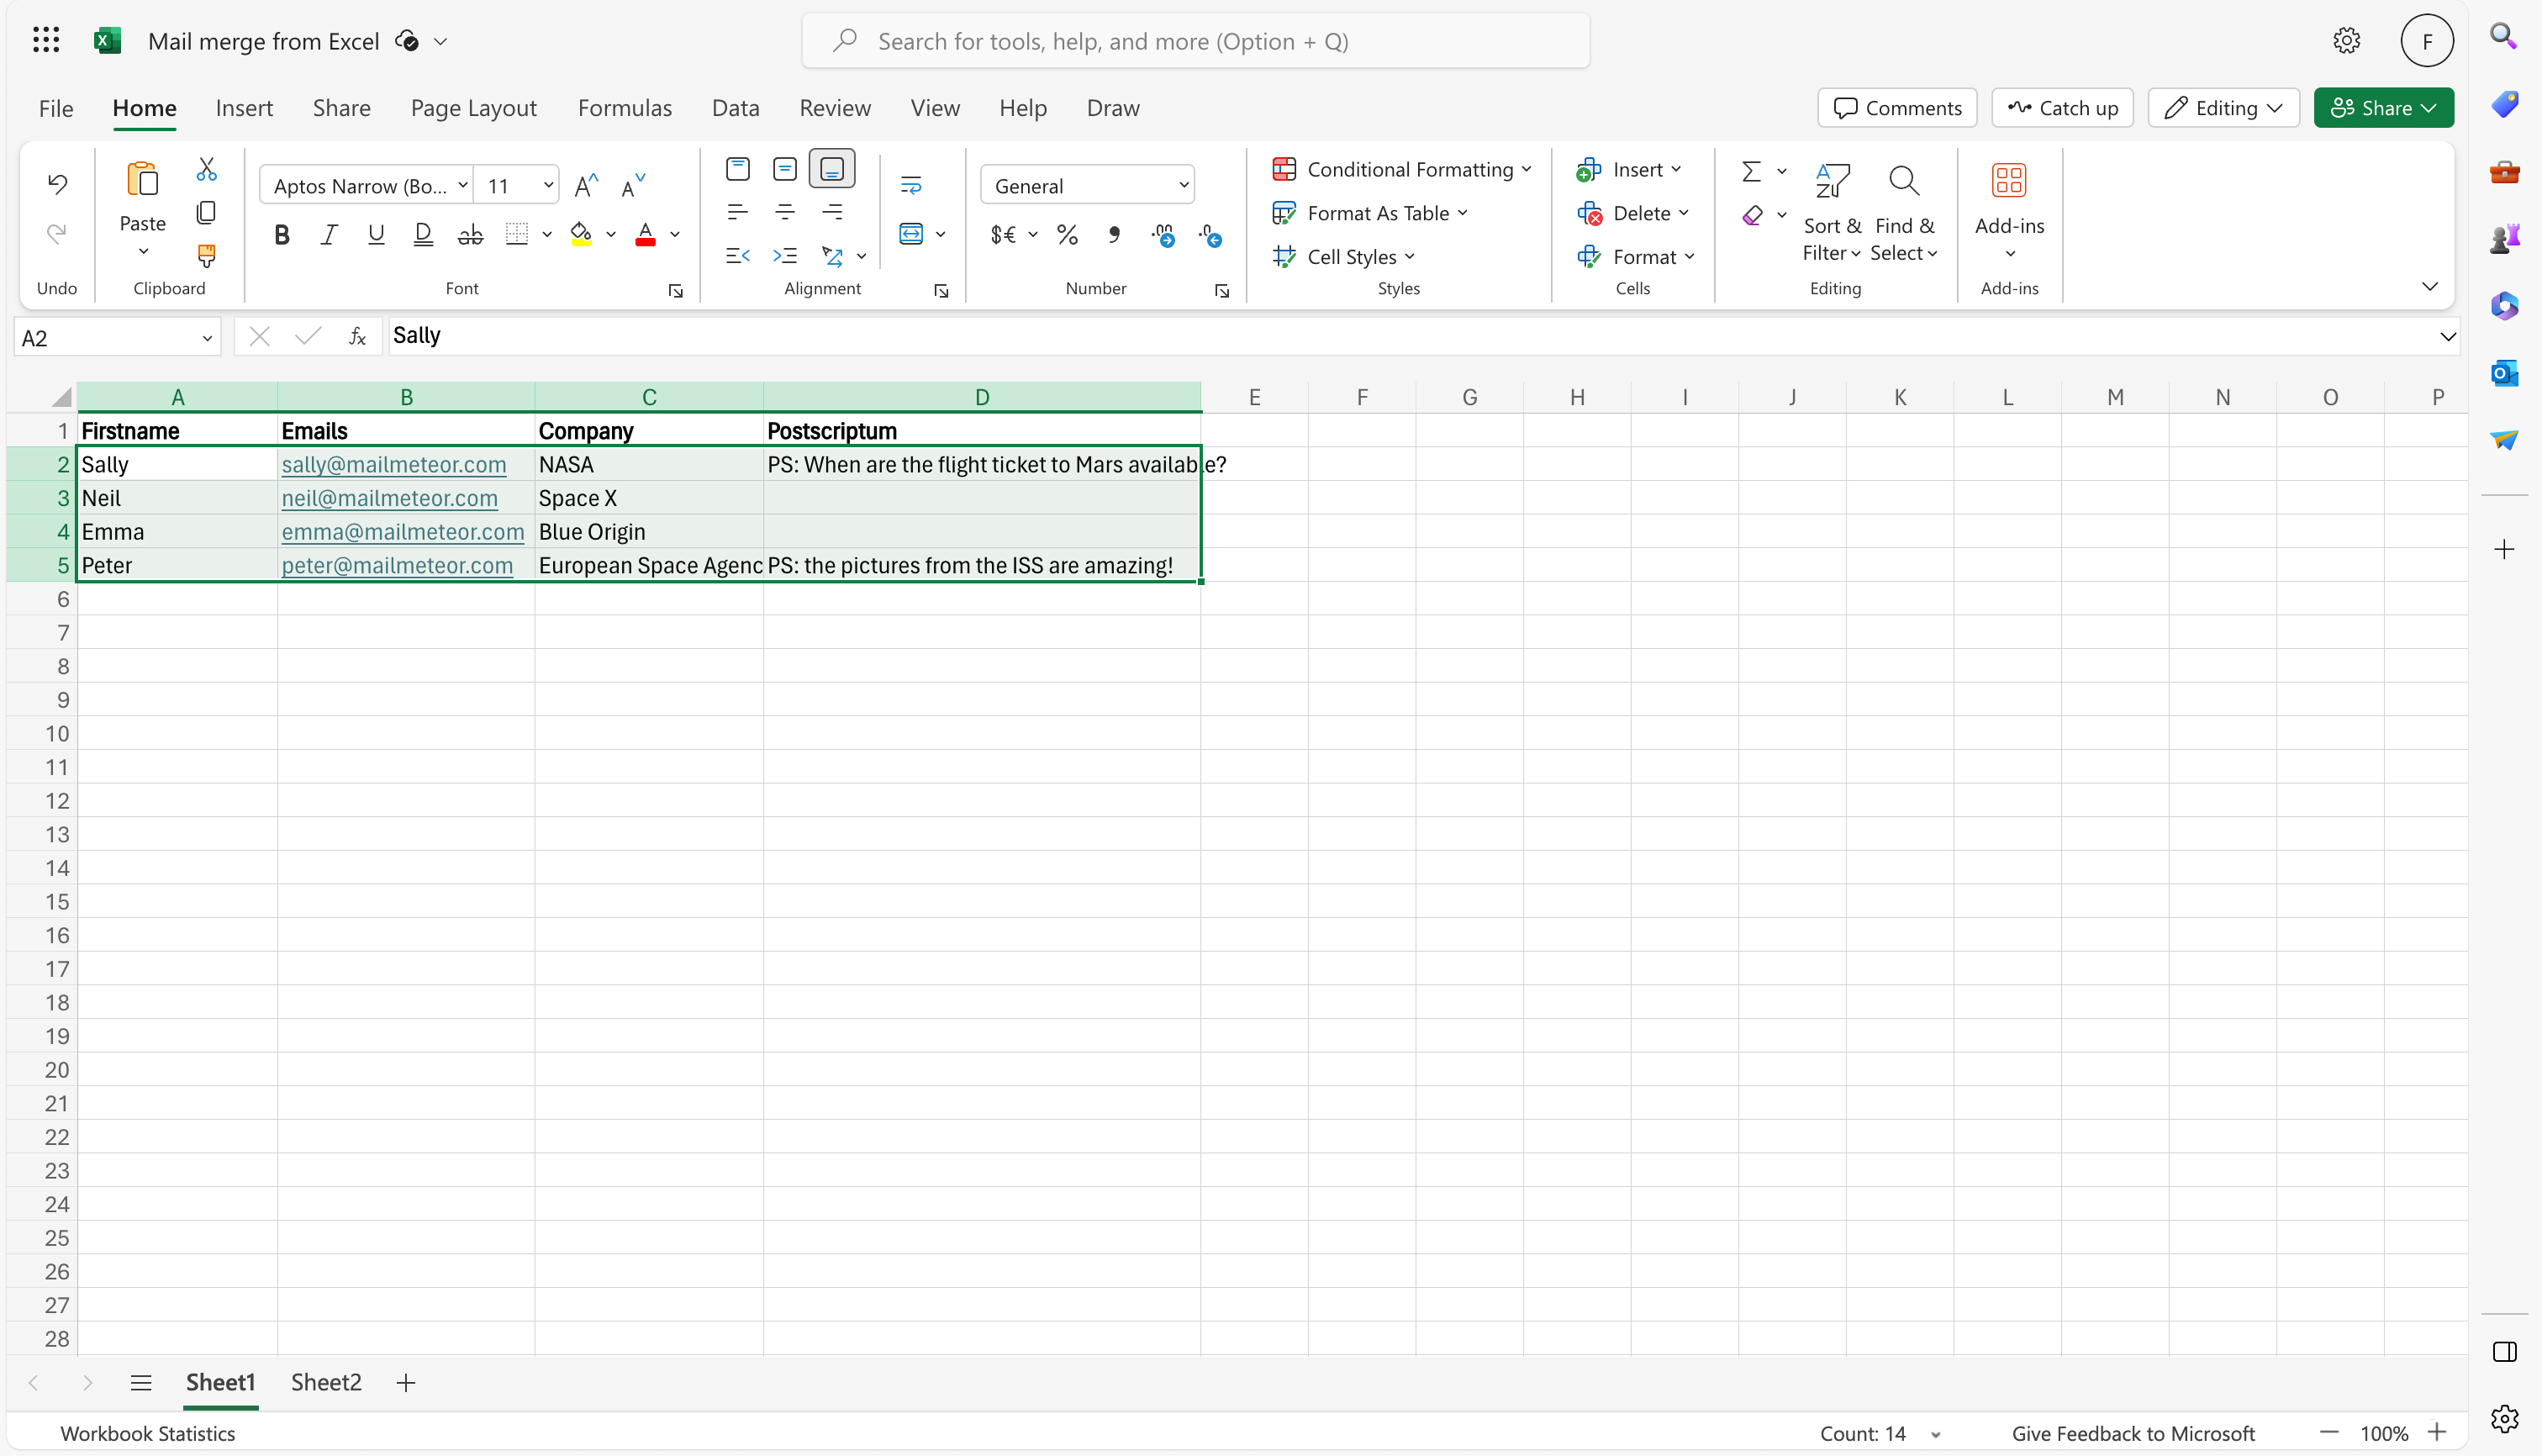
Fill your spreadsheet with your contacts.
-
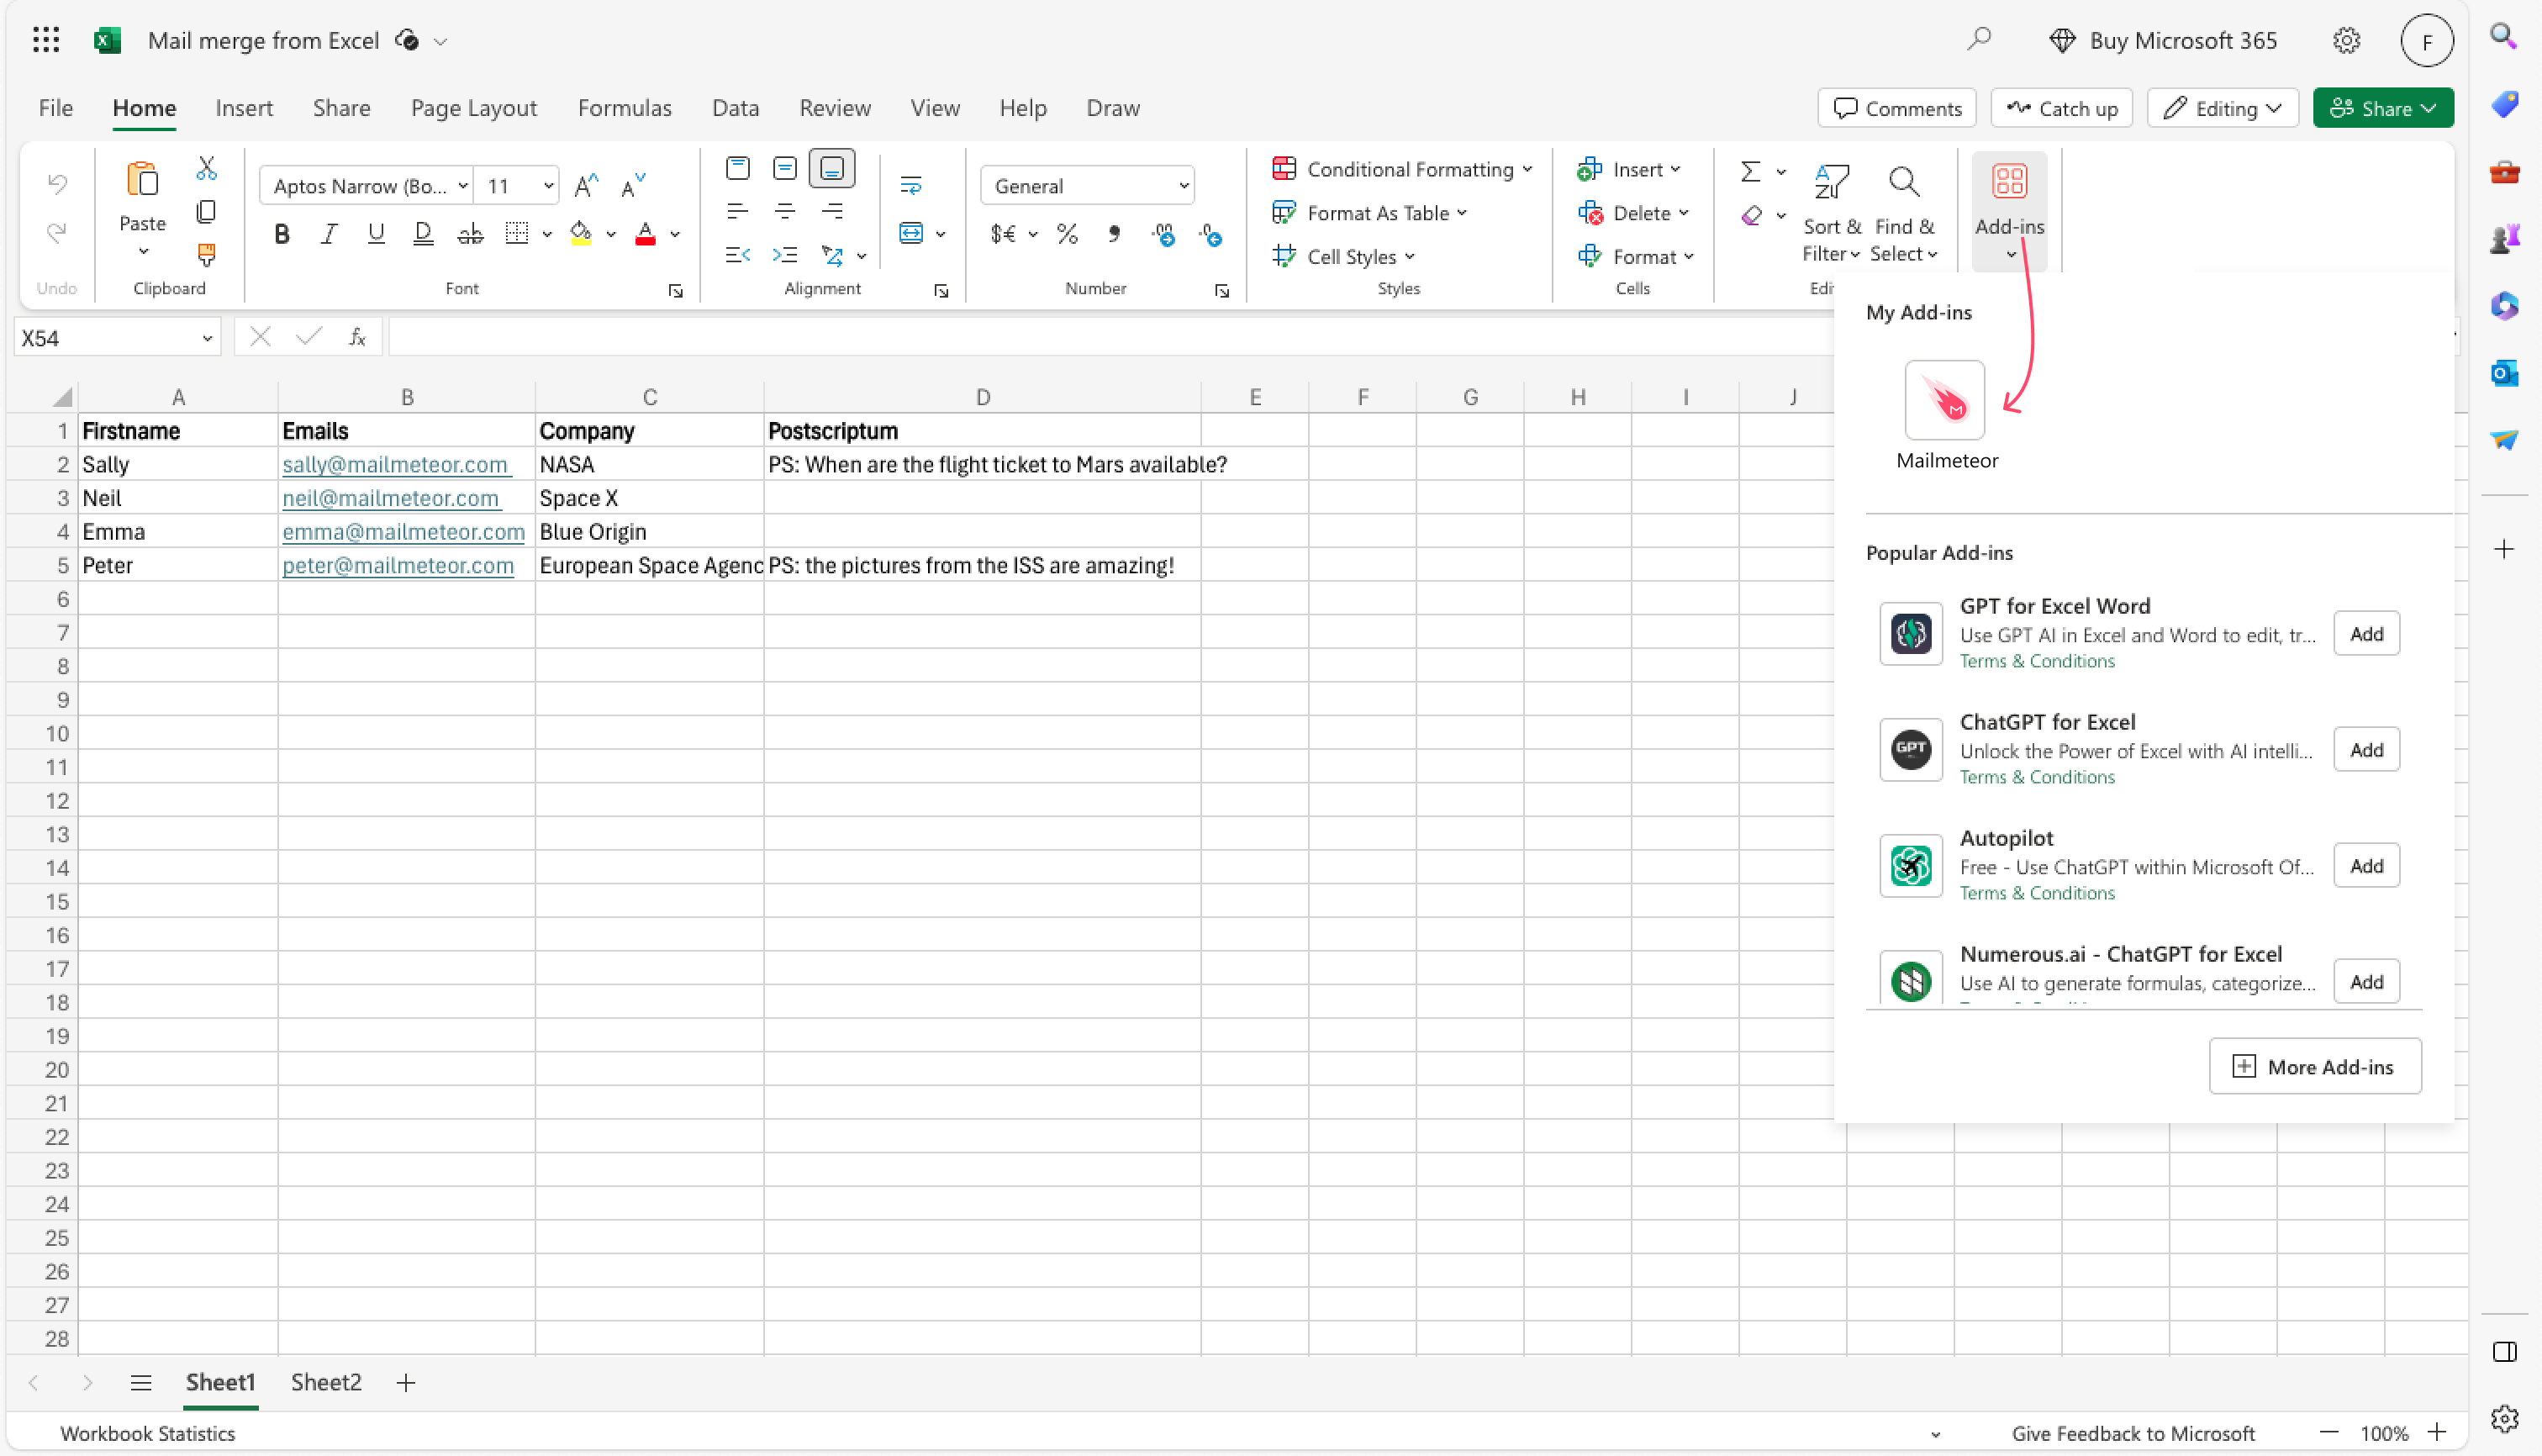
Now that your contact list is ready, you can open Mailmeteor by going to Home > Add-ins > Mailmeteor.
-
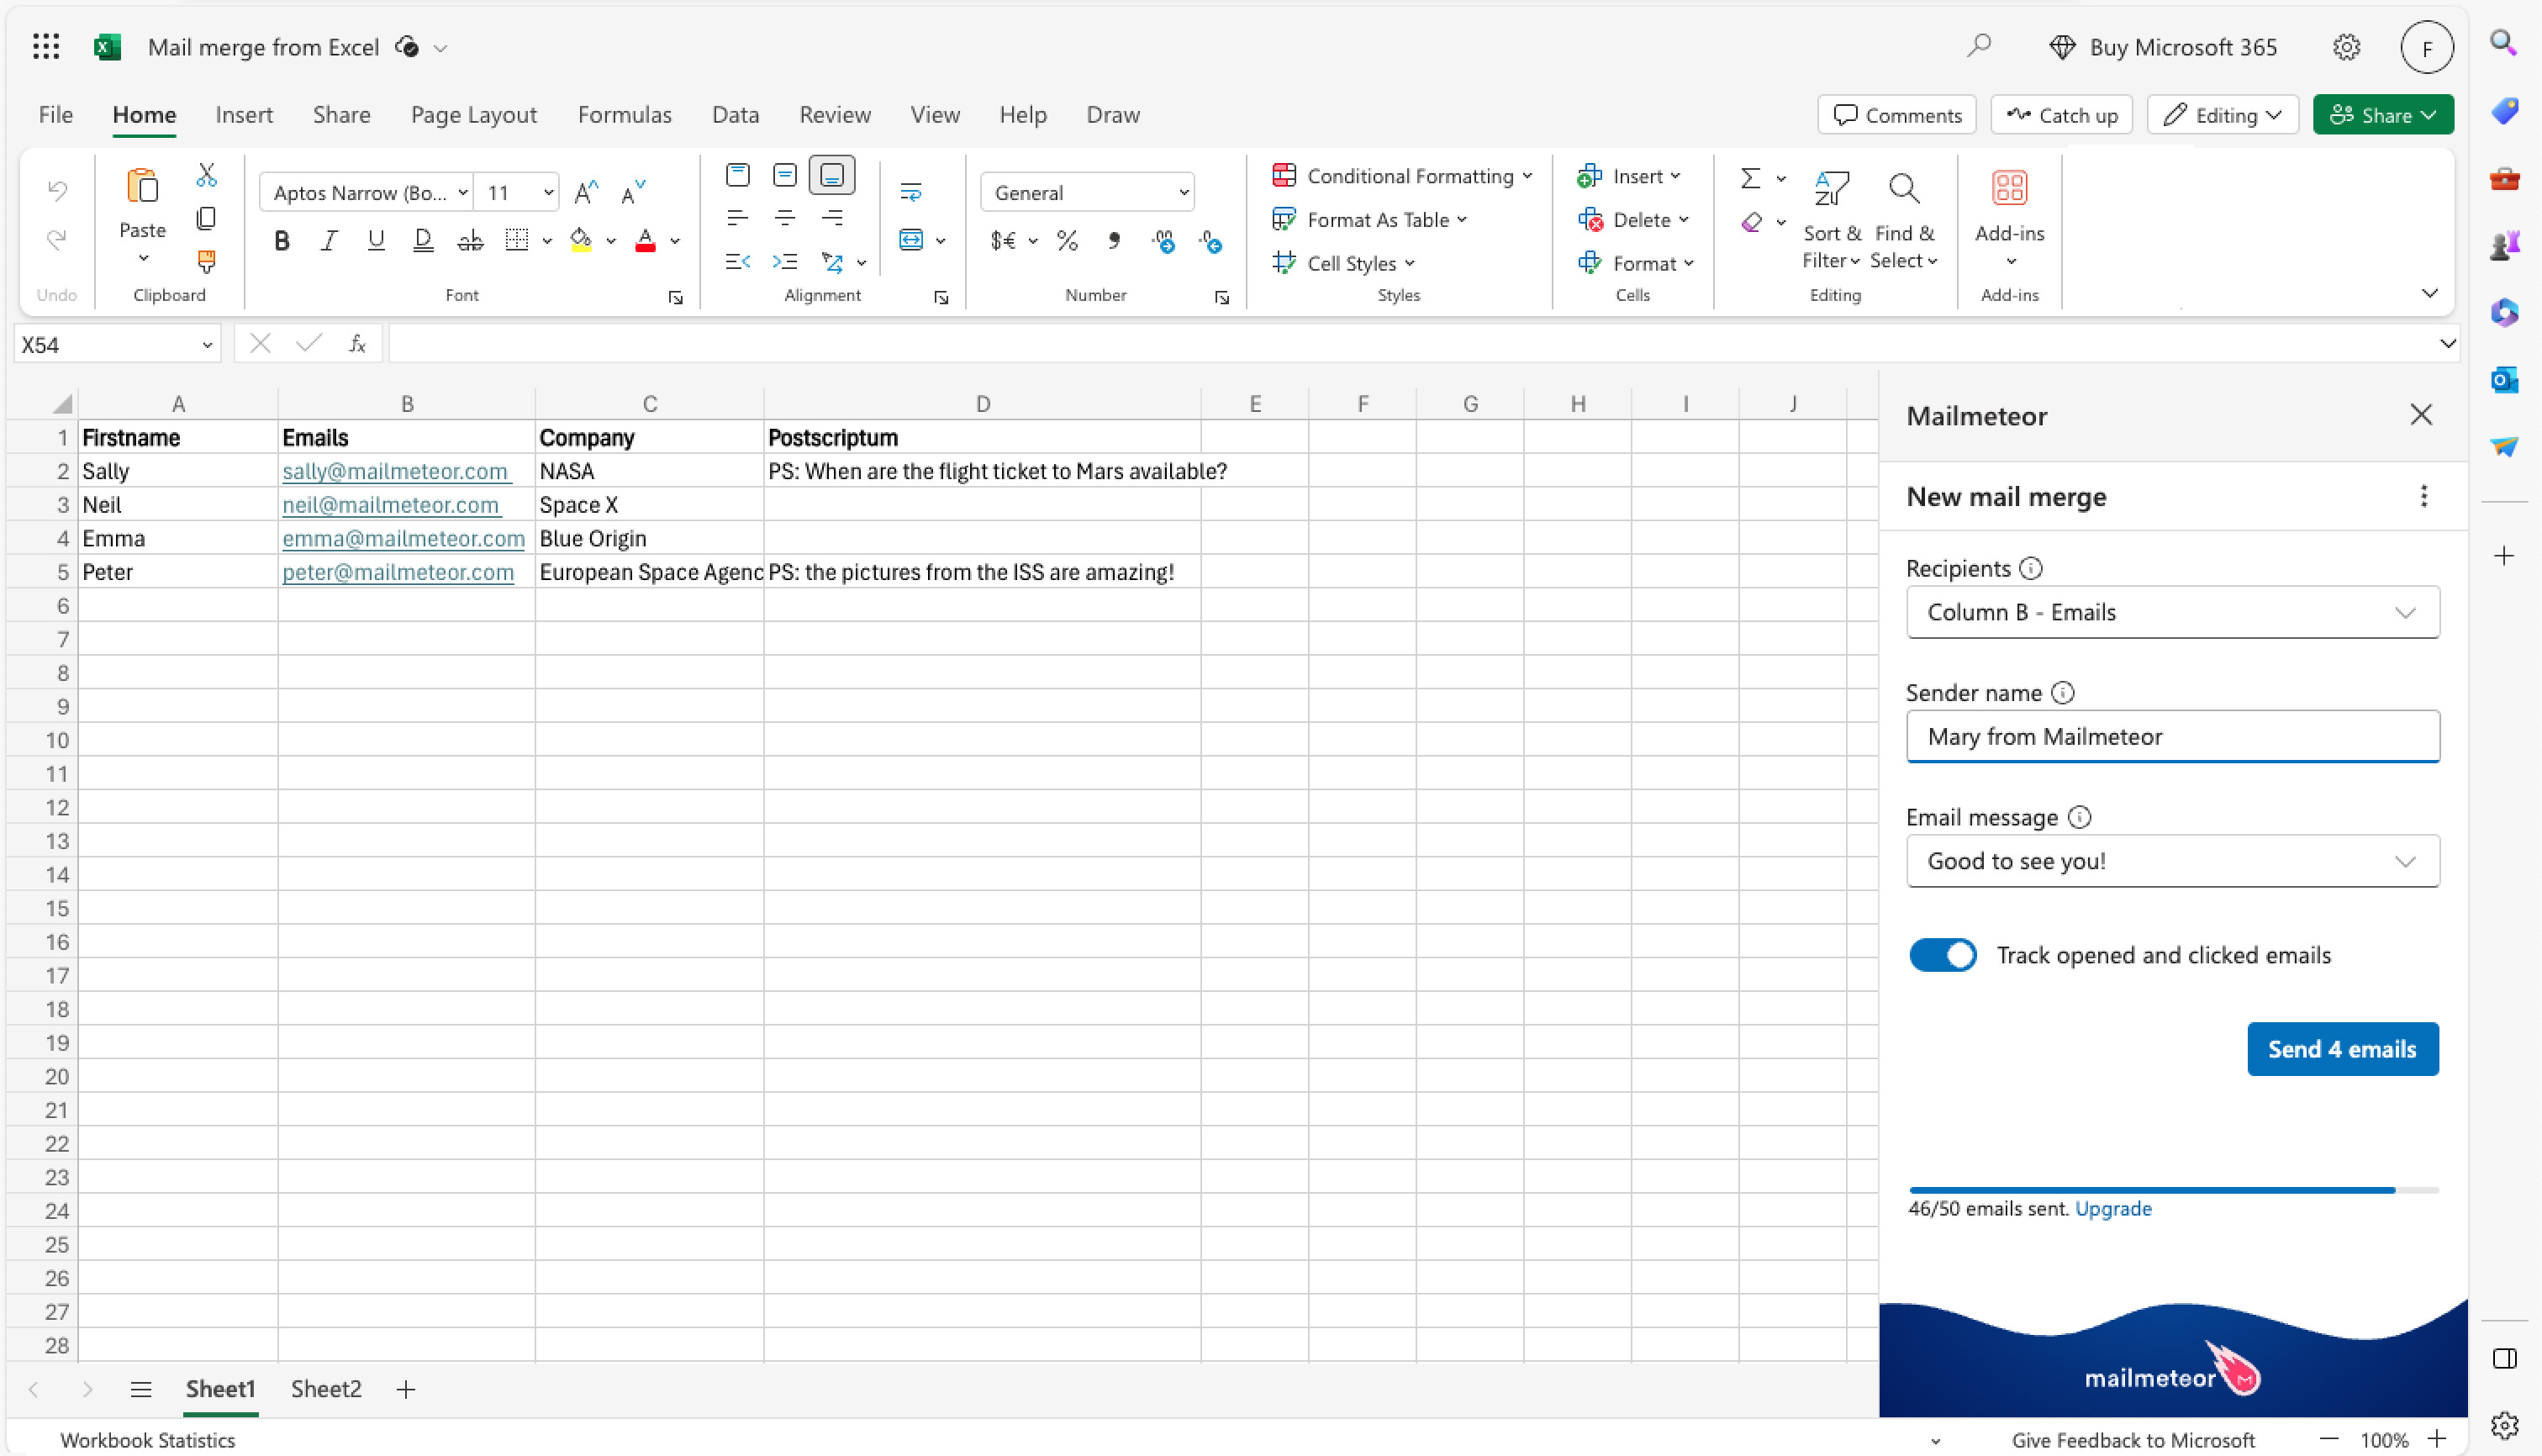
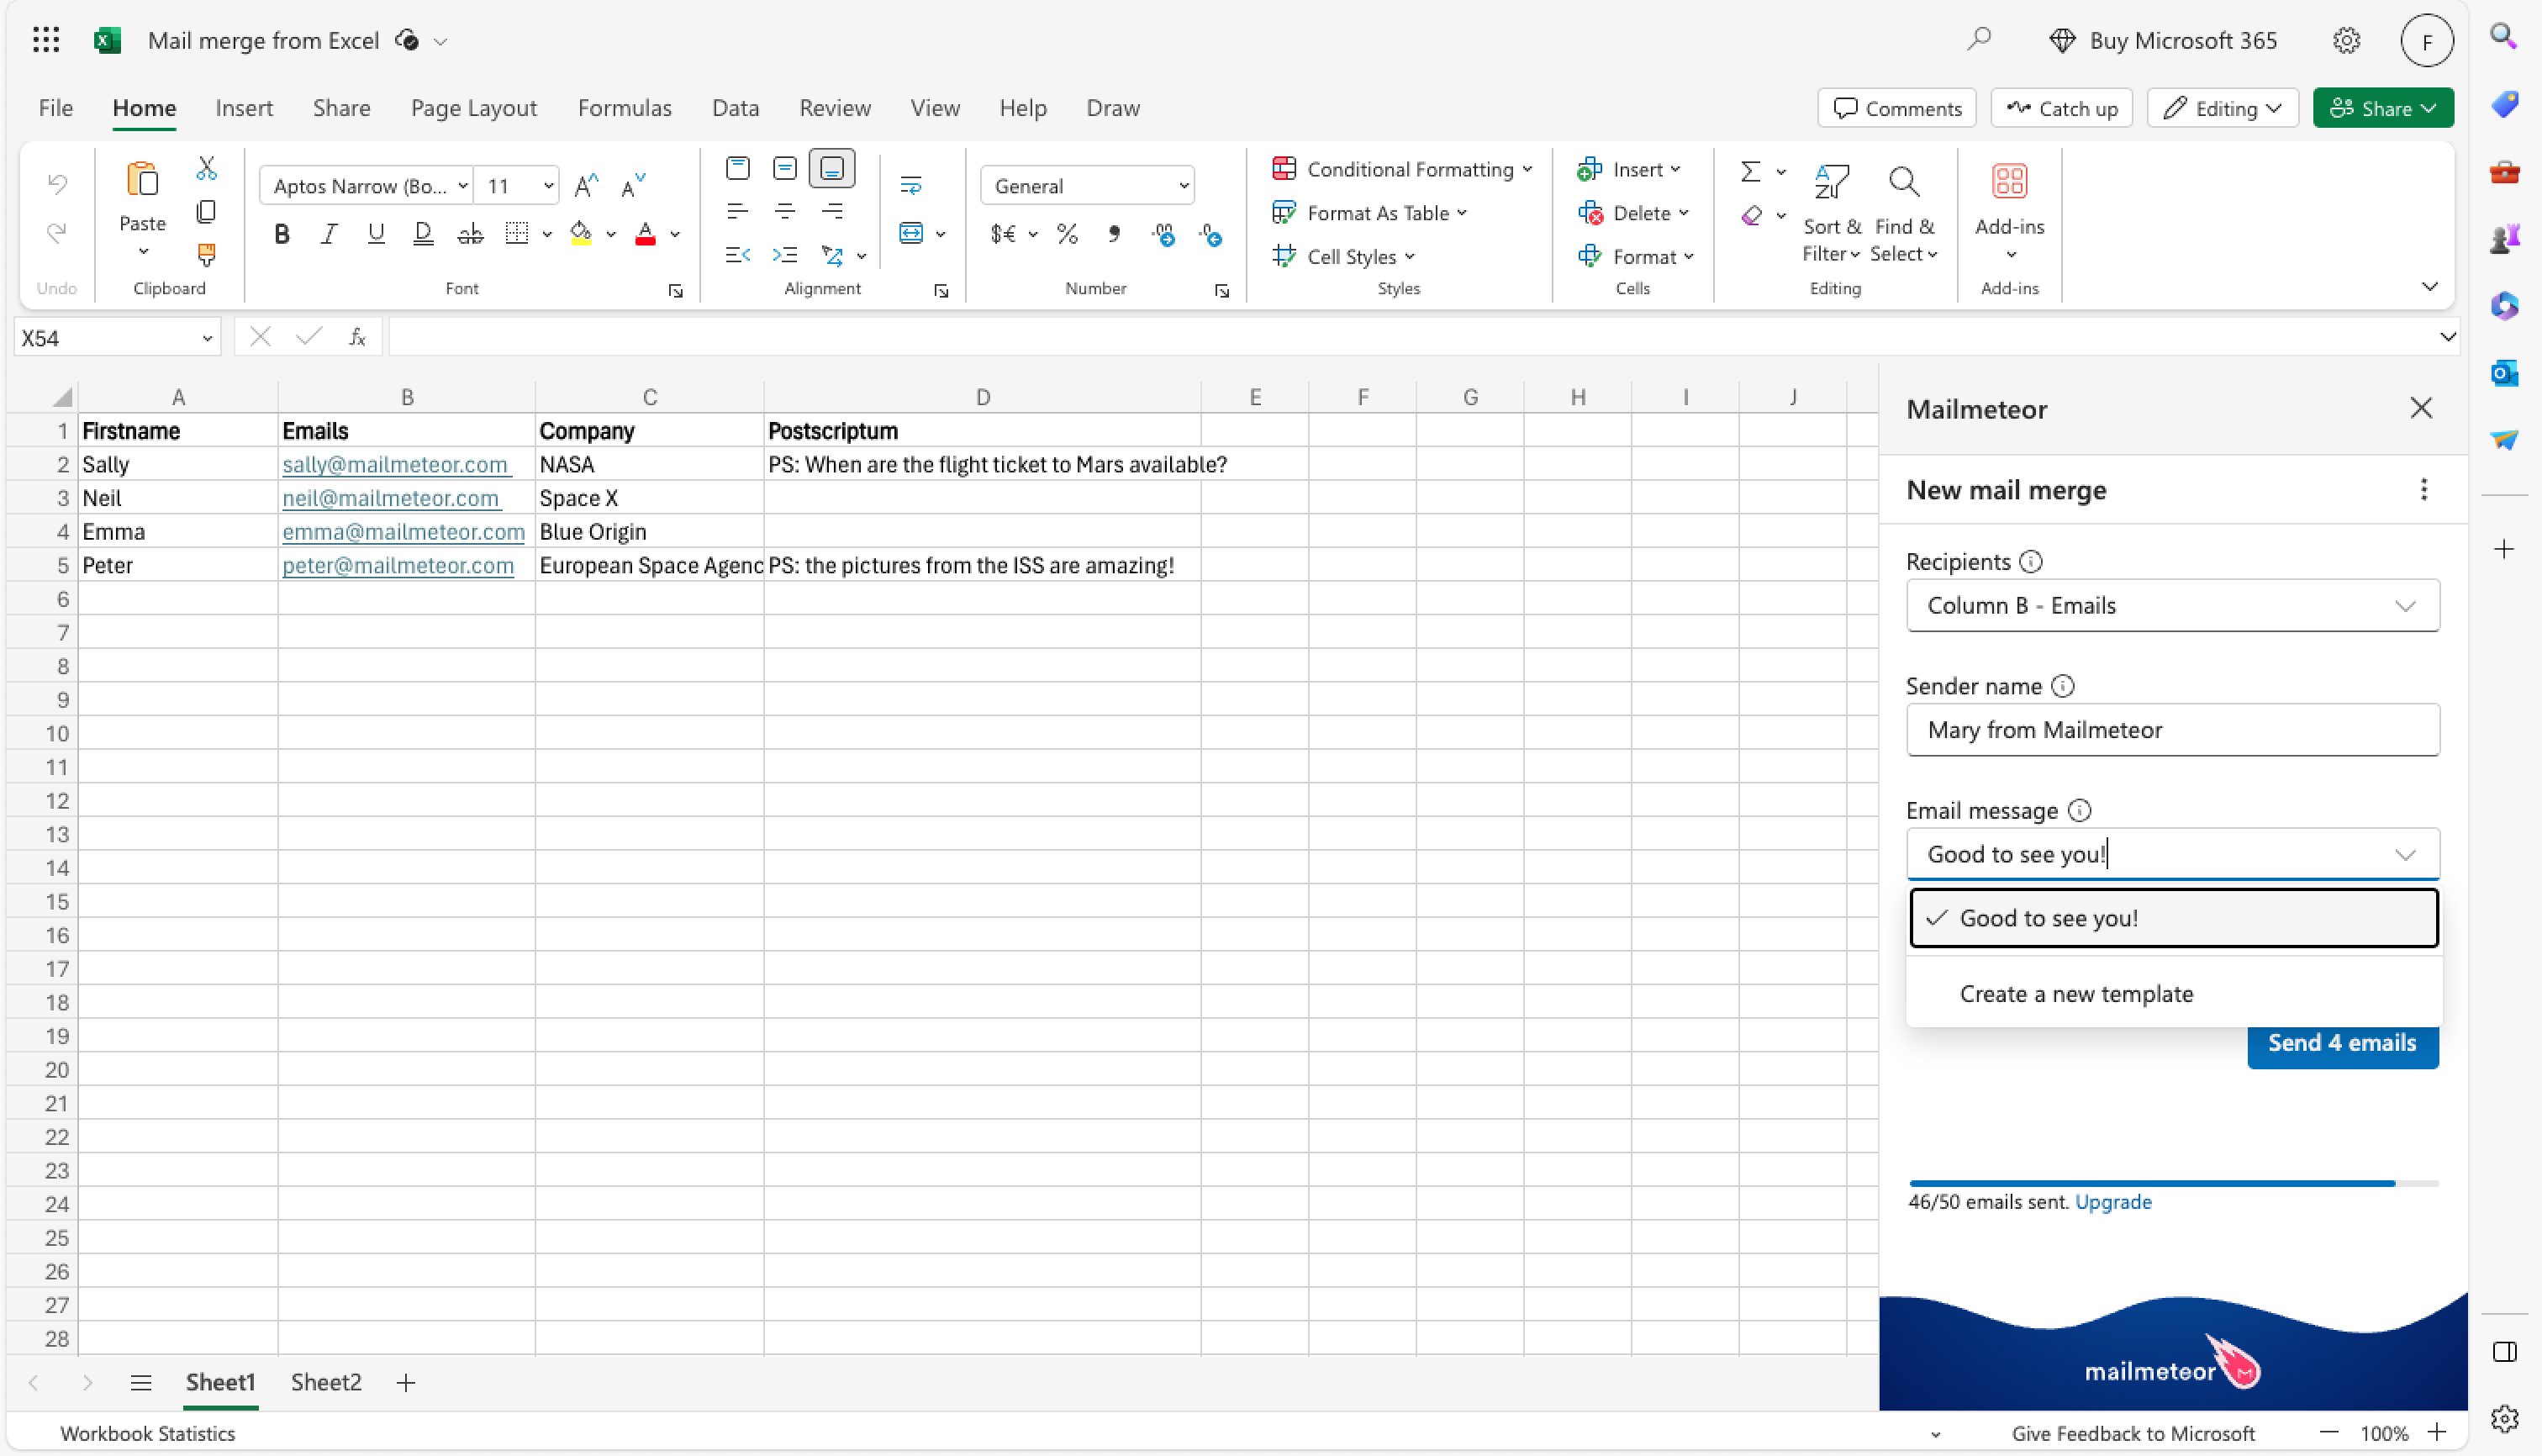
Next, ensure that Mailmeteor selected the right email column (e.g. column B in the screenshot below).
-
Optionaly, you can enter a sender name. This is how your recipients will receive your email. It could be your name (e.g. Neil Armstrong) or your company name (e.g. Nasa).
-
Select your email template. This is the content of the email that you’re recipient will receive (including the subject line, content and attachments).
If you haven’t created a template yet, you can select the “Create a new template” option. It will open the Mailmeteor Dashboard where you can compose emails and apply formatting, insert links, create bullet lists and so on.
To personalize your email with information from your spreadsheet, you can insert variables (aka merge fields) into your email, such as
{{ variable }}. Read our guide on personalization if you’d like to learn more about it. -
Once you’re ready, click “Send emails” to launch your campaign 🚀
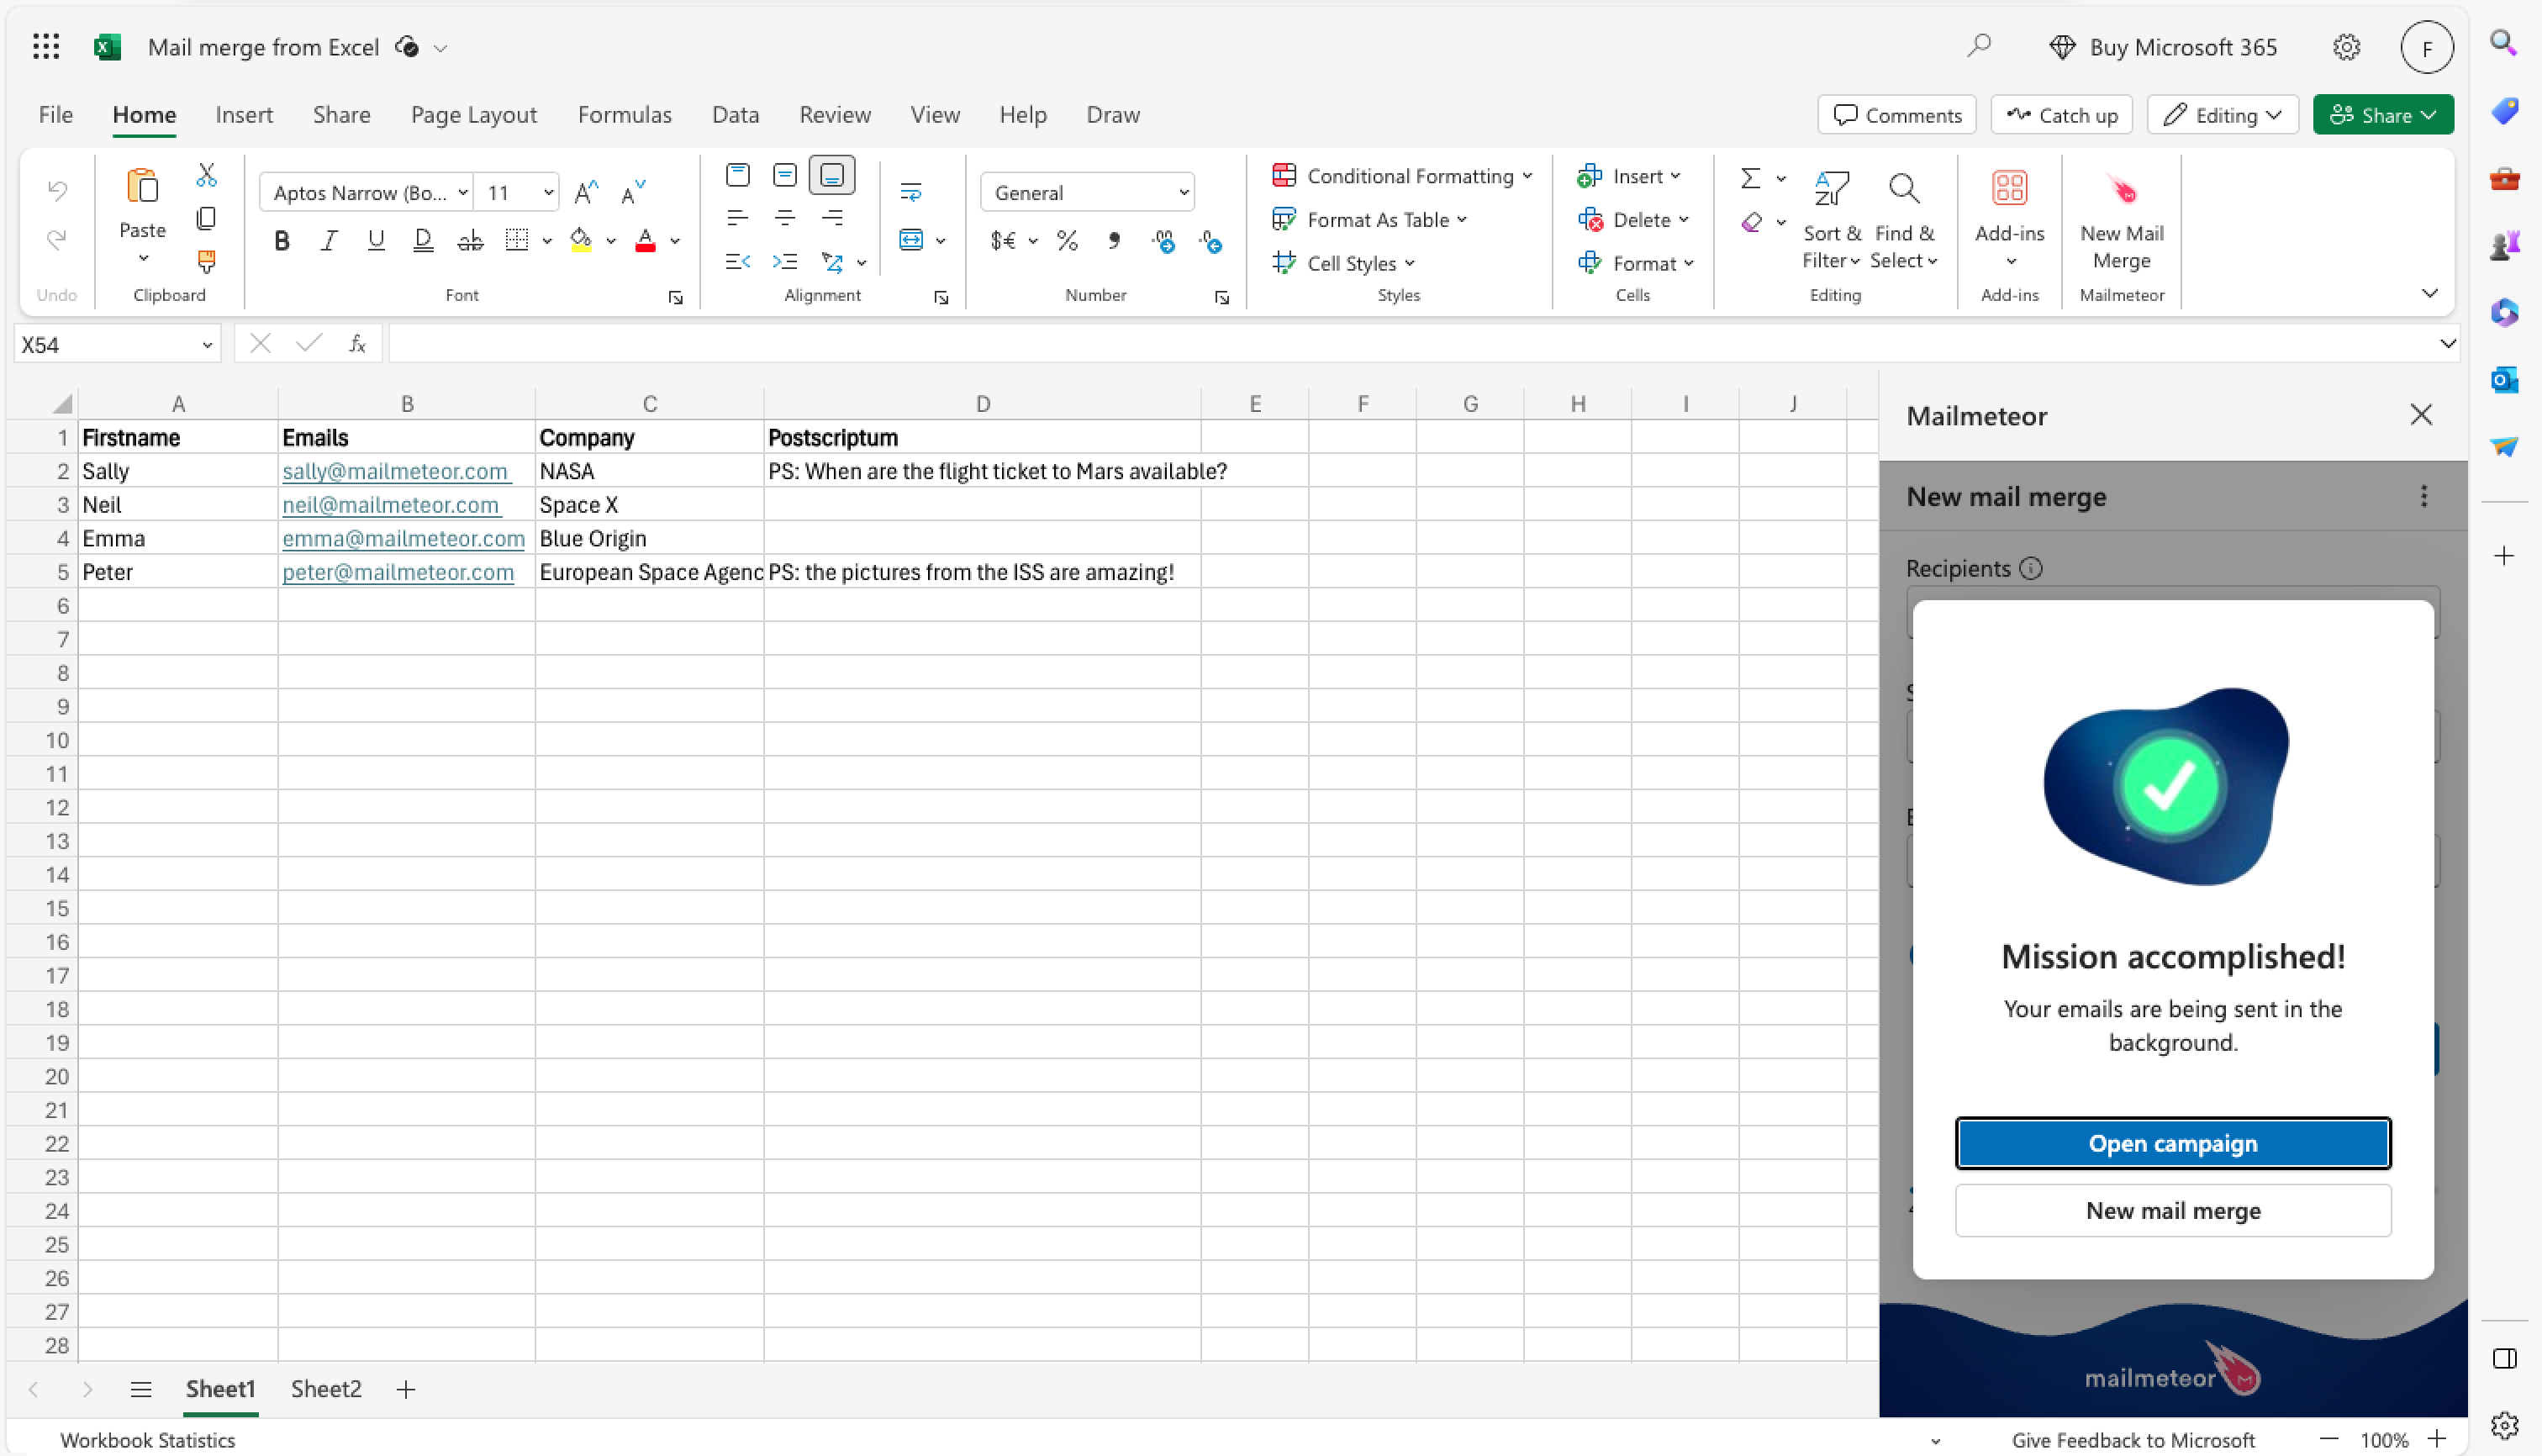
Voilà! You’ve sent your first email campaign from Mailmeteor’s add-in for Excel. Congrats 🎉
Going further with templates
You can design your template the way you want:
- Personalize emails with variables
- Add images and emojis
- Attach files and personalized attachments
- Import your own HTML template
- Insert a signature