New campaign
Mailmeteor for Google Docs is our latest product. This extension lets you turn your Google Docs into a fully responsive email builder and send personalized bulk emails.
Let’s see how you can send emails with Mailmeteor inside Google Docs:
1) Open Mailmeteor in Google Docs
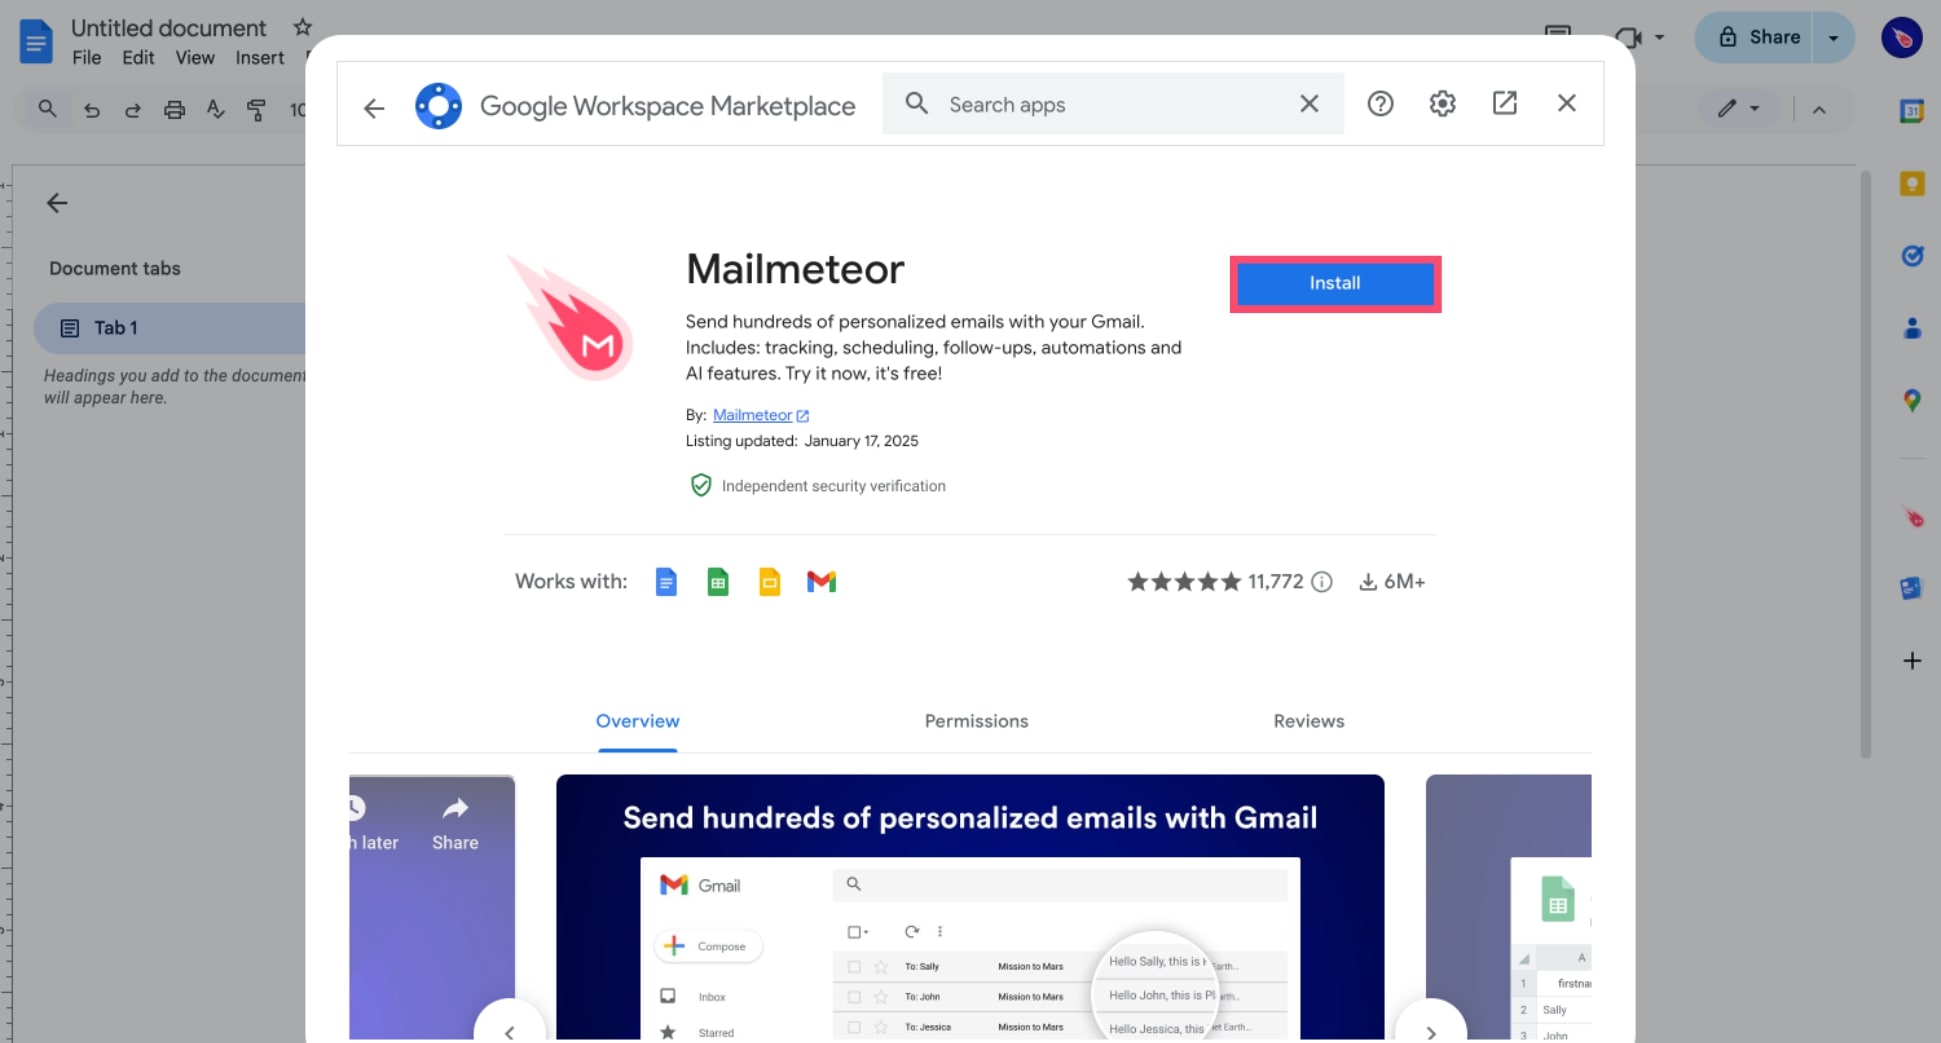
For starters, install Mailmeteor for Google Docs.
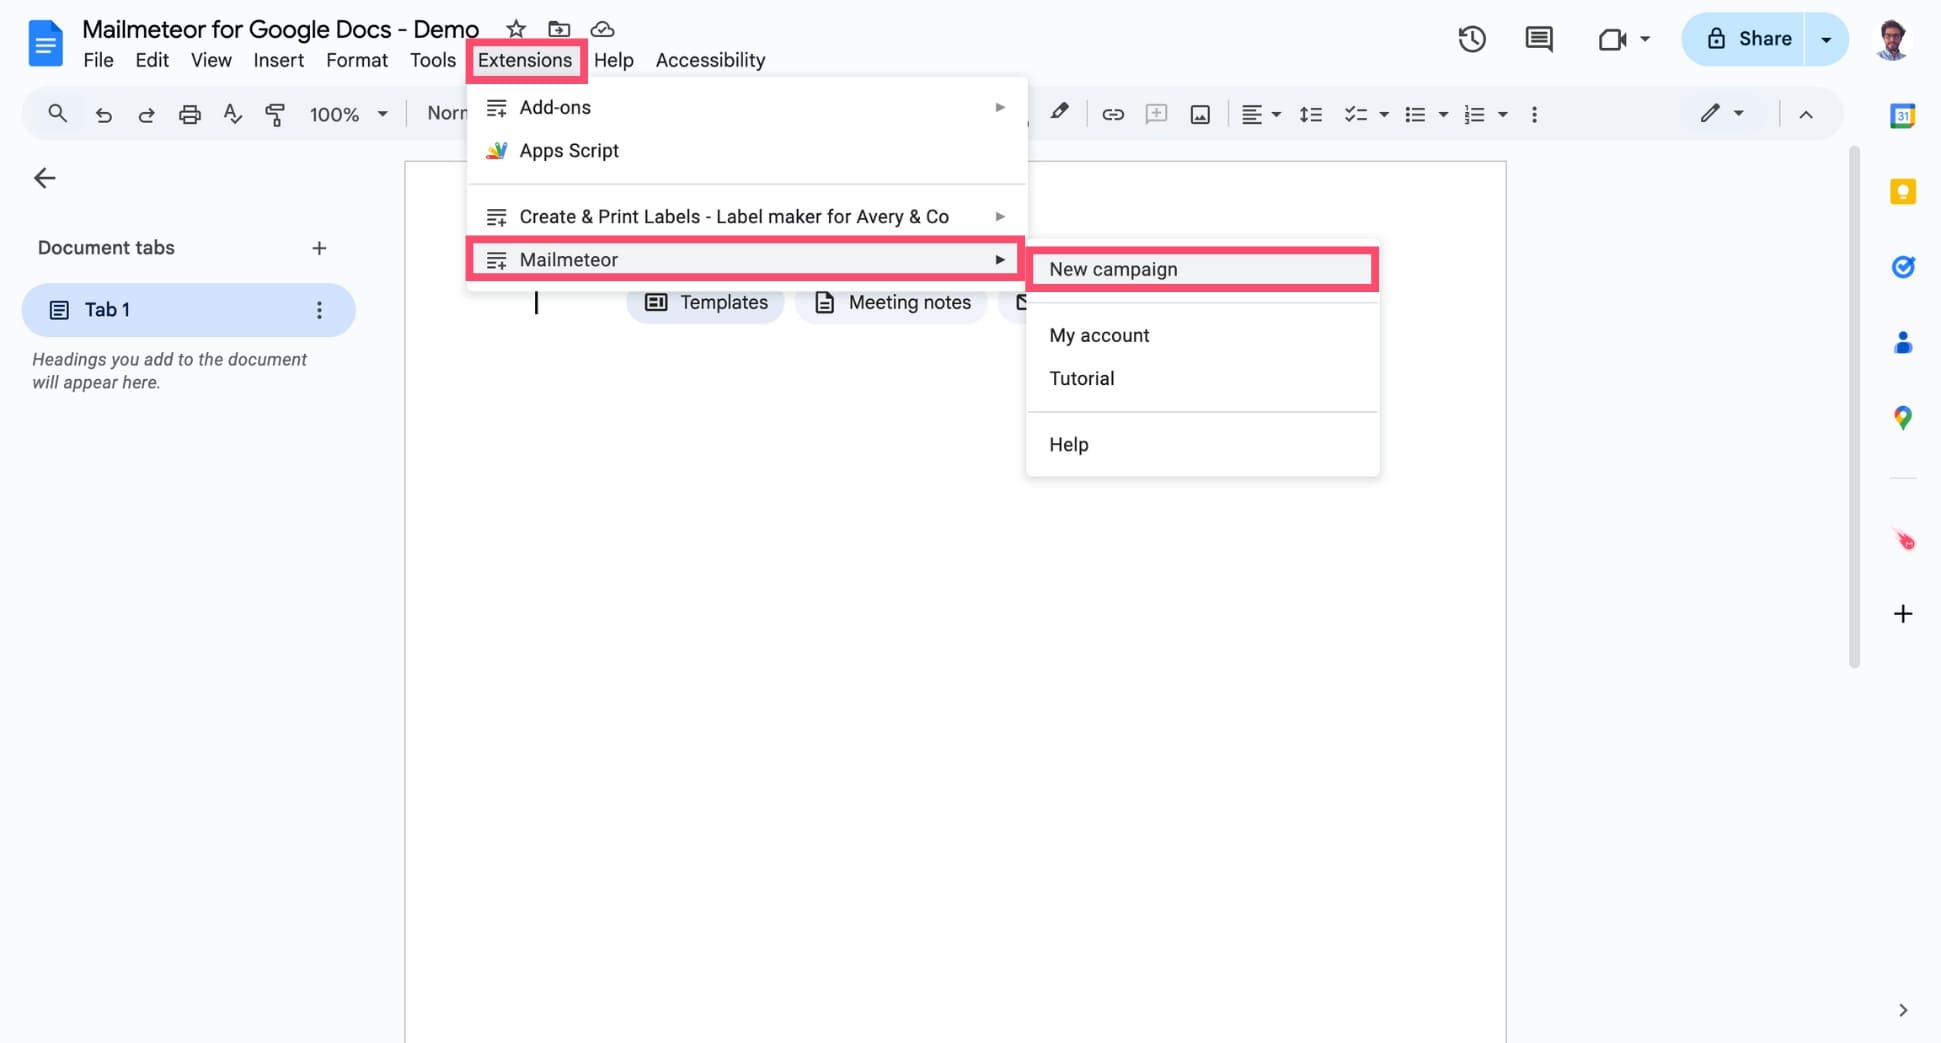
Then open a blank document (or a template) in Google Docs, and navigate to Extensions > Mailmeteor > New campaign.
2) Prepare your contact list in Google Sheets
Create a new spreadsheet in Google Sheets, and name your columns by adding headings on the first row of your spreadsheet.
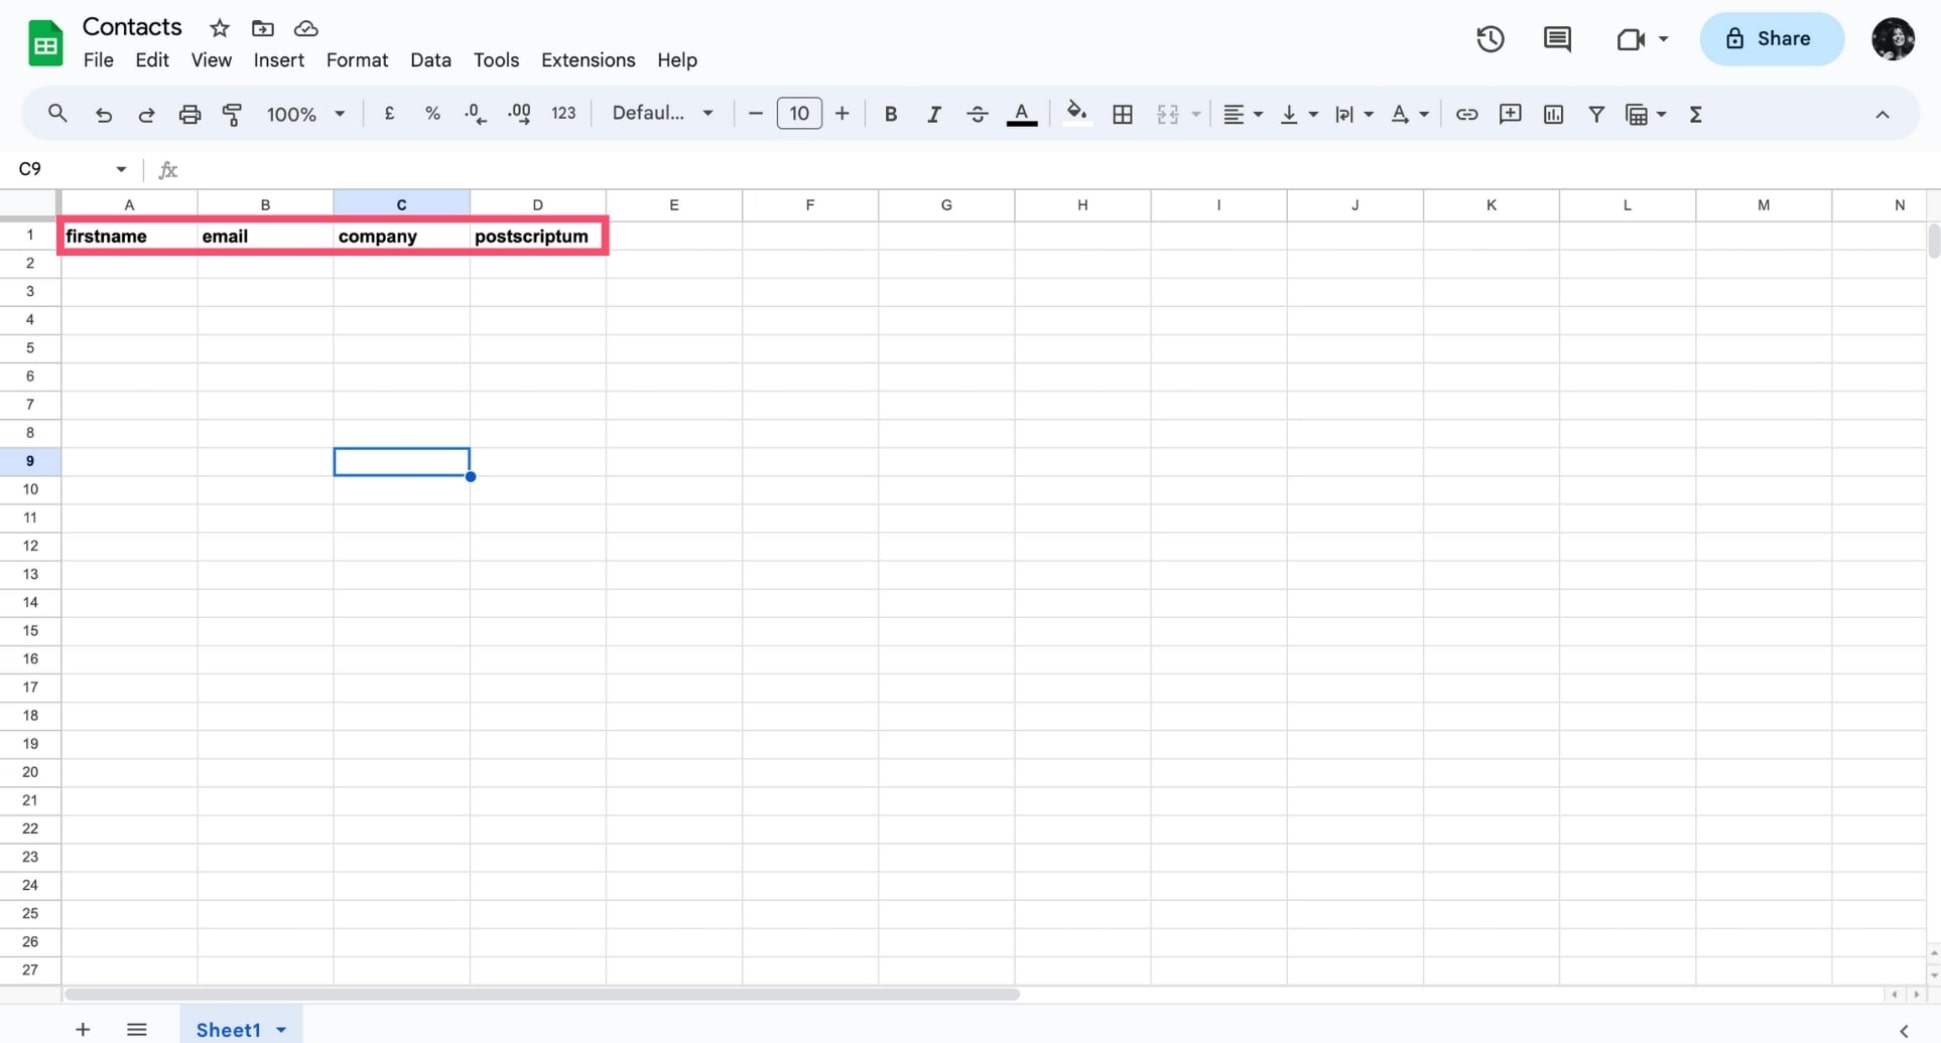
Each column represents a piece of information about your contacts. You can add as many columns as you want and pick any column header name you want. Just make sure these headers are placed on the first row.
Next, fill your spreadsheet with your contact info.
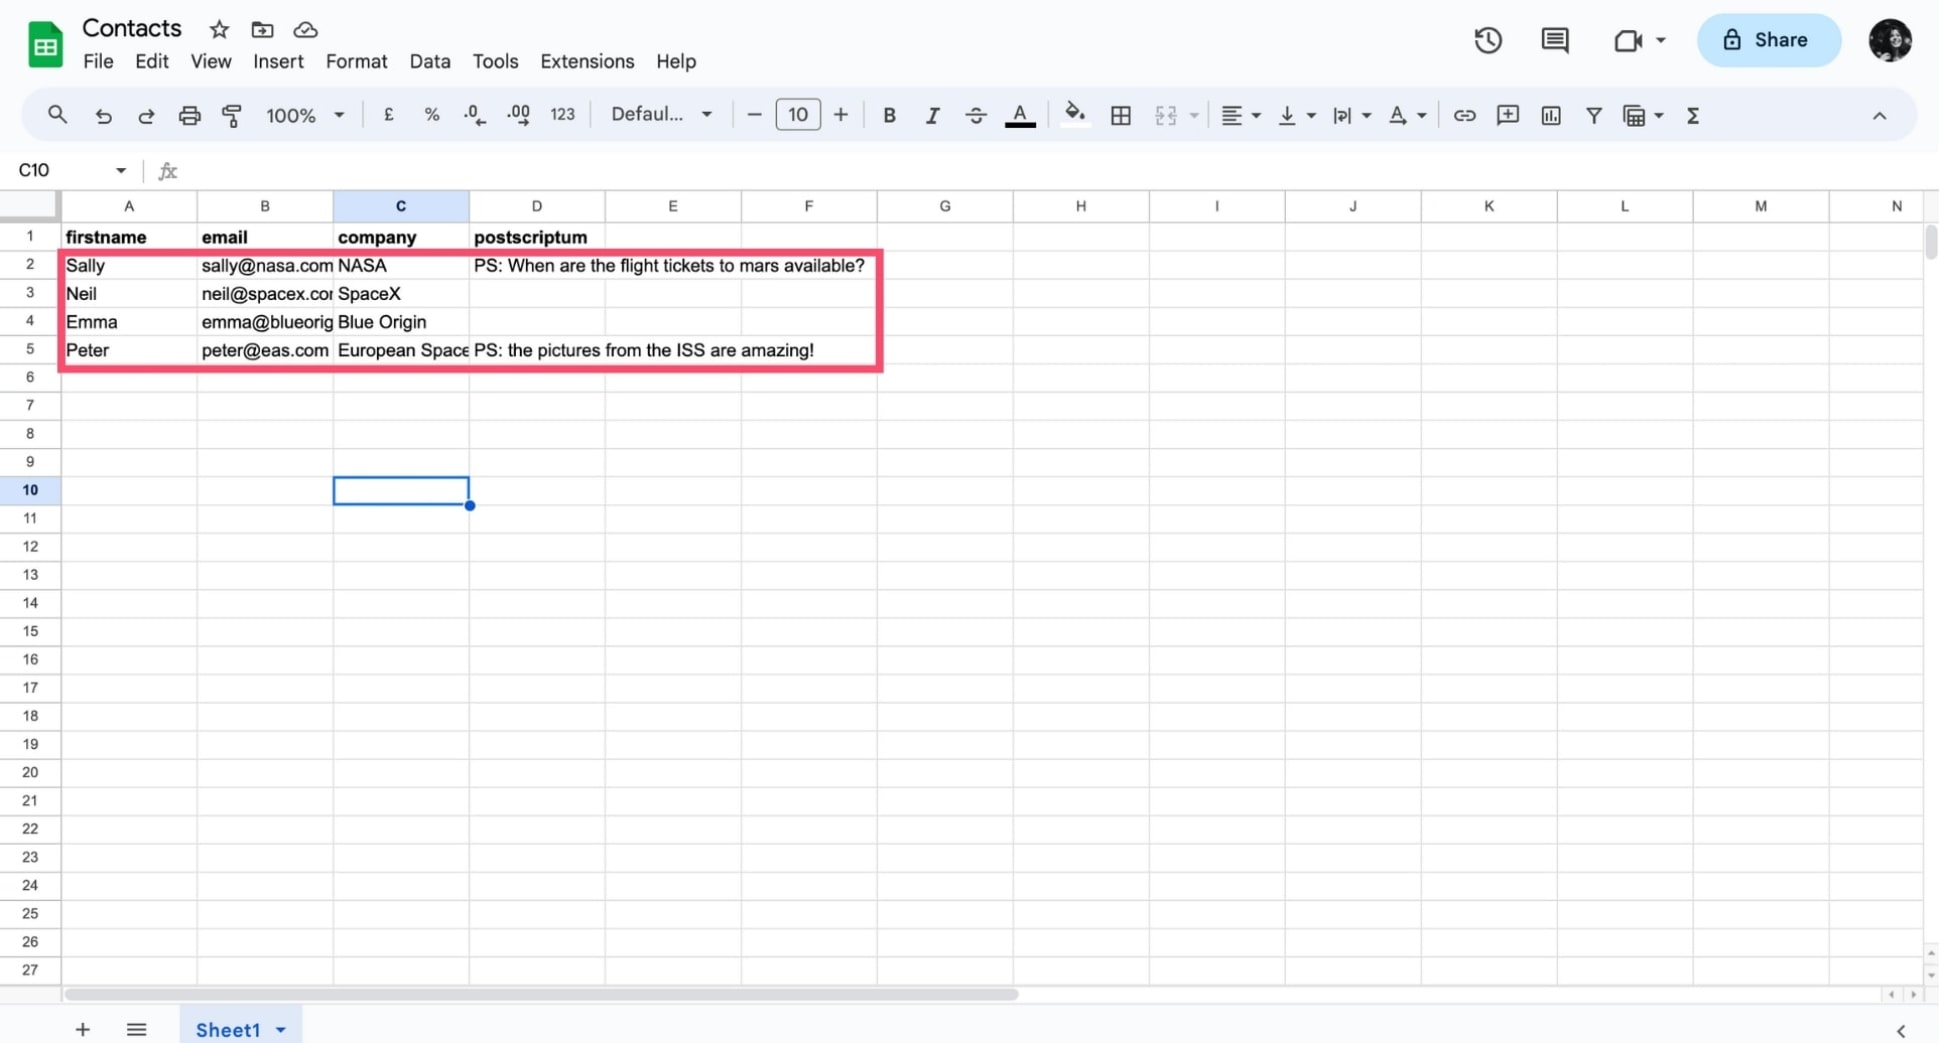
The data in each column can now be used to personalize your email for each recipient, allowing you to create a single email template and generate customized copies for hundreds or even thousands of contacts – all in just a few clicks.
3) Create your email template in Google Docs
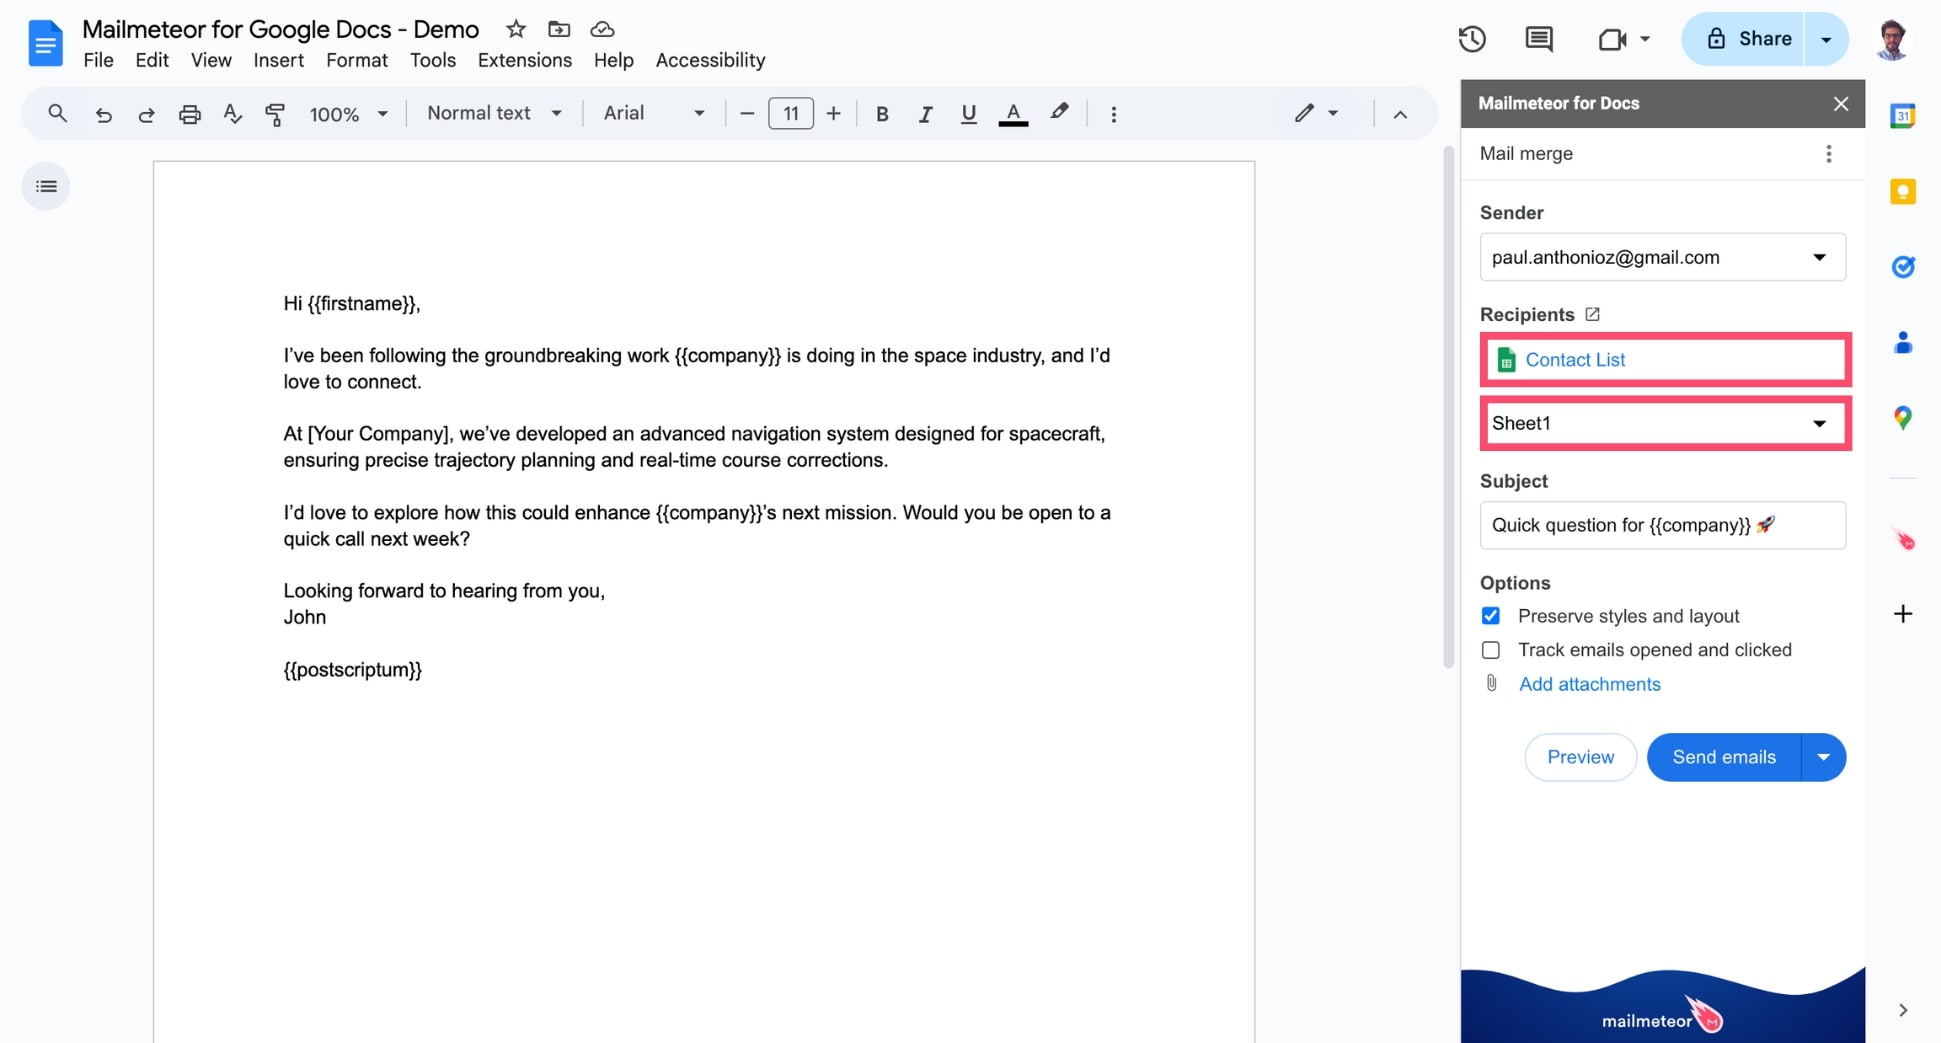
Under Recipients, select your Google Sheets spreadsheet to import your recipients and personalize your template.
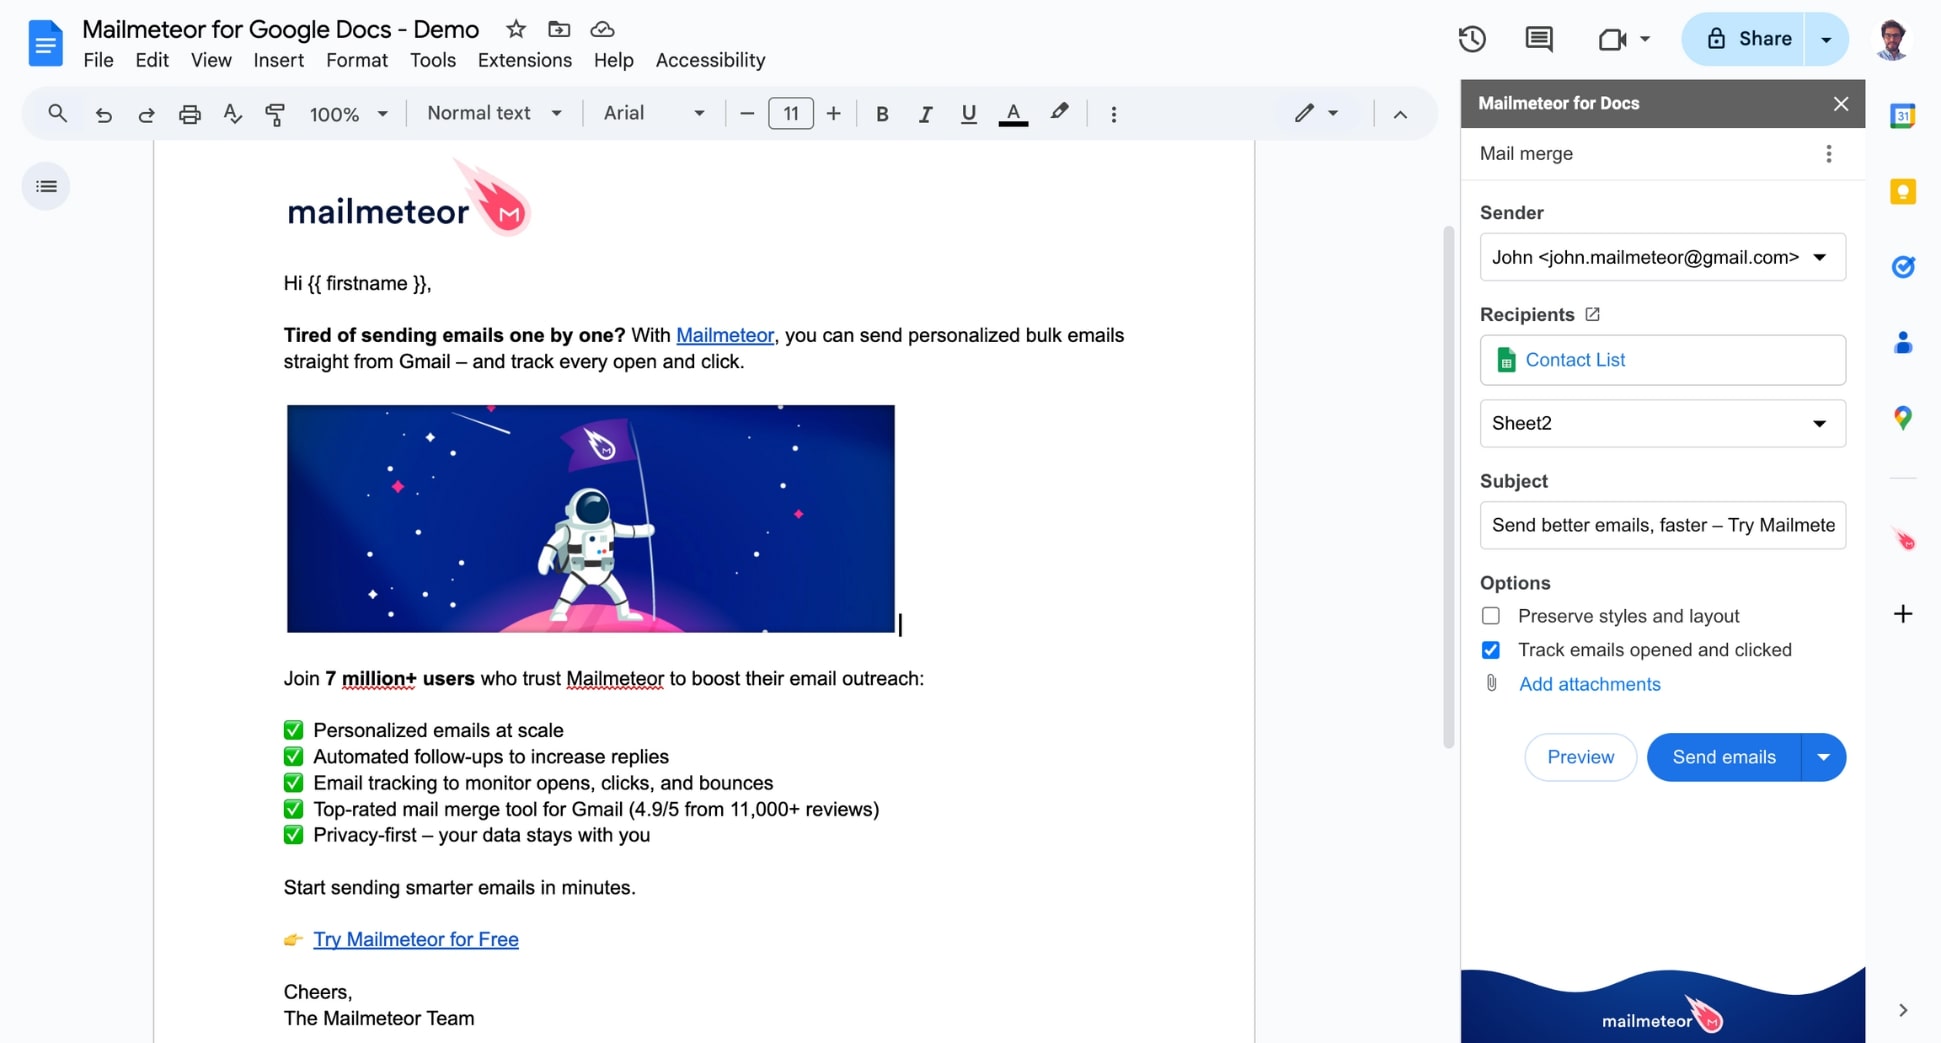
Compose your email like you normally would. You can stick to plain text, or use Google Docs to design your template the way you want:
- Insert images, GIFs, and links
- Customize the layout
- Add formatting
- Attach files
Here’s an example of layout you could use:
To personalize your email, simply type the name of a column from your Google Sheets inside double curly brackets, like this: {{ variable }}.
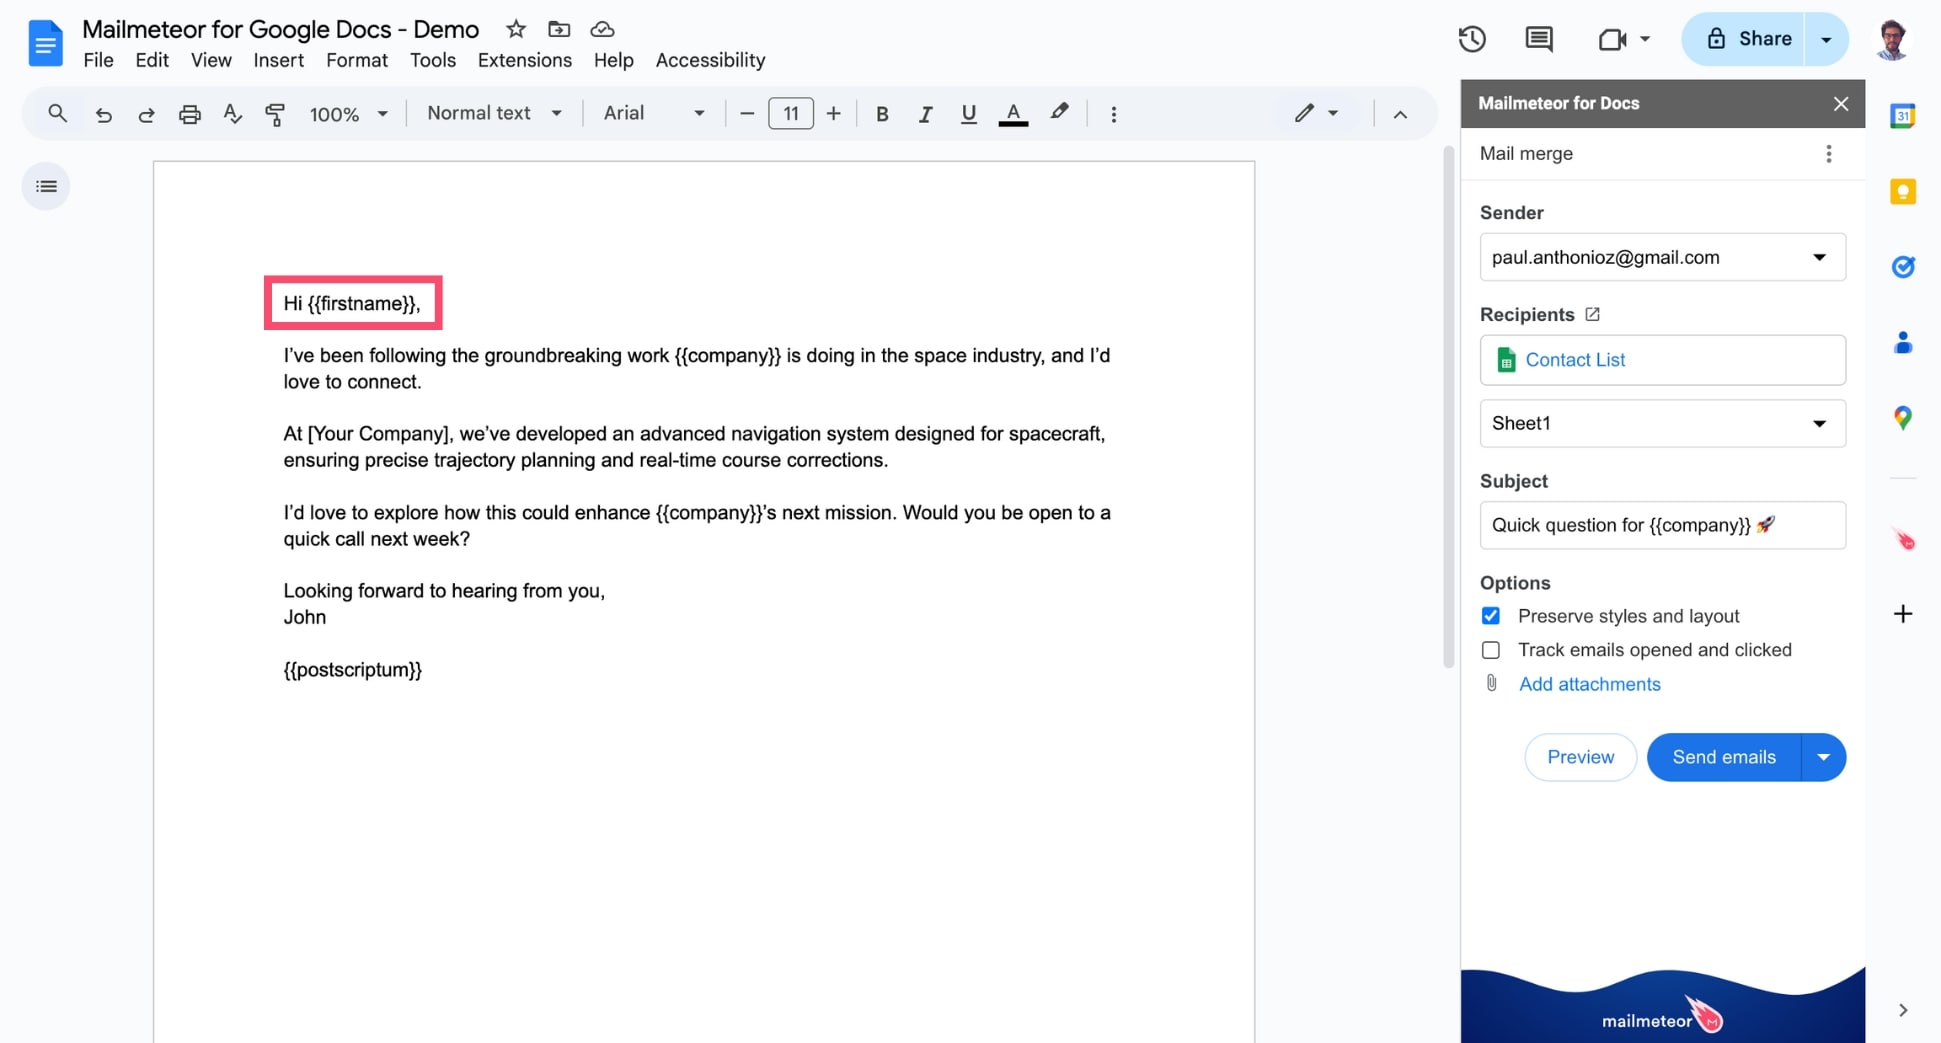
Once you press Send, Mailmeteor will automatically replace all the variables with the corresponding data for each recipient.
Lastly, edit the subject line of your email campaign. By default, we use the title of your Google Docs document as the subject line.
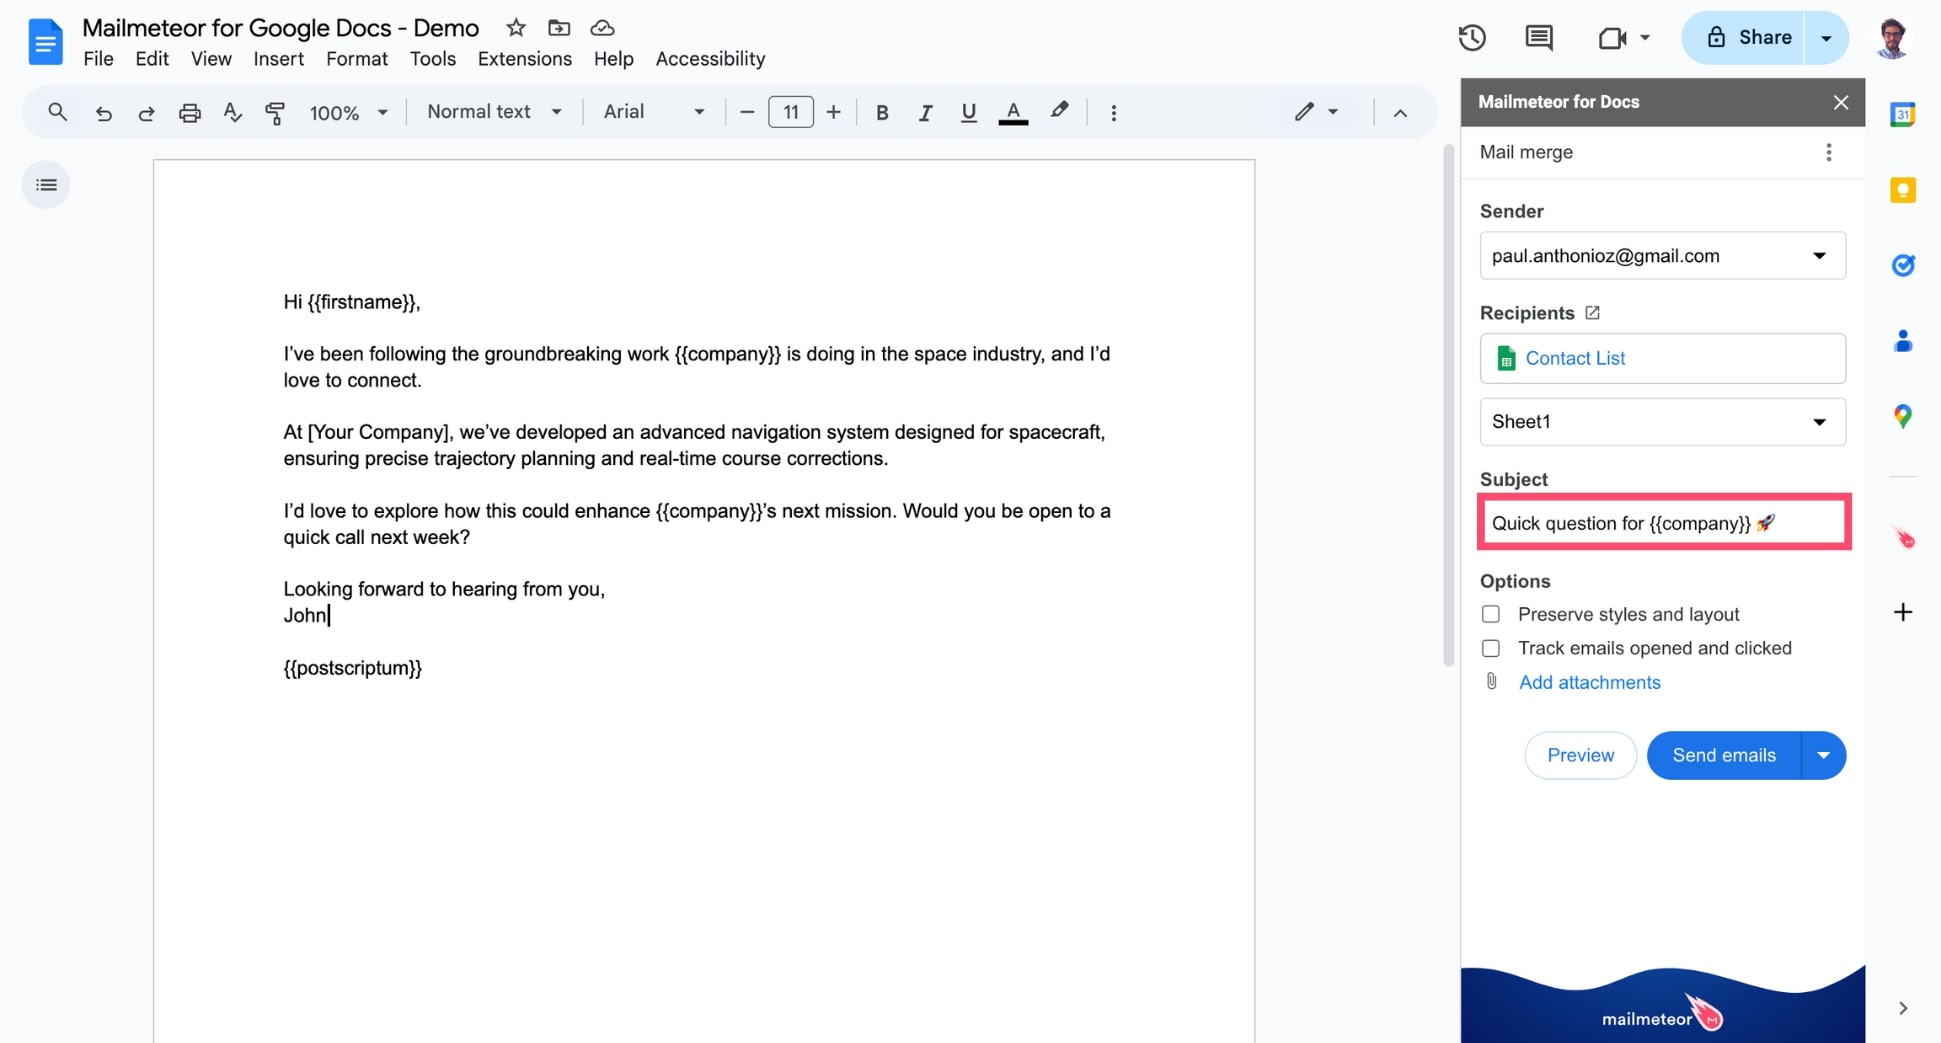
You can use {{ variables }} to personalize your subject line with your recipients’ name, or other relevant details.
4) Preview and send your campaign
Click Preview to see exactly how your campaign will appear in your recipients’ inboxes. Use the Previous and Next arrows in the top-right corner of the Preview window to view the email for each individual recipient.
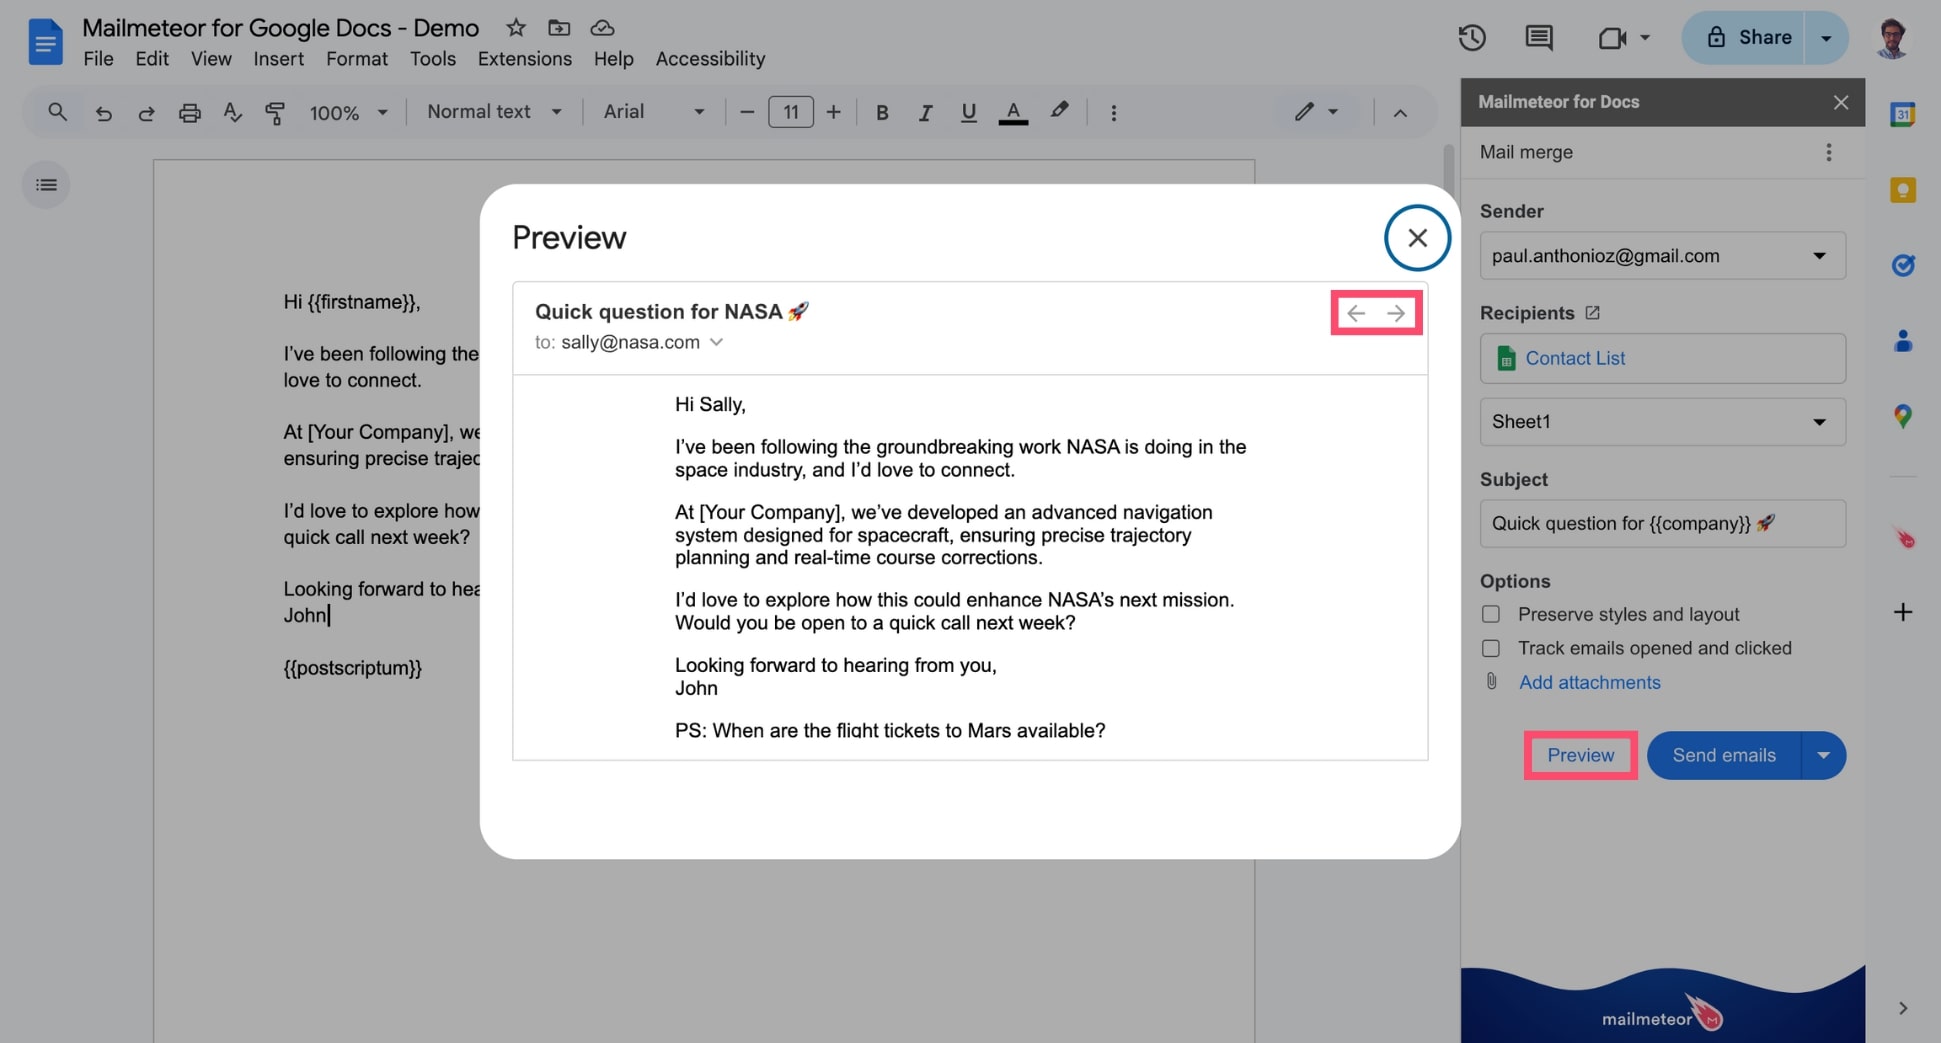
If your custom {{ variables }} don’t work properly, it means that the corresponding cell in your spreadsheet is empty or doesn’t have the right formatting. Check our dedicated article to solve any problems you may encounter.
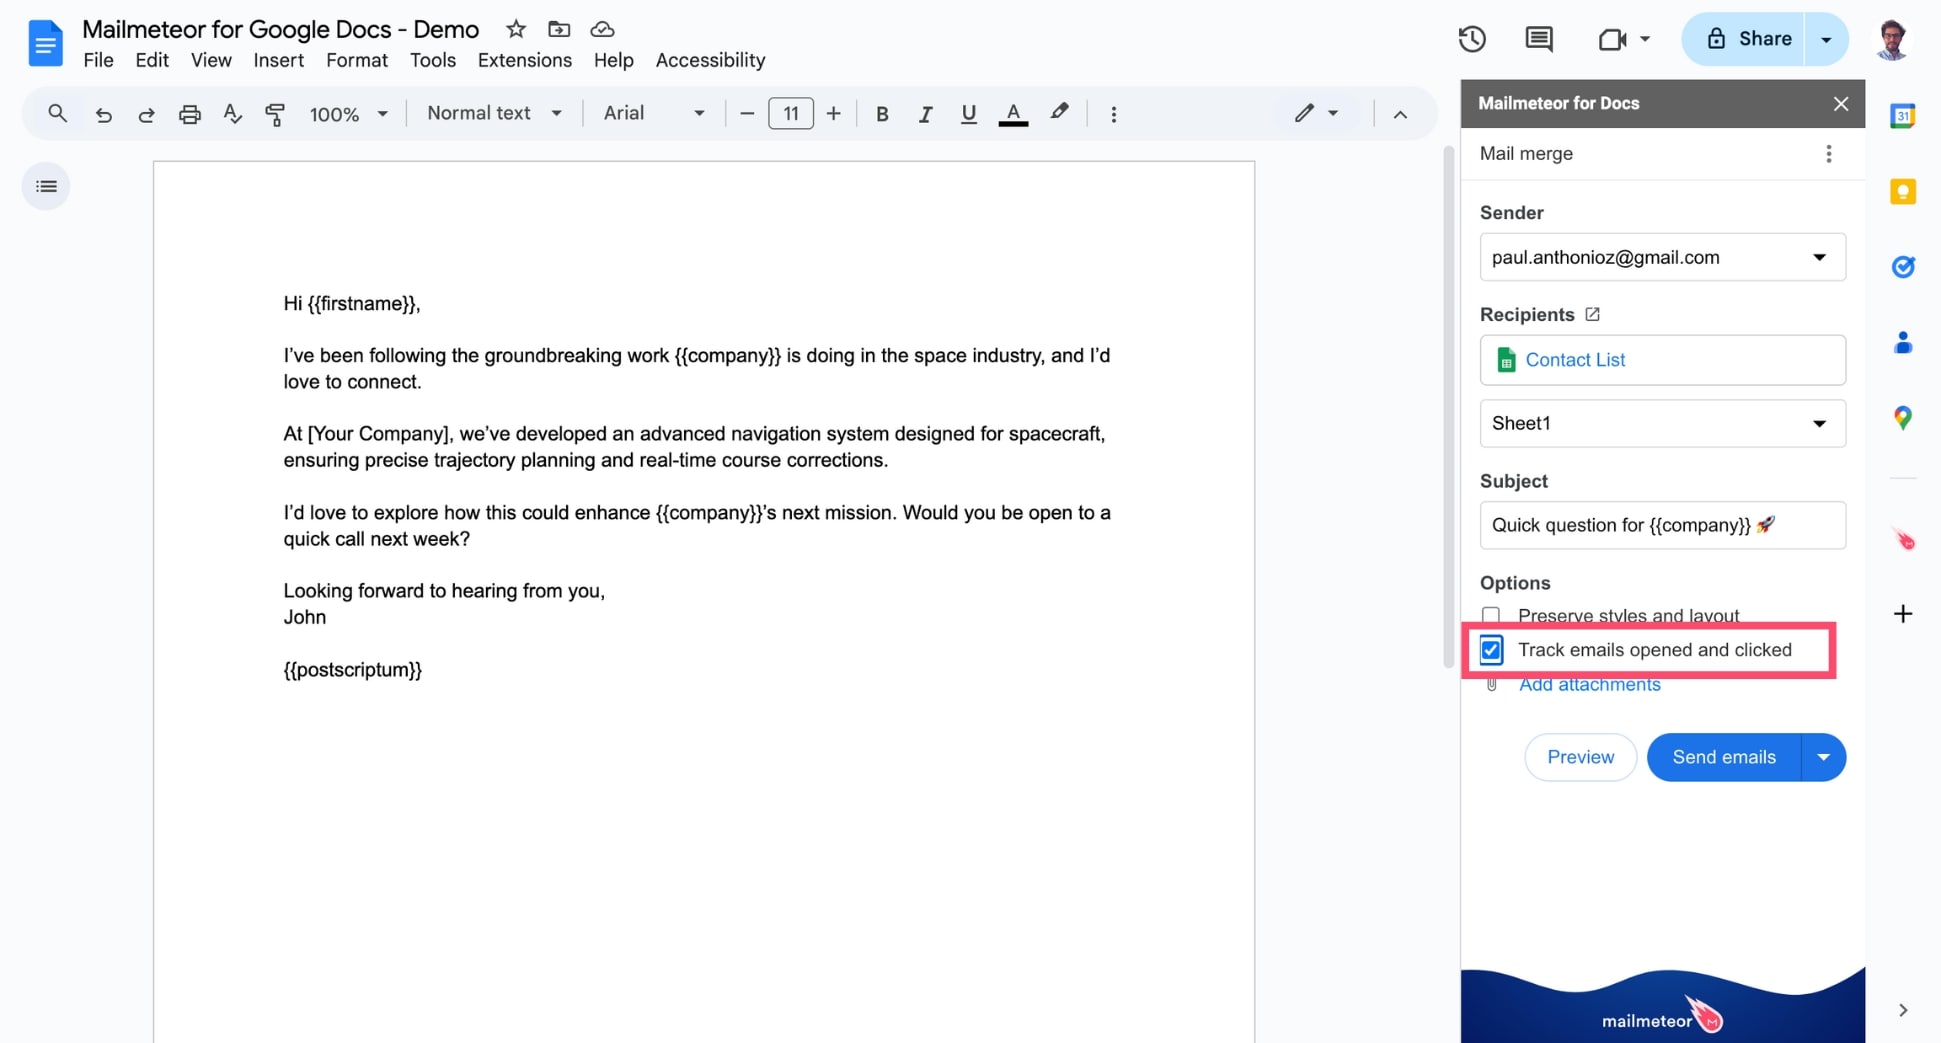
Before pressing send, finish configuring your campaign:
Select Track emails opened and clicked IF you want to monitor your campaign’s performance.
Select Preserve styles and layout IF you want to make sure your email looks exactly like what you see in Google Docs. But keep in mind that your {{ variables }} won’t work if you check this option.
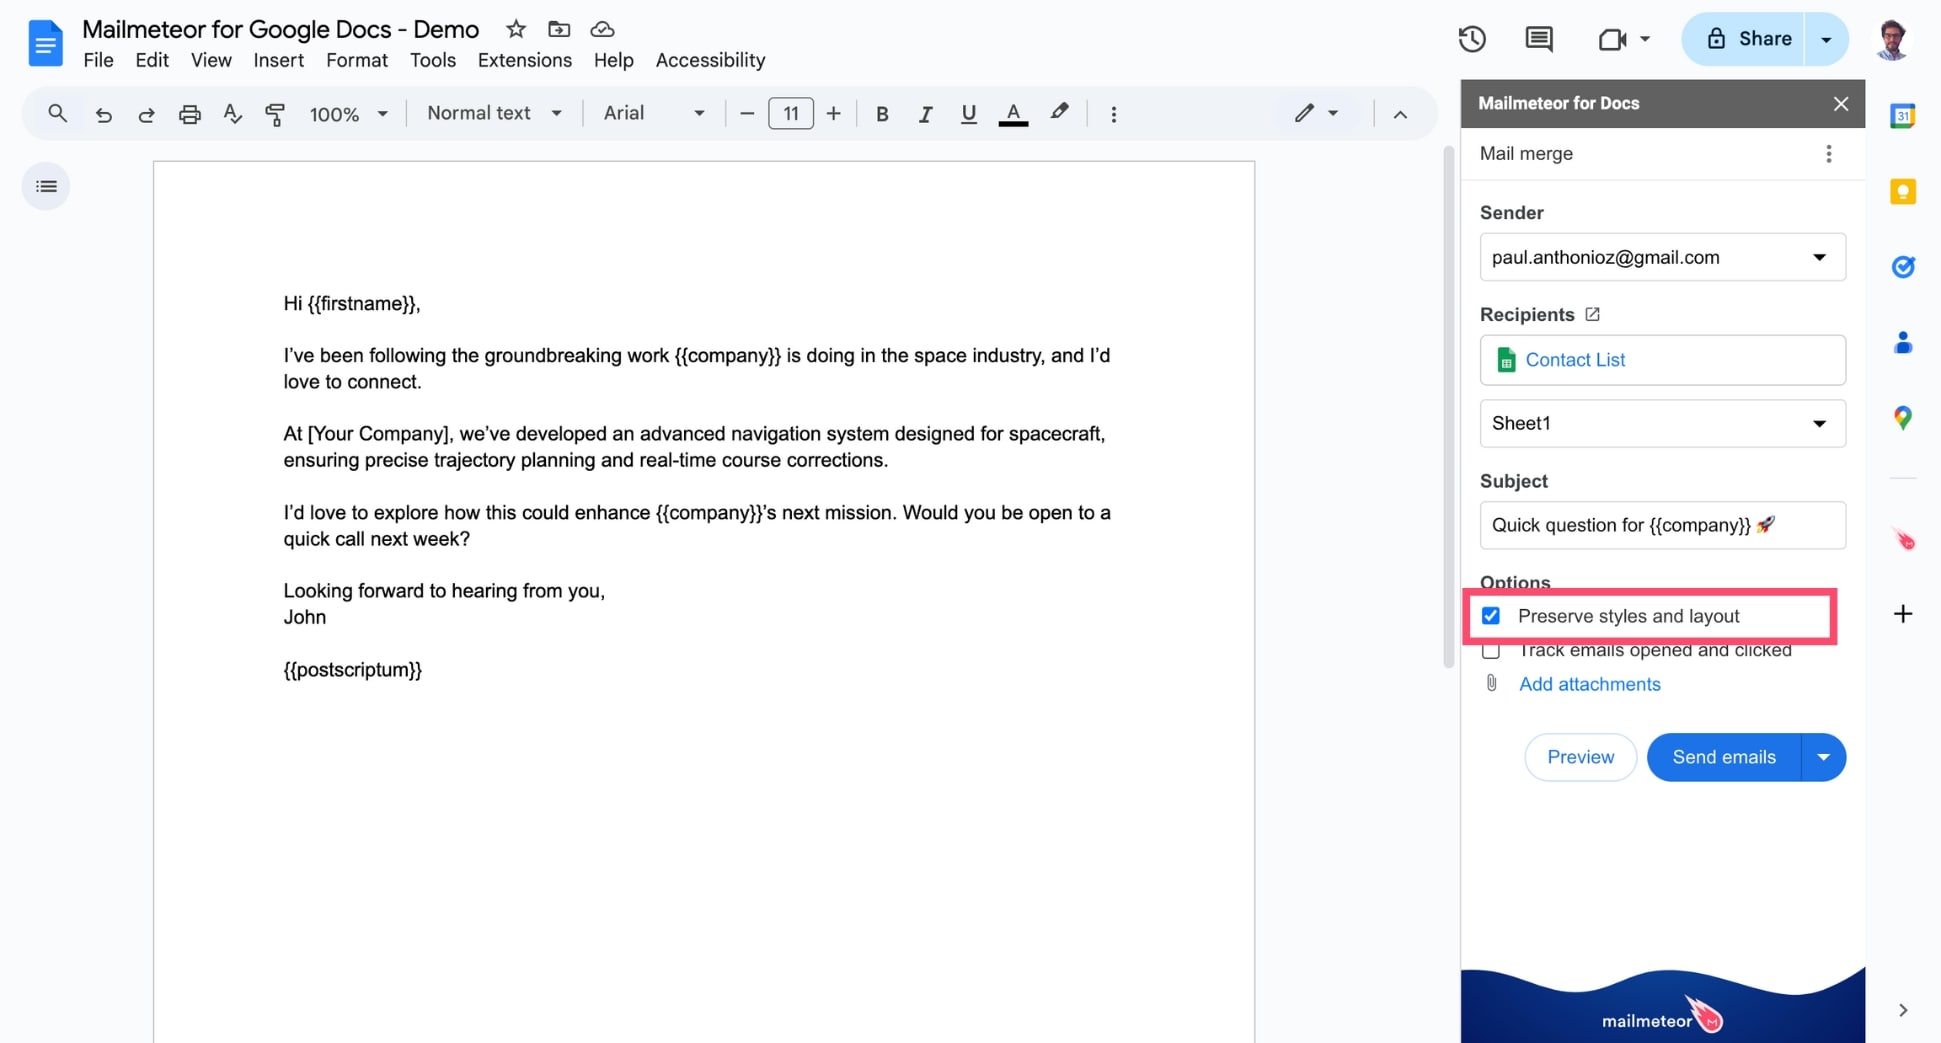
This option captures a screenshot of your Google Docs file and sends it as an image within your email. If this is unchecked, the email is sent in HTML format instead.
Once your emails look flawless, click Send emails, or schedule your campaign to reach your recipients at the perfect time.
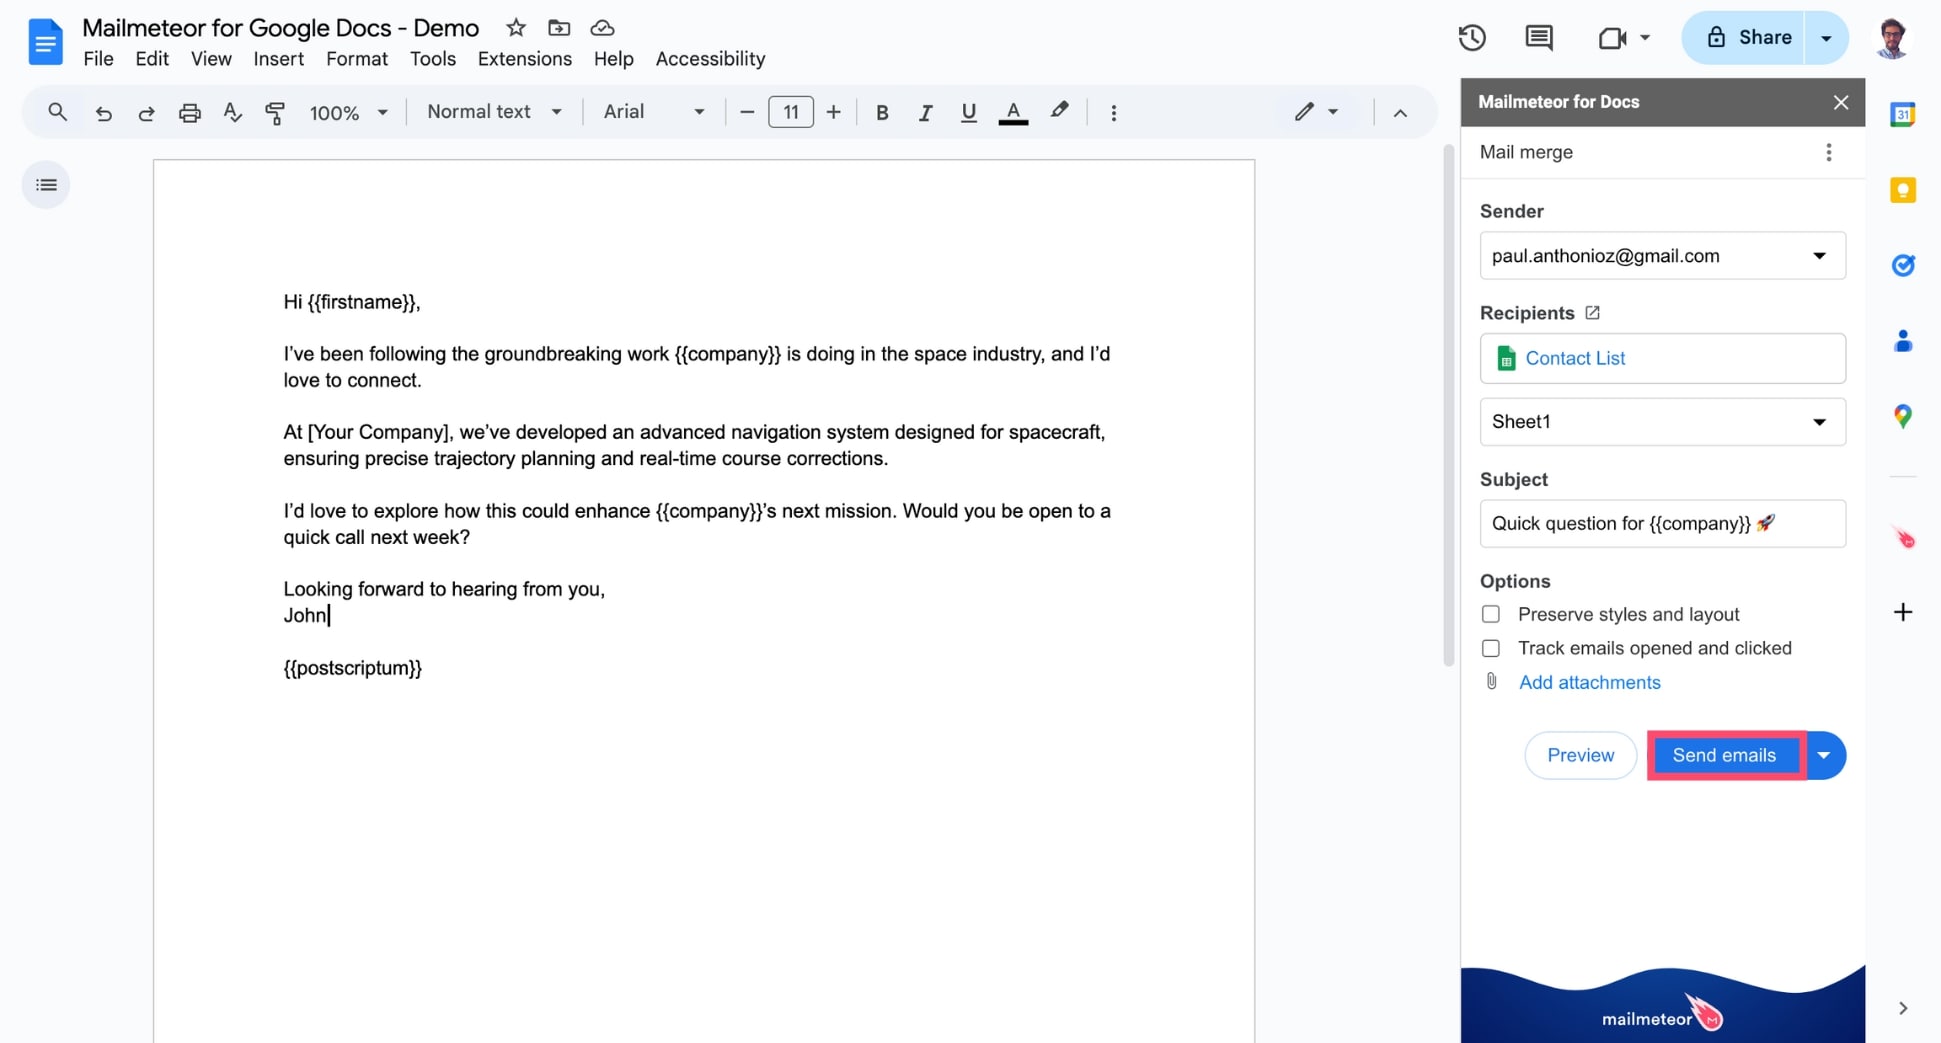
And that’s it. You’ve just sent your first email campaign using Mailmeteor for Google Docs. Congrats! 🎉
- Sending may take a few seconds to several minutes depending on your spreadsheet size.
- Check your campaign progress at any given time from the Mailmeteor Dashboard.
- Made a mistake? You can pause or cancel your campaign in just a few clicks from your Dashboard.
- We recommend sending emails progressively with the Autopilot feature for better deliverability.
- Track your emails in real-time thanks to the tracking report to see who opened or clicked your emails.