New campaign
Forget bland, generic emails. Personalization is the most efficient way to make your messages stand out in crowded inboxes. With Mailmeteor, you can personalize the body and the subject lines of your emails to make each recipient feel special.
This is a game changer. And if you learn how to use it properly in your email campaigns, you will 10x your engagement rates. To help you create personalized emails at scale, we use something called variables (also known as merge tags or merge fields).
Here’s what it looks like ⤵️
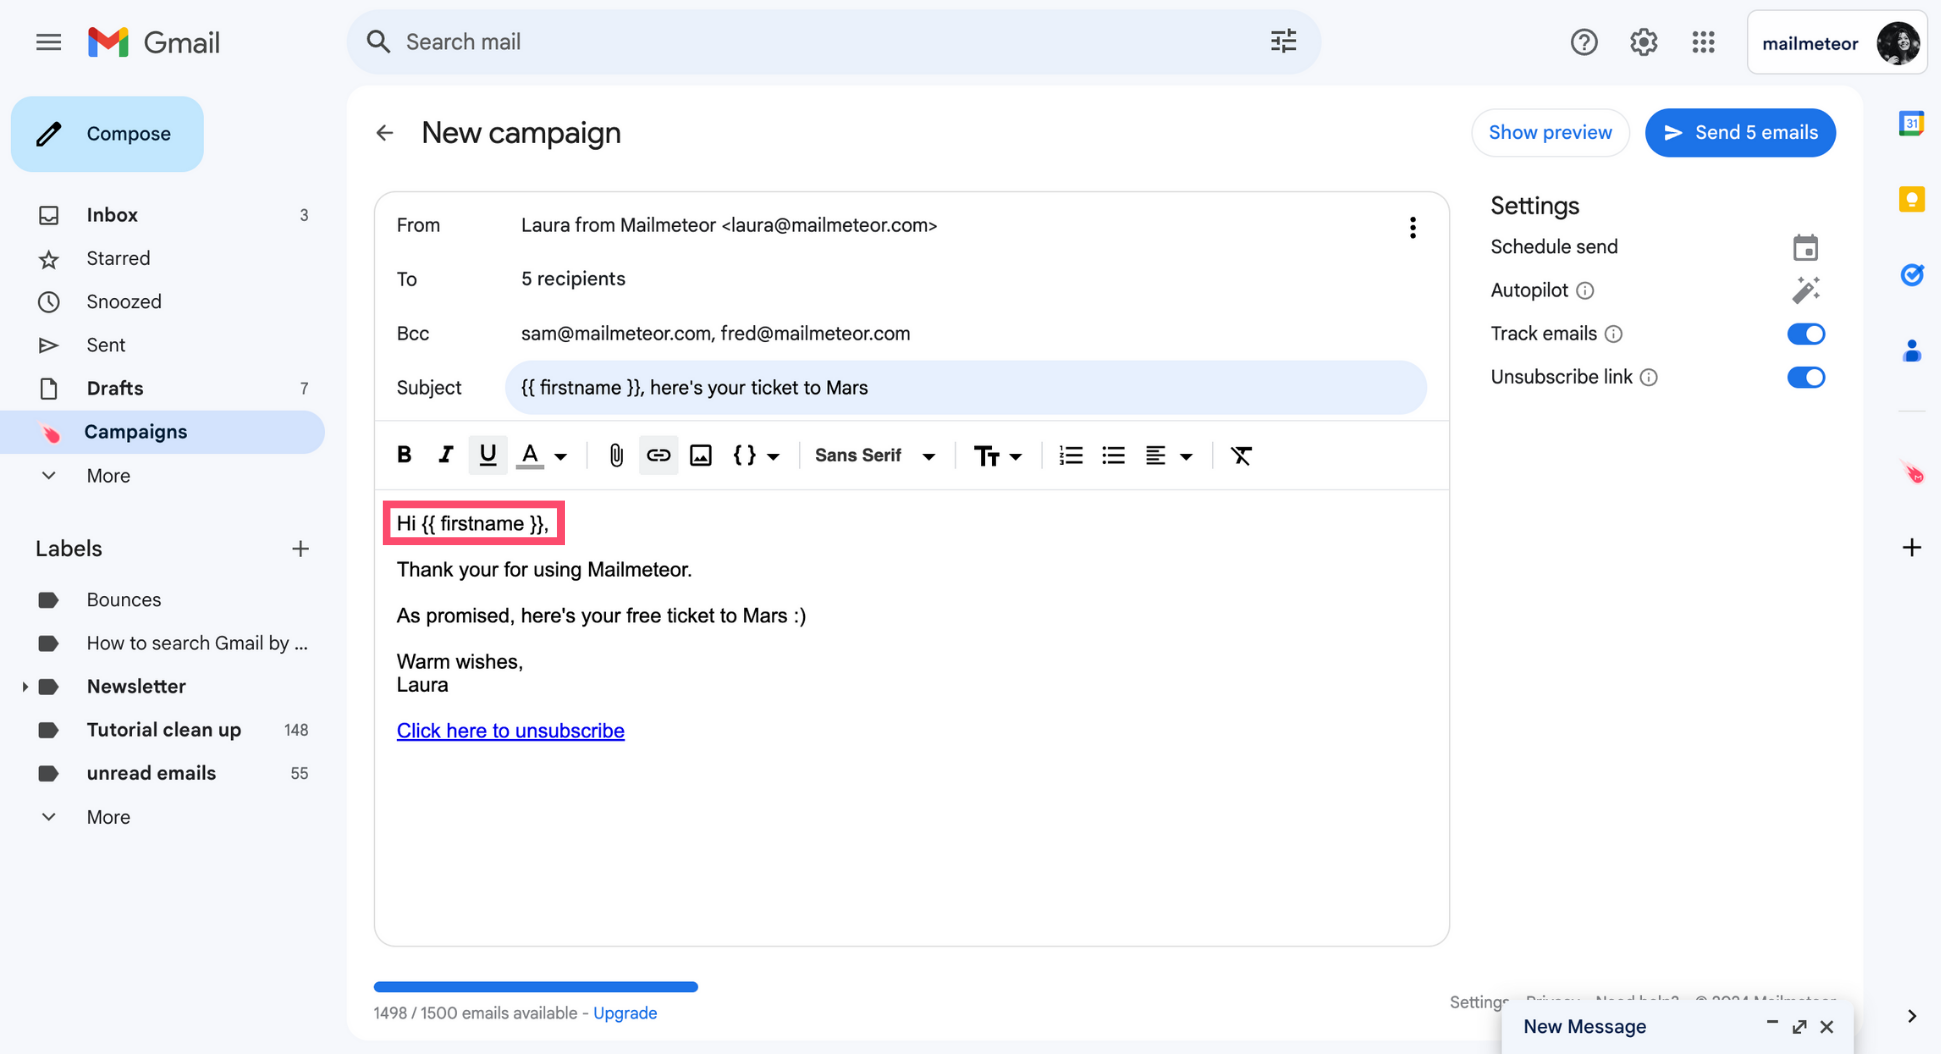
In this example, the personalized variable {{ firstname }} will automatically be replaced with the recipients’ first name once you send your campaign.
How to personalize the body of an email?
1. Sign in to your Gmail account.
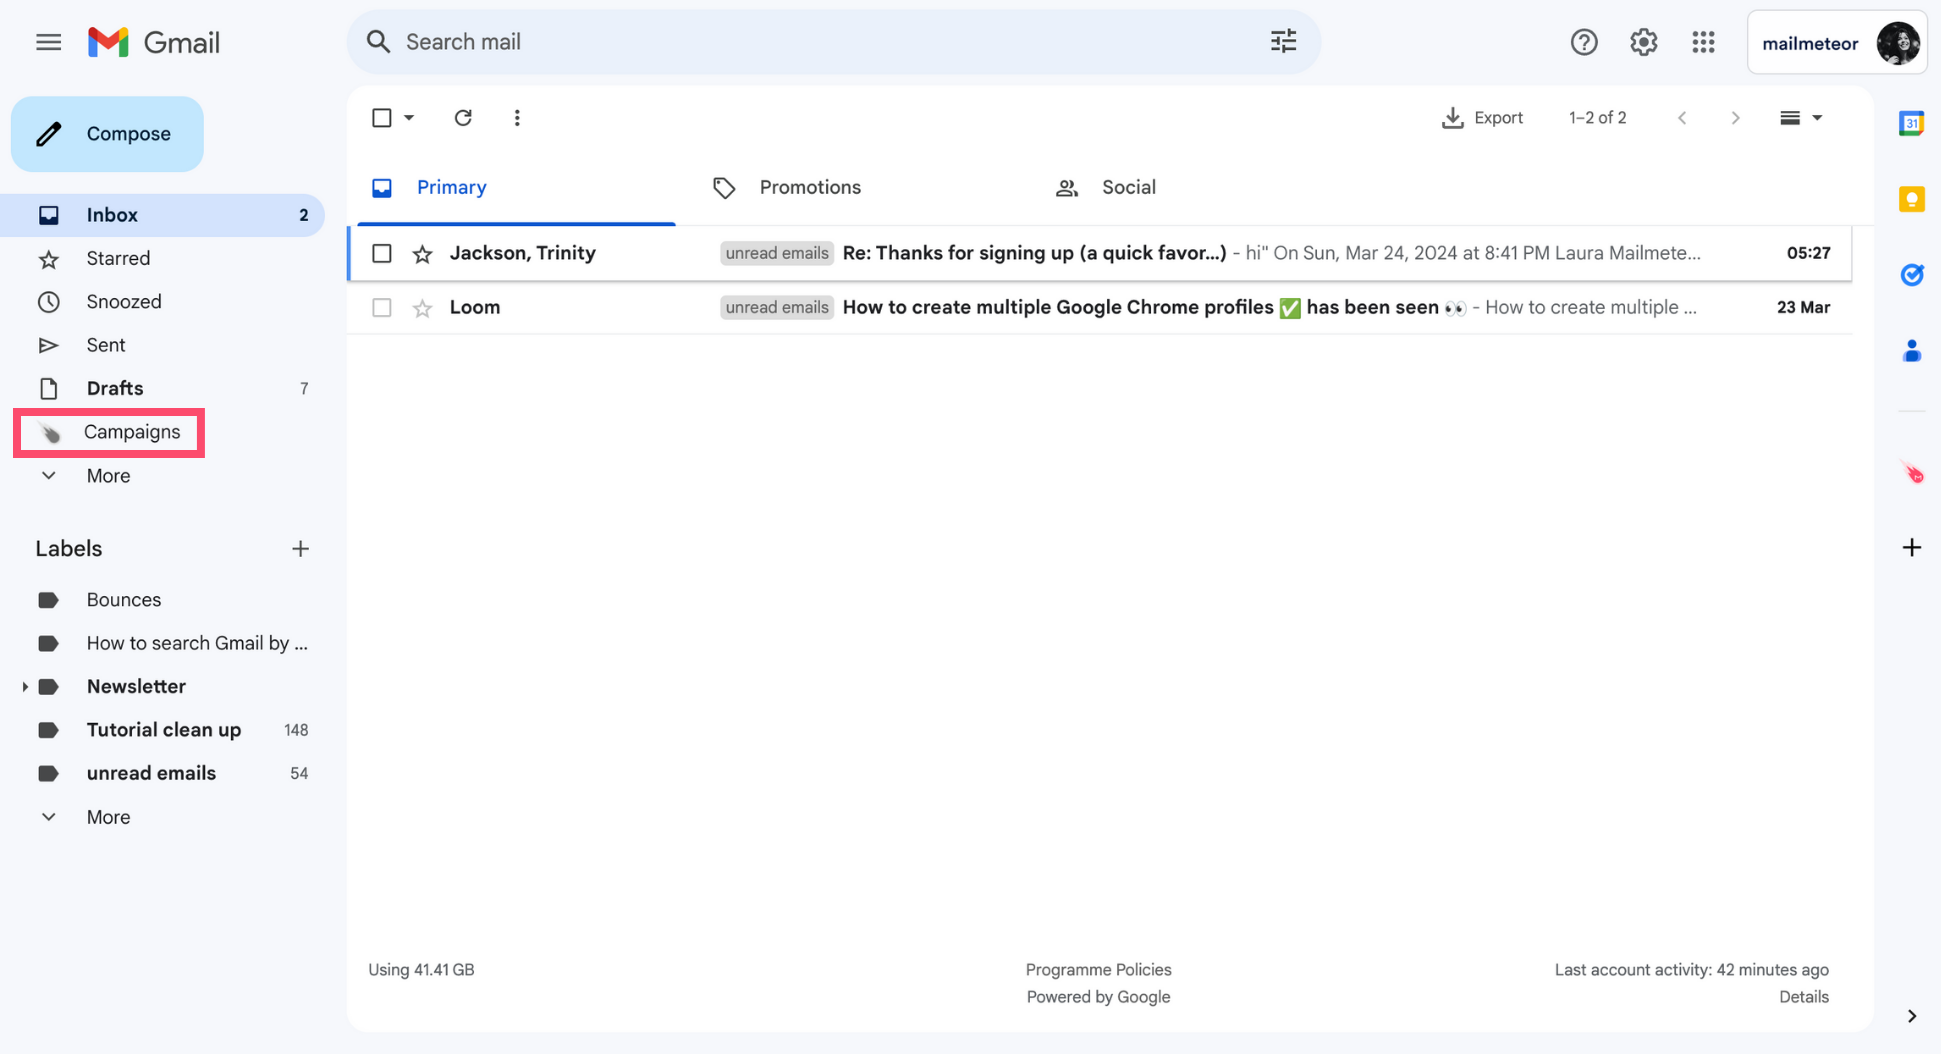
2. Go to Campaigns.
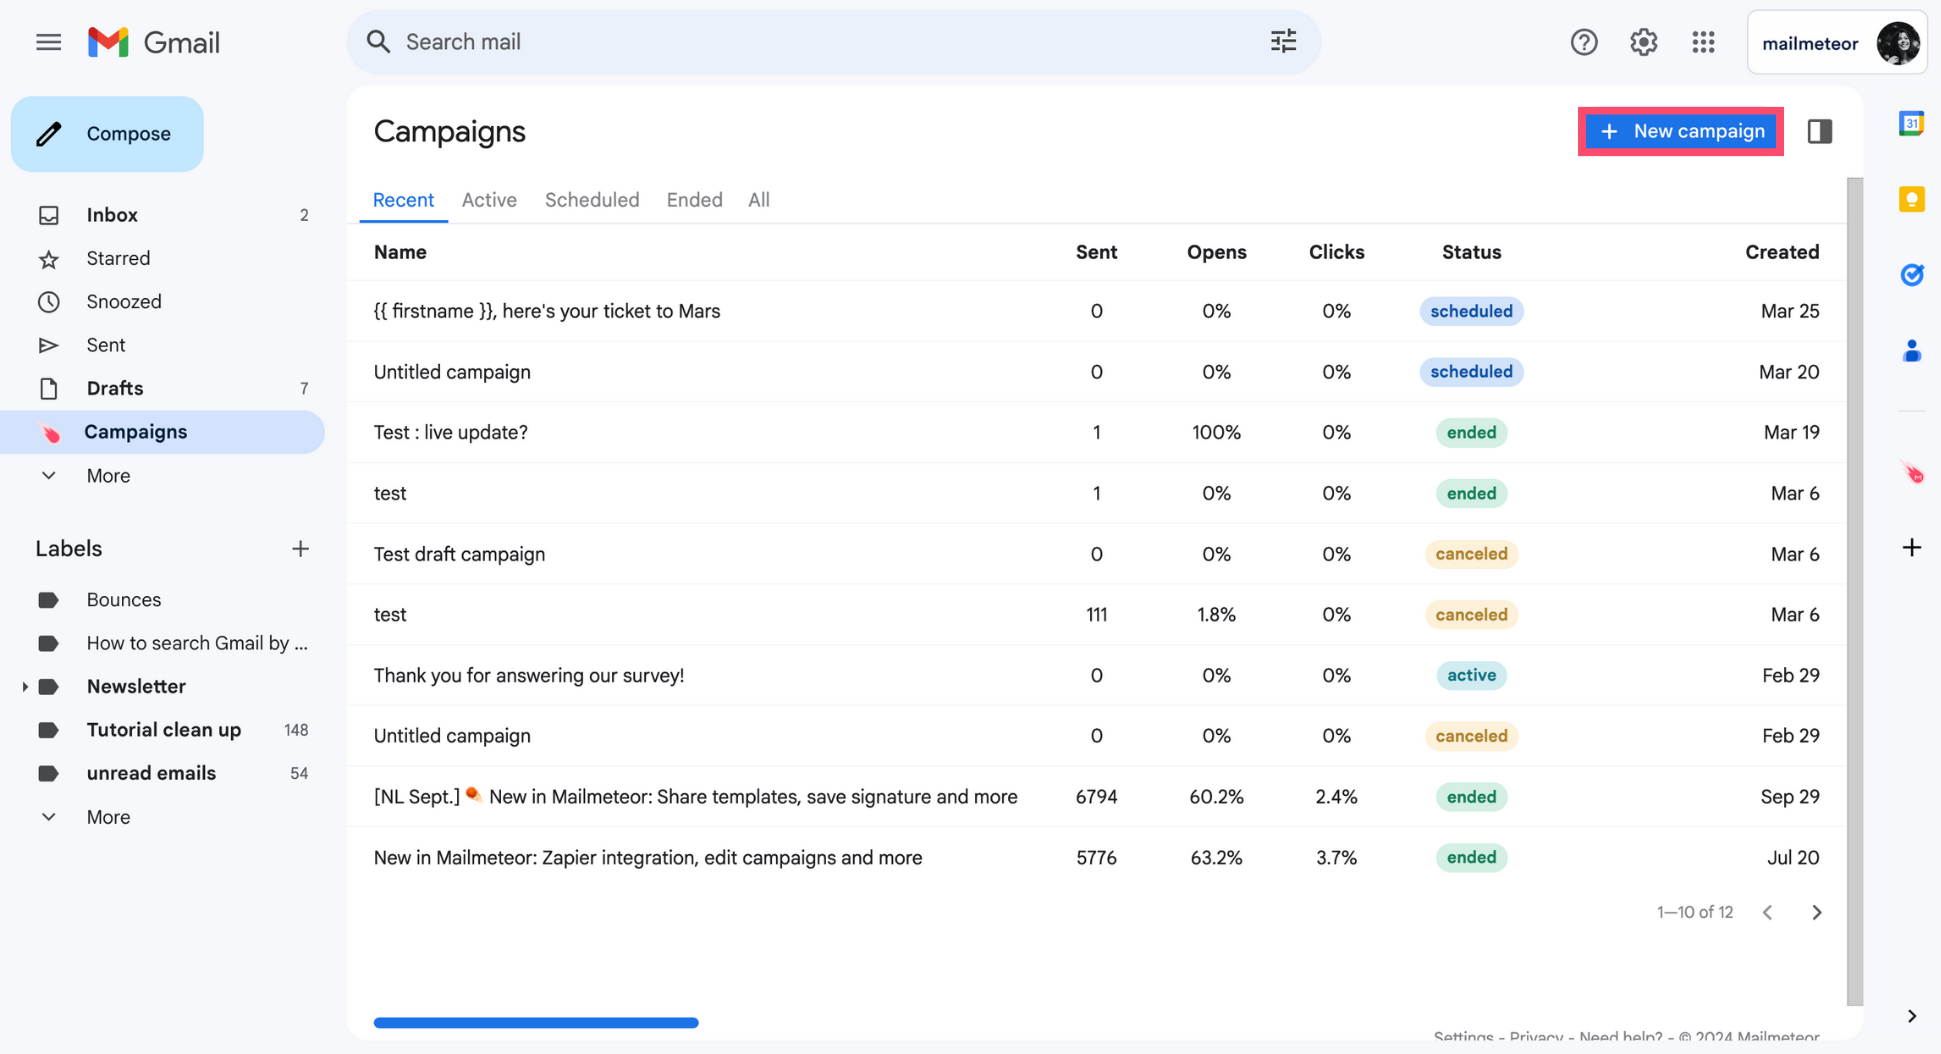
3. Create a New campaign.
4. Click Select recipients. Then add your recipients from Google Sheets, a contact list, or a CSV file.
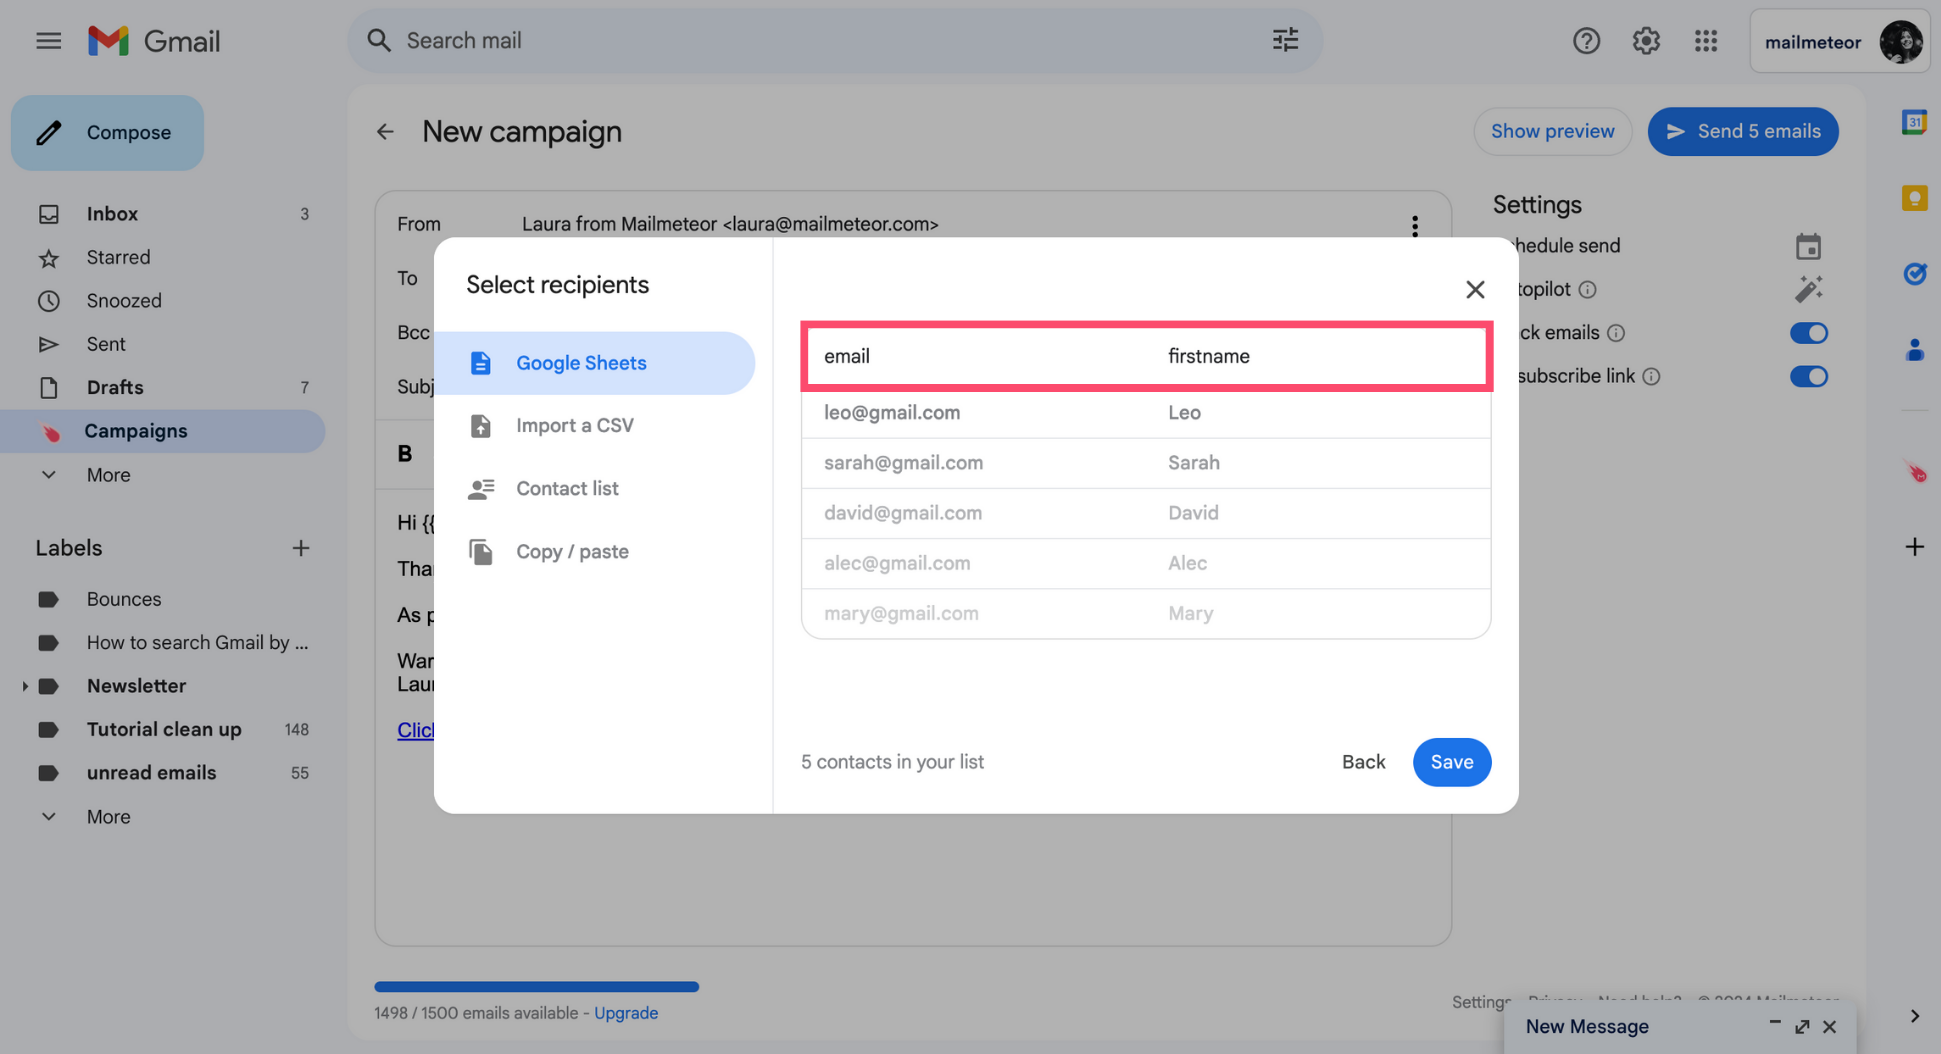
If you’re importing contacts from Google Sheets or a CSV file, make sure to add 1 column for each variable. In this example, we’ve imported recipients from a spreadsheet with two columns: email and firstname.
5. To add some dynamic content to your email, click Insert a variable and select the appropriate variable.
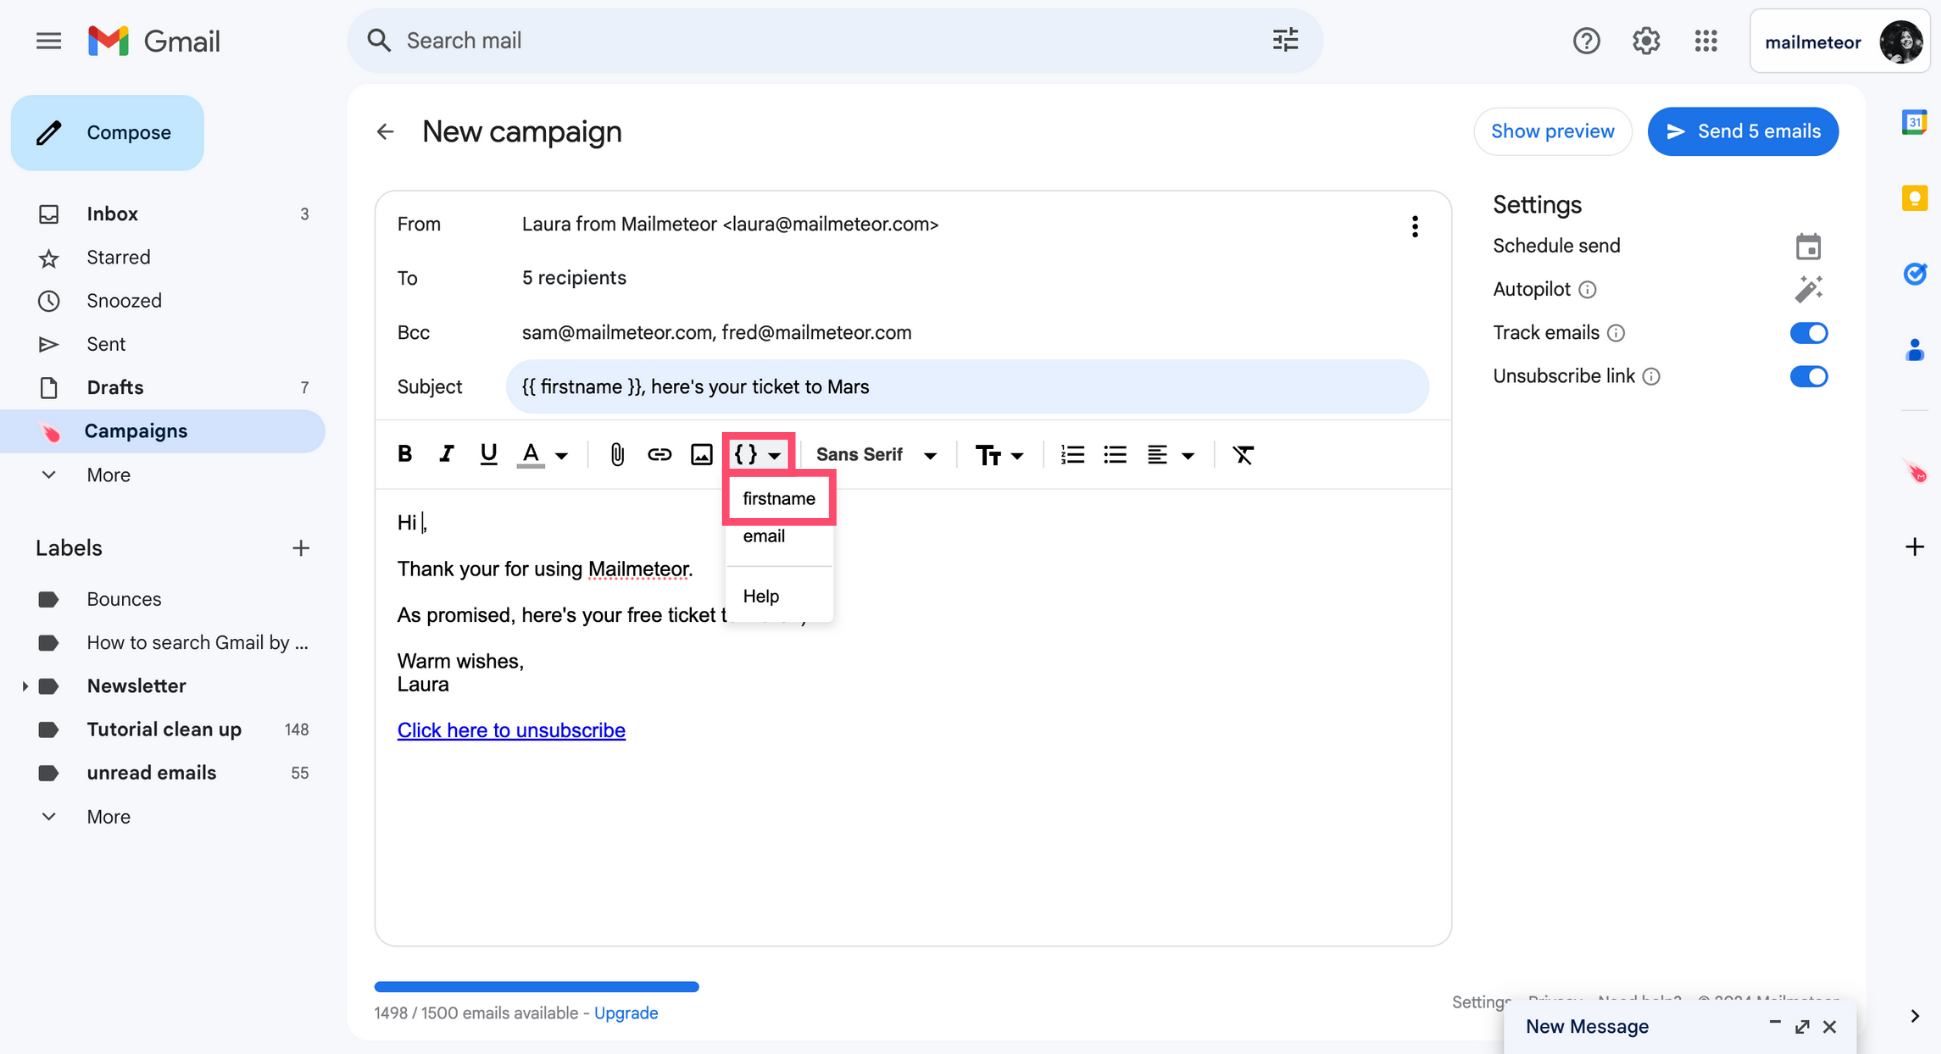
You can add as many variables as you want to your emails.
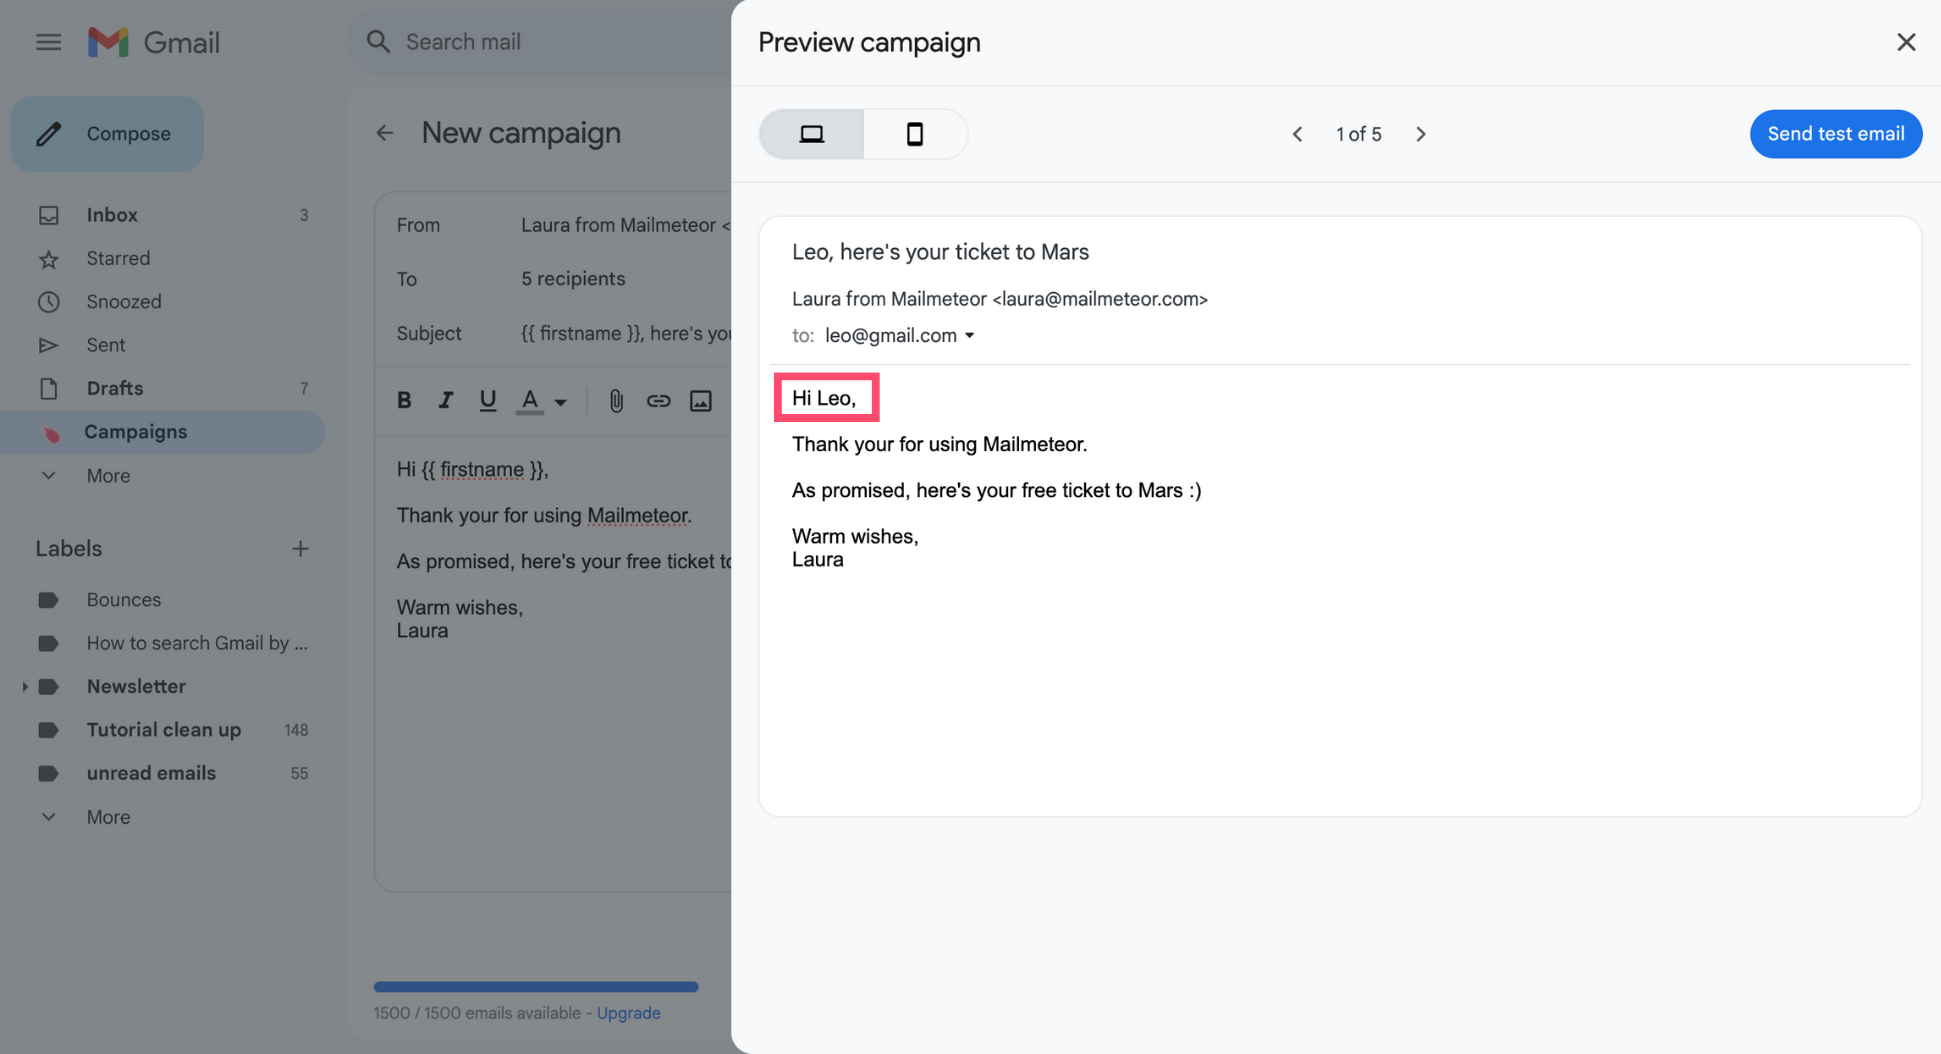
6. You can preview your emails before sending them to see how the personalized variables will look in your recipients’ inbox.
7. When you’re done editing your email, press Send or schedule your campaign to be sent at a later time.
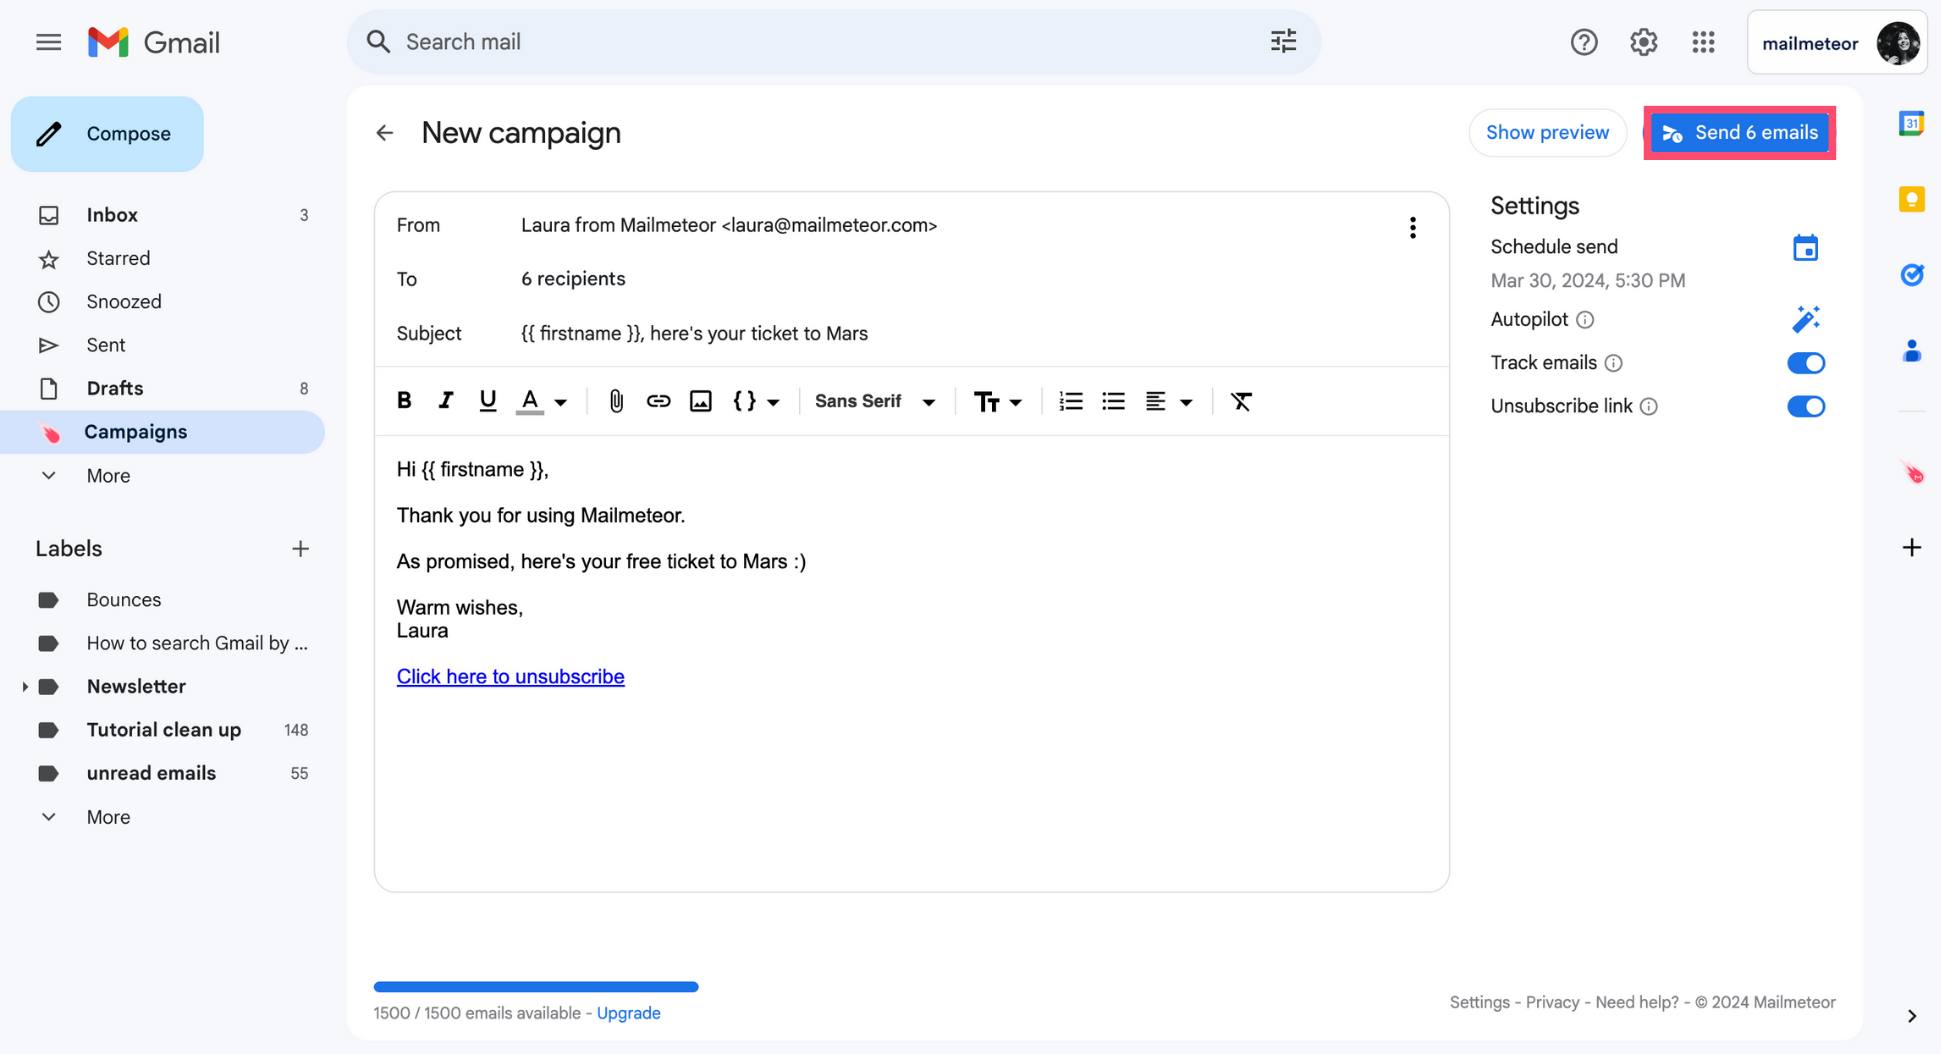
And voilà. Your mail merge has been sent. Pretty easy, right?
How to personalize the subject line?
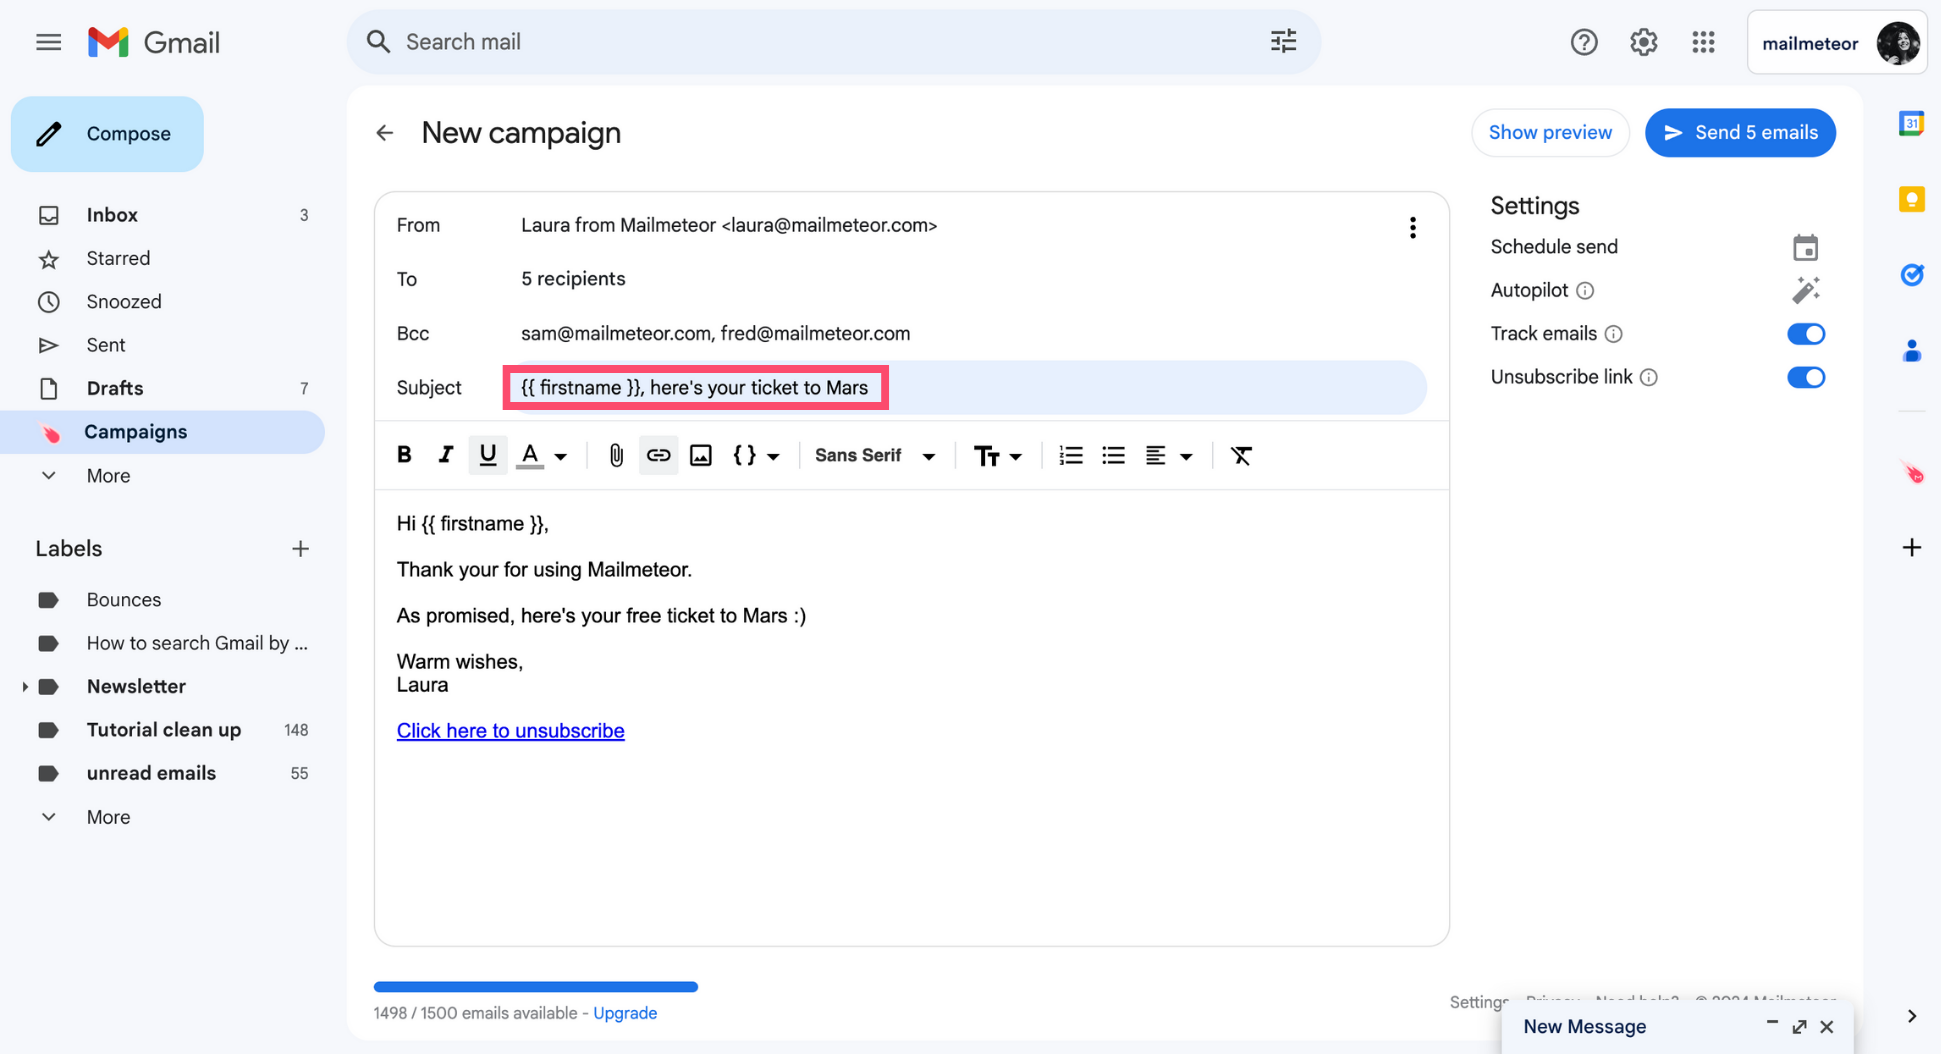
You can also personalize the subject line of your emails. To do so, simply type your personalized variables inside double braces.
In this example, we’ve personalized the subject line with the recipients’ first name using the {{ firstname }} variable ⤵️
