Filter recipients
Wondering how to send emails only to certain rows and skip others? How to send emails only to the new people added to the list? Mailmeteor lets you filter your spreadsheet to segment your contact list in just a few clicks.
Segmenting your recipients is incredibly helpful if you want to split your contact list into smaller groups or to follow up on a campaign. For example, you can retarget the people who did not click on your previous email.
How to segment your contact list
You can easily create filters and divide your list into smaller segments.
- Open your spreadsheet in Google Sheets.
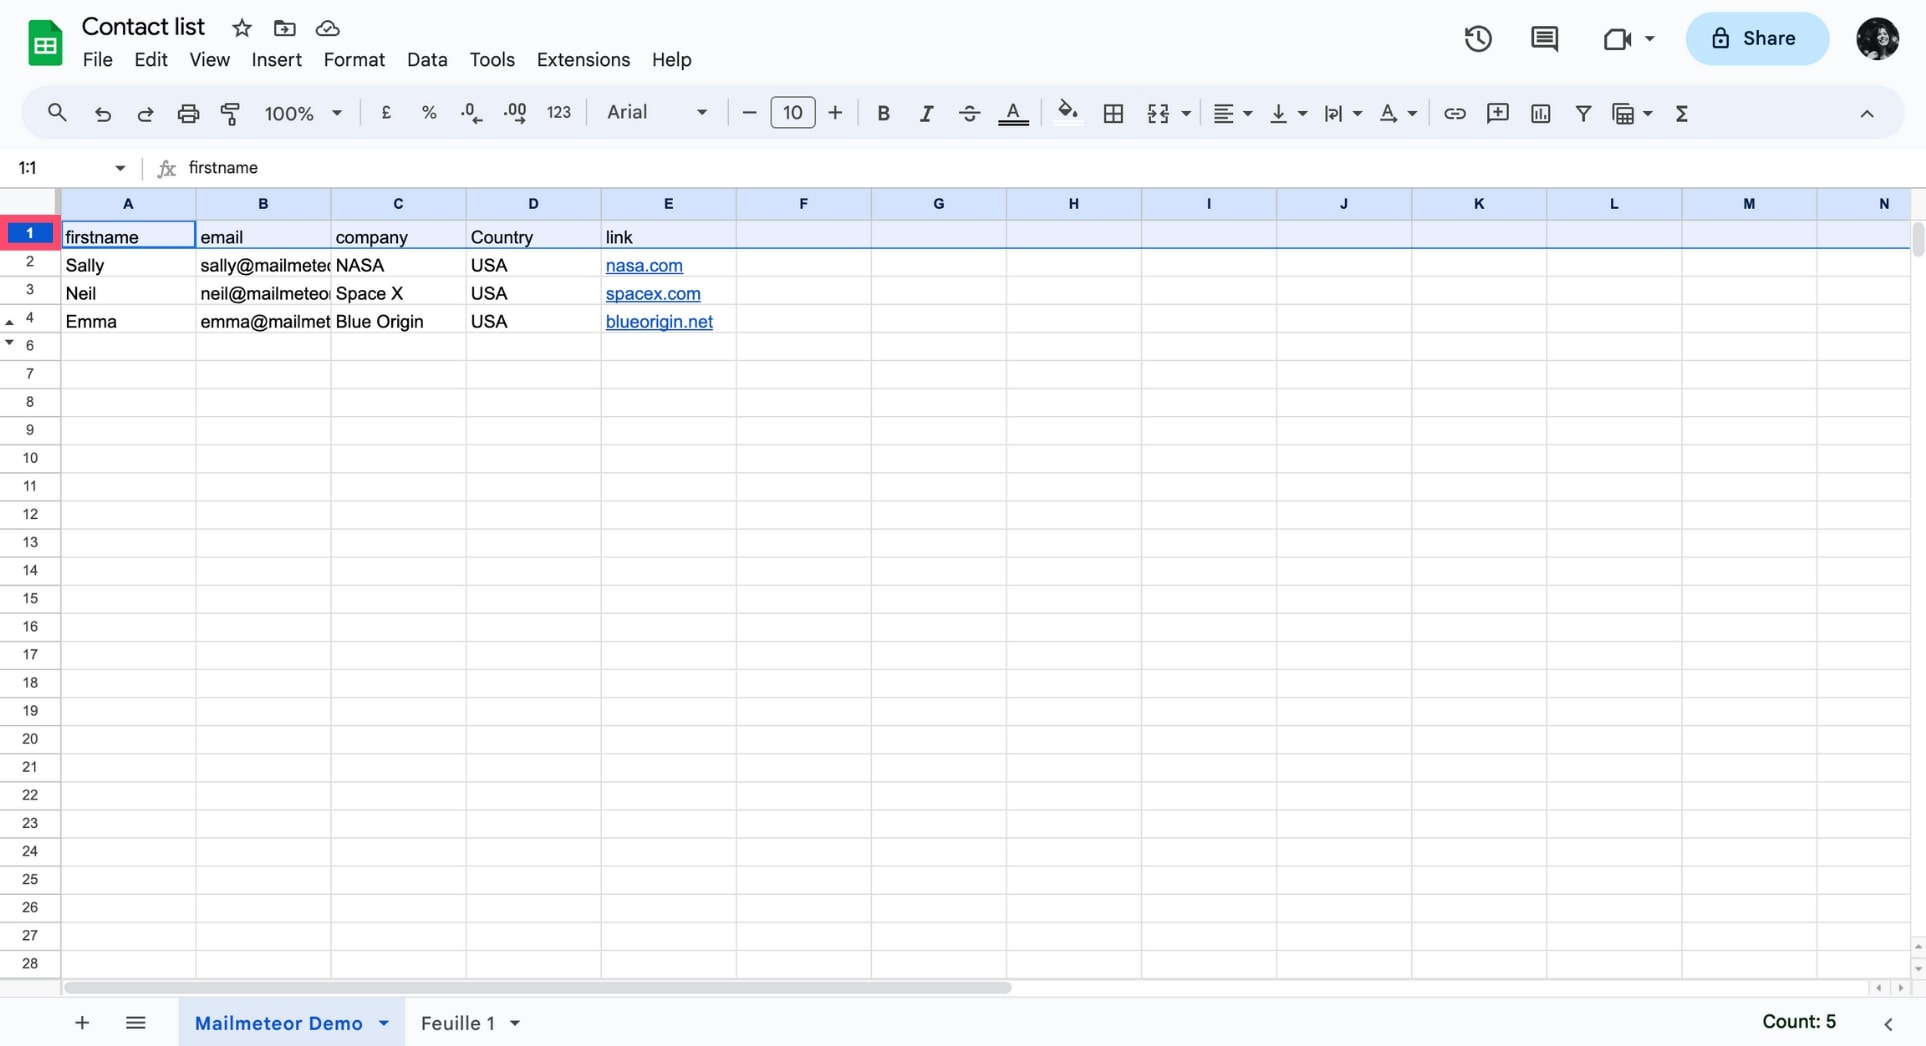
- On the left of your screen, click on the number 1. This will select your entire first row.
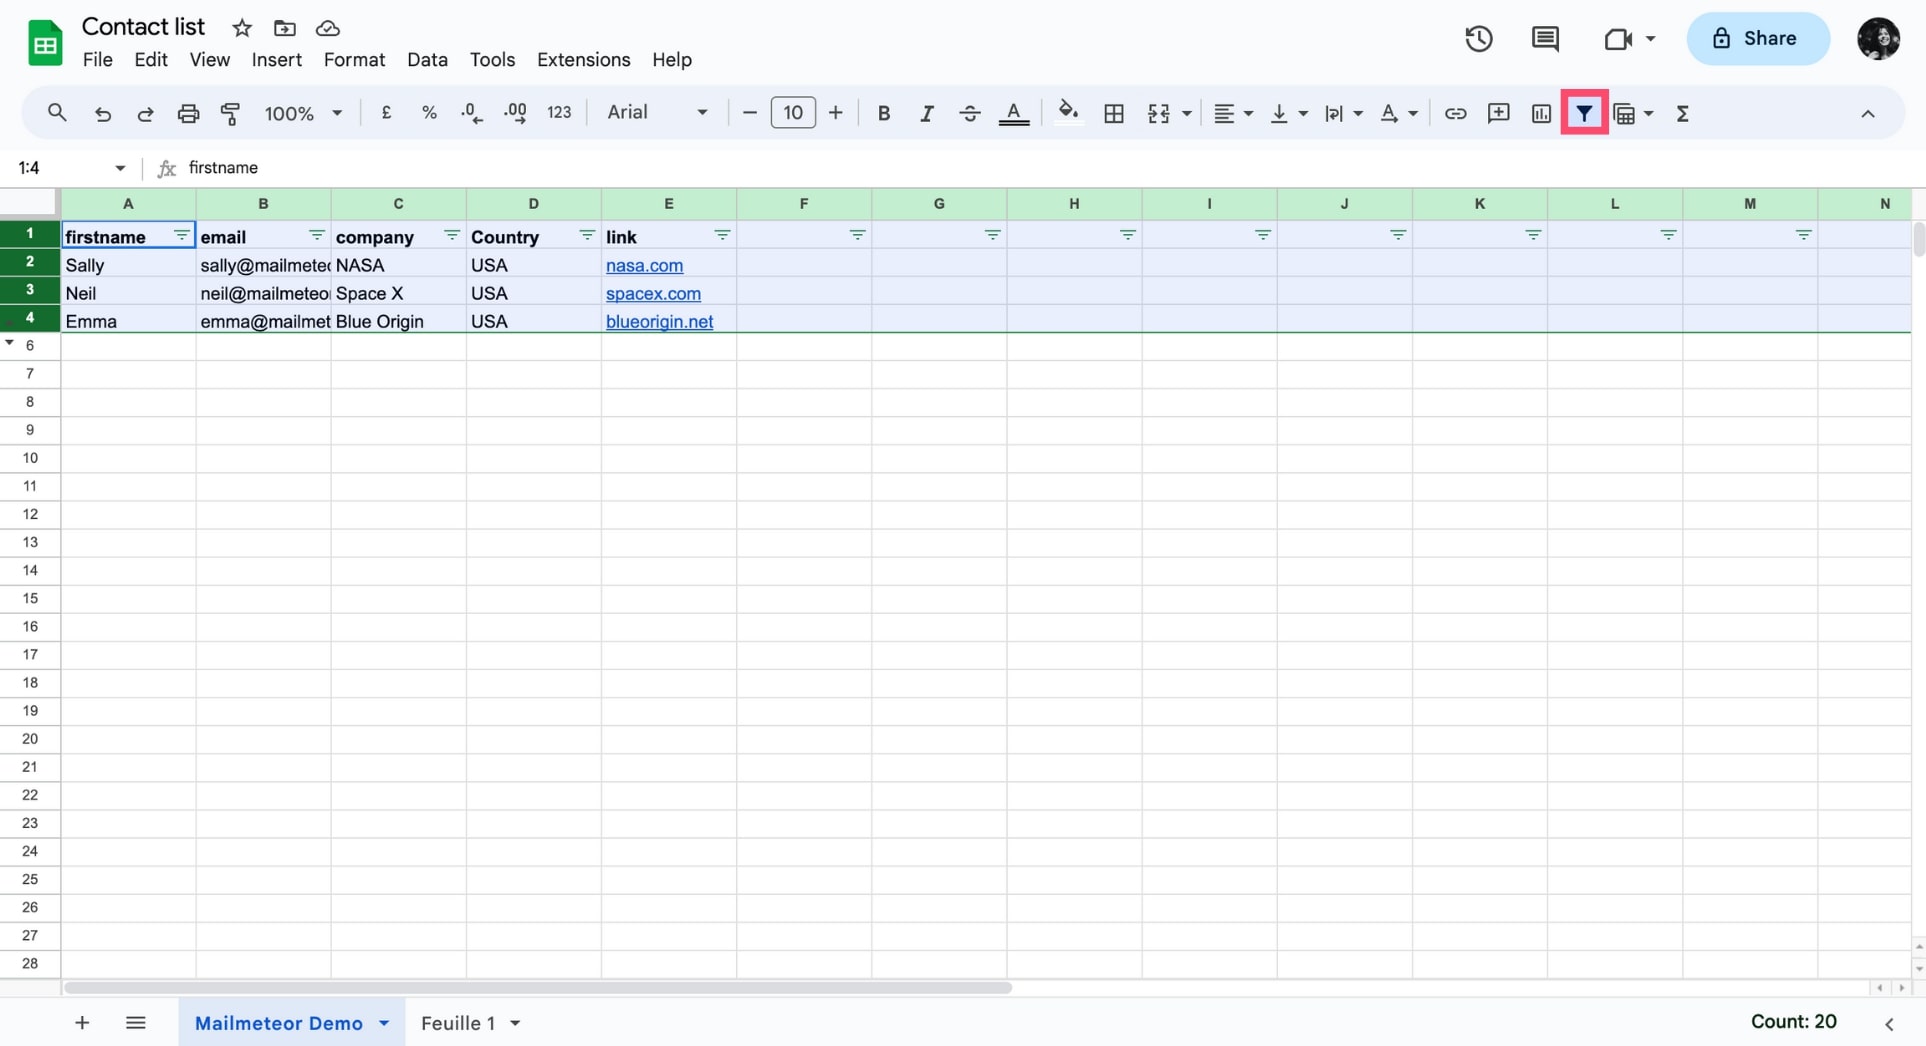
- In the Google Sheets toolbar, click the filter icon. Alternatively, you can go to Data > Create a filter.
- To configure your filter, go to the top of the range and click Filter
.
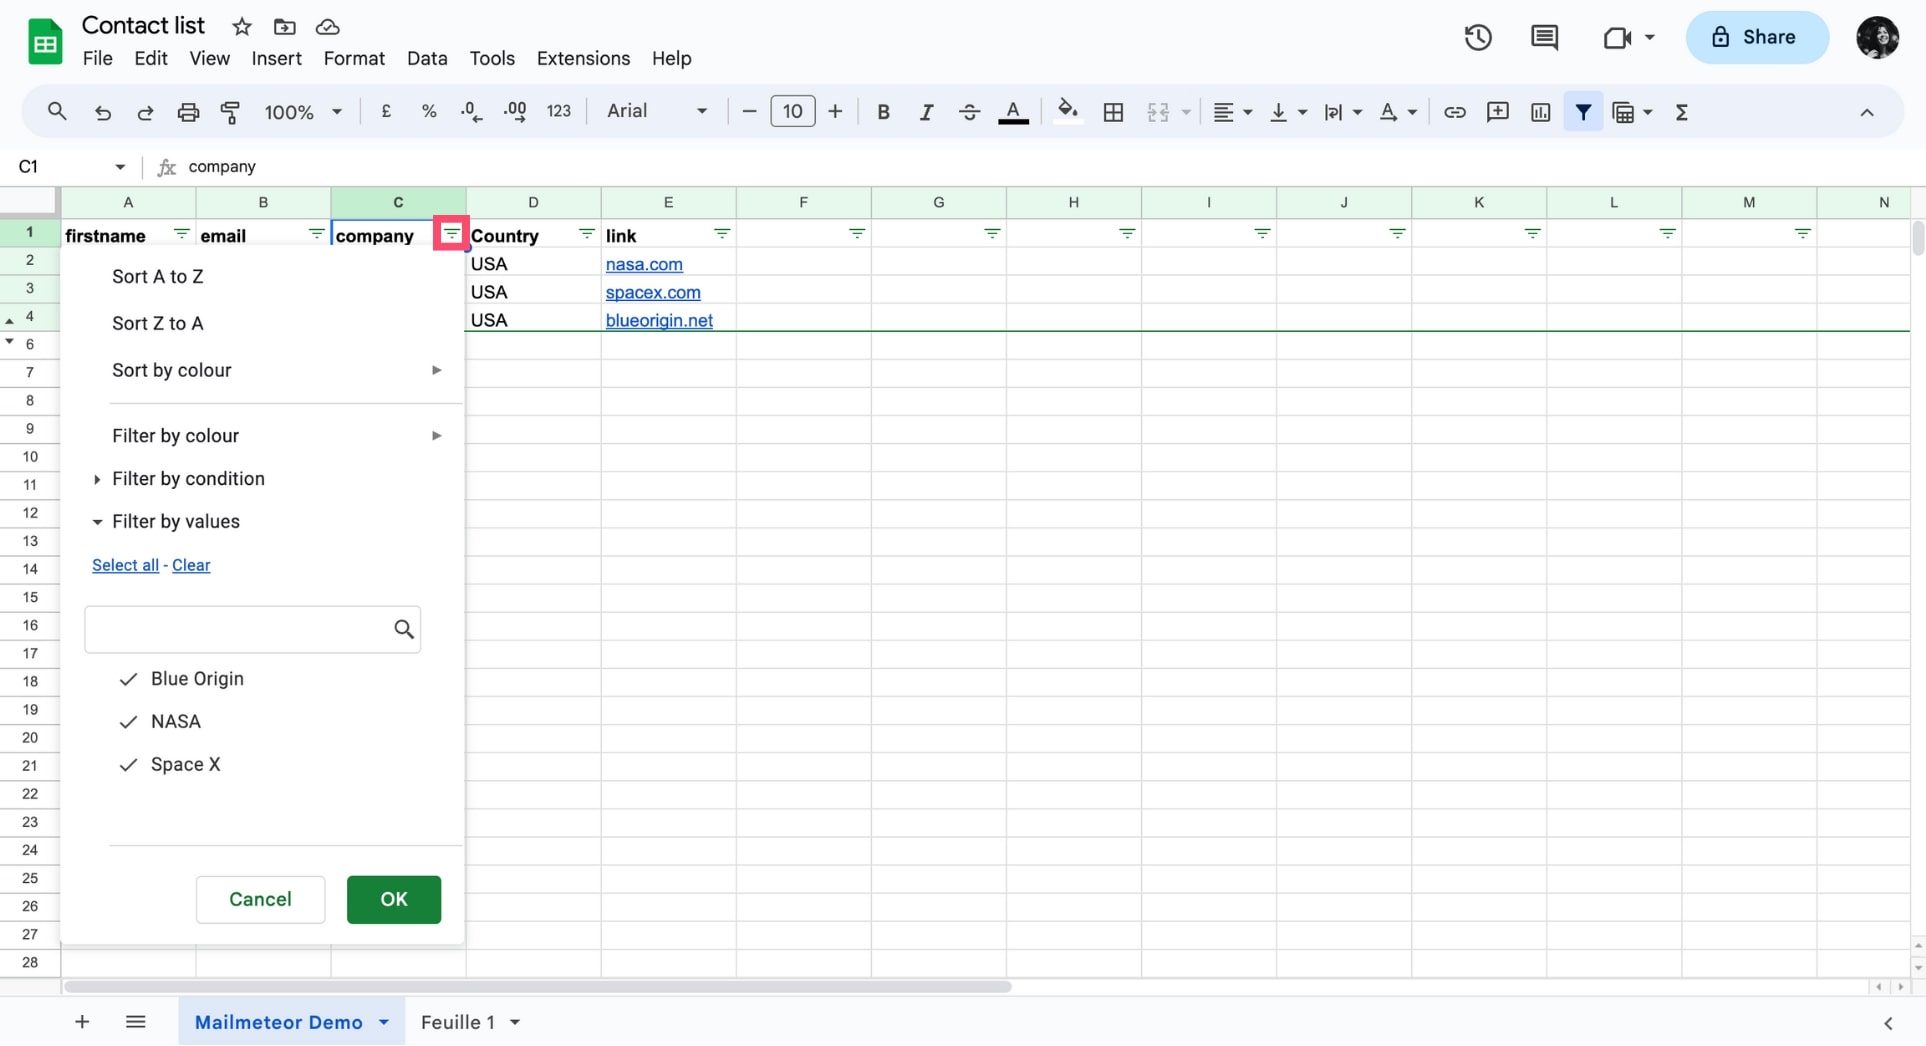
Here are the different types of filters you can create in Google Sheets:
- Filter by condition: choose from a list of conditions or write your own. For example, if the cell is empty.
- Filter by values: uncheck any data points that you want to hide and click OK. If you want to choose all data points, click Select all. You can also uncheck all data points, by clicking Clear.
- Search: search for data points by typing in the search box. For example, typing “P” will shorten your list to just the names that start with P.
Your emails will be only to visible rows. Play with the settings of your filter to target a specific audience and send emails only to certain recipients.
To turn off your filter, go to Data > Turn off filter.
Tip #1: How to send emails to only some recipients
Here is a step-by-step guide if you have a contact list and want to send a campaign only to some of them. For example, you’d like to send emails only to people living in a specific country:
- Filter your spreadsheet as shown above.
- Select the “country” column and untick all values except USA. This will hide all rows except for the recipients with “USA” in the “country” column.
- Open Mailmeteor in Google Sheets and send a new email campaign. Your messages will be sent only to visible rows.
Here’s a spreadsheet demo that gives you an idea on how it will look like after a few campaigns sent using filters:
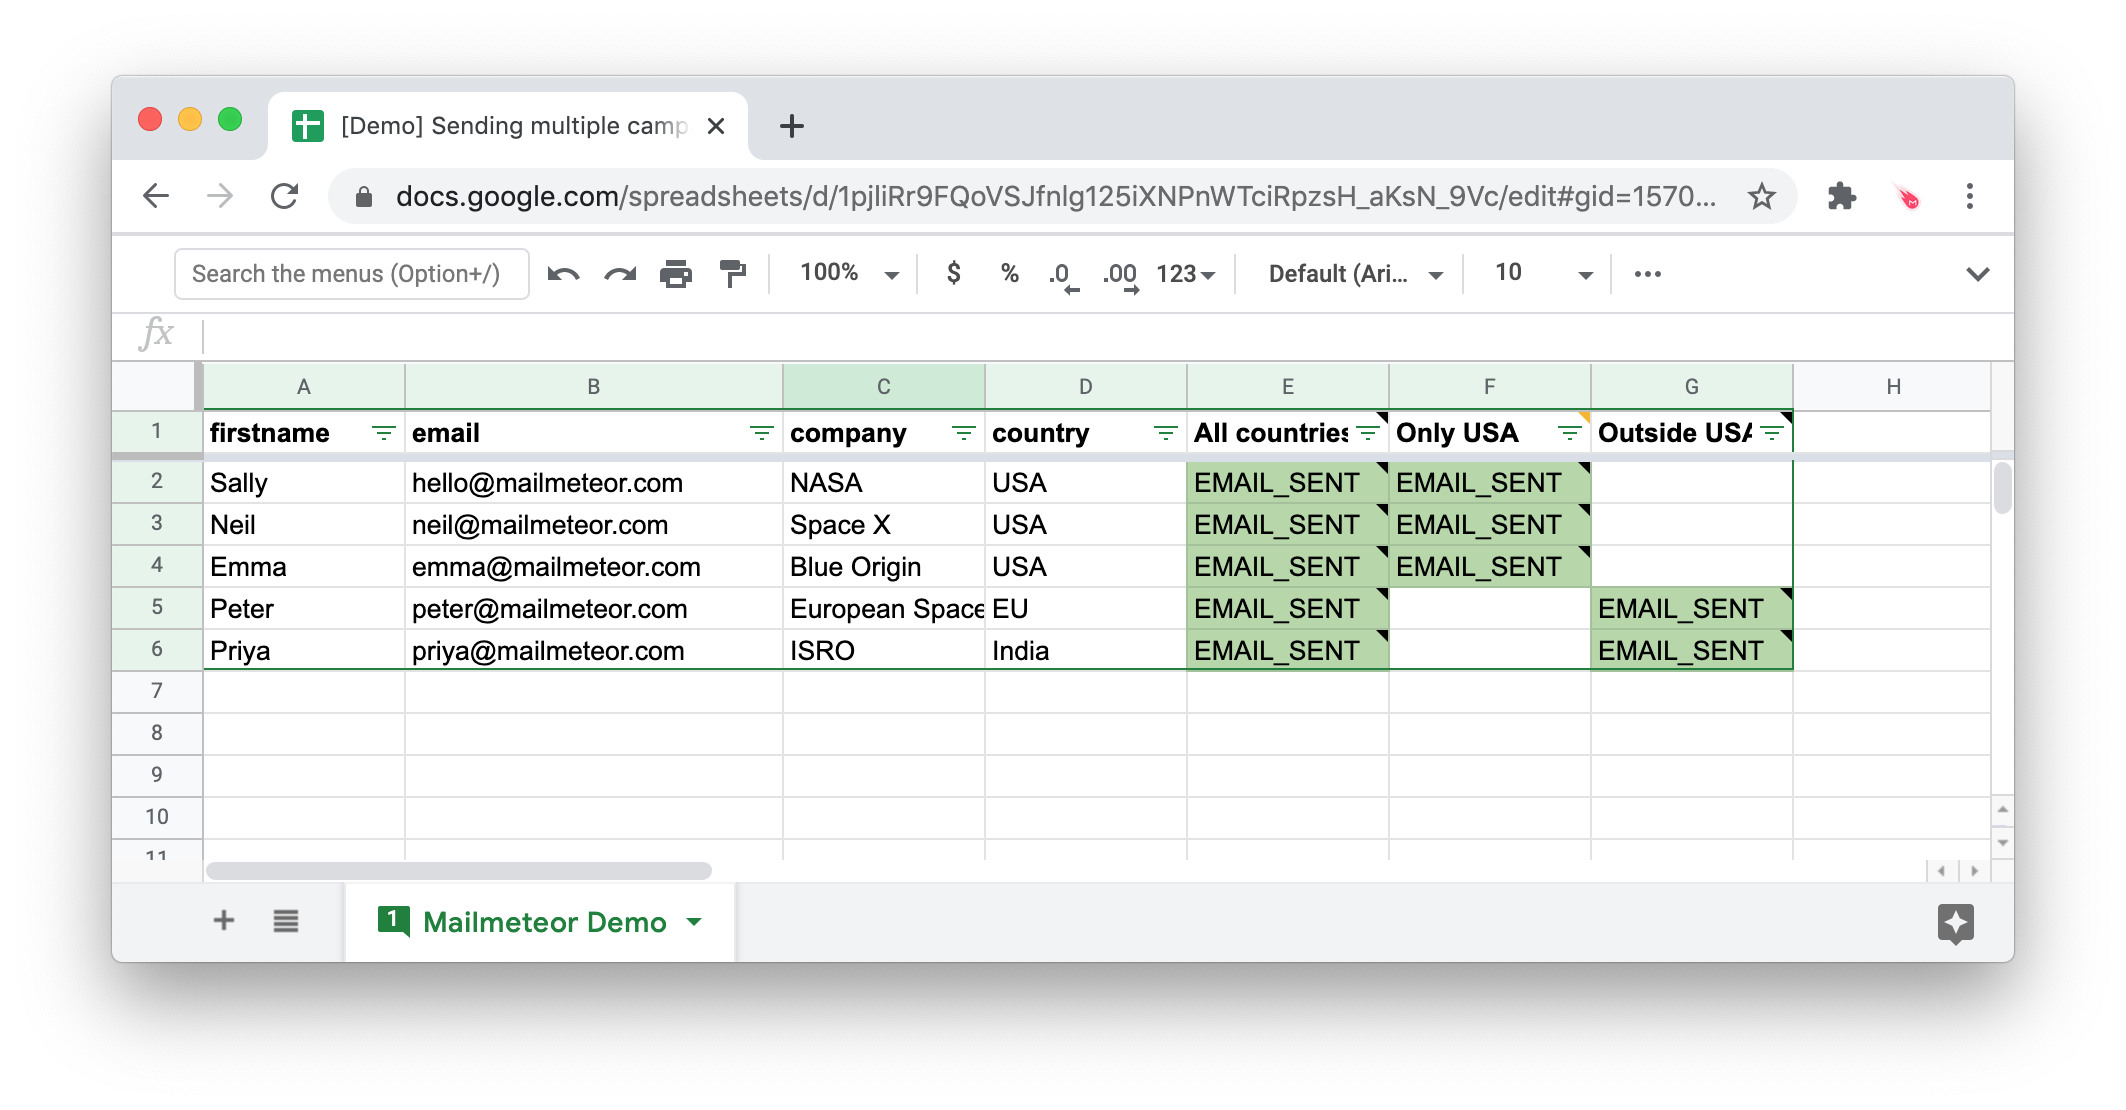
Sending campaigns to all countries, then USA only, then outside USA.
Tip #2: Follow up on recipients who have read your email but did not click on any links
Here’s how you can use the Google Sheets filters to engage with recipients who have not taken action yet with your first email:
- Filter your spreadsheet as shown above.
- Select the “Merge status” column and untick all values except “Emails opens”.
- Open Mailmeteor and send a new campaign. Mailmeteor will send emails only to the people who have opened your email but didn’t click any links.
This will create a new “Merge status” column next to the first one.
Tip #3: Resume sending emails from the last email sent, to avoid re-sending emails to all your contact list
Want to email only the people who were added recently to your list? Or to resume sending emails after your last campaign? Try using this filter.
- Filter your spreadsheet as shown above.
- Select the “Merge status” column and make sure only “Blank” cells are visible.
- Open Mailmeteor and send a new campaign. Mailmeteor will send emails only to the people you haven’t been contacted yet.
You can easily monitor all your email campaigns thanks to the Tracking report.
Video tutorial
If you prefer to watch a video, here’s a tutorial on how to use filters to segment your email list with Mailmeteor:
- Open your spreadsheet in Excel.
- On the left of your screen, click on the number 1. This will select your entire first row.
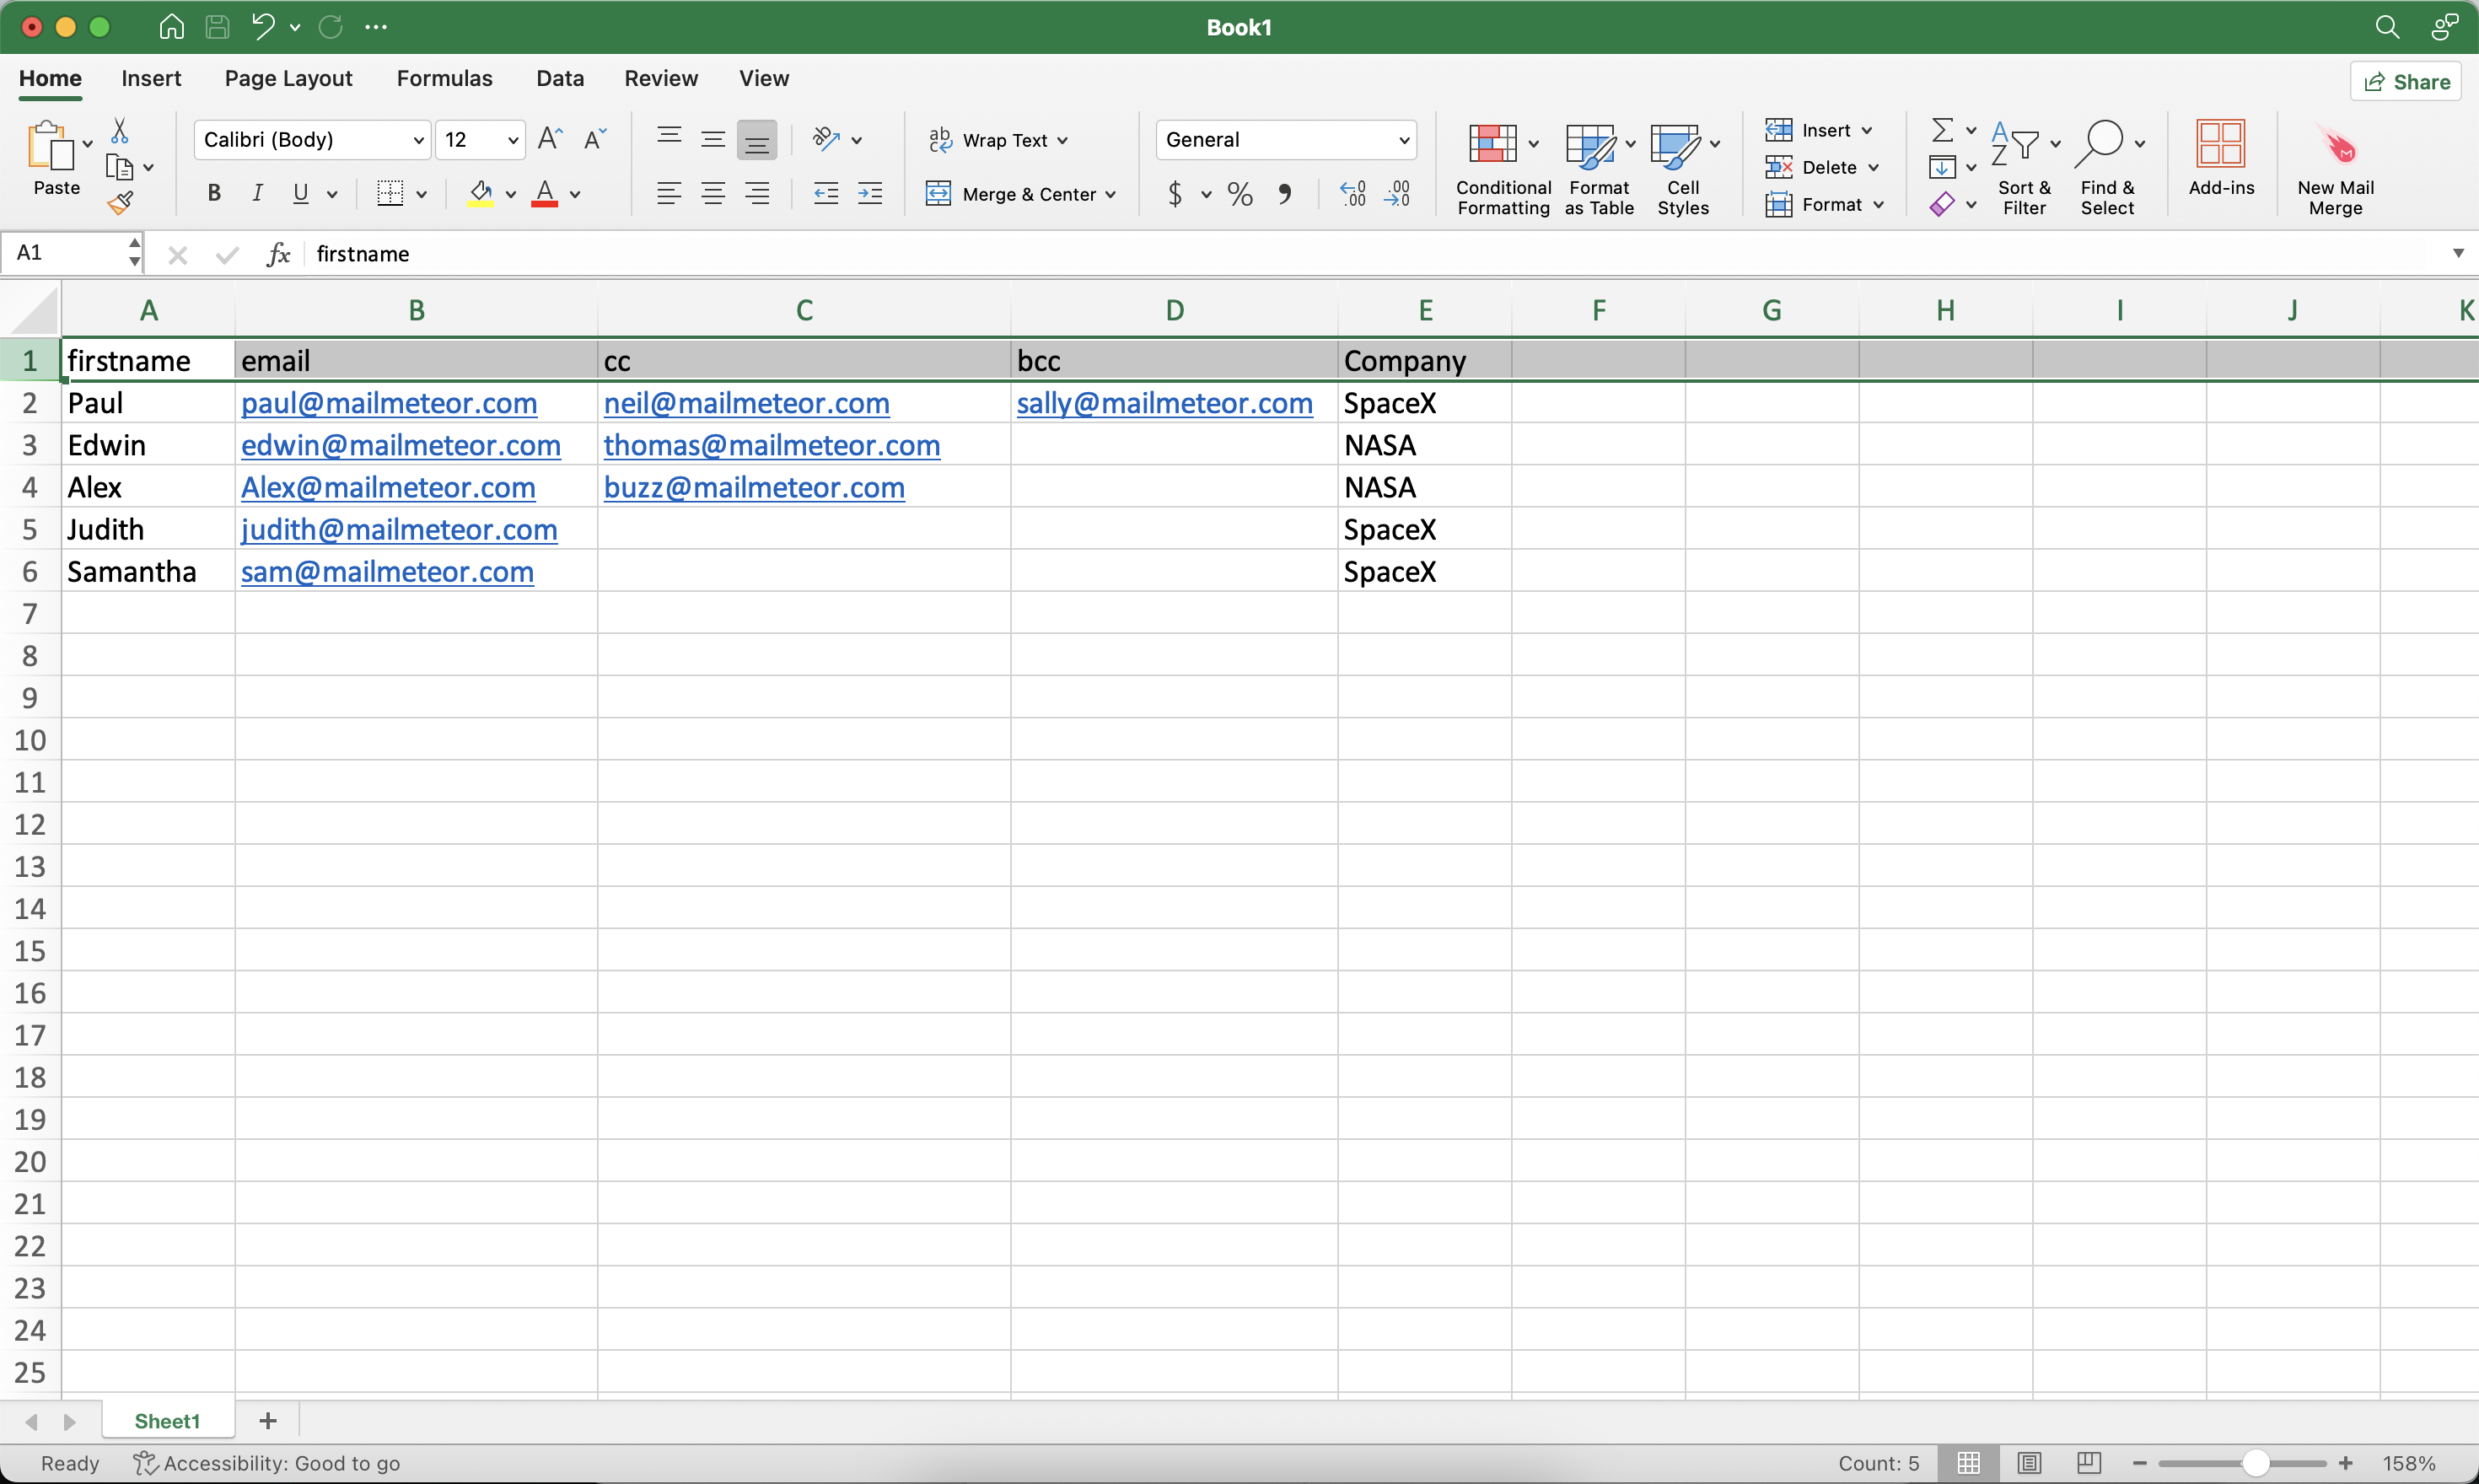
- In the toolbar, click the filter icon. Alternatively, you can go to Data > Create a filter.
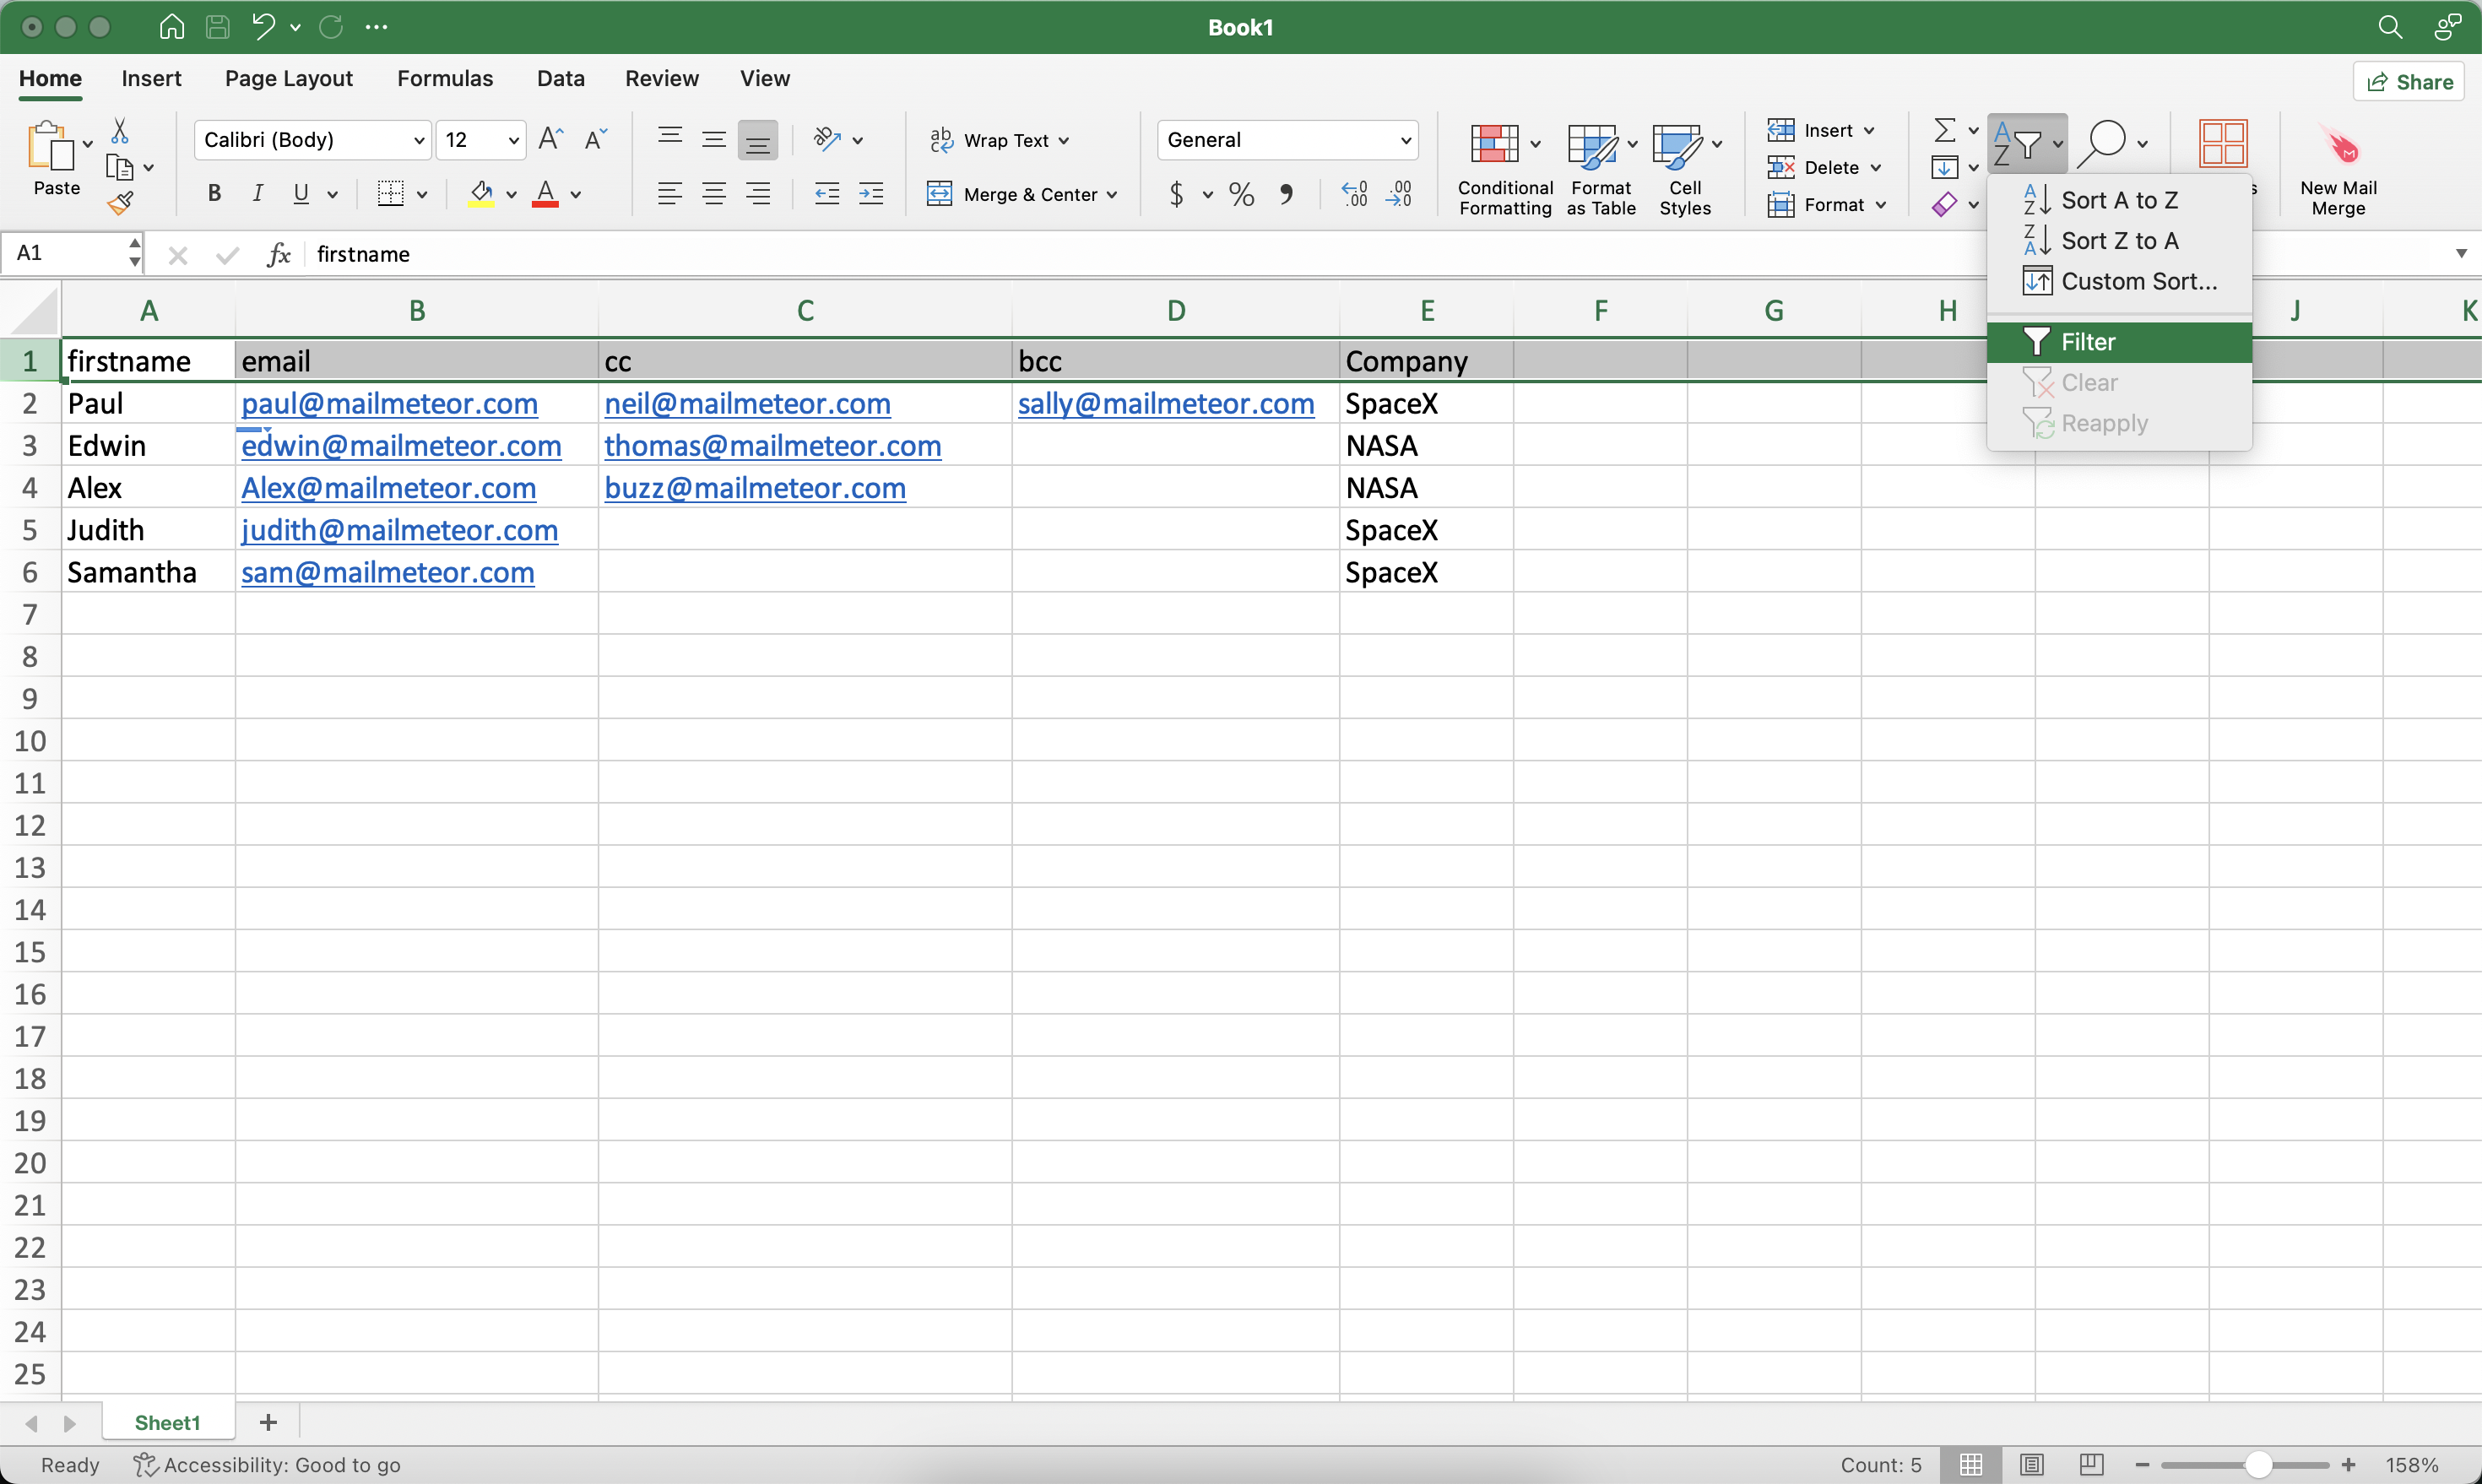
- To configure your filter, go to the top of the range and click Filter
.
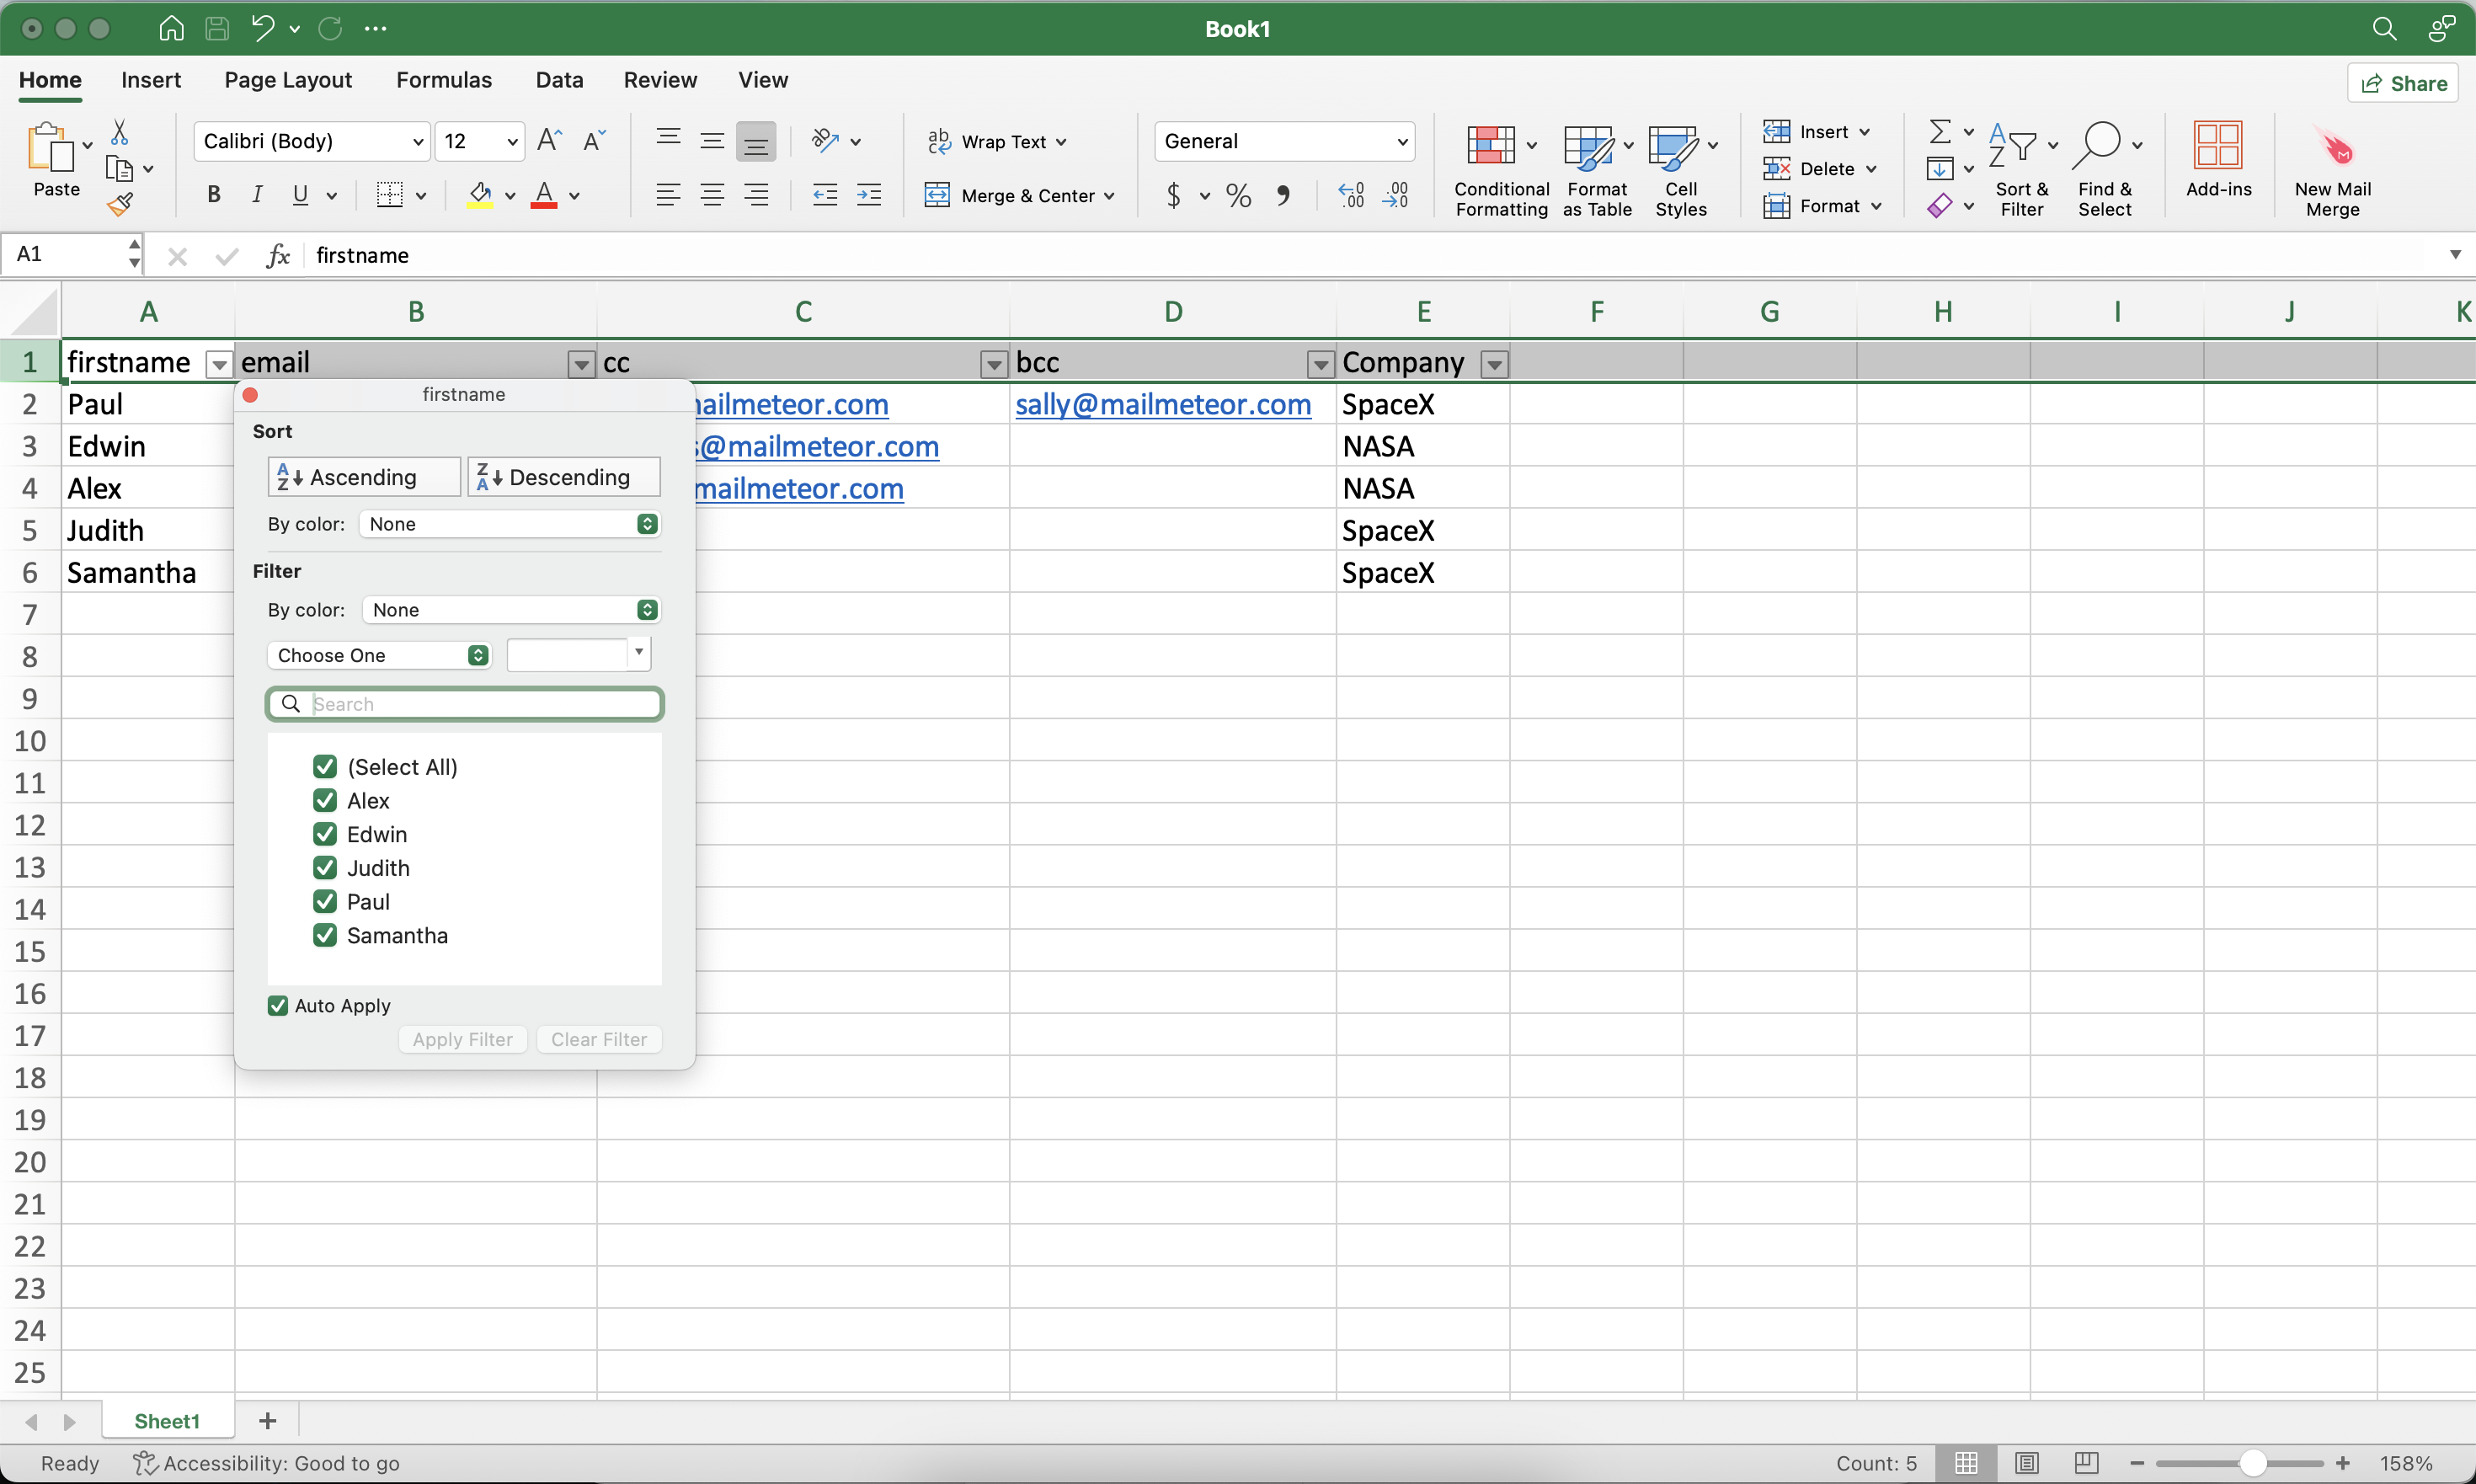
Here are the different types of filters you can create:
- Filter by condition: choose from a list of conditions or write your own. For example, if the cell is empty.
- Filter by values: uncheck any data points that you want to hide and click OK. If you want to choose all data points, click Select all. You can also uncheck all data points, by clicking Clear.
- Search: search for data points by typing in the search box. For example, typing “P” will shorten your list to just the names that start with P.
Your emails will be only to visible rows. Play with the settings of your filter to target a specific audience and send emails only to certain recipients.