Send your first campaign
In this tutorial, we’ll show you how to send your first email campaigns. Let’s get started:
-
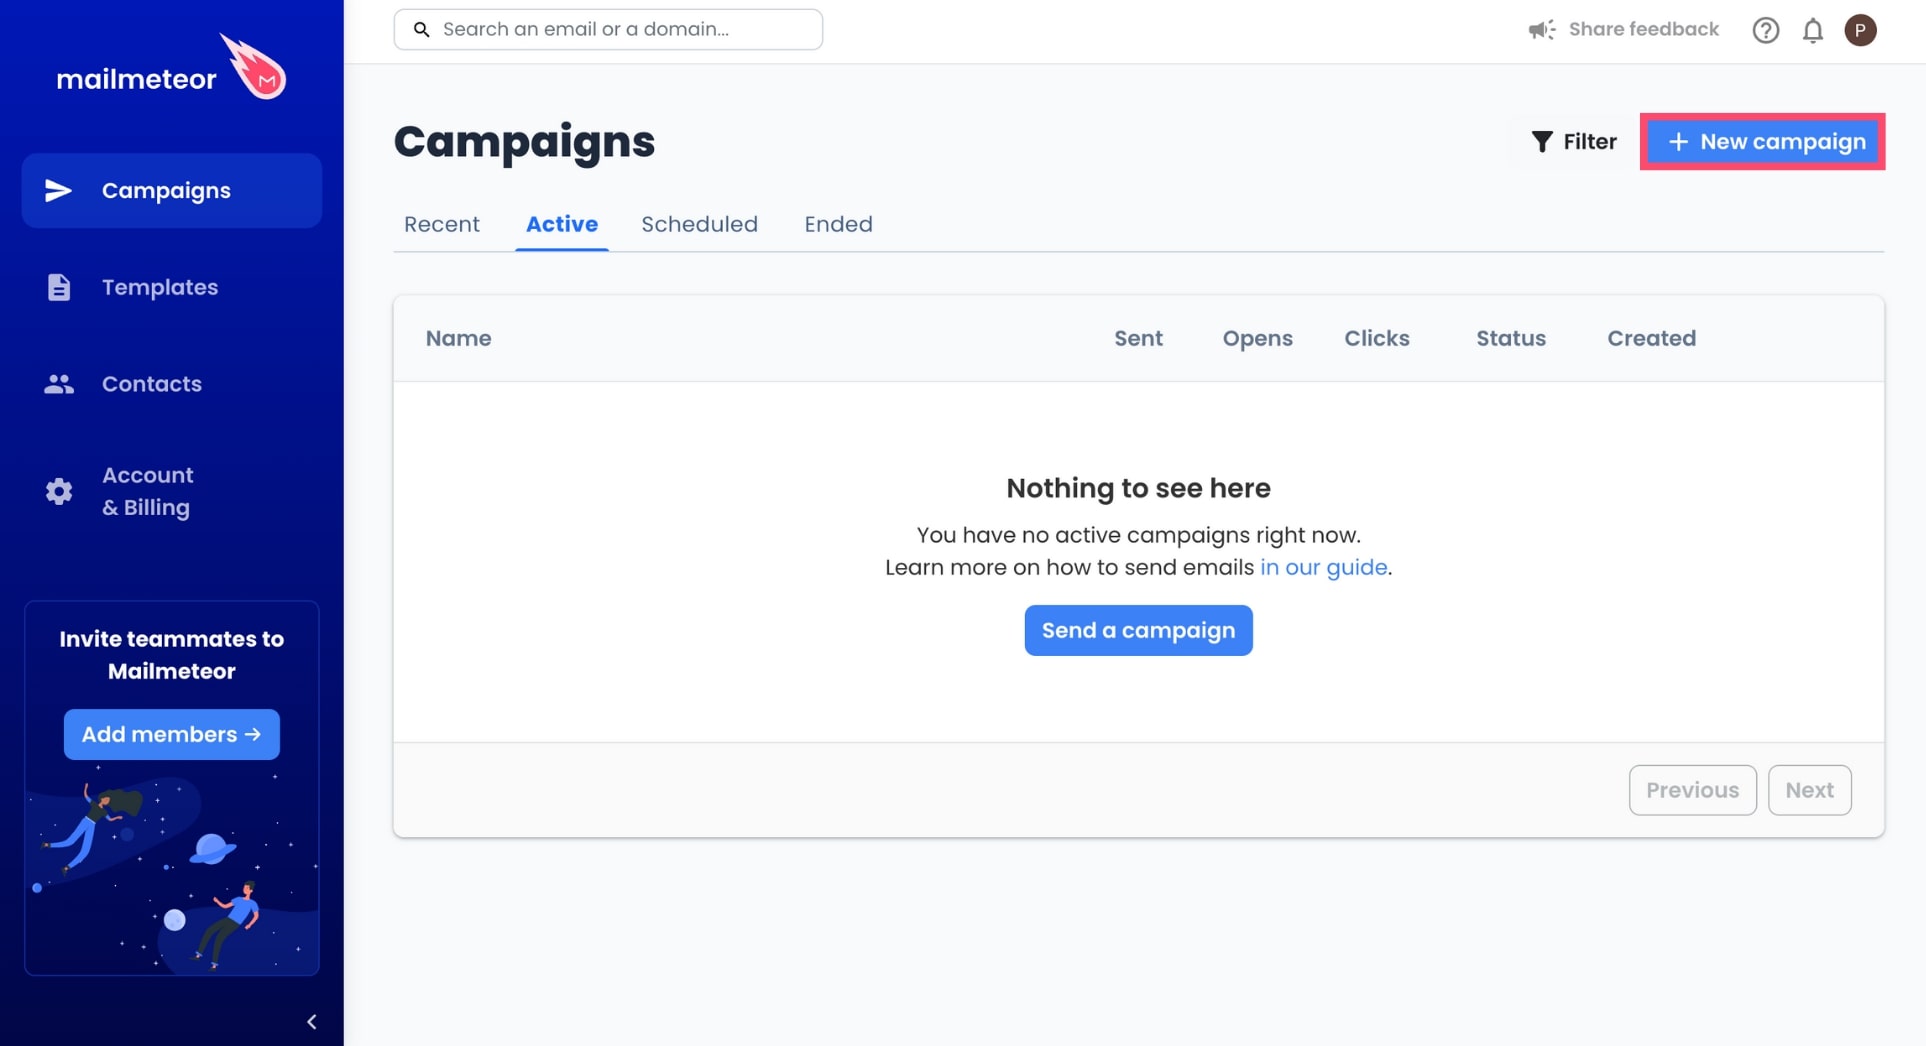
Sign in to Mailmeteor Dashboard.

-
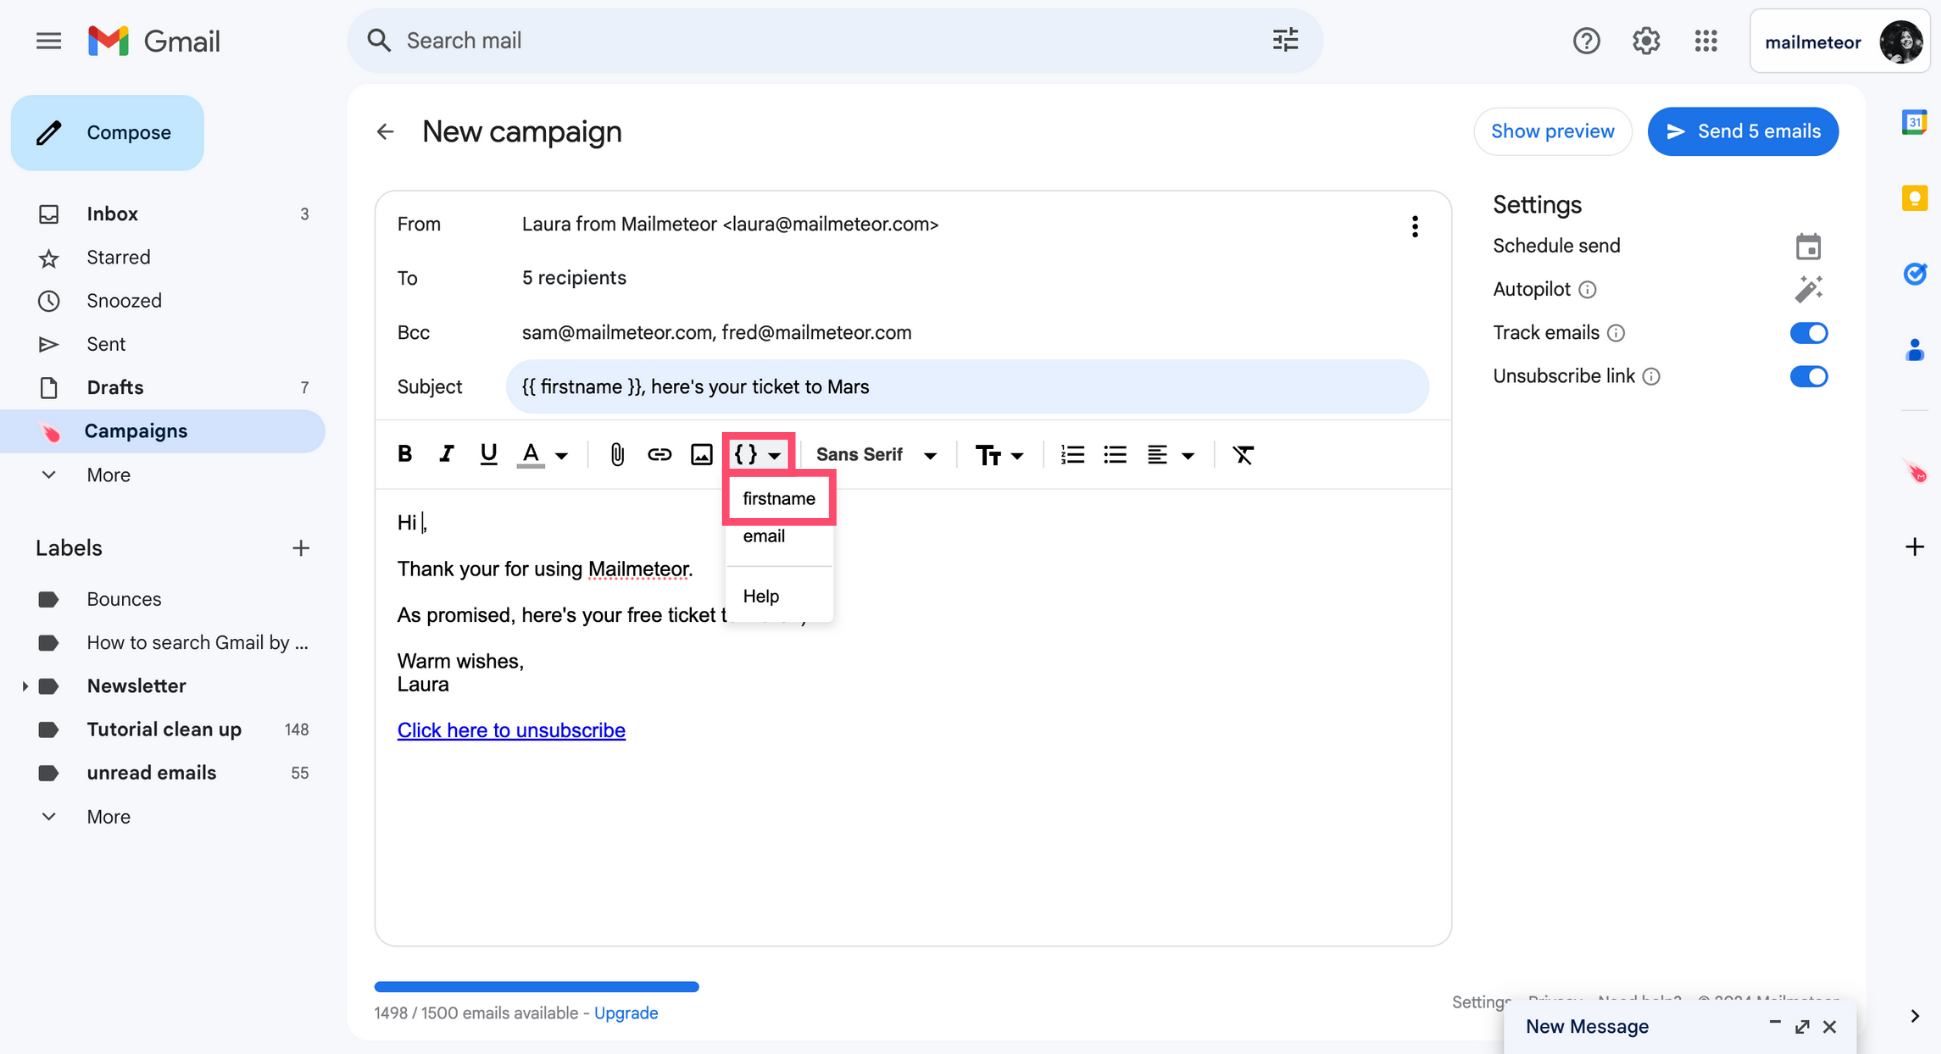
To create a new campaign, click New campaign.
-
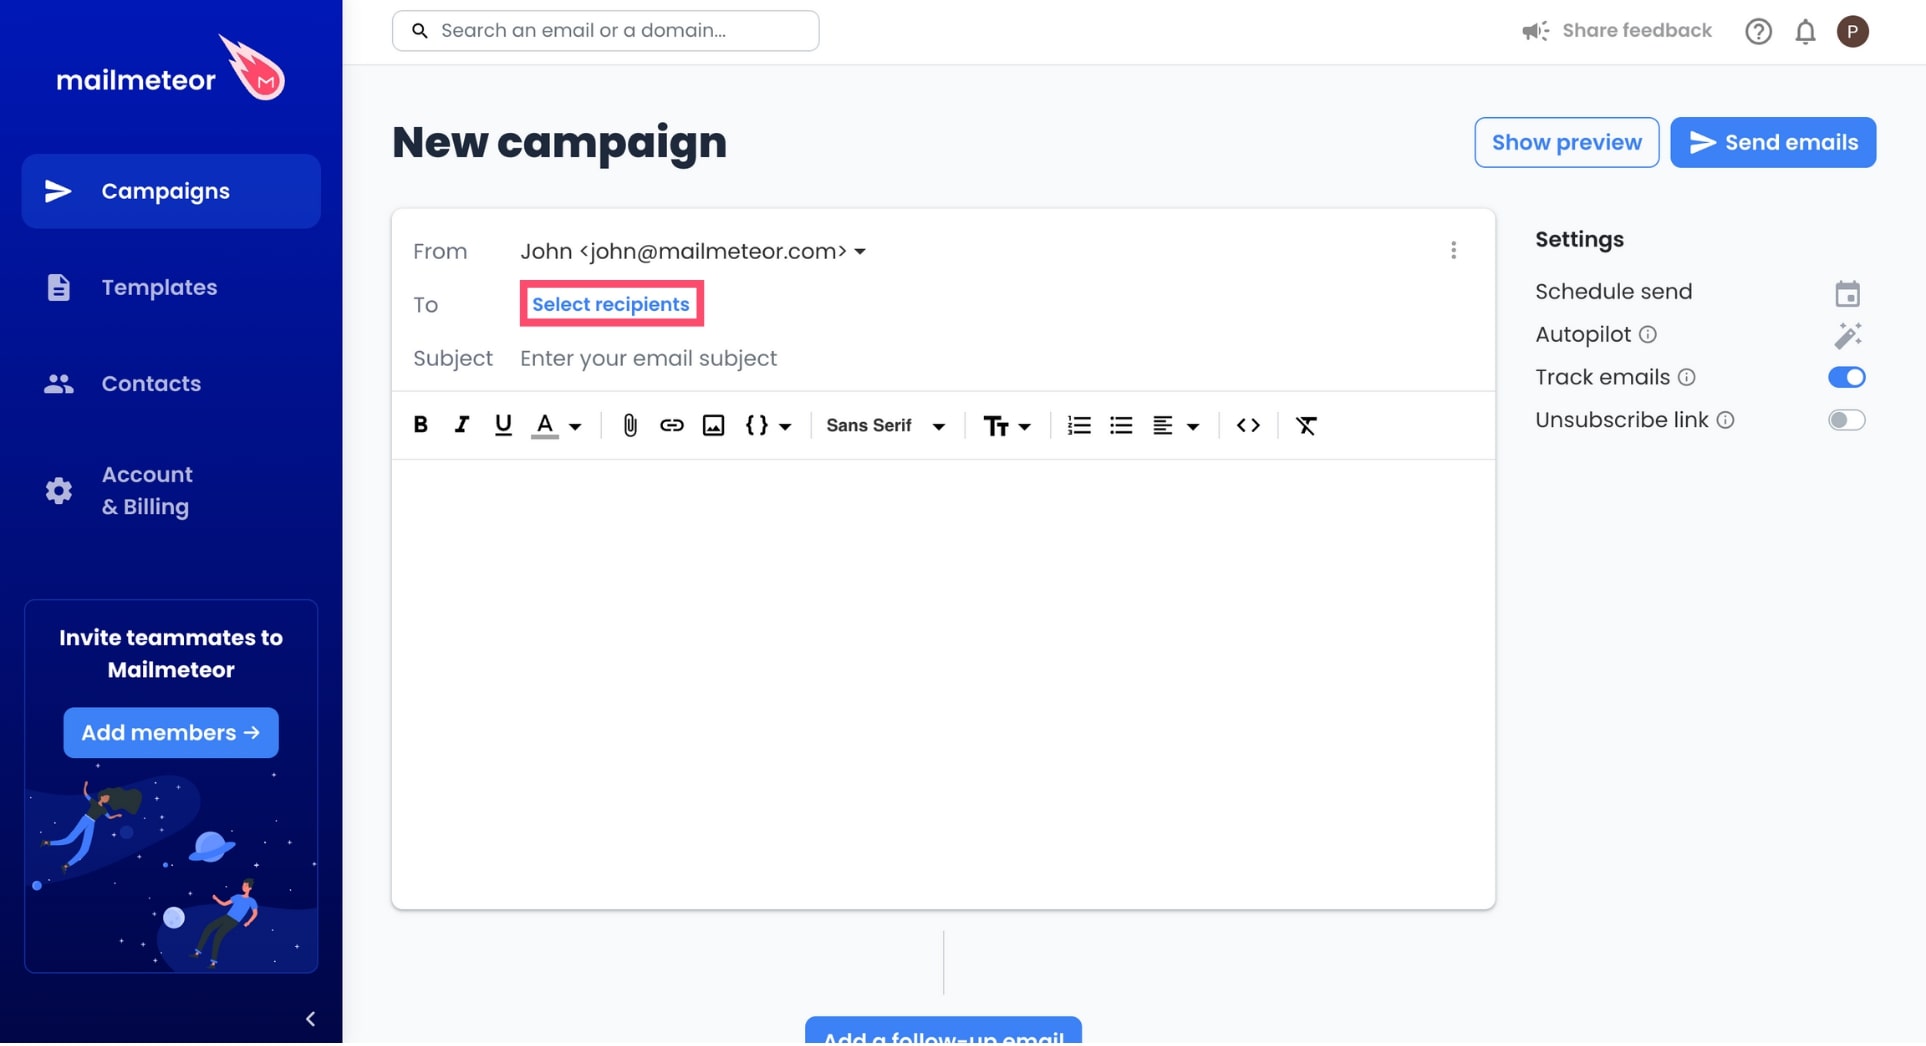
Now it’s time to add some contacts to your recipient list. To do so, click Select recipients in the To field.
In the Mailmeteor Dashboard, there are 4 ways to add recipients ⤵️
- Import a CSV - Upload a CSV file.
- Copy / paste - Copy and paste email addresses.
- Google Sheets - Import your mailing list from a spreadsheet.
- Contact list - Select a contact list you’ve created in Mailmeteor.
-
Compose your email. You can use the built-in email editor to craft a new message. Or you can import an existing email template.
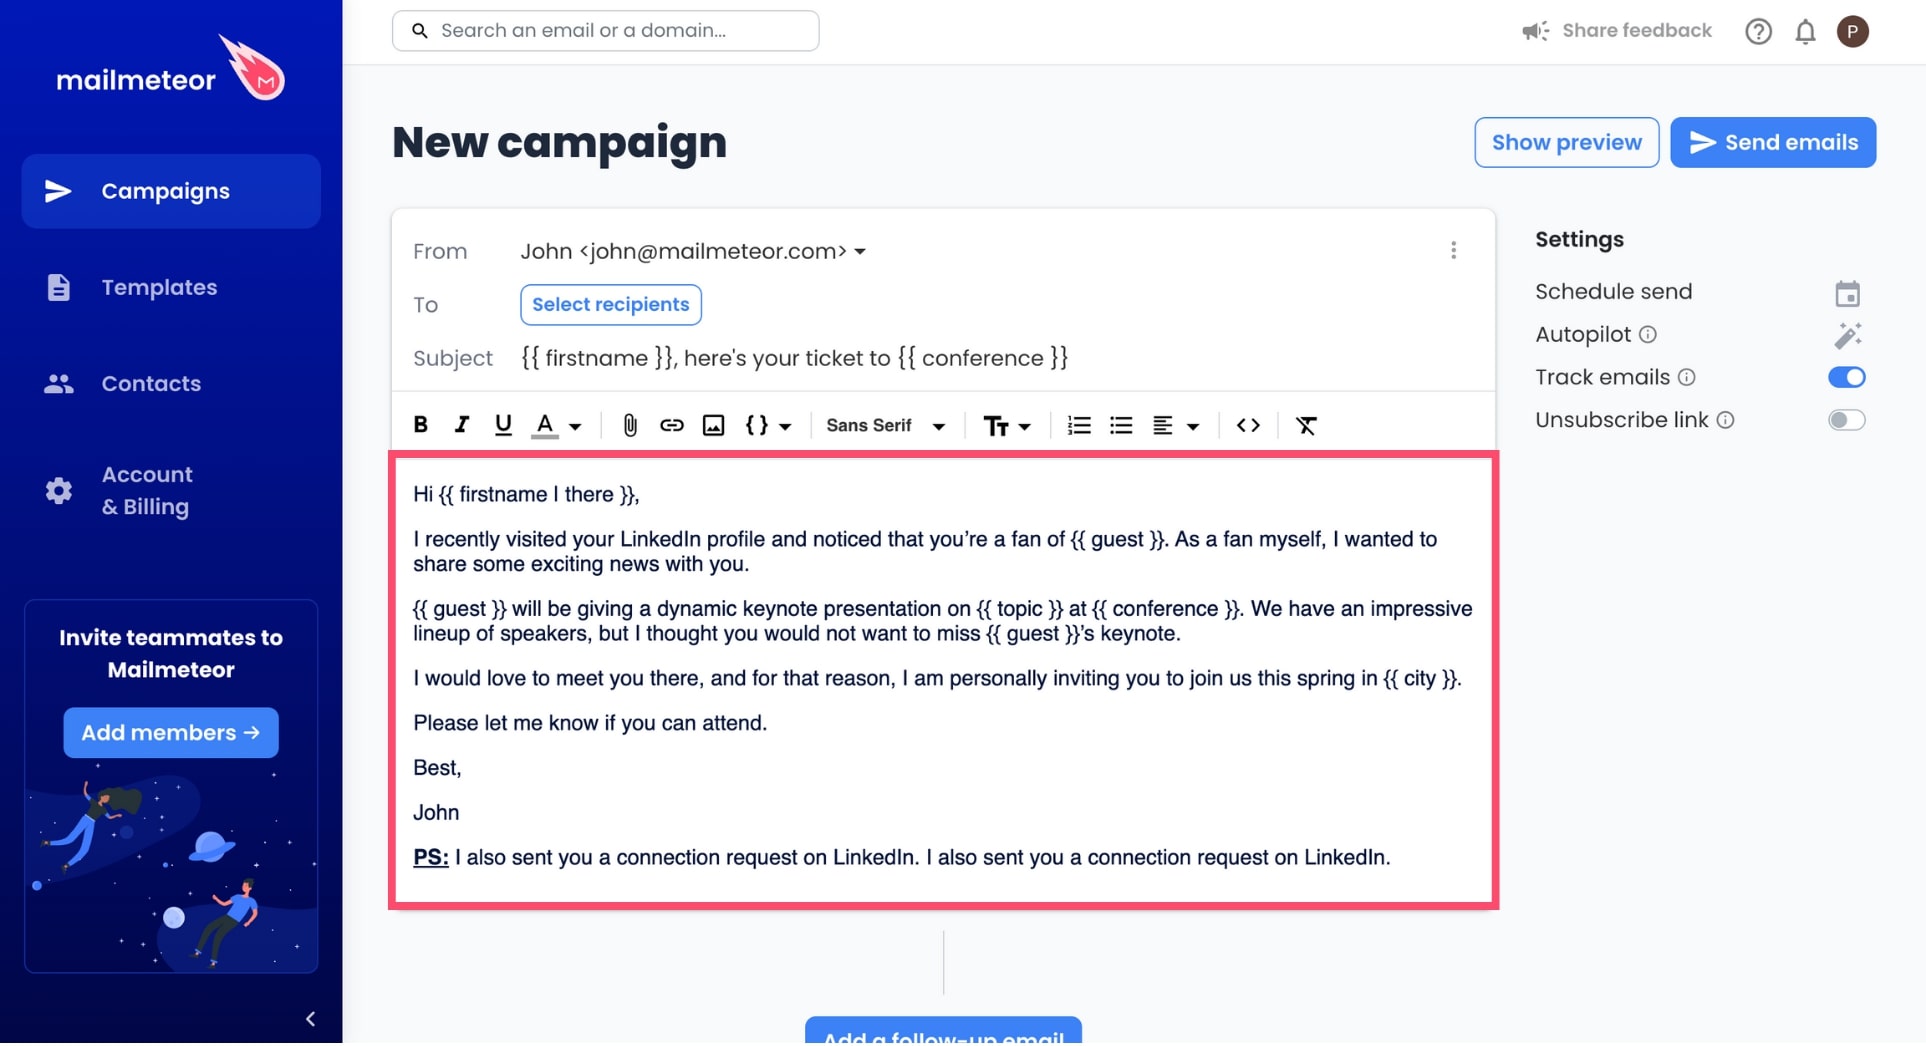
You can personalize everything in your email, including the subject line, thanks to {{ variables }}. Learn how to personalize your emails to get more clicks and opens.
-
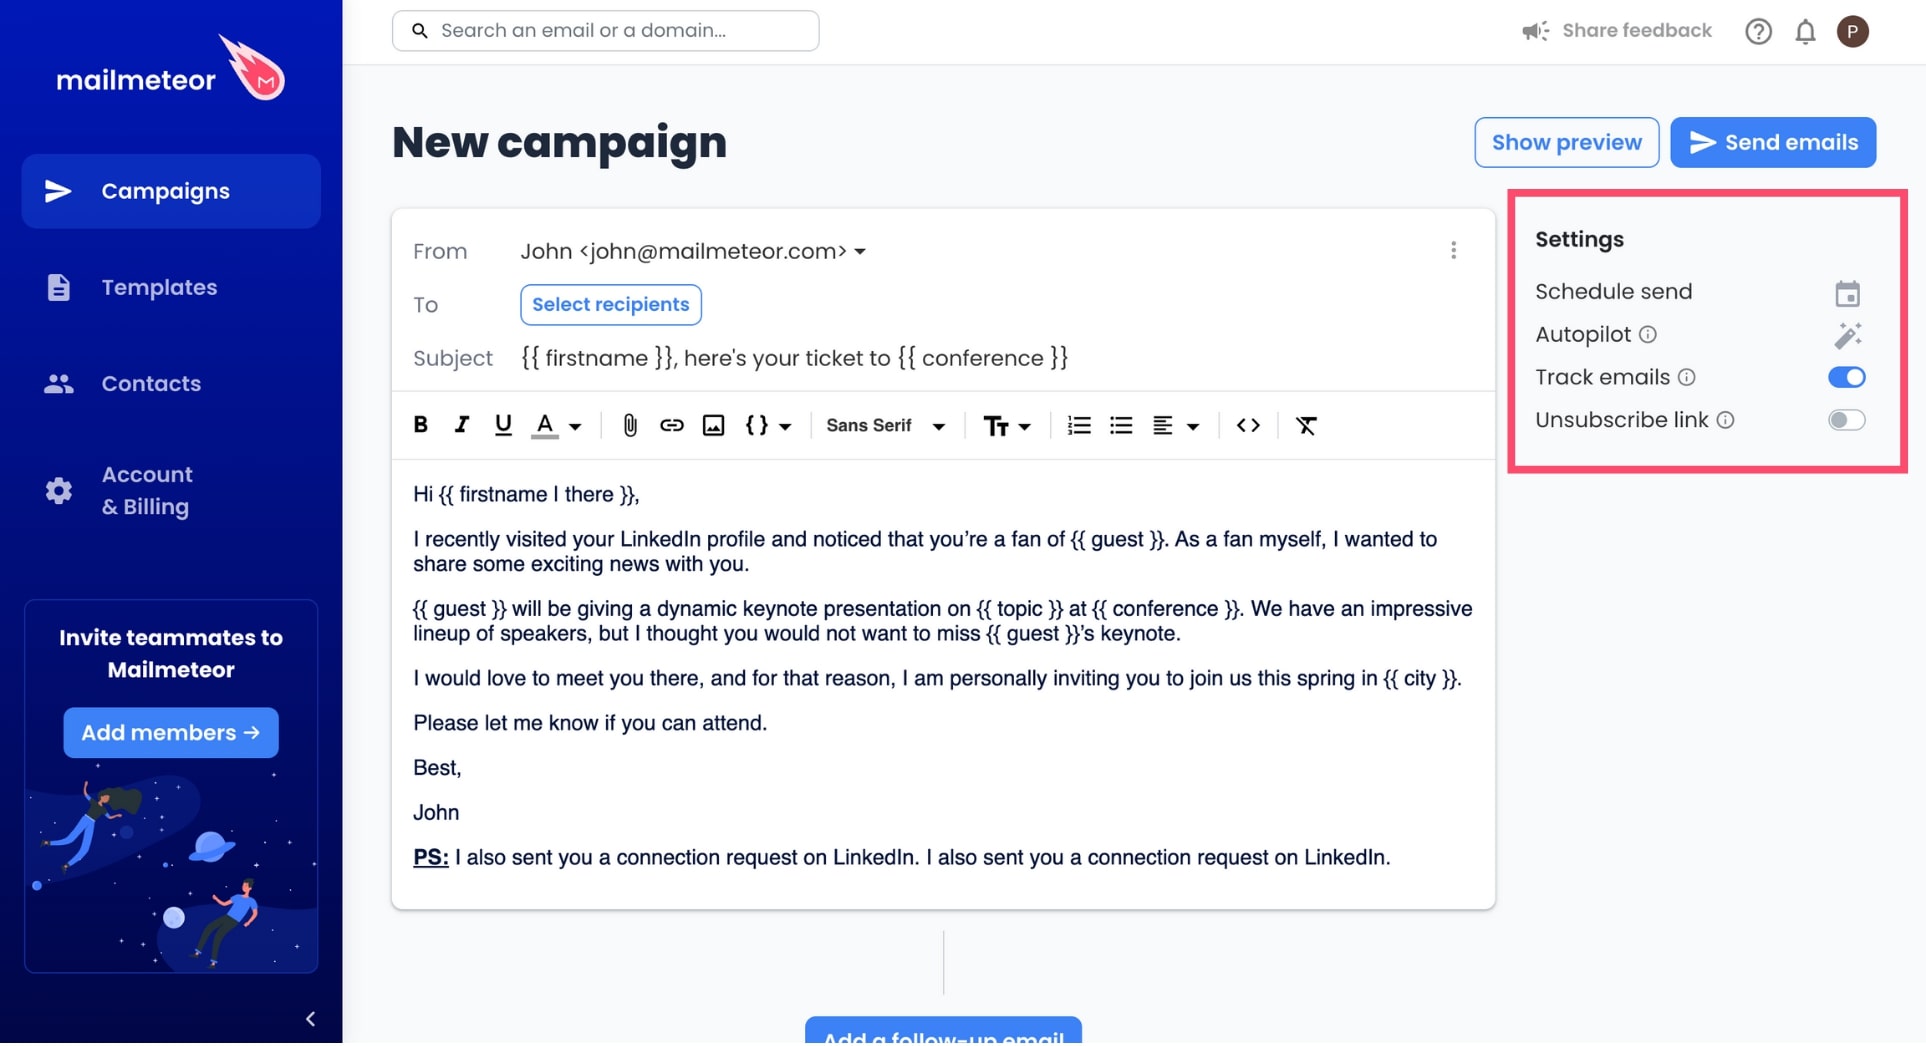
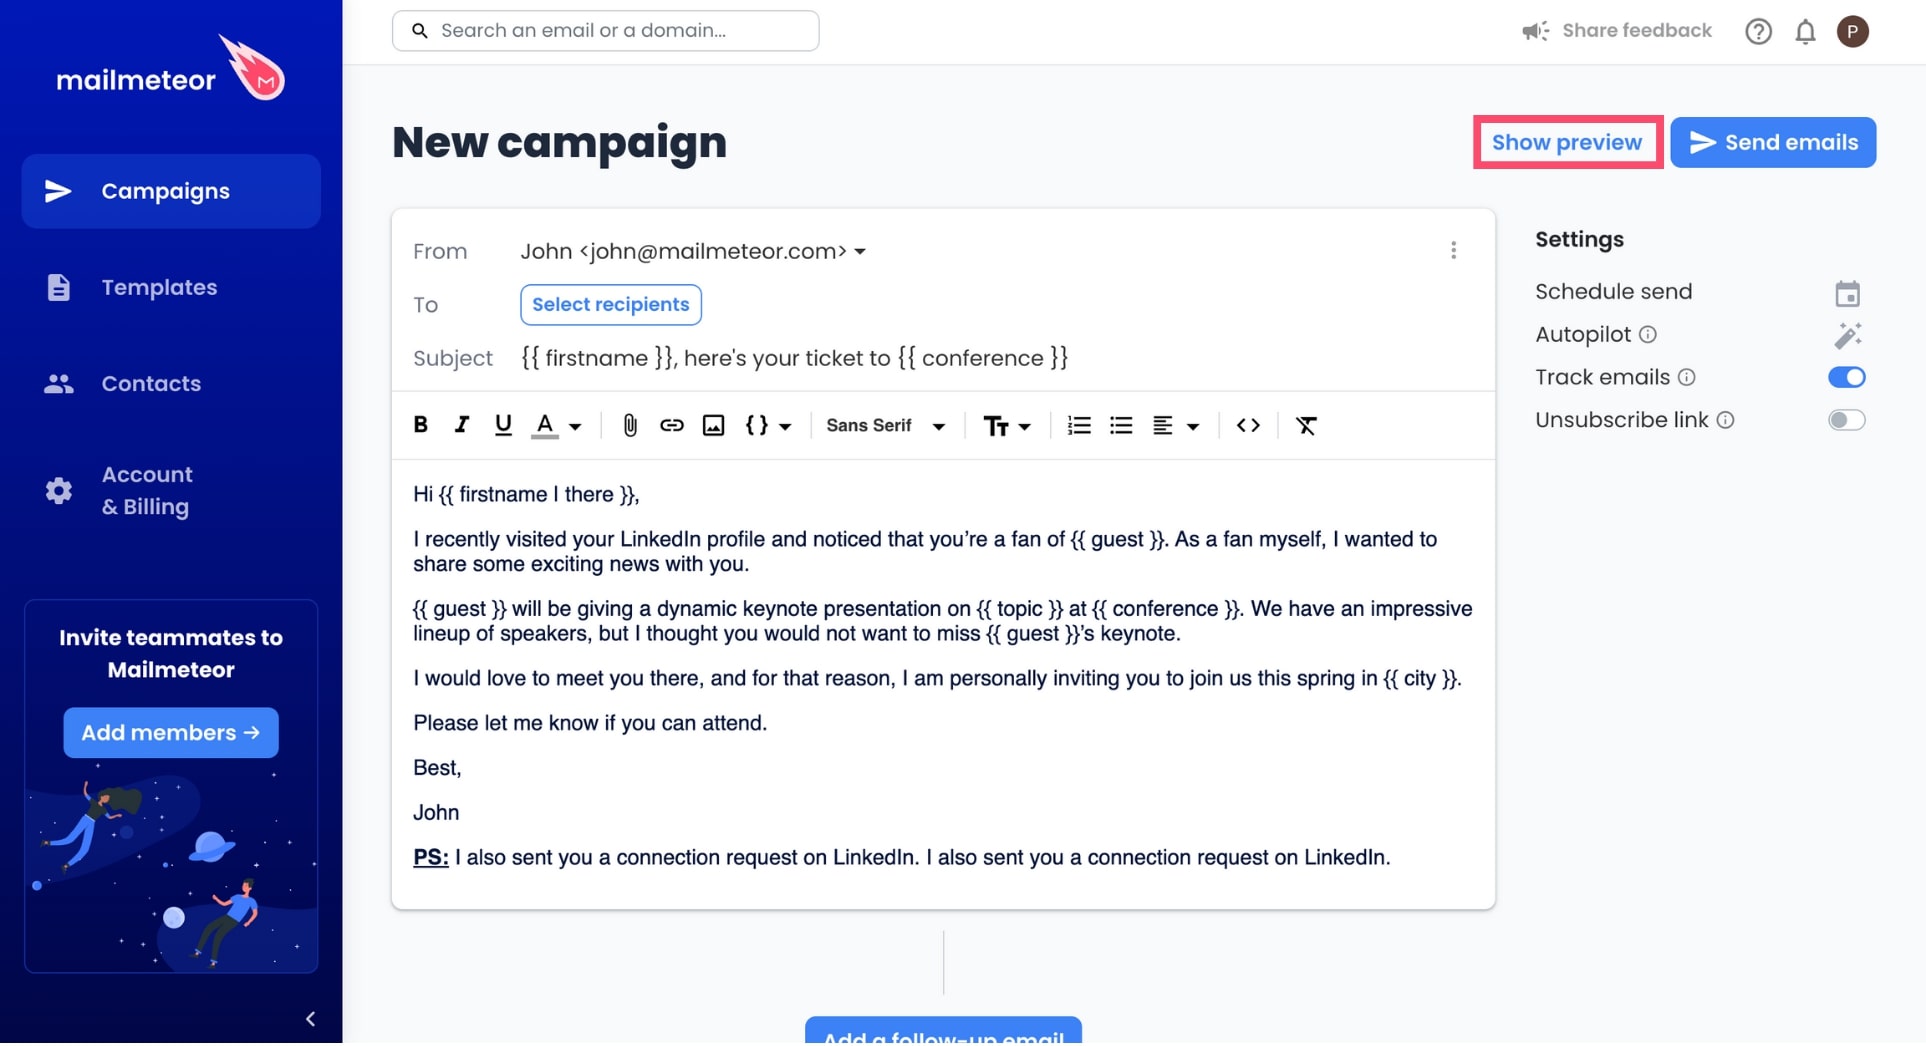
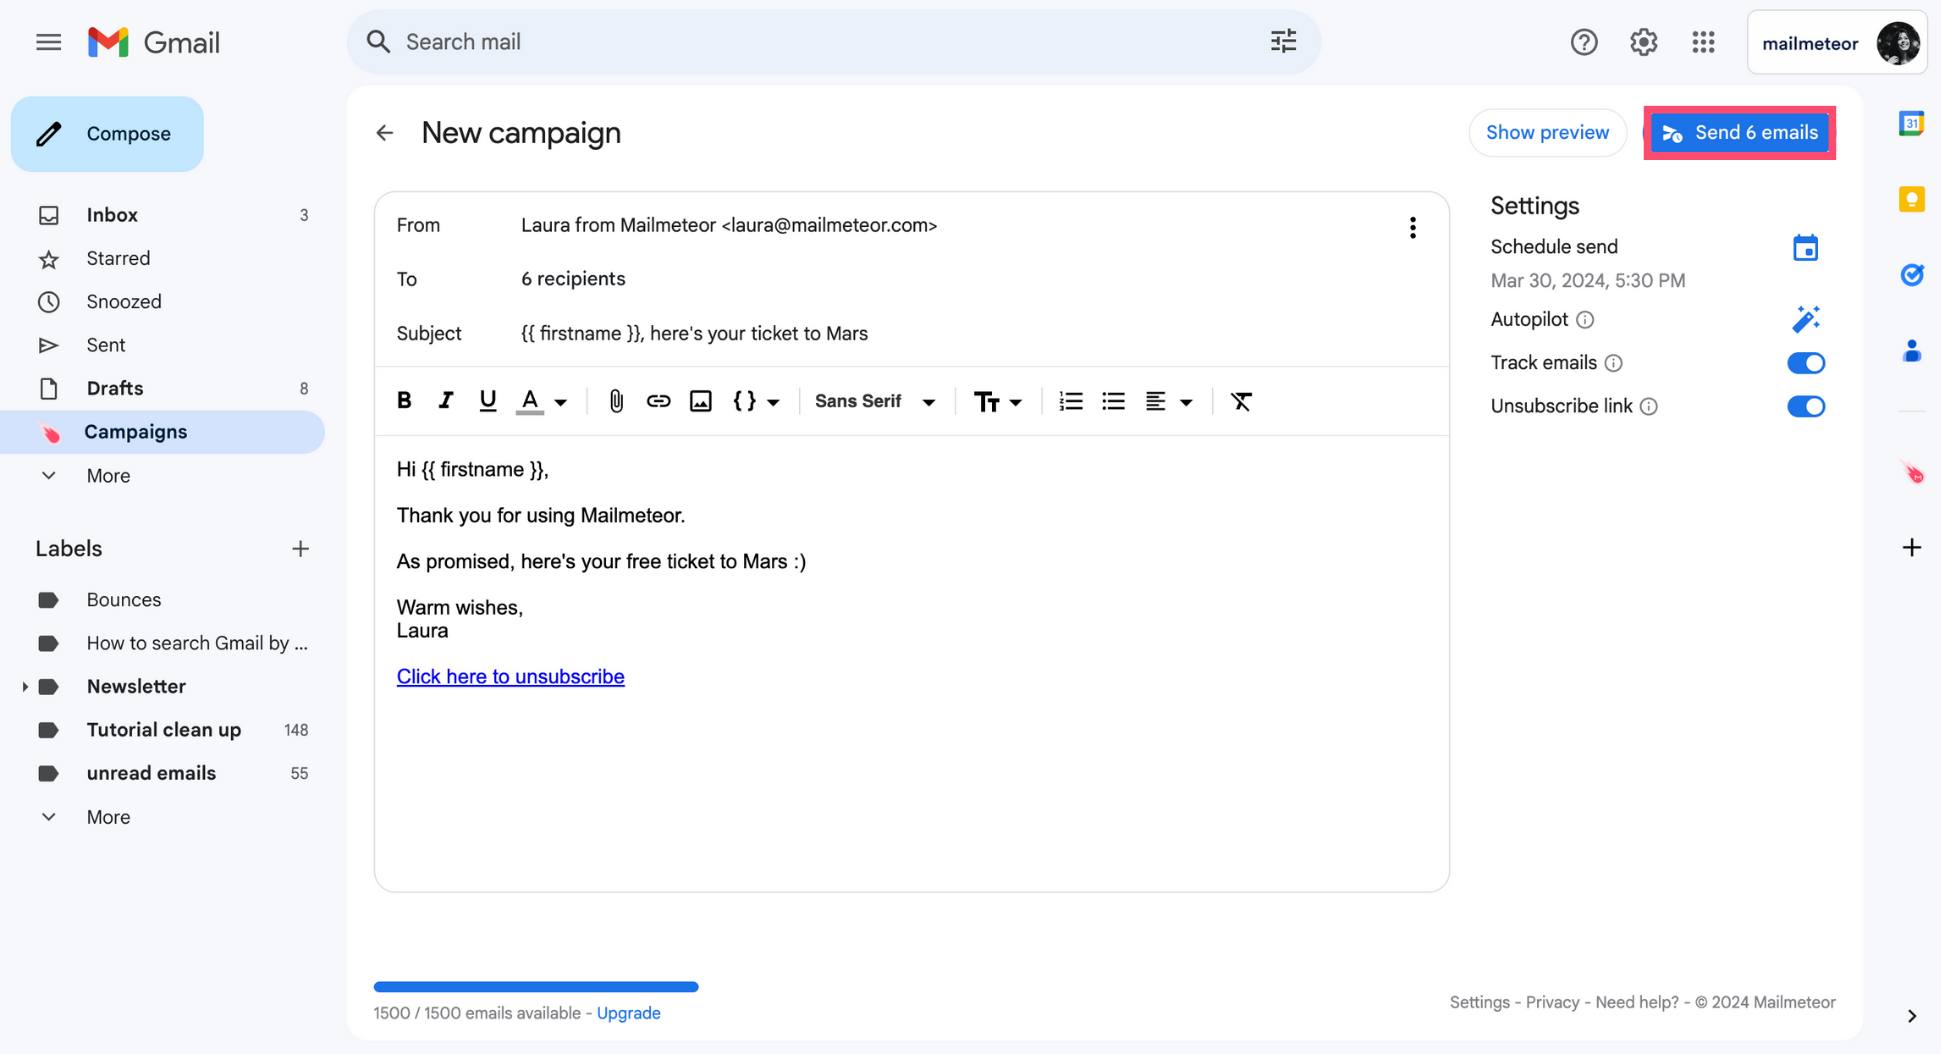
(Optional) Fine-tune your settings. With Mailmeteor, you’re in control. You can send your emails right away. Or you can schedule them for a later date. Advanced options are also available such as Autopilot to send your emails over a longer period of time, add an unsubscribe link, set a custom reply-to address, and track your emails in real time.
-
Preview your emails. Make sure everything looks great before sending your first email campaign.
-
Send your emails.
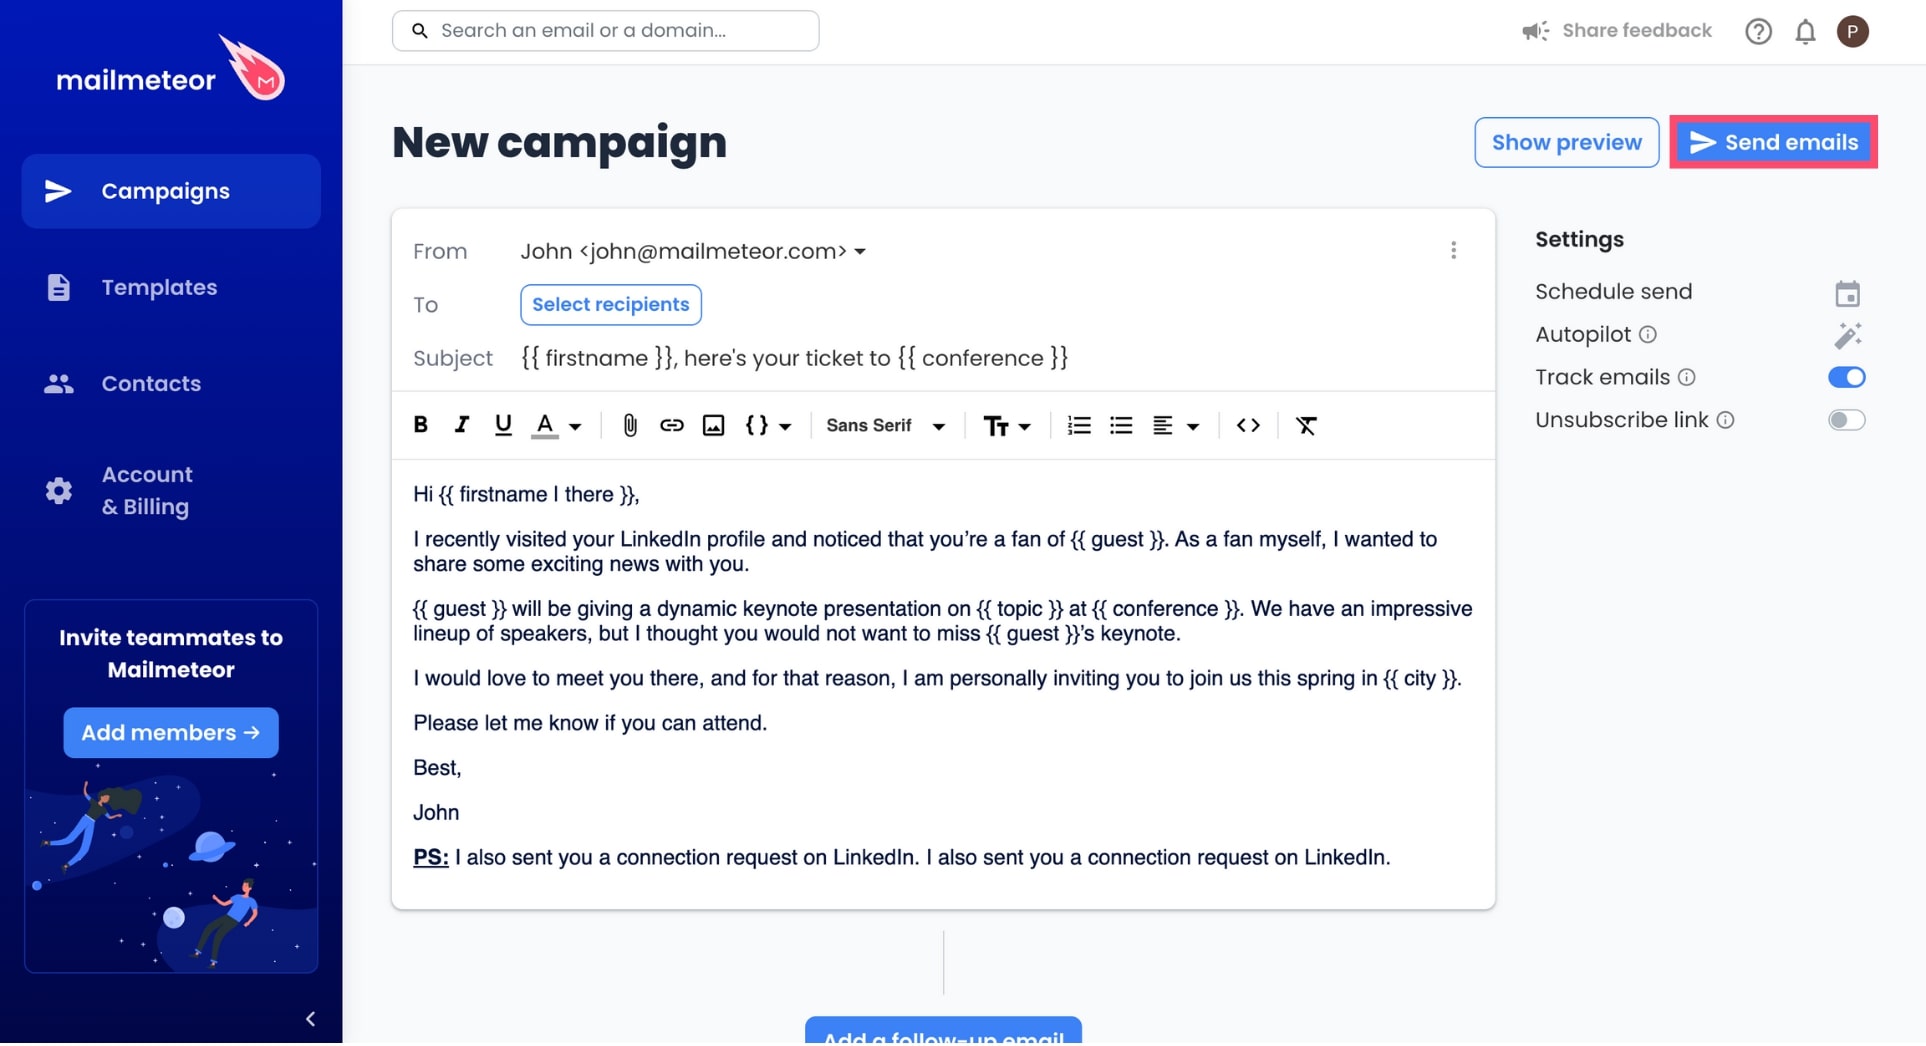
And voilà. You’ve just sent your first email campaign from the Mailmeteor Dashboard. Congrats! 🎉
Video tutorial
- Install Mailmeteor browser extension.
- Sign in to your Gmail account.
-
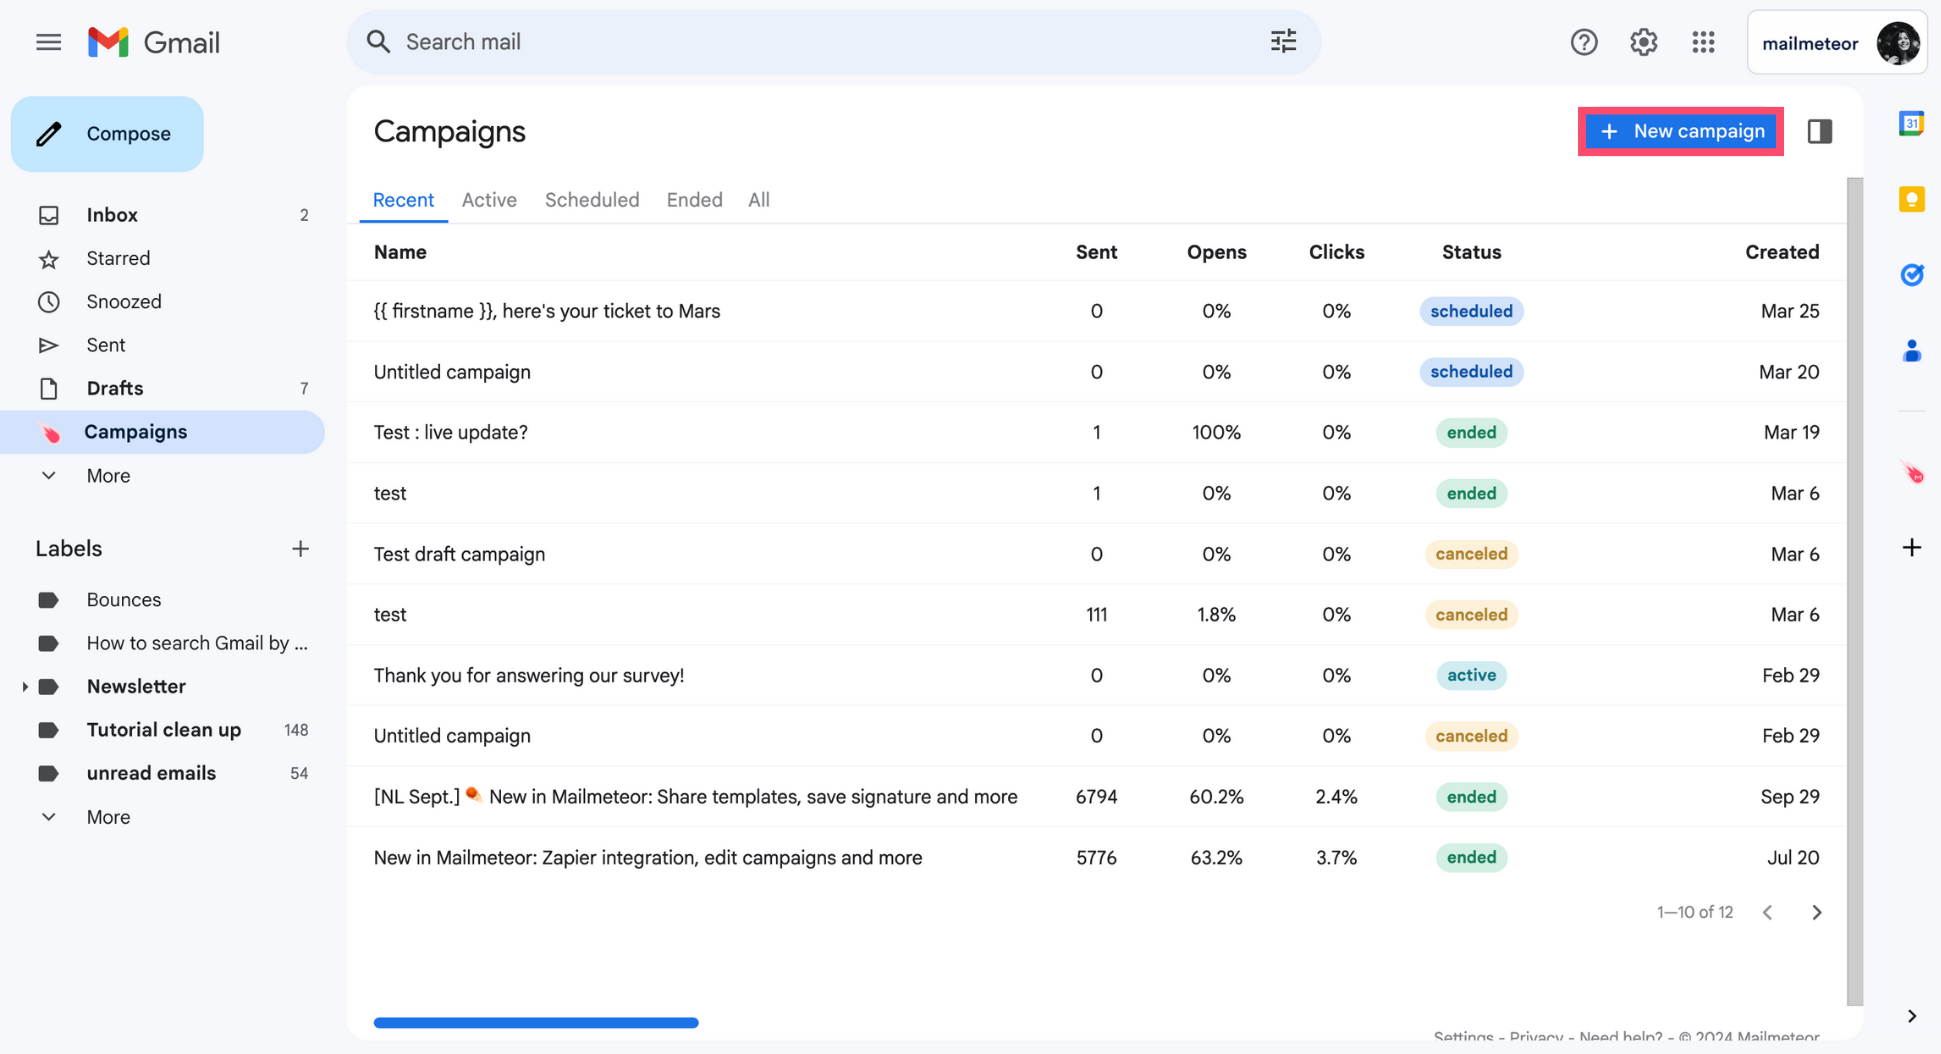
Go to Campaigns.

-
Create a New campaign.
-
Click Select recipients. Then add your recipients from Google Sheets, a contact list, or a CSV file.
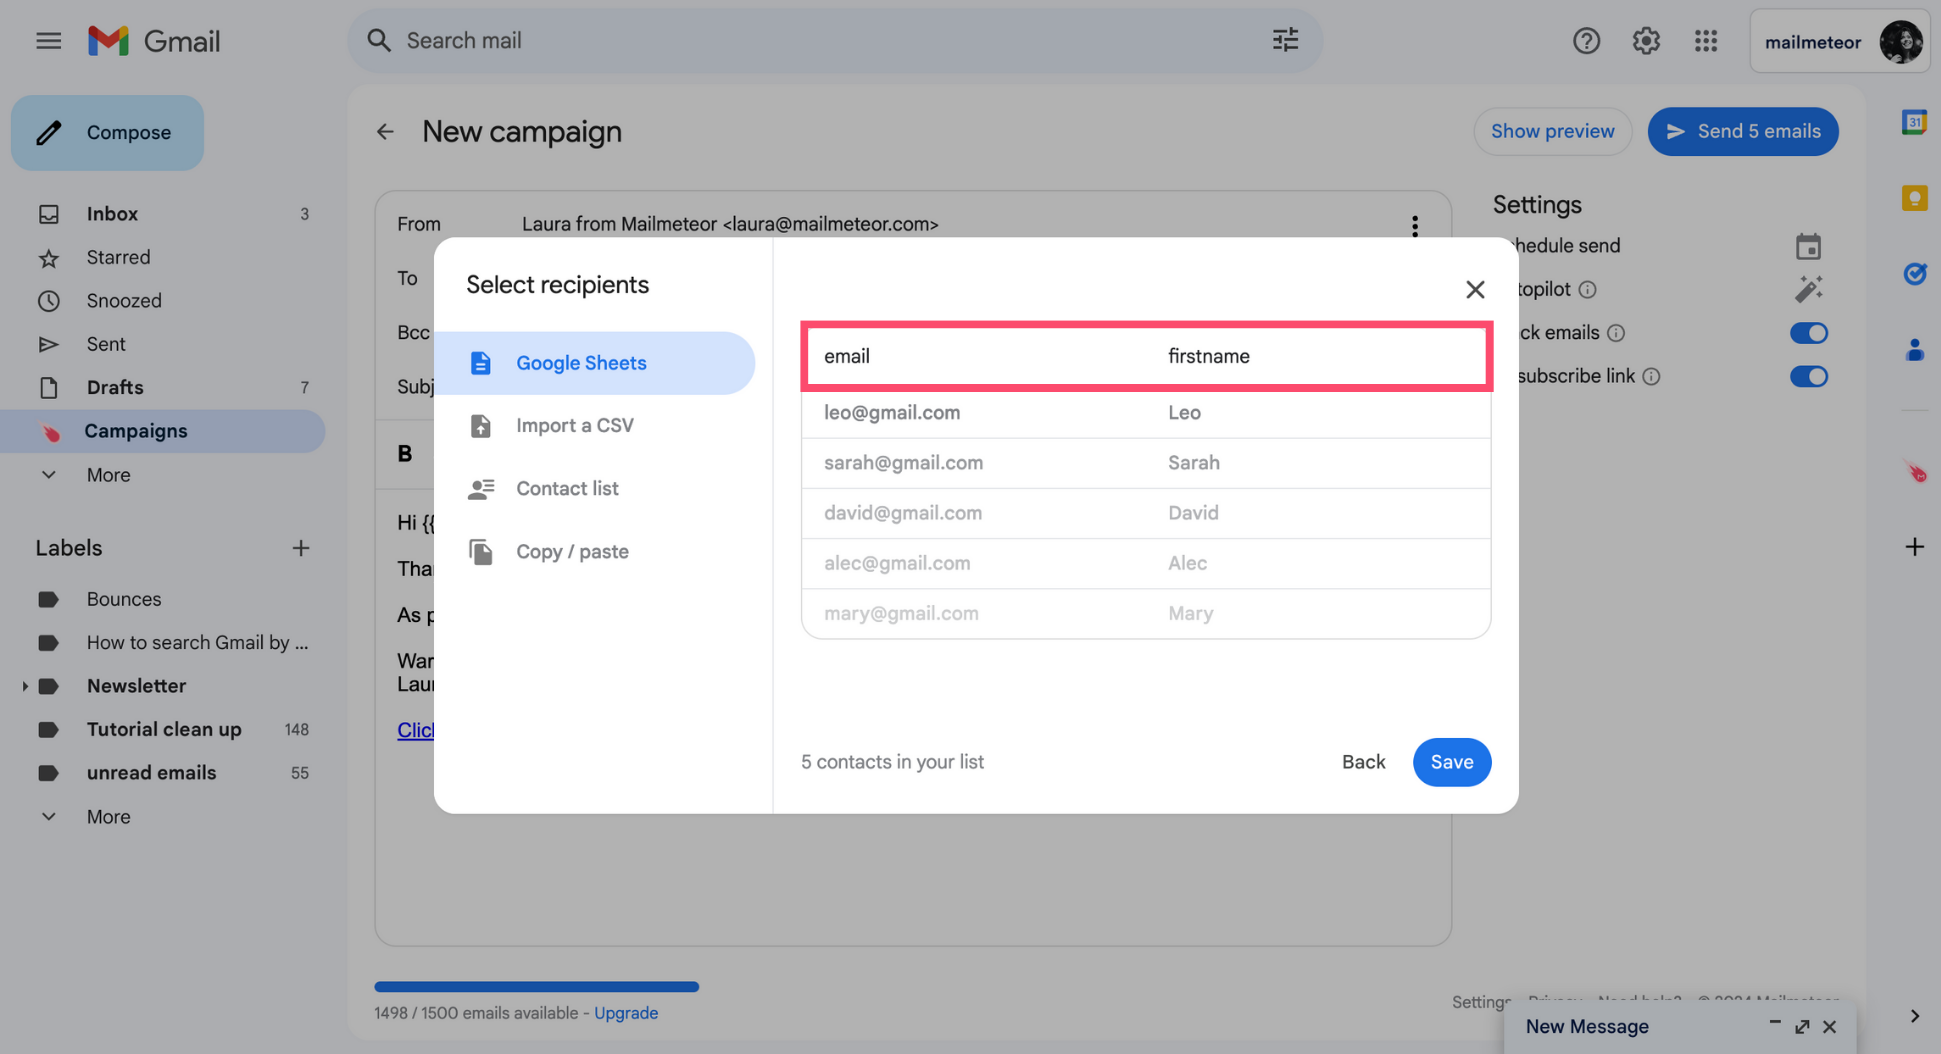
If you’re importing contacts from Google Sheets or a CSV file, make sure to add 1 column for each variable. In this example, we’ve imported recipients from a spreadsheet with two columns: email and firstname.
-
(Optional). To add some dynamic content to your email, click Insert a variable and select the appropriate variable.
-
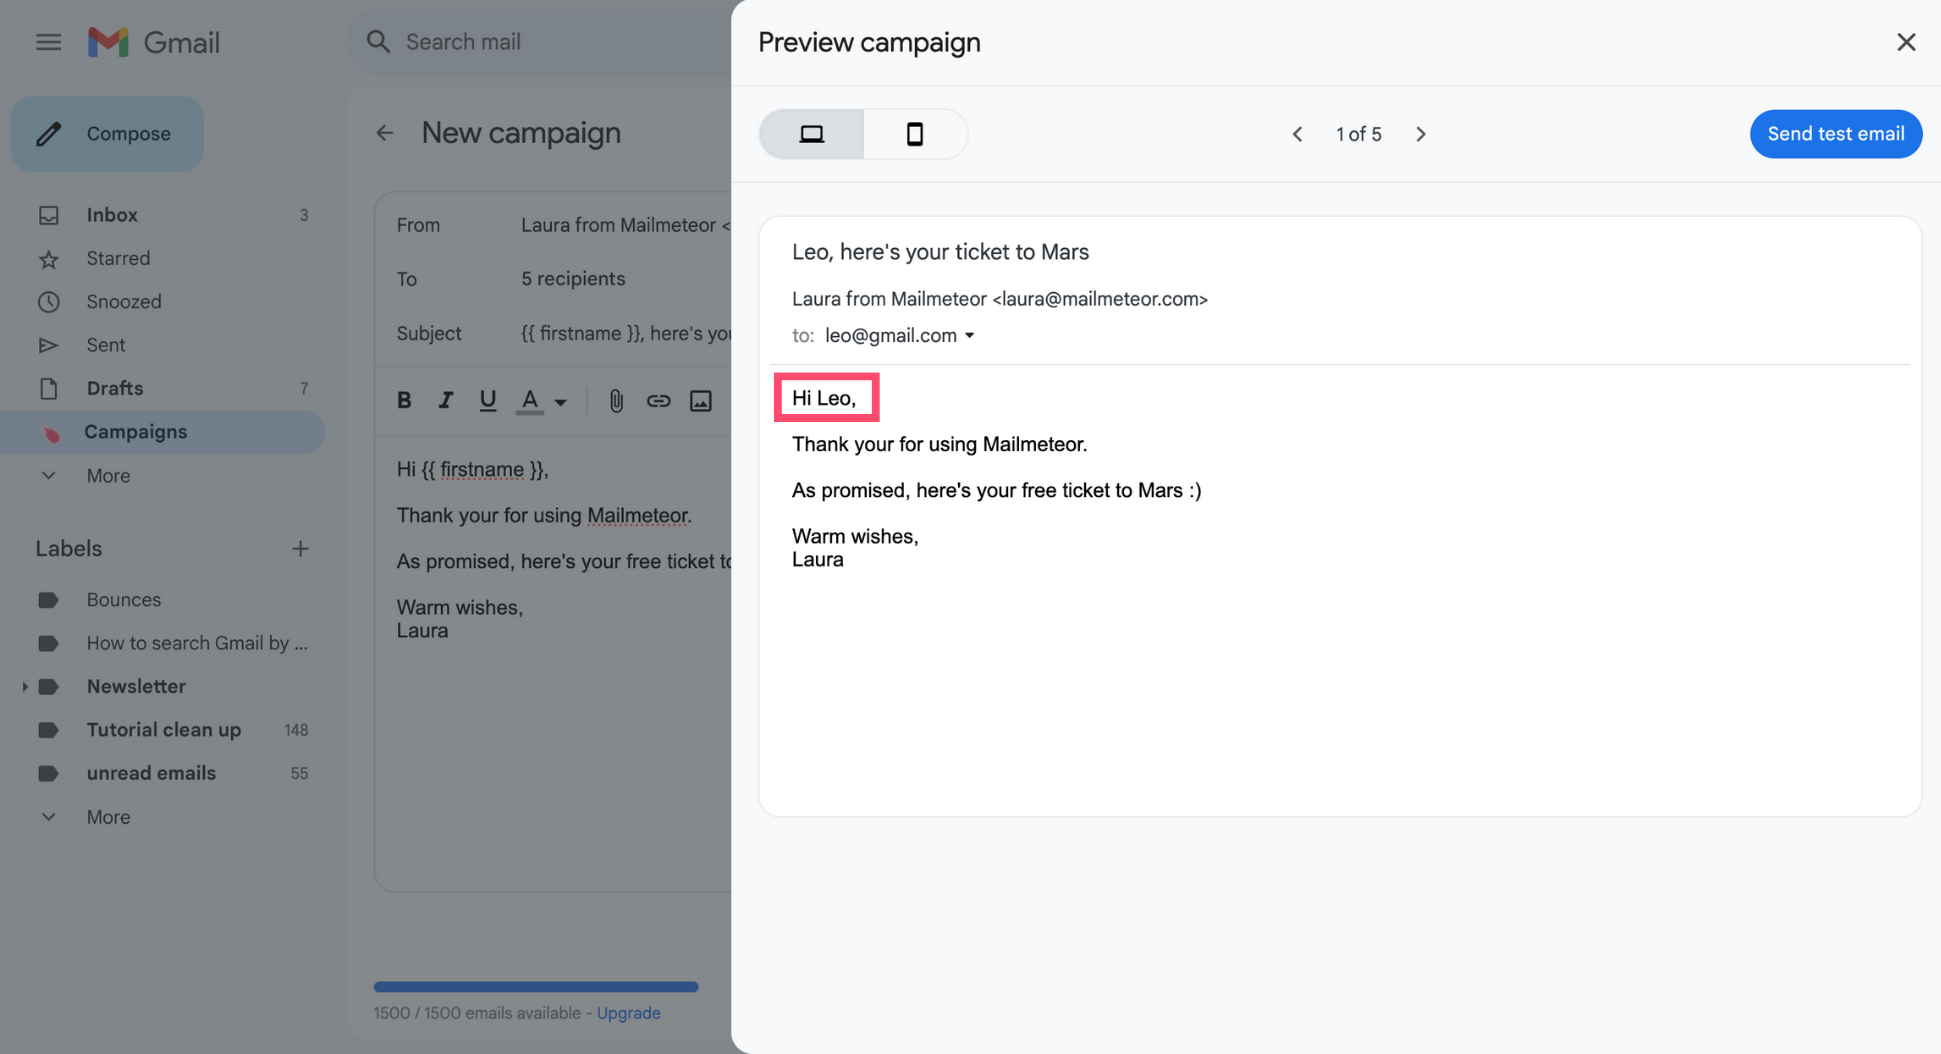
You can preview your emails before sending them to see how the personalized variables will look in your recipients’ inbox.
-
When you’re done editing your email, press Send or schedule your campaign to be sent at a later time.
And voilà. Your mail merge has been sent. Pretty easy, right?
- Install Mailmeteor mail merge for Google Sheets.
- Create a new spreadsheet in Google Sheets (or copy this demo spreadsheet).
-
Name your columns by adding headings on the first row of your spreadsheet.
Each column represents a piece of information about your contacts. In the example below, we’ve added 4 columns: firstname, email, company, postscriptum.
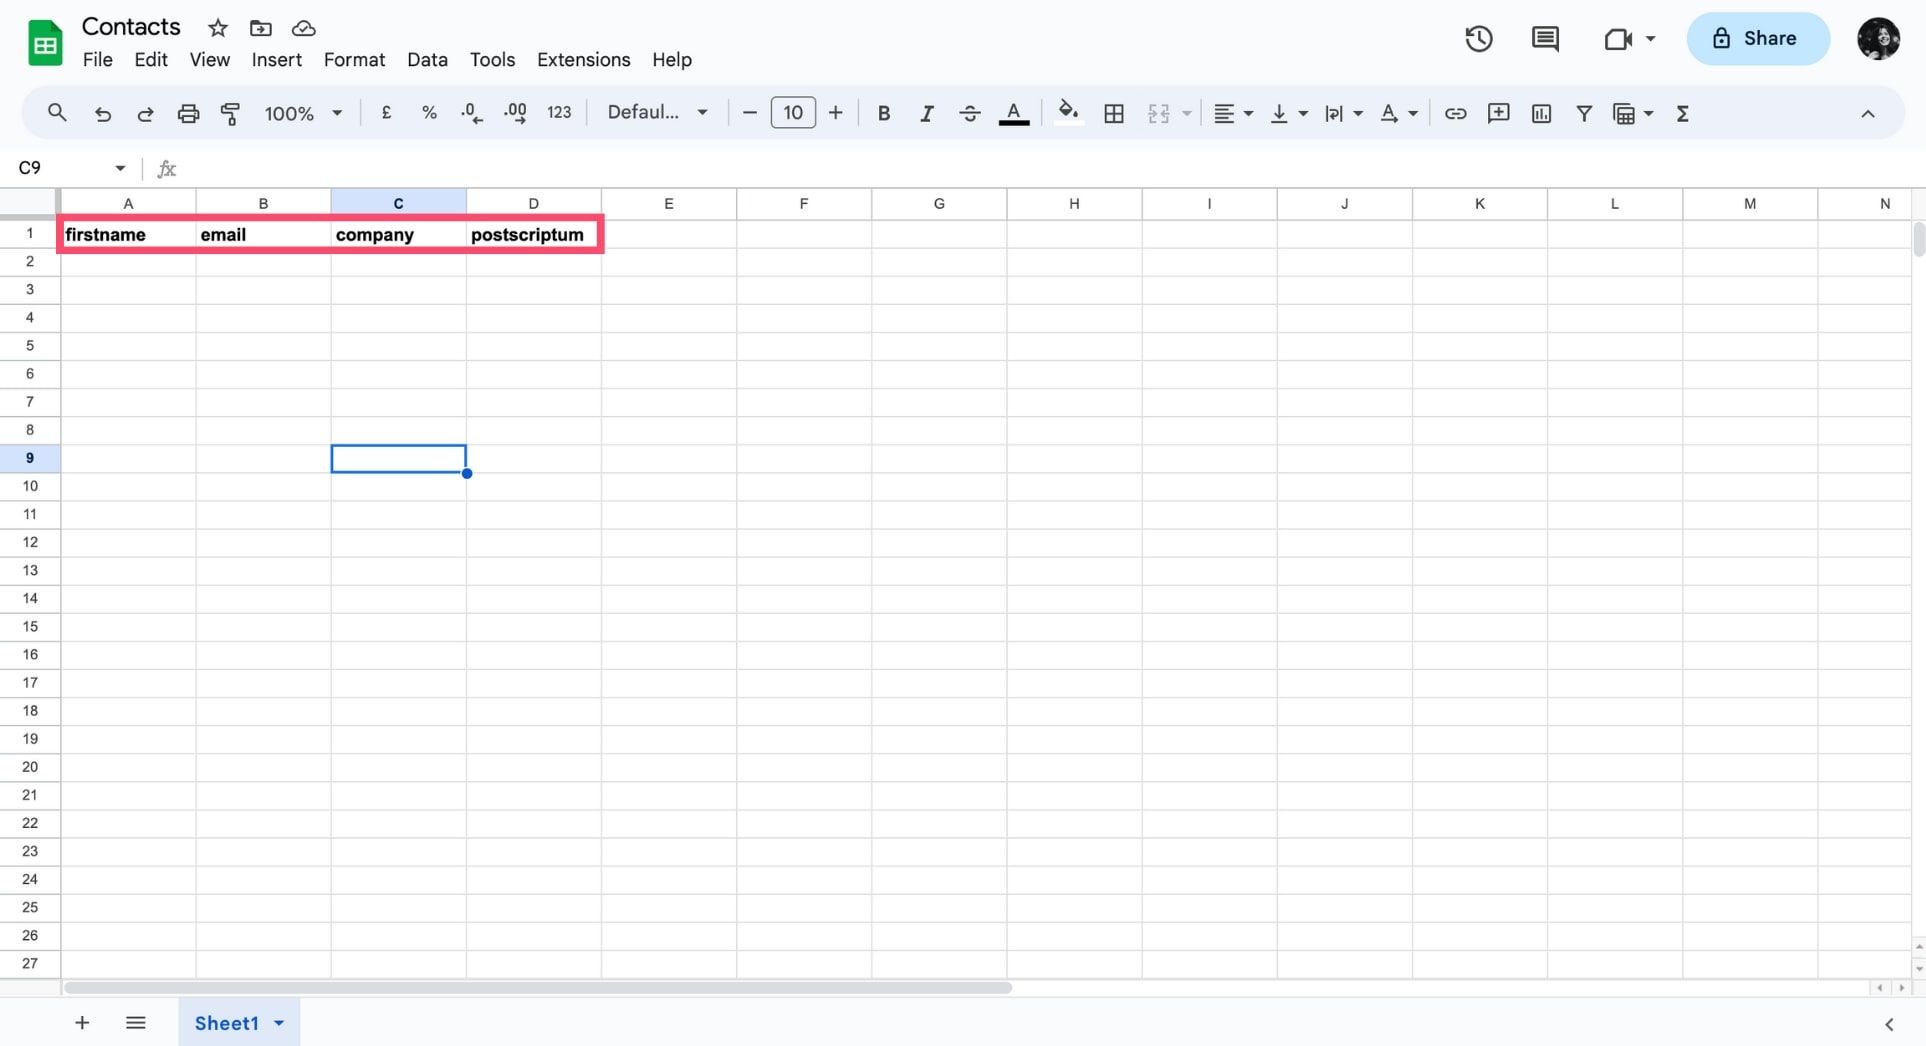
You can add as many columns as you want and pick any column header name you want. The only thing that matters is that you make sure these headers are placed on the first row.
The data in each column can be used as a custom variable in your email. This means you can write a single email template and automatically transform it into a personalized message for each of your recipients.
-
Fill your spreadsheet with your contact info.
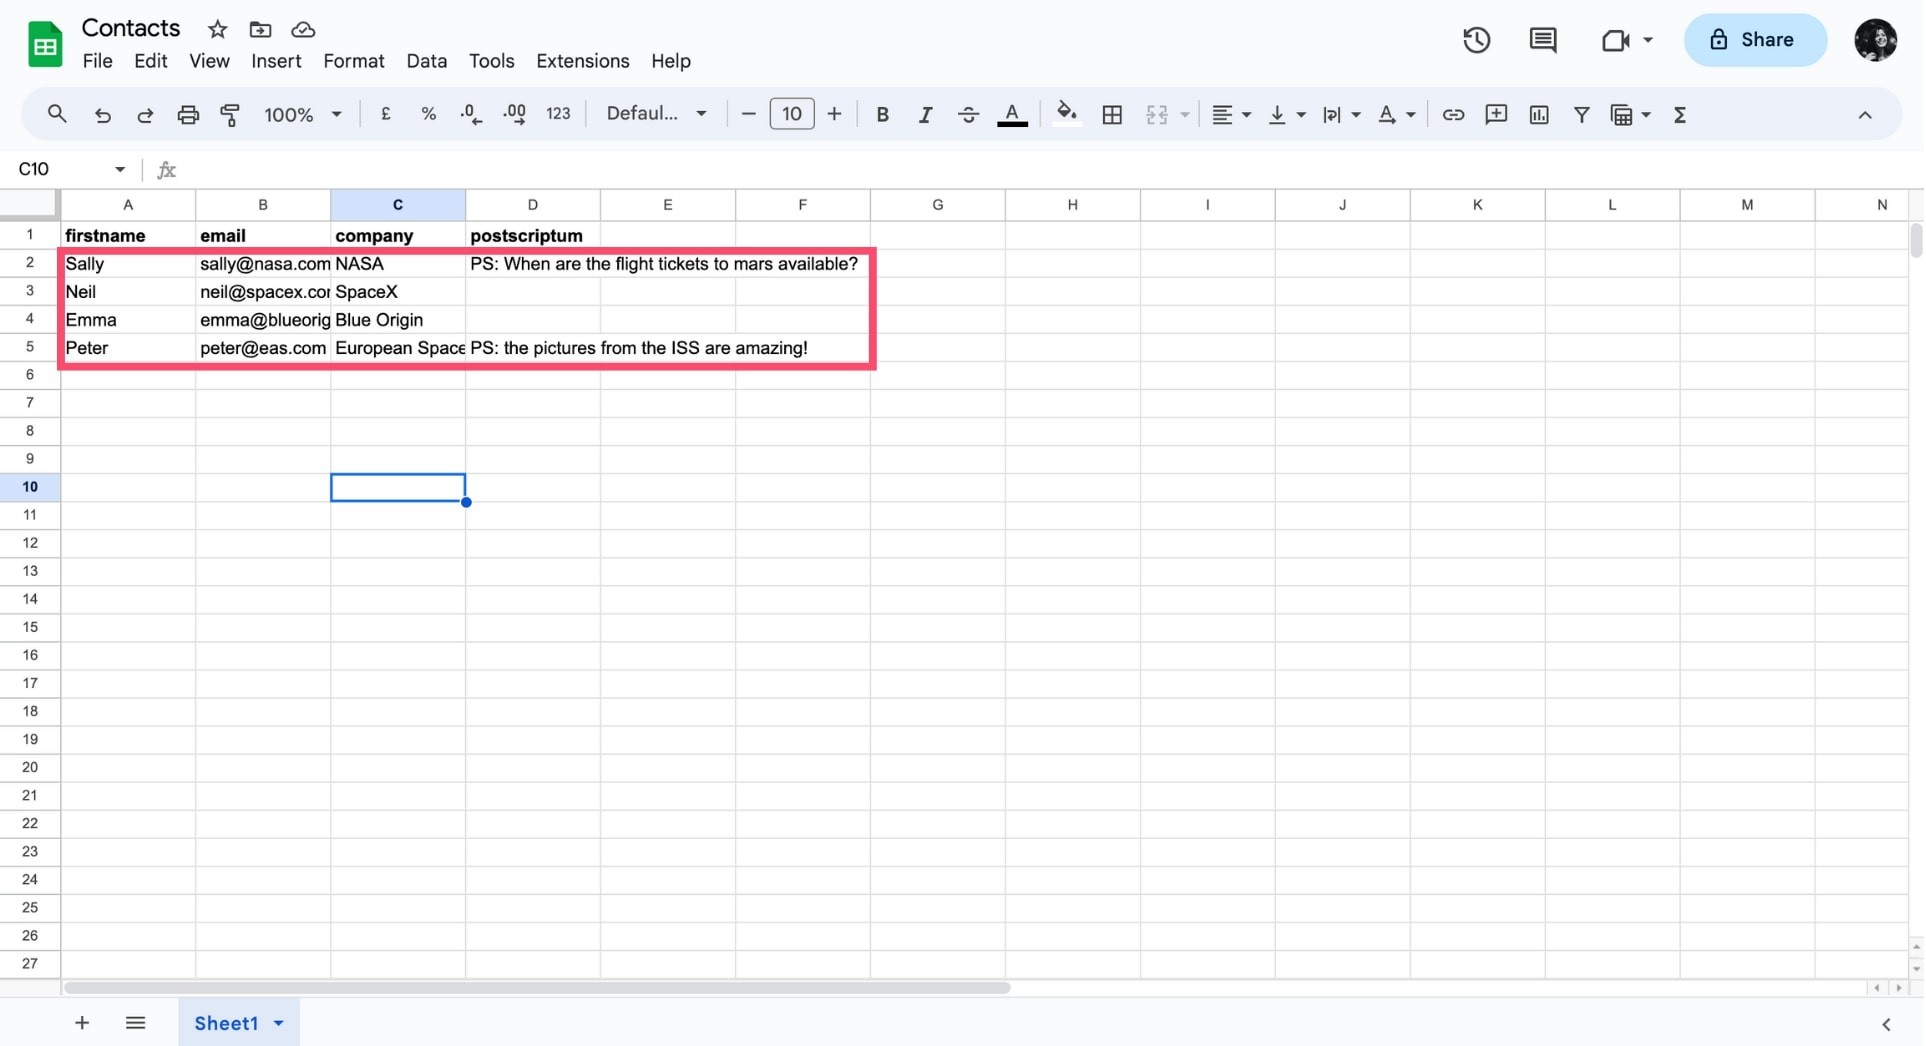
It’s fine if you leave some cells blank. Except in the “email” column. In the example below, some recipients will get a Post Scriptum, and others won’t.
-
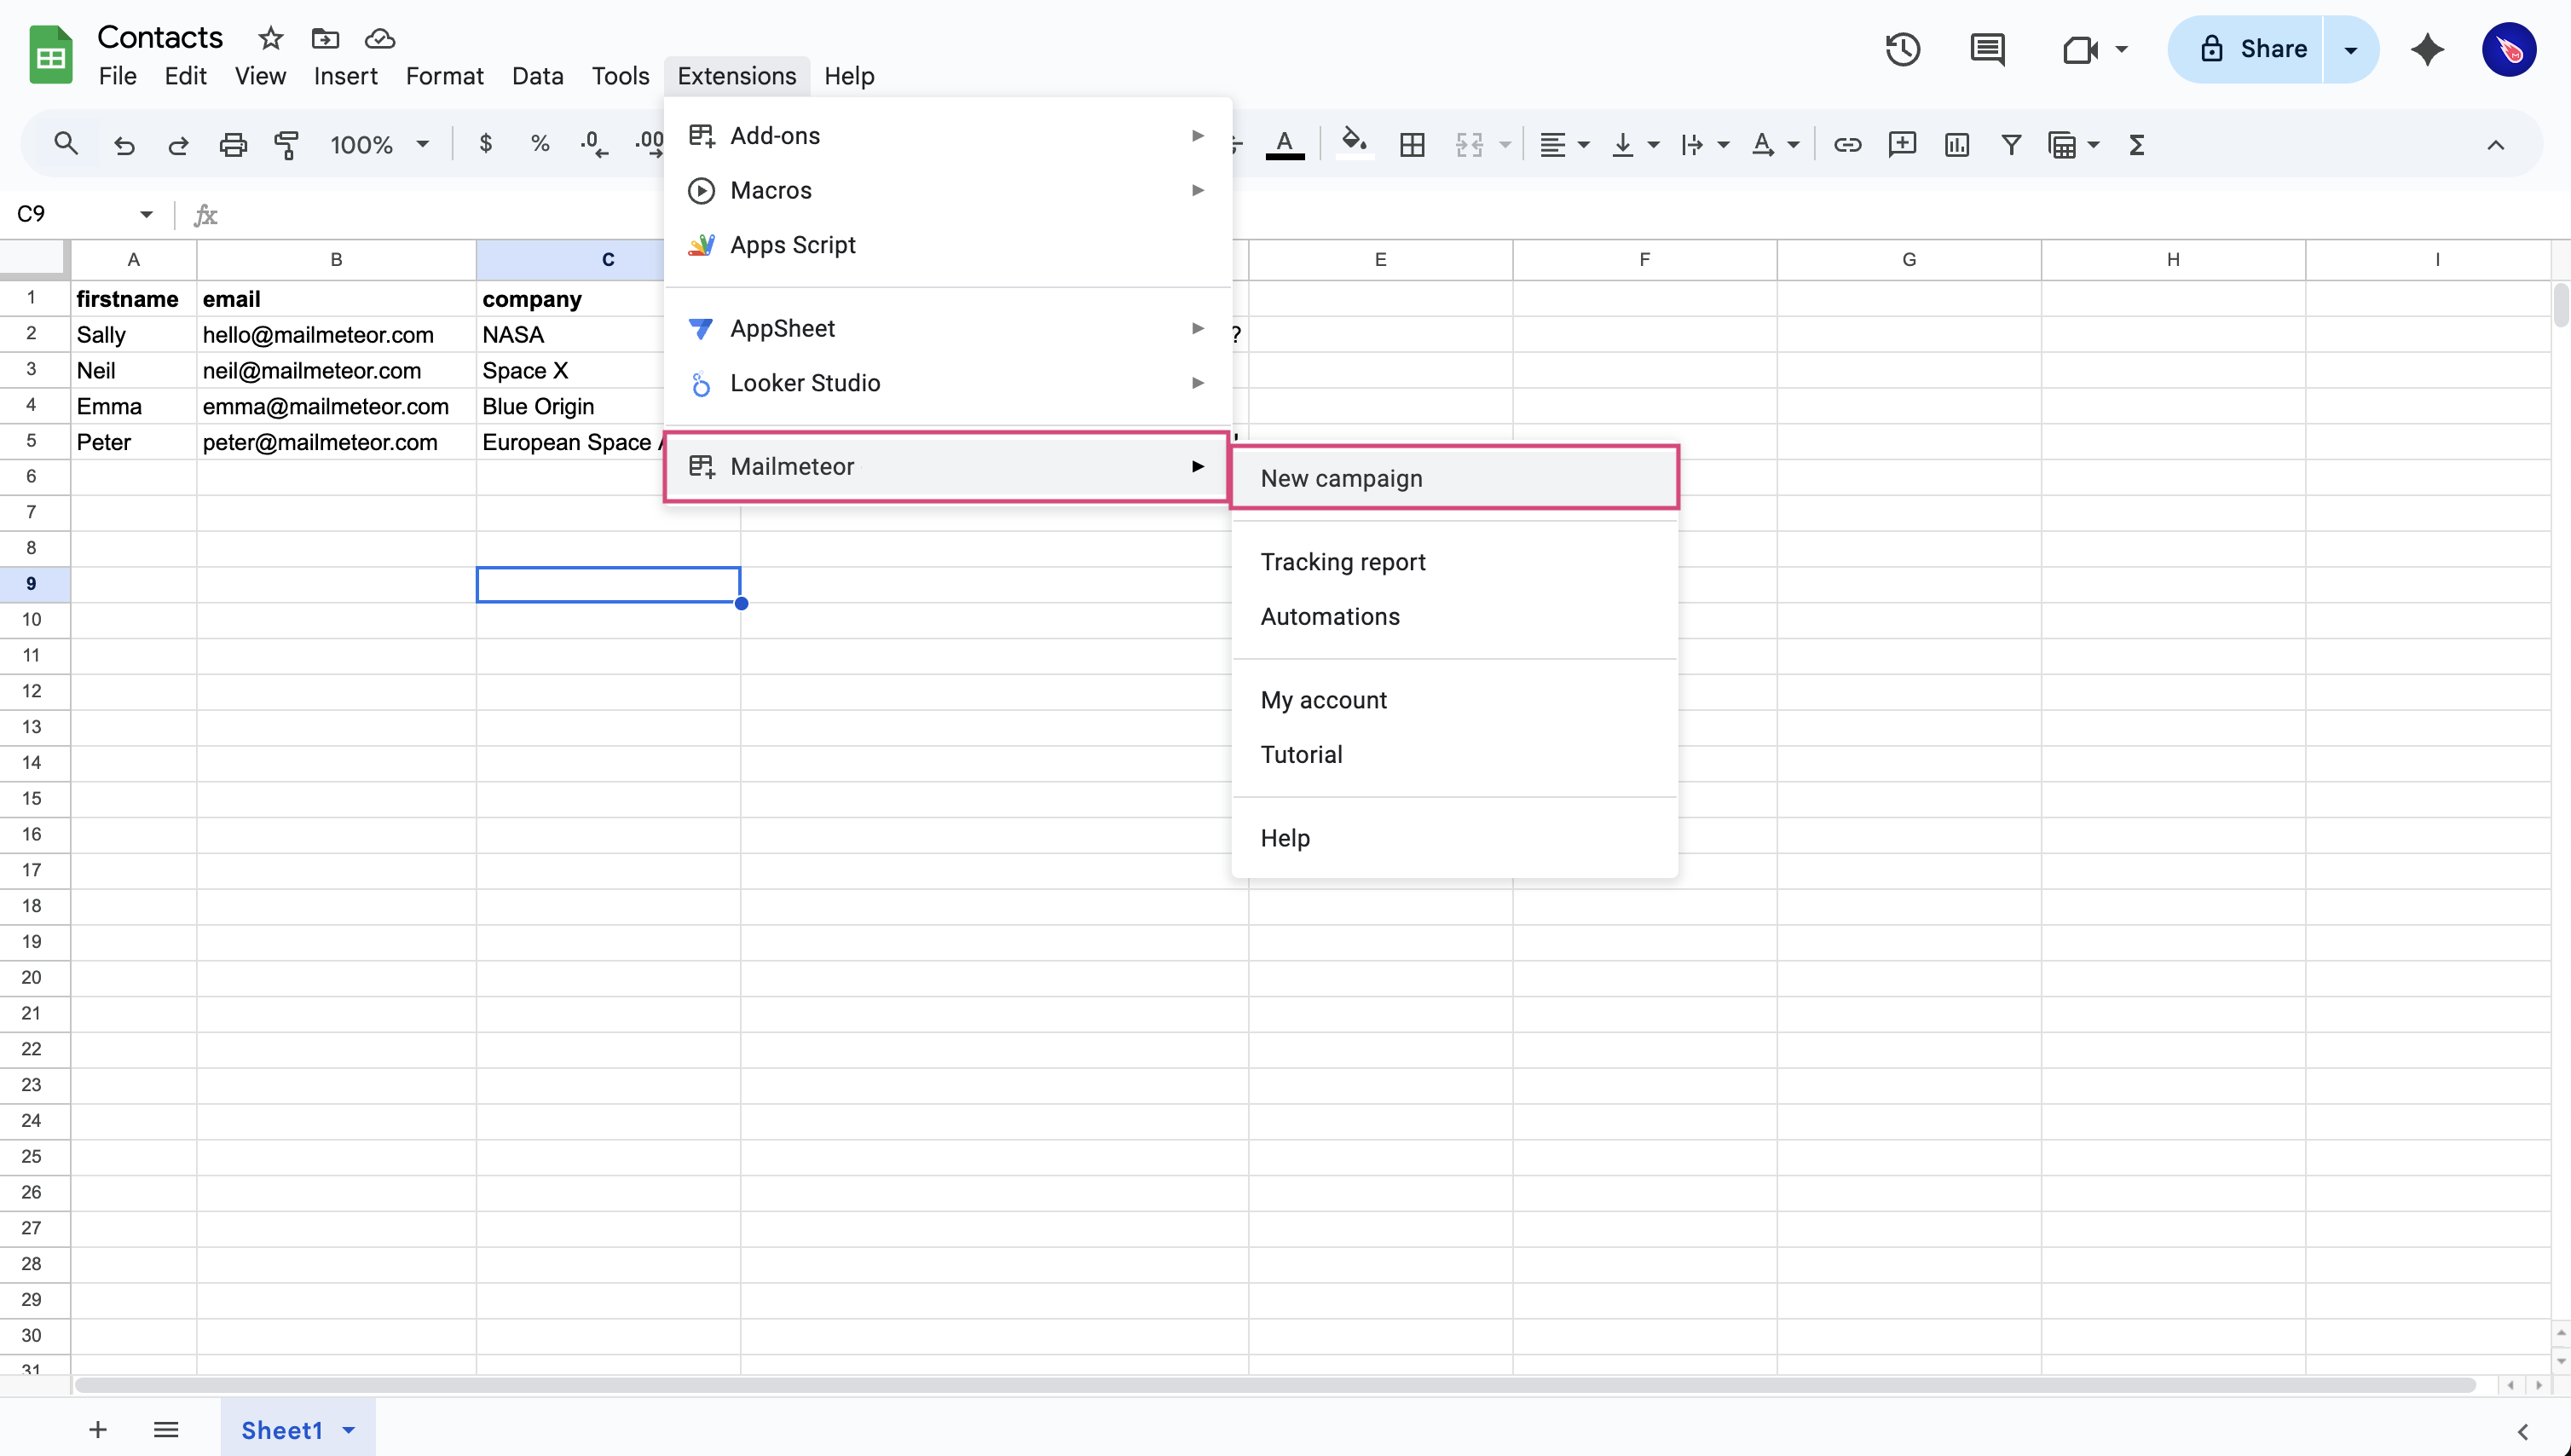
Now that your contact list is ready, you can open Mailmeteor by going to Extensions > Mailmeteor > New campaign.
-
From there, you can compose your email from scratch, or select an existing template.
Mailmeteor text editor works exactly like Gmail. You can apply different formatting, insert links, create bullet lists and so on.
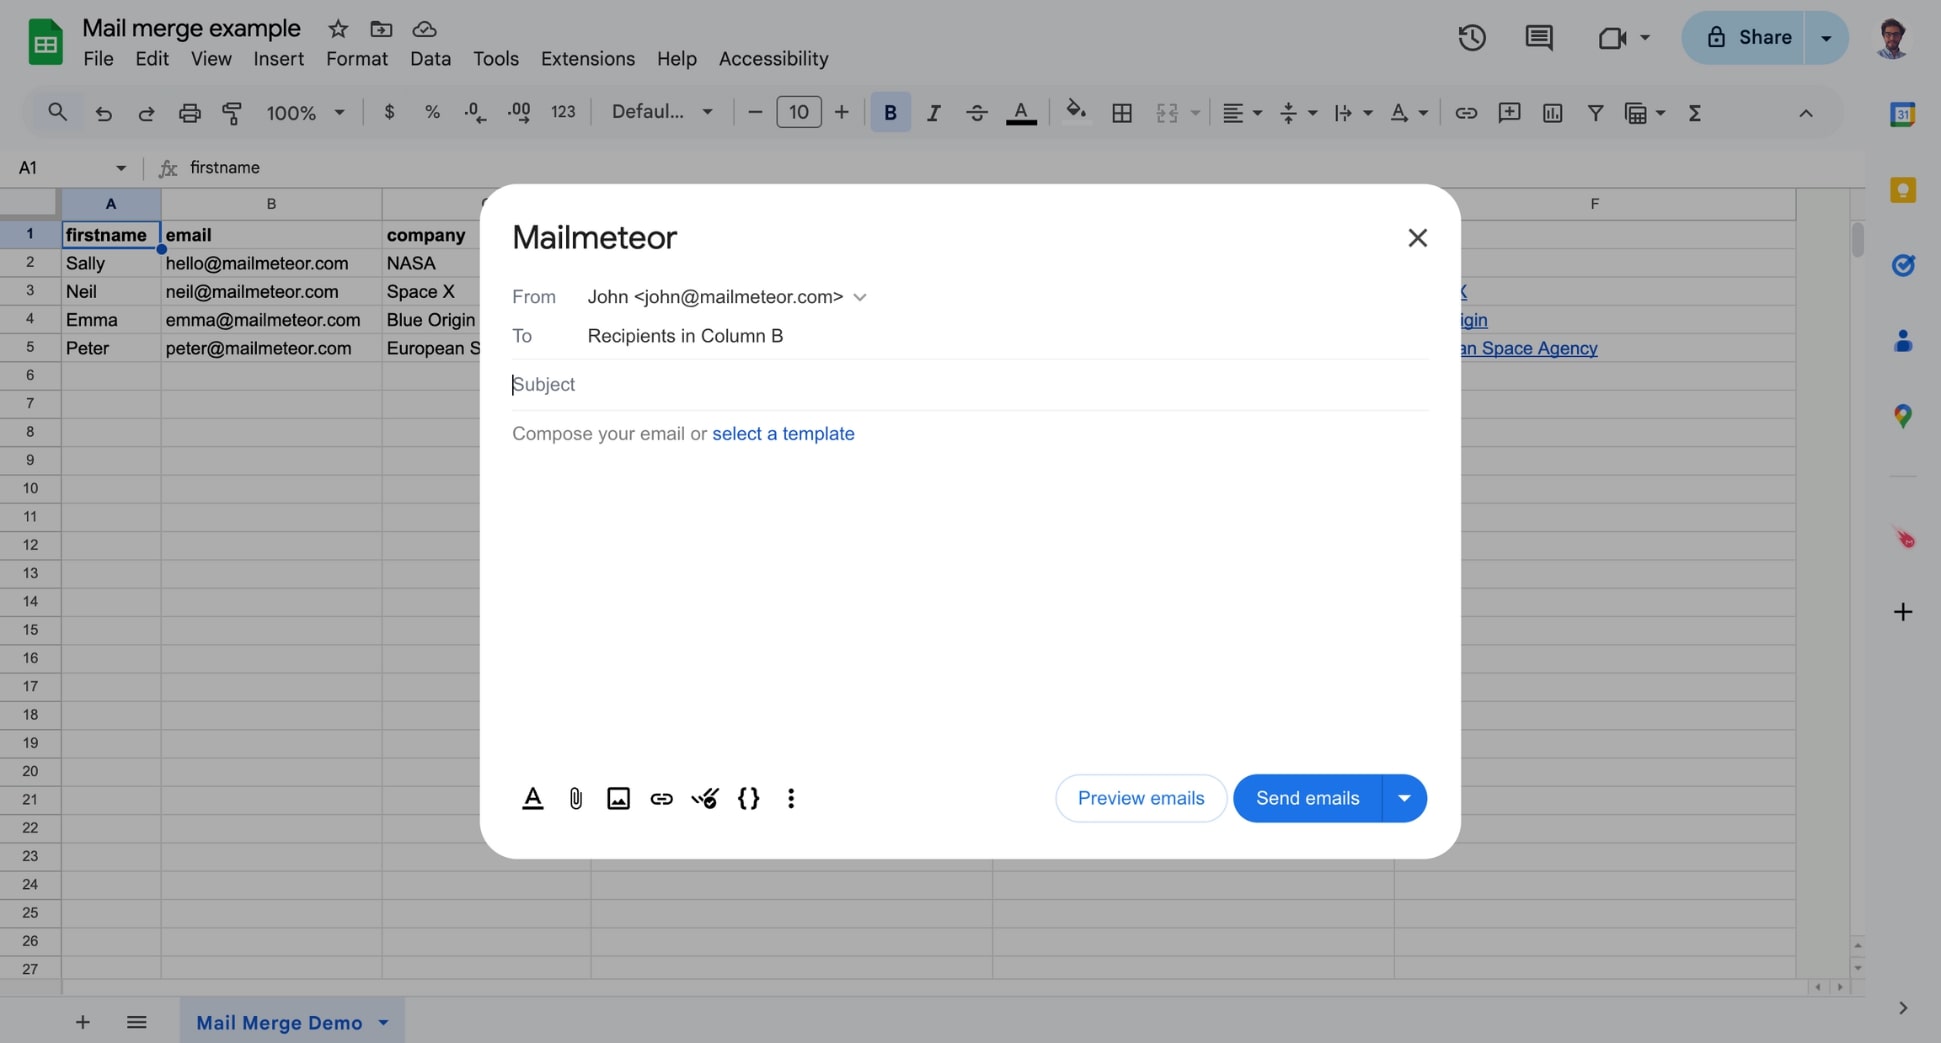
You can edit your template the way you want:
-
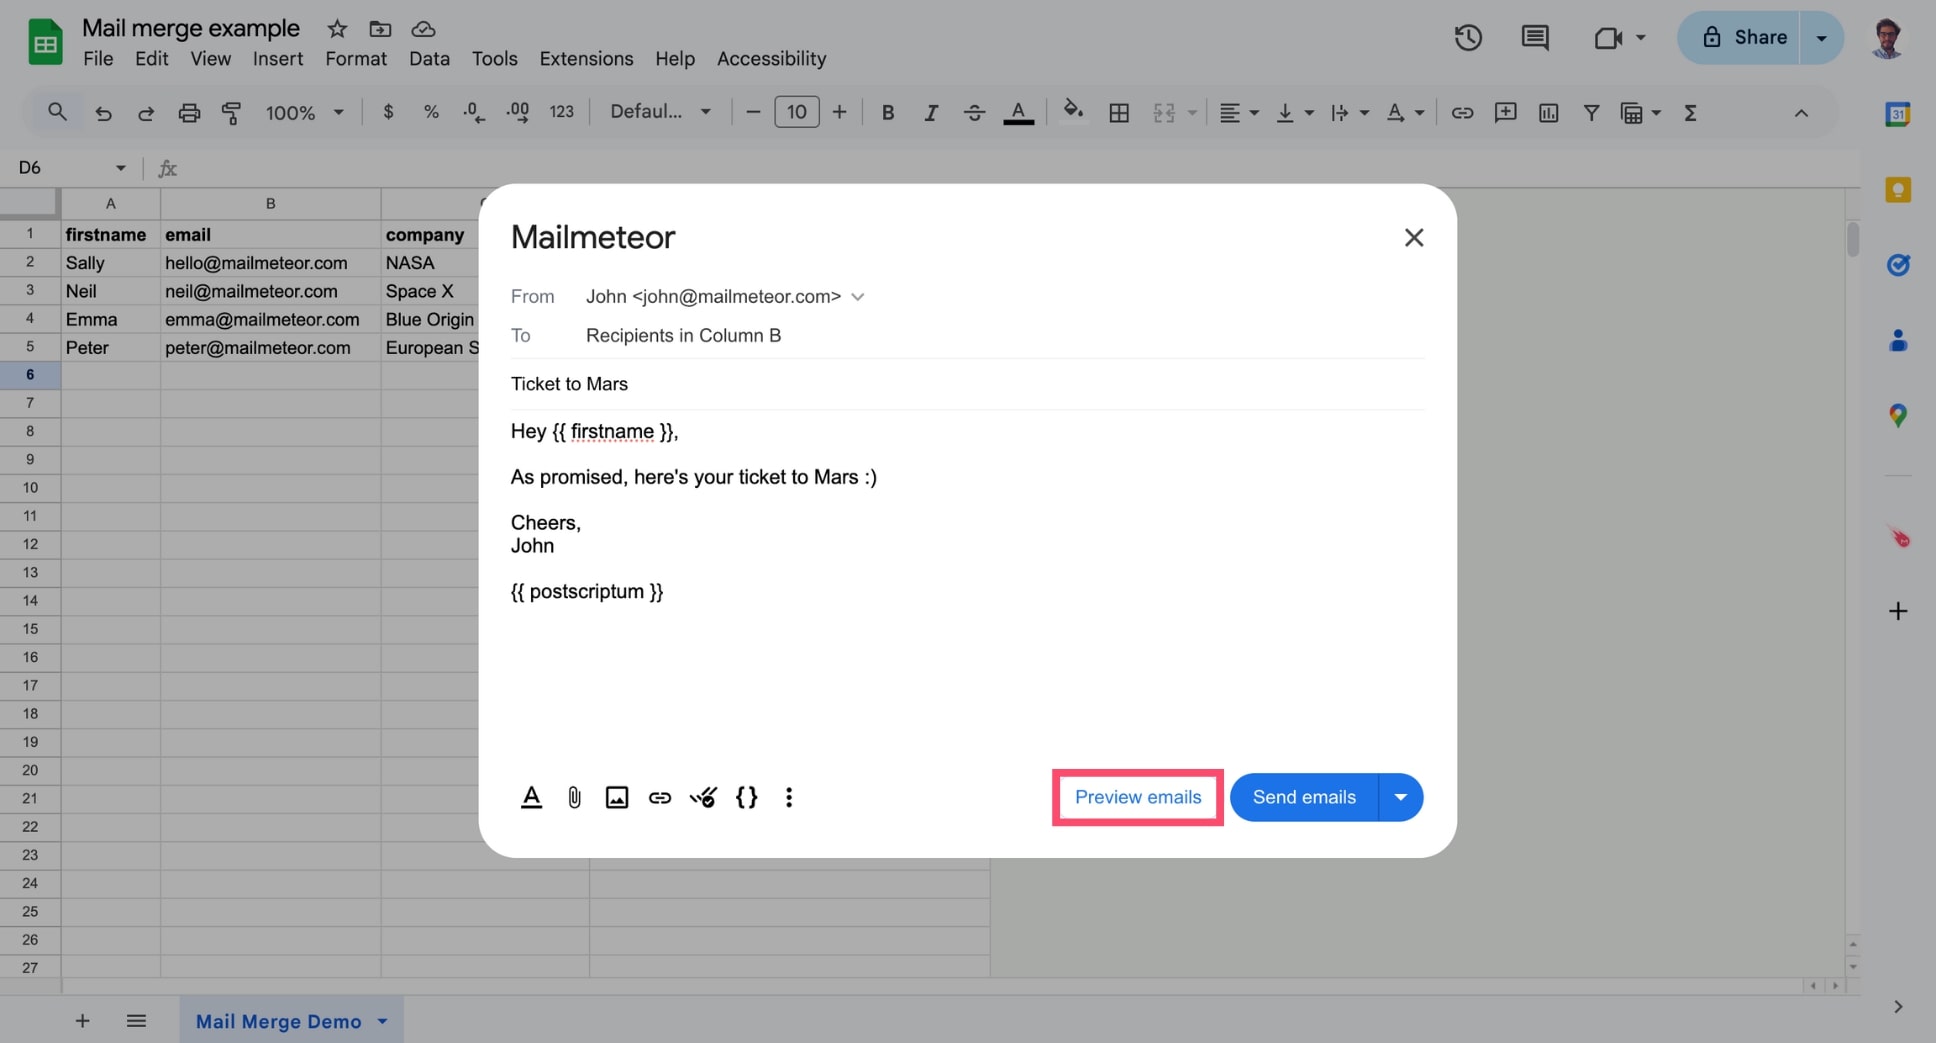
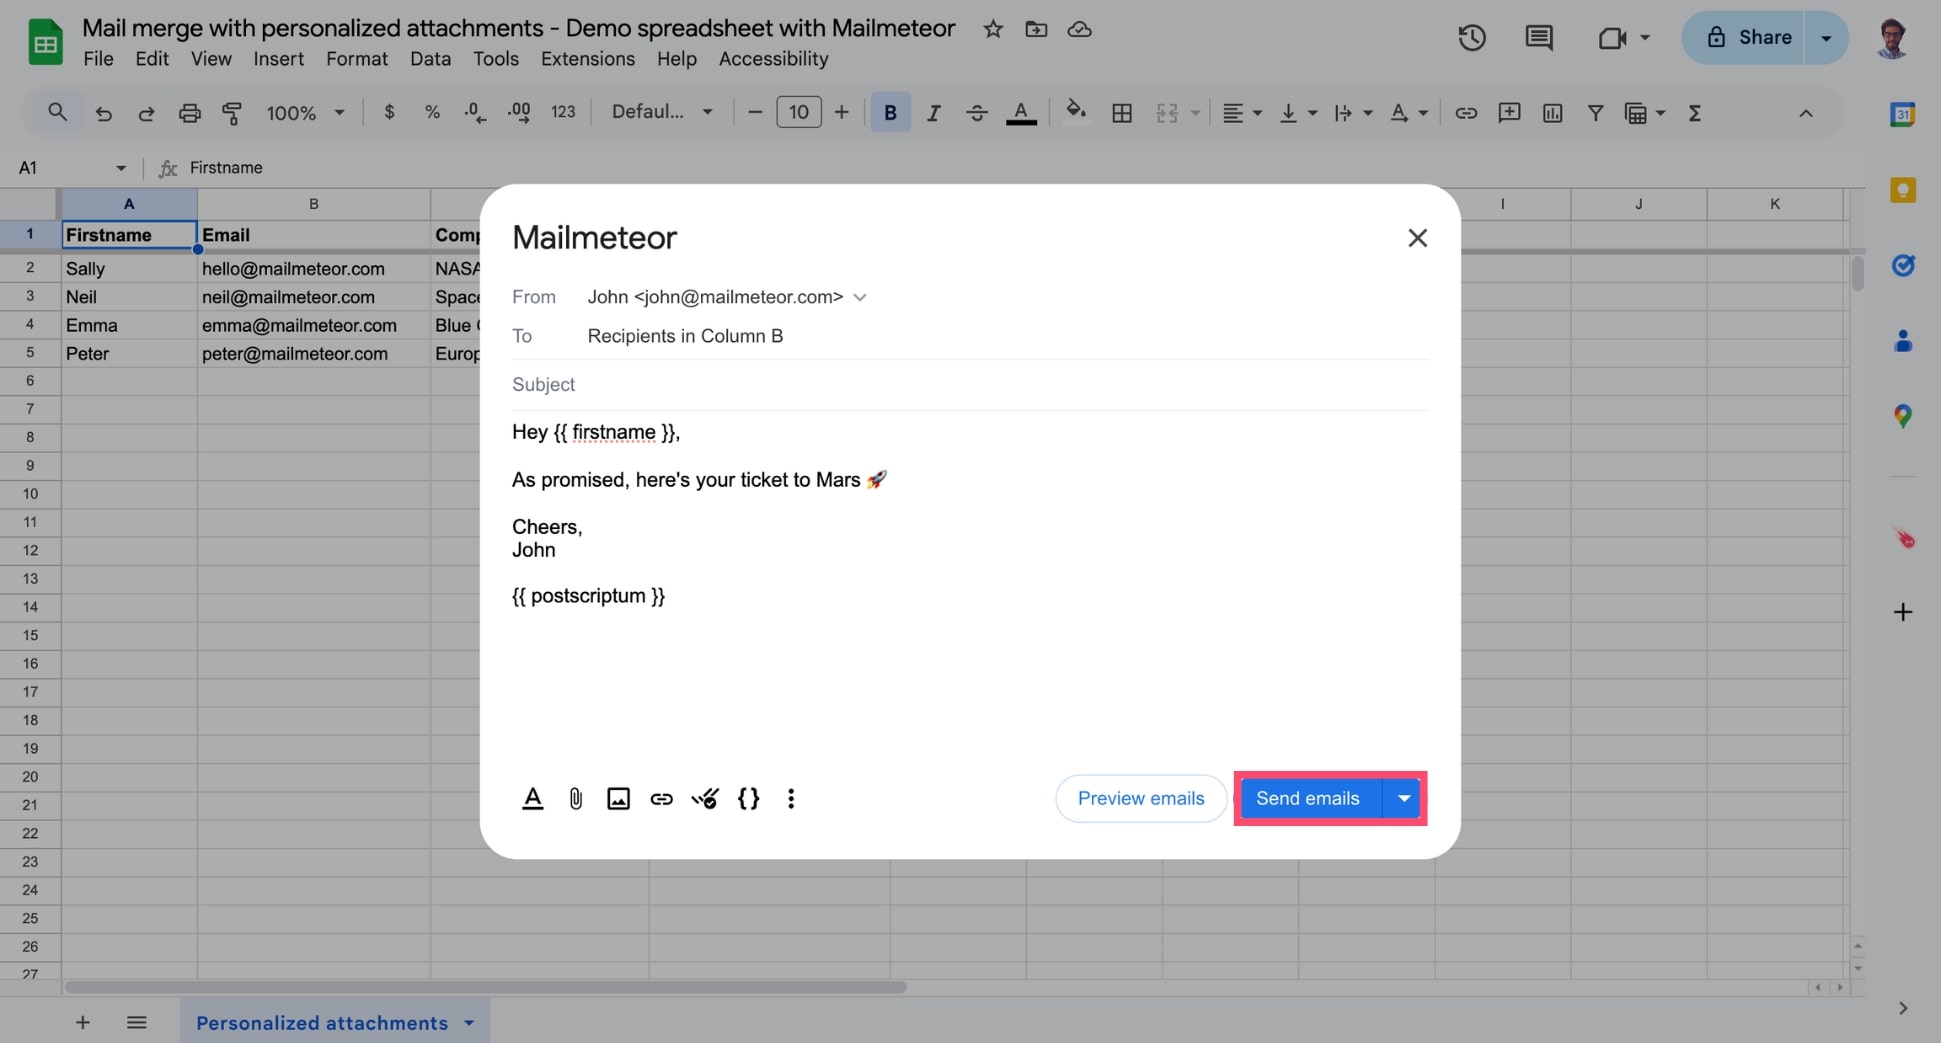
Click Preview emails to make sure everything looks great. This handy feature lets you preview how your emails will look for each recipient before actually sending them.
-
Ready to take off? Hit Send emails to launch your campaign — or schedule it to land at just the right moment 🚀
And that’s it. You’ve just sent your first email campaign from Mailmeteor’s Google Sheets add-on. Congrats! 🎉
-
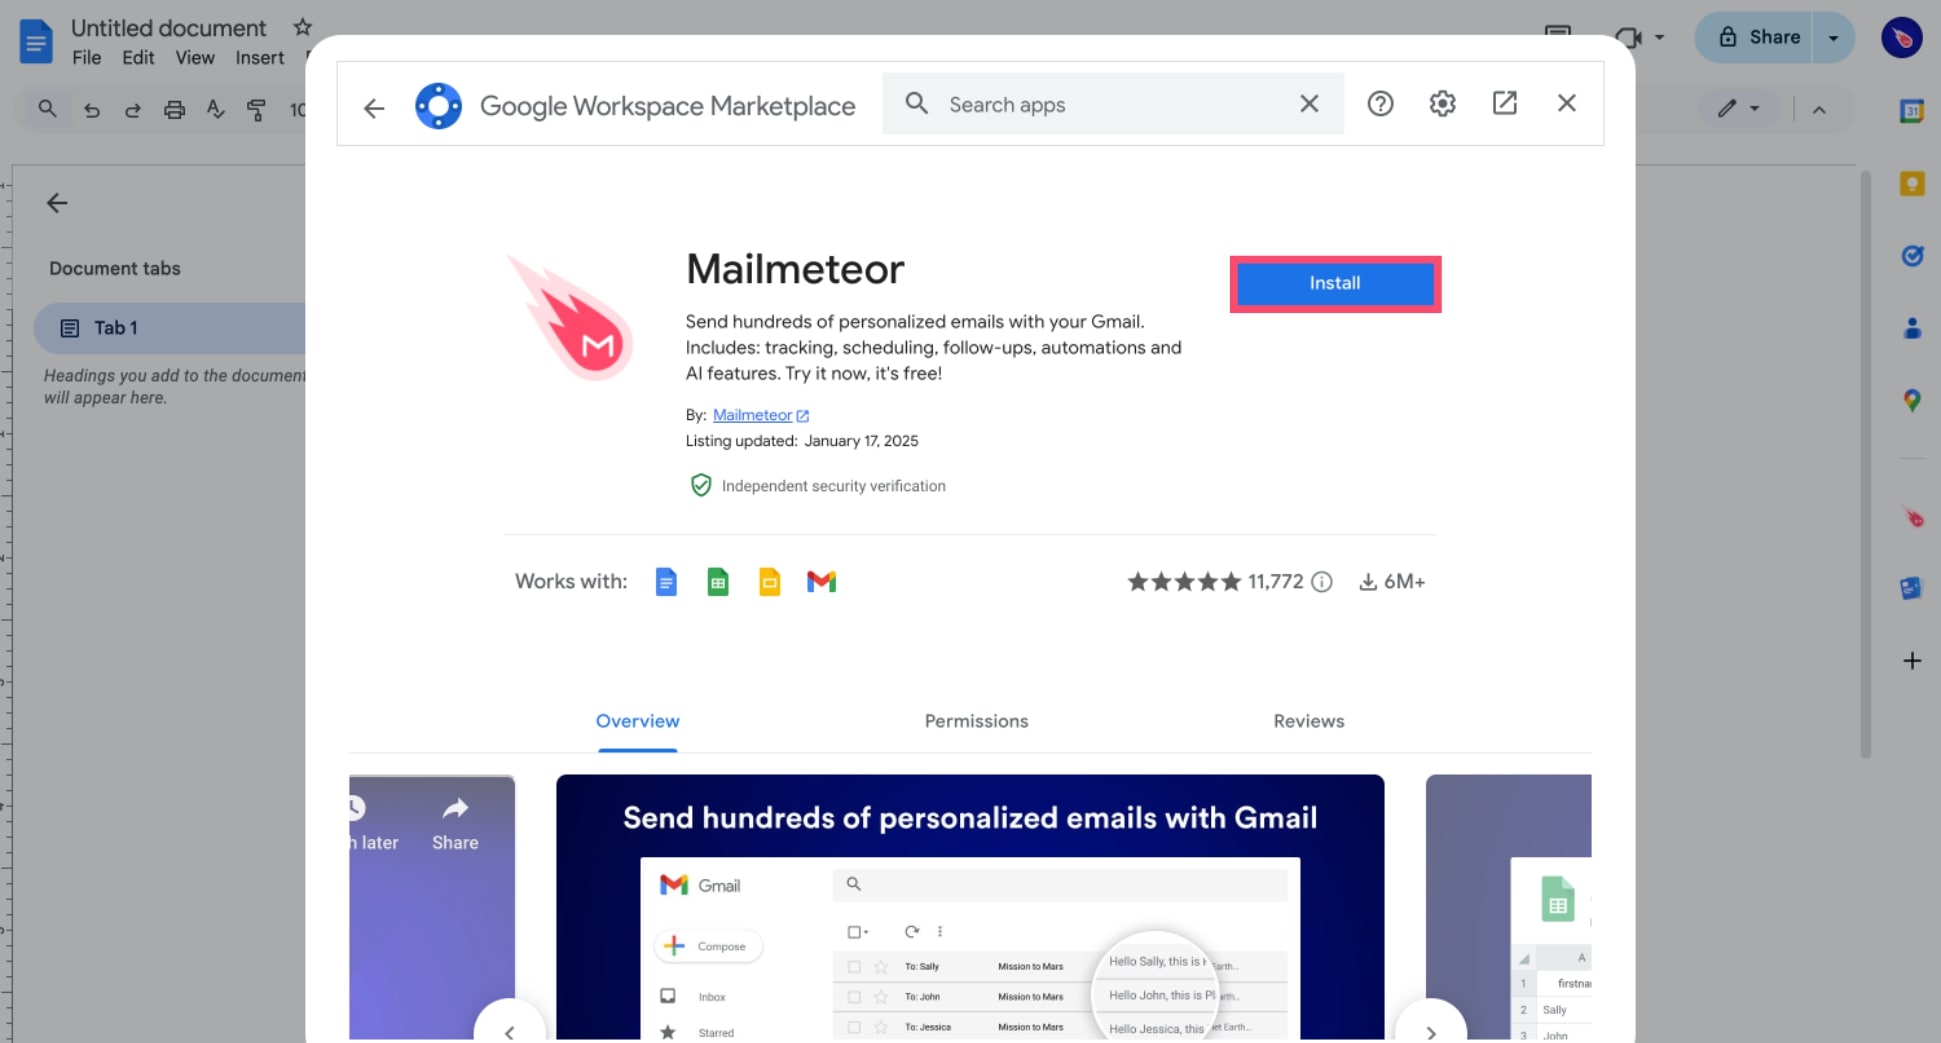
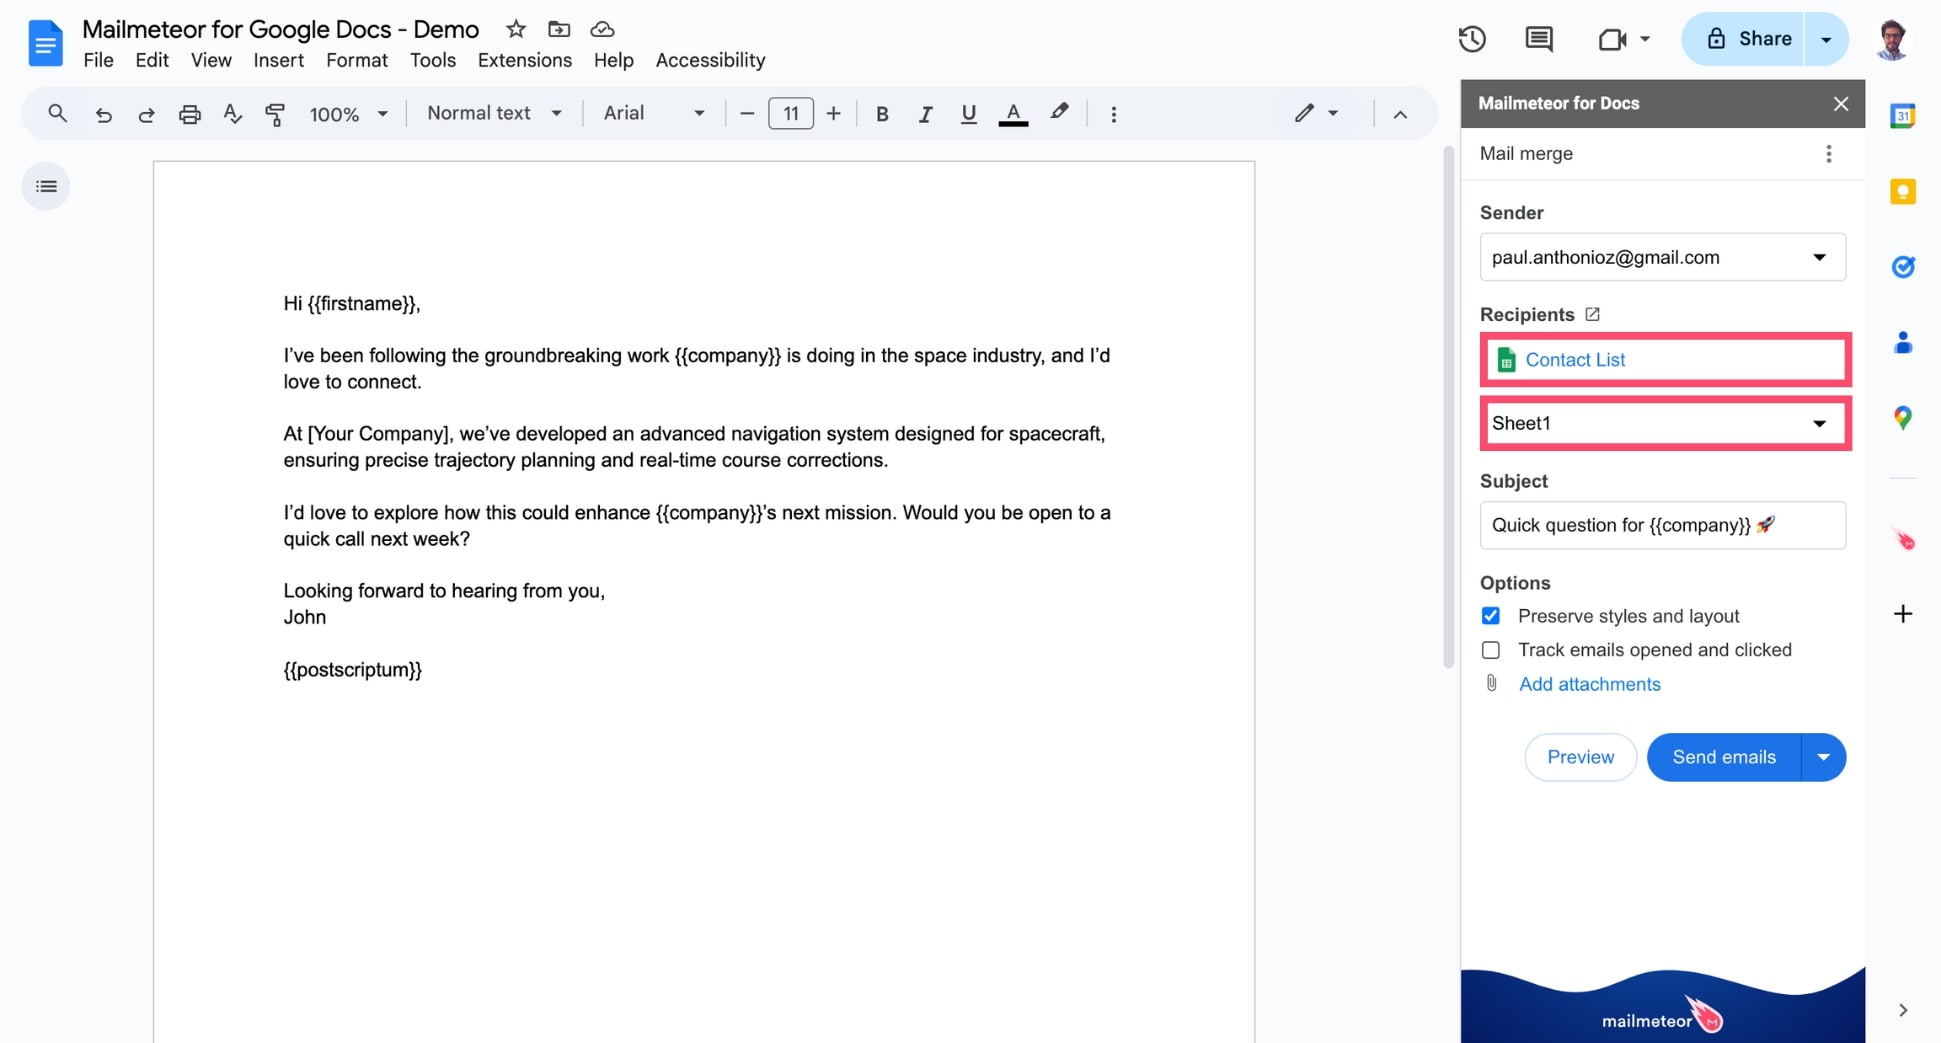
Install Mailmeteor for Google Docs.
-
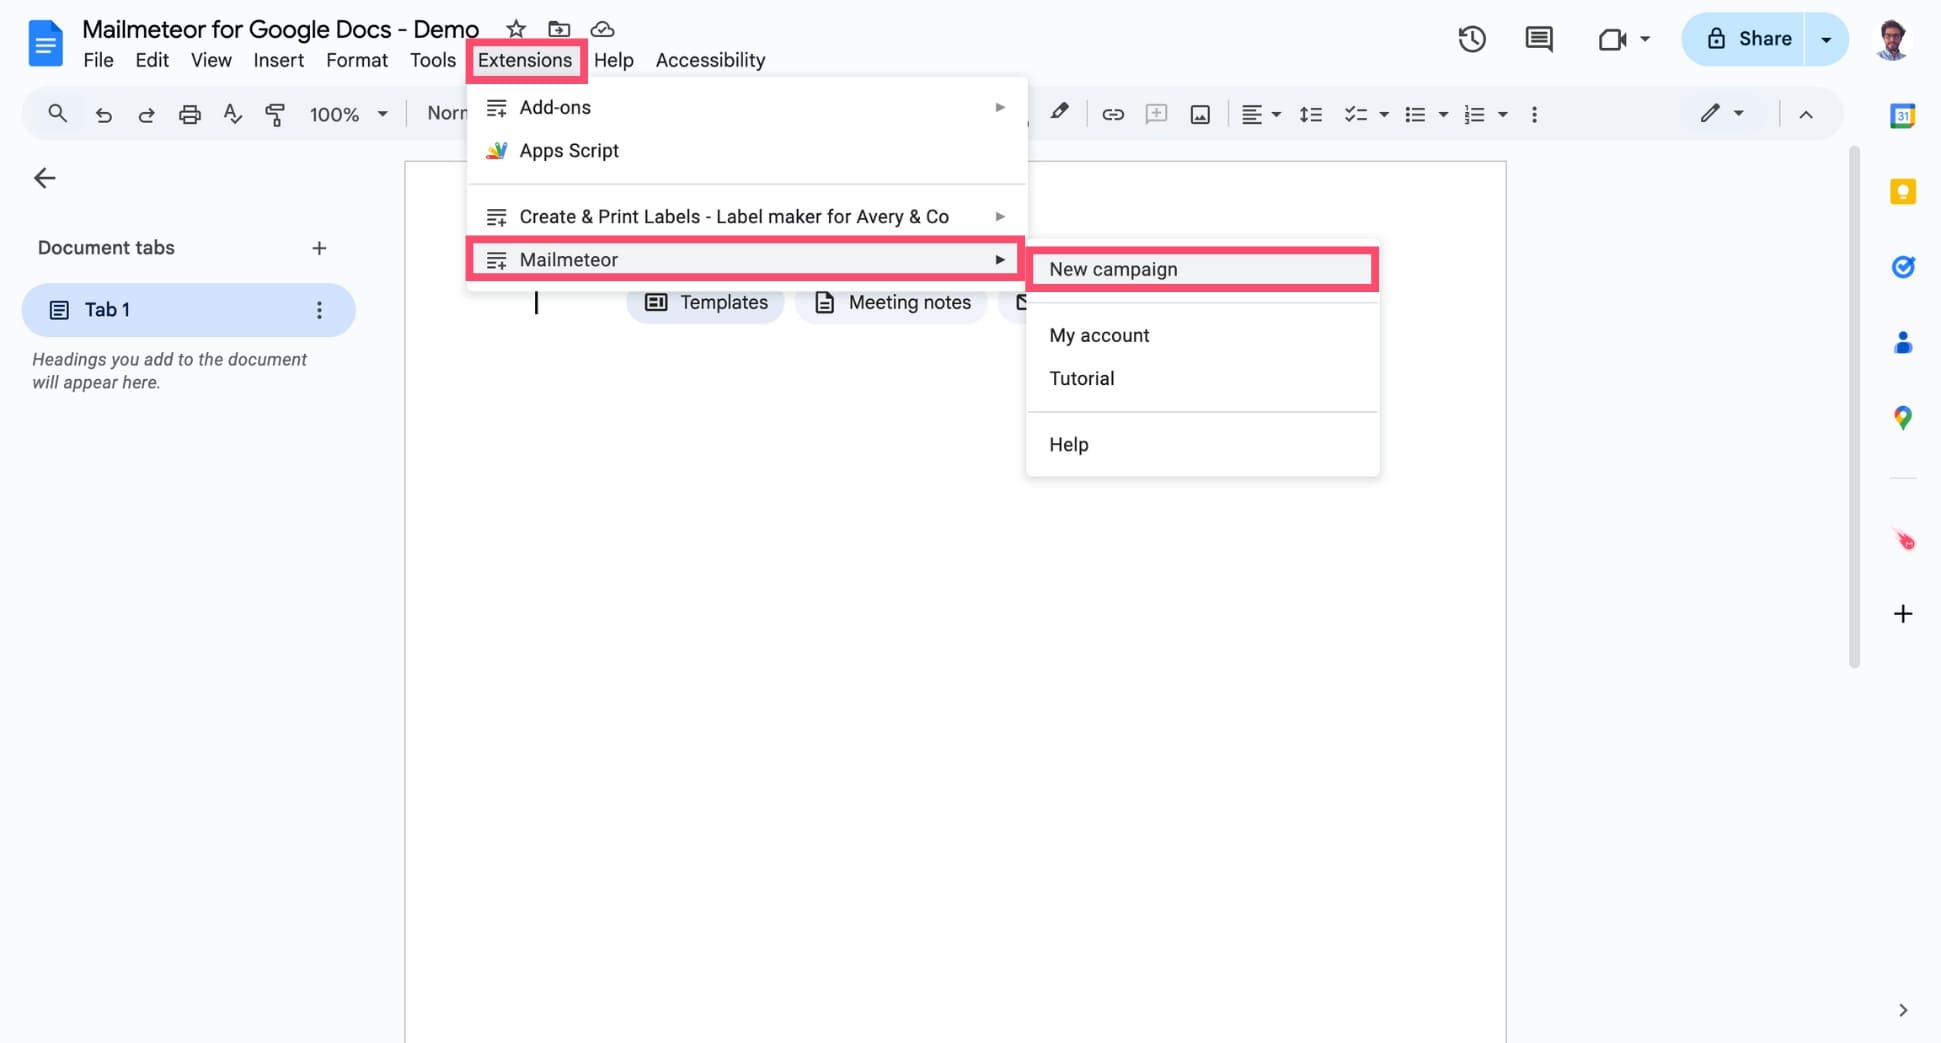
Open a blank document (or a template) in Google Docs, and navigate to Extensions > Mailmeteor > New campaign.
-
Write your email template in the document. You can stick to plain text, or use Google Docs formattings to design your template the way you want:
- Insert images, GIFs, and links
- Customize the layout
- Add formatting
- Attach files
-
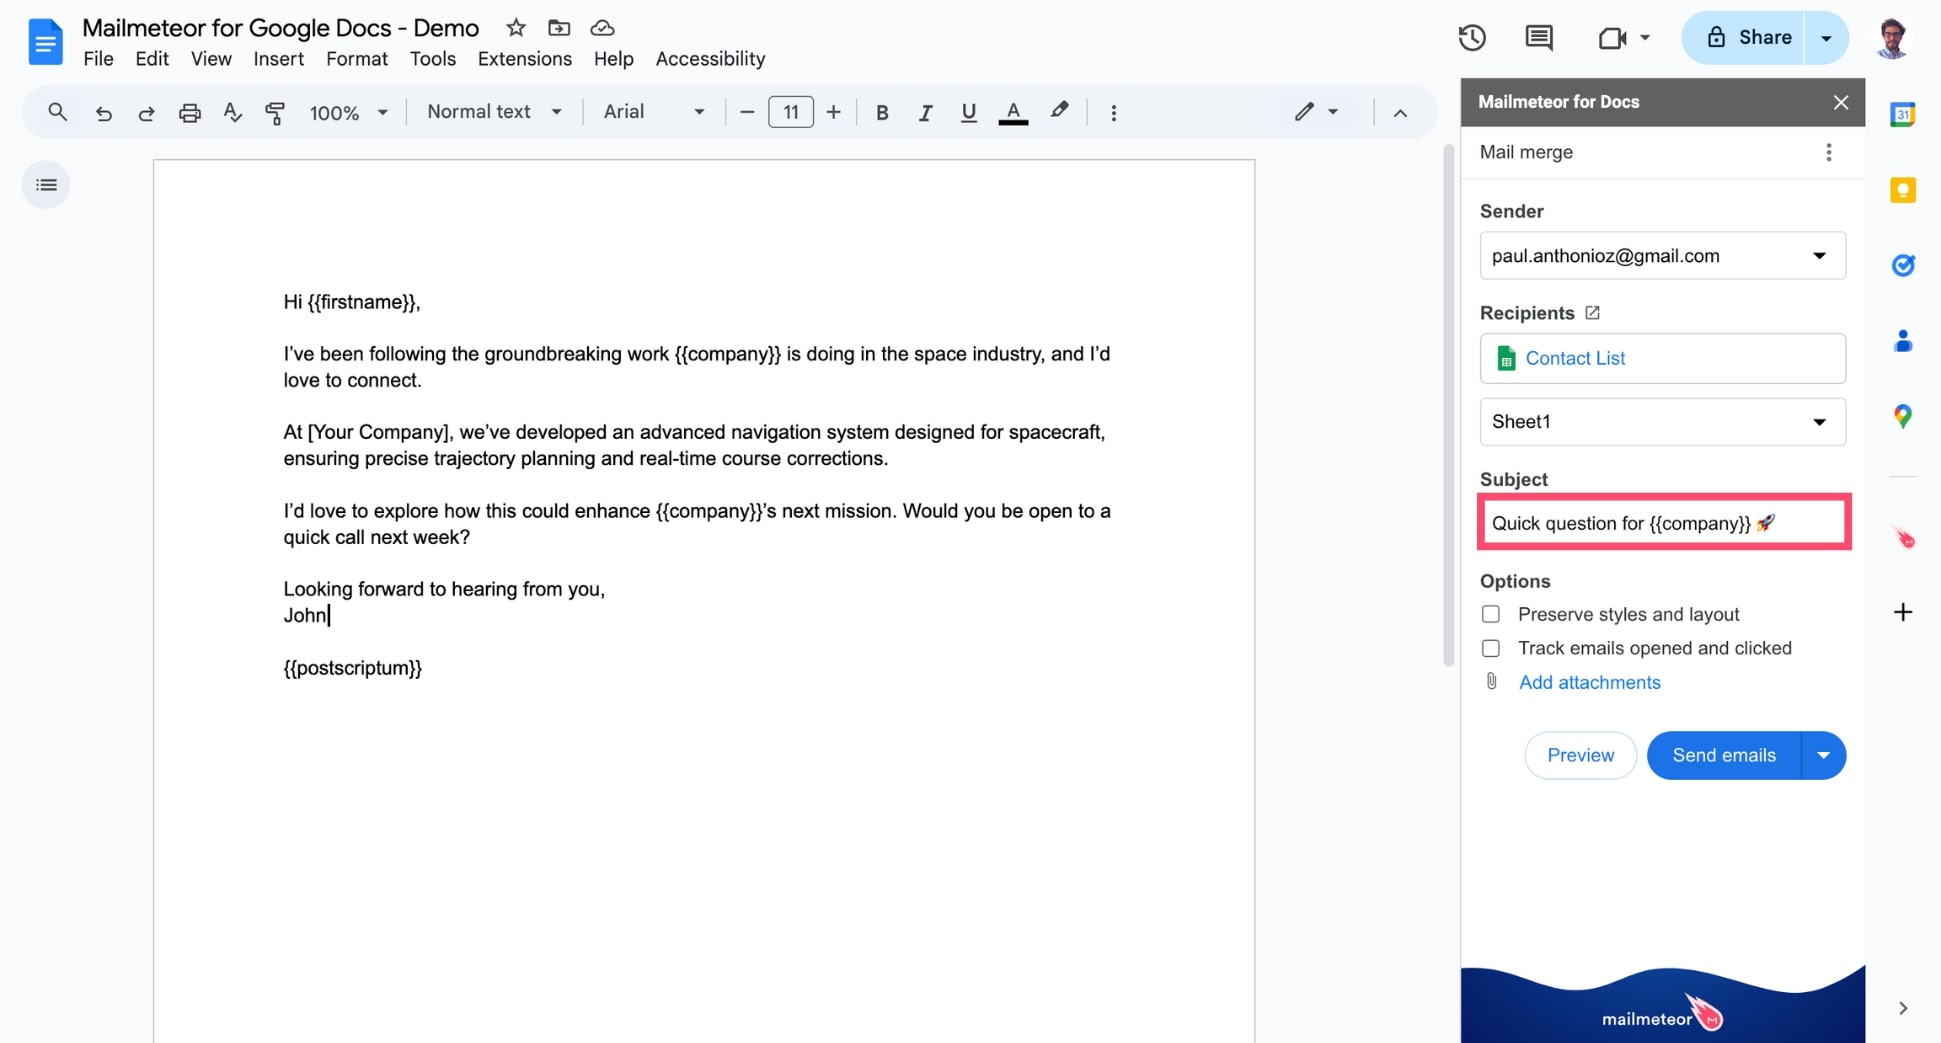
Edit the subject line of your email. By default, we use the title of your Google Docs document as the subject line.
-
Under Recipients, select your Google Sheets spreadsheet to import your recipients and personalize your template.
-
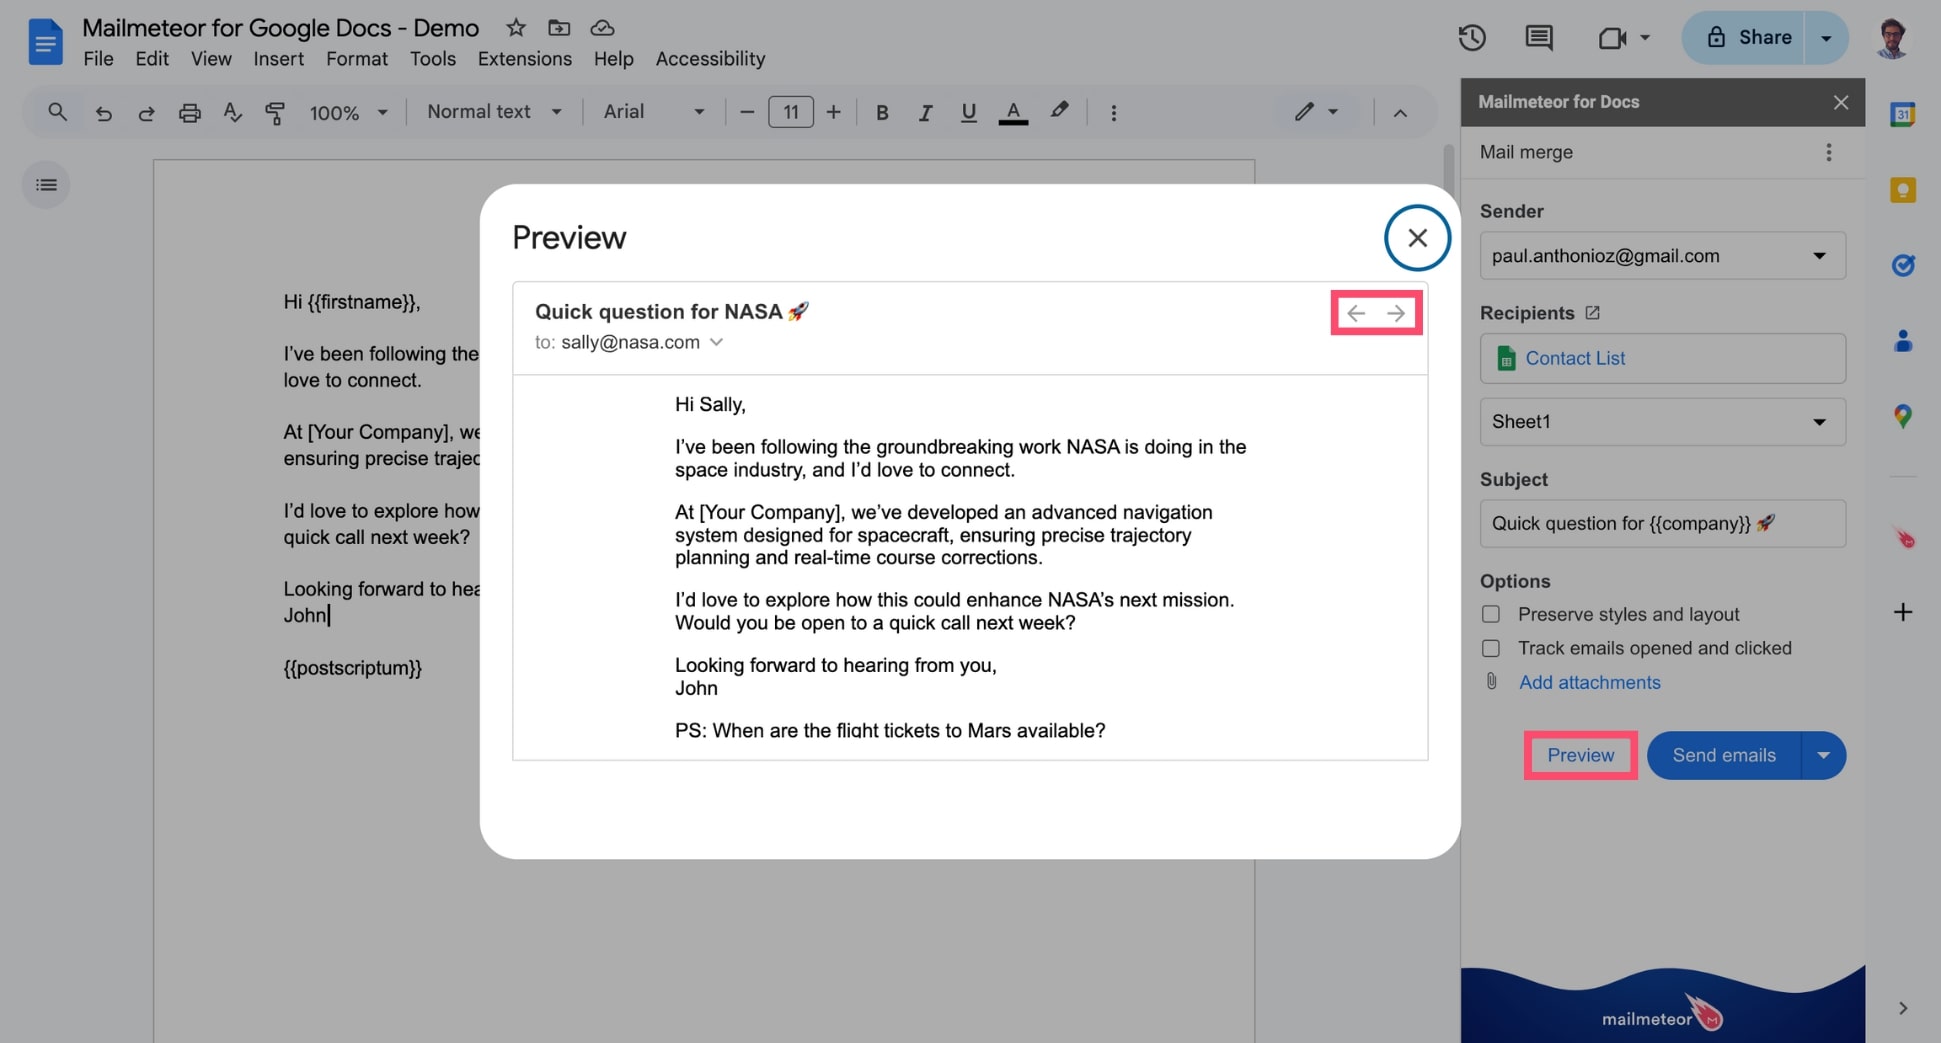
Click Preview to see exactly how your campaign will appear in your recipients’ inboxes. Use the Previous and Next arrows in the top-right corner of the Preview window to view the email for each individual recipient.
-
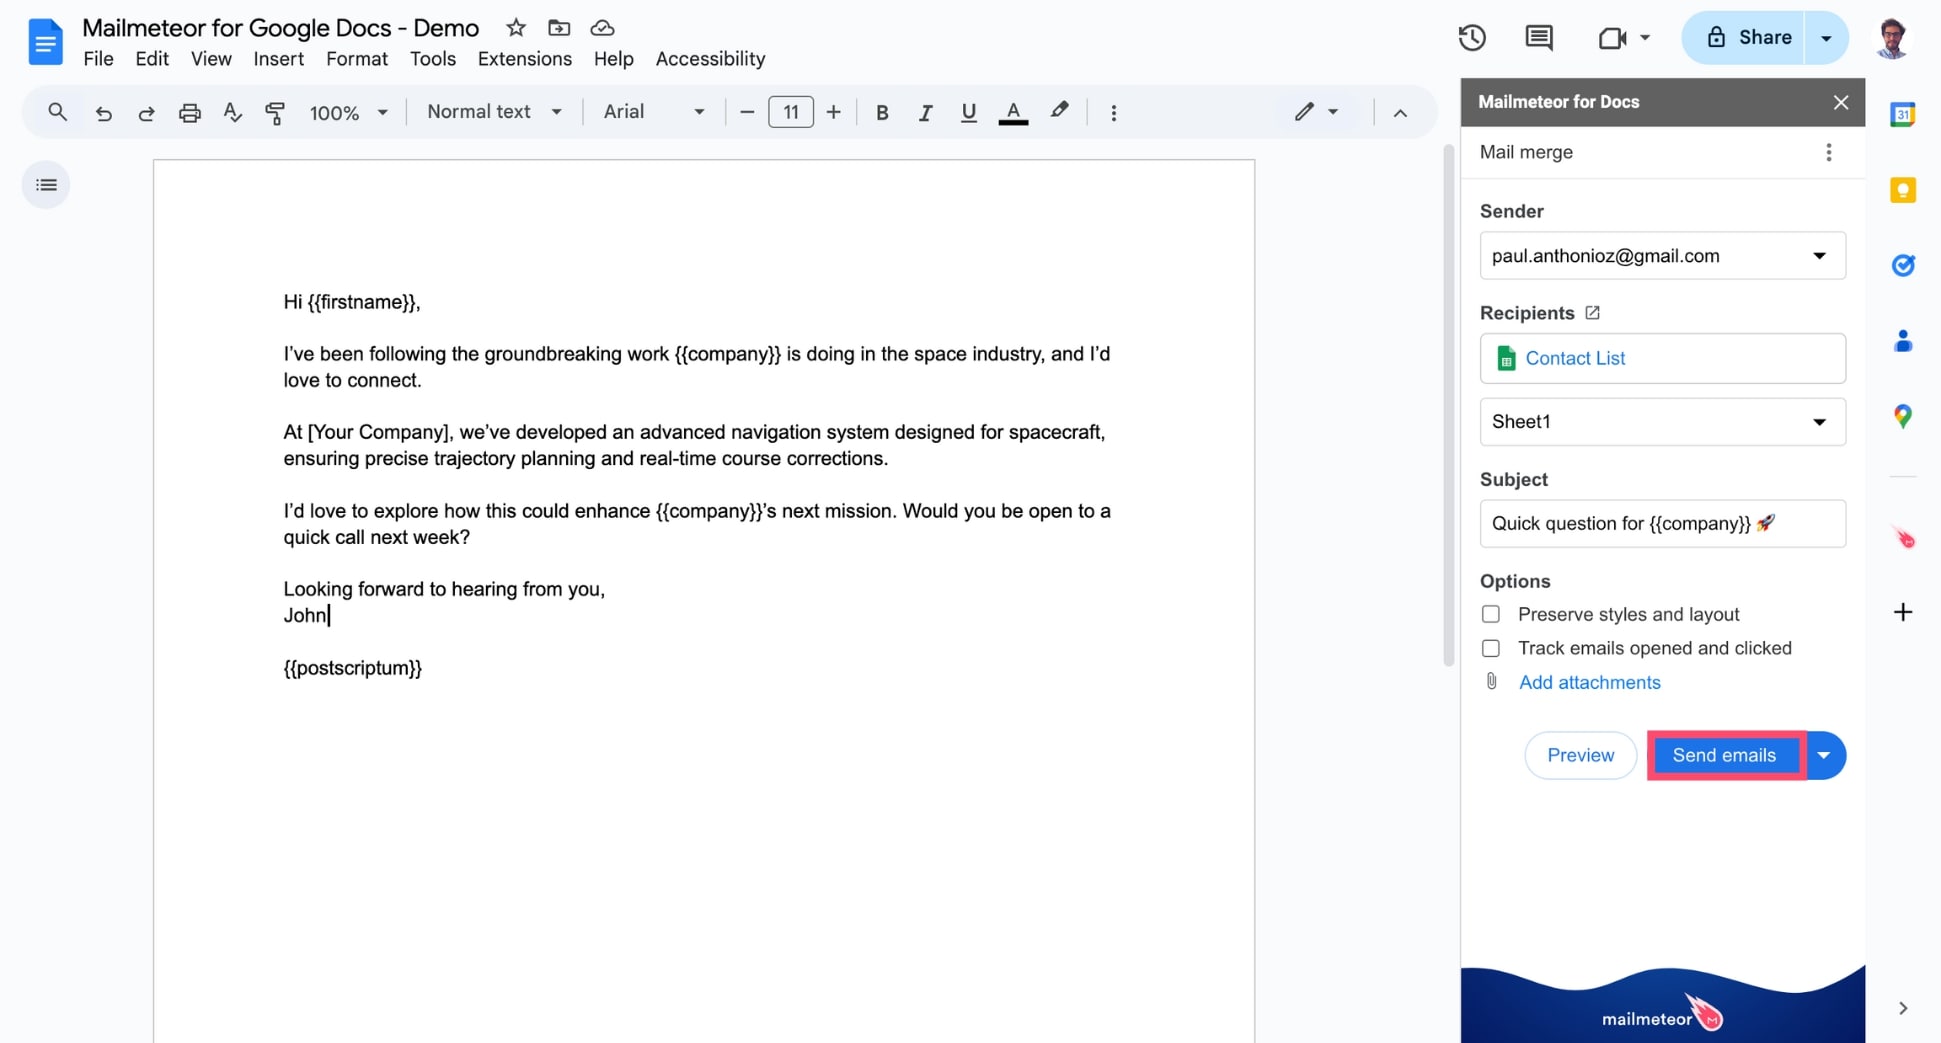
Once your emails look flawless, click Send emails, or schedule your campaign to reach your recipients at the perfect time.
And that’s it. You’ve just sent your first email campaign using Mailmeteor for Google Docs. Congrats! 🎉
Use layouts and variables
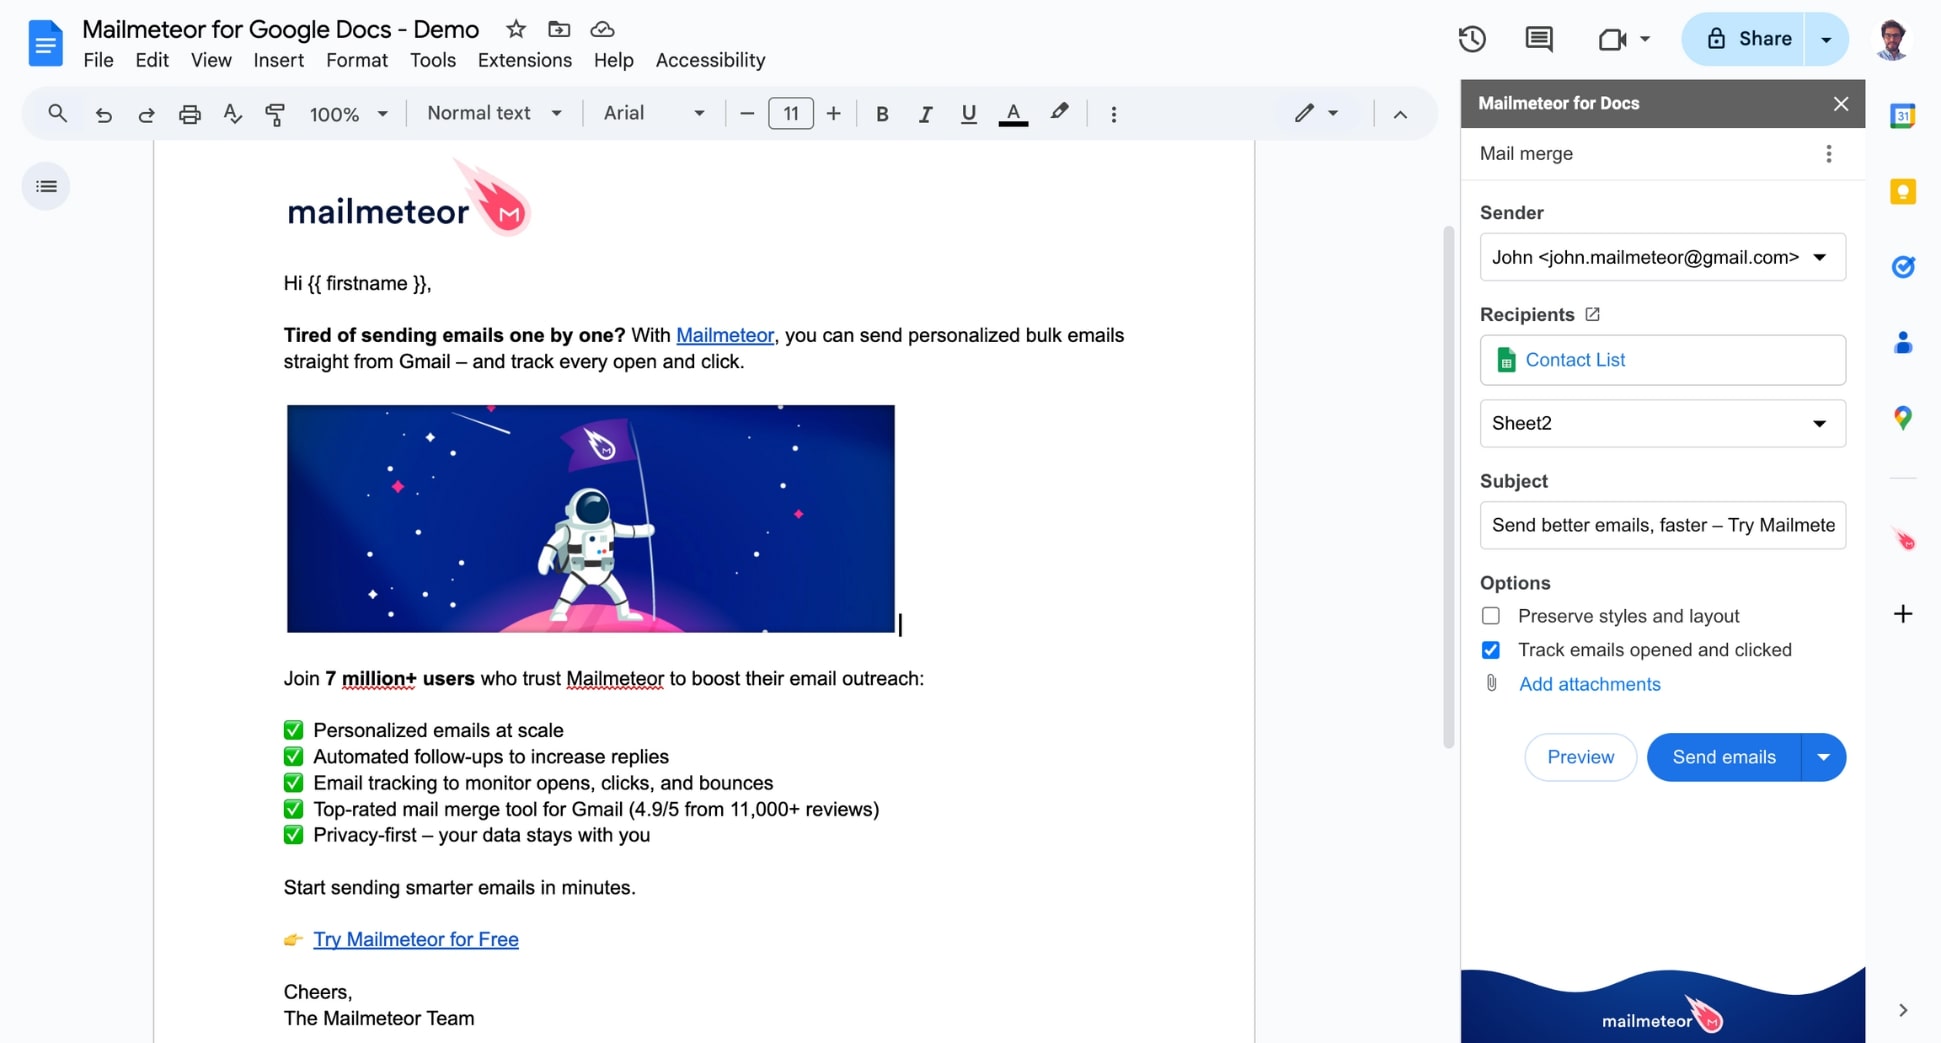
Here’s an example of layout you could use to send good-looking emails from Google Docs:
To personalize your email, simply type the name of a column from your Google Sheets inside double curly brackets, like this: {{ variable }}.
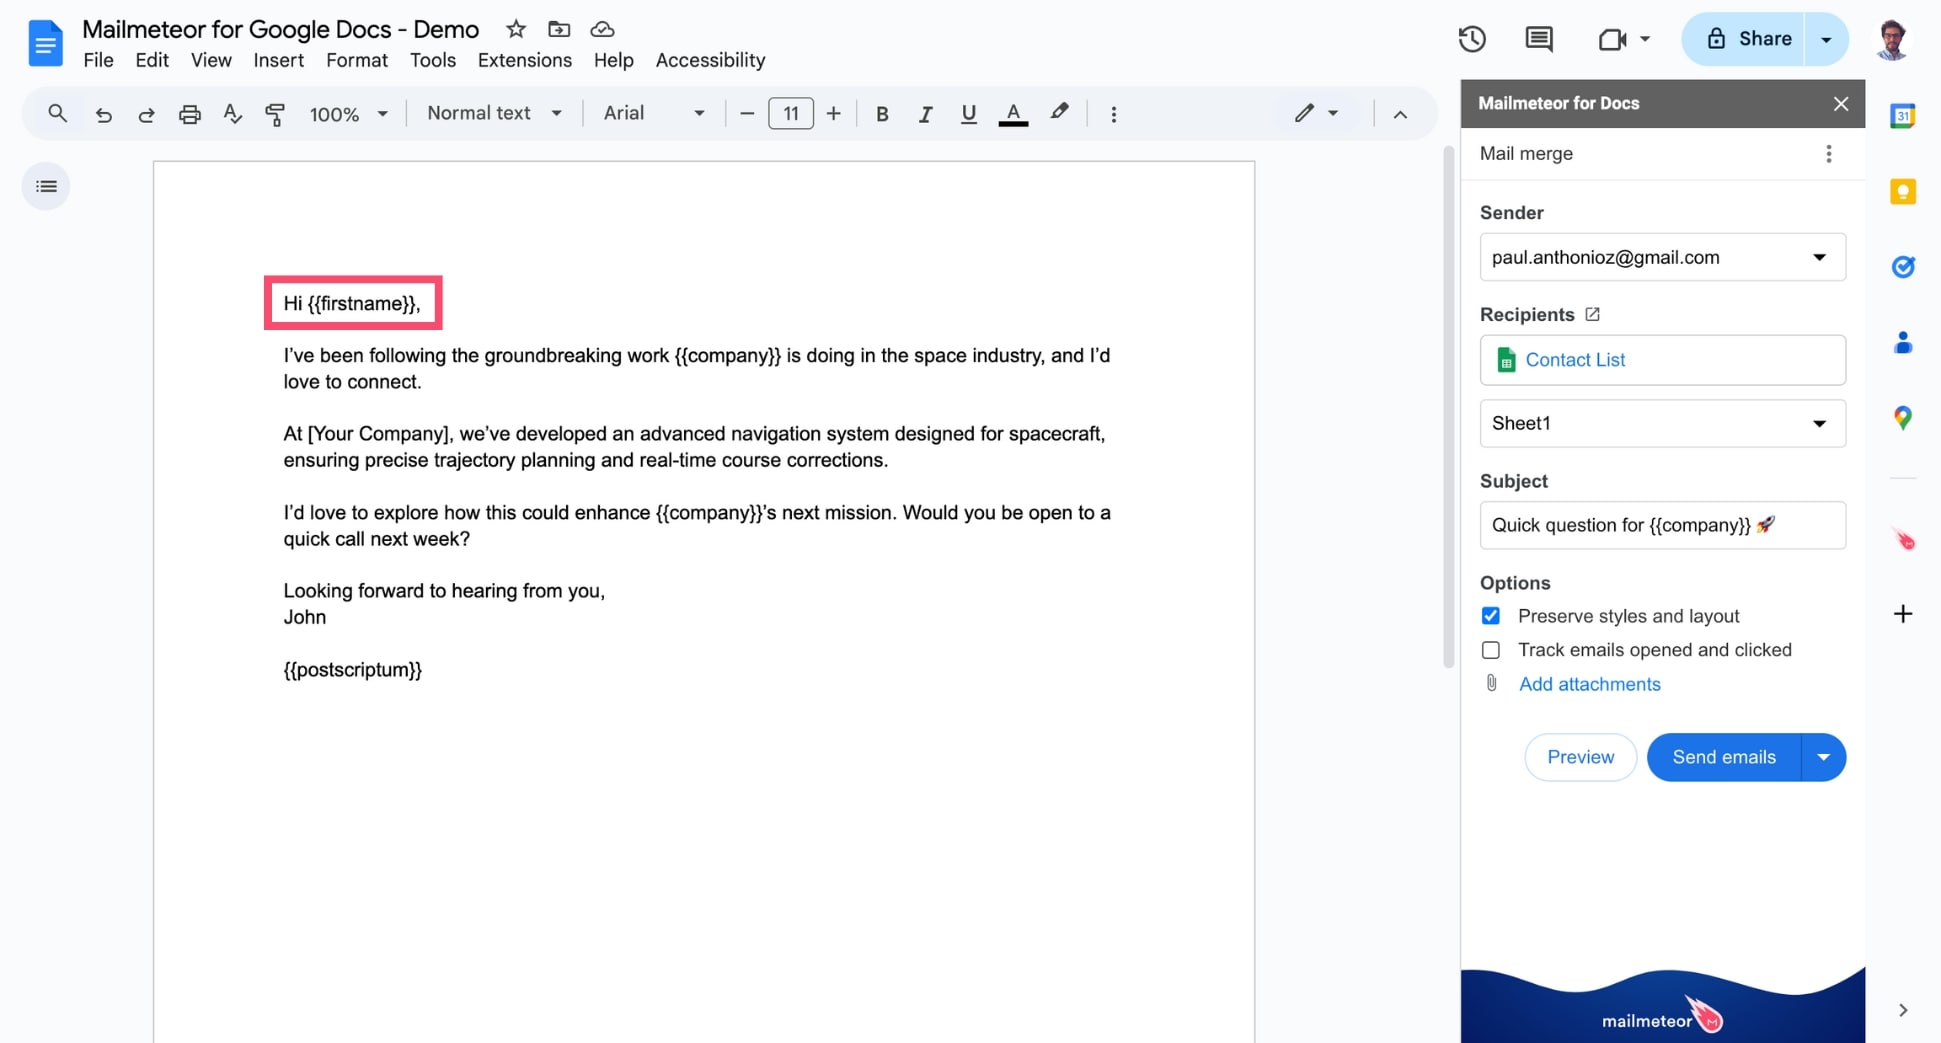
Once you press Send, Mailmeteor will automatically replace all the variables with the corresponding data for each recipient.
More options
Before pressing send, finish configuring your campaign with these options:
-
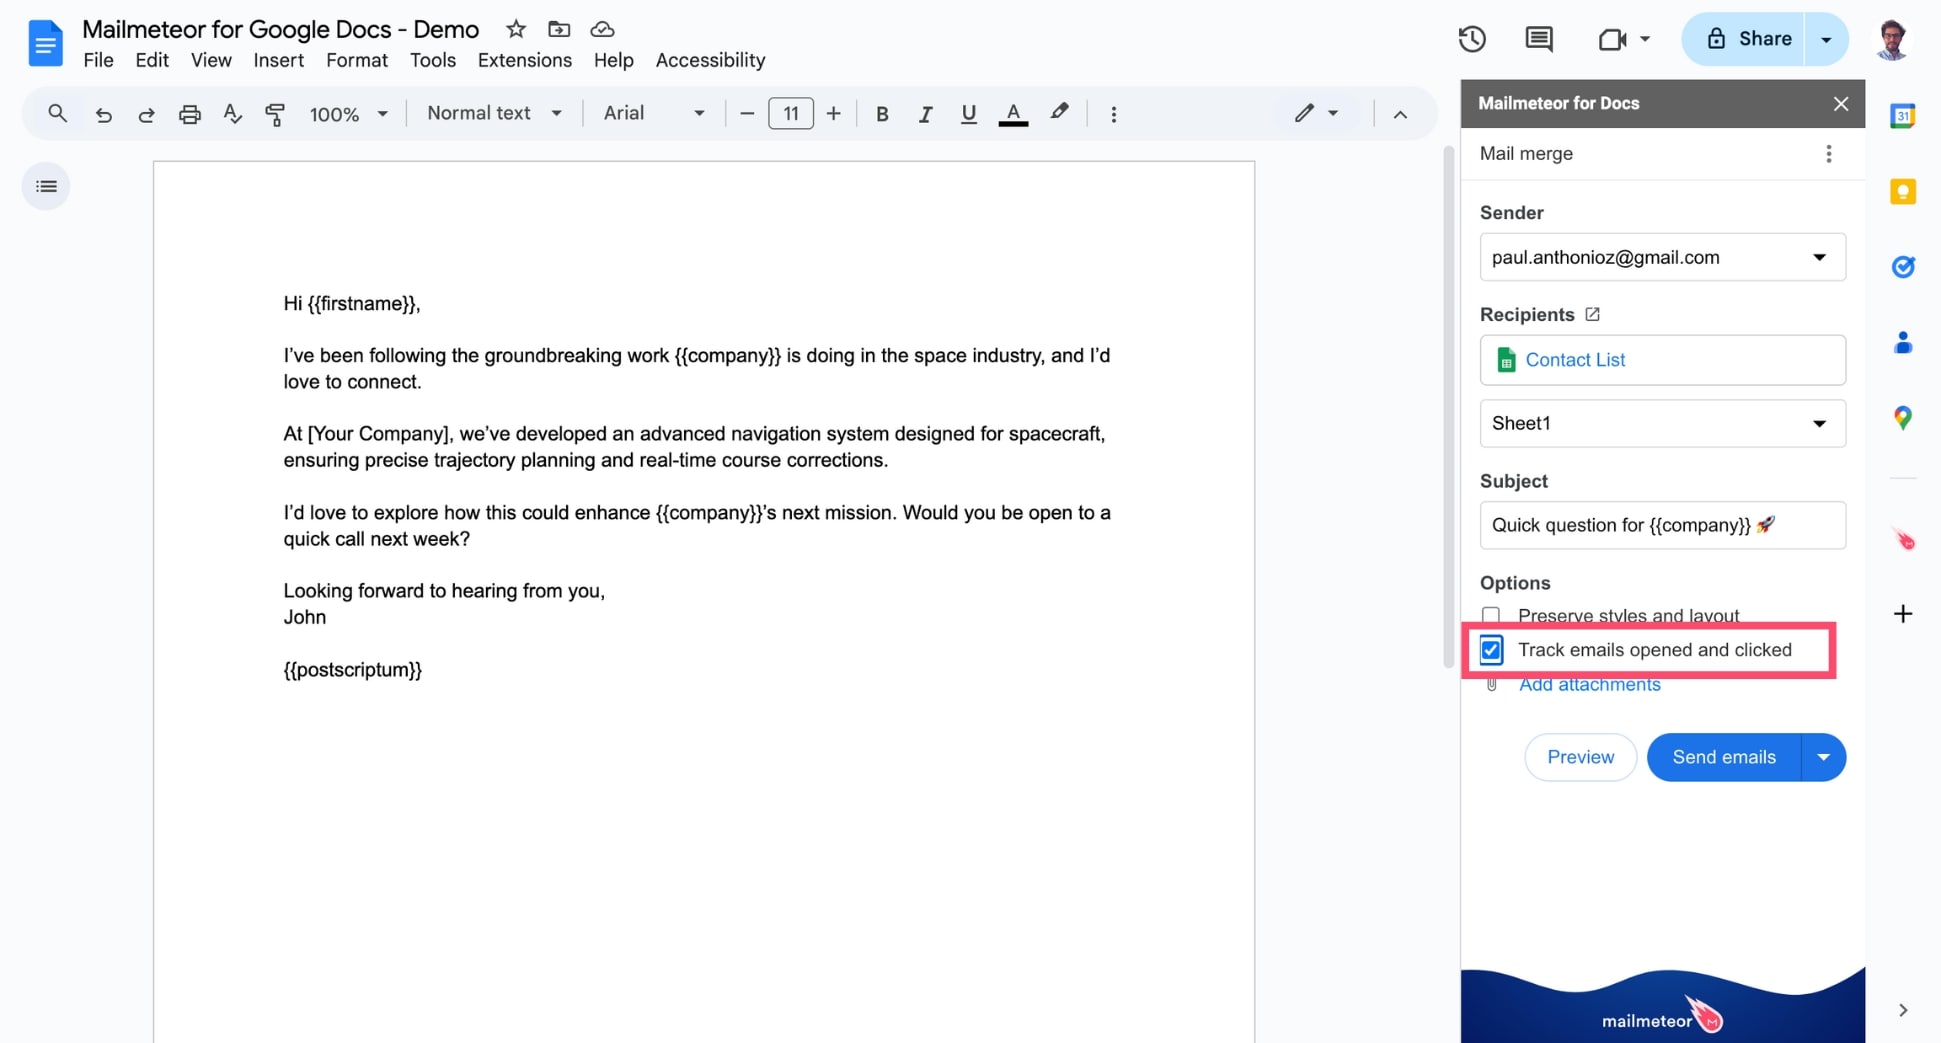
Select Track emails opened and clicked IF you want to monitor your campaign’s performance.
-
Select Preserve styles and layout IF you want to make sure your email looks exactly like what you see in Google Docs. But keep in mind that your
{{ variables }}won’t work if you check this option.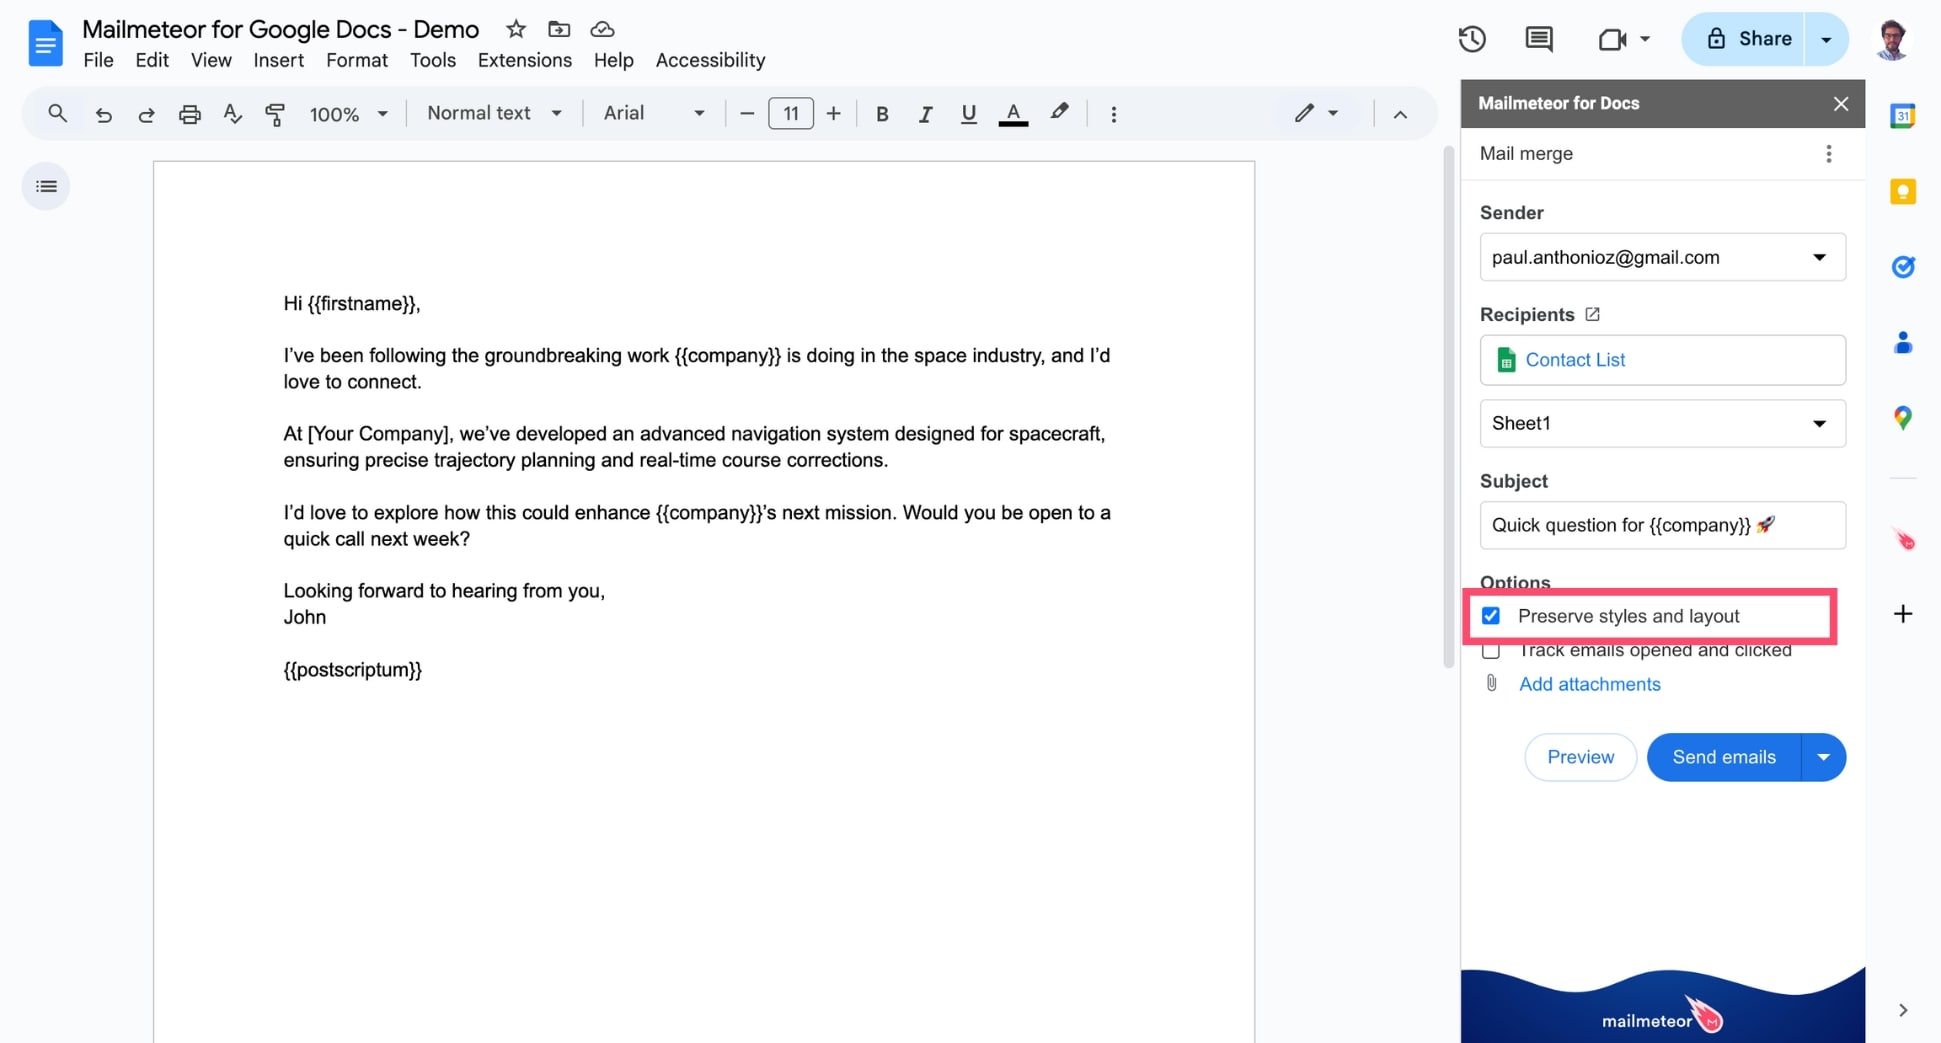
NB: This option captures a screenshot of your Google Docs file and sends it as an image within your email. If this is unchecked, the email is sent in HTML format instead.
Video tutorial
- Install Mailmeteor for Excel.
- Create a new spreadsheet in Excel or open an existing one.
-
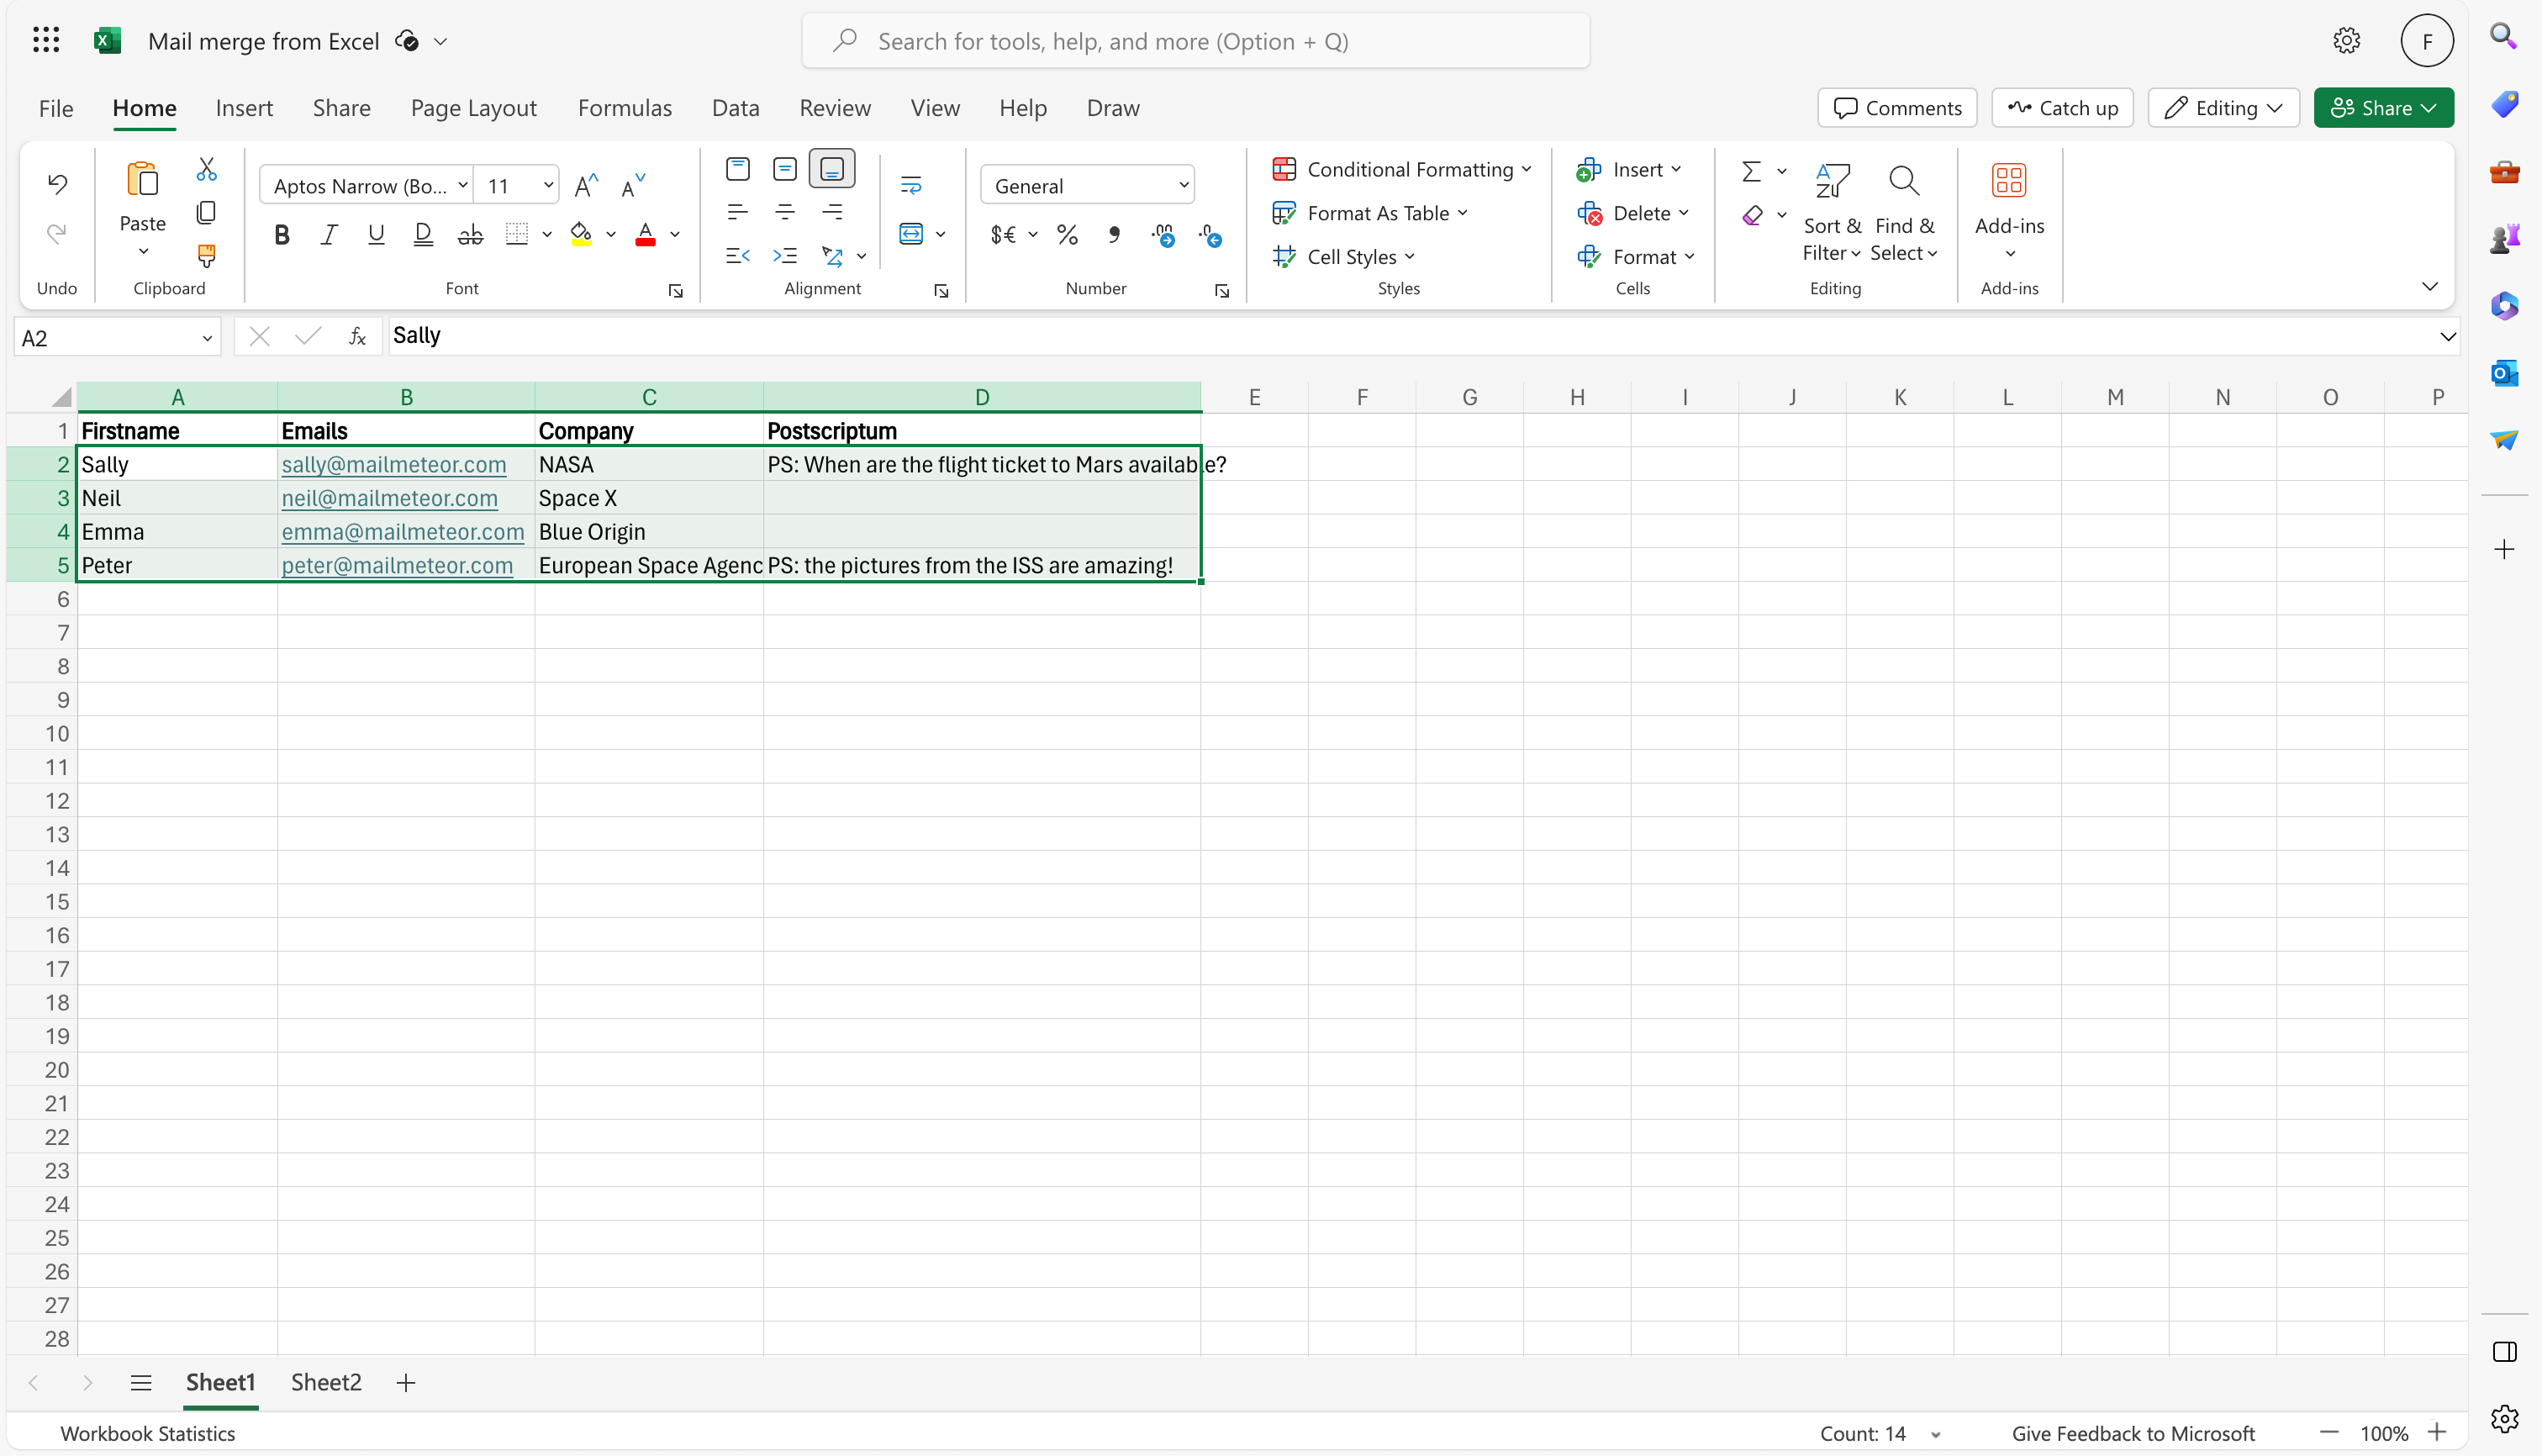
Name your columns by adding text on the first row of your spreadsheet. Each column represents a piece of information about your contacts. In the example below, we’ve added 3 columns: firstname, email, company, and postscriptum.
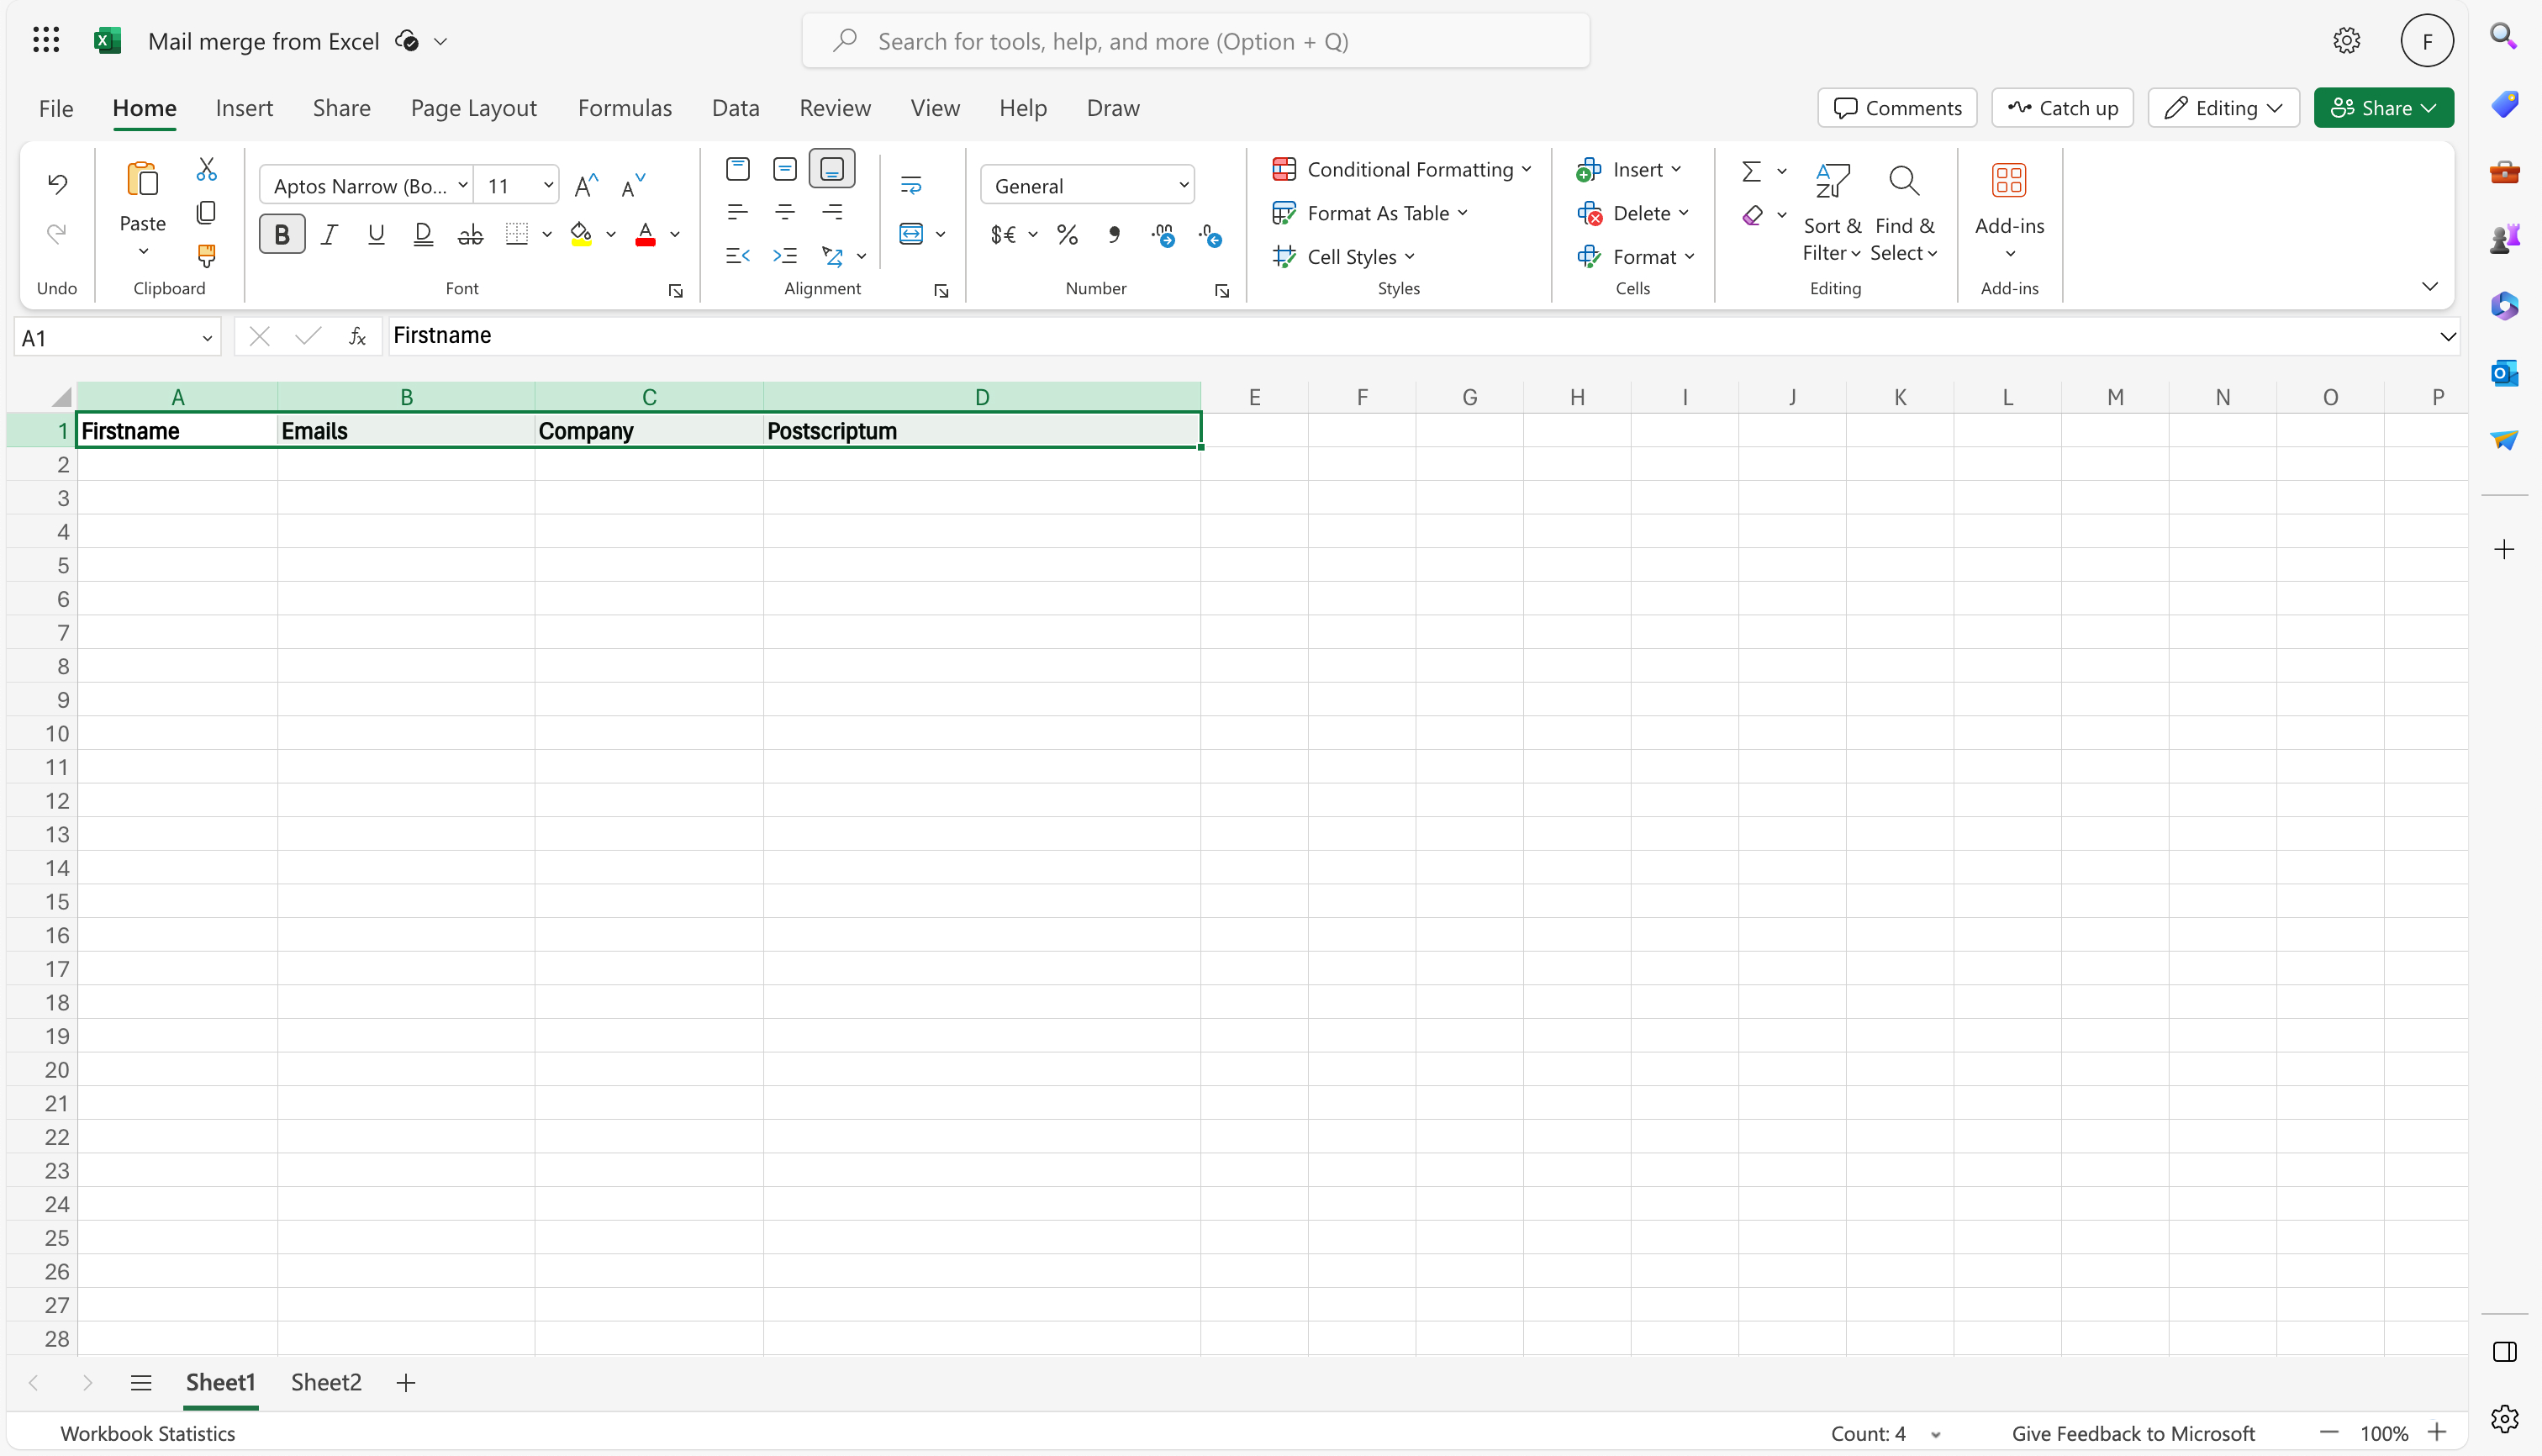
You can add as many columns as you want and pick any column header name you want. The only thing to keep in mind is that headers must be placed on the first row (#1).
-
Fill your spreadsheet with your contacts.
-
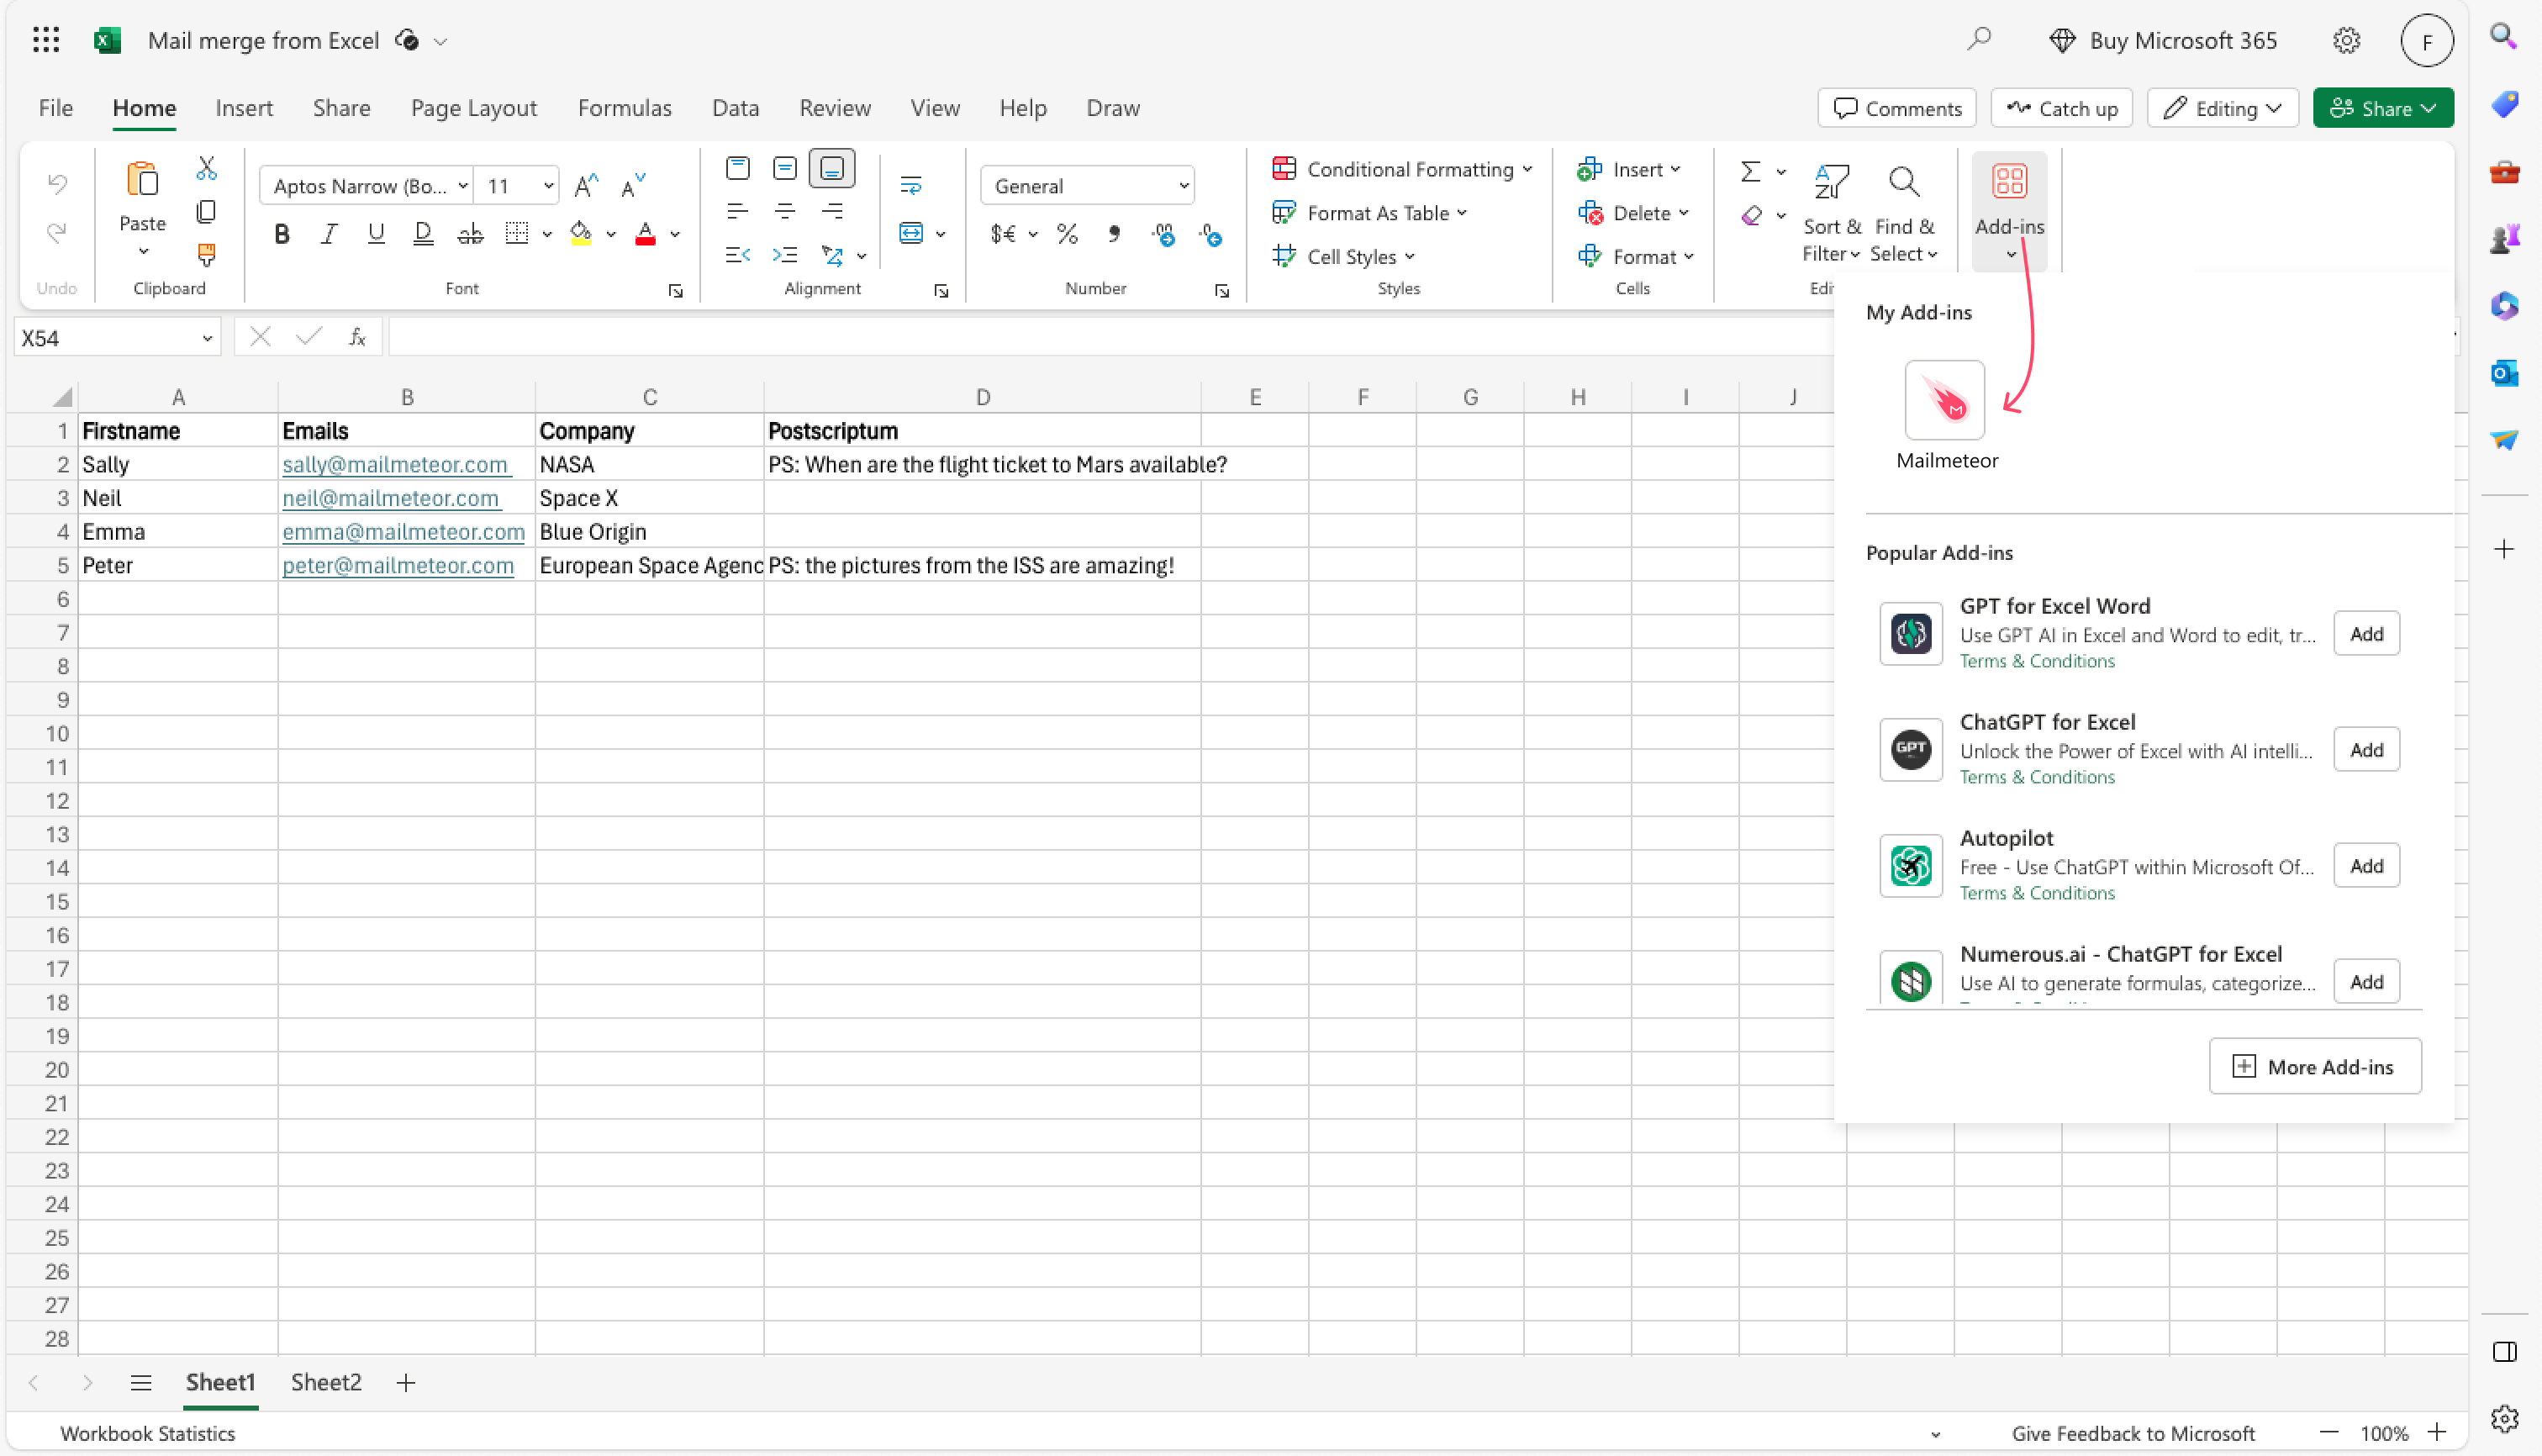
Now that your contact list is ready, you can open Mailmeteor by going to Home > Add-ins > Mailmeteor.
-
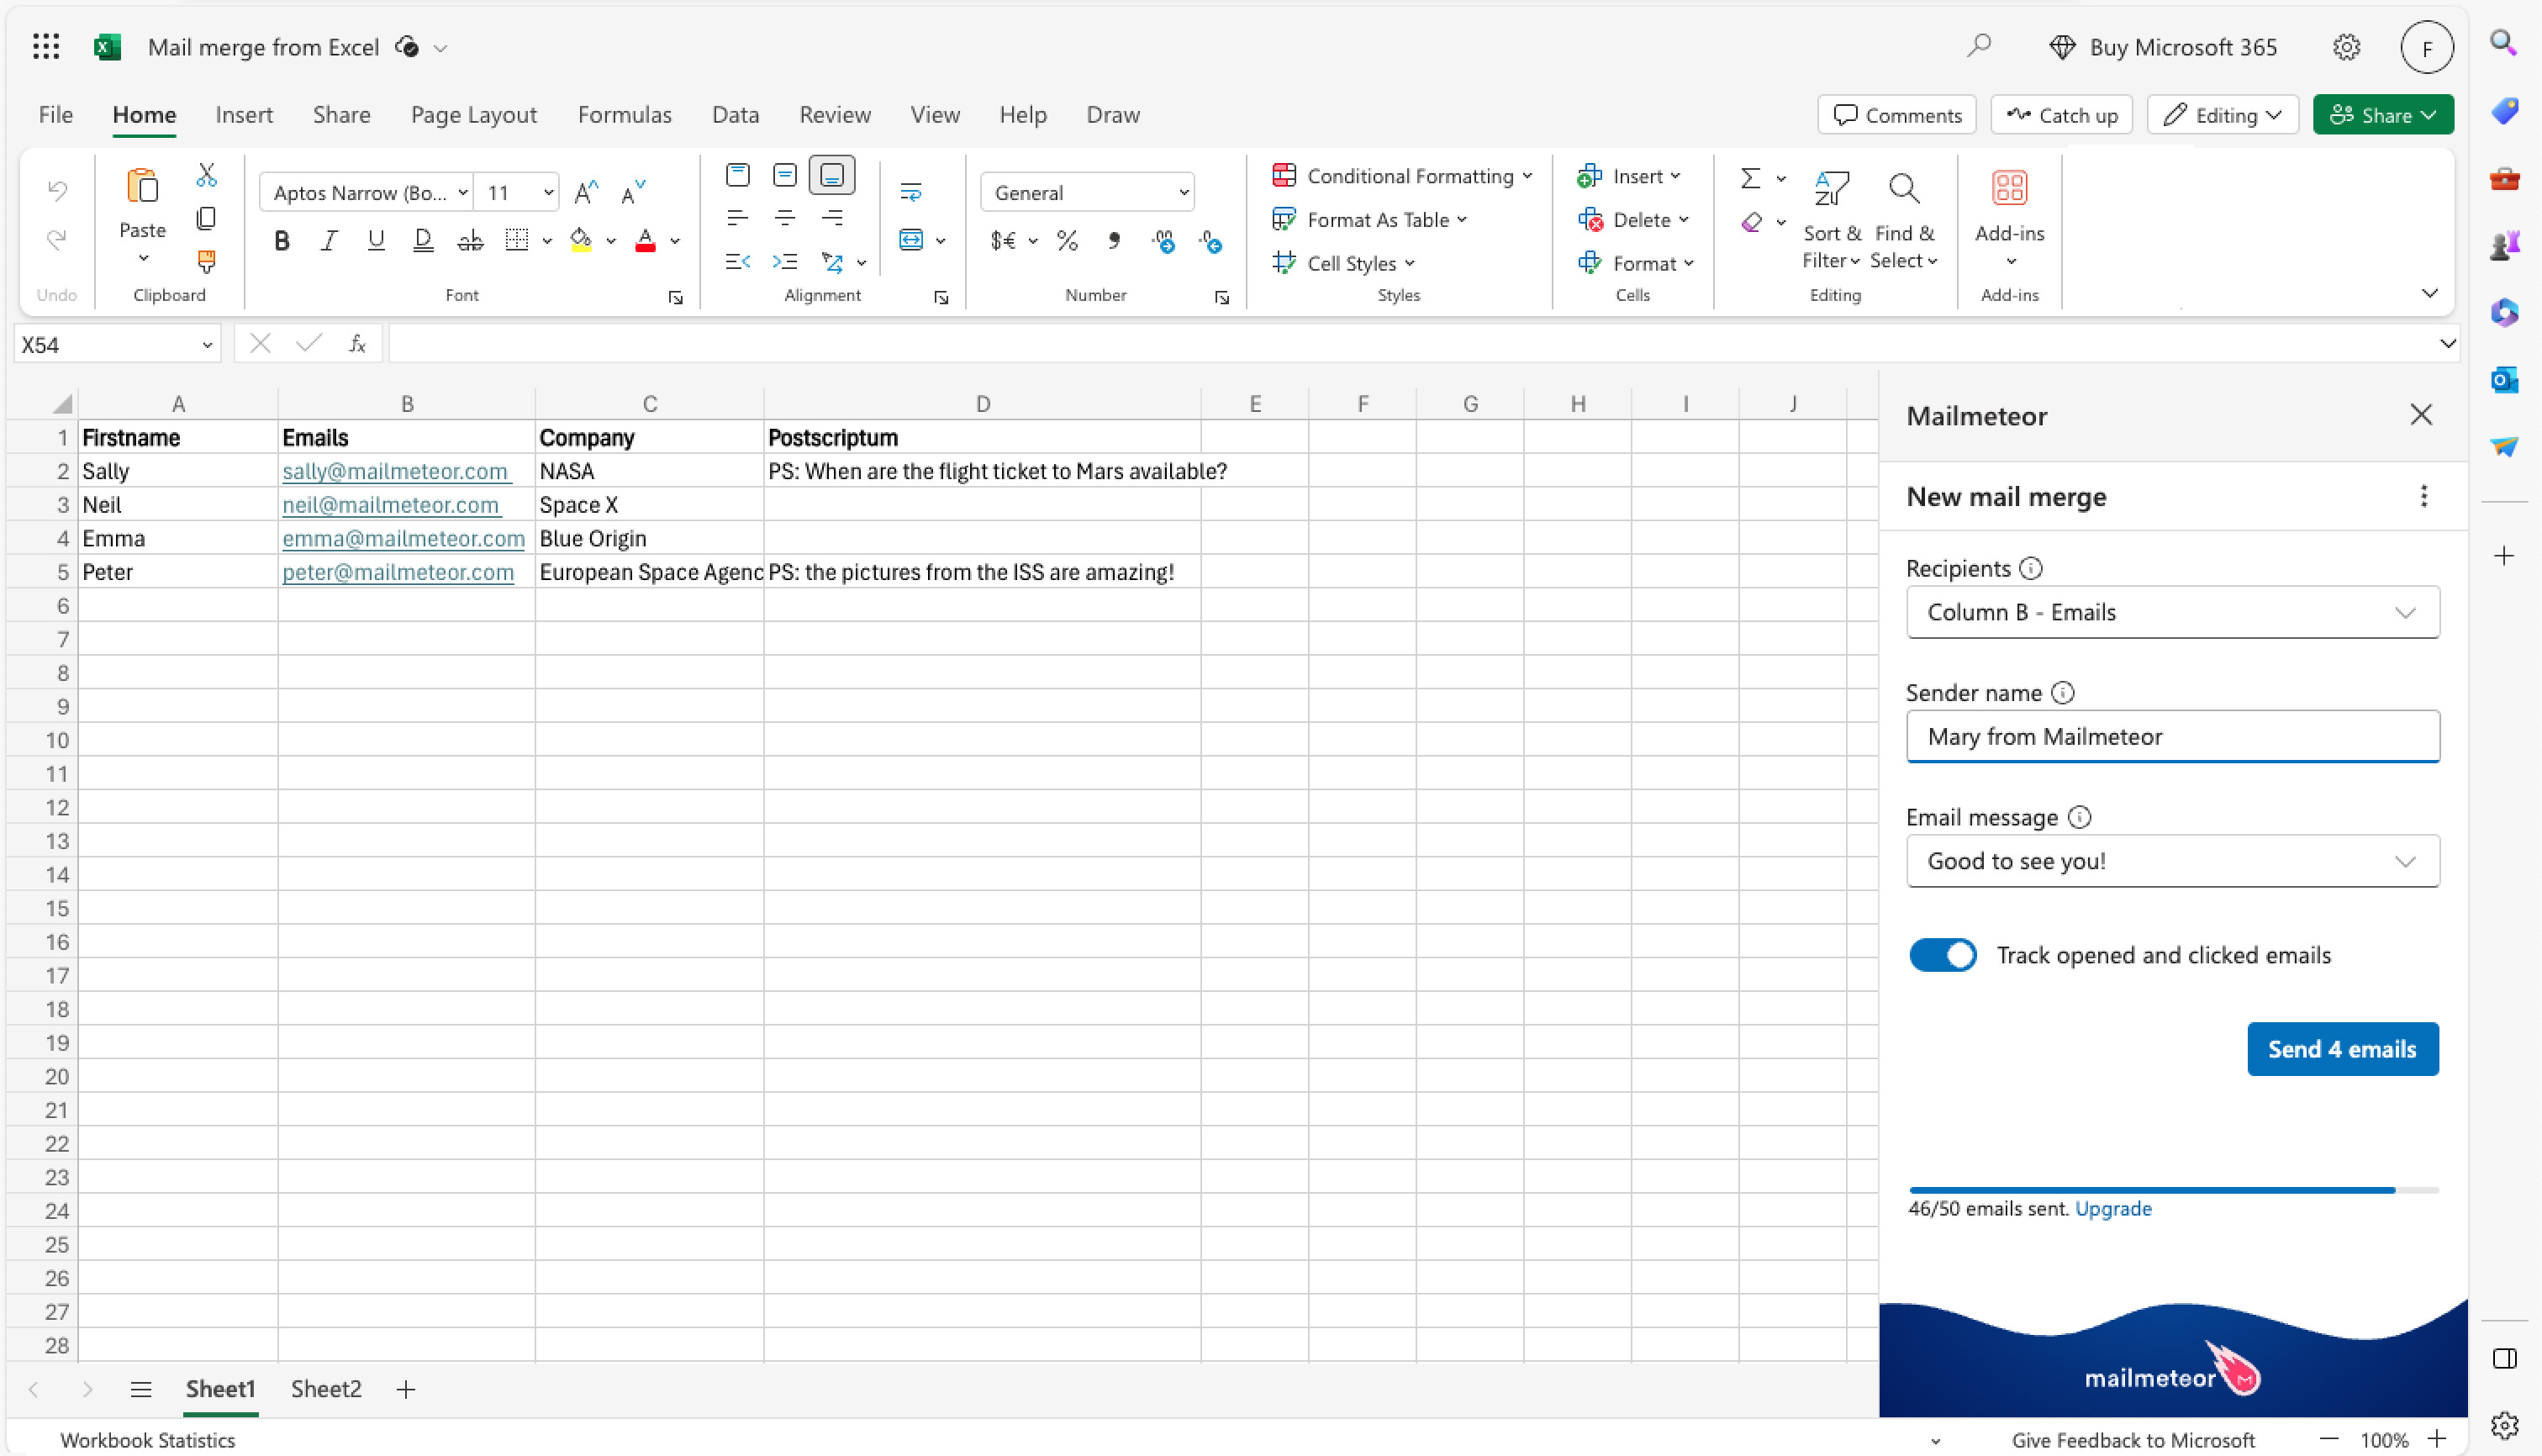
Next, ensure that Mailmeteor selected the right email column (e.g. column B in the screenshot below).
-
Optionaly, you can enter a sender name. This is how your recipients will receive your email. It could be your name (e.g. Neil Armstrong) or your company name (e.g. Nasa).
-
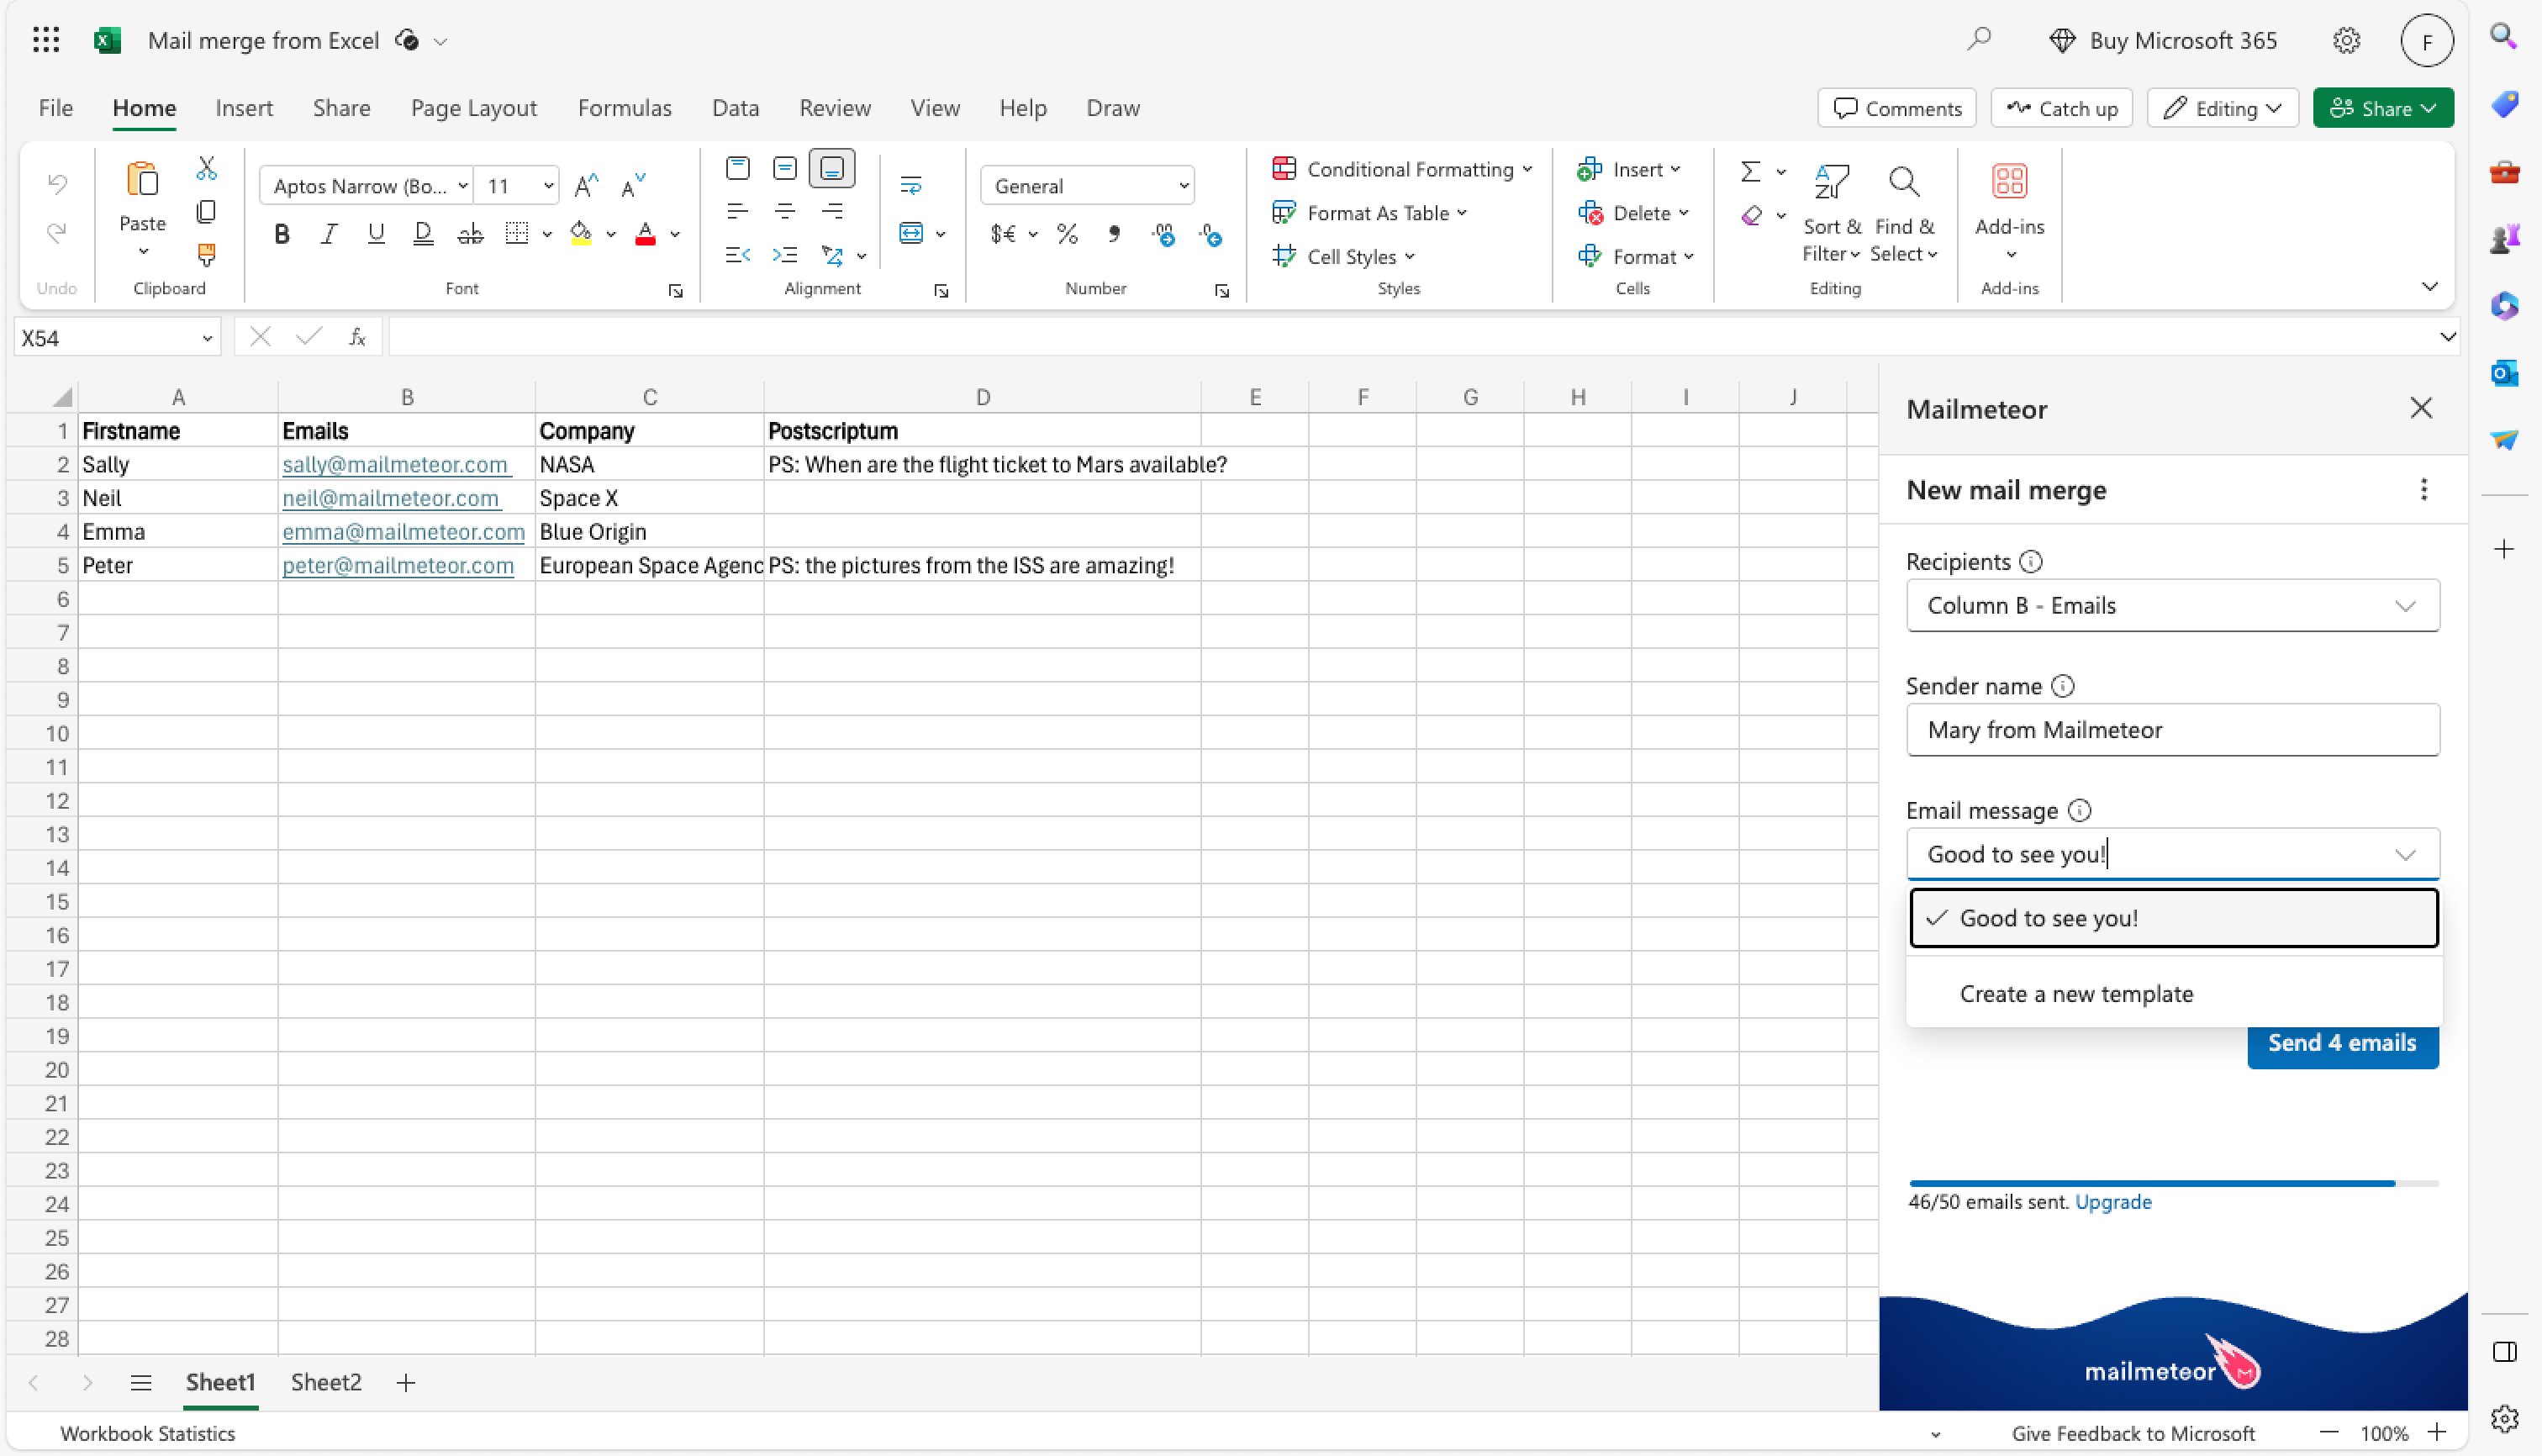
Select your email template. This is the content of the email that you’re recipient will receive (including the subject line, content and attachments).
If you haven’t created a template yet, you can select the “Create a new template” option. It will open the Mailmeteor Dashboard where you can compose emails and apply formatting, insert links, create bullet lists and so on.
To personalize your email with information from your spreadsheet, you can insert variables (aka merge fields) into your email, such as
{{ variable }}. Read our guide on personalization if you’d like to learn more about it. -
Once you’re ready, click “Send emails” to launch your campaign 🚀
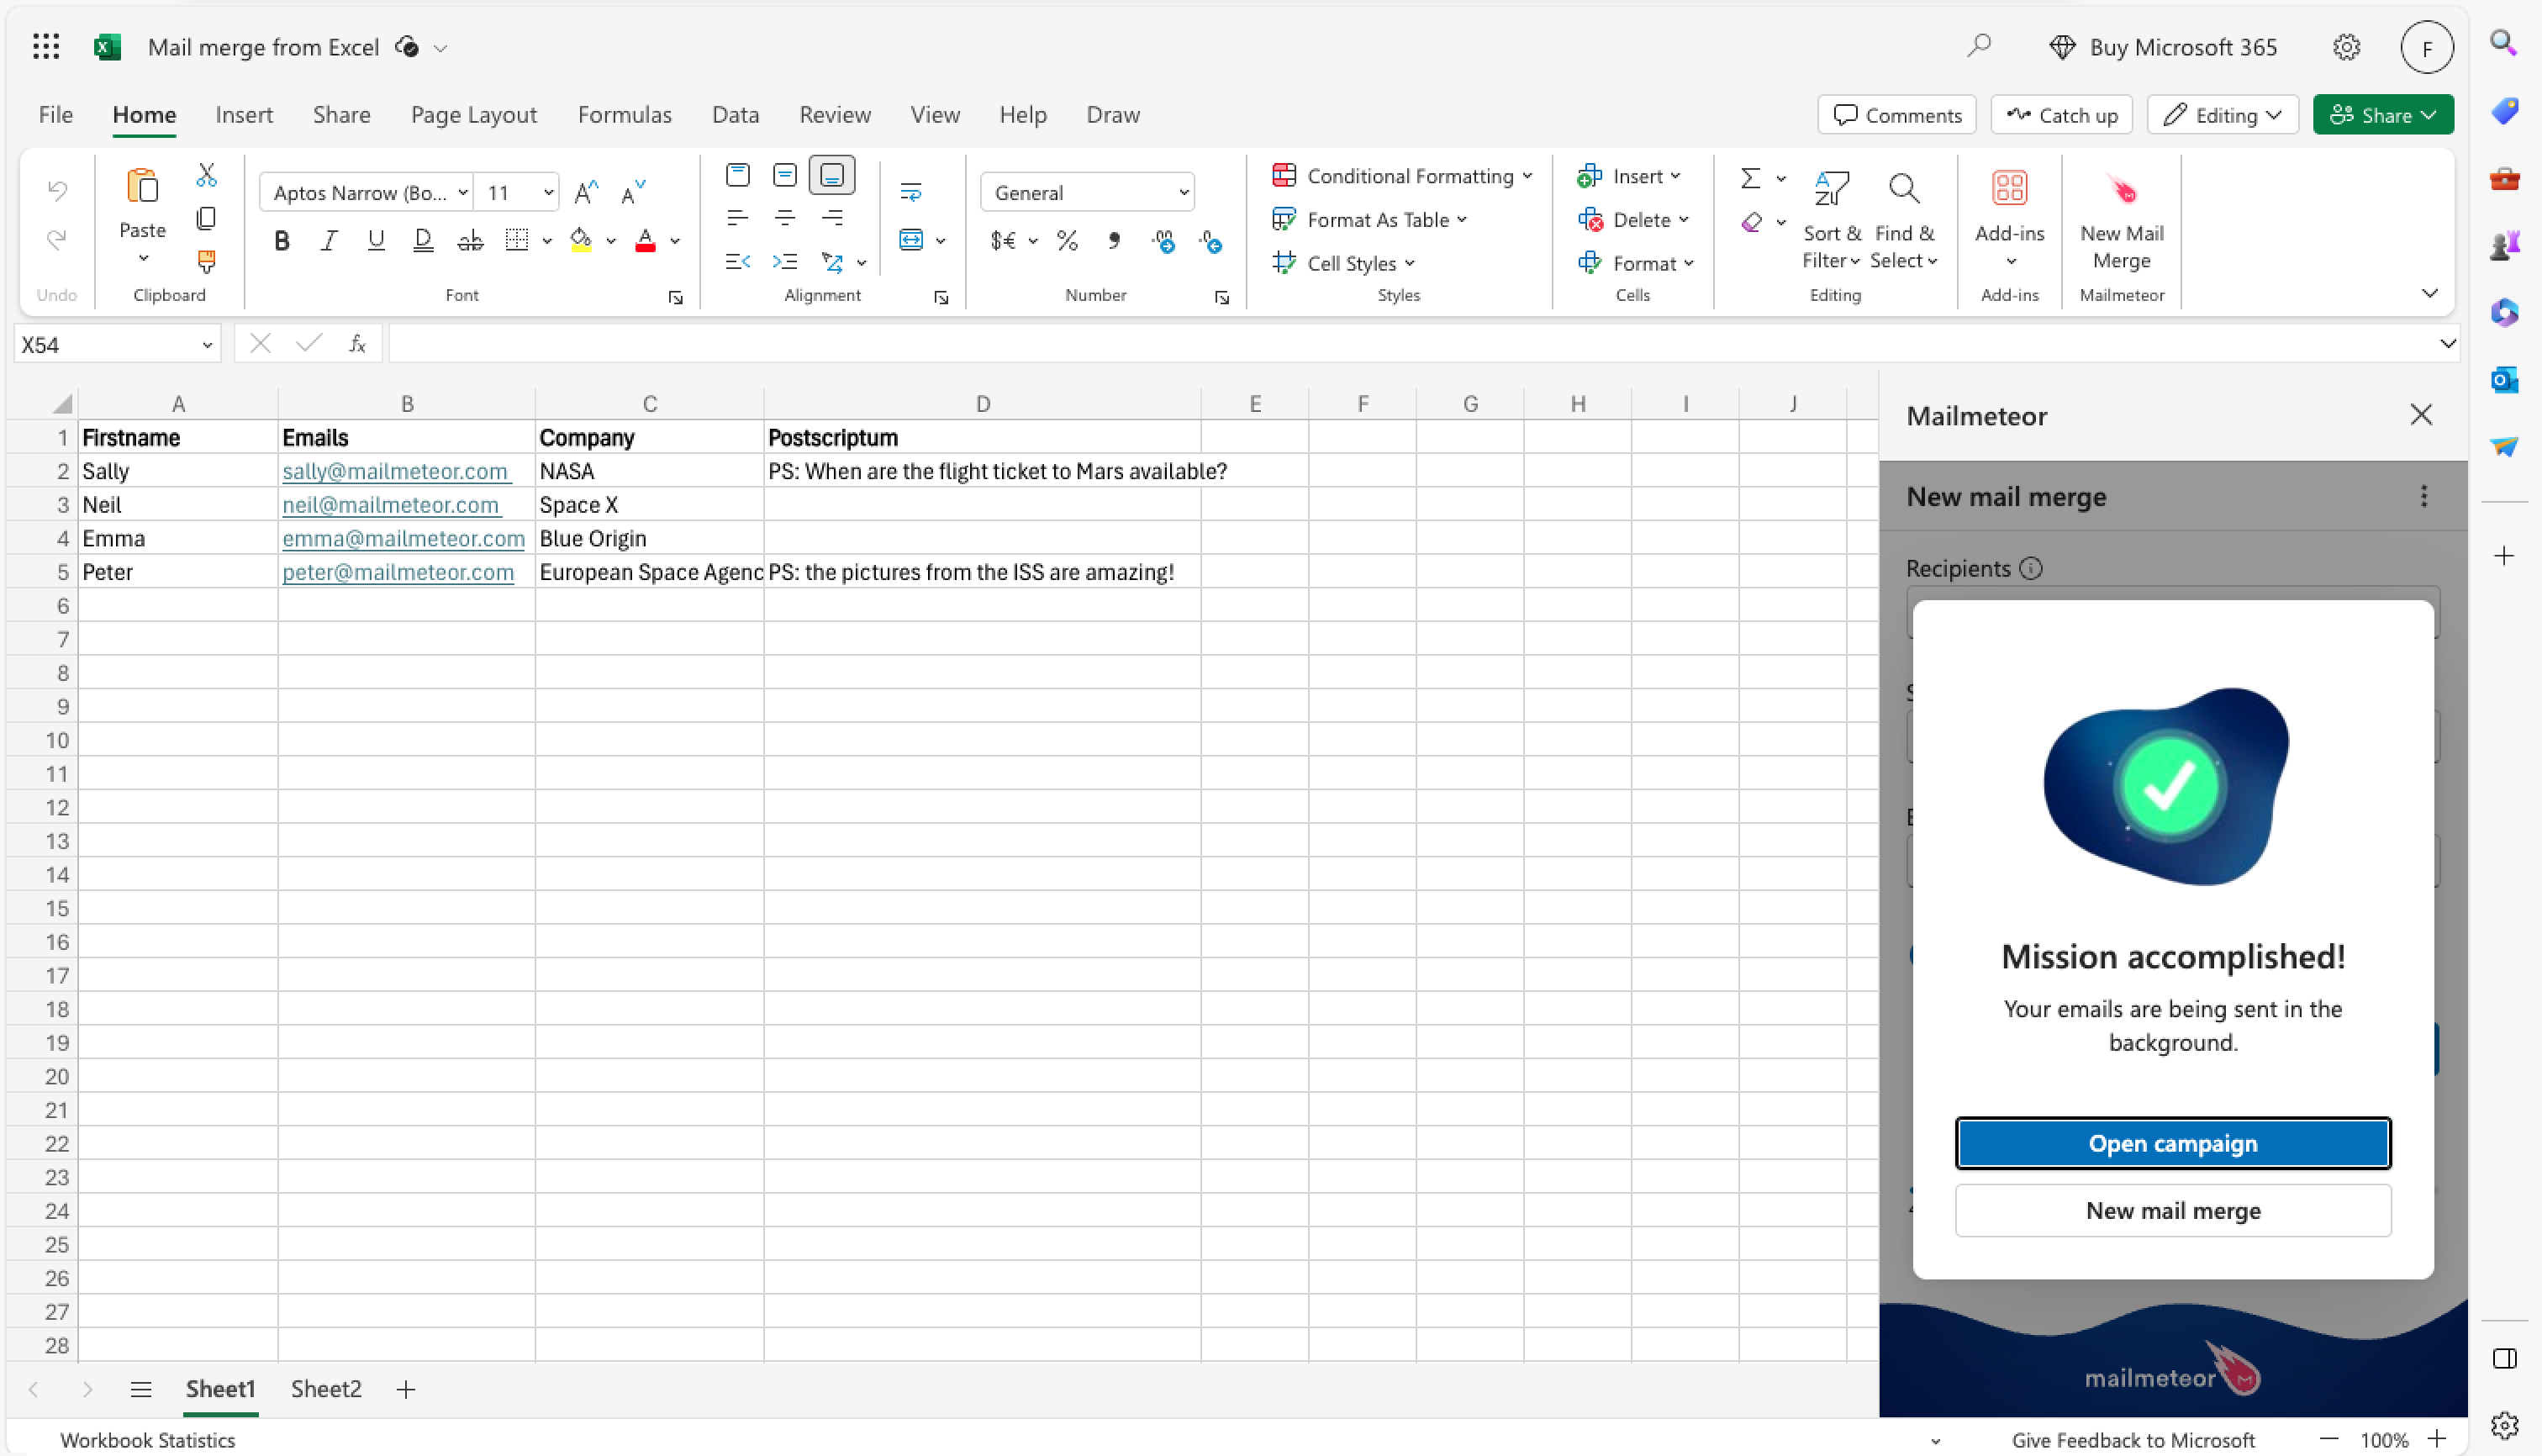
Voilà! You’ve sent your first email campaign from Mailmeteor’s add-in for Excel. Congrats 🎉
Going further with Mailmeteor
Avoid spam & get better email results
When sending large email campaigns, it’s easy to accidentally trigger spam filters or receive a high number of complaints or unsubscribes from your recipients. In the long run, this can negatively impact your account’s reputation and lower your email deliverability.
Make sure to read our sending guidelines to learn how to properly structure your emails, avoid common spam triggers, and ensure that your emails are being sent to engaged and interested recipients.
Become a Pro at emailing
Mailmeteor is packed with advanced features designed to help you achieve better results, in less time. To browse all the possibilities we have to offer, visit the sections below. You’ll learn how to:
- Add CC or BCC recipients
- Improve your email deliverability with Autopilot
- Schedule your emails
- Send emails from an alias
- Import your own HTML design
- Add an unsubscribe link
- Integrate with your CRM
Discover Mailmeteor’s hidden features
Want to level up your emailing skills? Here are 5 handy Mailmeteor features that very few people actually know about ⤵️