Scheduling a campaign
You can schedule emails in Mailmeteor to send your emails at a later time. Scheduled emails may be sent gradually after the scheduled time.
How to schedule emails?
When you create a campaign in Mailmeteor Dashboard, you can schedule when emails will start to be sent. Here’s how to do it:
- Go to your Mailmeteor Dashboard.
- Create a new campaign.
- Click Schedule send.
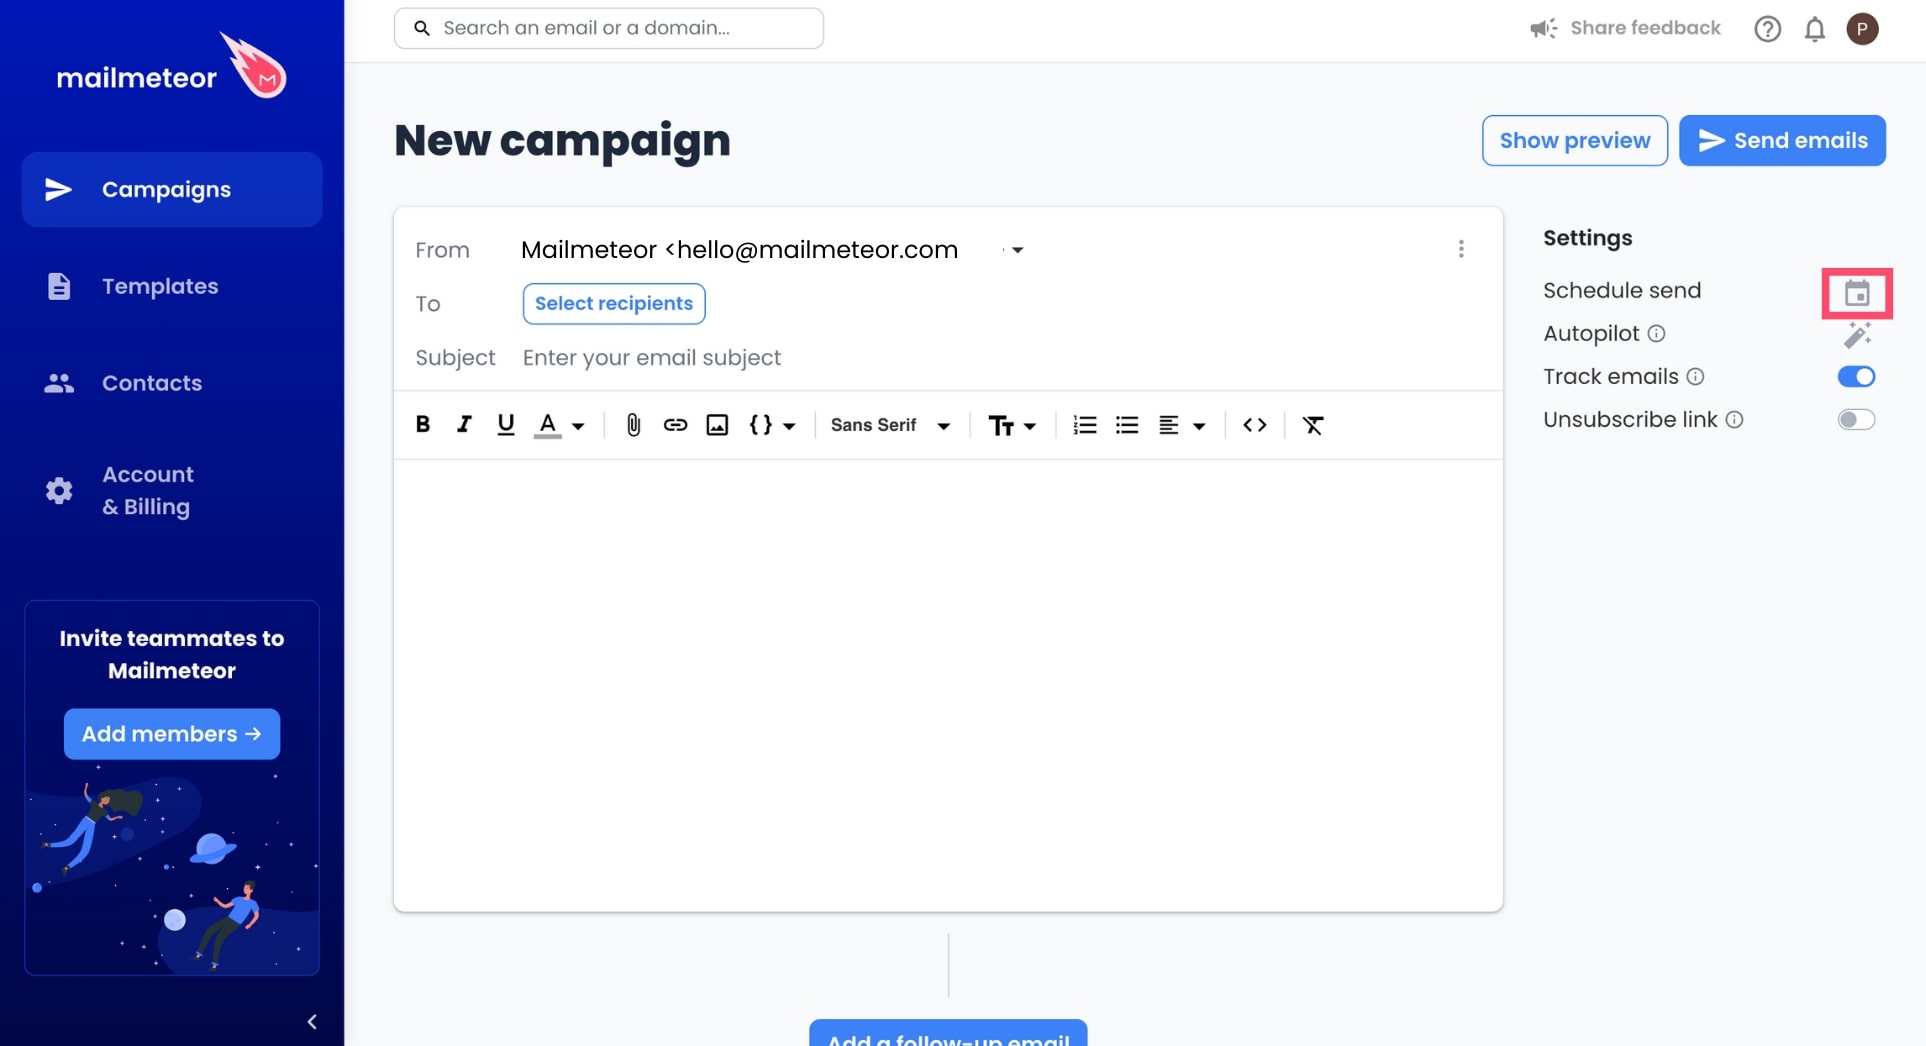
- Select the date and time.
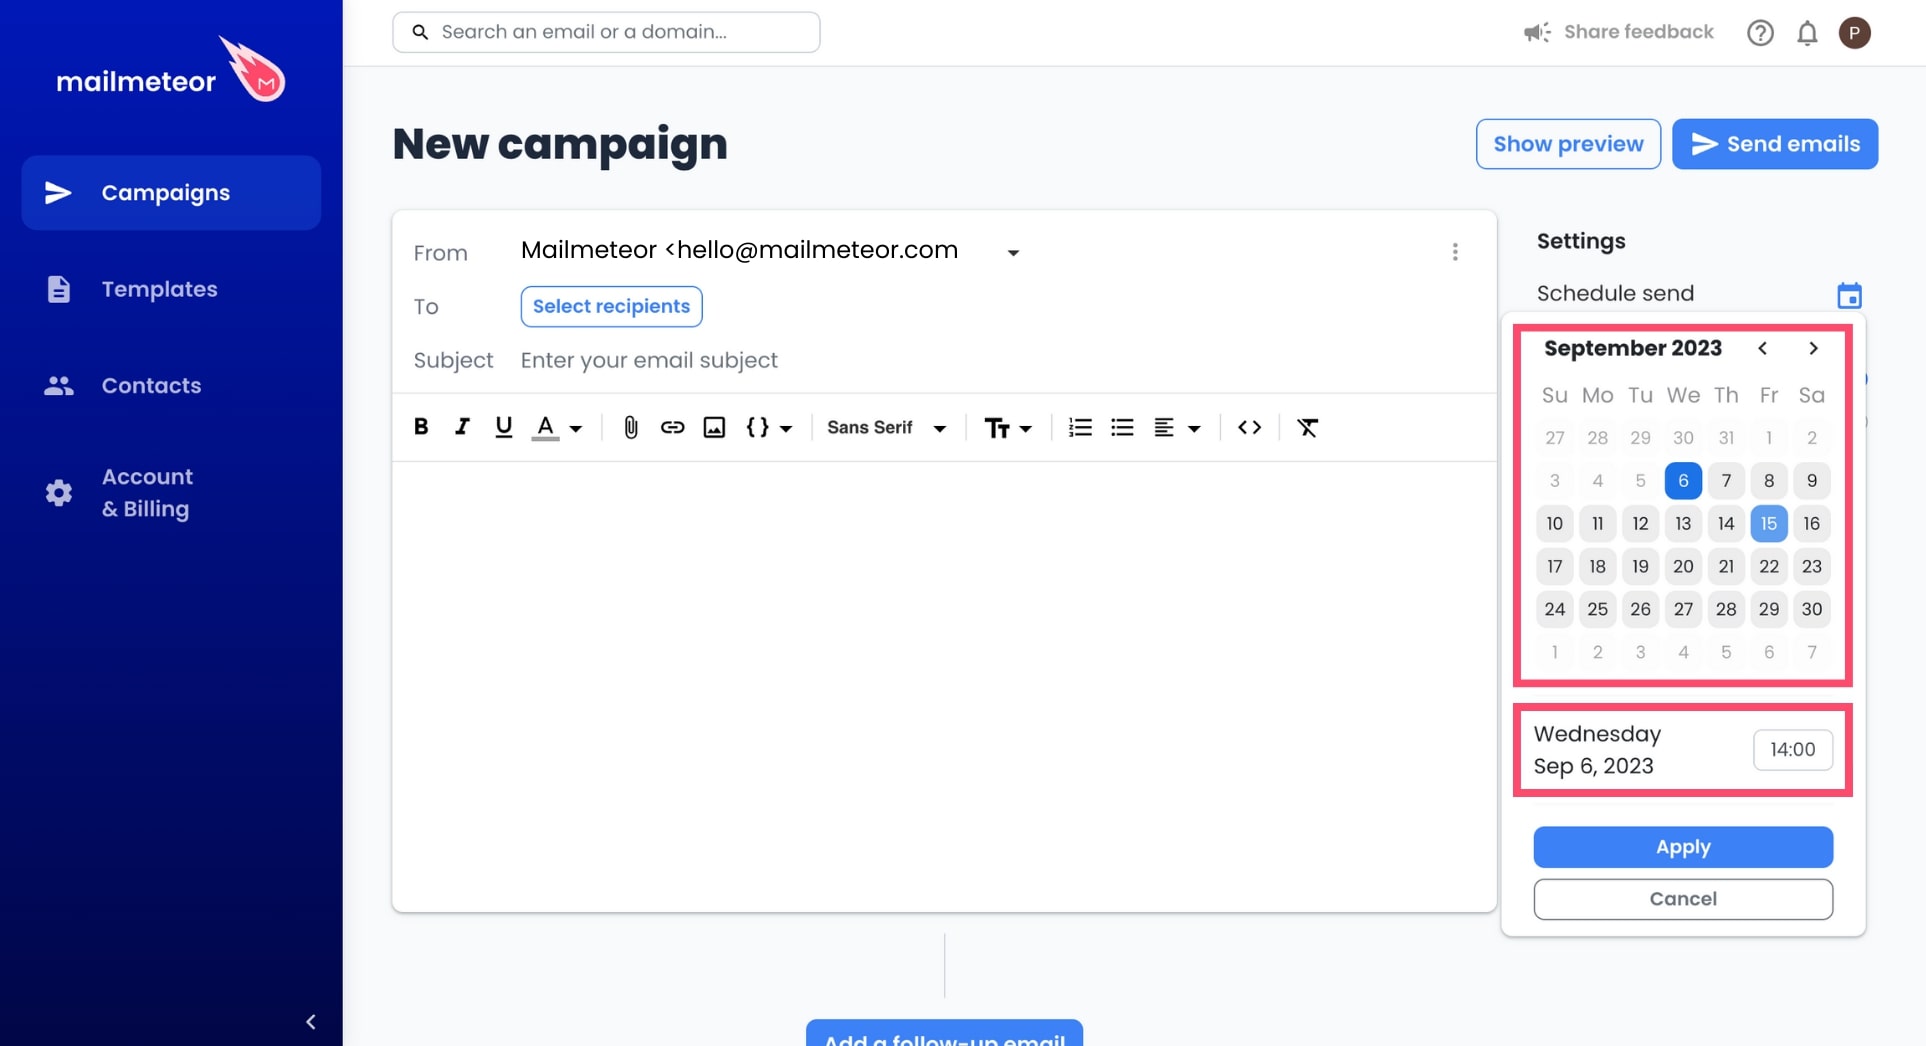
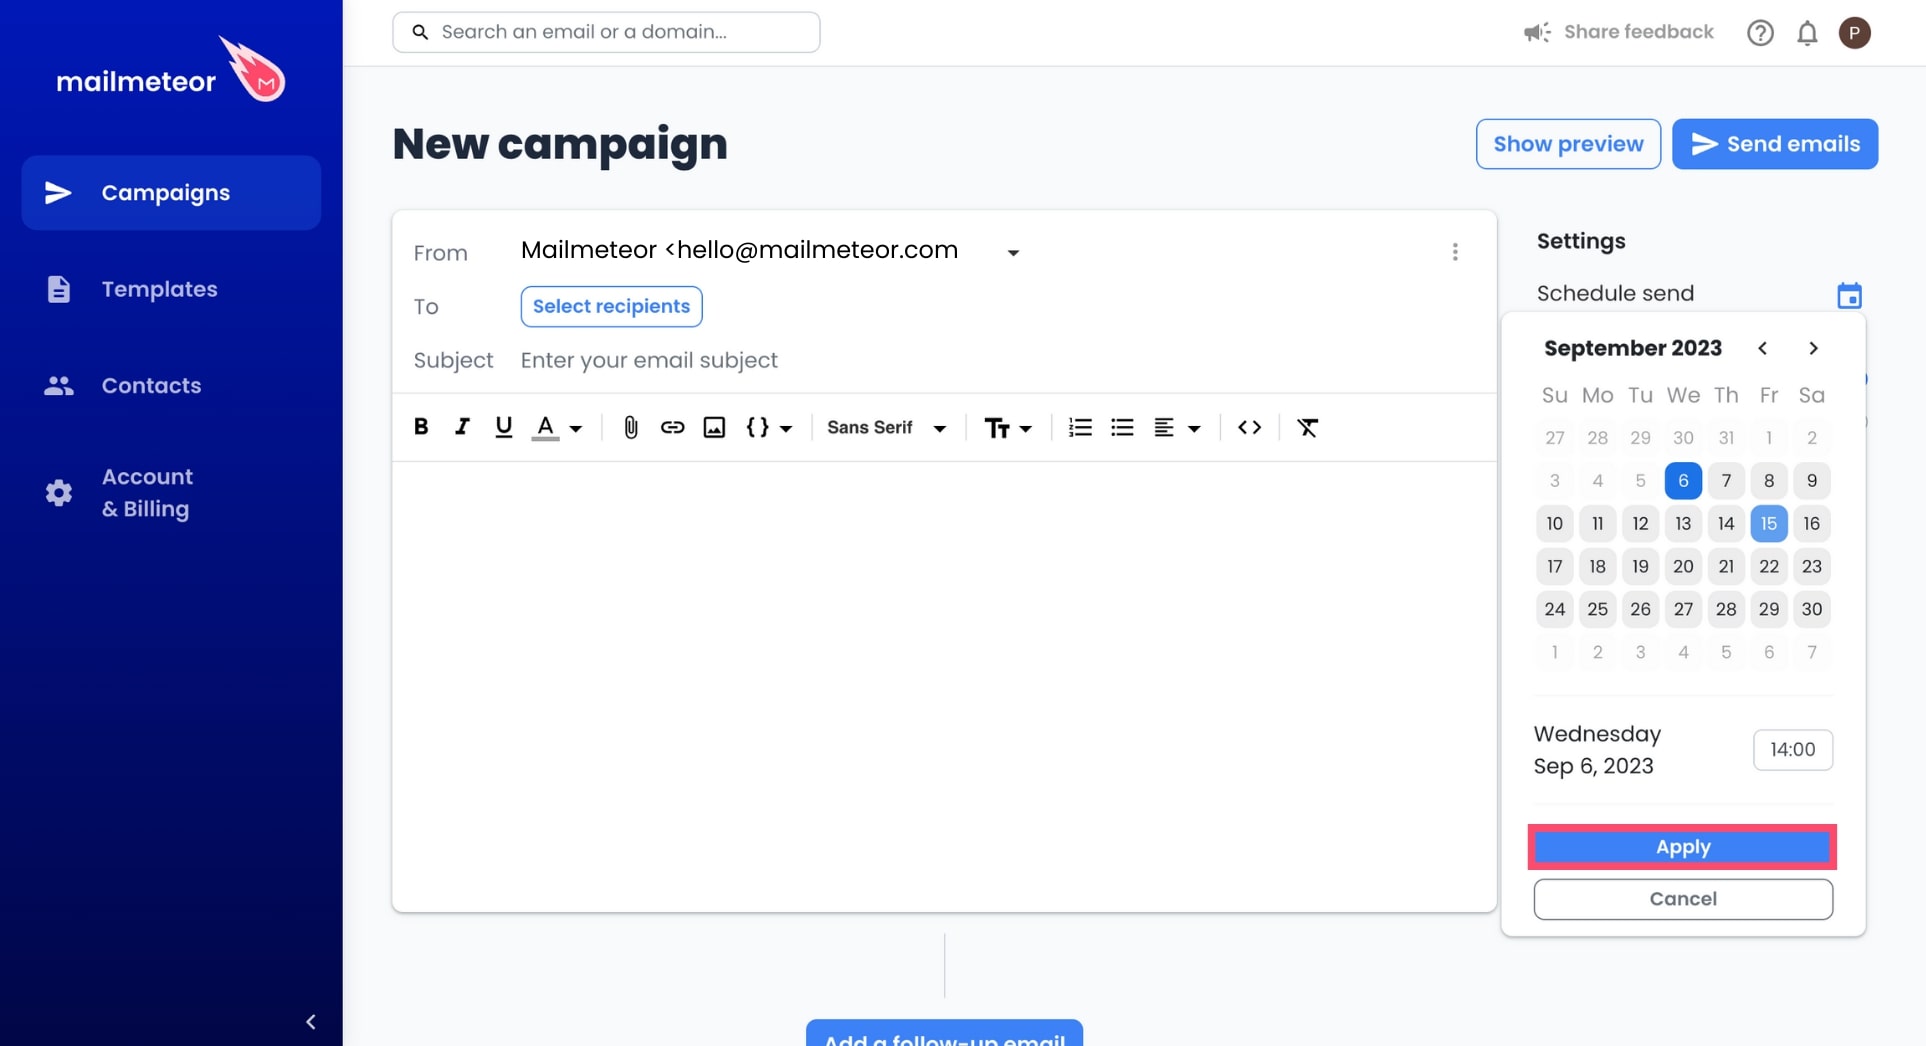
- Click Apply to confirm.
When will my emails be sent?
With Mailmeteor’s scheduling feature, you can plan when to send your emails. It could be in a few minutes or up to 120 days from now.
Your scheduled emails are sent gradually. Depending on the size of your contact list, the sending may take a few minutes to one hour. This helps prevent your emails from falling into spam and secure your account.
Your emails will be sent based on the timezone you scheduled them in.
How to view scheduled campaigns?
- Sign in to your Mailmeteor Dashboard.
- Go to Campaigns > Scheduled.
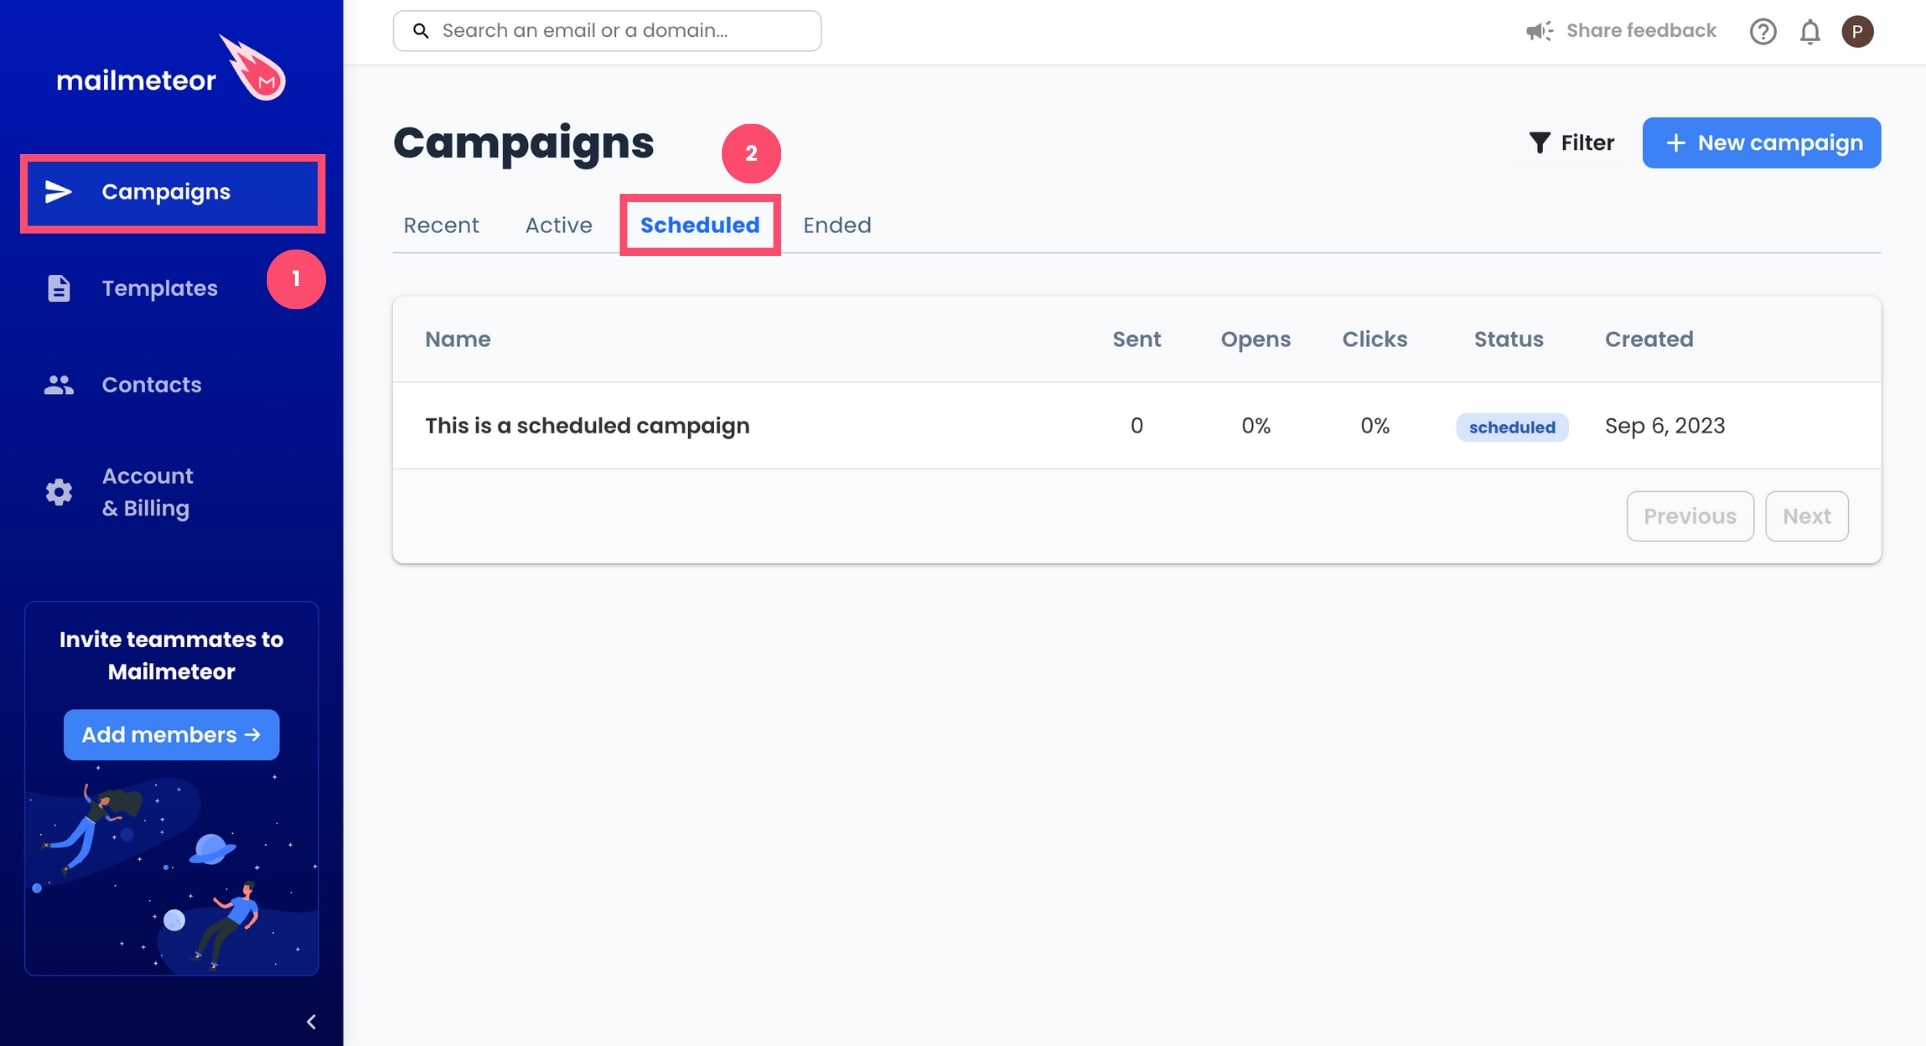
- Click on a campaign.
How to edit a scheduled campaign?
Made a mistake? Or want to make some last-minute changes? Here’s how you can edit a scheduled campaign in Mailmeteor before we start sending your emails.
- Open your Mailmeteor Dashboard.
- Go to Campaigns > Scheduled.
- Select your email campaign.
- Click on the Action button.
- Select Update campaign.
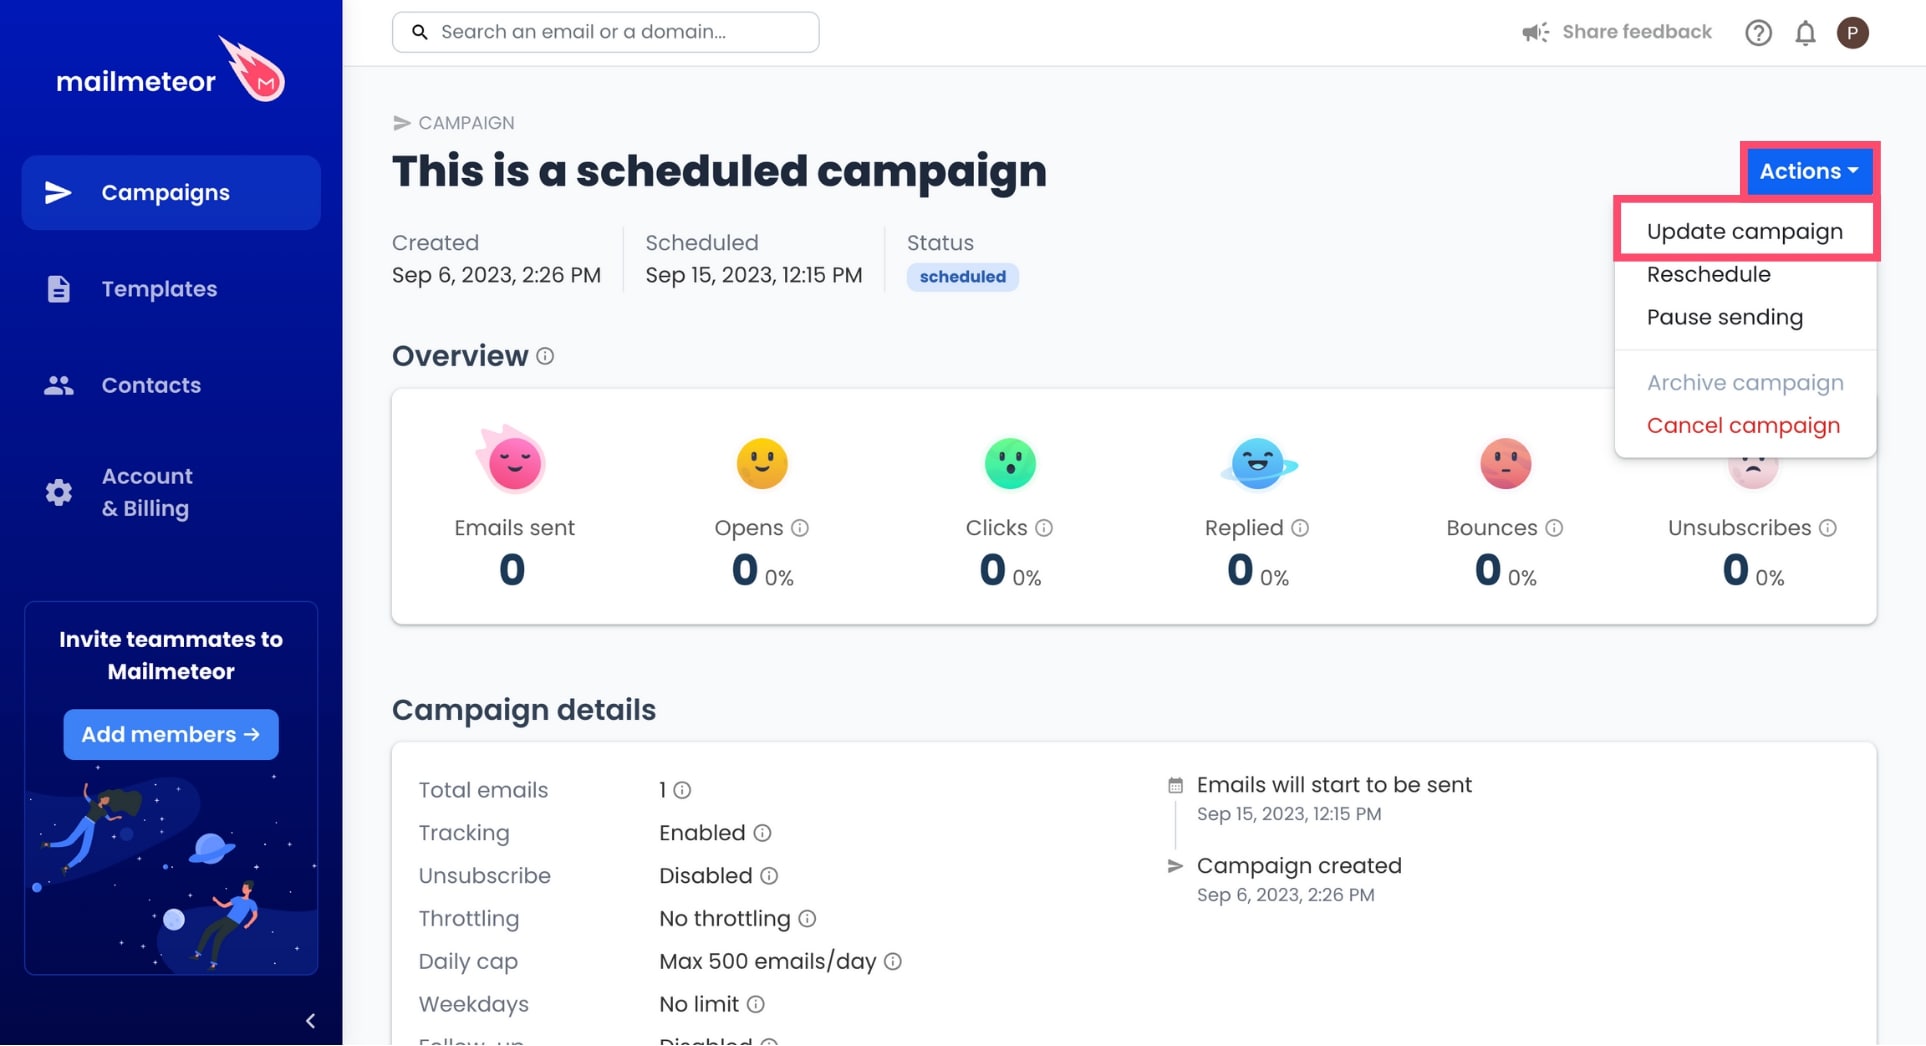
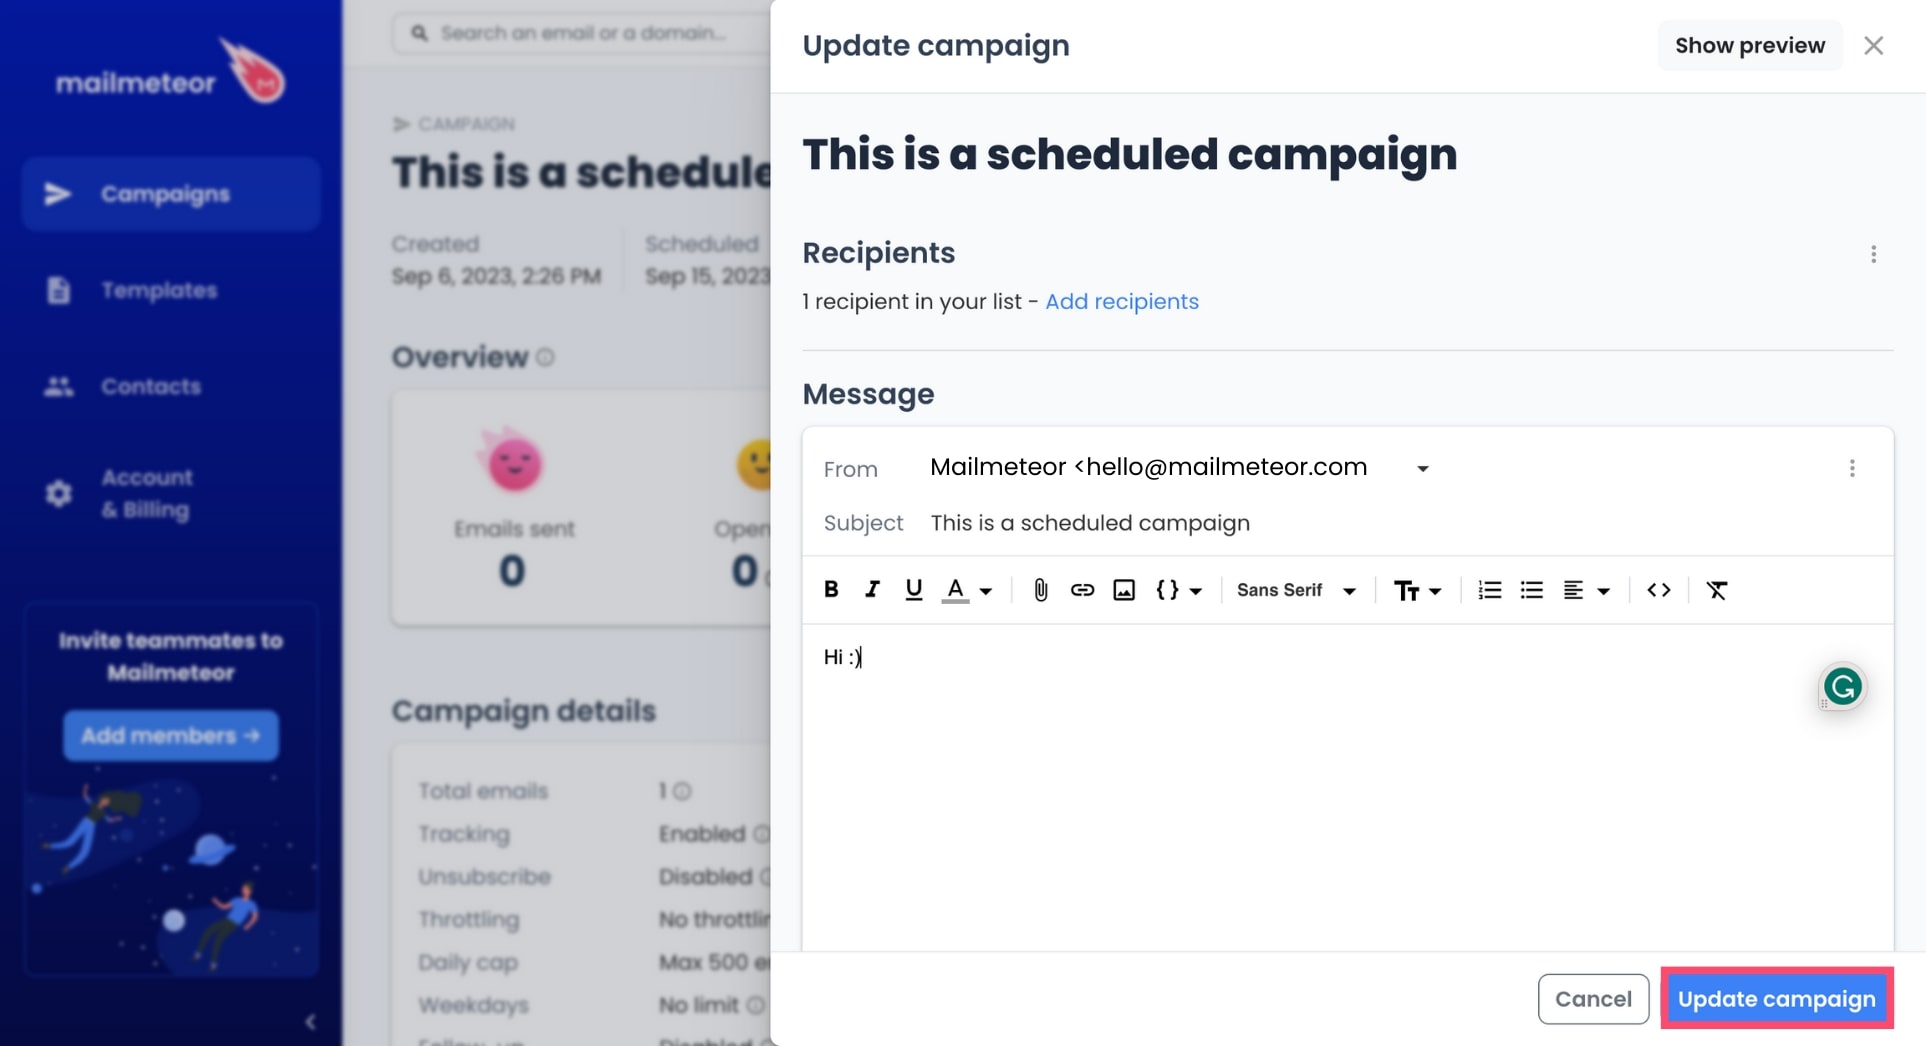
- From there, you can edit your subject line, the body of your email, or the list of recipients.
- Once you’re happy with the changes you’ve made, click Update campaign.
How to cancel a scheduled campaign?
Want to cancel a campaign you’ve scheduled? Here’s how to do it:
- Open your Mailmeteor Dashboard.
- Go to Campaigns > Scheduled.
- Select your email campaign.
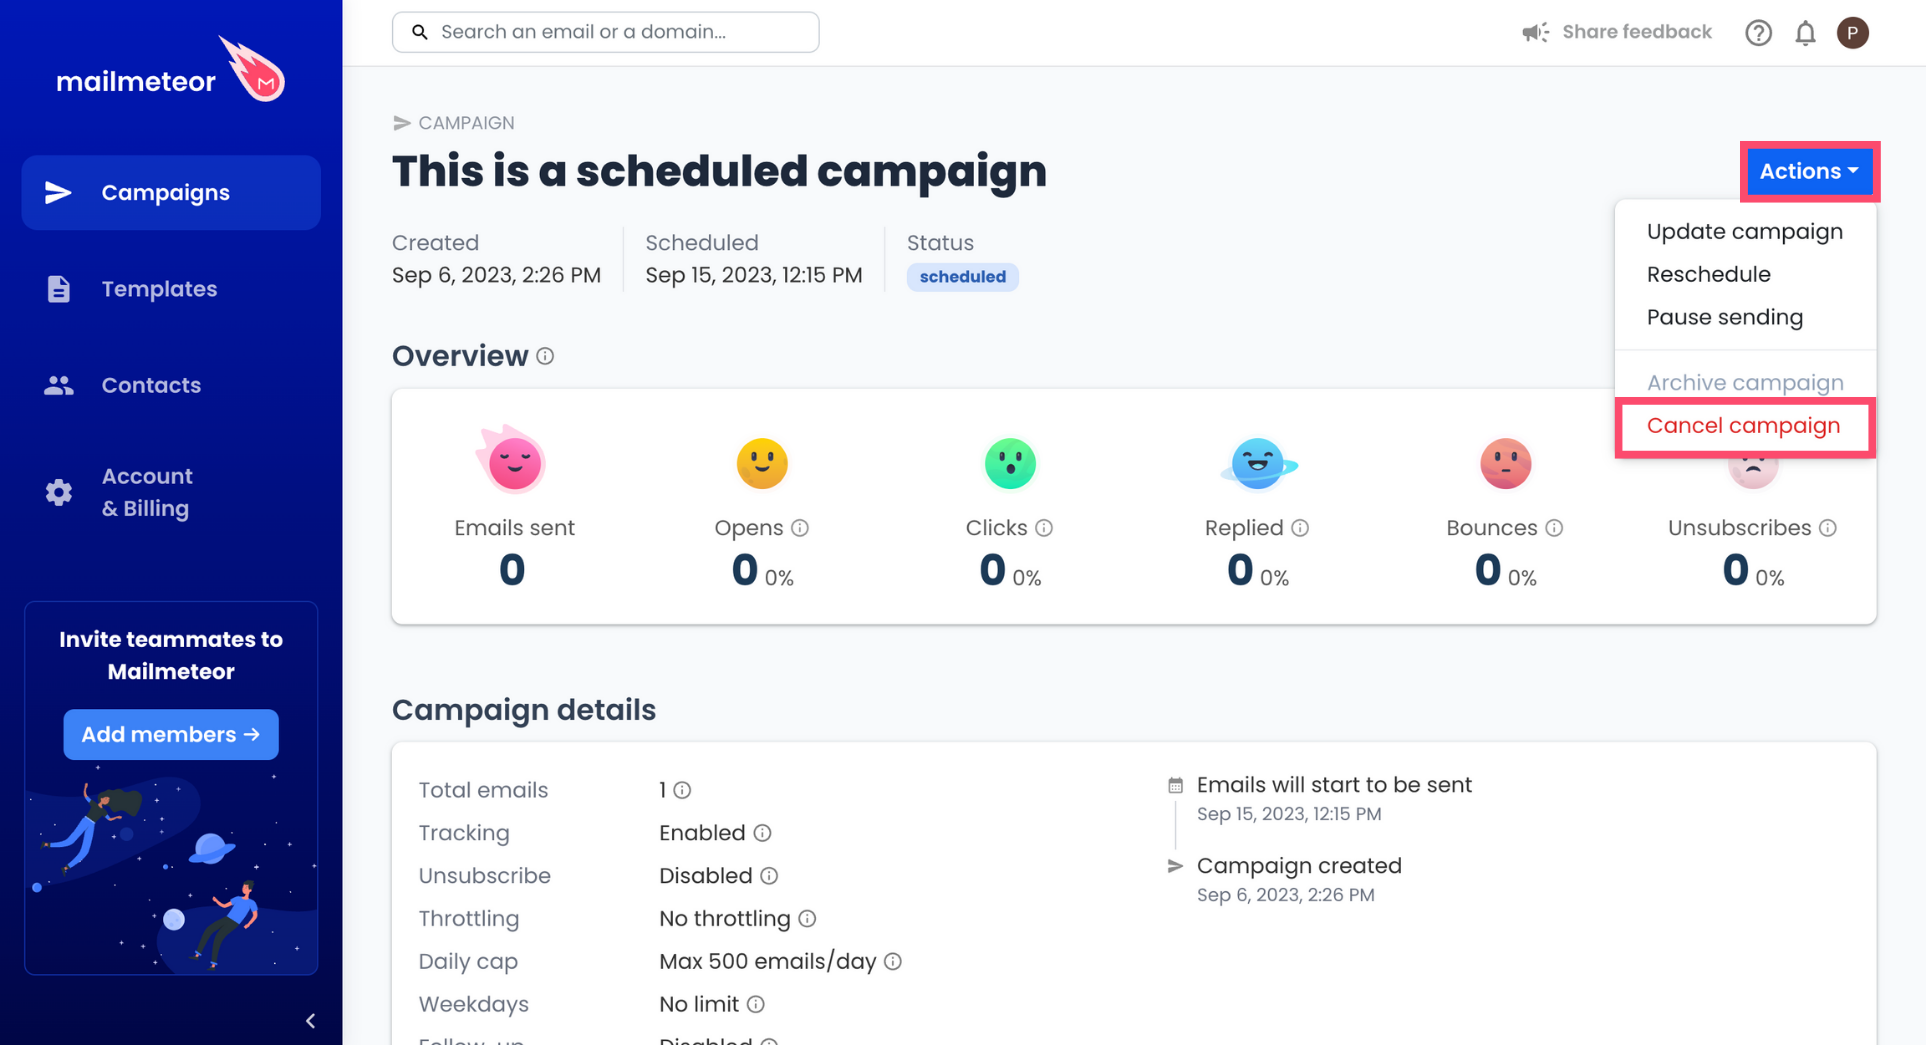
- Click on the Action button and select Cancel campaign.
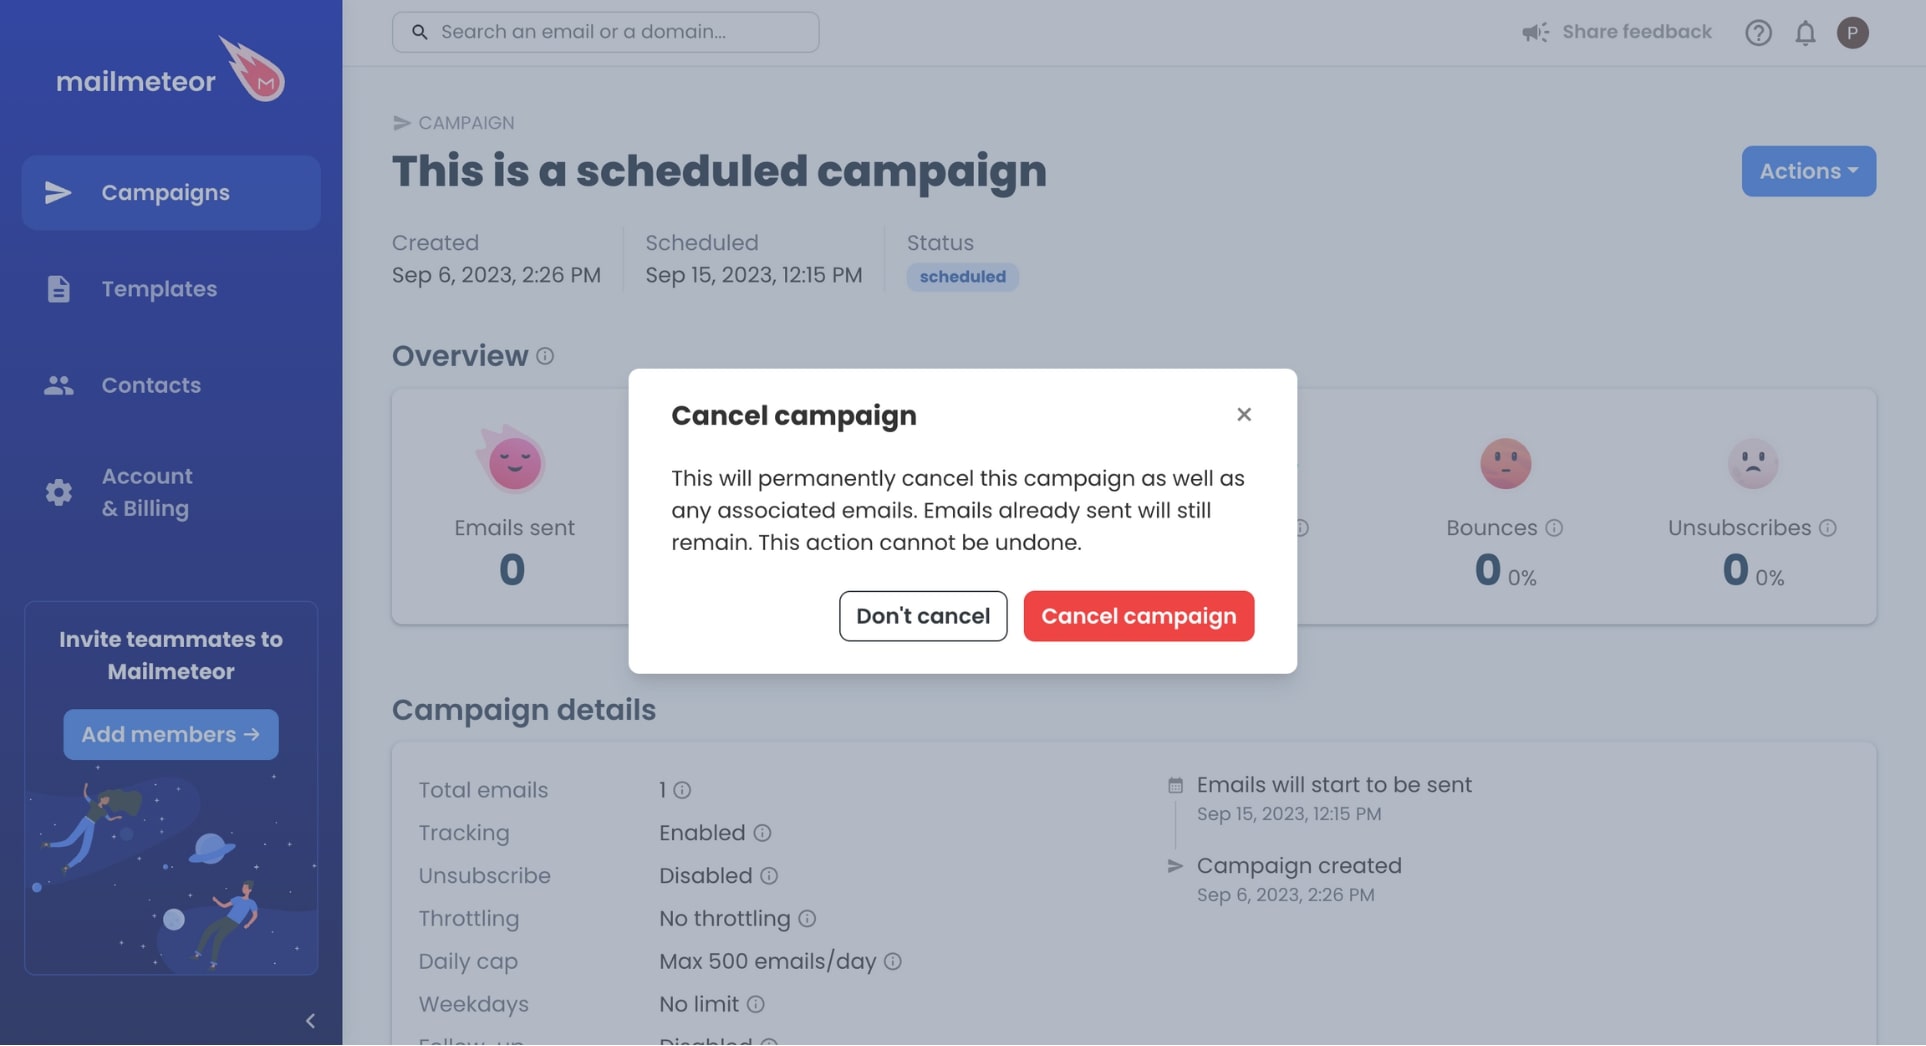
- To confirm, click Cancel campaign.
Video tutorial
If you prefer to watch a video, here’s a tutorial on how to schedule your campaigns with Mailmeteor: