Custom tracking domain
When sending emails with Mailmeteor, you can use your unique, brand-centric domain name to track email opens and clicks. This ensures your recipients trust the links they click on your emails and highly improves your deliverability when tracking is ON.
Custom tracking domain is a Pro feature
To set up your custom tracking domain and dramatically improve your email deliverability, upgrade to our Pro plan.
Why should you use a custom tracking domain?
When tracking is ON, Mailmeteor uses by default a pool of domain names that are shared amongst all of our users. While this is standard practice, we consider it the bare minimum that we can provide. So on top of a pool of domain names, each of our users has access to a unique, account-centric, subdomain to track events.
For example, for a user having the following email address [email protected], Mailmeteor will use the following unique subdomain johndoeexampleorg.mmtracking.appspot.com to track emails.
While this makes our tracking service incredibly robust and reliable, we have learned from experience that anti-spam filters may attribute a negative score to emails with very long or low-quality domain names.
From the recipient’s perspective, it makes sense. Your recipients are more likely to click on a link that starts with: click.example.org instead of johndoeexampleorg.mmtracking.appspot.com
That’s why we recommend all our users who need reliable tracking metrics to configure a custom tracking domain. We’re using the exact same technique, here at Mailmeteor, in all of our email communications.
How to configure your custom tracking domain
.png)
1) Add your domain
- Sign in to your Mailmeteor Dashboard.
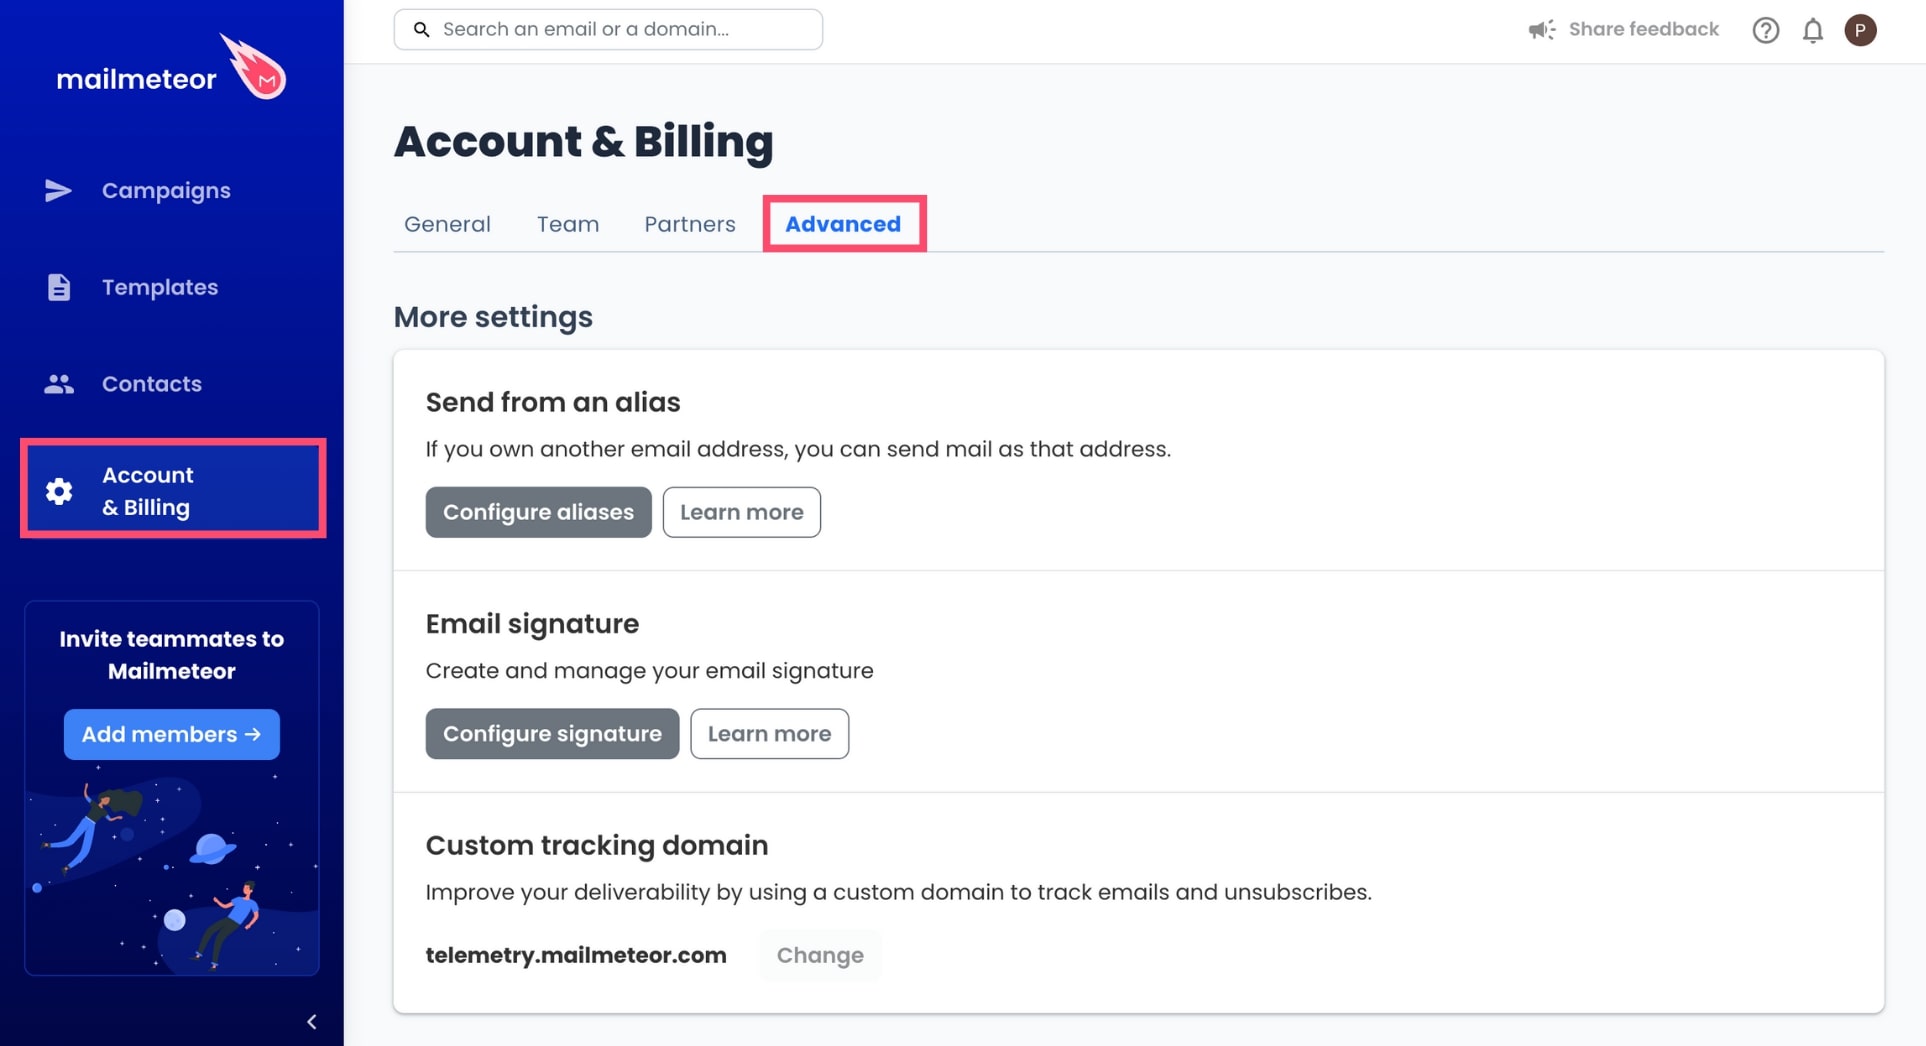
- In the left-side menu, go to Account & Billing.
- Open the Advanced tab.

- Under Custom tracking domain, click Configure.
- Enter the domain (or subdomain) you want to use. It should be a domain that you own since you’ll need write access to DNS records to complete this procedure.
- Click Continue to start the validation process. Mailmeteor will then provide the DNS records you need to validate your custom tracking domain.
2) Update your DNS records
- Go to your domain provider’s website.
- Locate the DNS management page.
- Create a new record with the inputs provided during the previous step.
- Make sure to save your changes and wait for at least one hour for DNS propagation.
3) Verify and save your new domain
- Go back to your Mailmeteor Dashboard.
- In the custom tracking domain modal, click on “Verify”. Mailmeteor will perform several checks to validate the DNS changes and issue an SSL certificate.
- Once your domain is successfully verified, make sure to Save your new domain. Mailmeteor will use that domain for all emails sent after your custom tracking domain has been saved.
Once your custom domain is set up, your Mailmeteor Dashboard will look as follows:
![]()
Which domain or subdomain should I use?
Technically, you can use any domain or subdomain that you own. But we’d recommend using a short and obvious subdomain of your primary domain.
For example, if your company uses http://example.com for its public website, we recommend using tracking.example.com as your custom tracking domain.
Some of our users are getting fancy with their custom tracking domain though. Here are a few examples of subdomains that we’ve spotted recently:
click.example.comemail.example.comtelemetry.example.comto.example.com
Where and when is my custom domain being used?
Mailmeteor uses your custom tracking domain for the following:
- Tracking opens (by inserting a tracking pixel).
- Tracking clicks (by rewriting links in your email).
- Hosting the “Do you want to unsubscribe?” page.
For additional security, we apply HTTPS everywhere and we don’t use cookies.