Start warming-up an account
Mailmeteor’s warm-up solution helps you improve your email reputation, so your emails land in your clients’ inboxes.
How to warm-up an account?
Here’s how to warm-up an account and improve its reputation:
- Sign in to the Mailmeteor Dashboard.
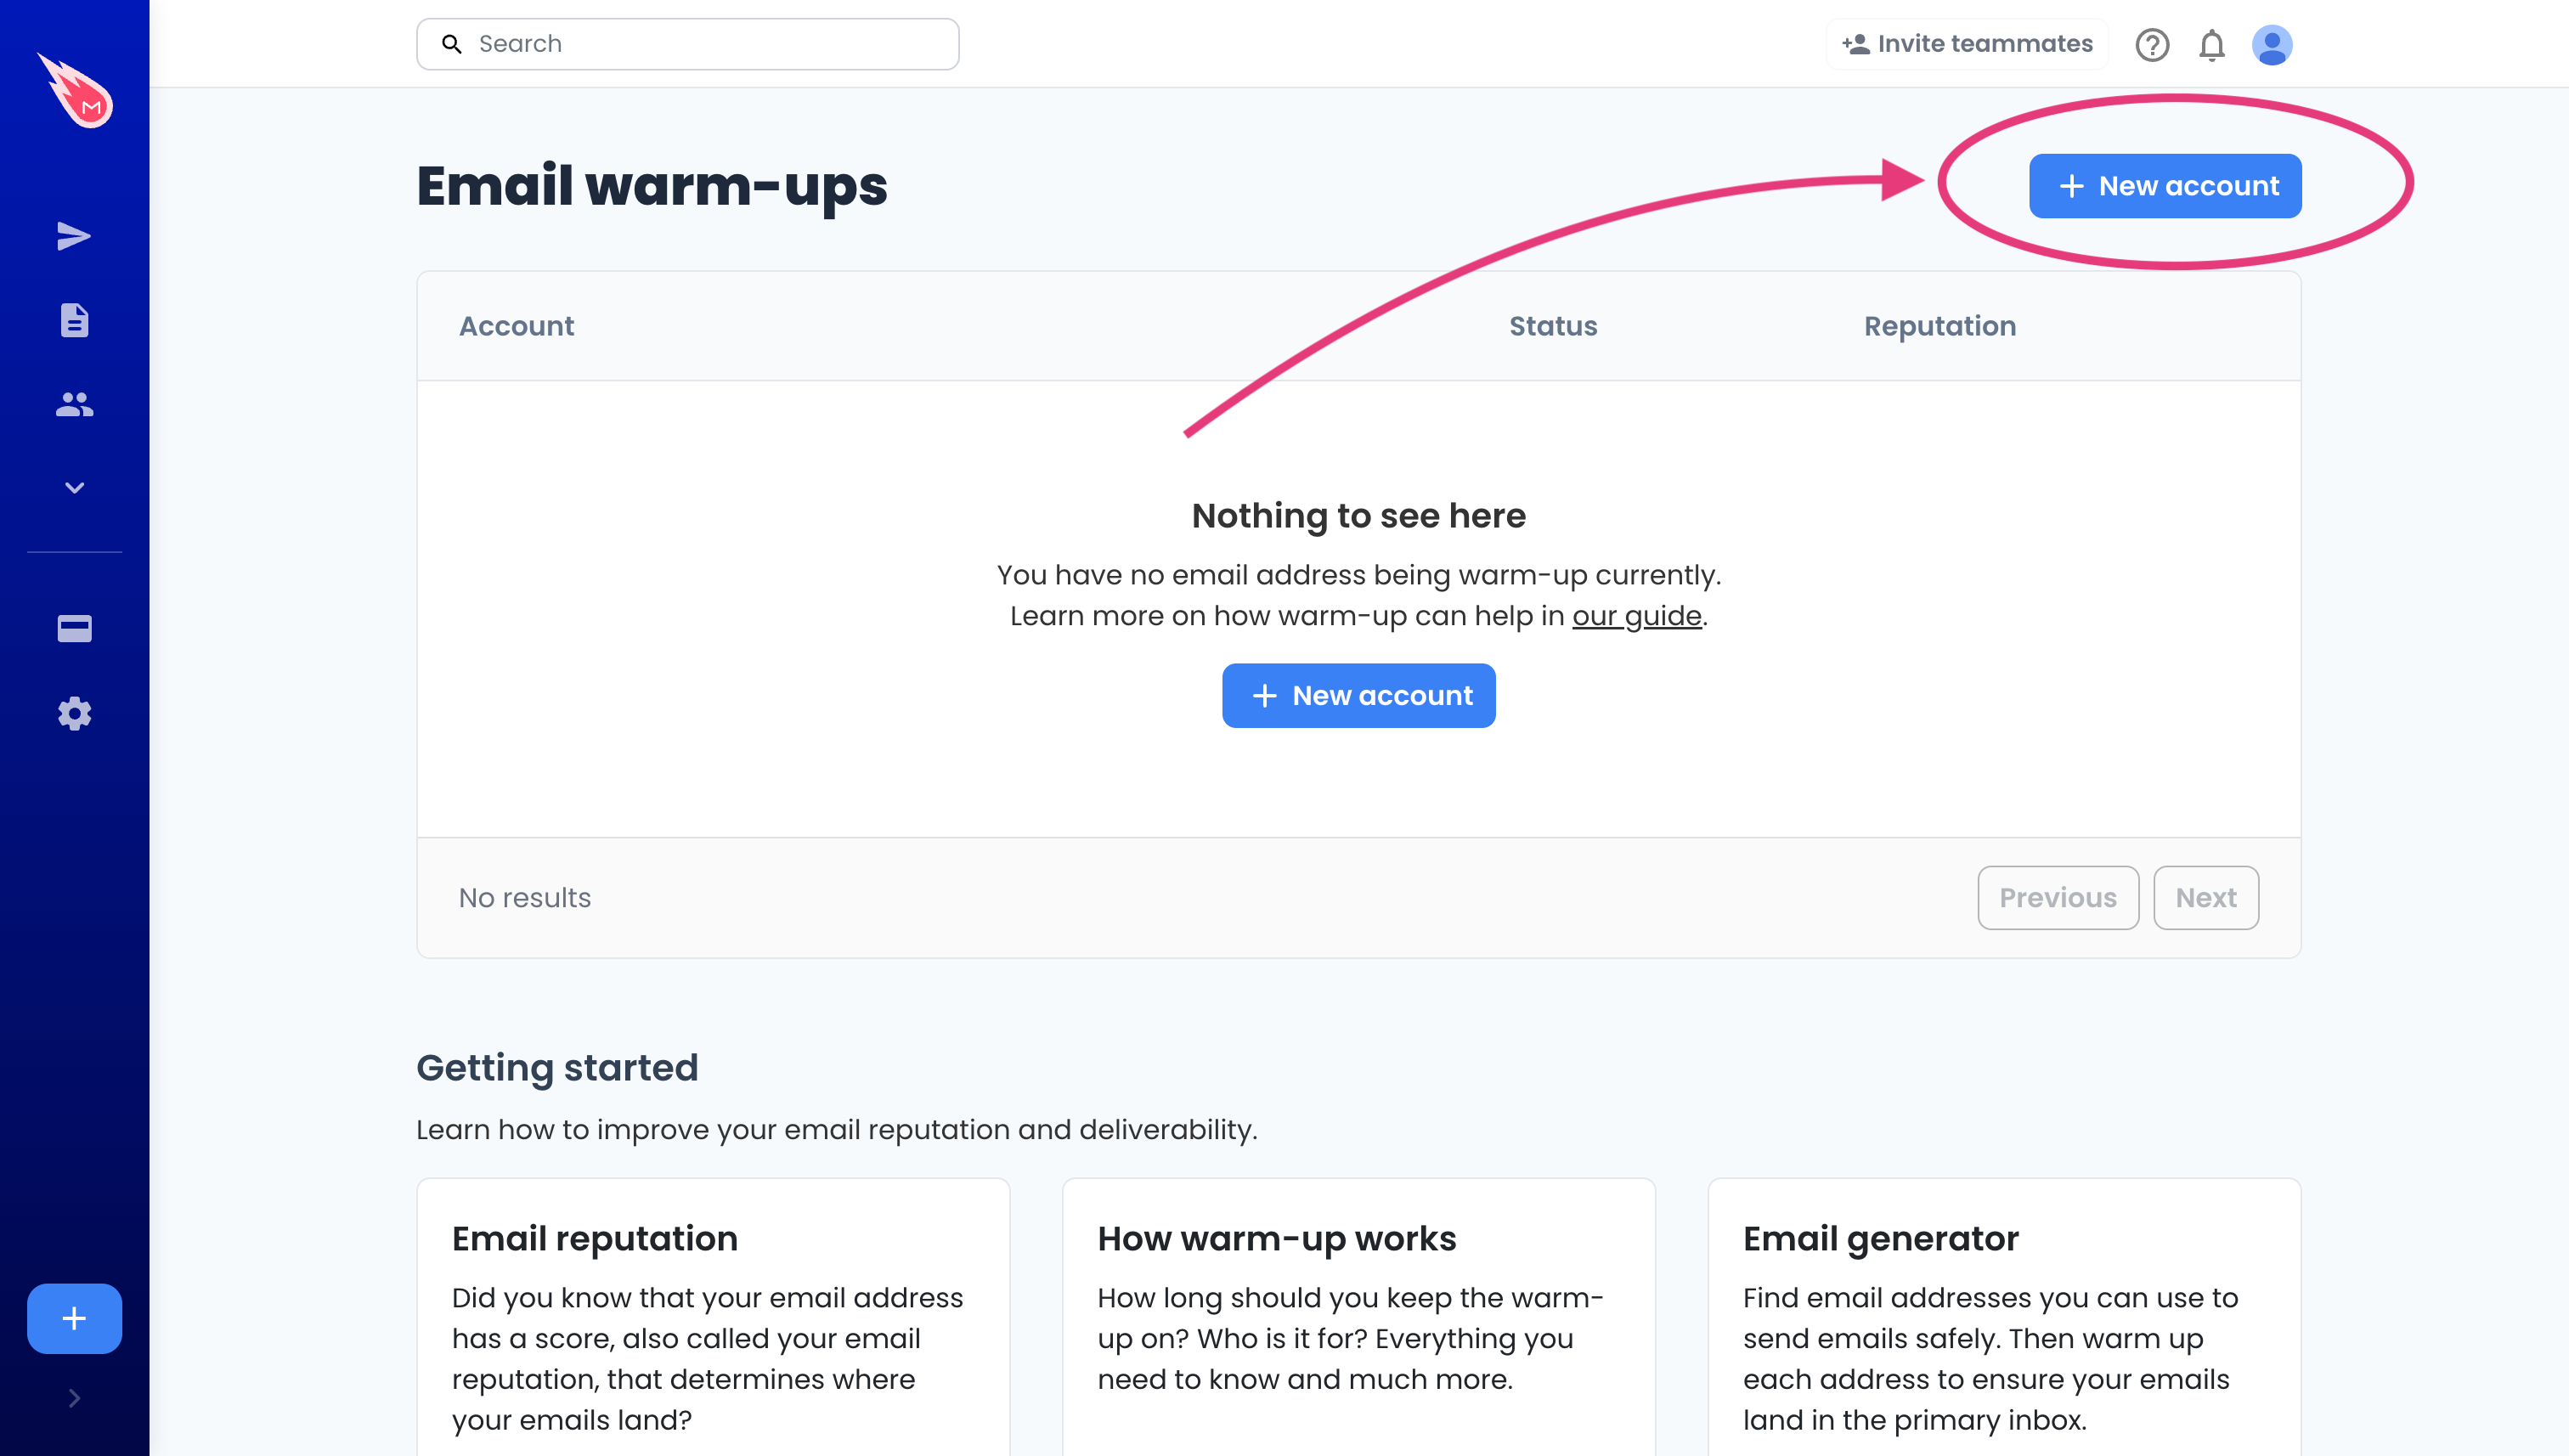
- On the left-hand sidebar, click on Warm-up.
-
Click on New account.
-
Enter the email address of the account, then click Configure.
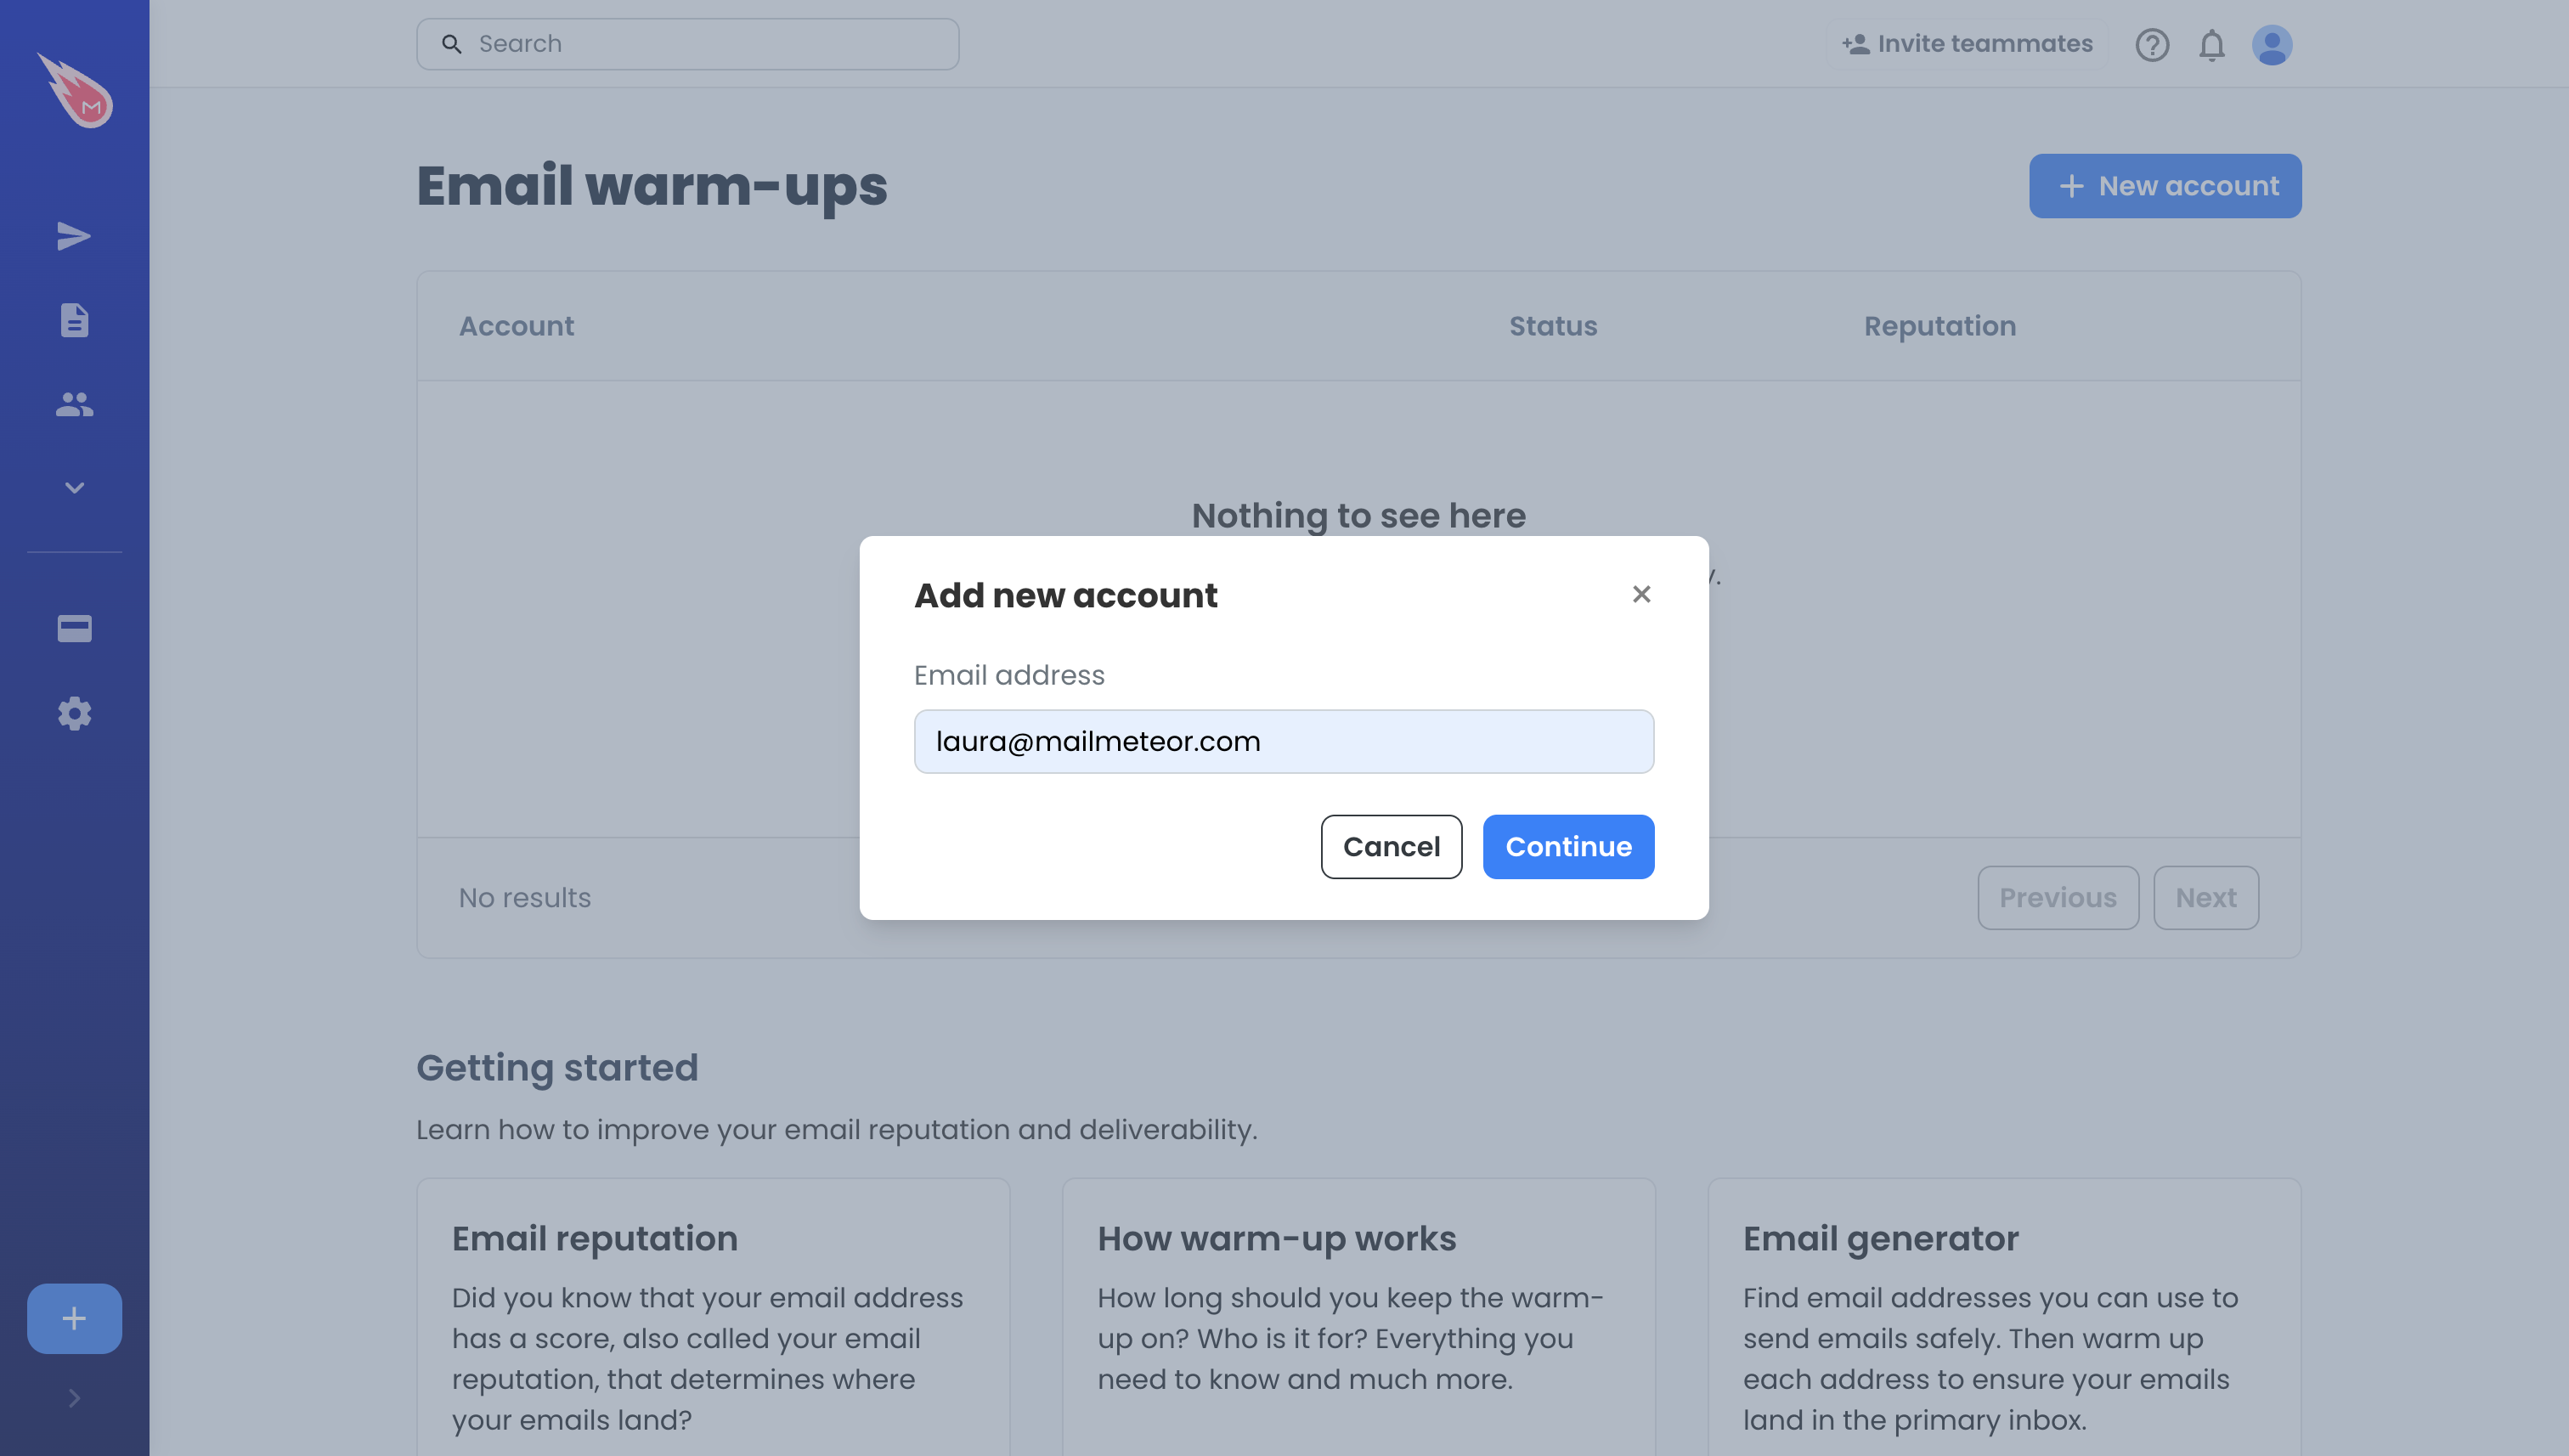
- Follow the steps to start warming-up the account.
That’s it! We’ll take care of the rest. Your email address will start sending messages and receive interactions from our trusted network of inboxes.
What happens after warm-up starts?
Mailmeteor will:
- Send a small volume of emails each day to real inboxes.
- Trigger realistic inbox actions: open, reply, forward, star, etc.
- Gradually increase the daily volume over time.
- Help boost your sender reputation with Gmail, Outlook, Yahoo, Zoho, and more.
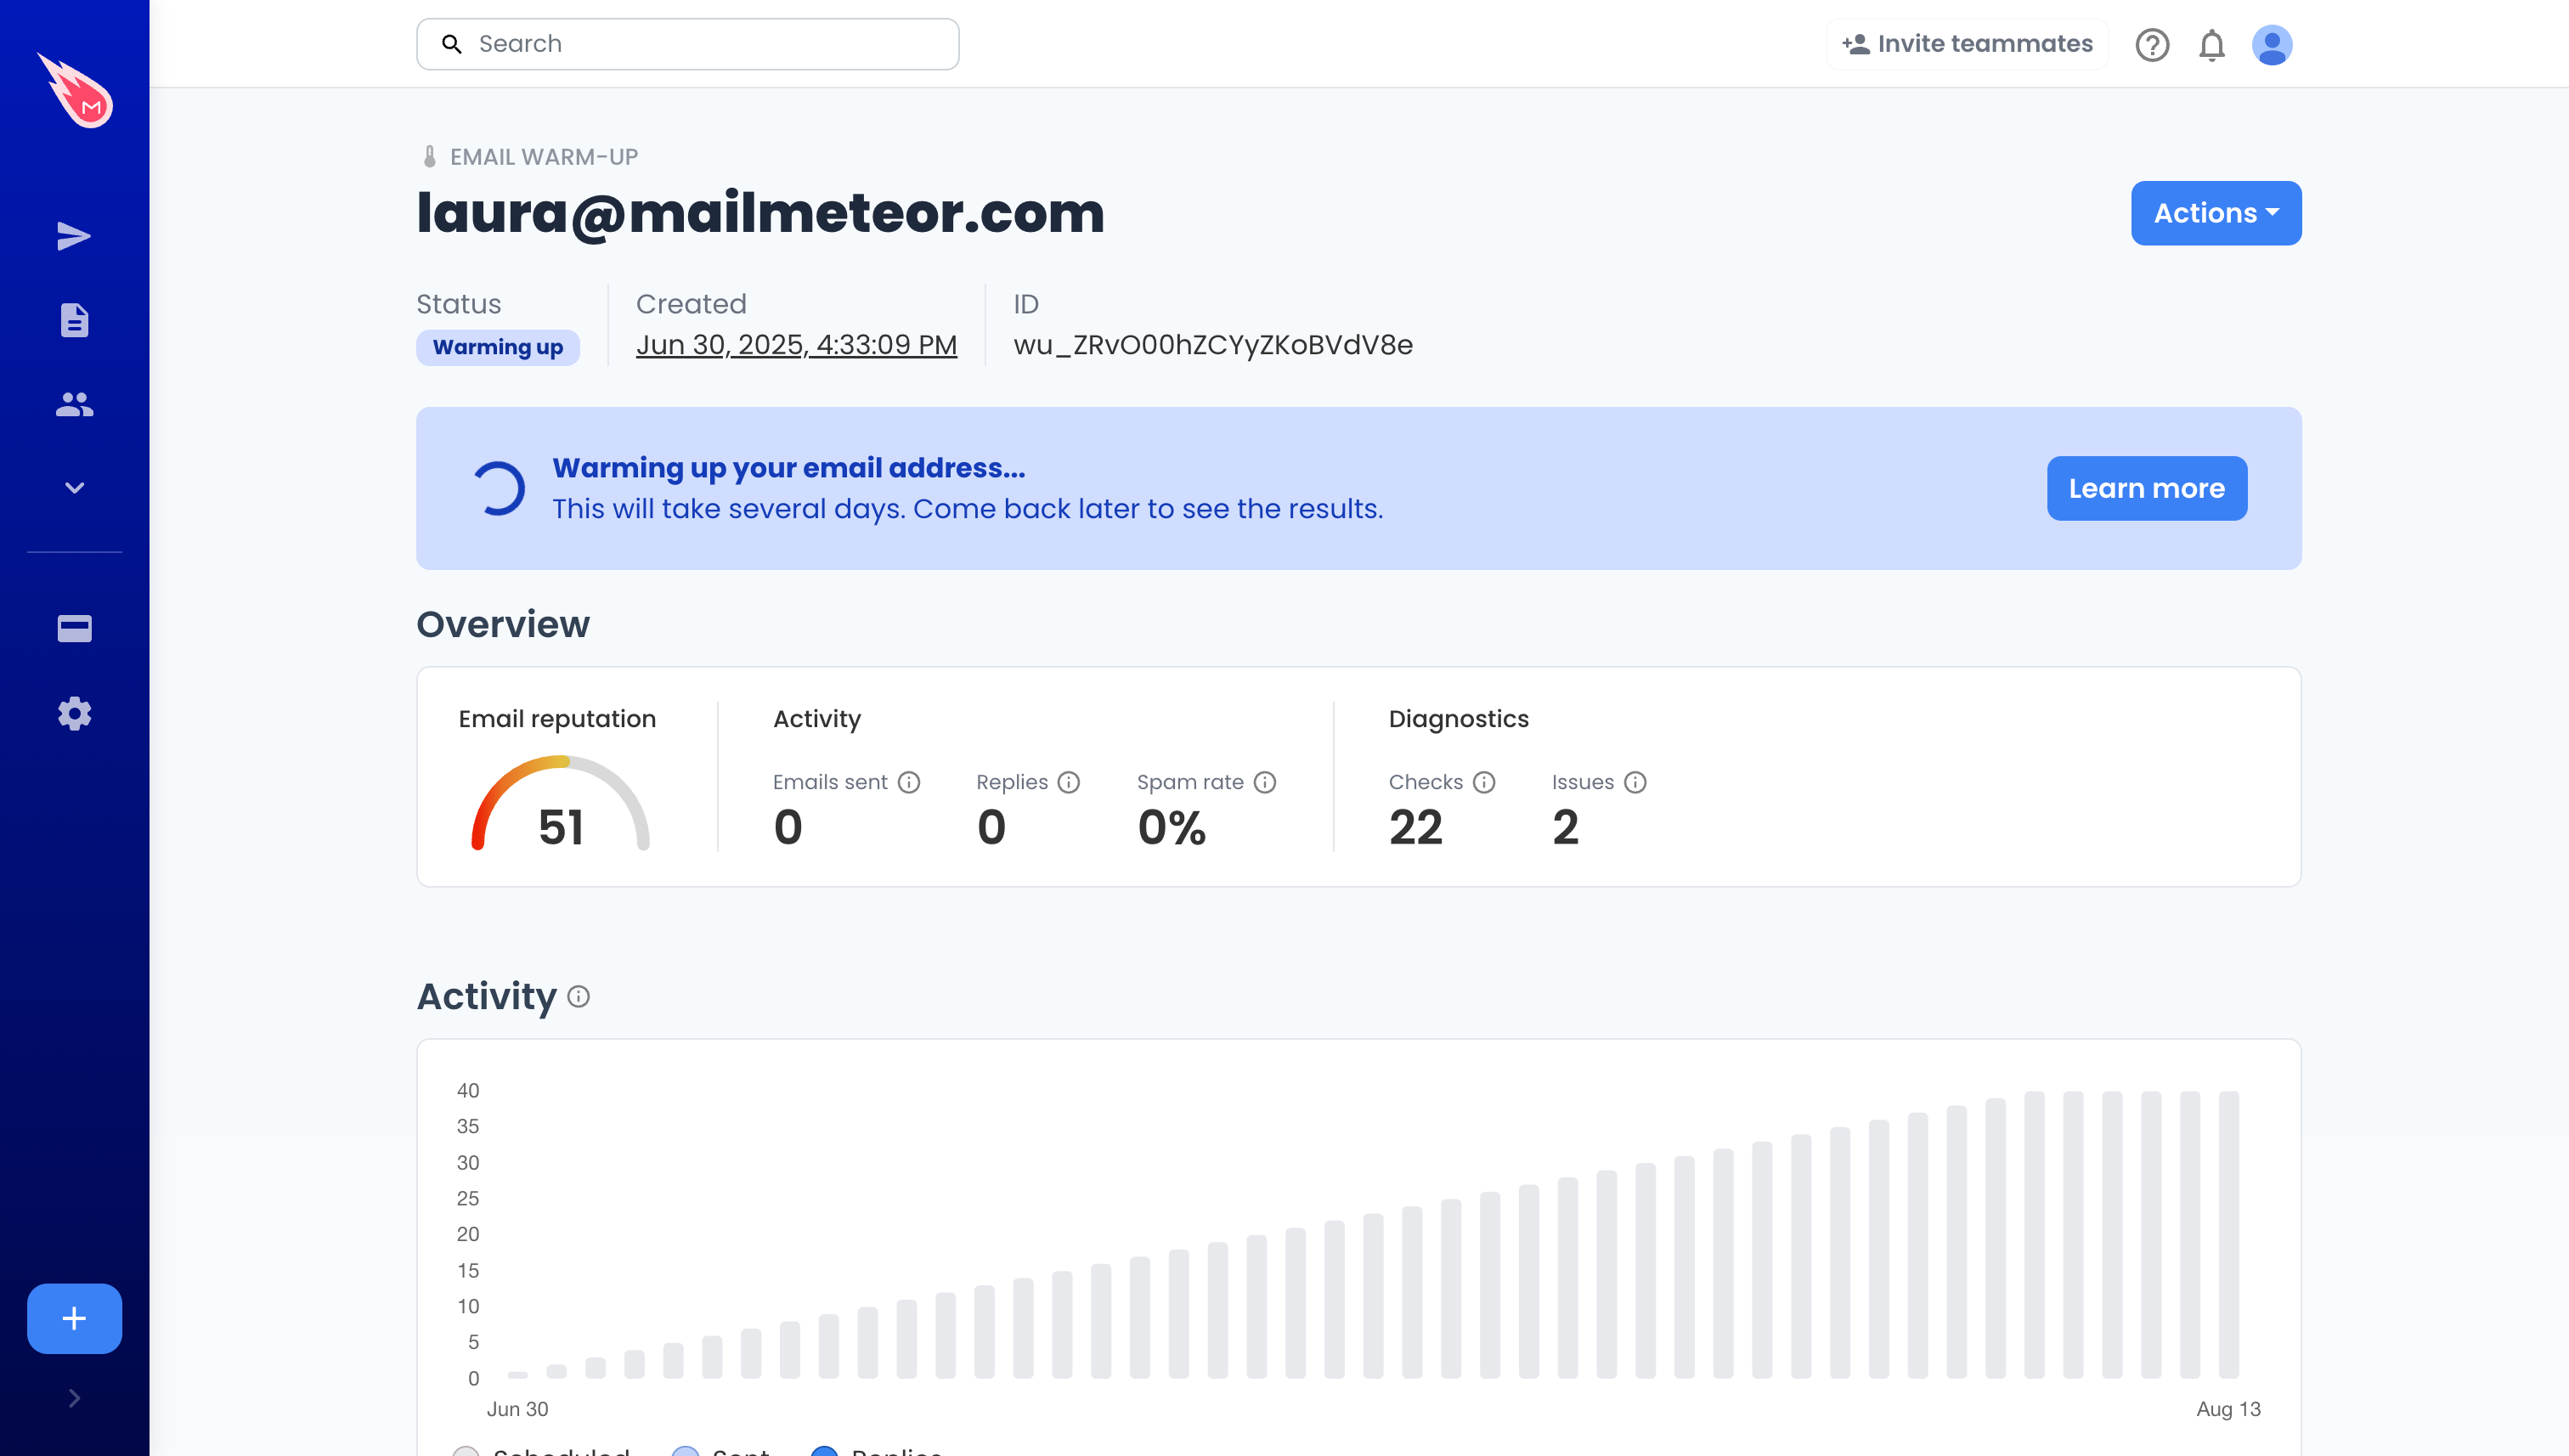
You'll see your warm-up progress on Mailmeeteor Dashboard, including daily send volume and a deliverability score.
As your warm-up progresses, your email reputation will improve. This is the trust level email providers assign to your address. You can check your reputation by regularly accessing the Dashboard or using our free tool.
Troubleshooting tips
No option to start warm-up?
Make sure your plan is on Pro or higher, and that you’ve connected your email account correctly. If you are on lower plan, you can still purchase a warm-up from Settings > Billing in the Dashboard or contact the support team.
Email isn’t warming up?
Check that your inbox supports IMAP and that Gmail security alerts haven’t blocked access. See Troubleshooting warm-up for help.
How to hide the warm-up emails in your inbox?
Create a rule to automatically archive emails that contain the word "mbx" . This keyword is included in all warm-up messages sent and received through Mailmeteor. Here’s how to create the rule in Gmail:
- Sign in to Gmail and open the Settings.
- In the Filters and Blocked Addresses section, click on Create a new filter.
- In the filter options, next to Subject, enter
wbx - Click on Create filter.
- Now choose “Skip the Inbox” (archive it), then save by clicking Create filter.