Google Sheets
Mailmeteor for Google Sheets is our flagship product, trusted by over 6 million users worldwide and rated 4.9/5 with 11,500+ reviews. It lets you send hundreds of personalized emails directly from Google Sheets.
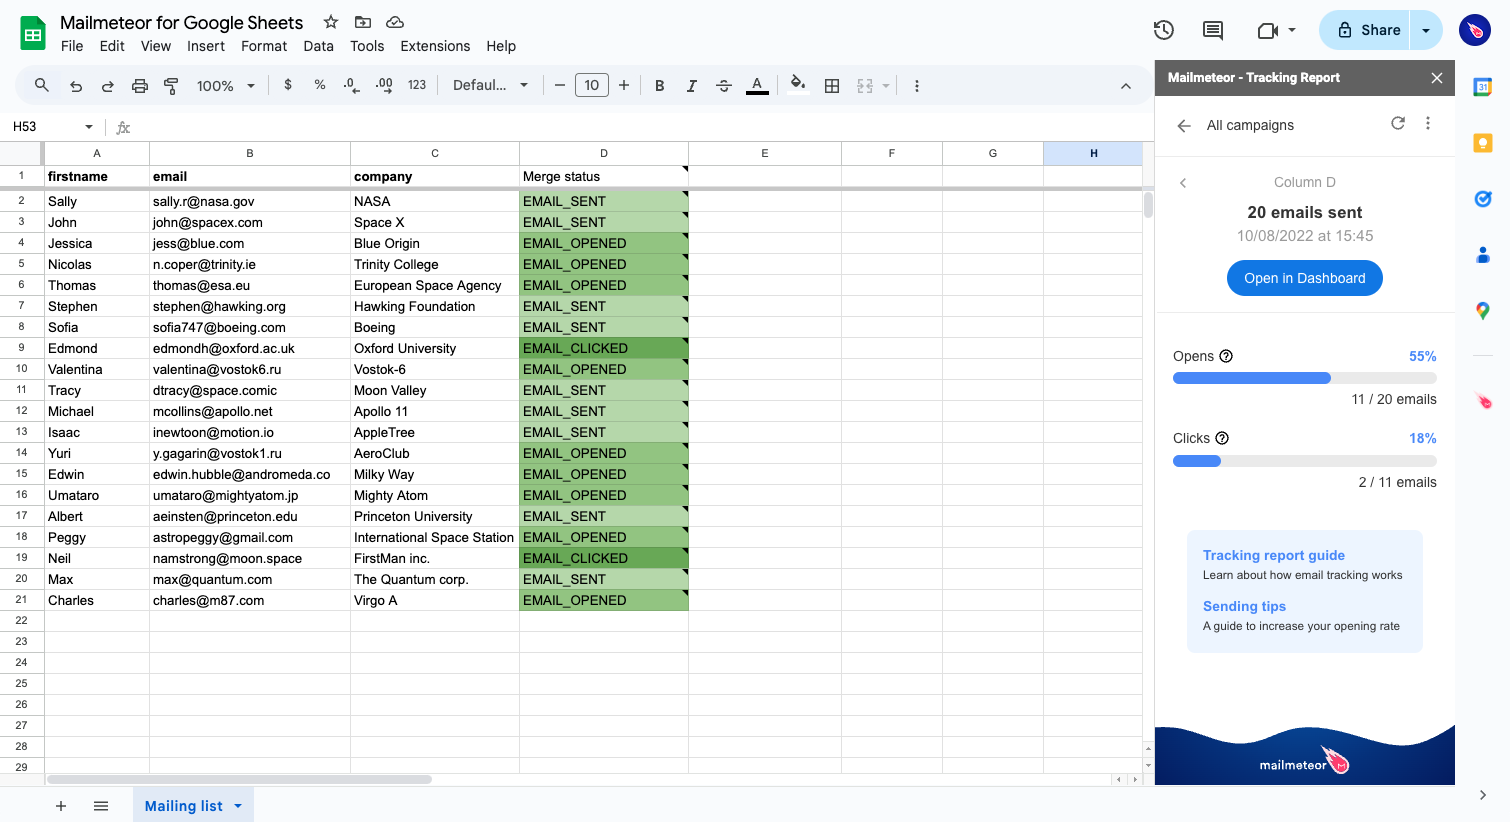
This free add-on provides everything you need to send email campaigns within Google Sheets, with powerful features like personalization, schedule send, autopilot, tracking, and more.
Here are some popular ways our users use it:
- Sending newsletters from Google Sheets
- Sharing payslips or invoices
- Lead generation, with automated follow-ups
- Automatically sending emails based on Google Sheets changes
How to install Mailmeteor extension for Google Sheets?
Mailmeteor is a verified Google Workspace add-on. To start using the app, install it for your own use or for your all team:
Individual installation
1) Go to the Google Workspace Marketplace
For starters, head to the Mailmeteor page on the Google Workspace Marketplace.
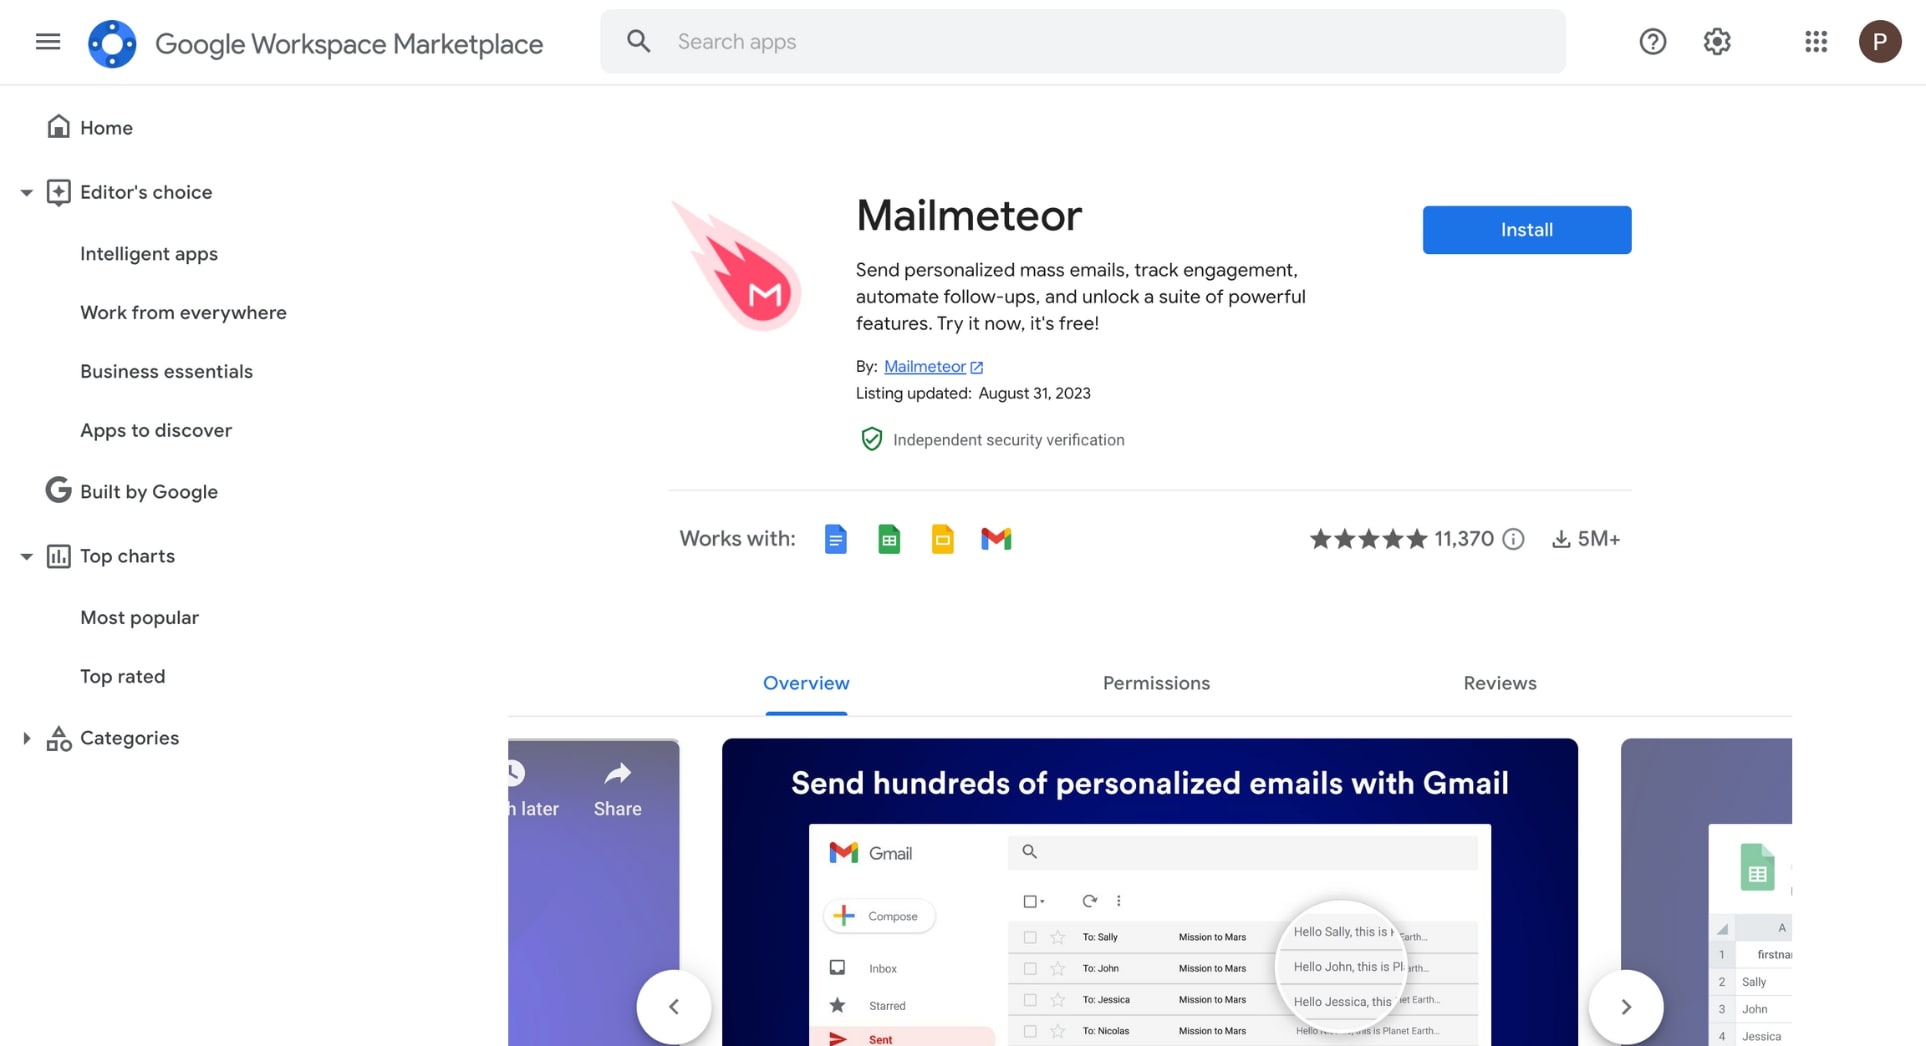
Go to the Google Workspace Marketplace
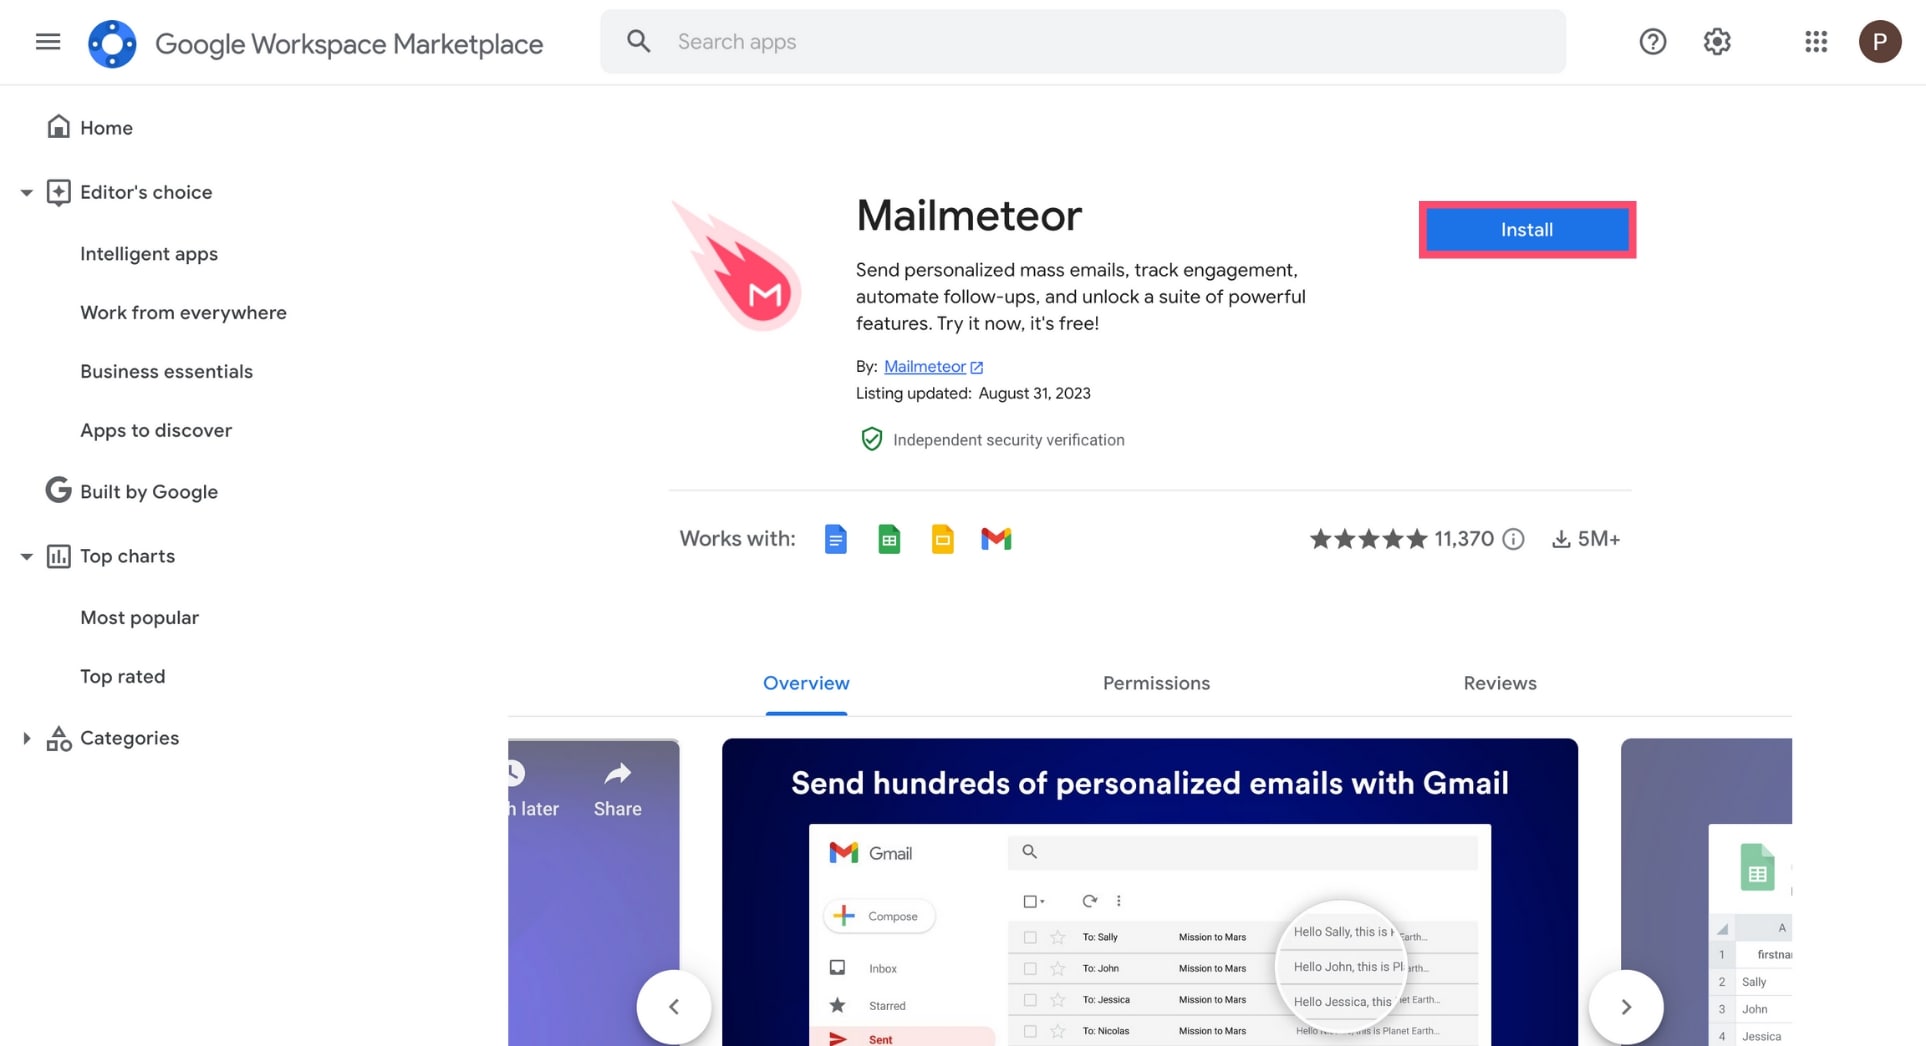
2) Install Mailmeteor and review permissions
Click on the “Install” button.
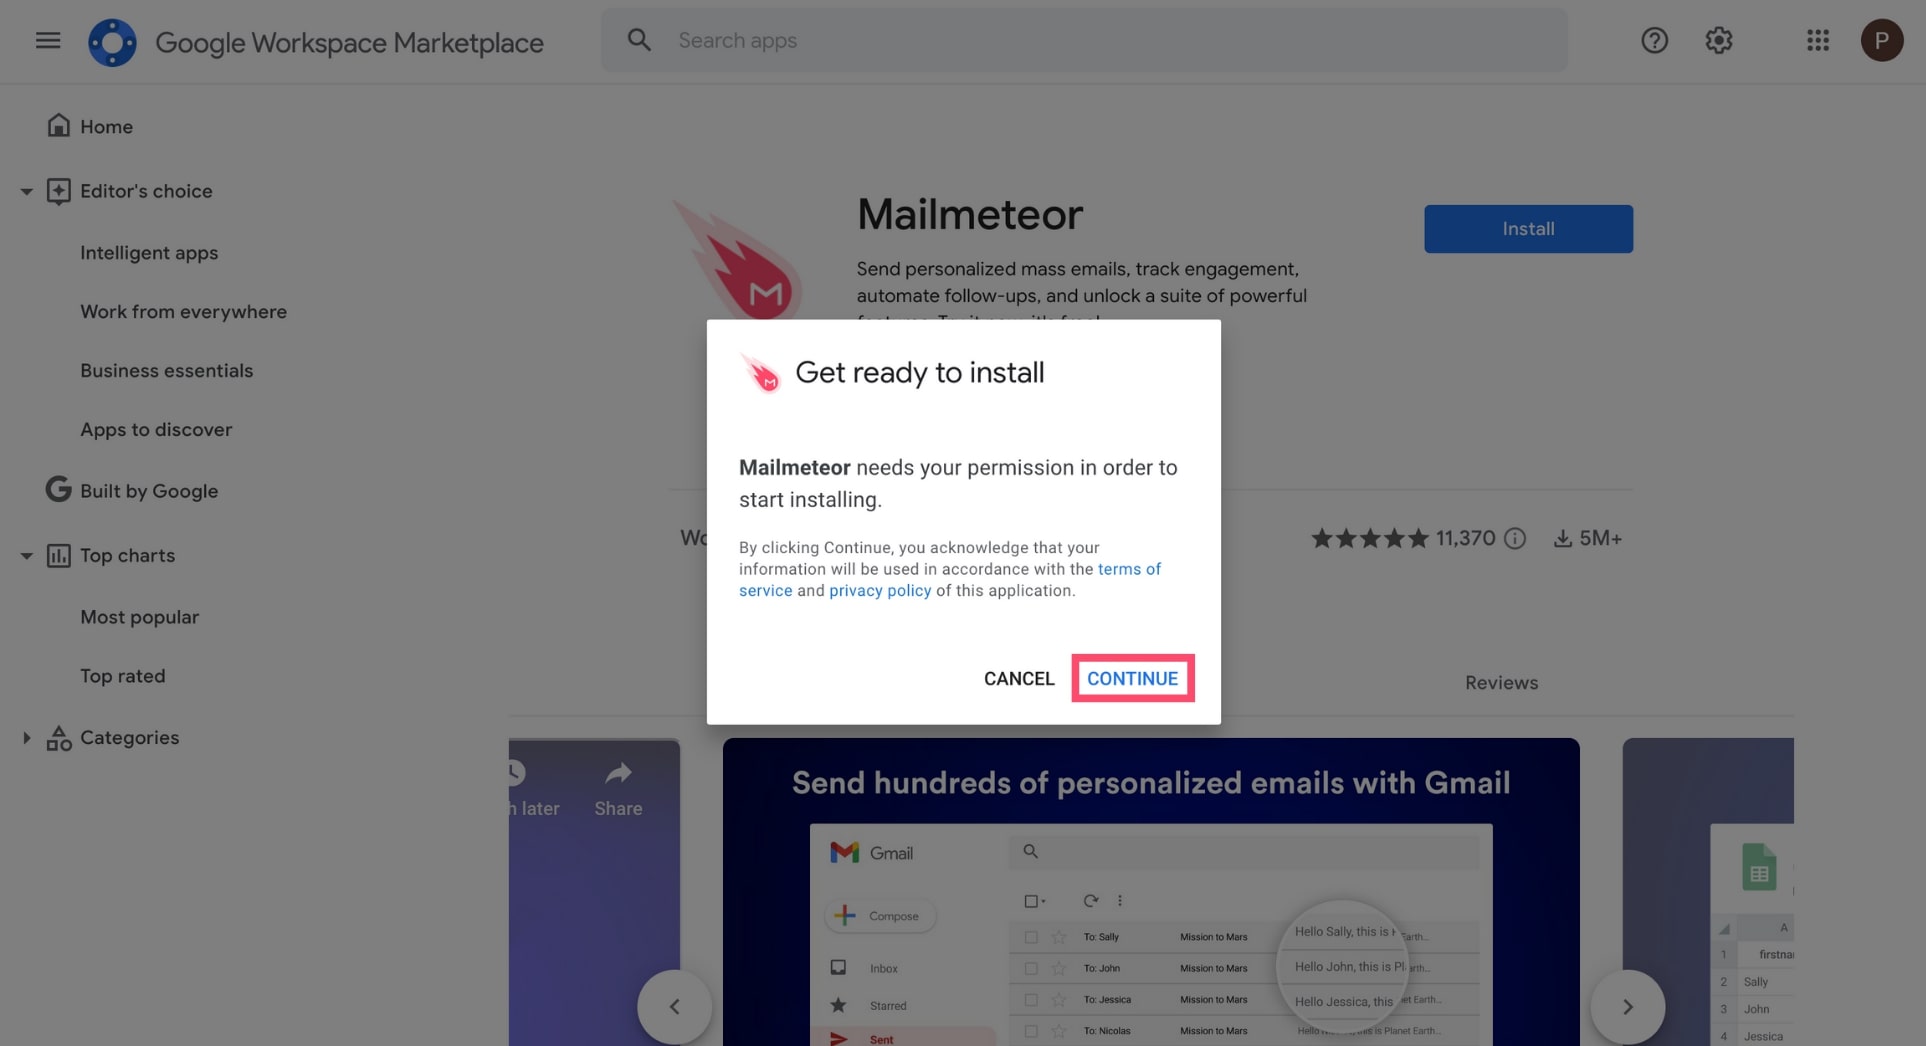
A consent popup will appear. Click on “Continue”.
Select the Google account on which you wish to install Mailmeteor.
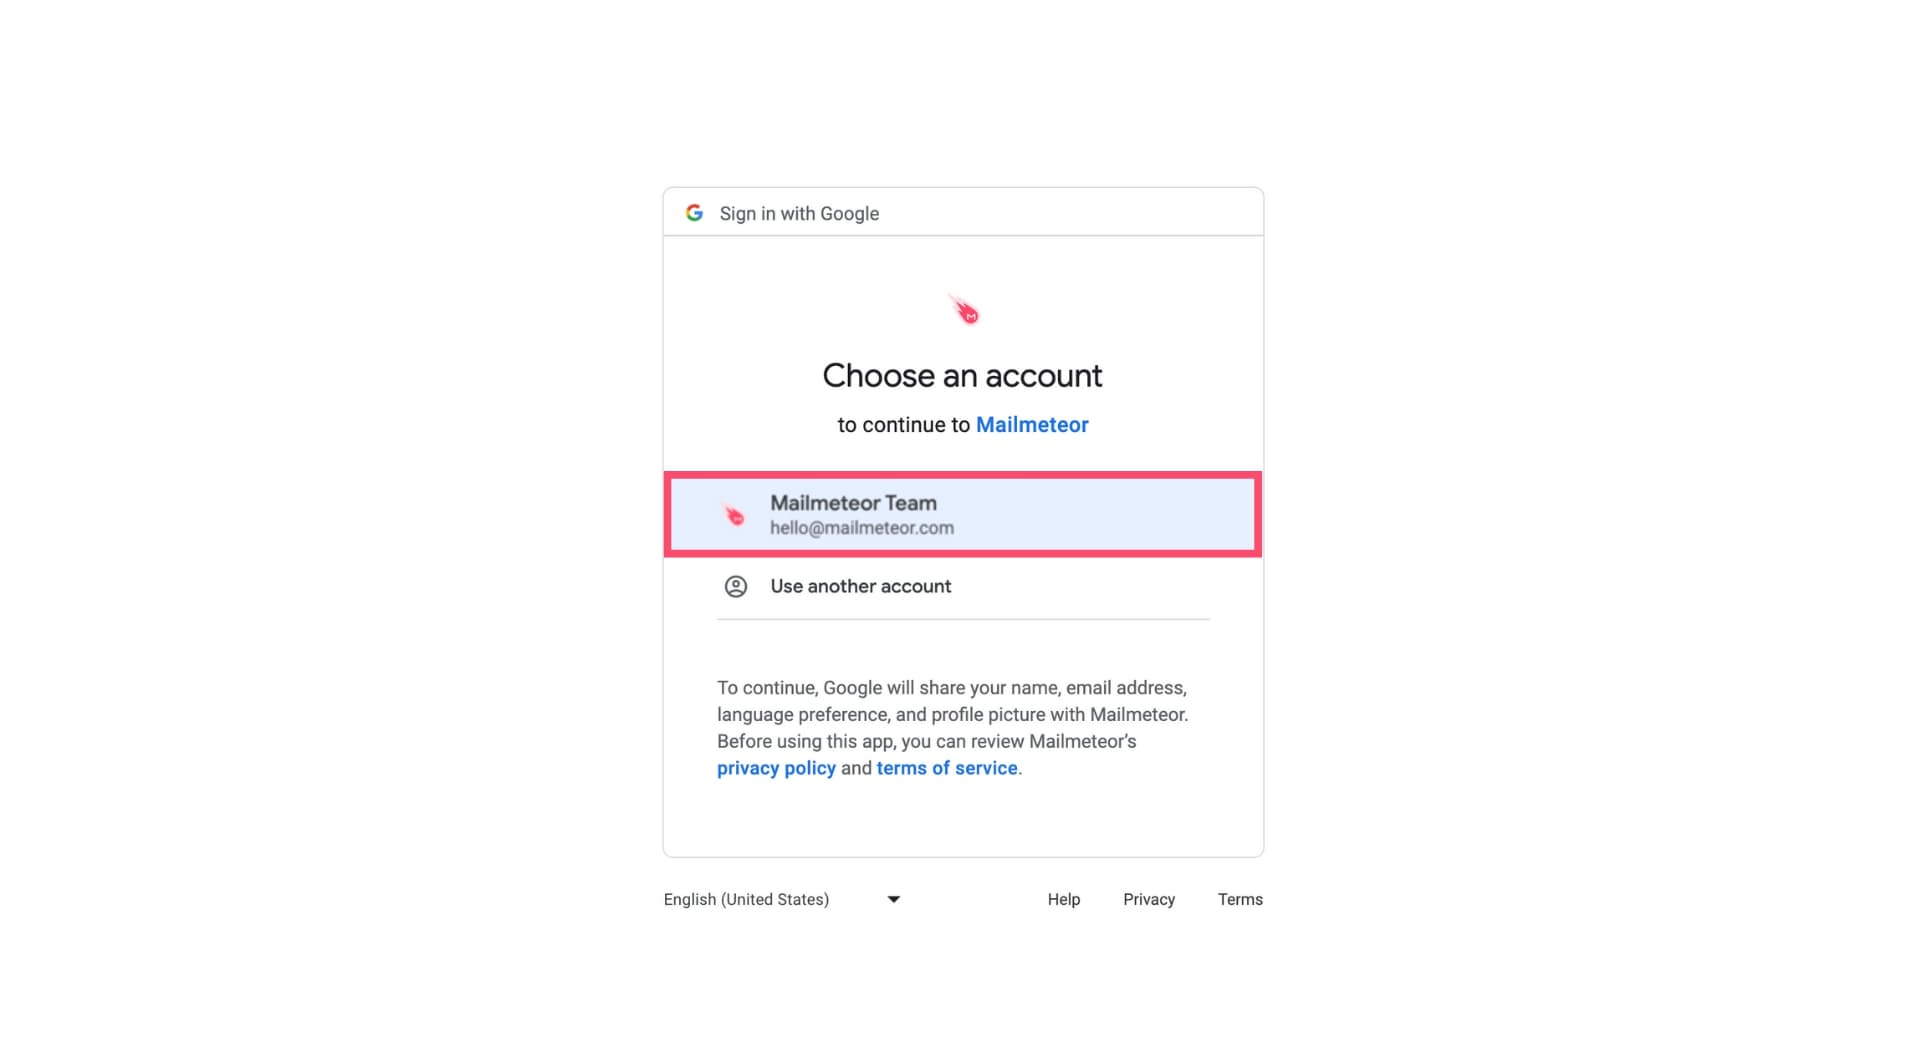
Review the permissions and click on “Allow”
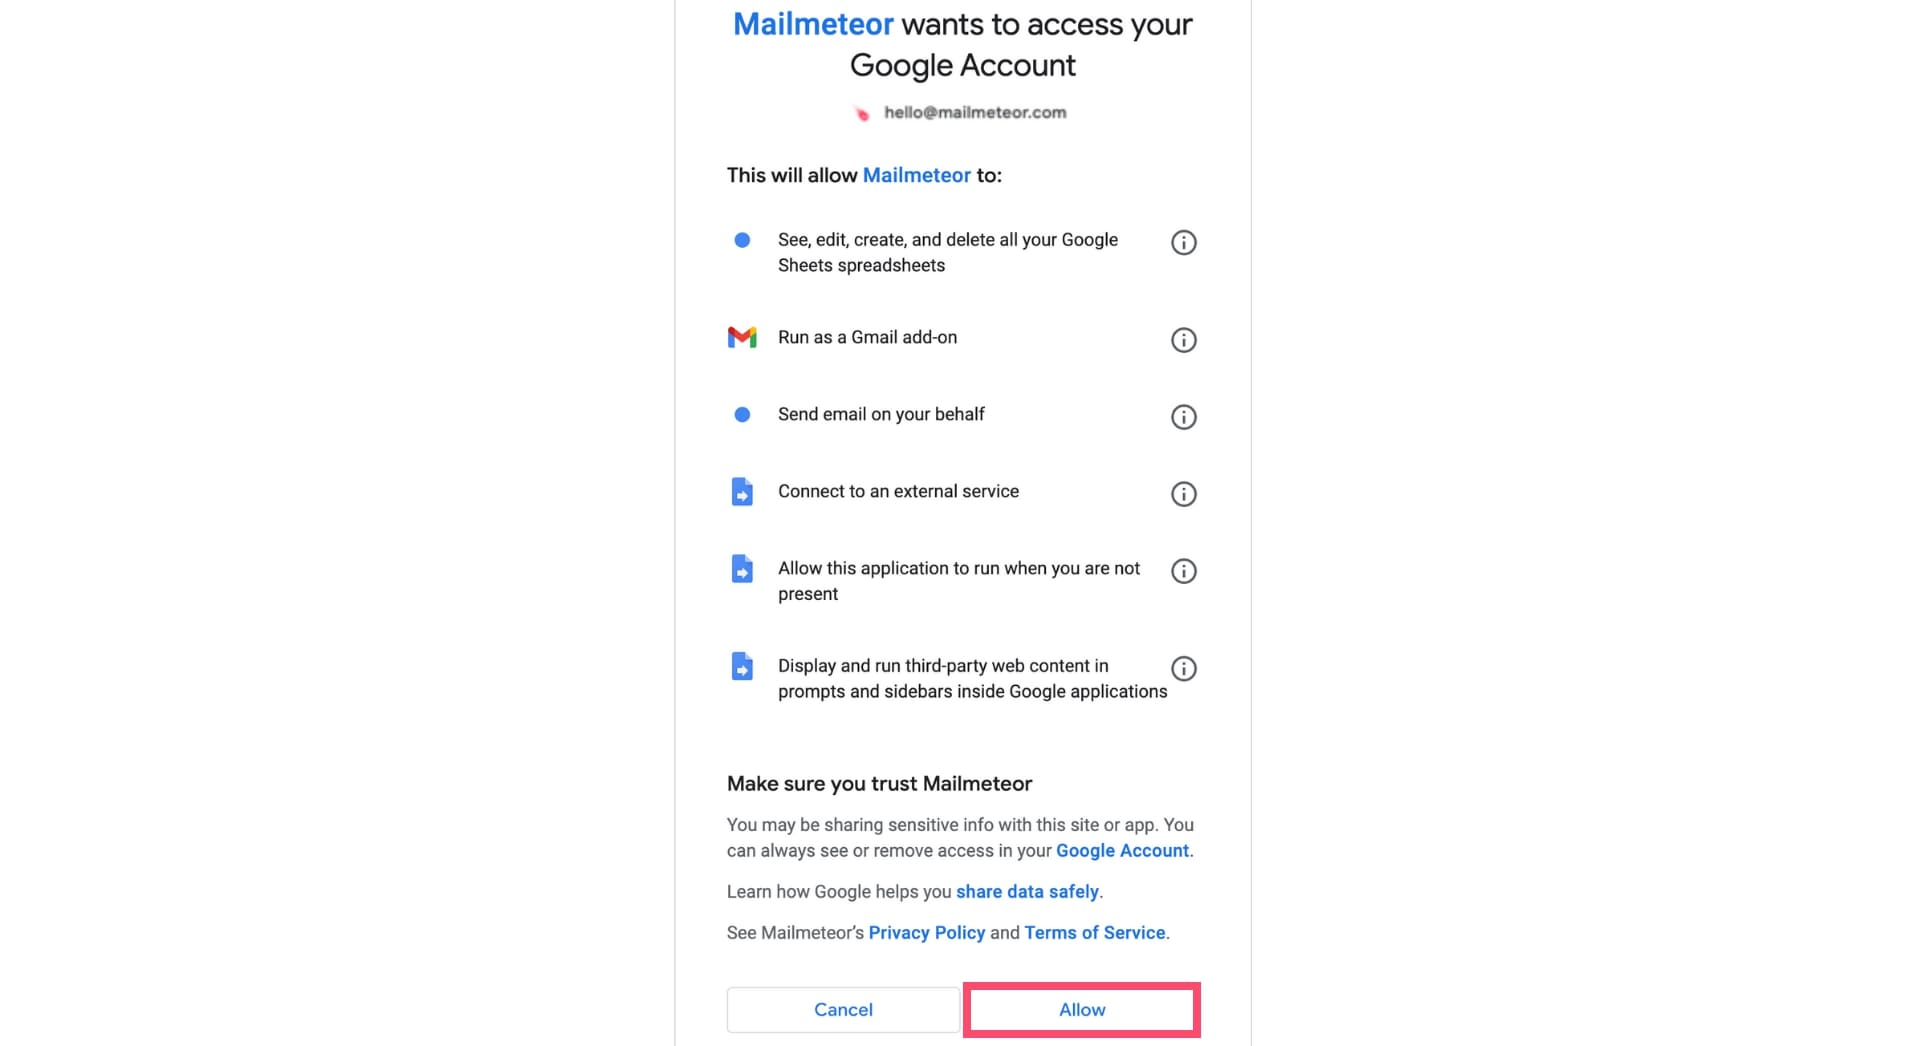
We built Mailmeteor to respect your privacy by design. Visit this page to learn more about Mailmeteor permissions.
Click on “Next”.
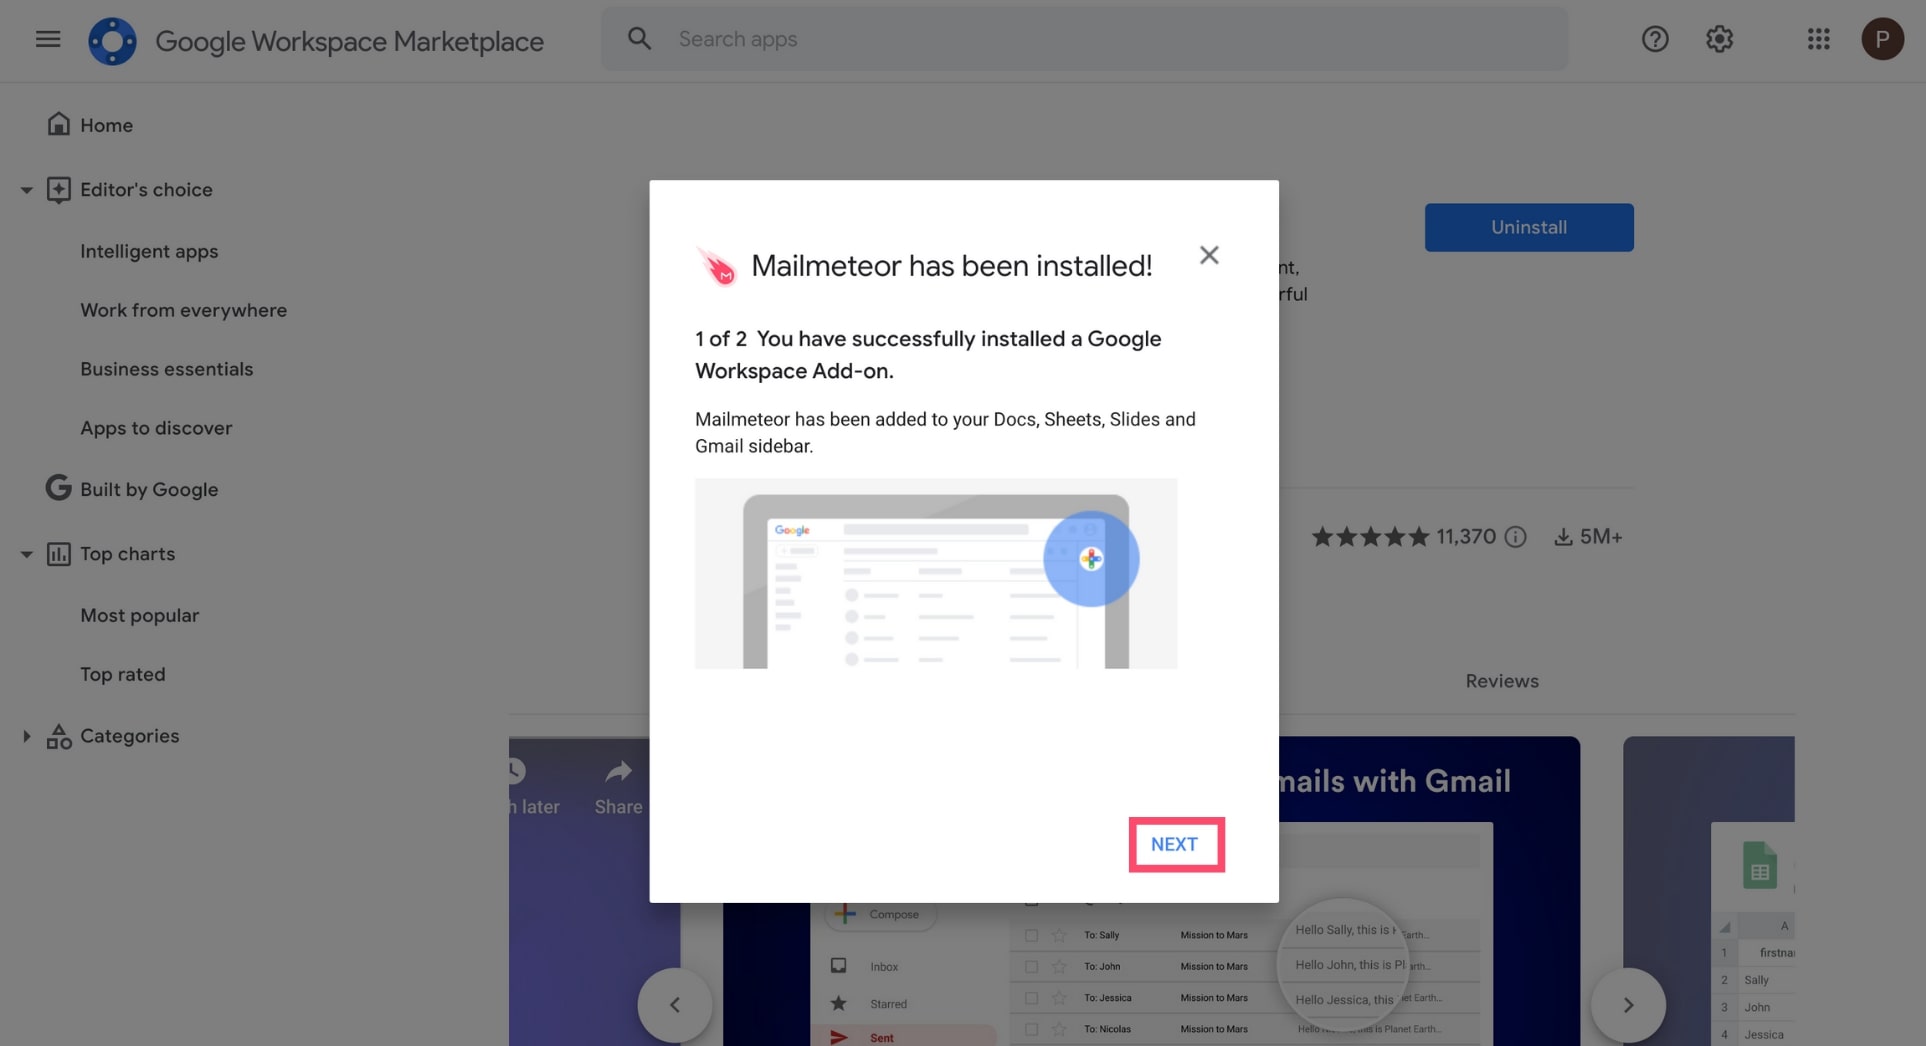
Then click on “Done”.
.jpg)
3) Start using Mailmeteor
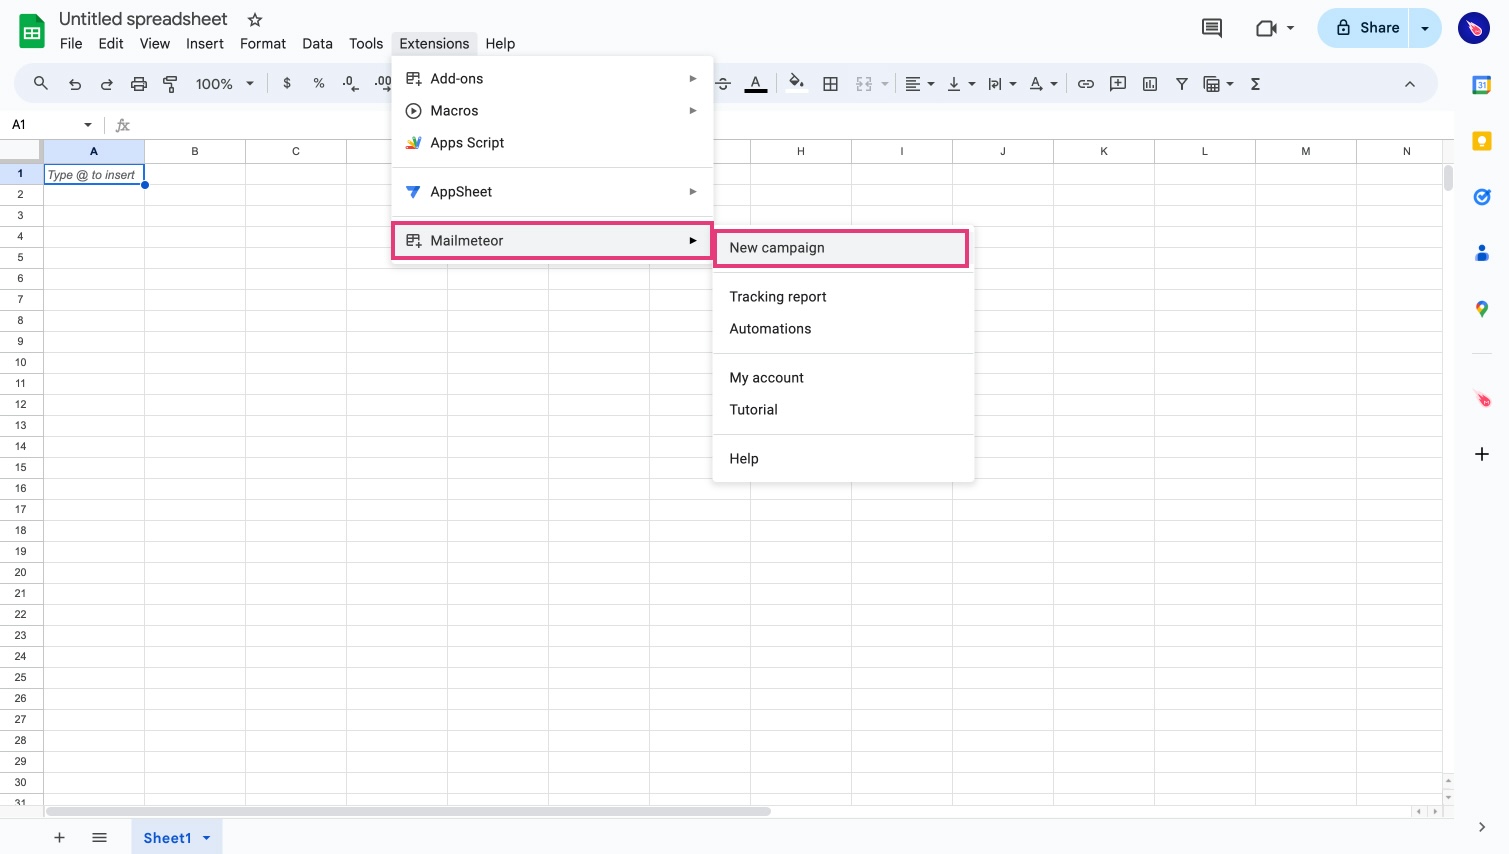
Mailmeteor is now installed 🥳 To start using the app, open a Google Sheets spreadsheet, go to the Extensions menu. Then select Mailmeteor > Open Mailmeteor.
Domain installation
The Google Workspace Marketplace provides a selection of enterprise apps that can enhance the features of native Google Cloud apps.
Mailmeteor is a verified Google Workspace add-on. To start using the app, install it on your domain.
1) Go to the Google Workspace Marketplace
For starters, head to the Mailmeteor page on the Google Workspace Marketplace. Make sure that you’re logged in with your Admin account.

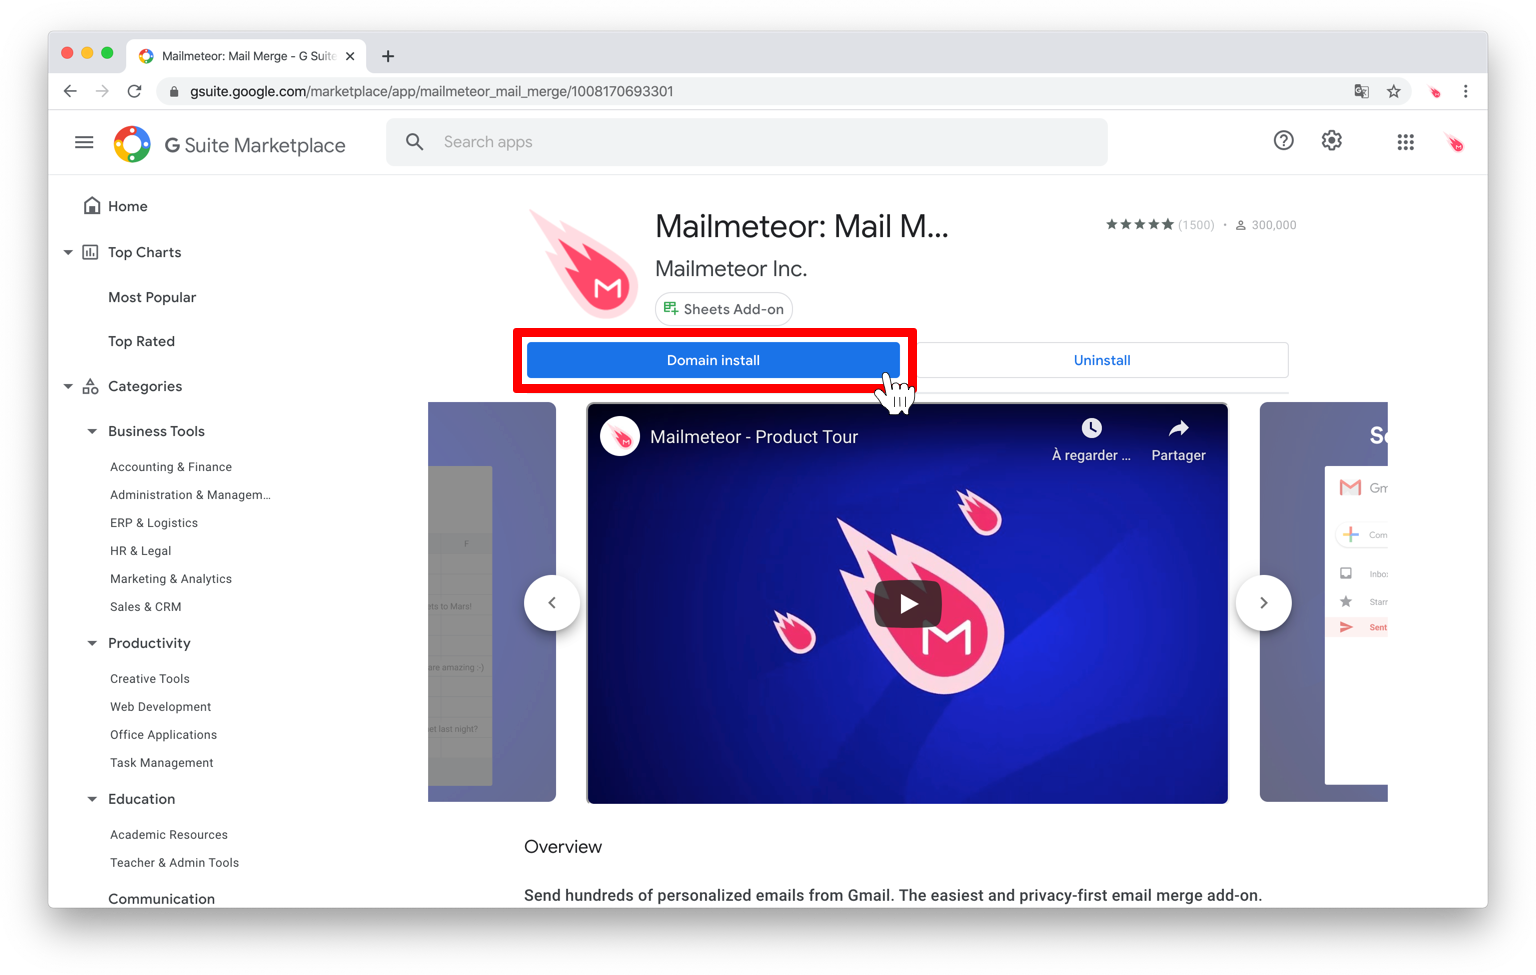
2) Install Mailmeteor on your domain
Click on the Domain install button.
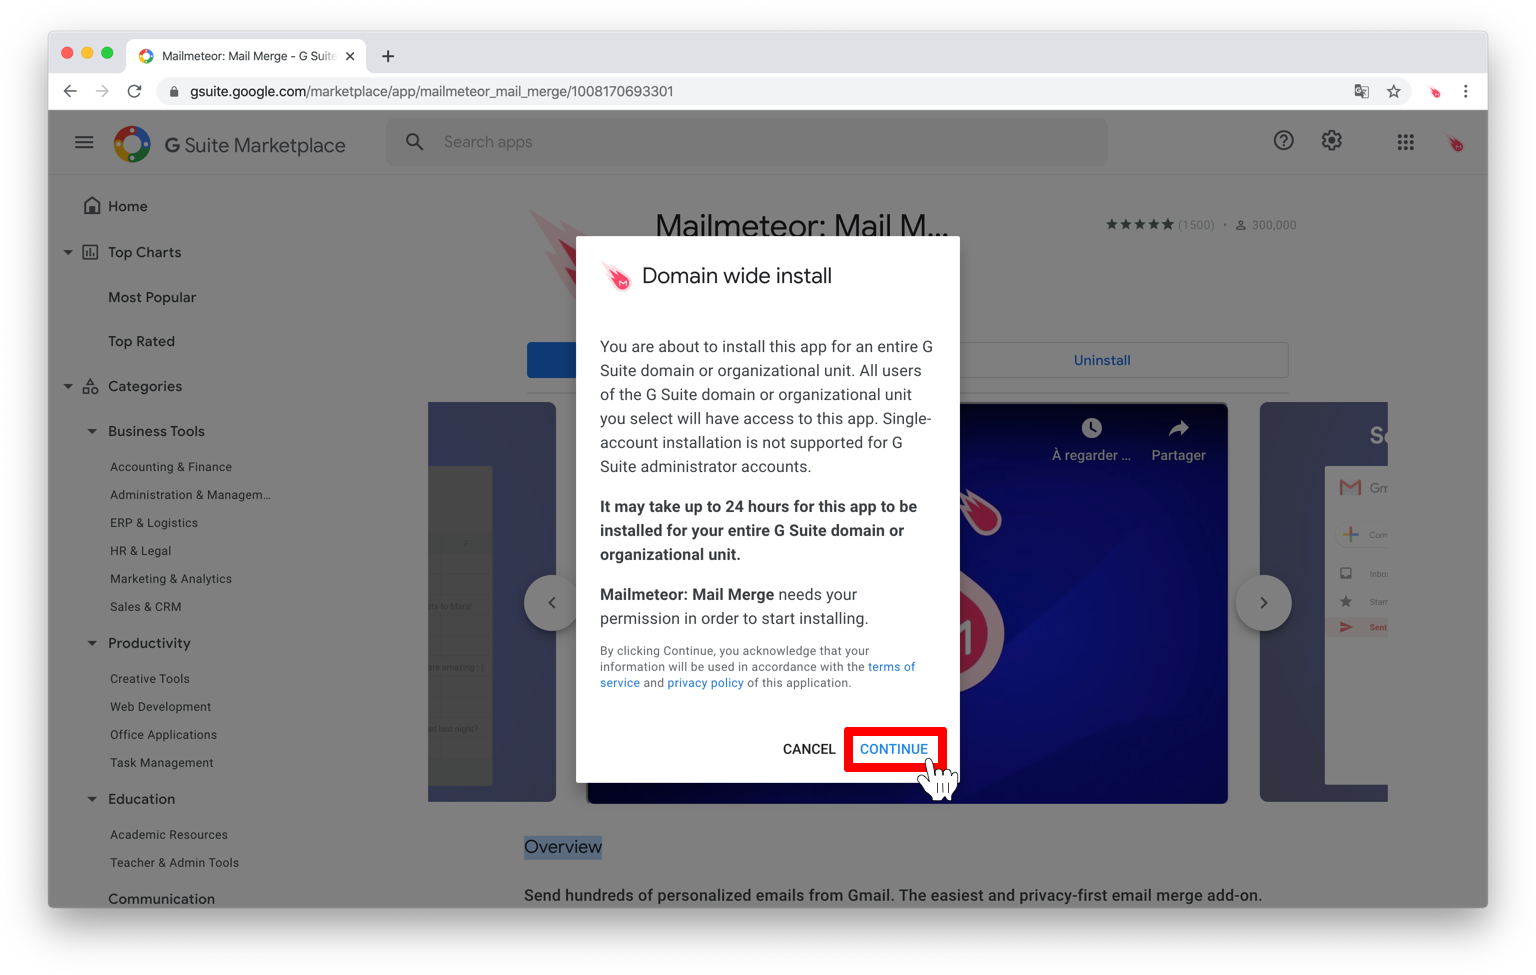
A consent popup will appear. Click Continue.
Mailmeteor is a verified Google Workspace add-on. The app underwent a strict validation process before being published on the Google Marketplace. Read more about Google’s verification process and how we keep our platform safe.
Select the domain on which you want to install Mailmeteor. Then, review permissions, tick the Terms of Service box, and click Accept.

We built Mailmeteor to respect your privacy by design. The app complies with the French Data Protection Laws and the European General Data Protection Regulation 2016/679 (GDPR). Read more about Mailmeteor permissions.
To finish installing Mailmeteor, click Next.
Then click Done.
3) Start using Mailmeteor
Mailmeteor is now installed on your Google Workspace domain. Congratulations 🥳 To start using the app, open a Google Sheets spreadsheet, go to the Extensions menu, and click Mailmeteor > Open Mailmeteor.
What’s next?
Now that you’ve installed Mailmeteor on your domain, here’s how you can continue the onboarding process.
Invite teammates to Mailmeteor 🤝
Want to start working with the members of your team? Mailmeteor lets you add more users in just a few clicks. Here’s how to invite your teammates to join. Each user you add will automatically gain access to the same features as you.
Education Program 🎓
Are you part of a school, college, or university? The Mailmeteor Education Program offers free Premium accounts to all members of your staff or students. Learn more about the Mailmeteor Education Program and how to apply.