Schedule send
When you prepare a mail merge, you can schedule the emails to be sent at a later date. Here’s how to do it:
- Go to Mailmeteor Dashboard.
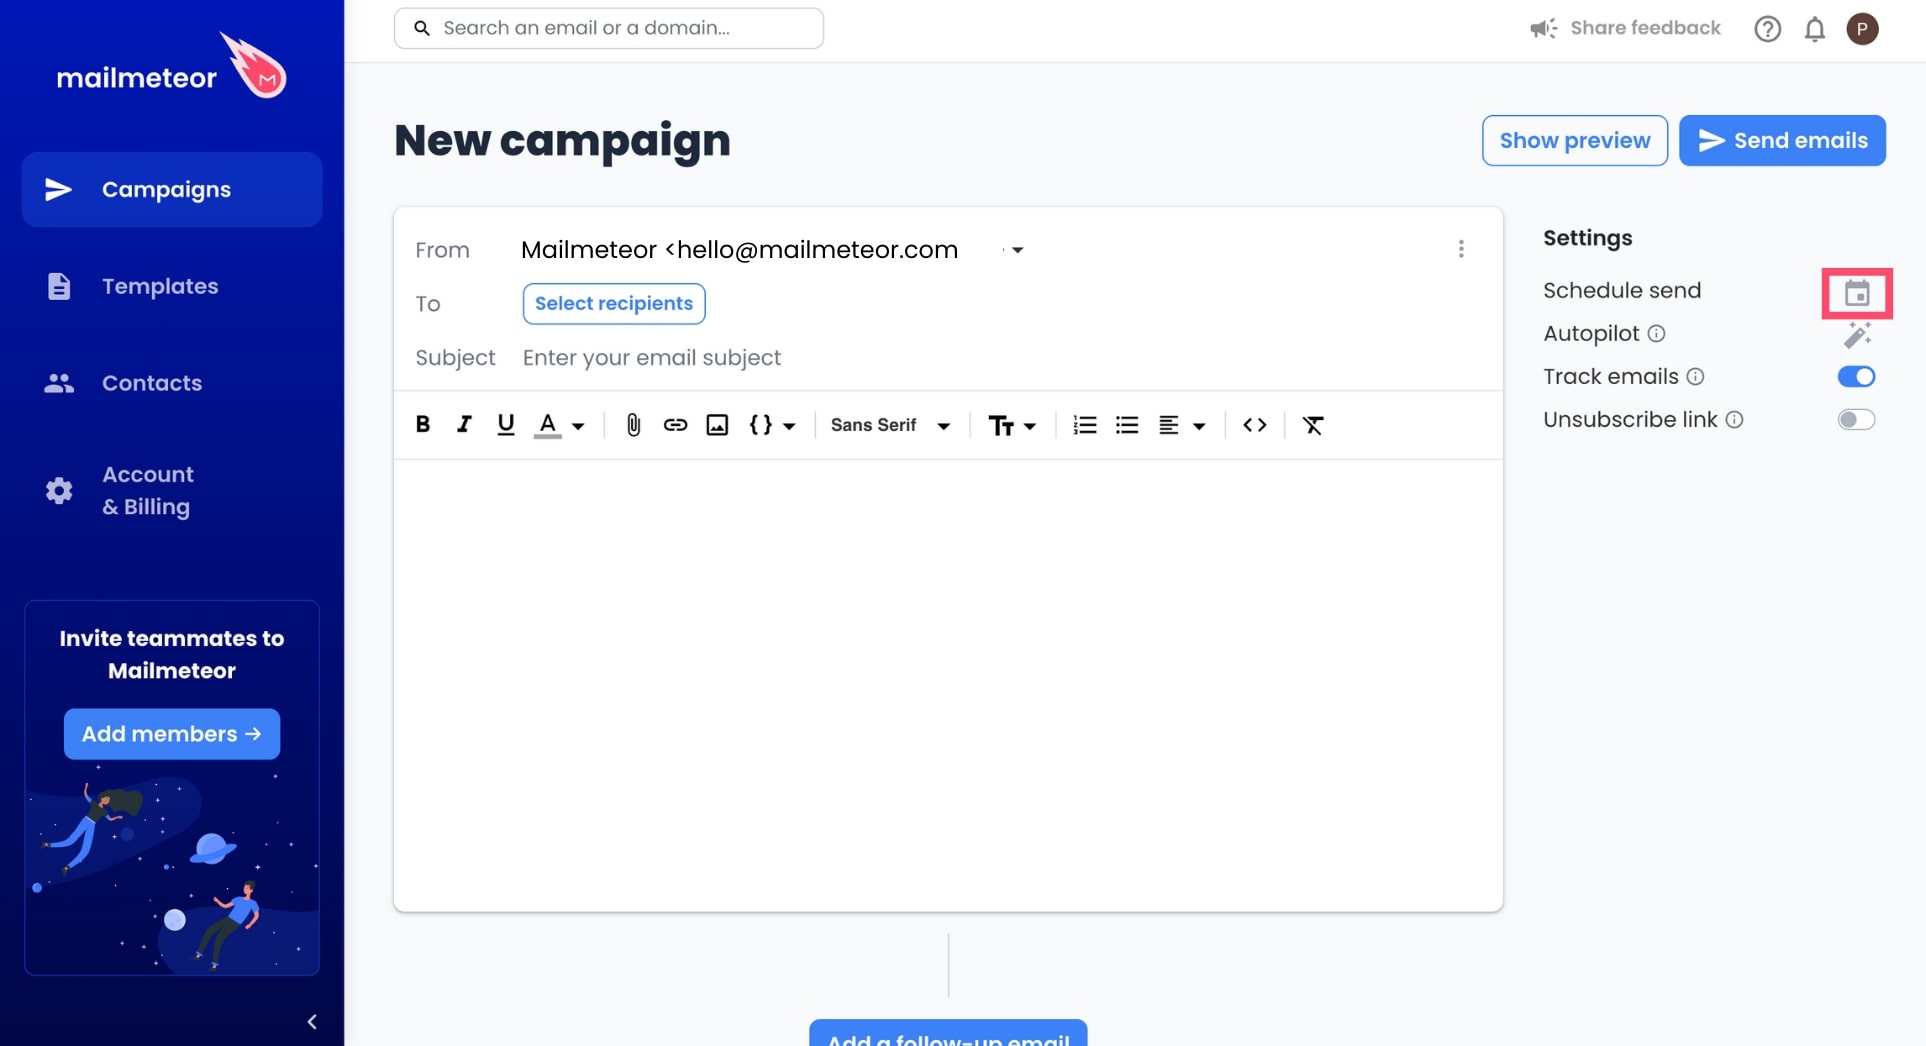
- Create a new campaign.
-
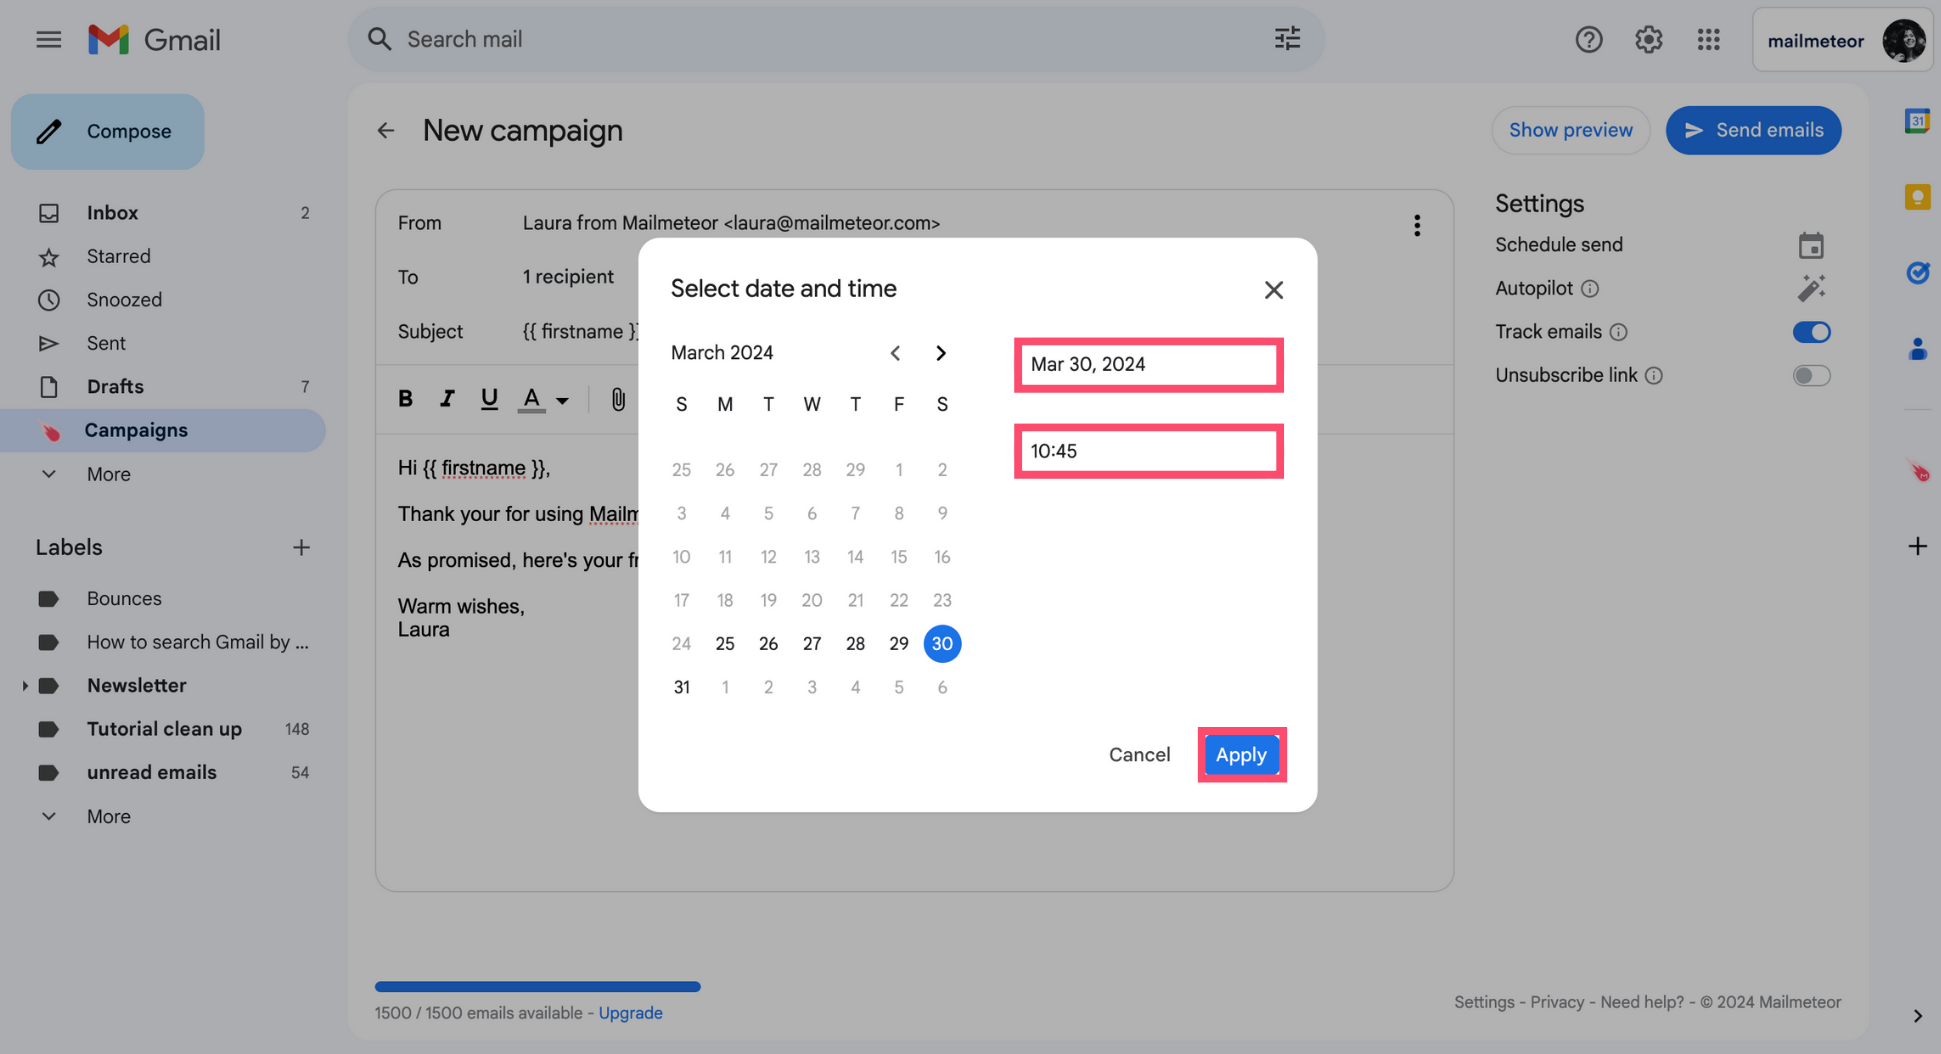
Click Schedule send.
-
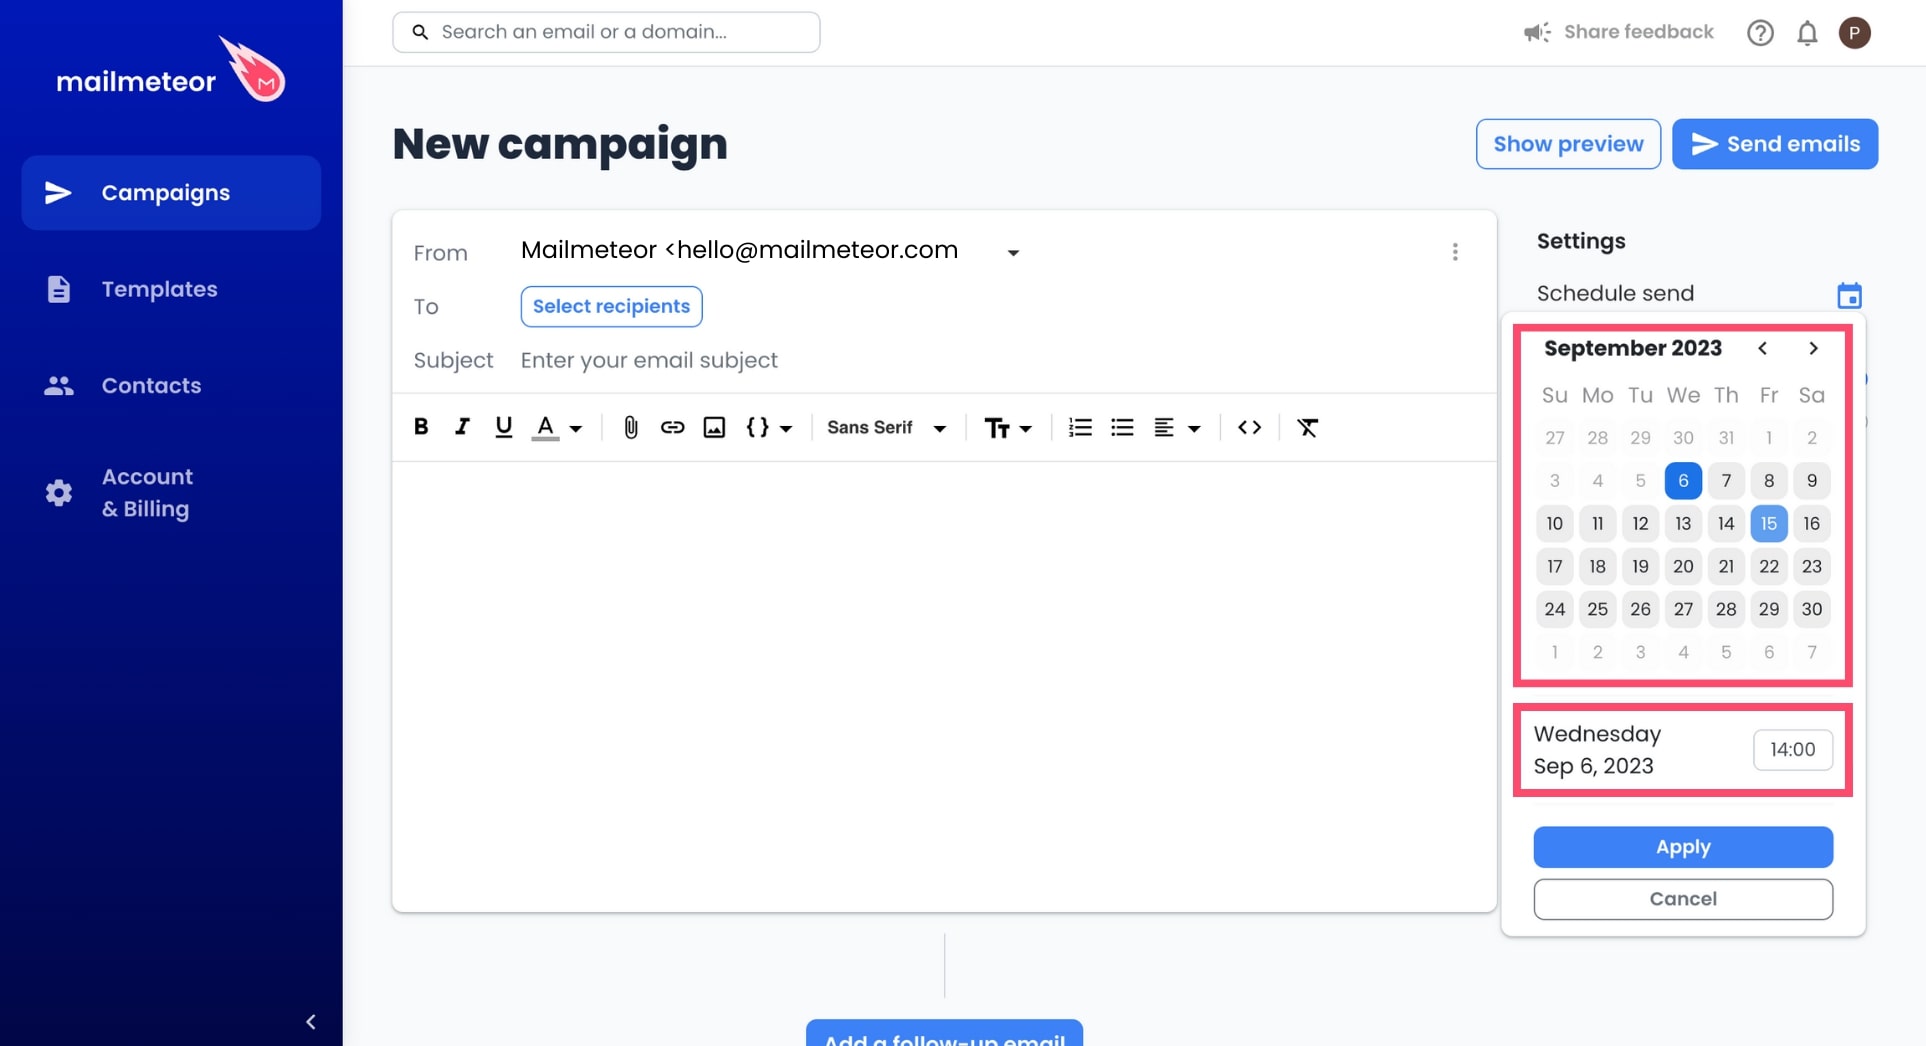
Select the date and time.
-
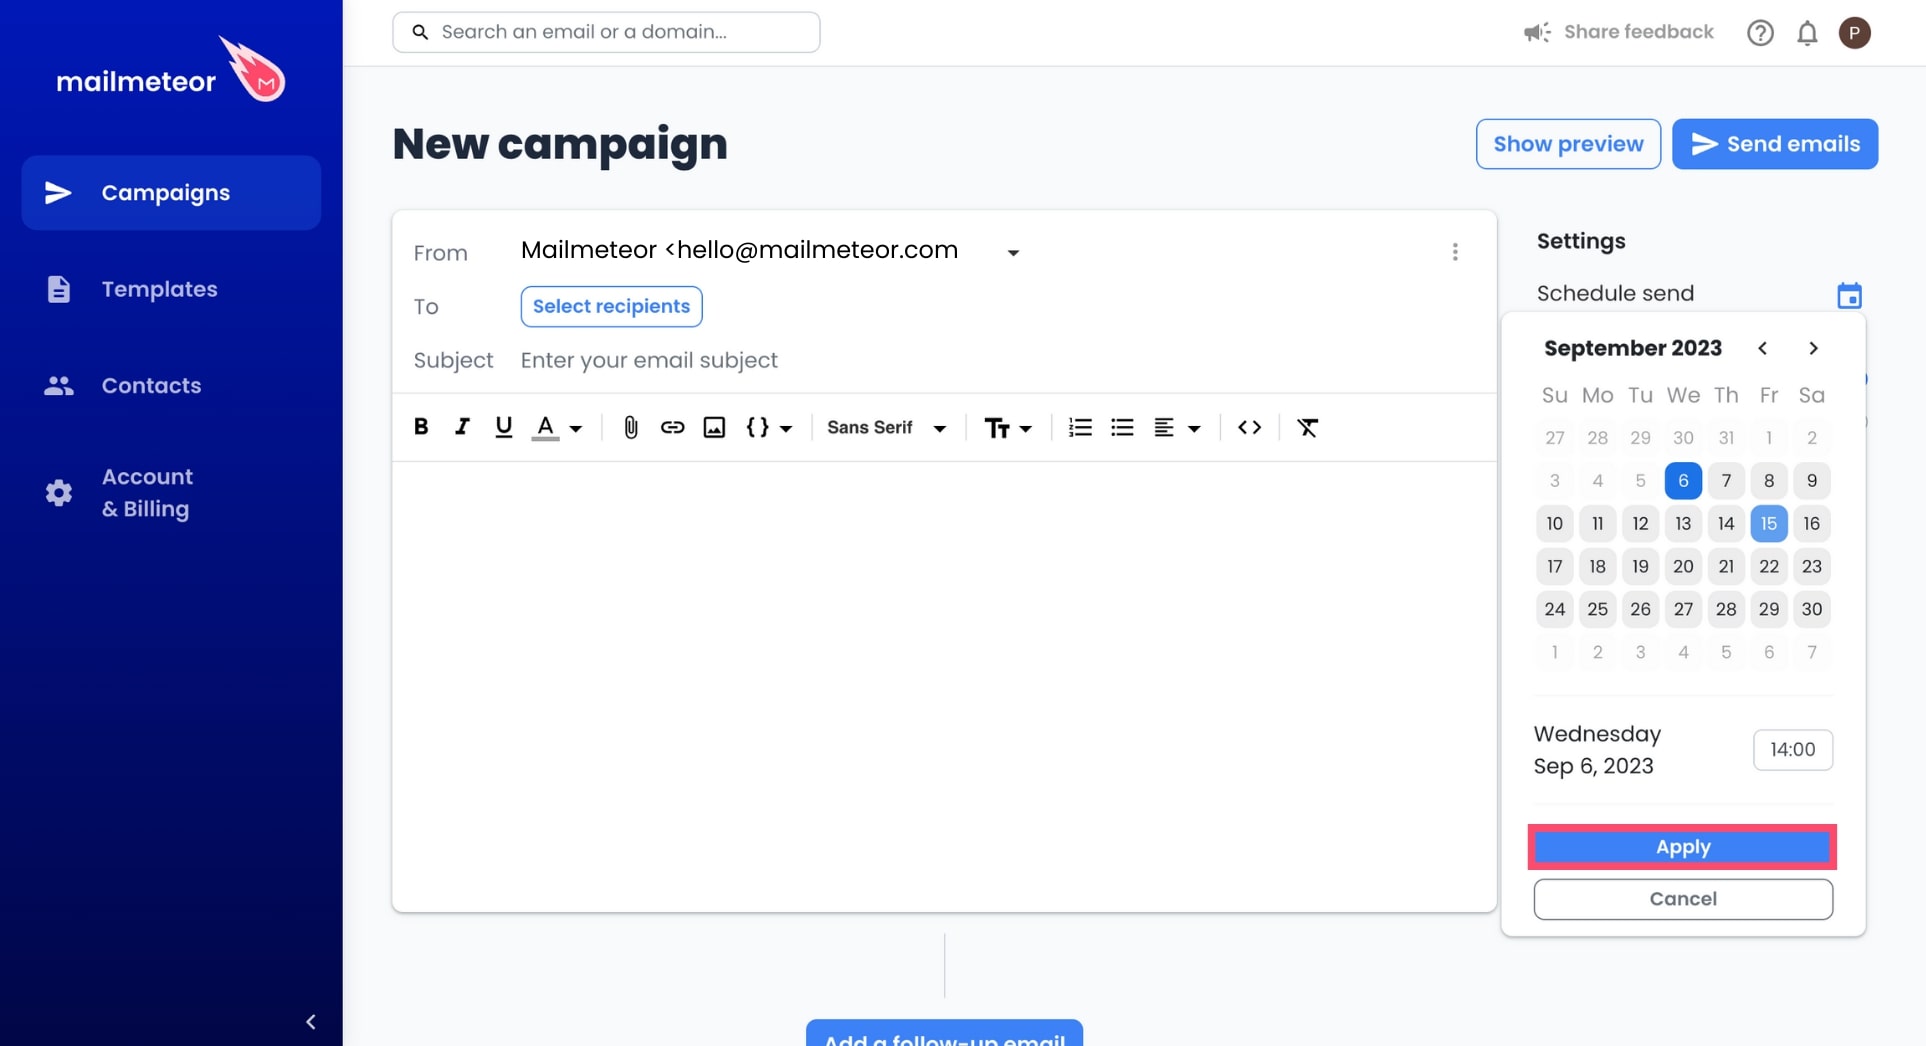
Click Apply to confirm.
How to view scheduled campaigns?
- Sign in to Mailmeteor Dashboard.
-
Go to Campaigns > Scheduled.
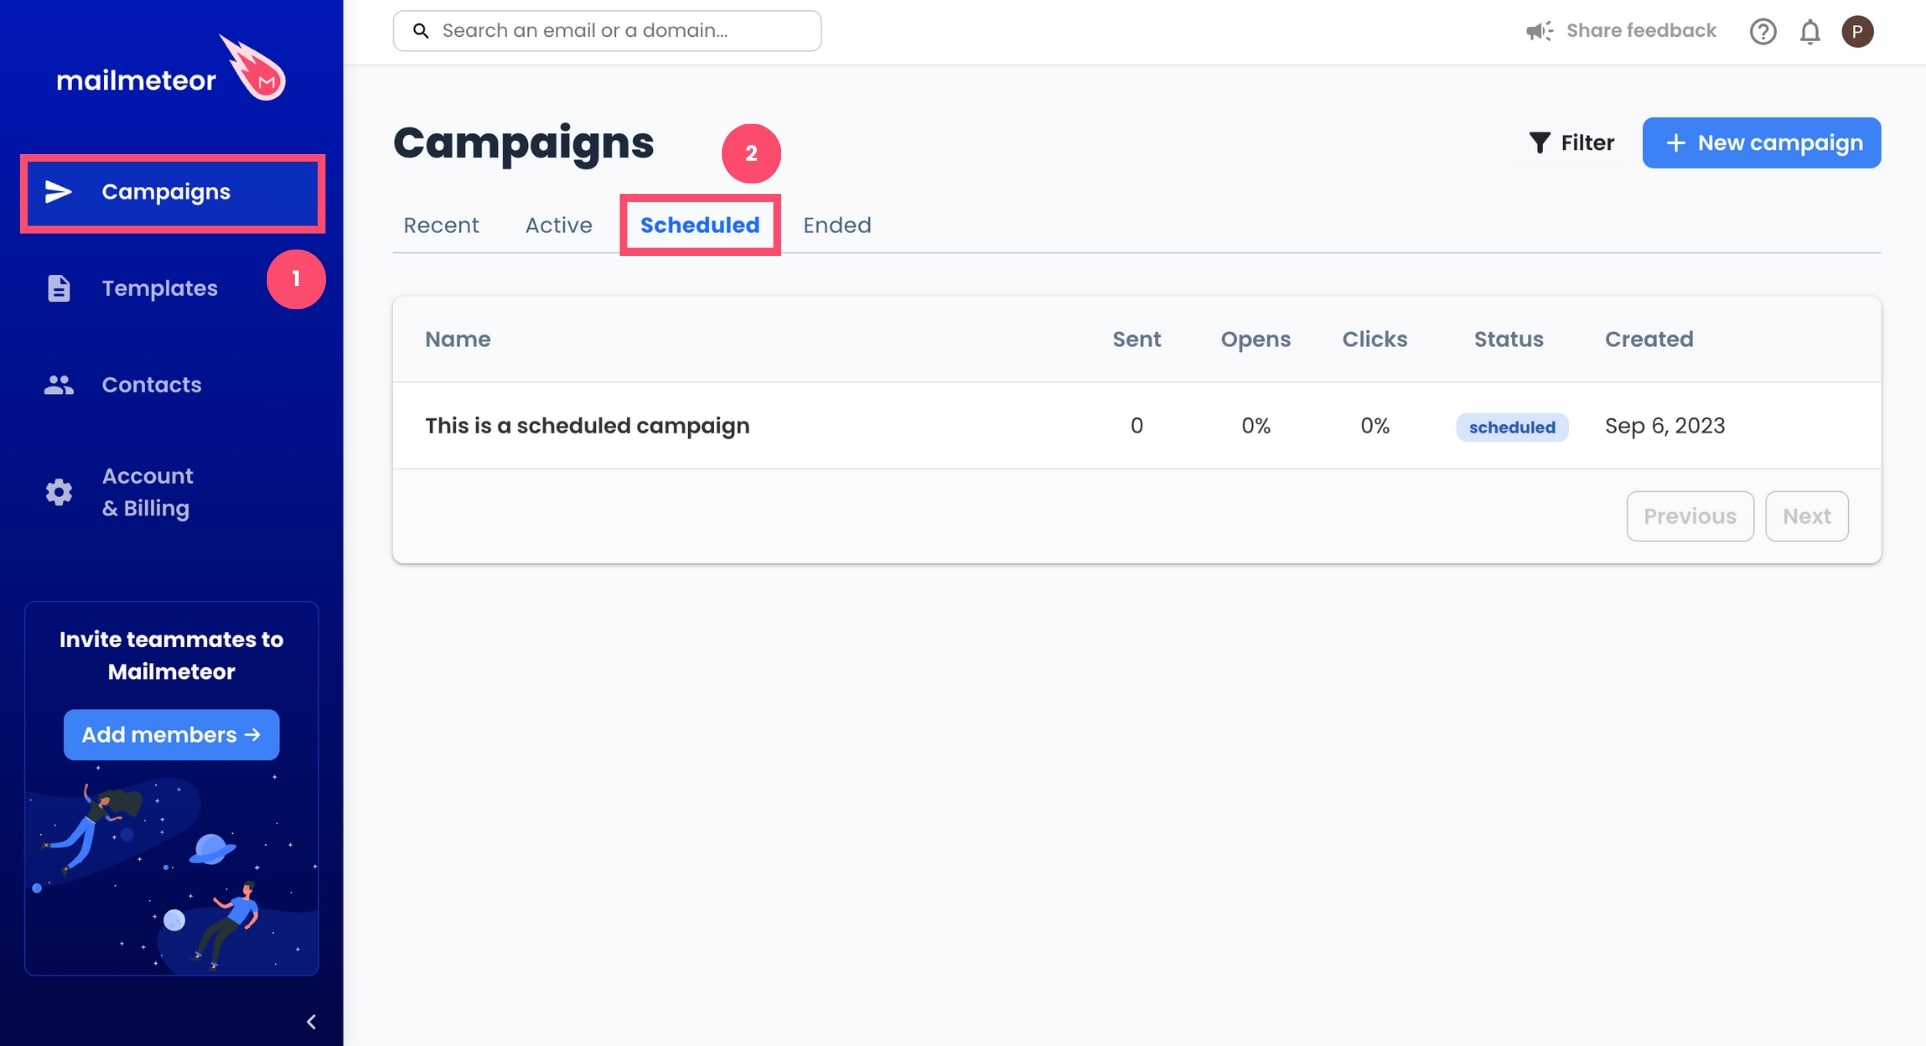
- Click on a campaign.
How to edit a scheduled campaign?
Made a mistake? Or want to make some last-minute changes? Here’s how you can edit a scheduled campaign in Mailmeteor before we start sending your emails.
- Open Mailmeteor Dashboard.
- Go to Campaigns > Scheduled.
- Select your email campaign.
- Click on the Action button.
-
Select Update campaign.
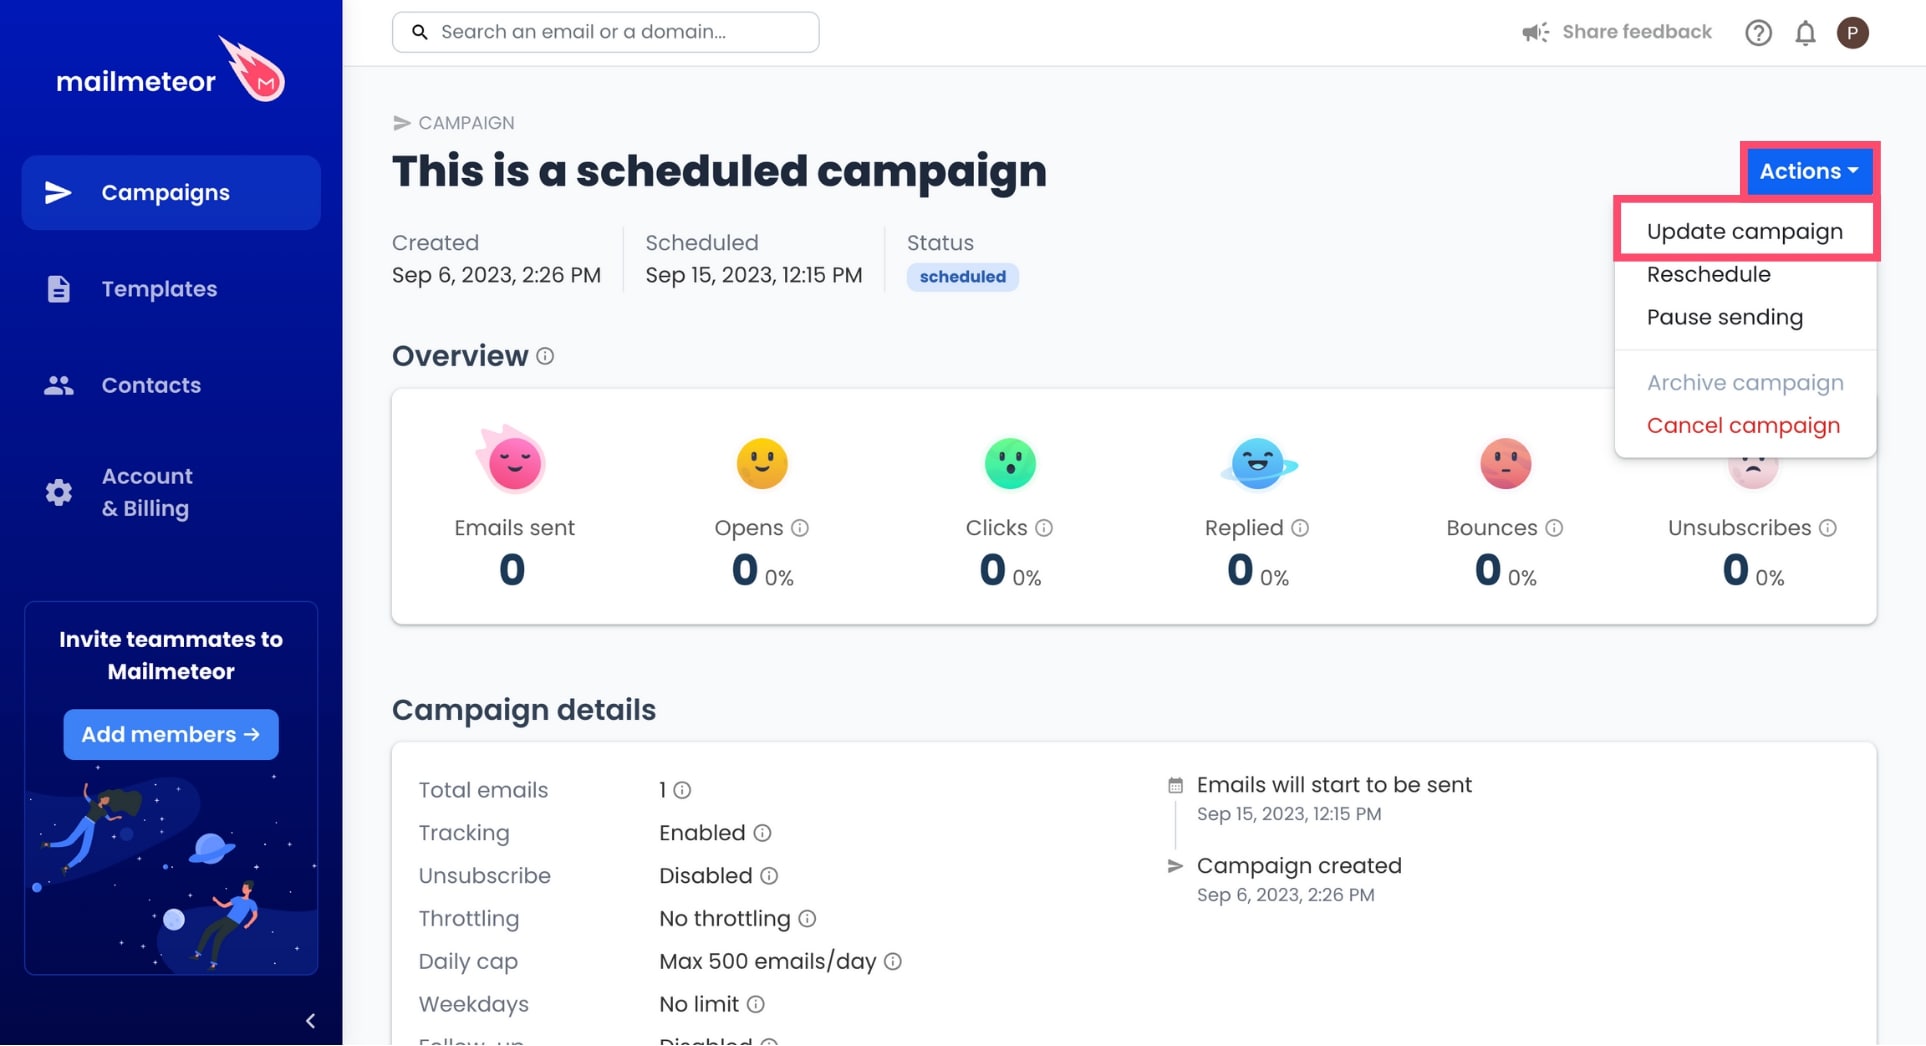
- From there, you can edit your subject line, the body of your email, or the list of recipients.
-
Once you’re happy with the changes you’ve made, click Update campaign.

How to cancel a scheduled campaign?
Want to cancel a campaign you’ve scheduled? Here’s how to do it:
- Open Mailmeteor Dashboard.
- Go to Campaigns > Scheduled.
- Select your email campaign.
-
Click on the Action button and select Cancel campaign.
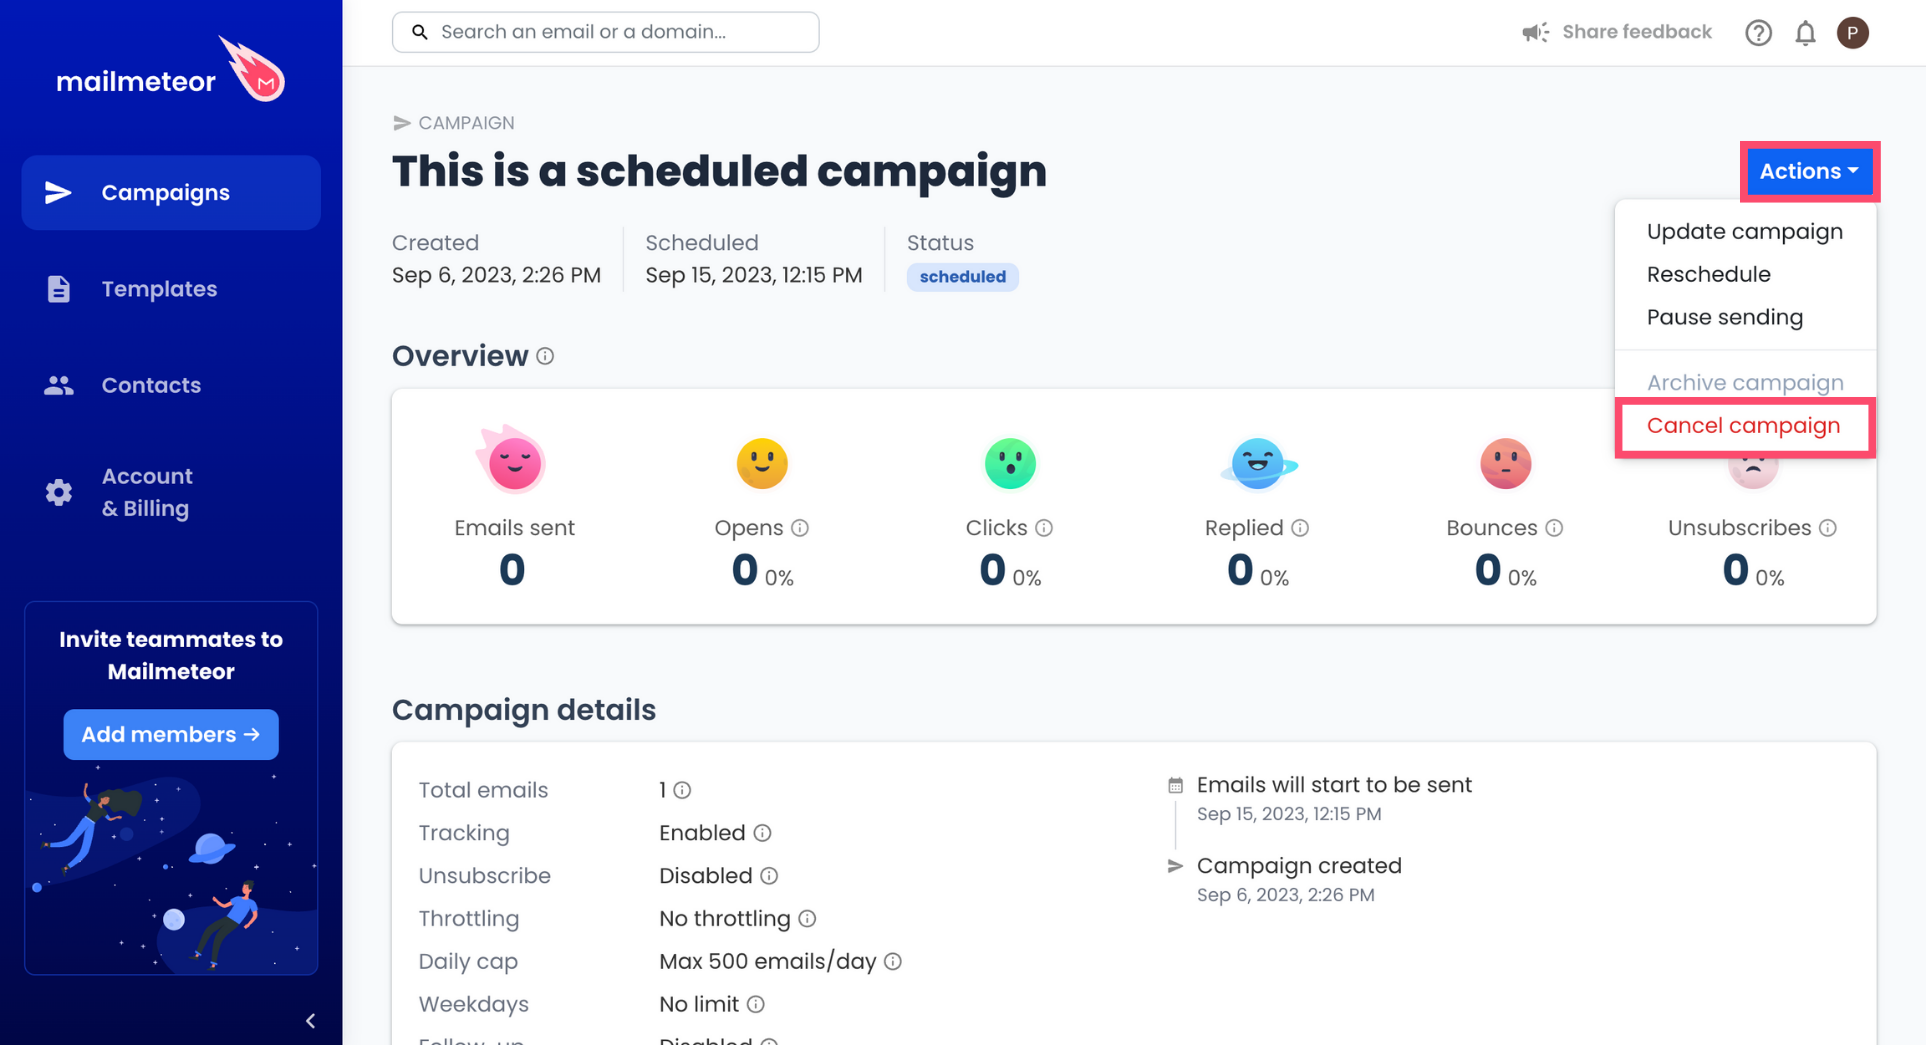
-
To confirm, click Cancel campaign.

Video tutorial
If you prefer to watch a video, here’s a tutorial on how to schedule your campaigns with Mailmeteor:
- Sign in to your Gmail account.
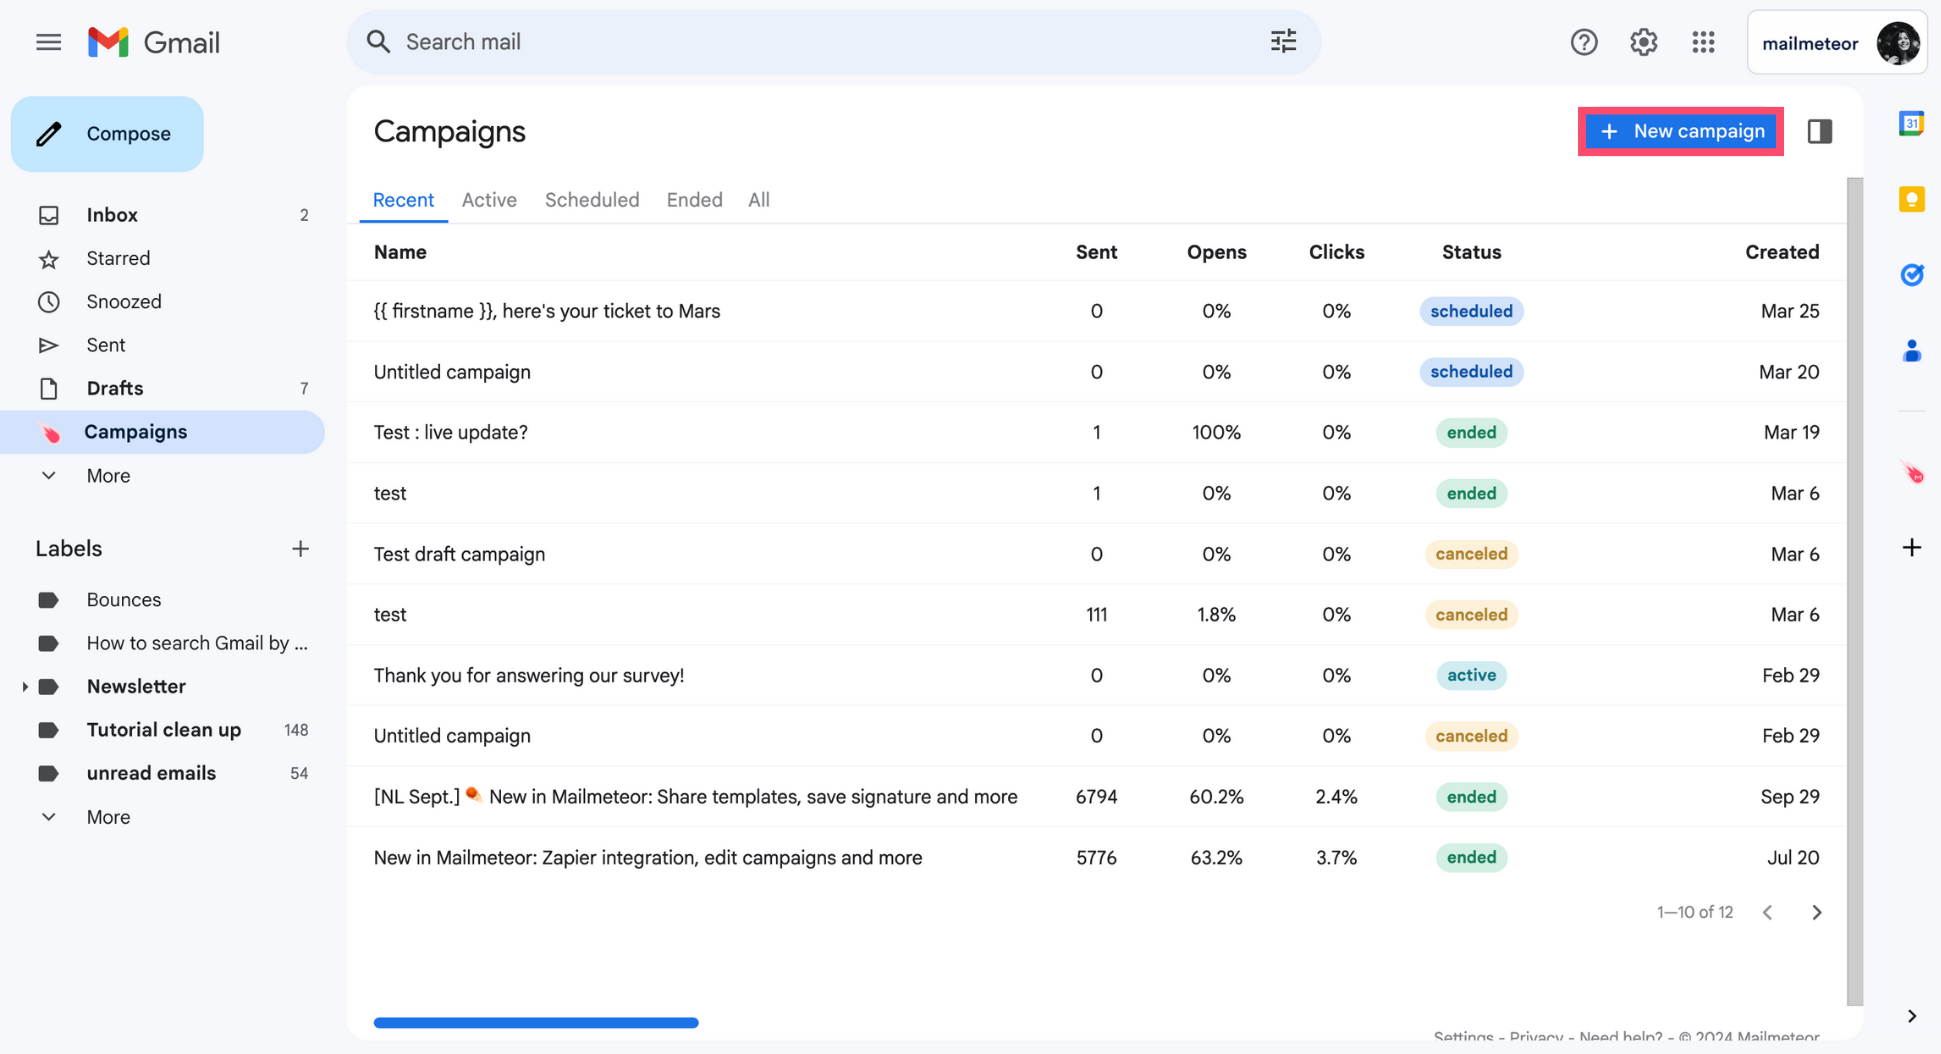
-
Go to Campaigns.

-
Create a New campaign.
-
Under Settings, click Schedule send.
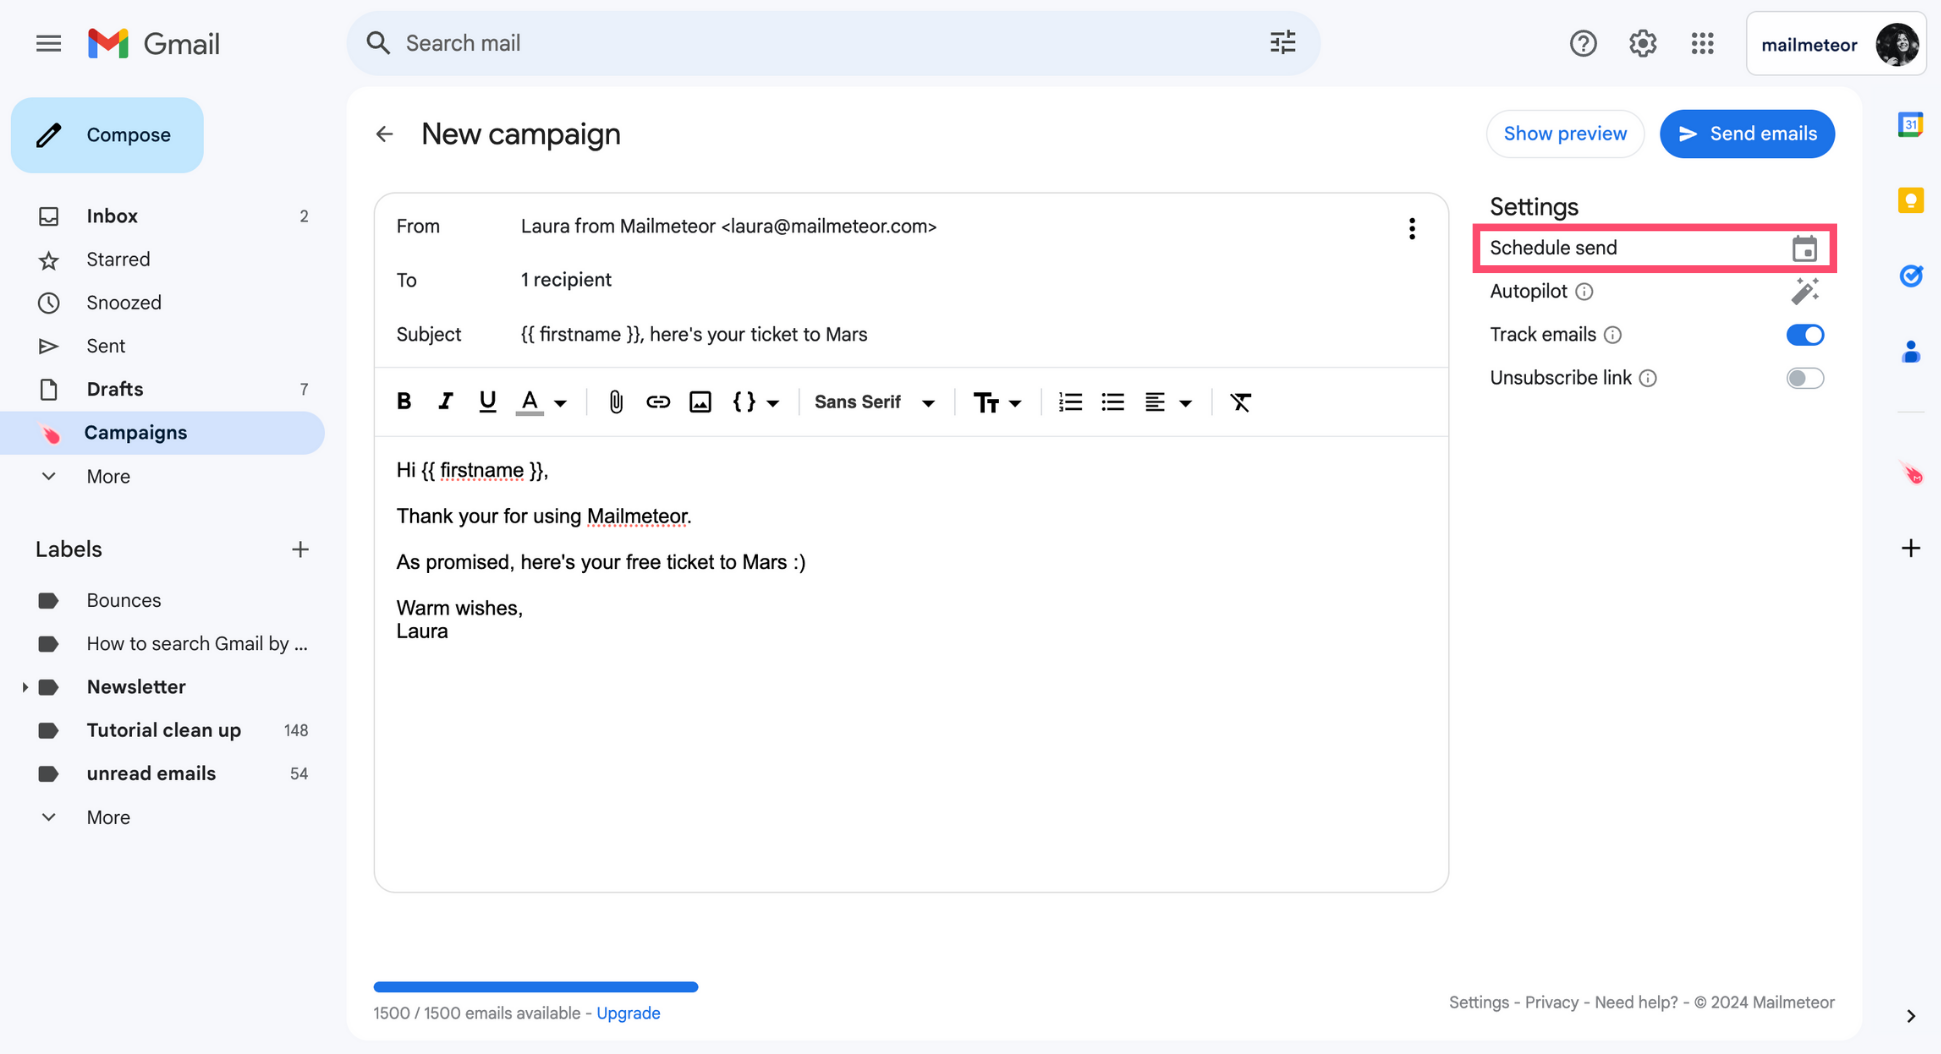
-
Pick a date and time. Then click Apply.
-
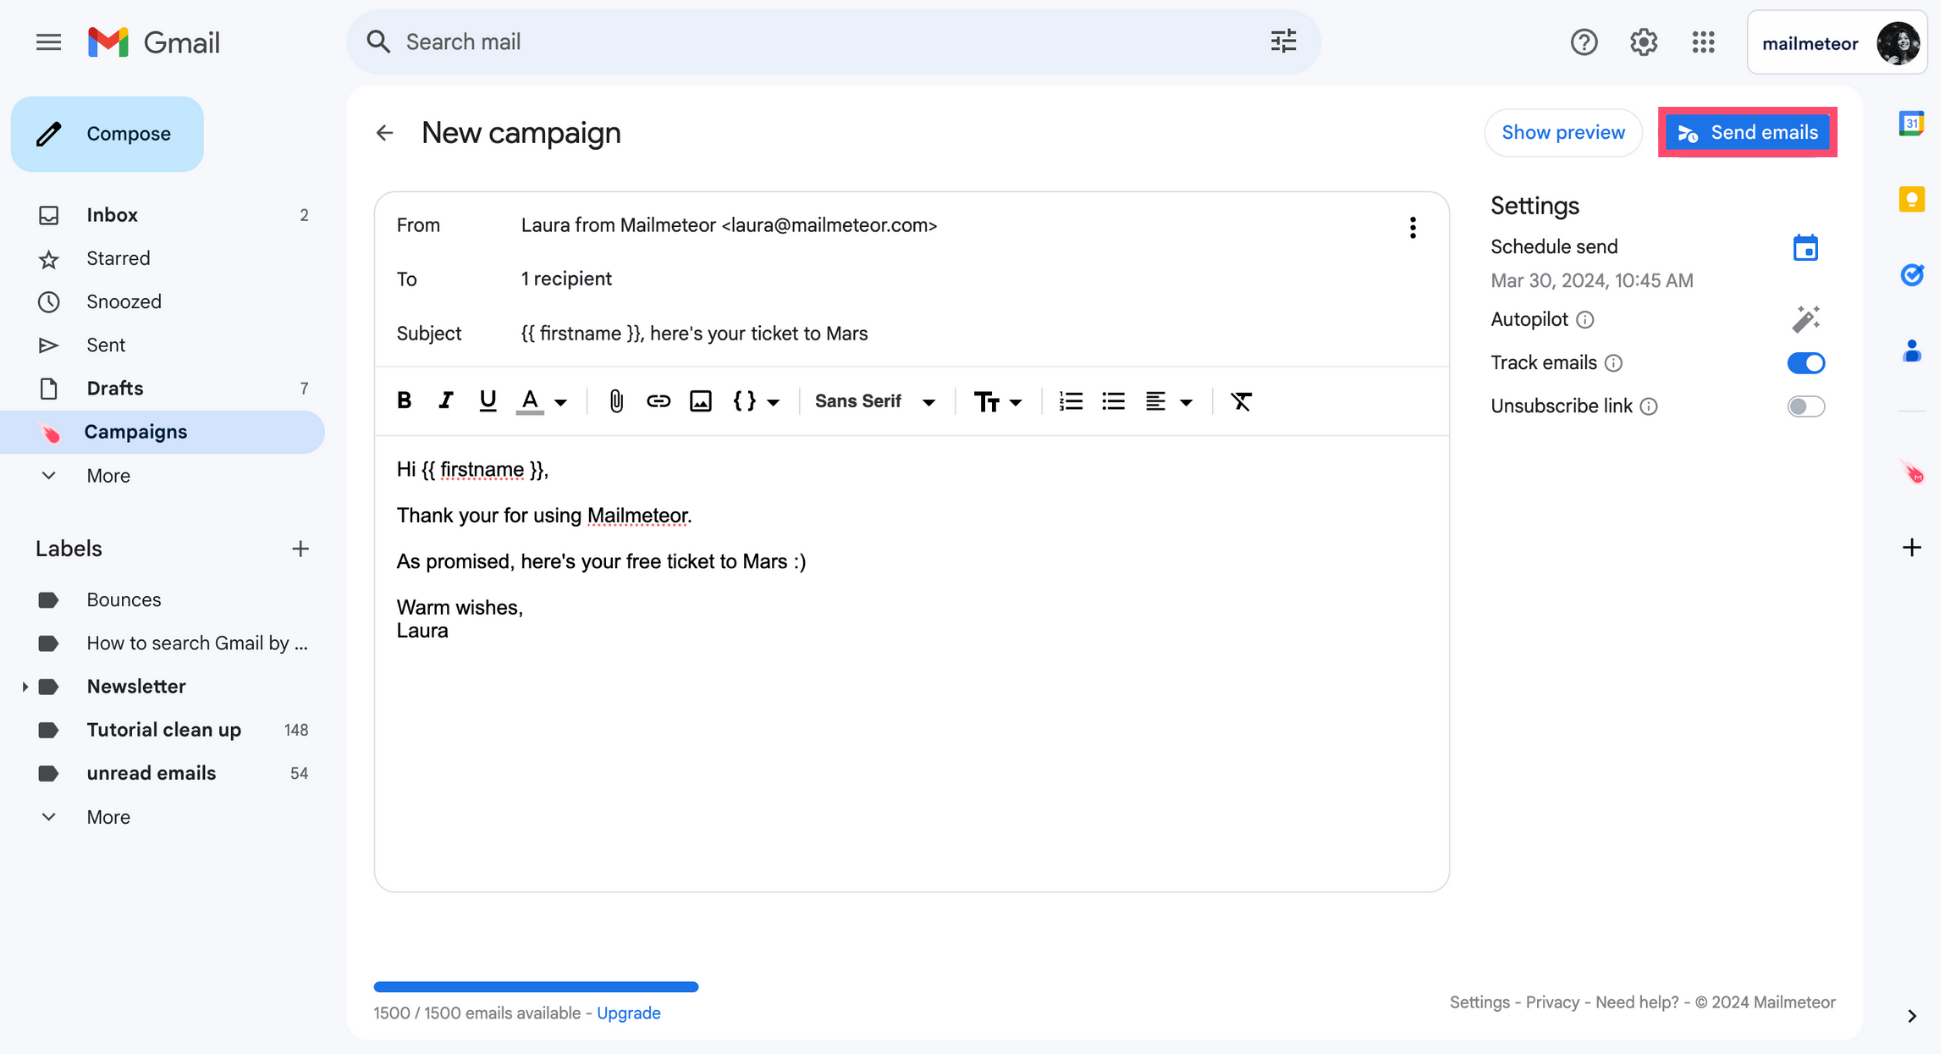
Once your campaign is ready, click Send emails.
-
To confirm, click Schedule send.
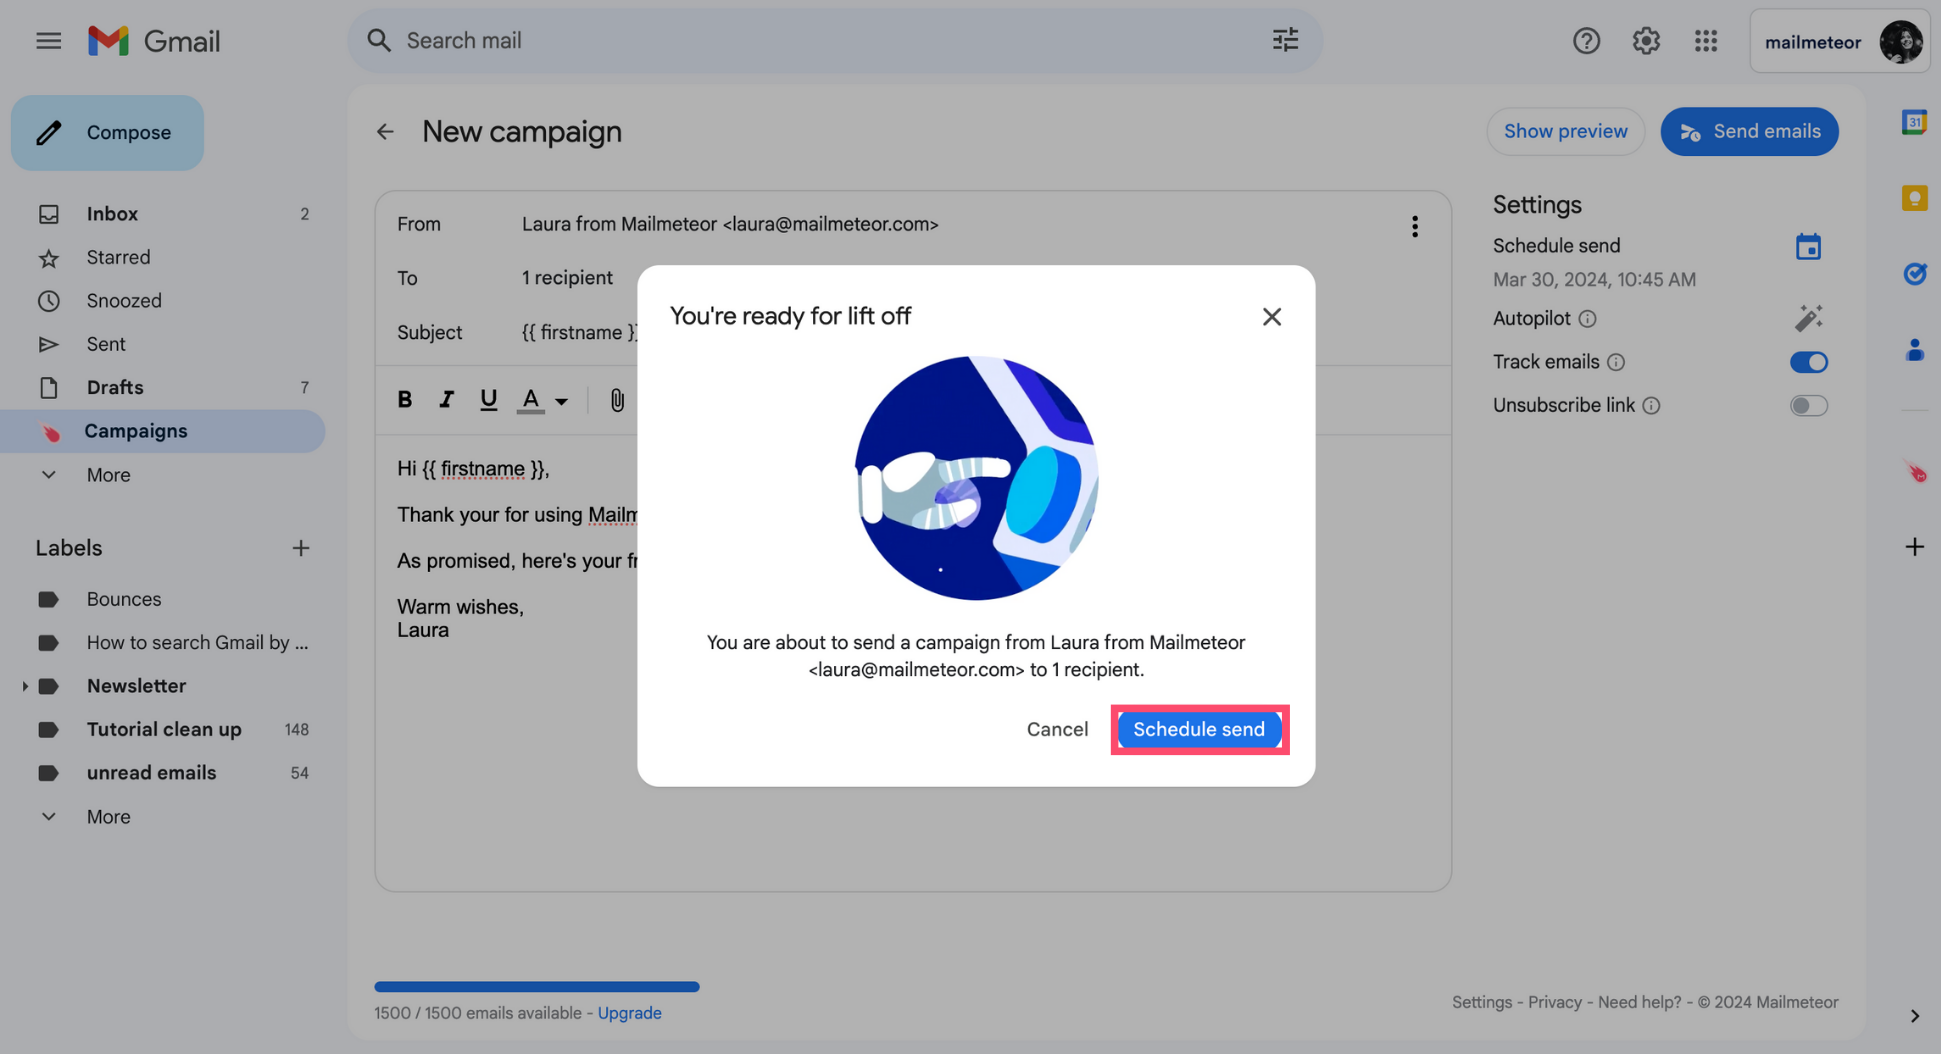
Your emails will be sent gradually after the scheduled time. Depending on the size of your contact list, the dispatch may take a few minutes to one hour. This is designed to maximize your deliverability and secure your email account.
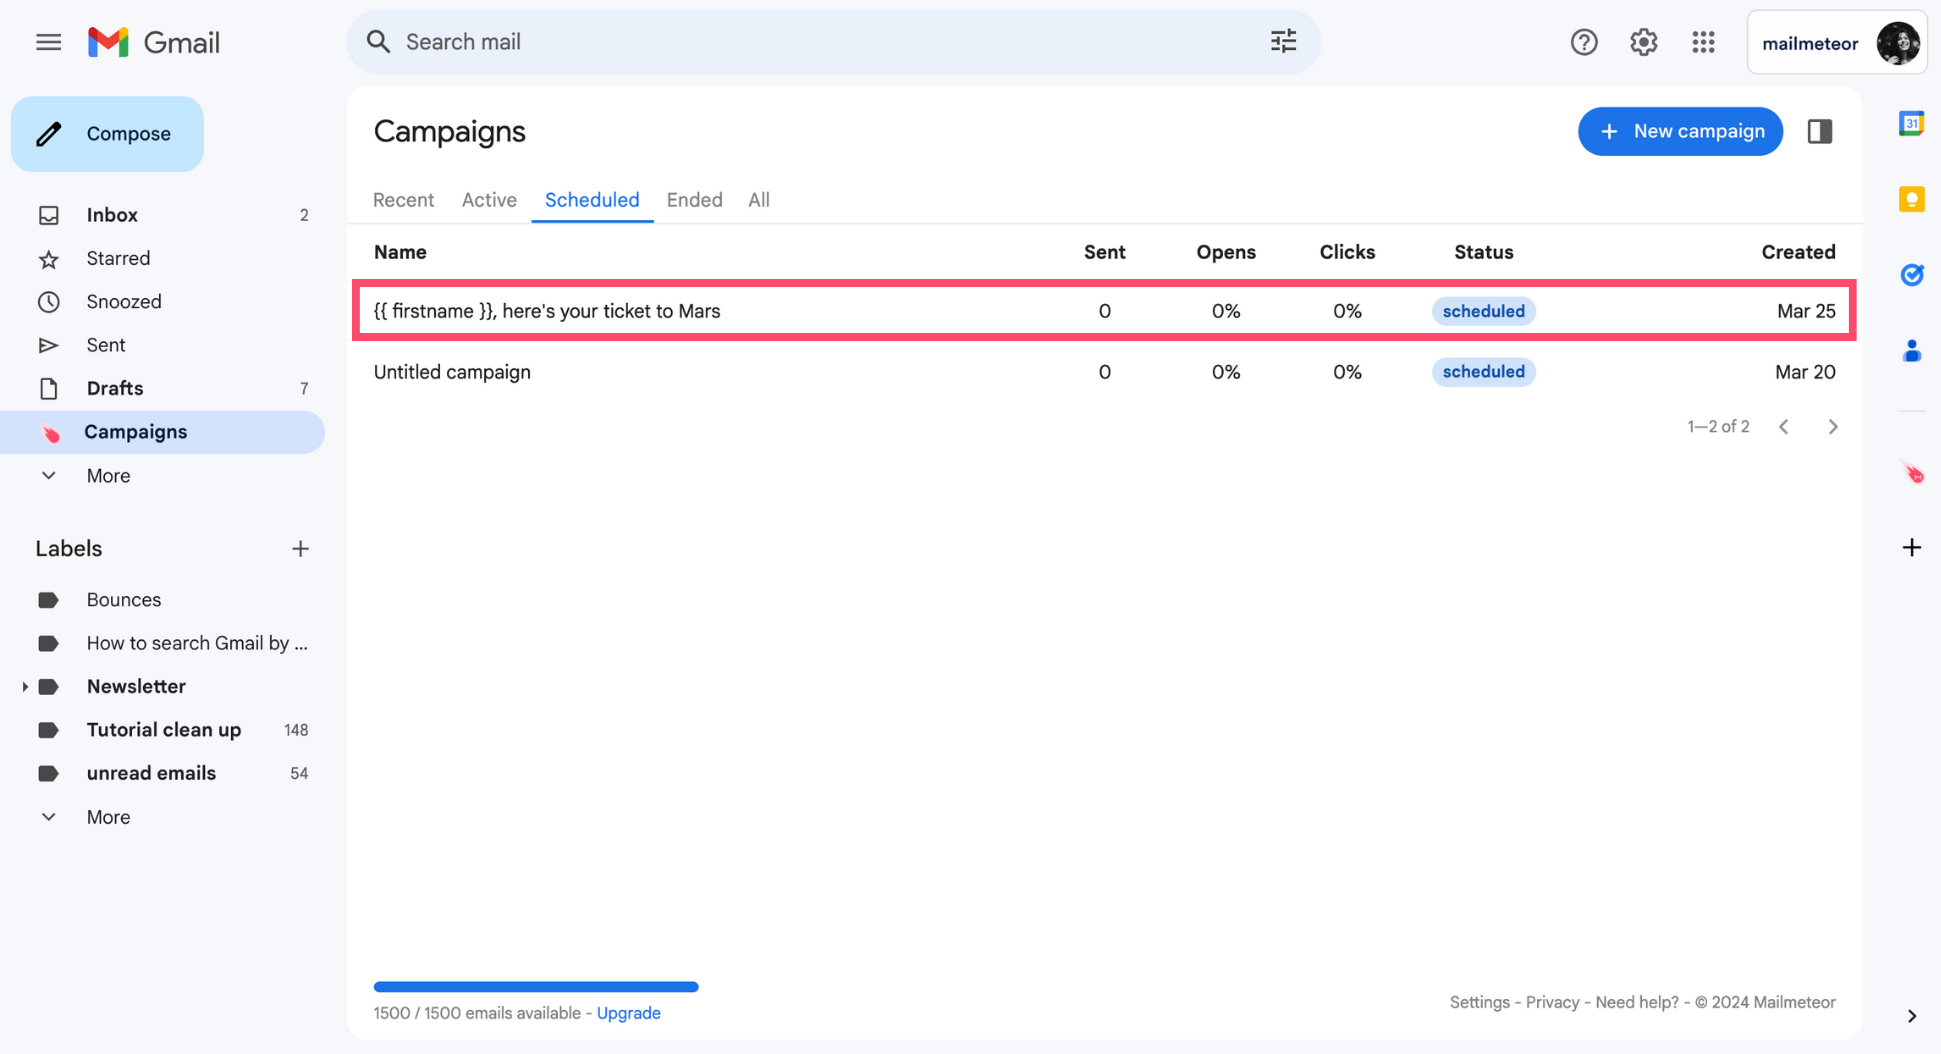
How to view scheduled campaigns?
- Sign in to your Gmail account.
-
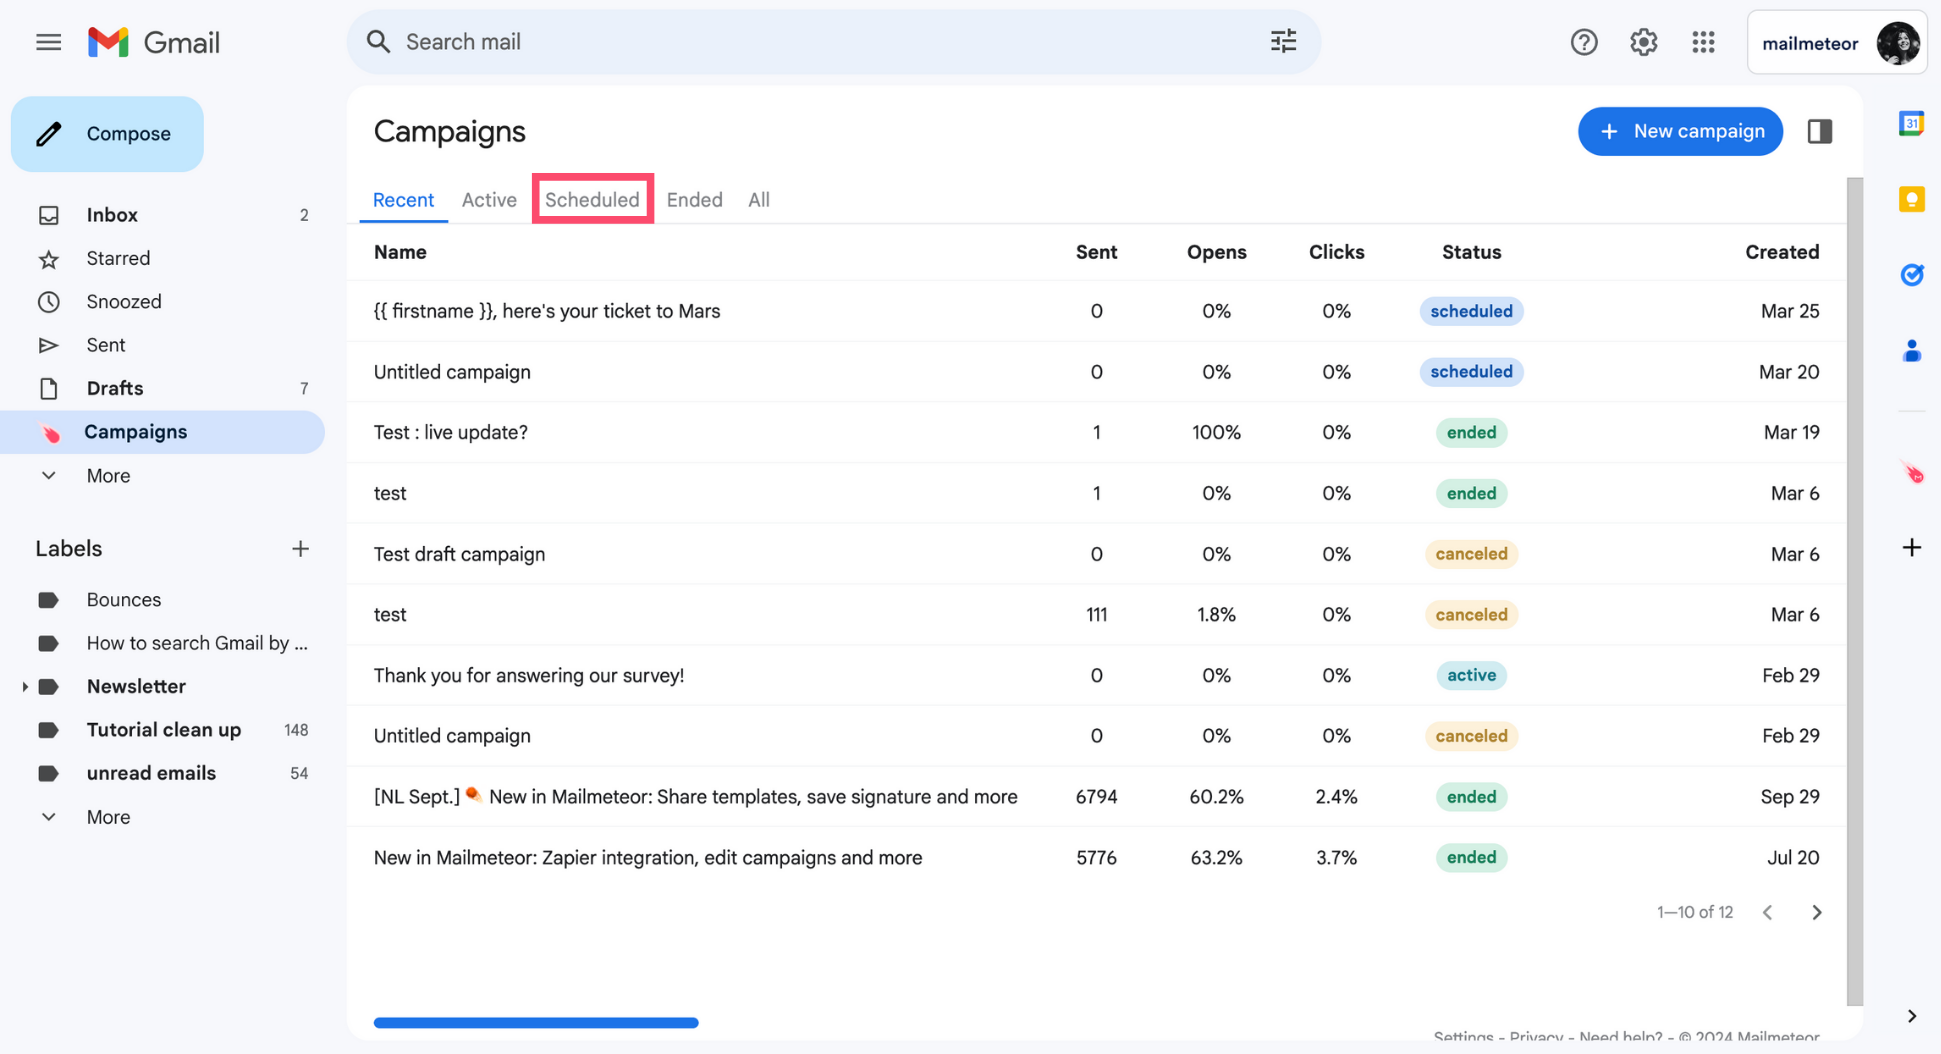
Open the Campaigns tab.
-
Go to Scheduled.
-
Select the campaign you want to view.
-
Click Open campaign.
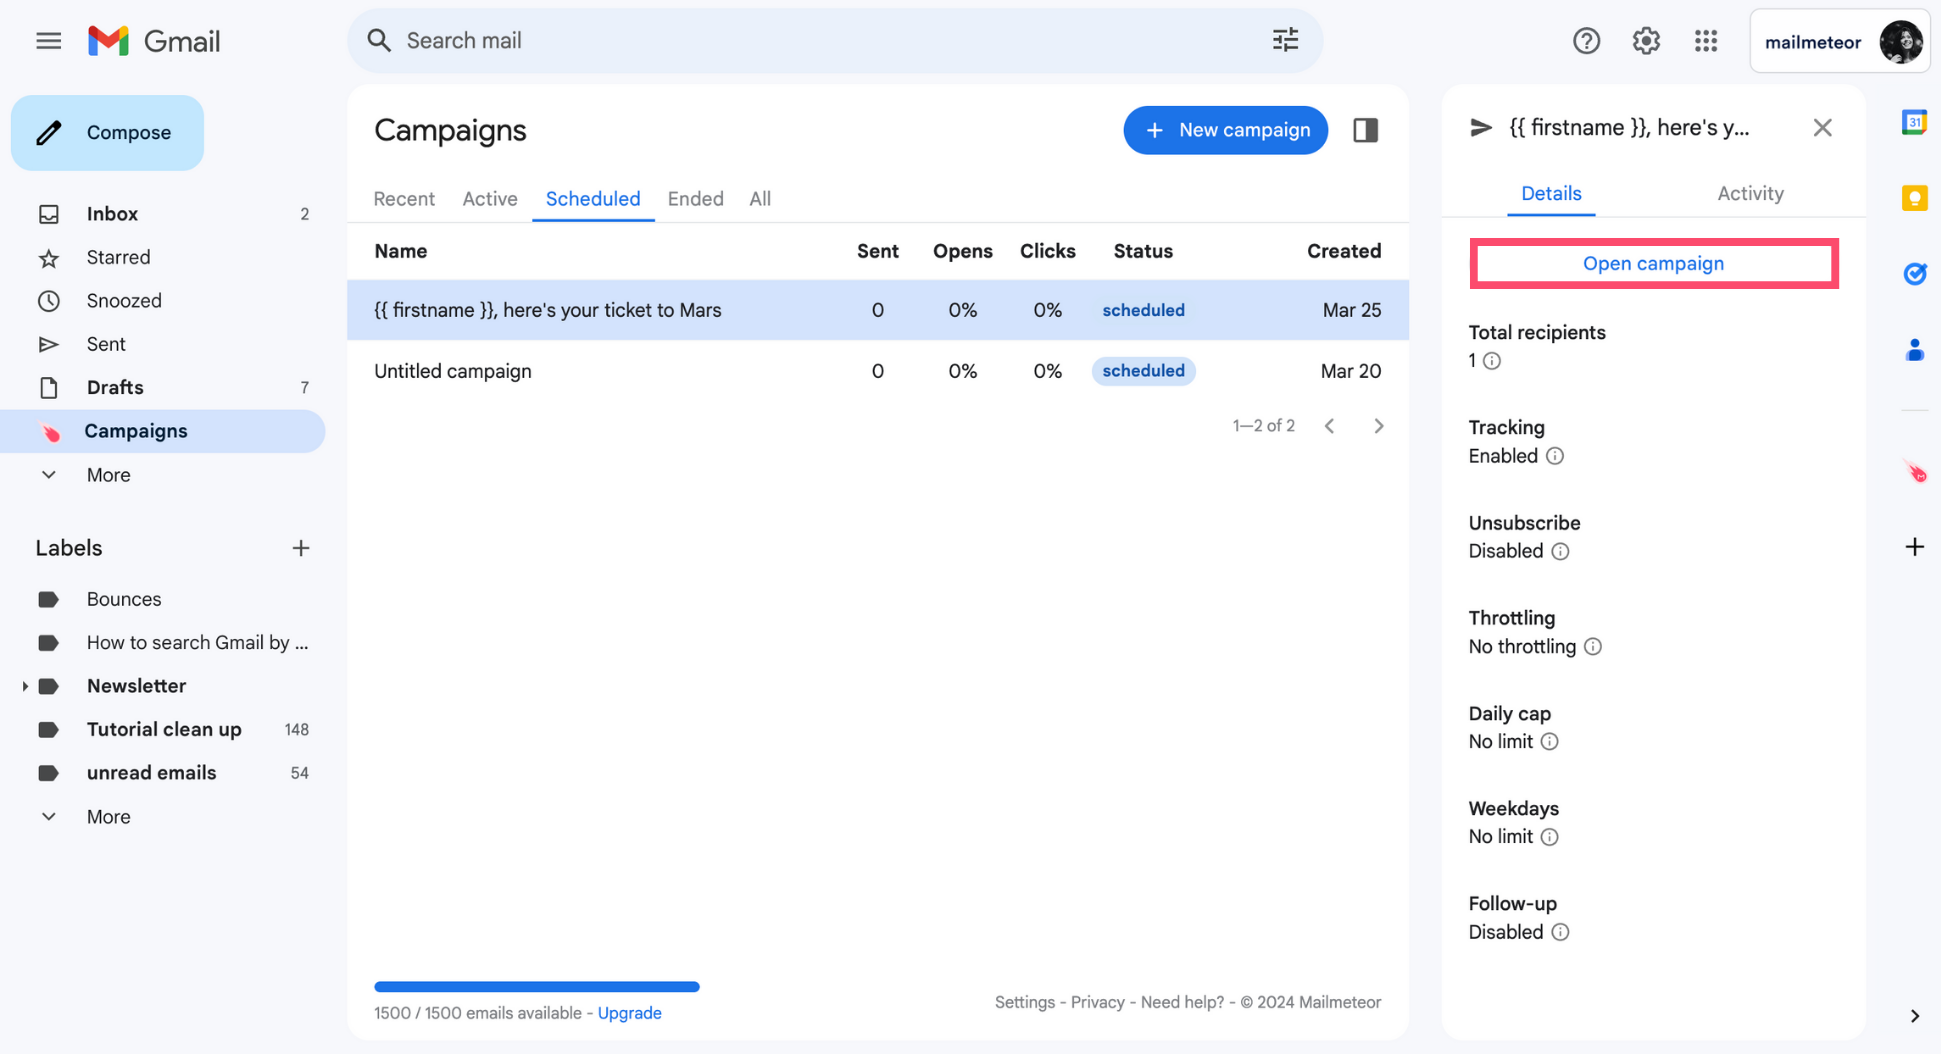
And voilà. You’ll get an overview of your scheduled campaign, with key information, like the scheduled date and time, as well as the contacts that will receive this email. Here’s what it looks like in Gmail ⤵️
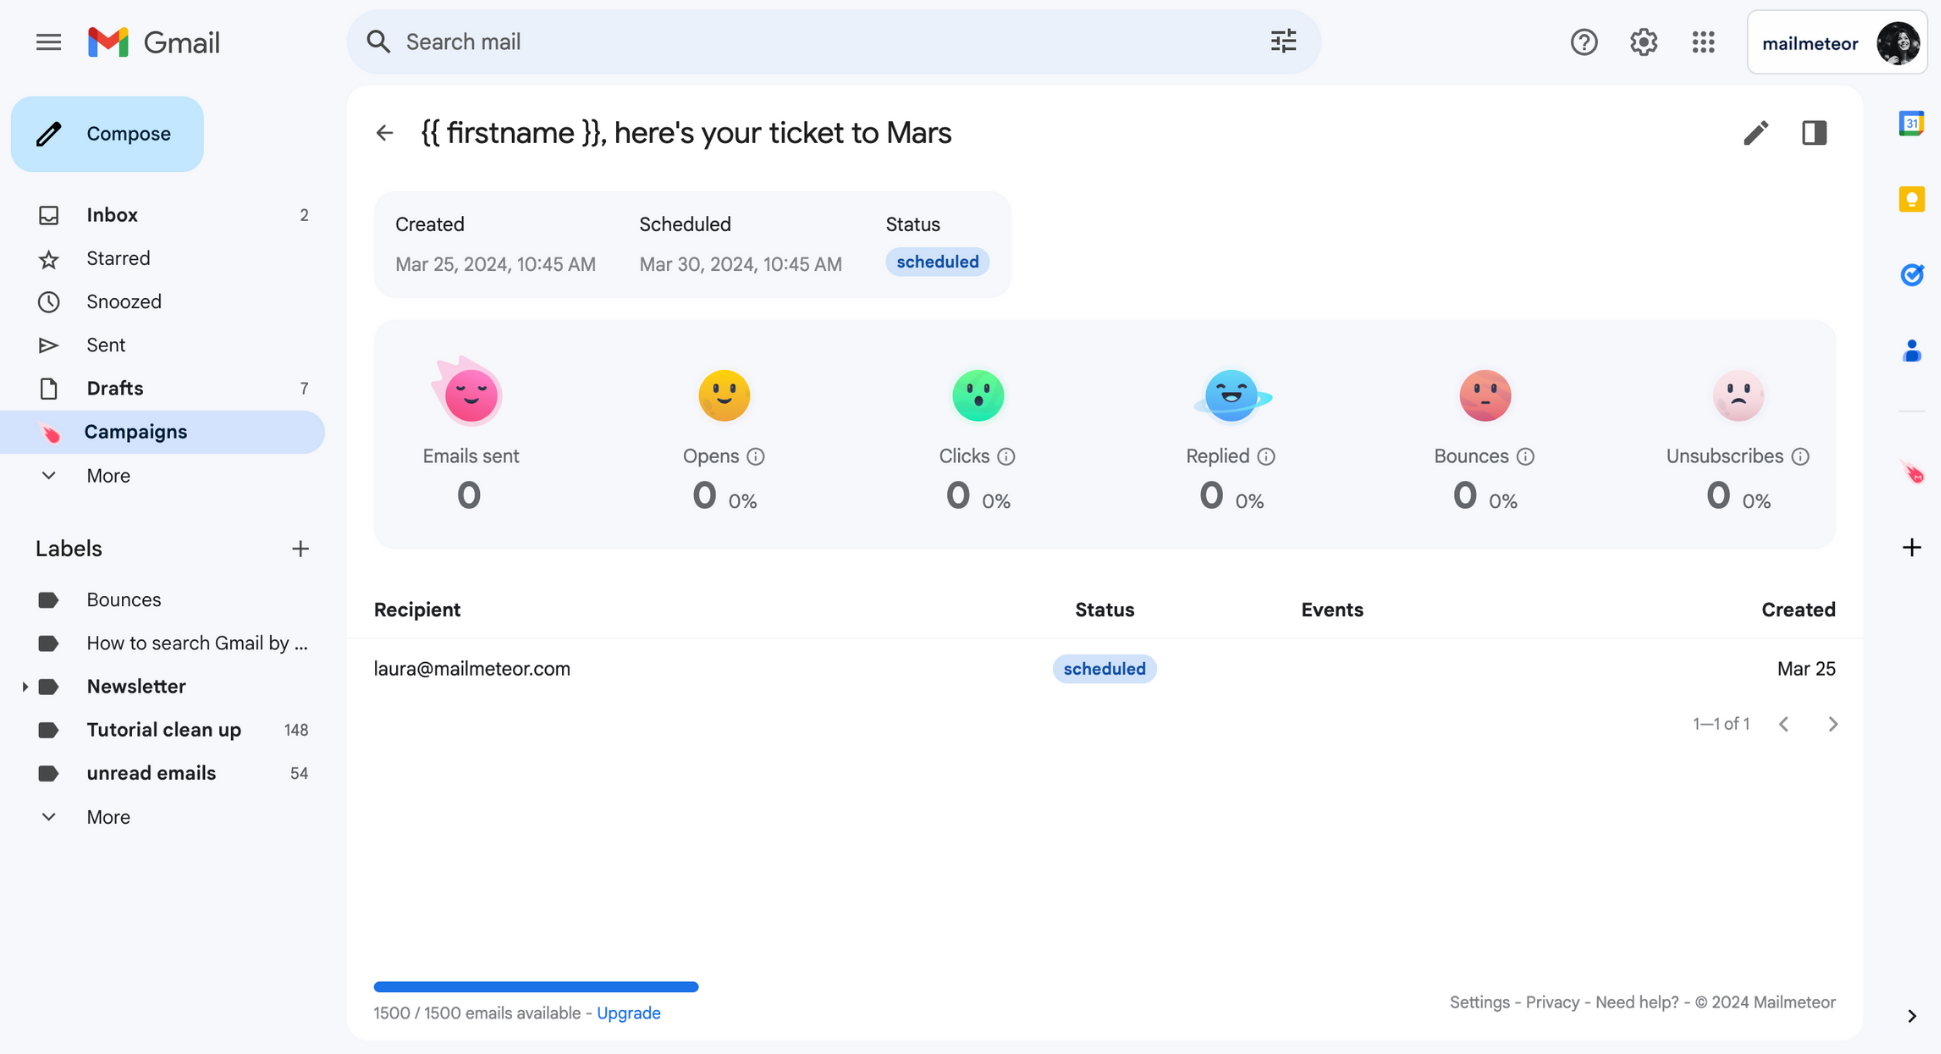
From this window, you can reschedule, pause, resume, cancel, or edit a scheduled campaign whenever you want.
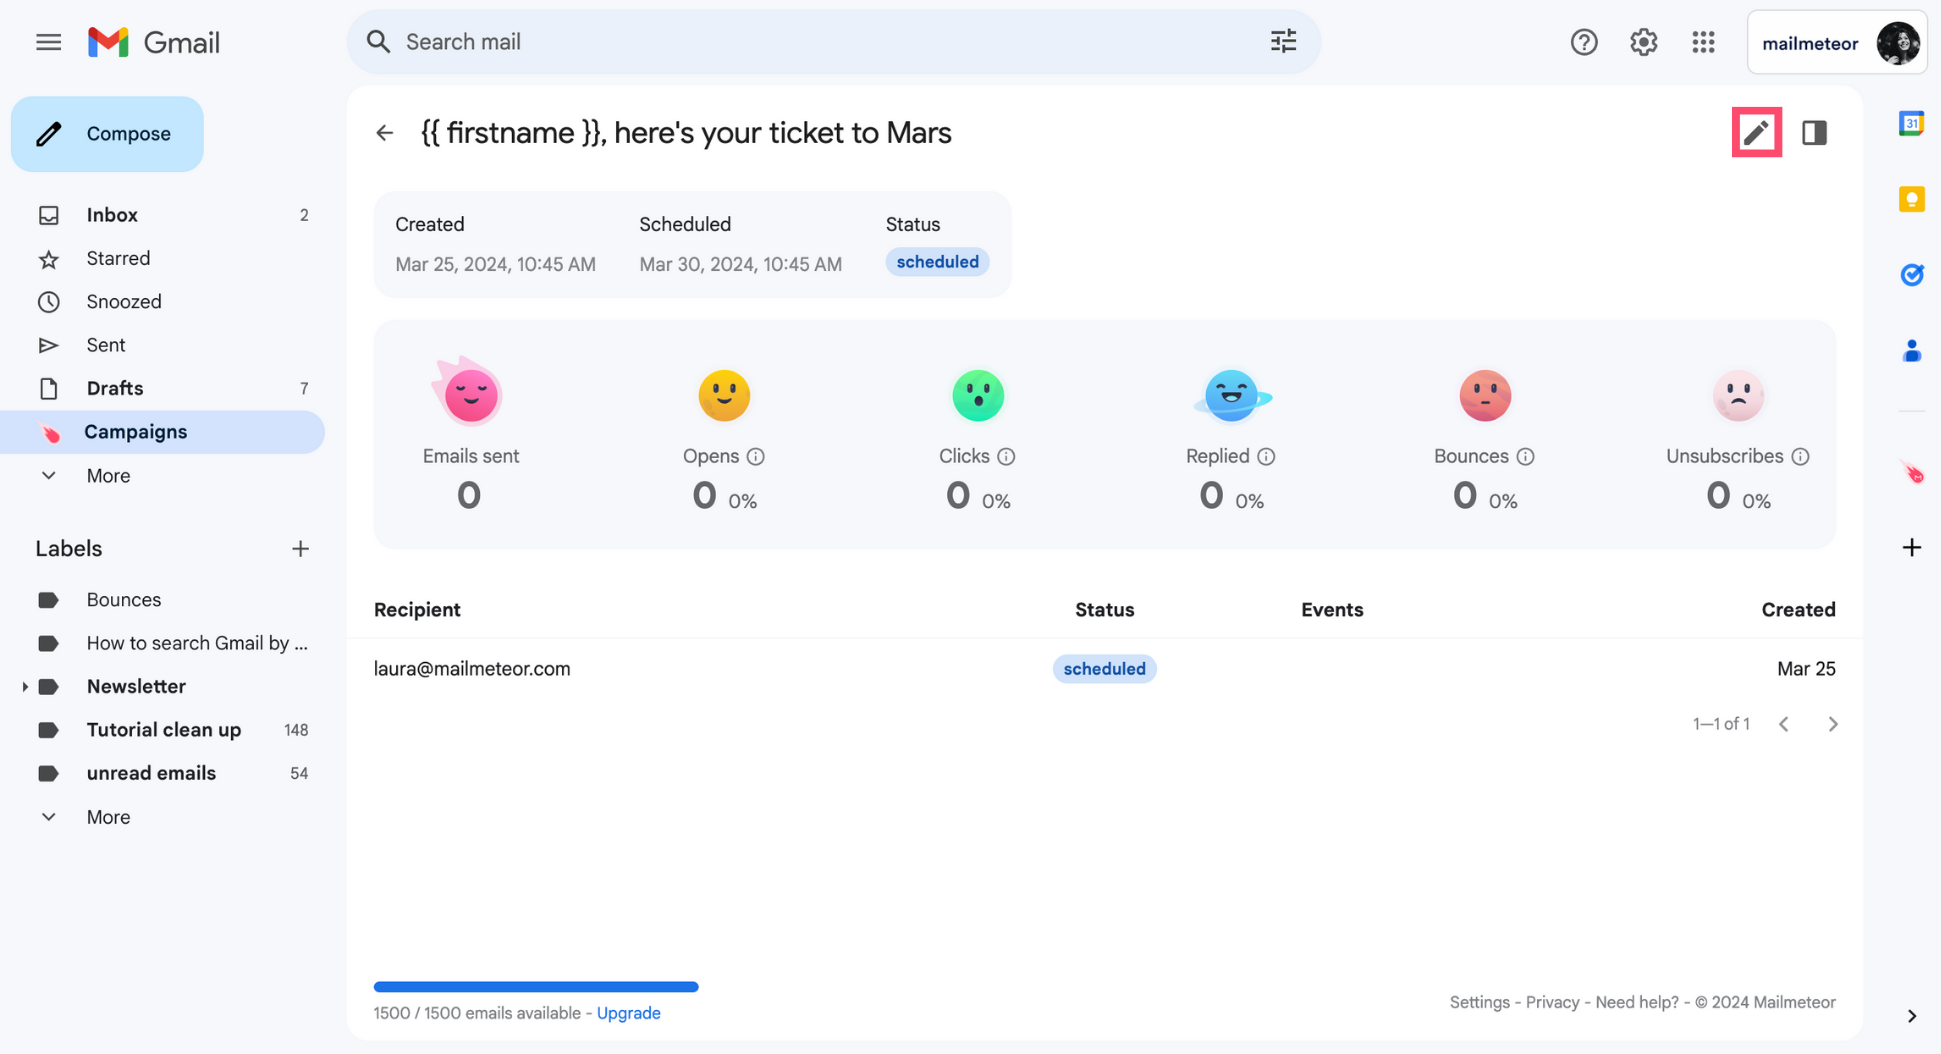
How to reschedule a campaign?
-
Open your campaign in Gmail.
-
Click the Pencil icon.
This will take you to the Mailmeteor Dashboard, a special place where you can manage all your email campaigns in just a few clicks. If you don’t already have an account, you may need to create one.
-
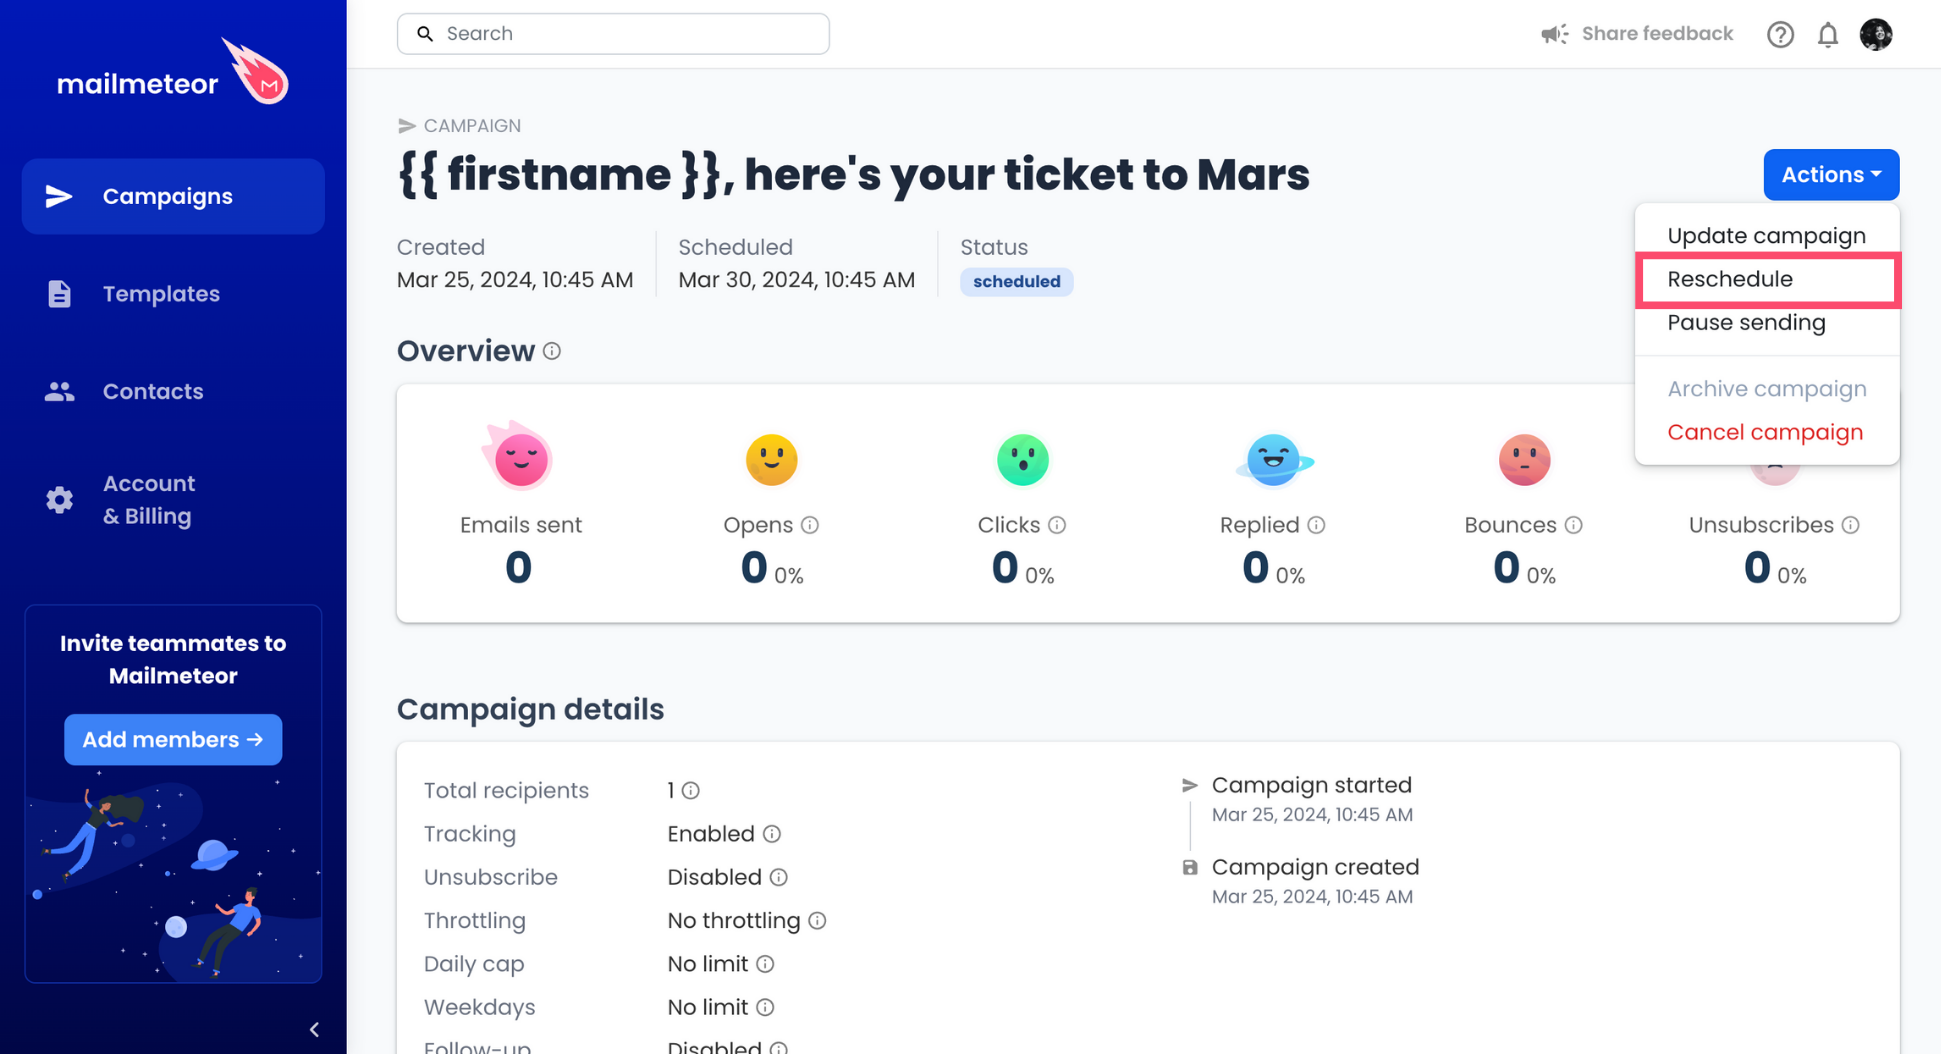
Go to Actions.
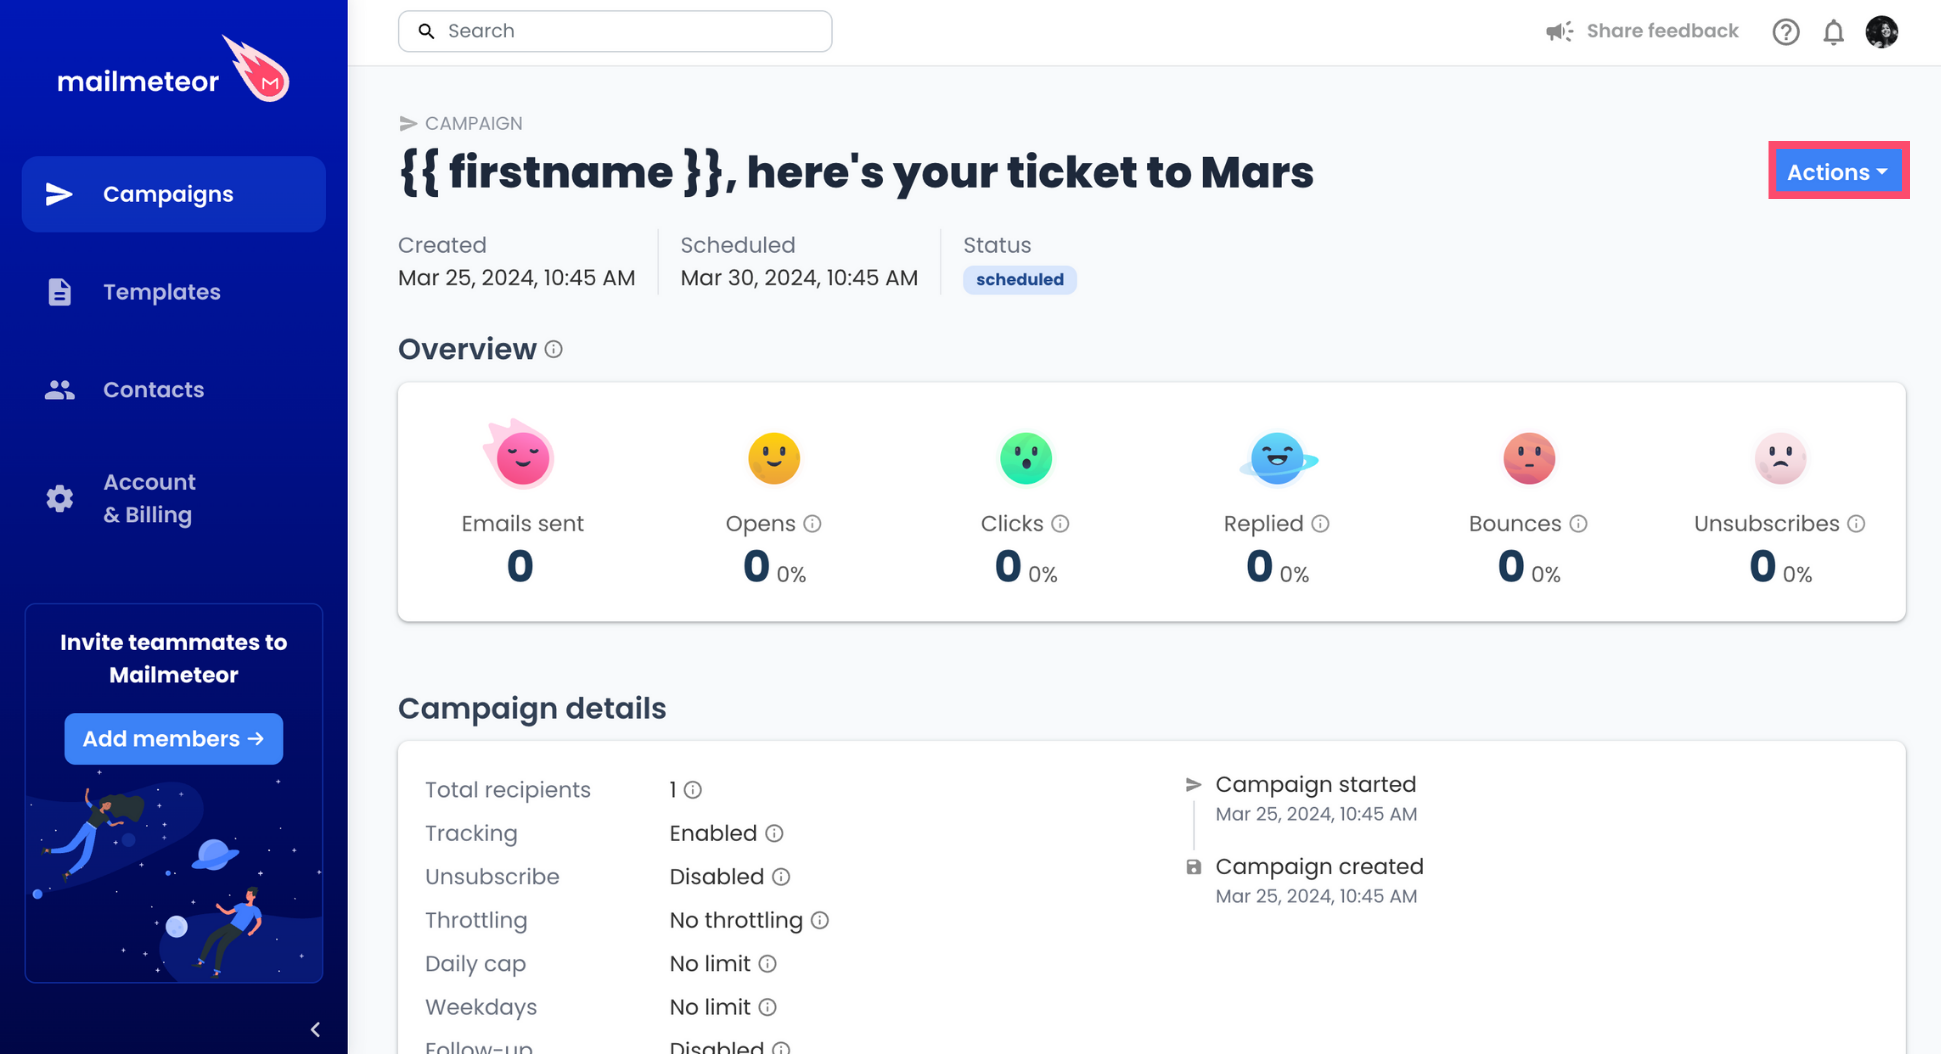
-
Select Reschedule.
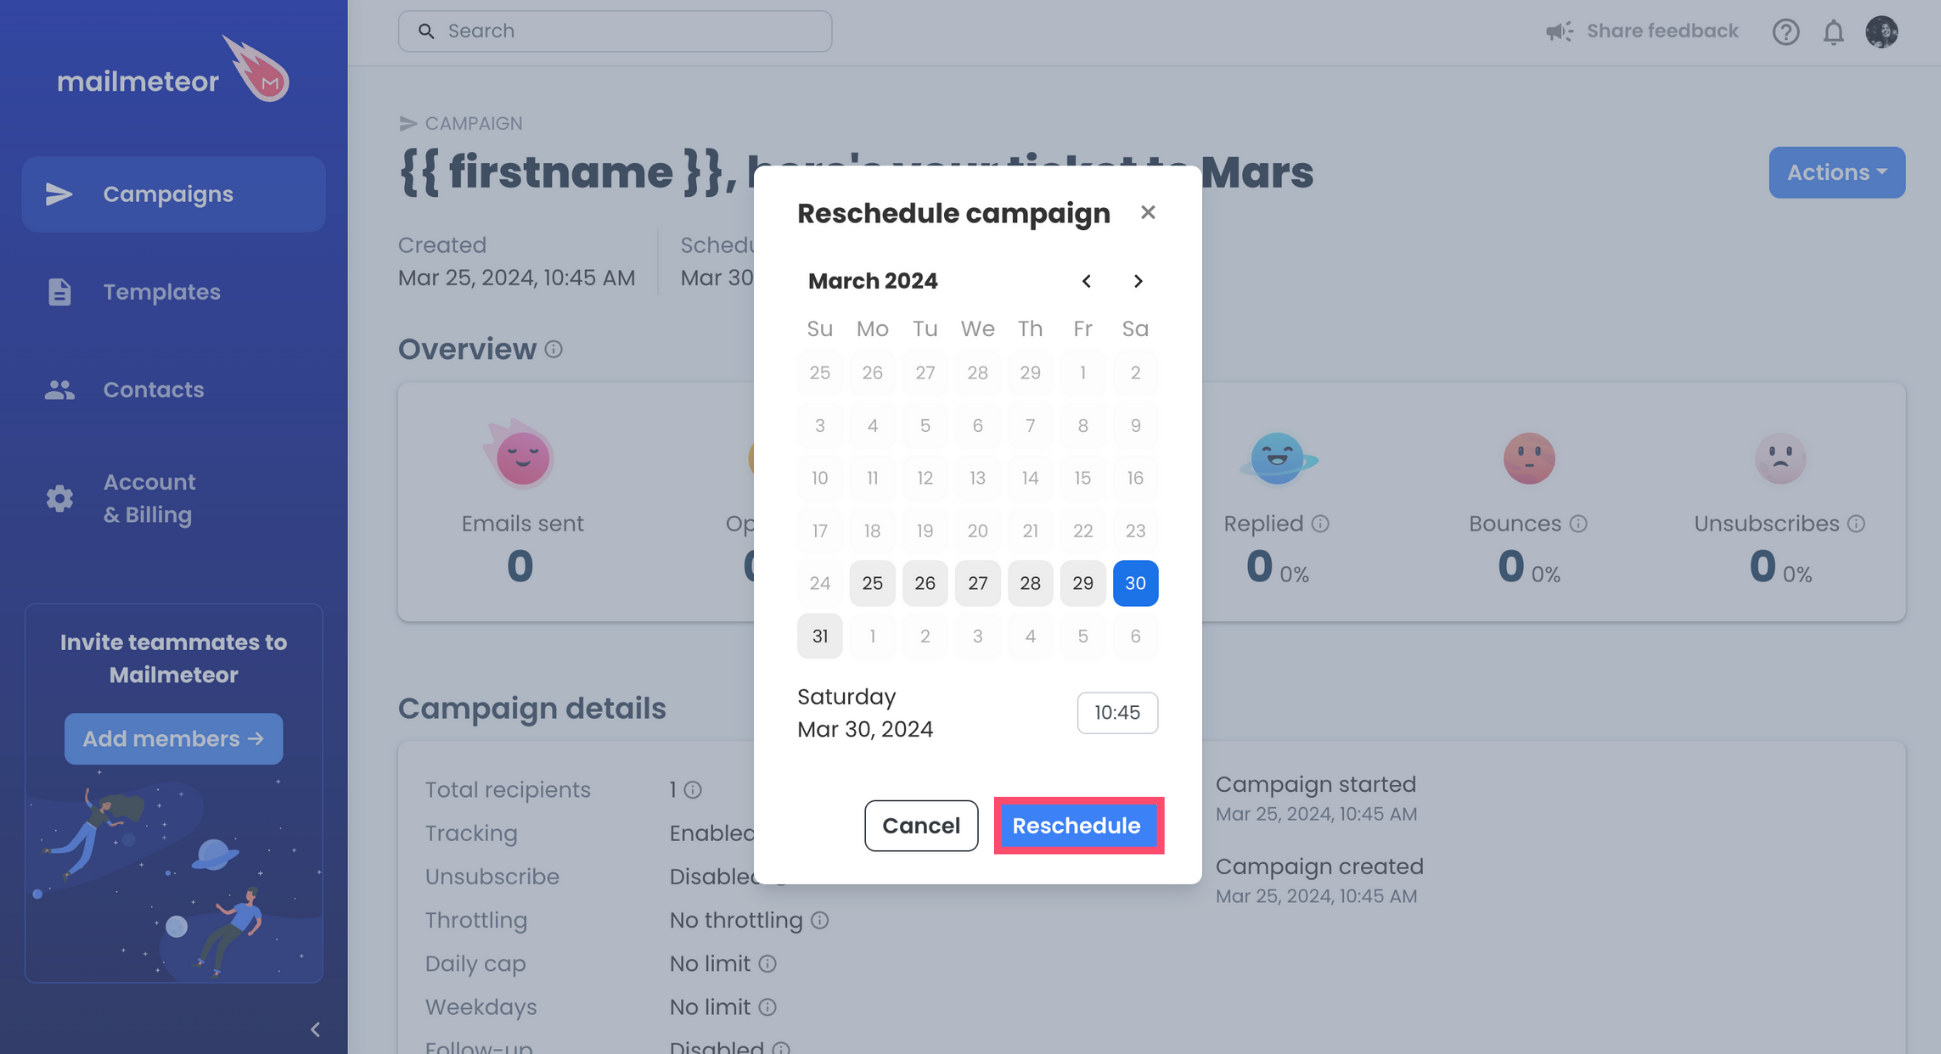
-
Pick a new date and time. Then click Reschedule to confirm.
-
Open Mailmeteor for Sheets.
-
Compose your email or select a template.
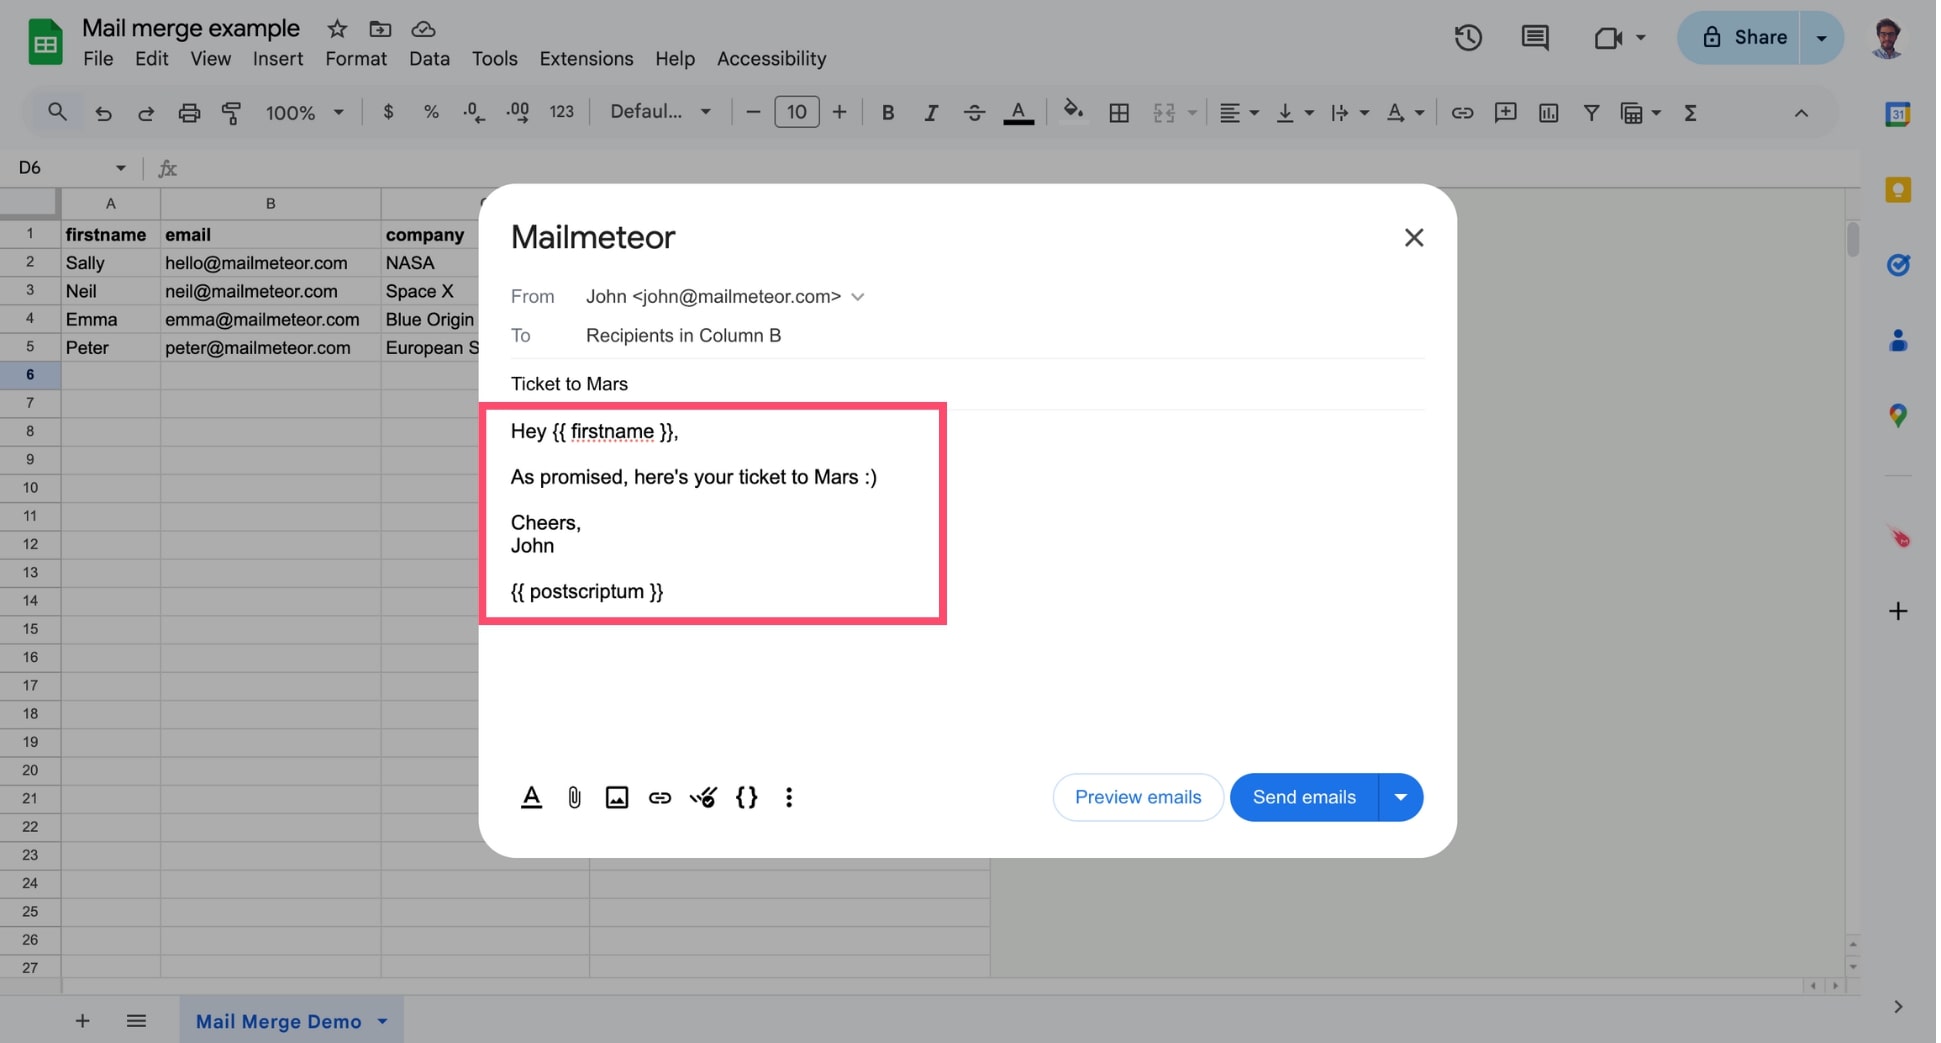
-
Next to Send emails, click the small caret symbol (“▼”) and select Schedule send.
.jpg)
-
Select the date and time.
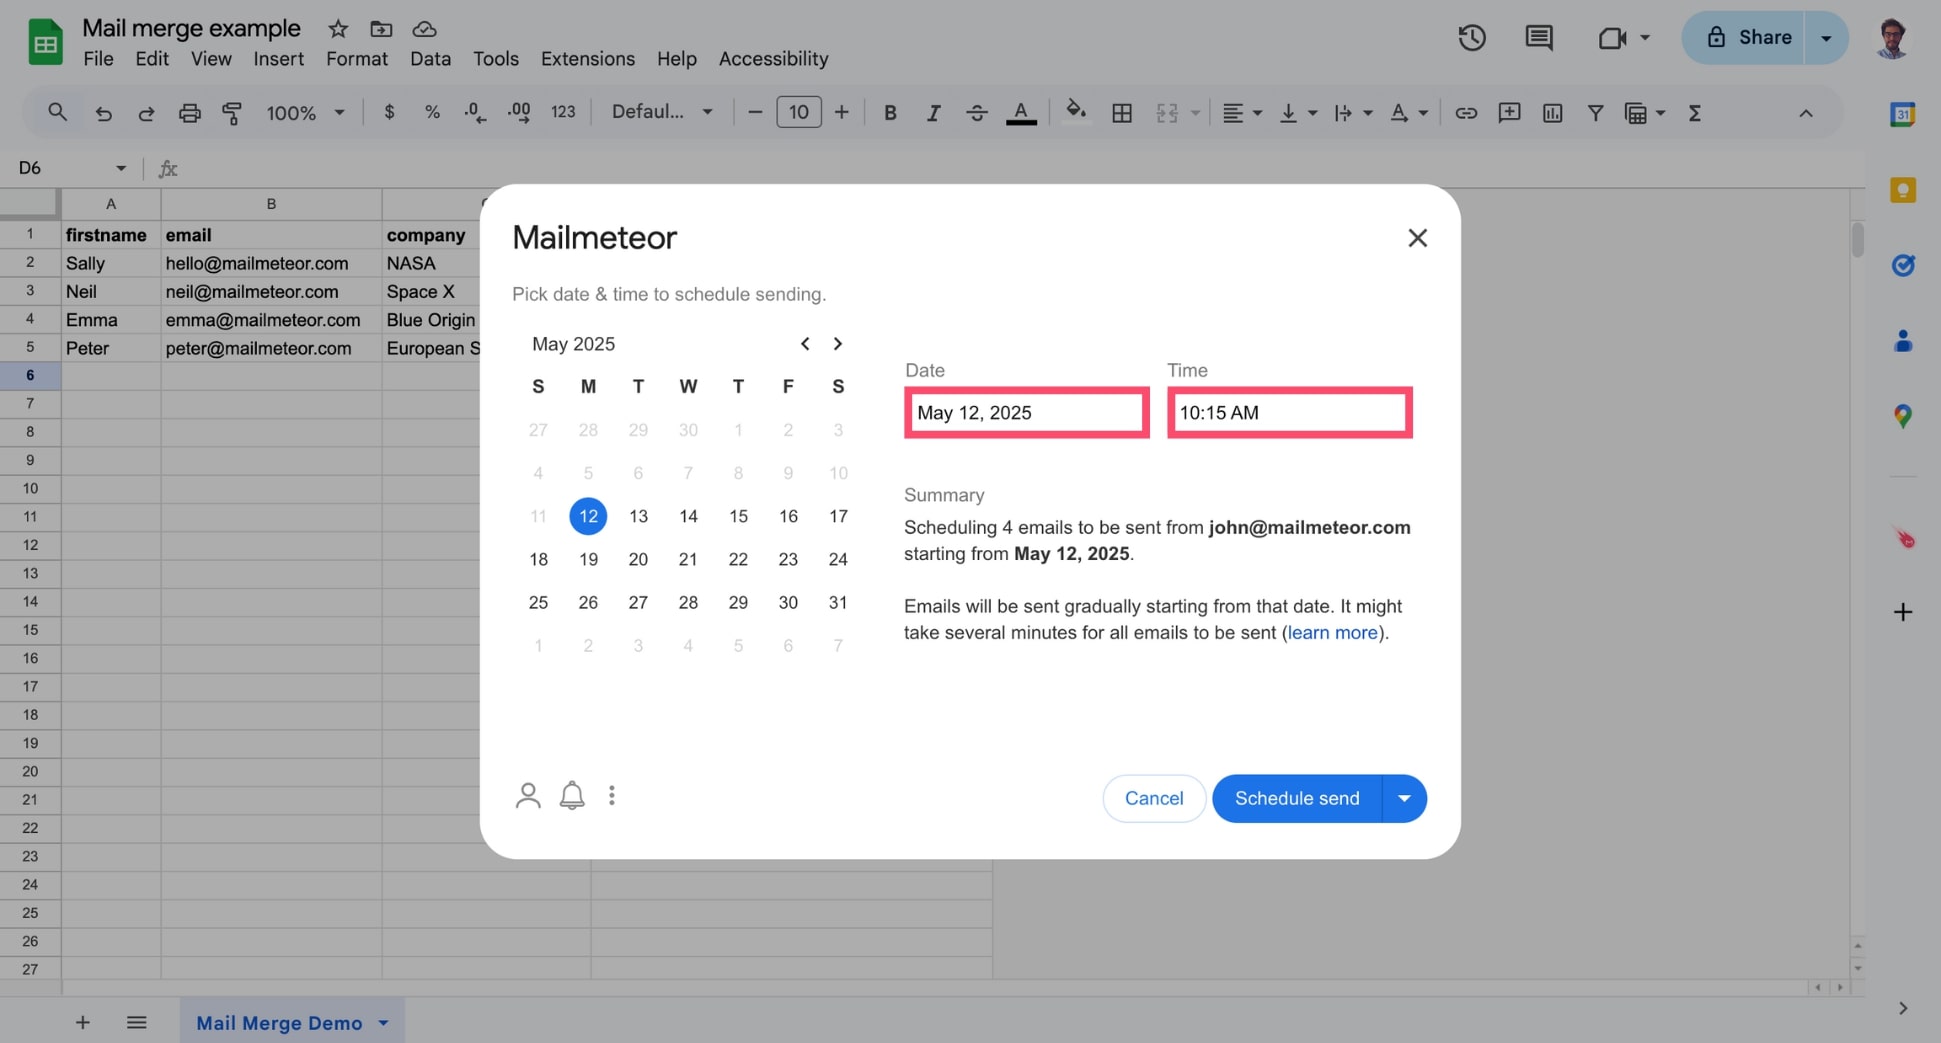
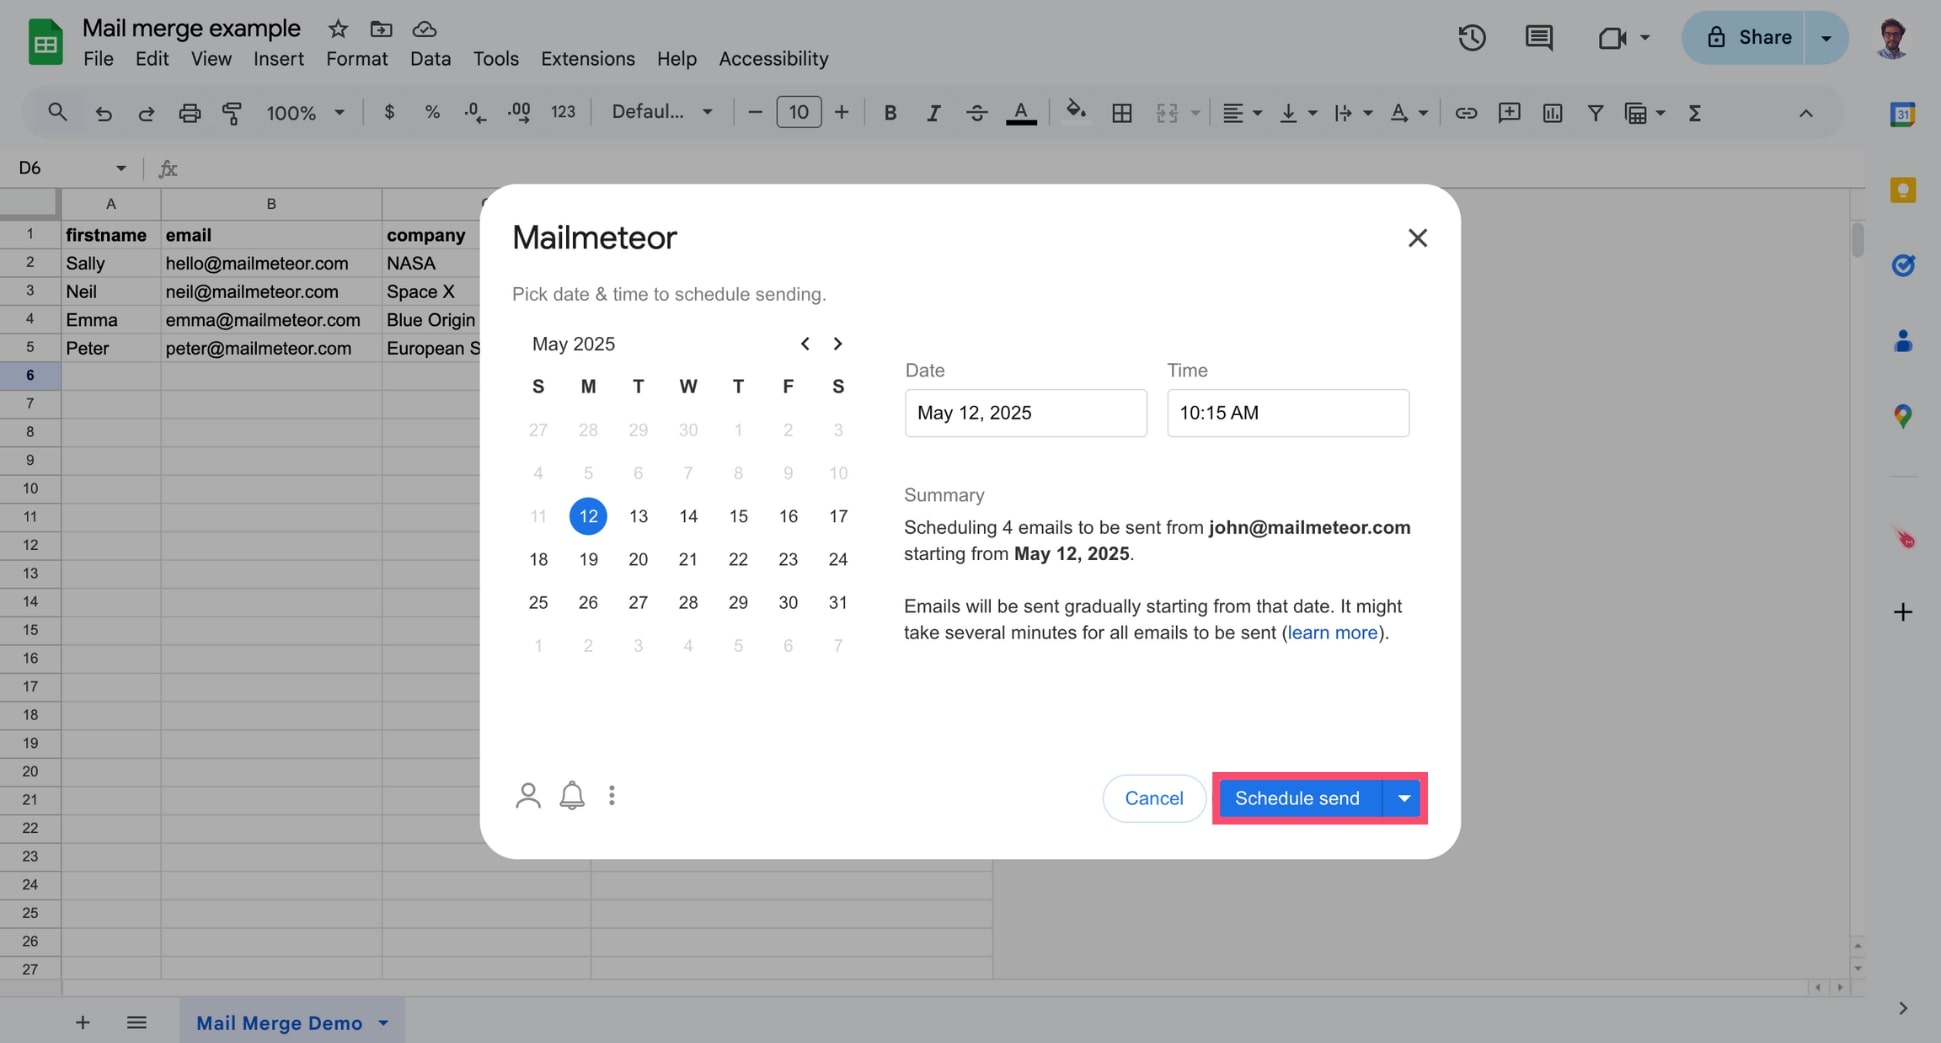
-
Click Schedule send to send emails at a later date.
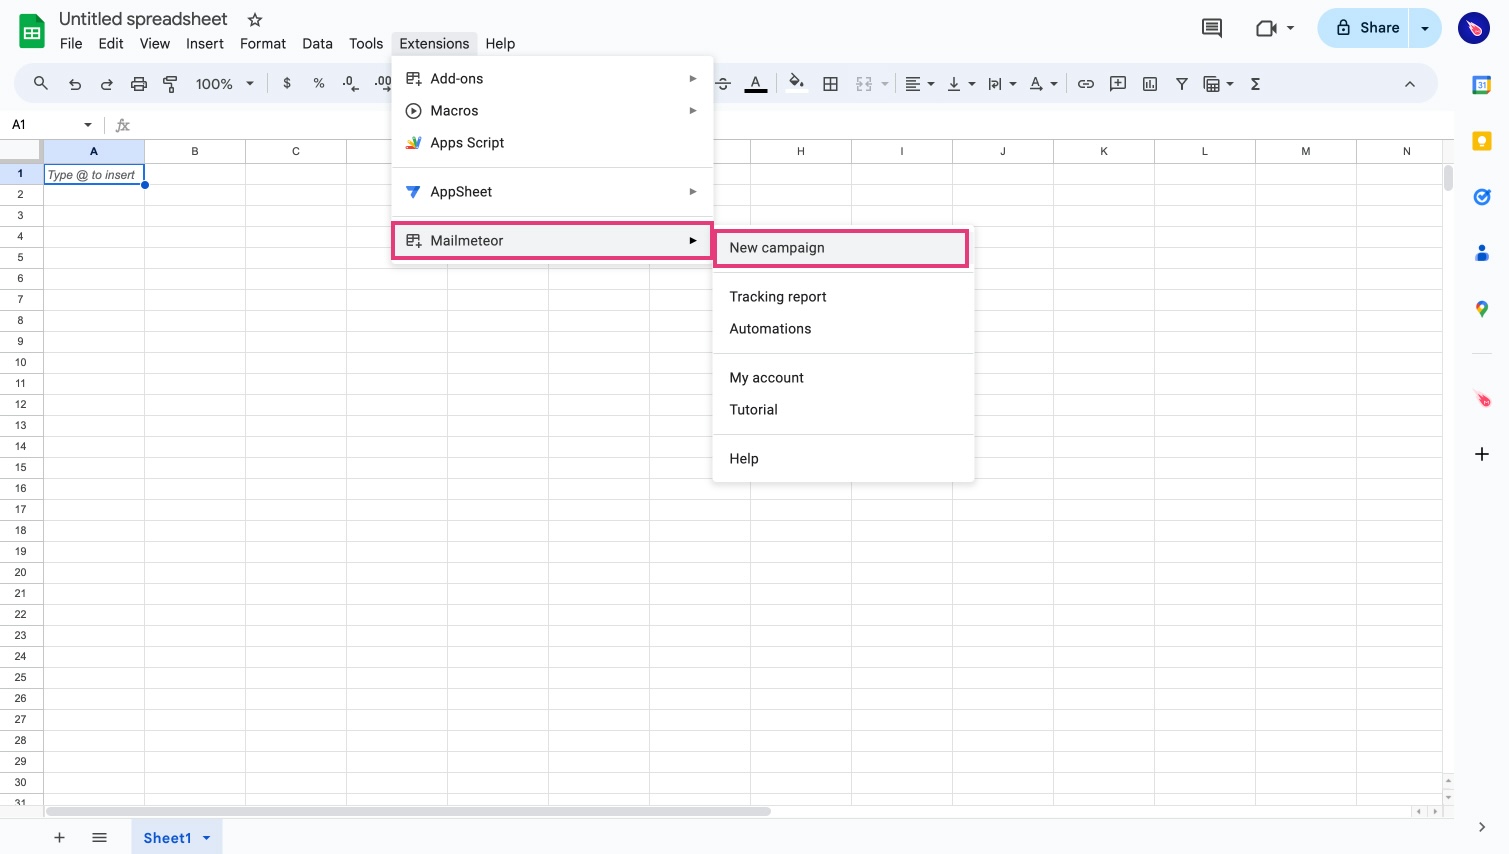
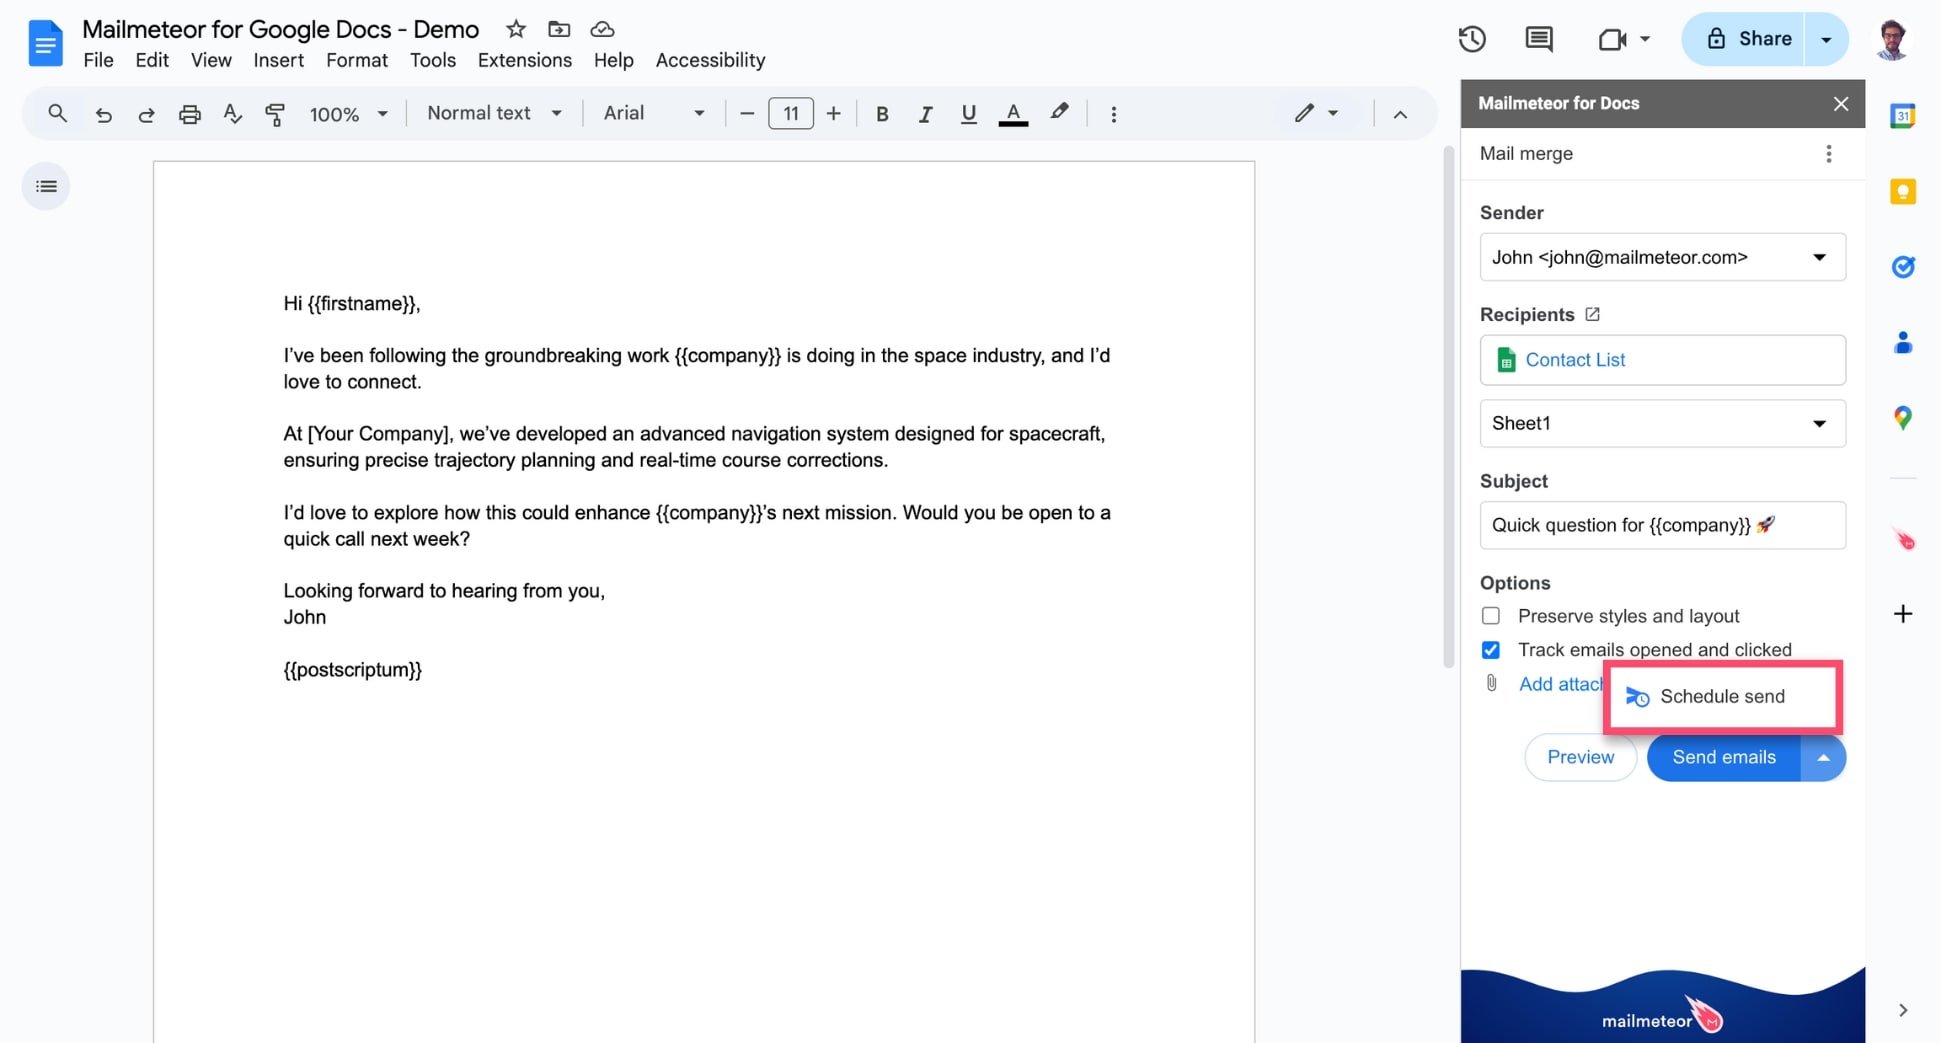
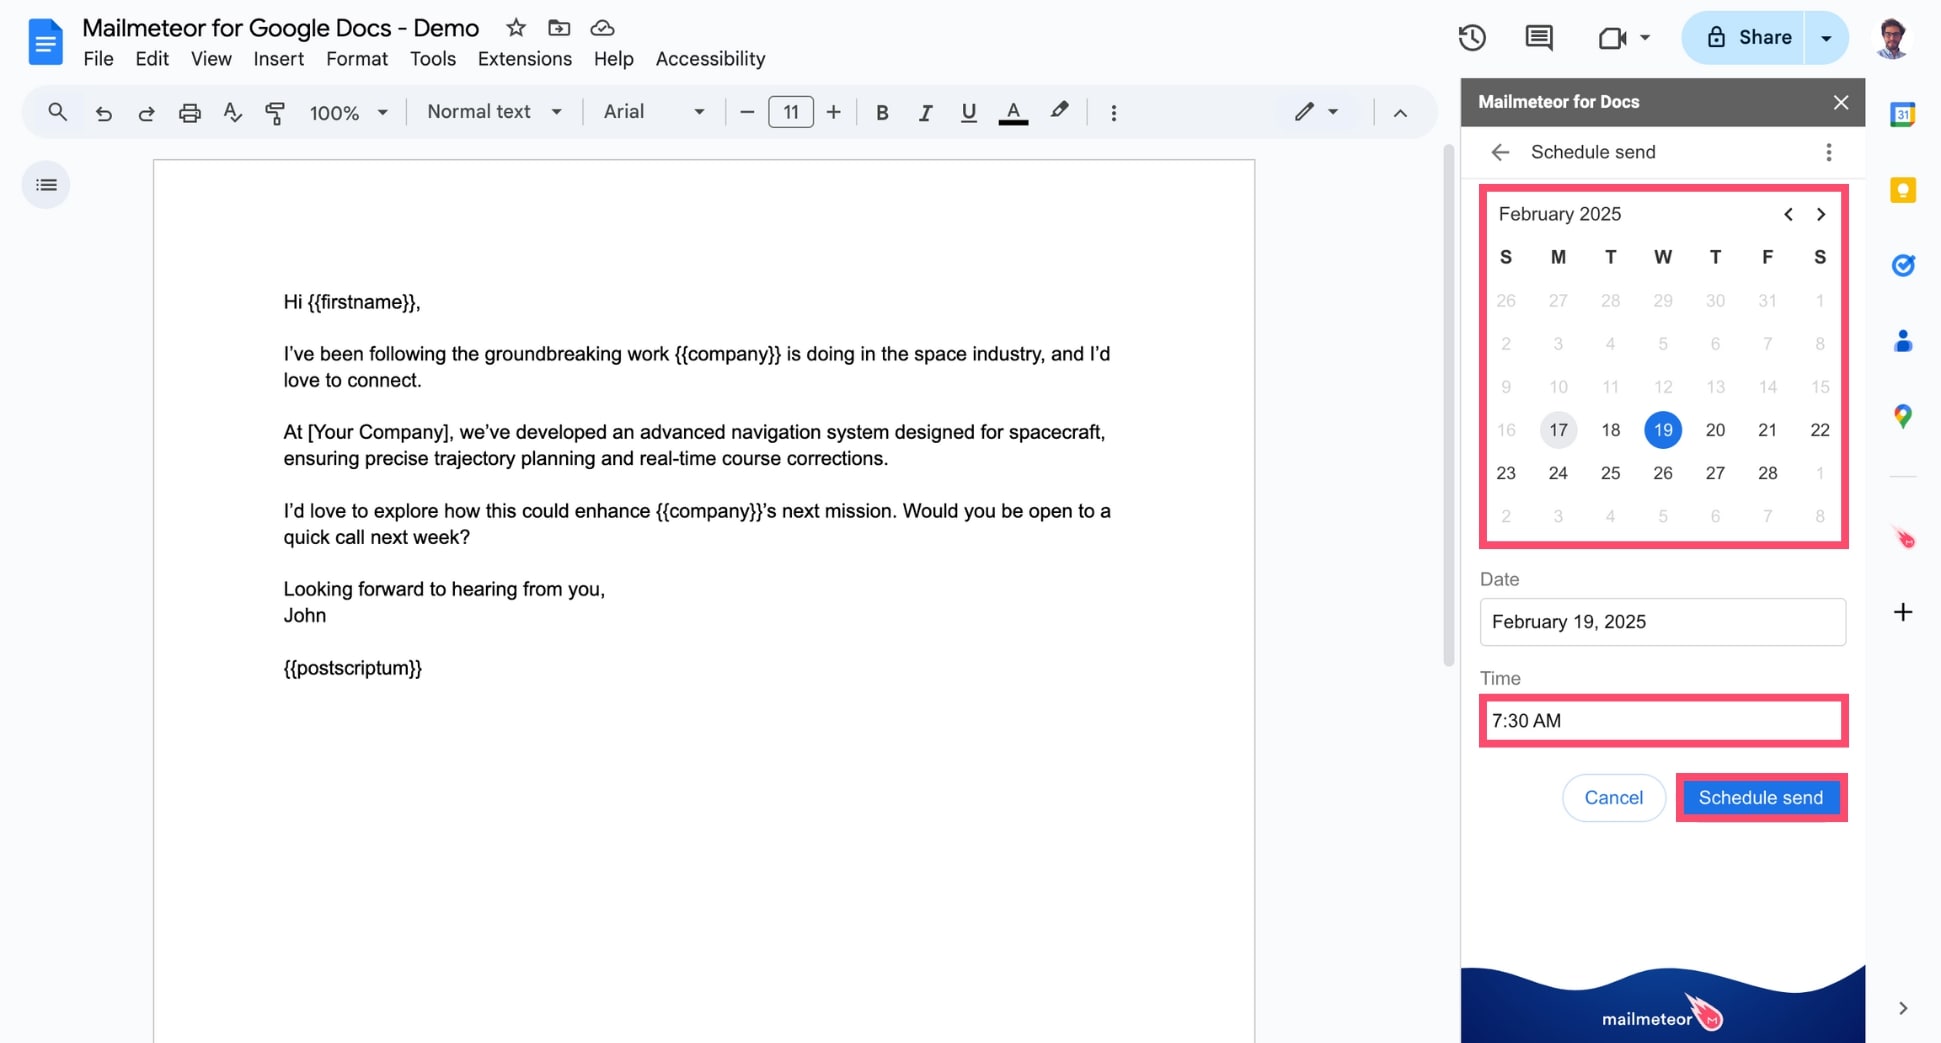
- Open your Google Docs. Then navigate to Extensions > Mailmeteor > New campaign and create a new campaign.
-
Next to Send emails, click the small caret symbol (▼). Then select Schedule send.
-
Pick the date and time. Then click Schedule send to confirm.
And voilà. Your campaign is now set to go out at the appointed time. You can sit back and relax while we take care of the rest.
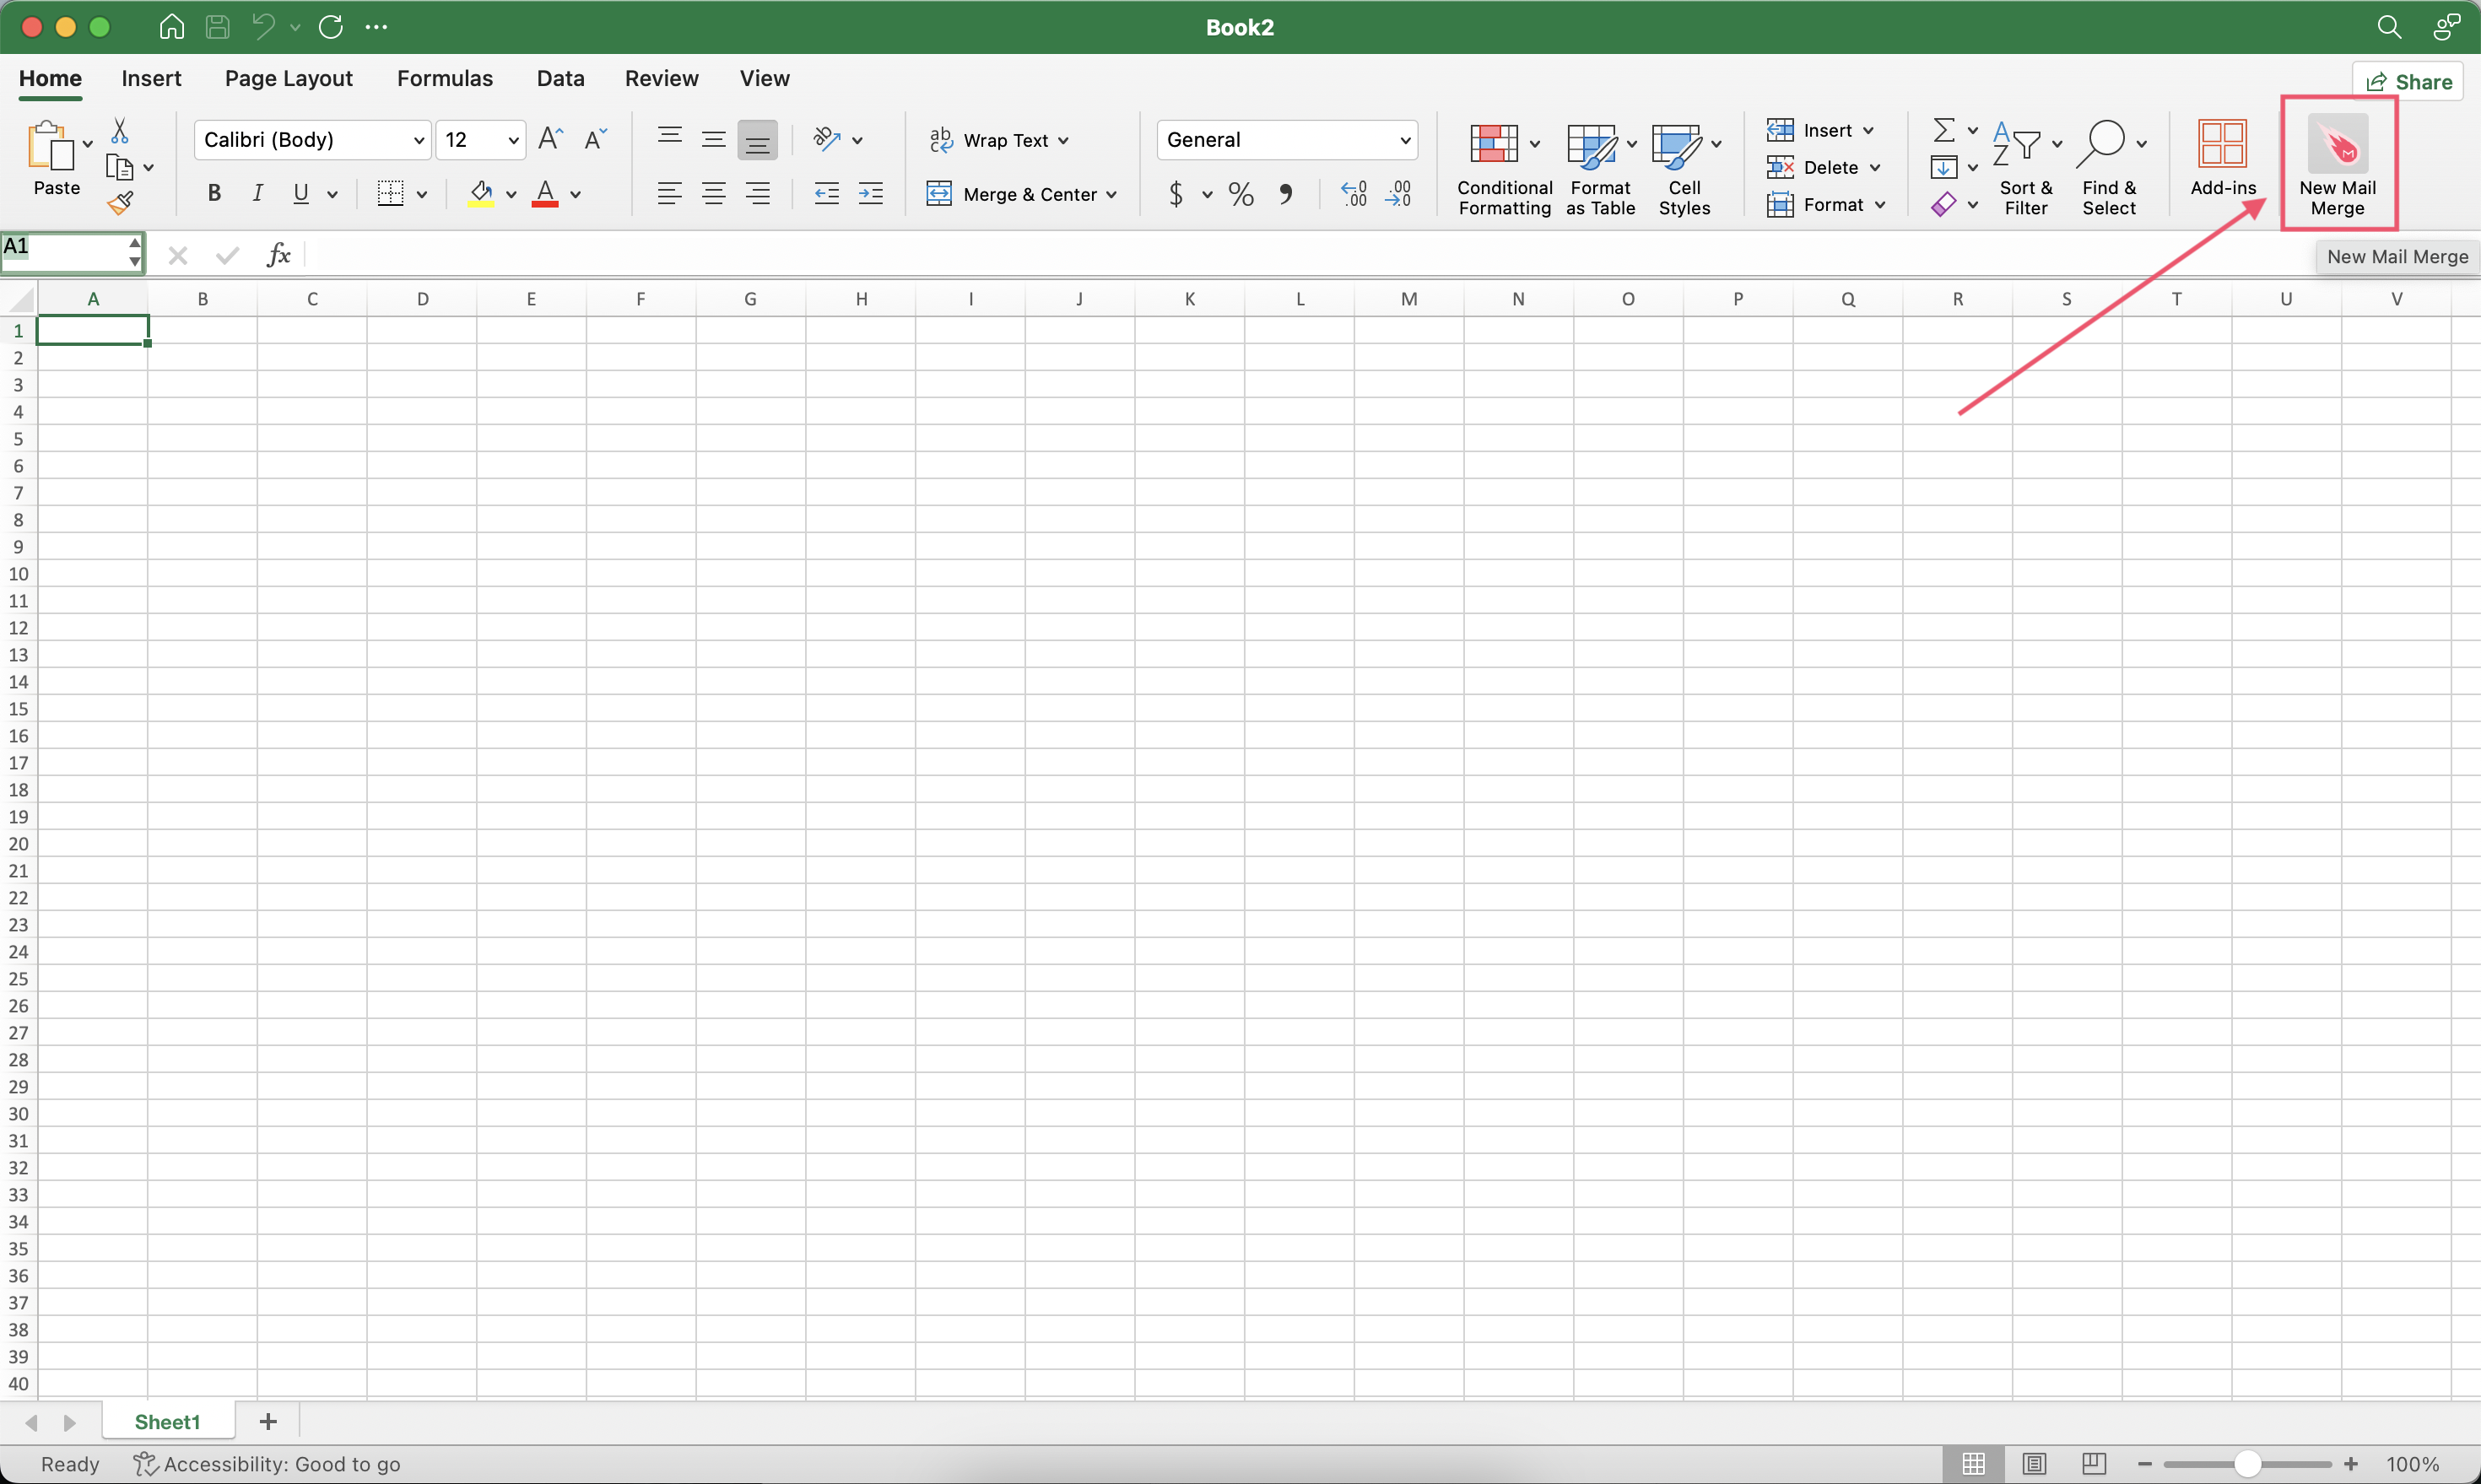
- Open Excel and select your spreadsheet with your contact list.
-
Open Mailmeteor’s add-in for Excel
-
Next to Send emails, click the small caret symbol (“▼”) and select Schedule send.
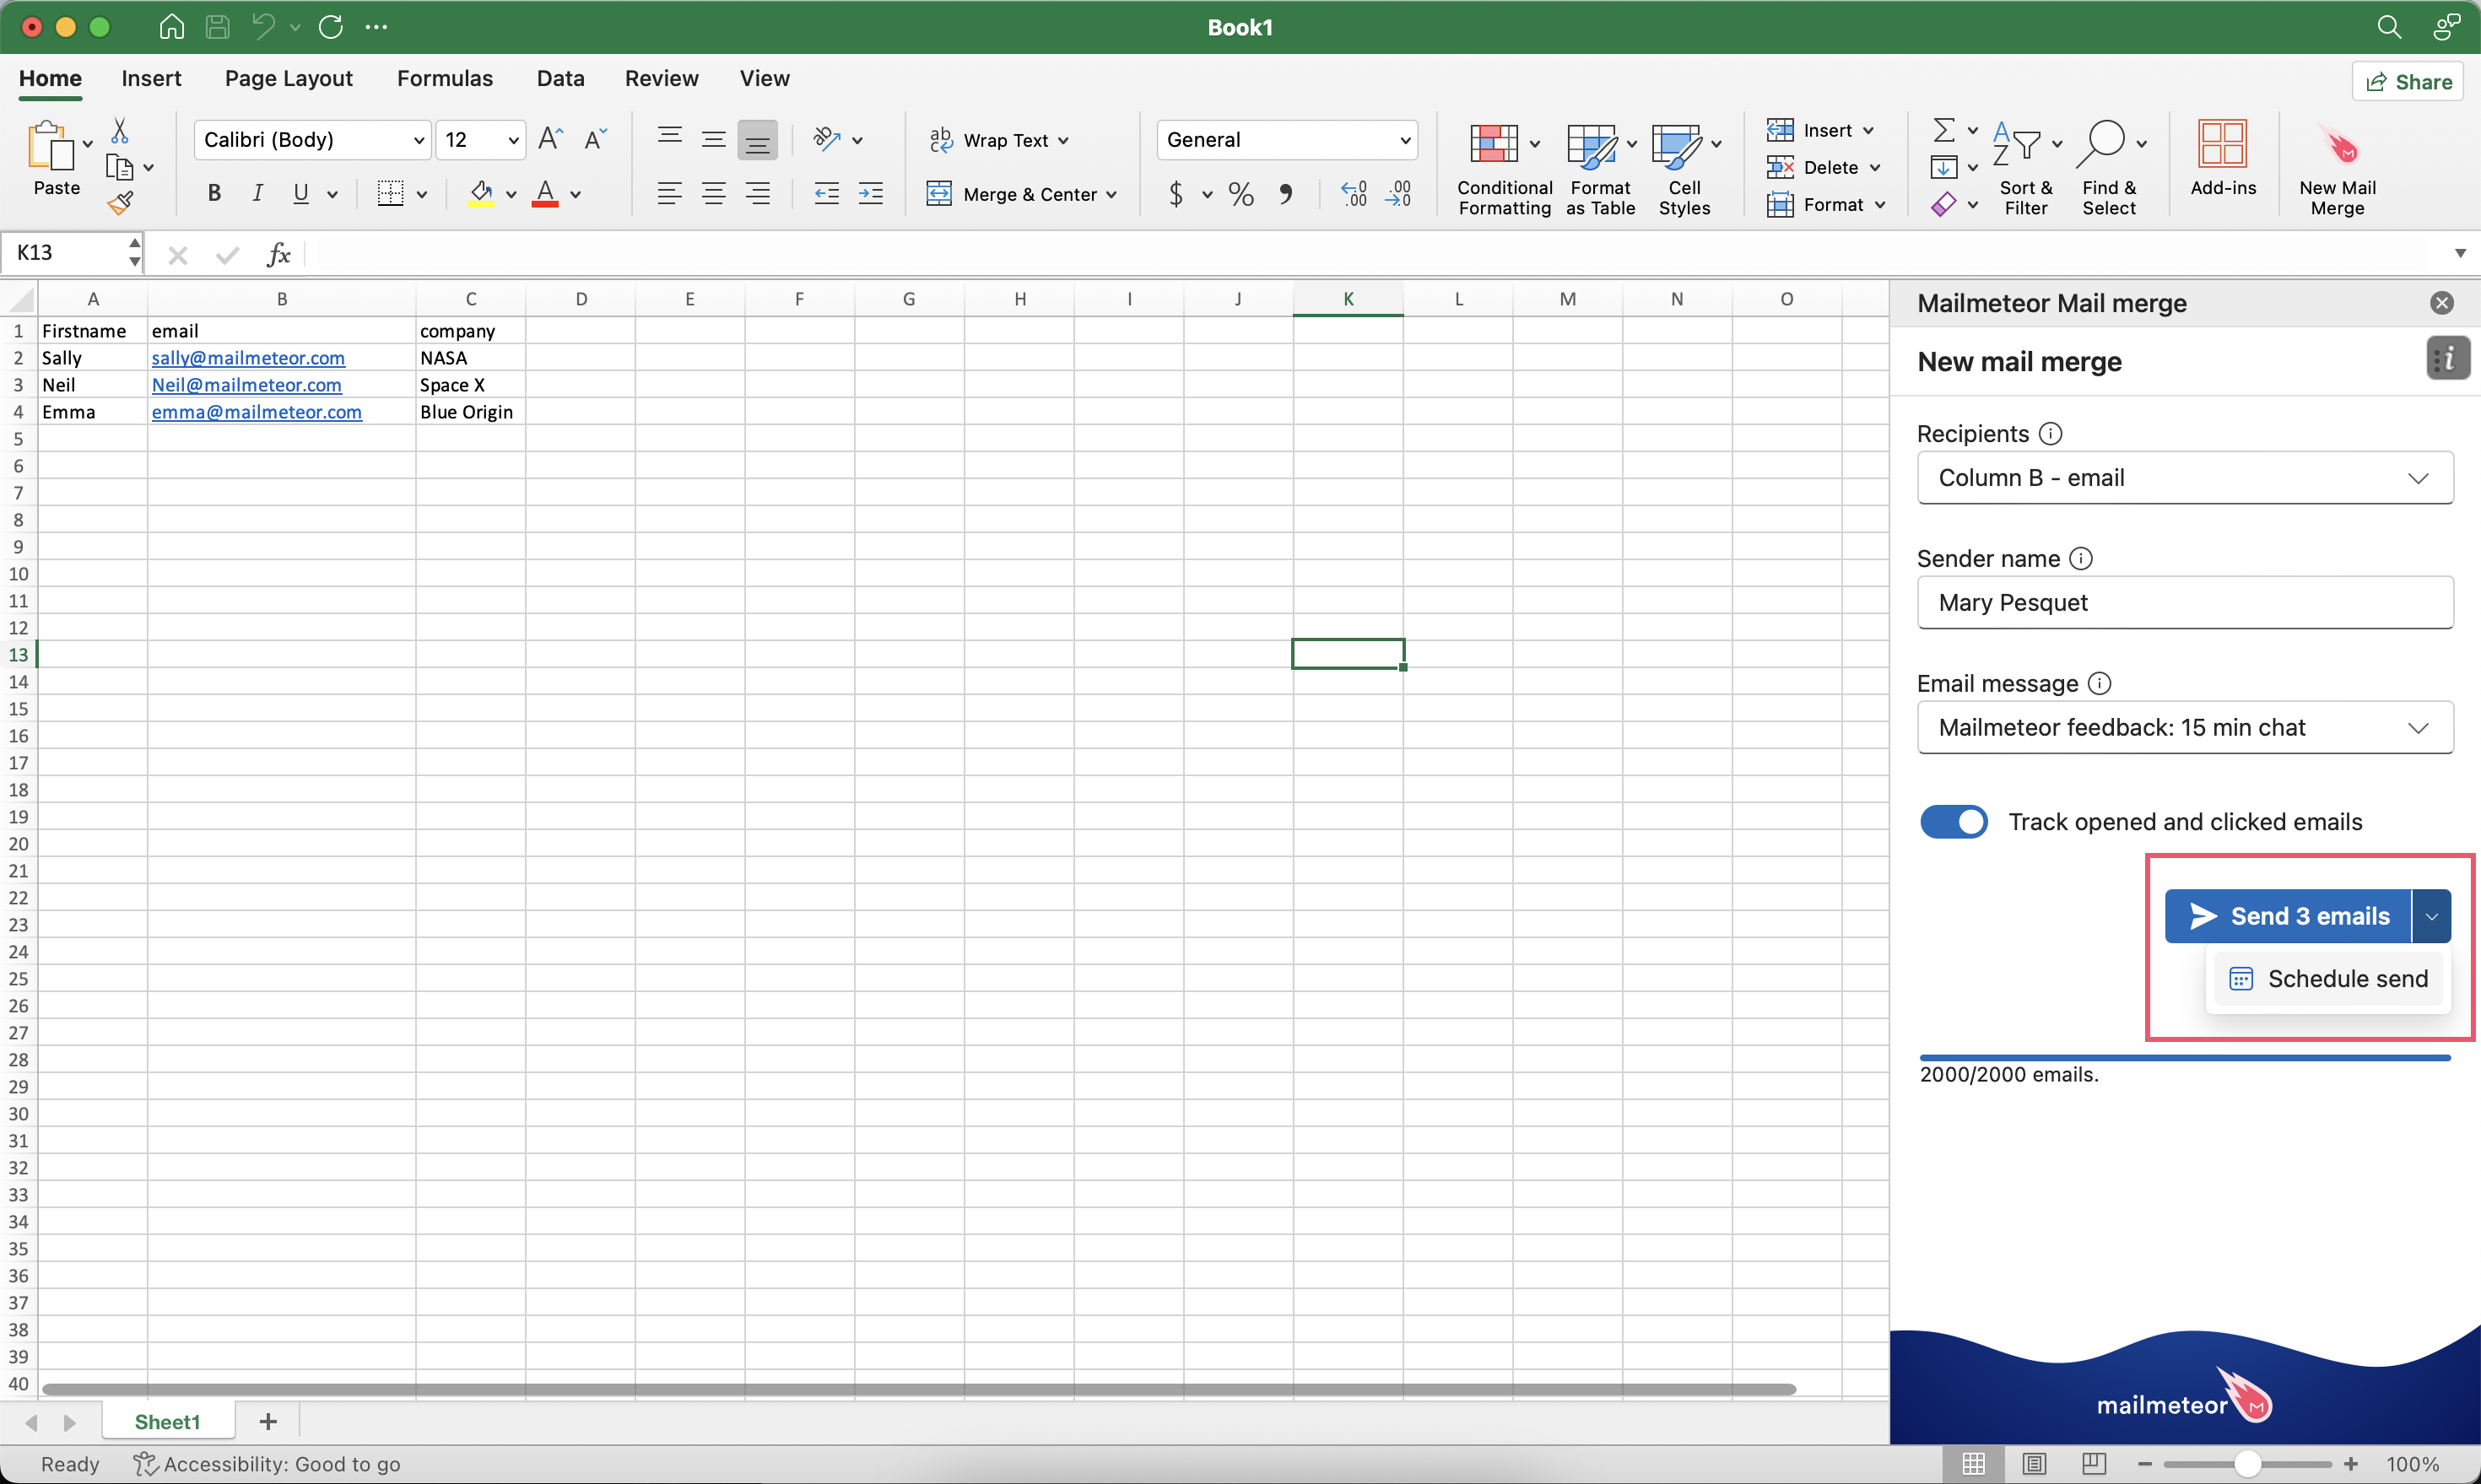
-
Select the date and time.
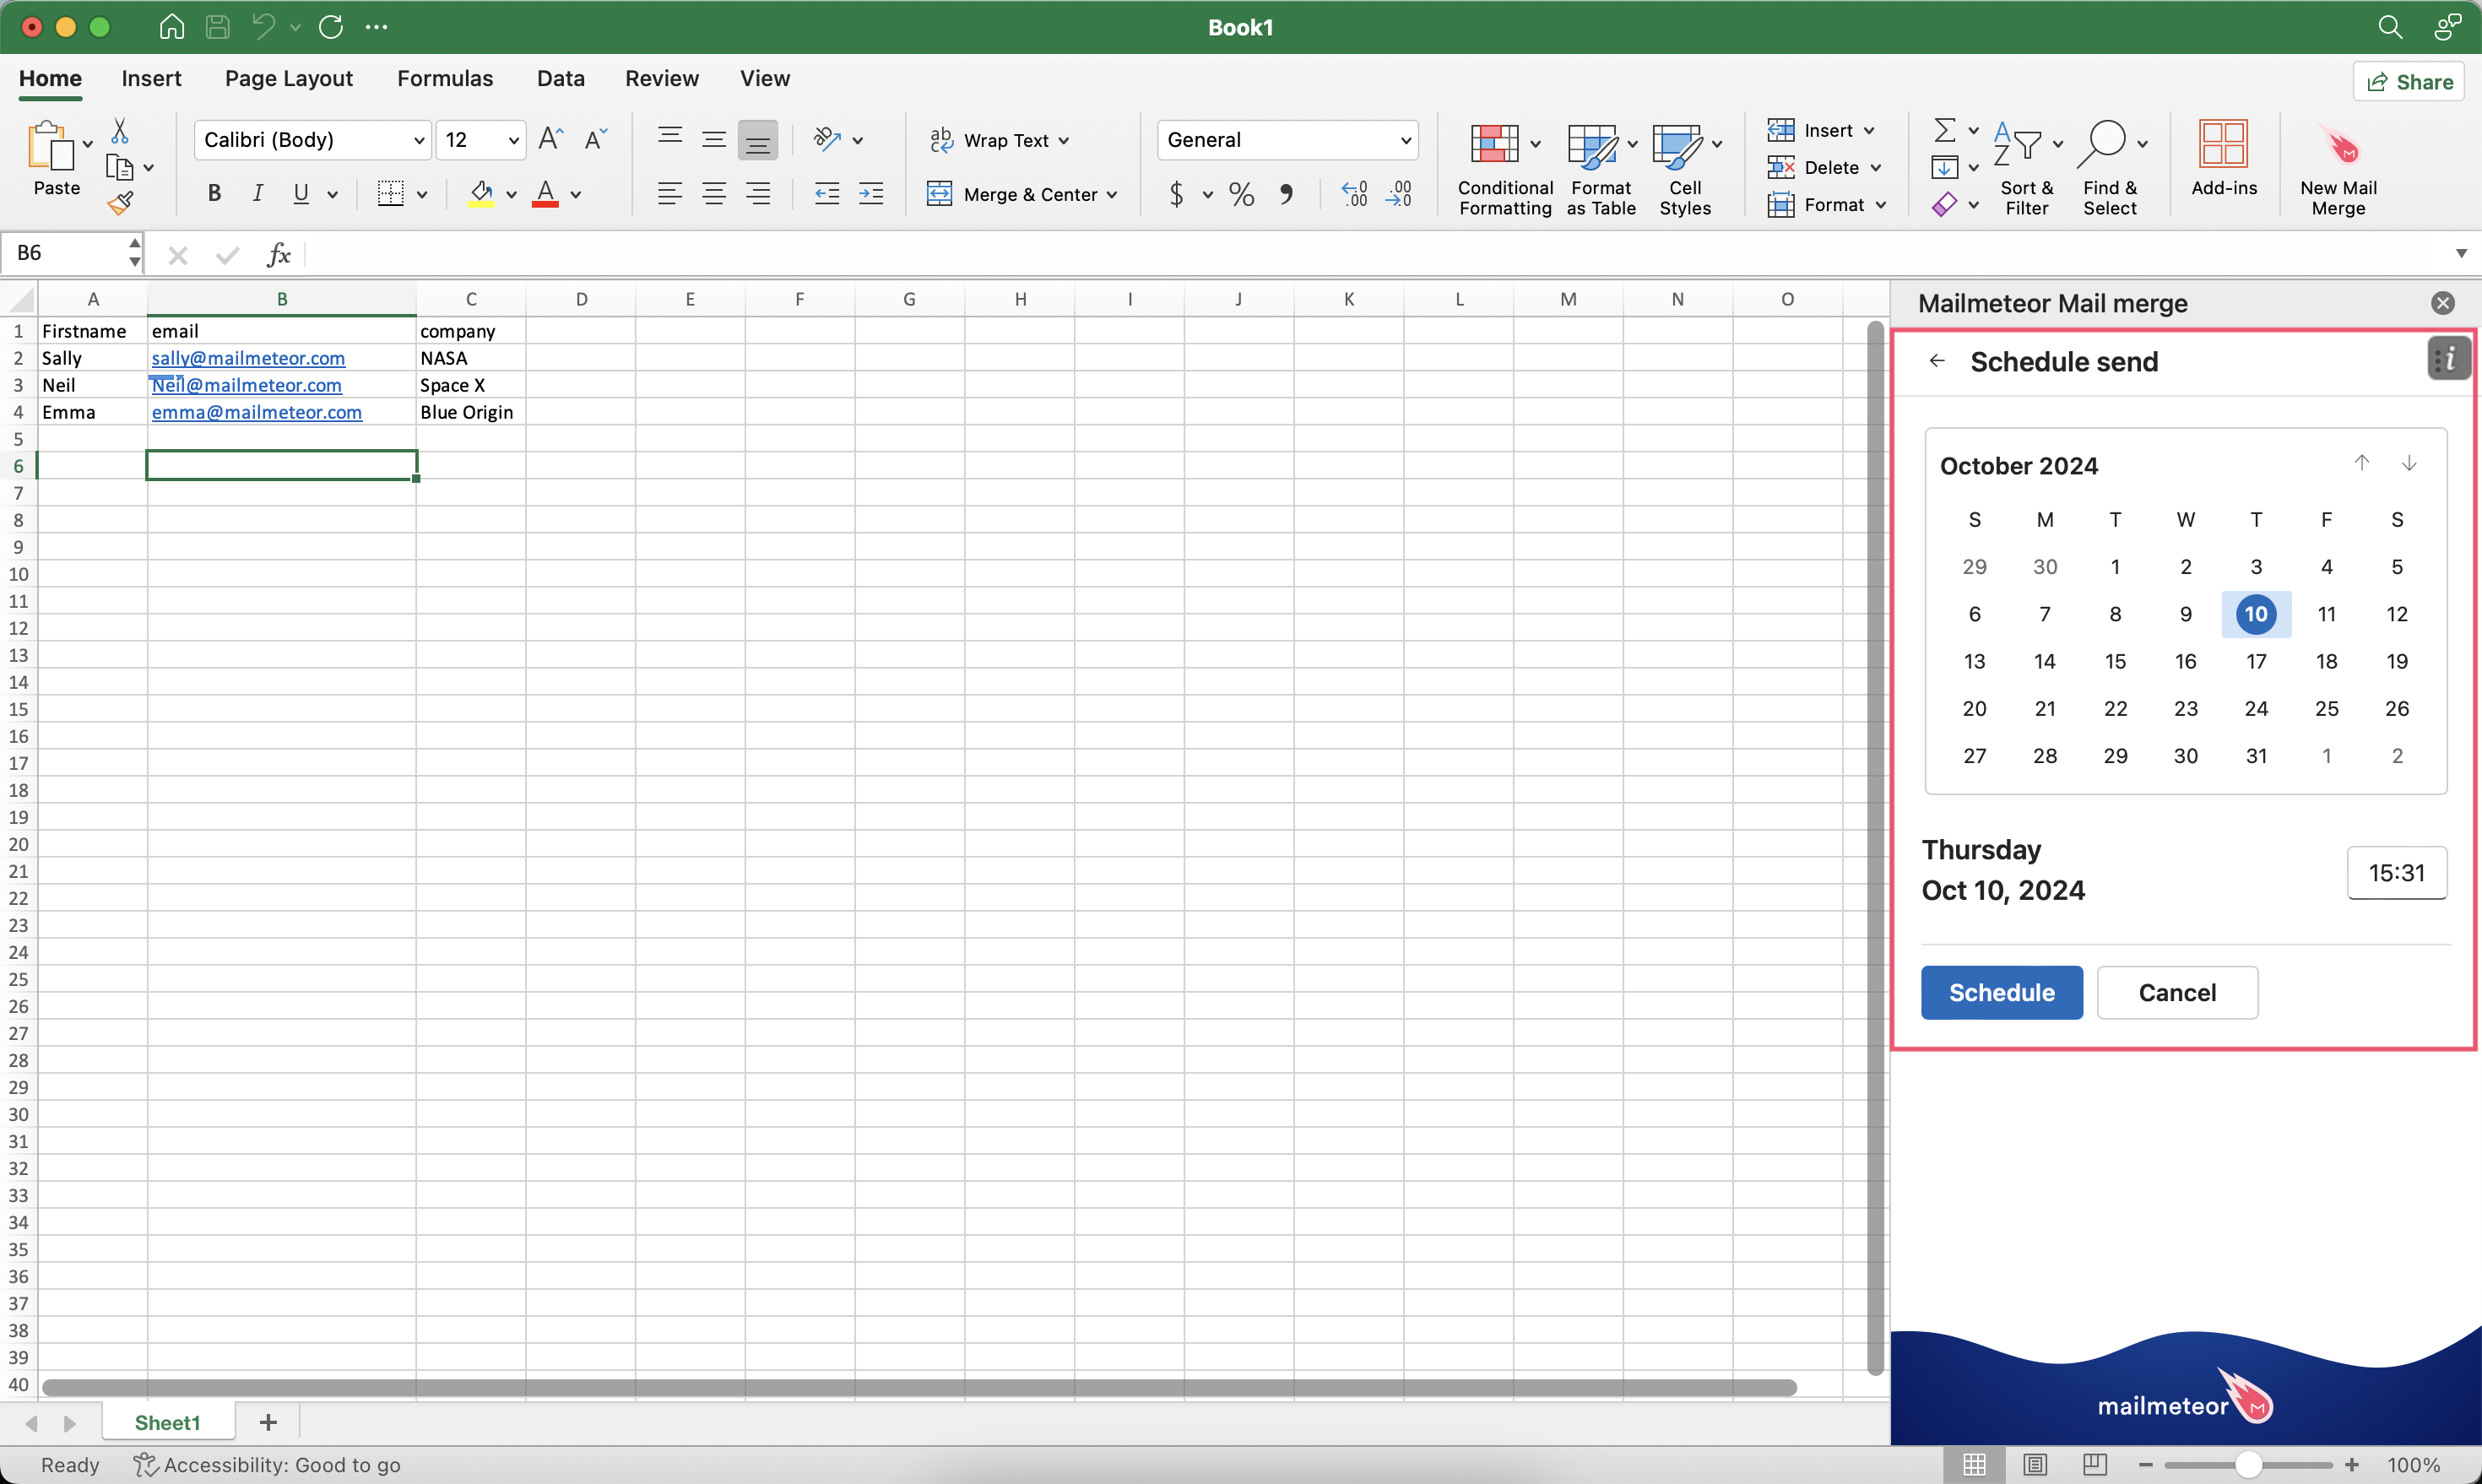
- Click Schedule to send emails at a later date.
How to view scheduled campaigns?
- Sign in to Mailmeteor Dashboard.
-
Go to Campaigns > Scheduled.
- Click on a campaign.
How to edit a scheduled campaign?
Made a mistake? Or want to make some last-minute changes? Here’s how you can edit a scheduled campaign in Mailmeteor before we start sending your emails.
- Open Mailmeteor Dashboard.
- Go to Campaigns > Scheduled.
- Select your email campaign.
- Click on the Action button.
-
Select Update campaign.
- From there, you can edit your subject line, the body of your email, or the list of recipients.
-
Once you’re happy with the changes you’ve made, click Update campaign.
When will my emails be sent?
With Mailmeteor’s scheduling feature, you can plan when to send your emails. It could be in a few minutes or up to 120 days from now.
Your scheduled emails are sent gradually. Depending on the size of your contact list, the sending may take a few minutes to one hour. This helps prevent your emails from falling into spam and secure your account.