Sending from a different address or alias
With Mailmeteor, you can send personalized mass emails from the account you use to sign in (your primary account) or from another email address. This allows you to send your campaigns from multiple identities.
How to send from a different address?
You can send emails from different addresses in Mailmeteor. Here’s how to do it from the Mailmeteor Dashboard:
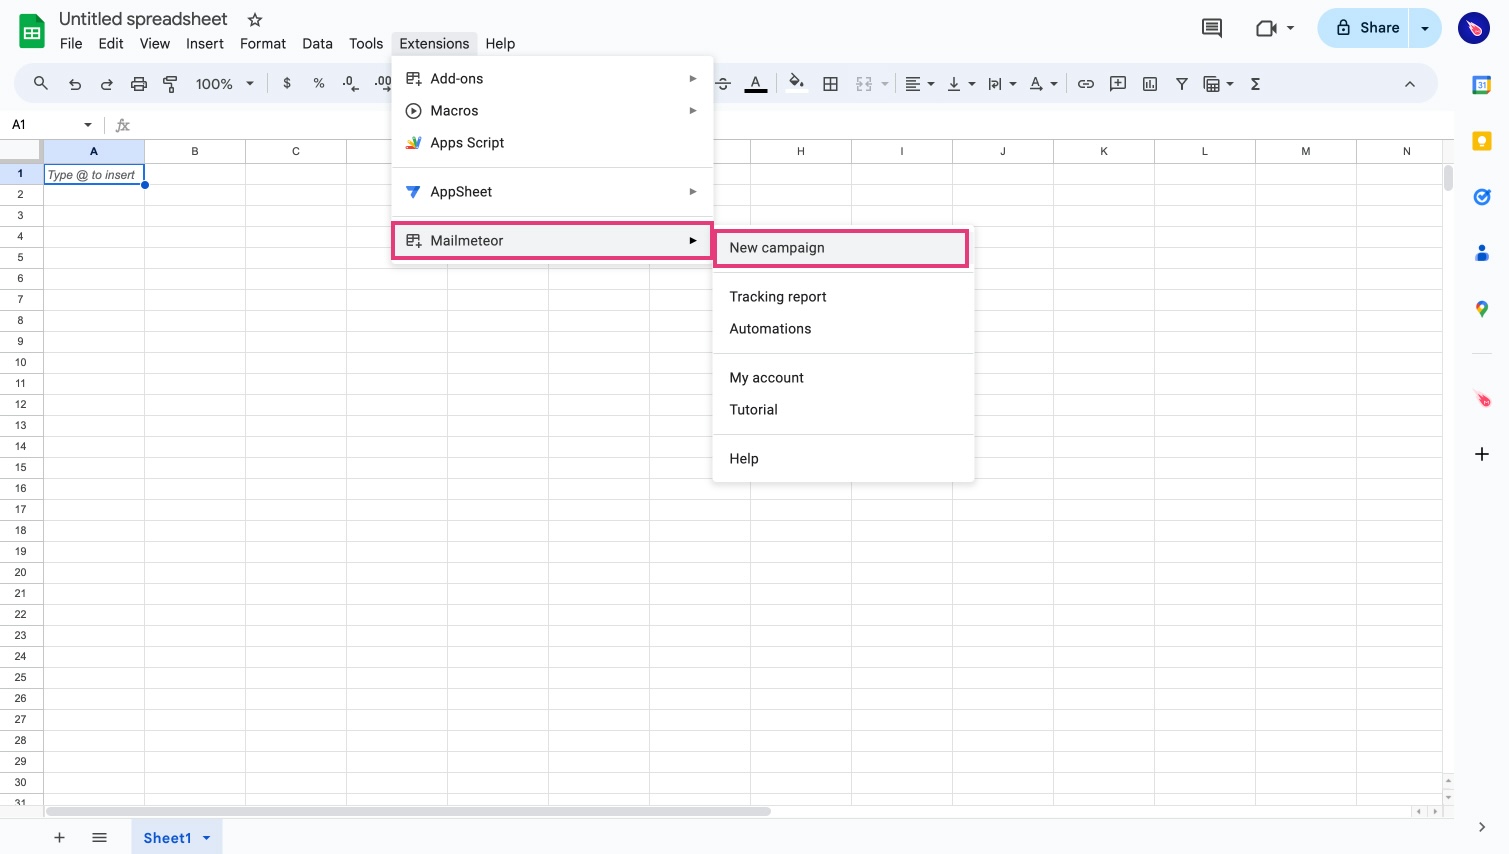
- Open Mailmeteor Dashboard.
- Create a new campaign.
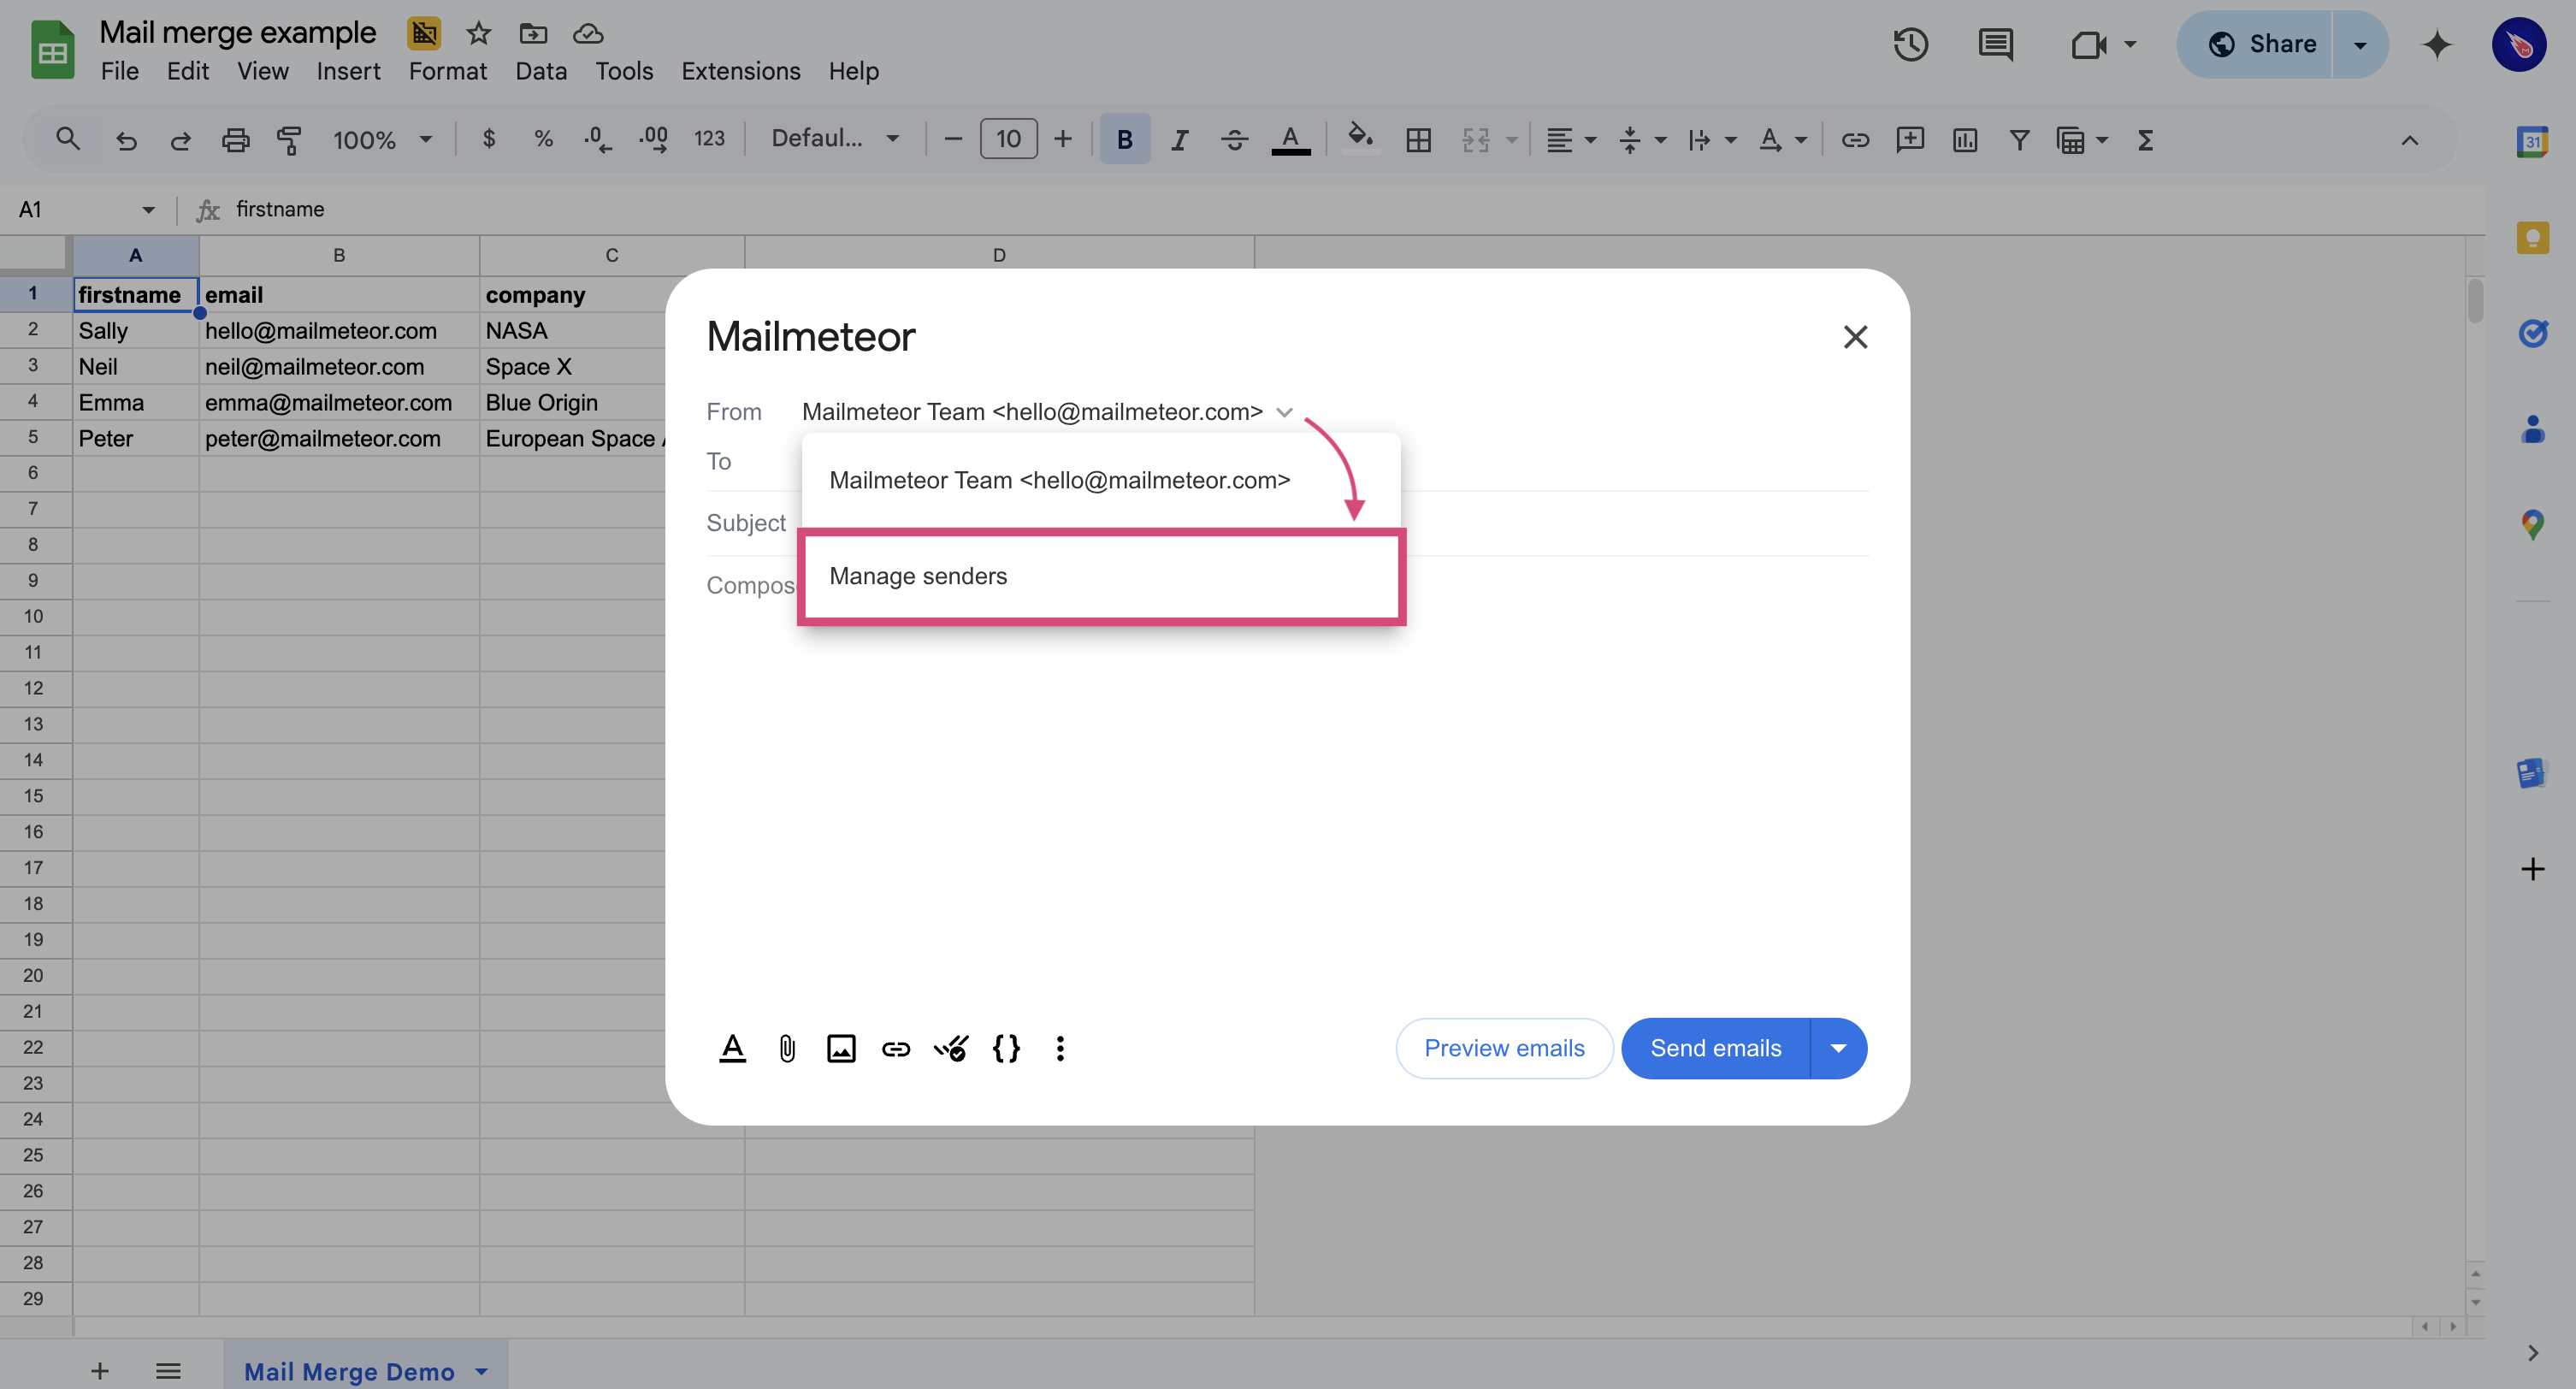
- In the From field, next to your email address, click on the small caret symbol (“▼”) and select the sender you’d like to use.
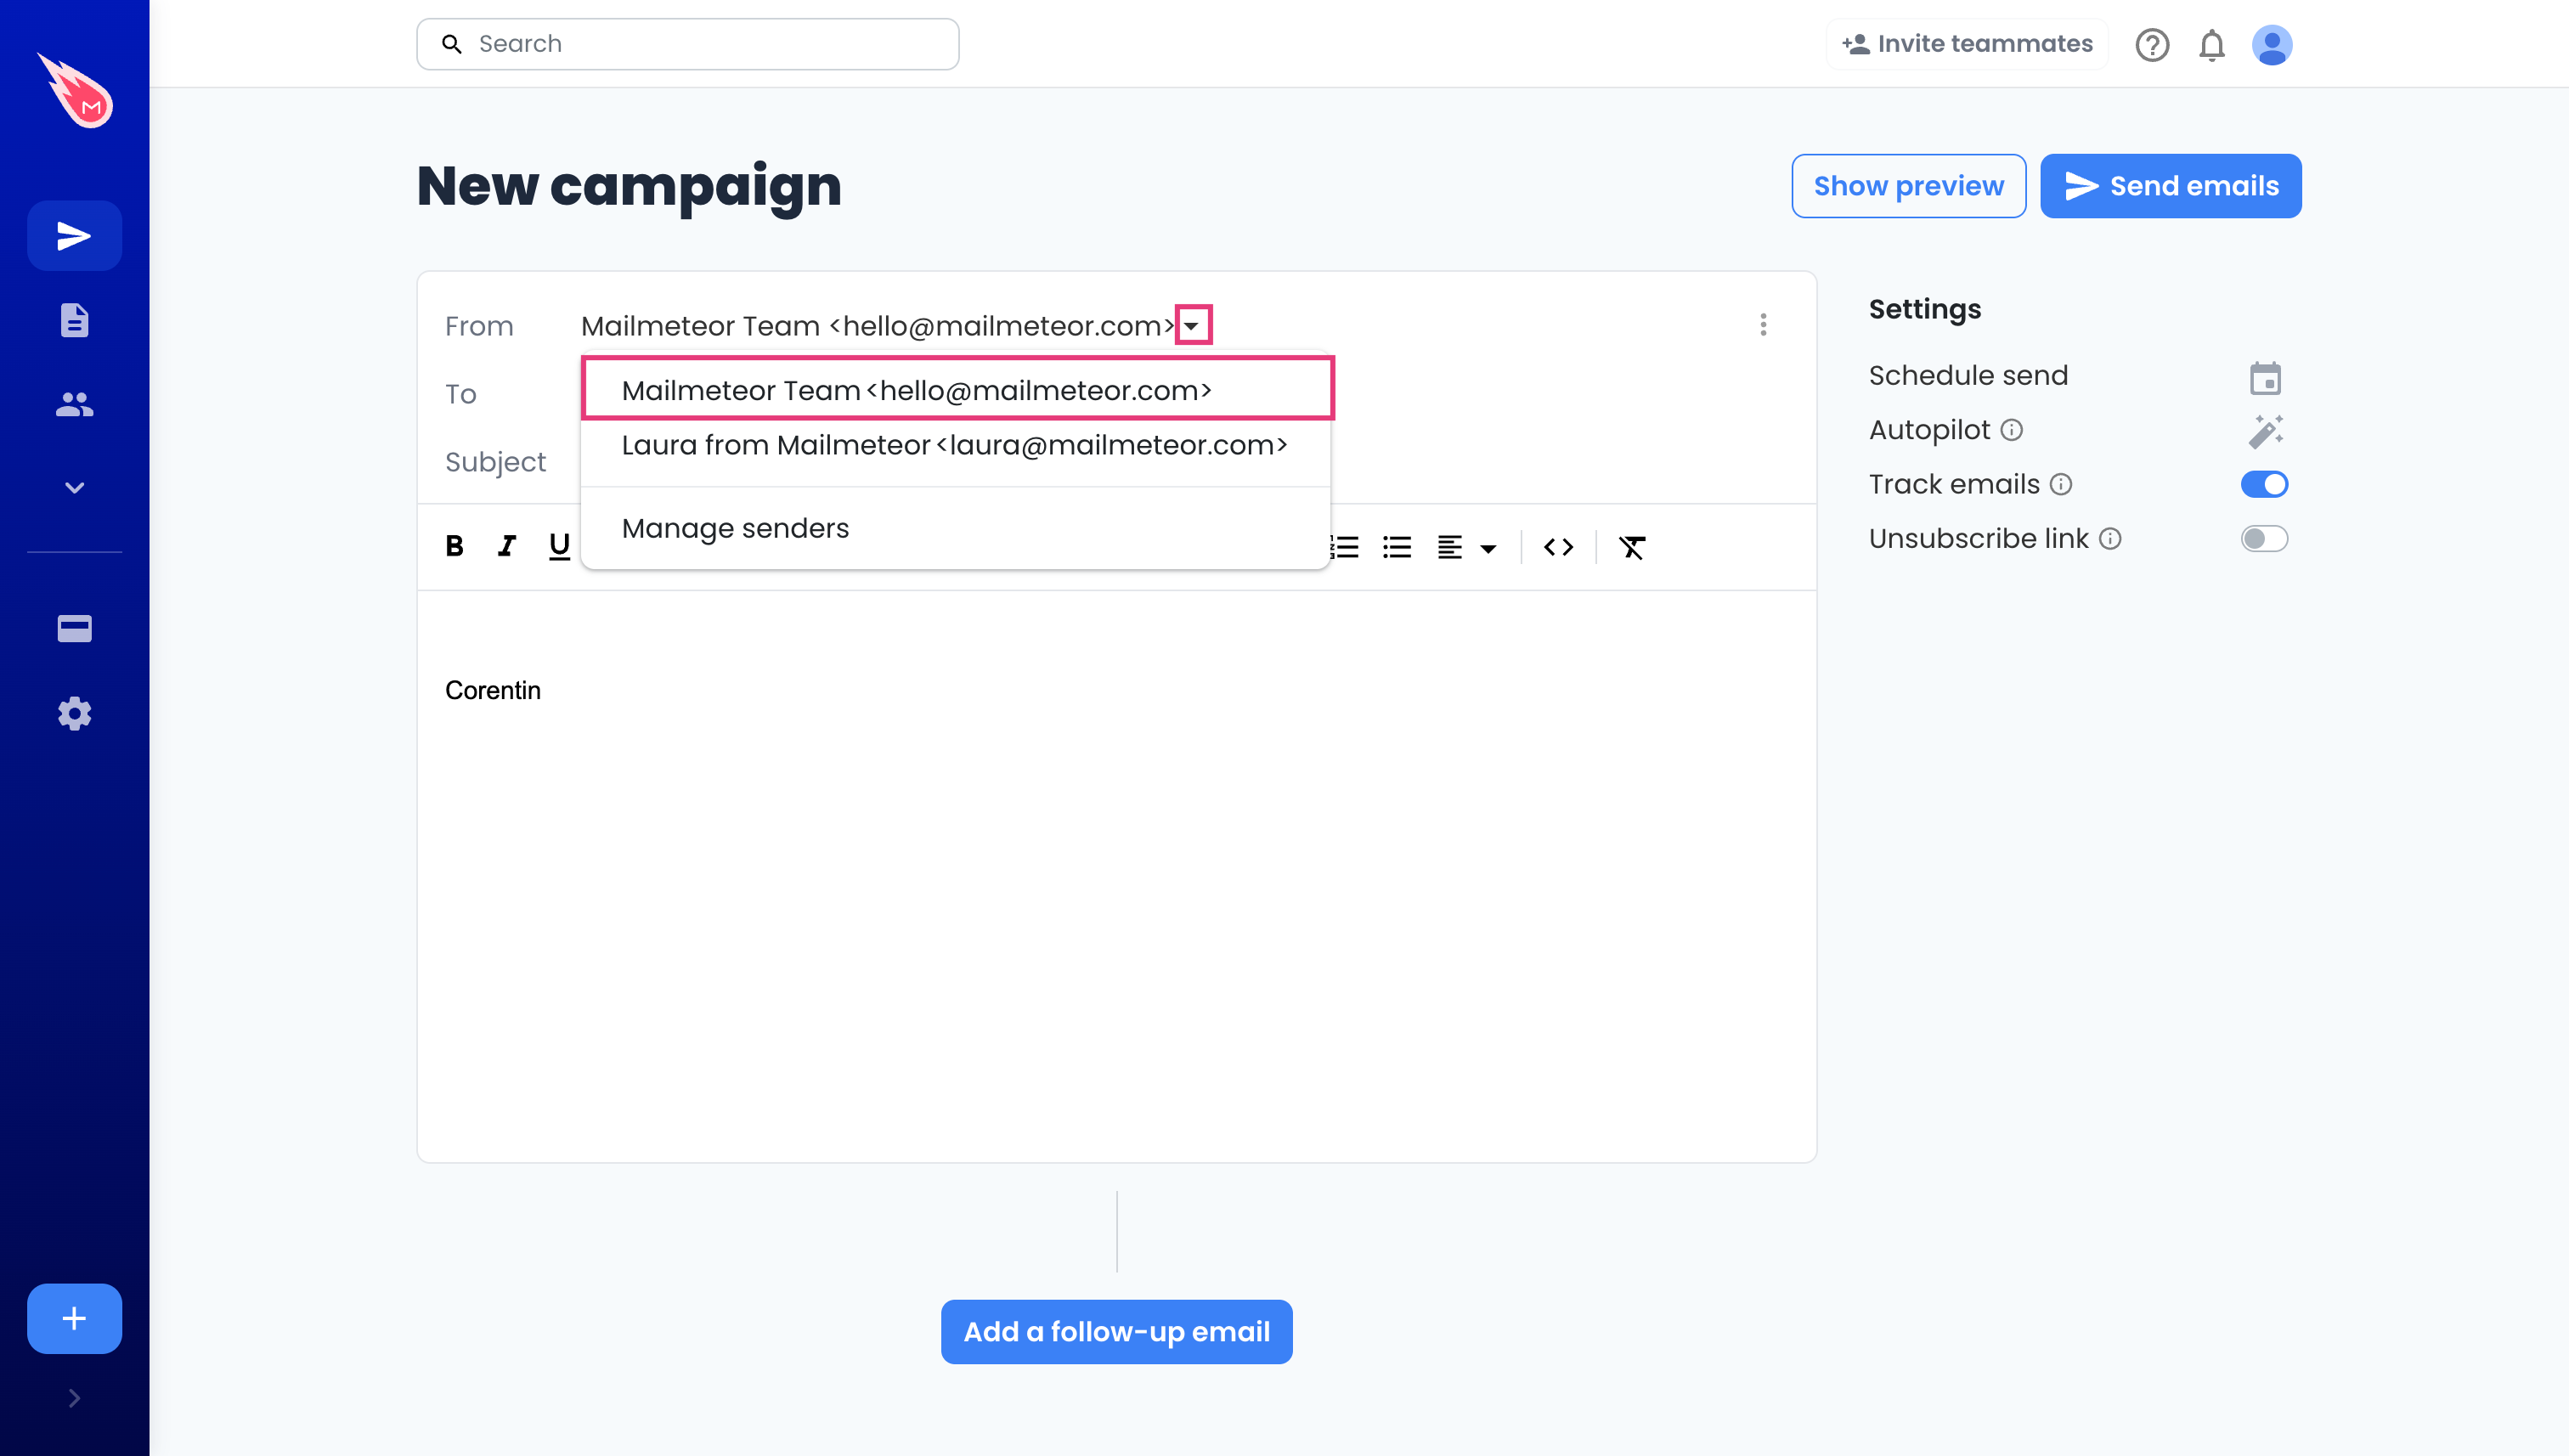
You'll see a list of all active senders. Click on Manage senders to view more options.
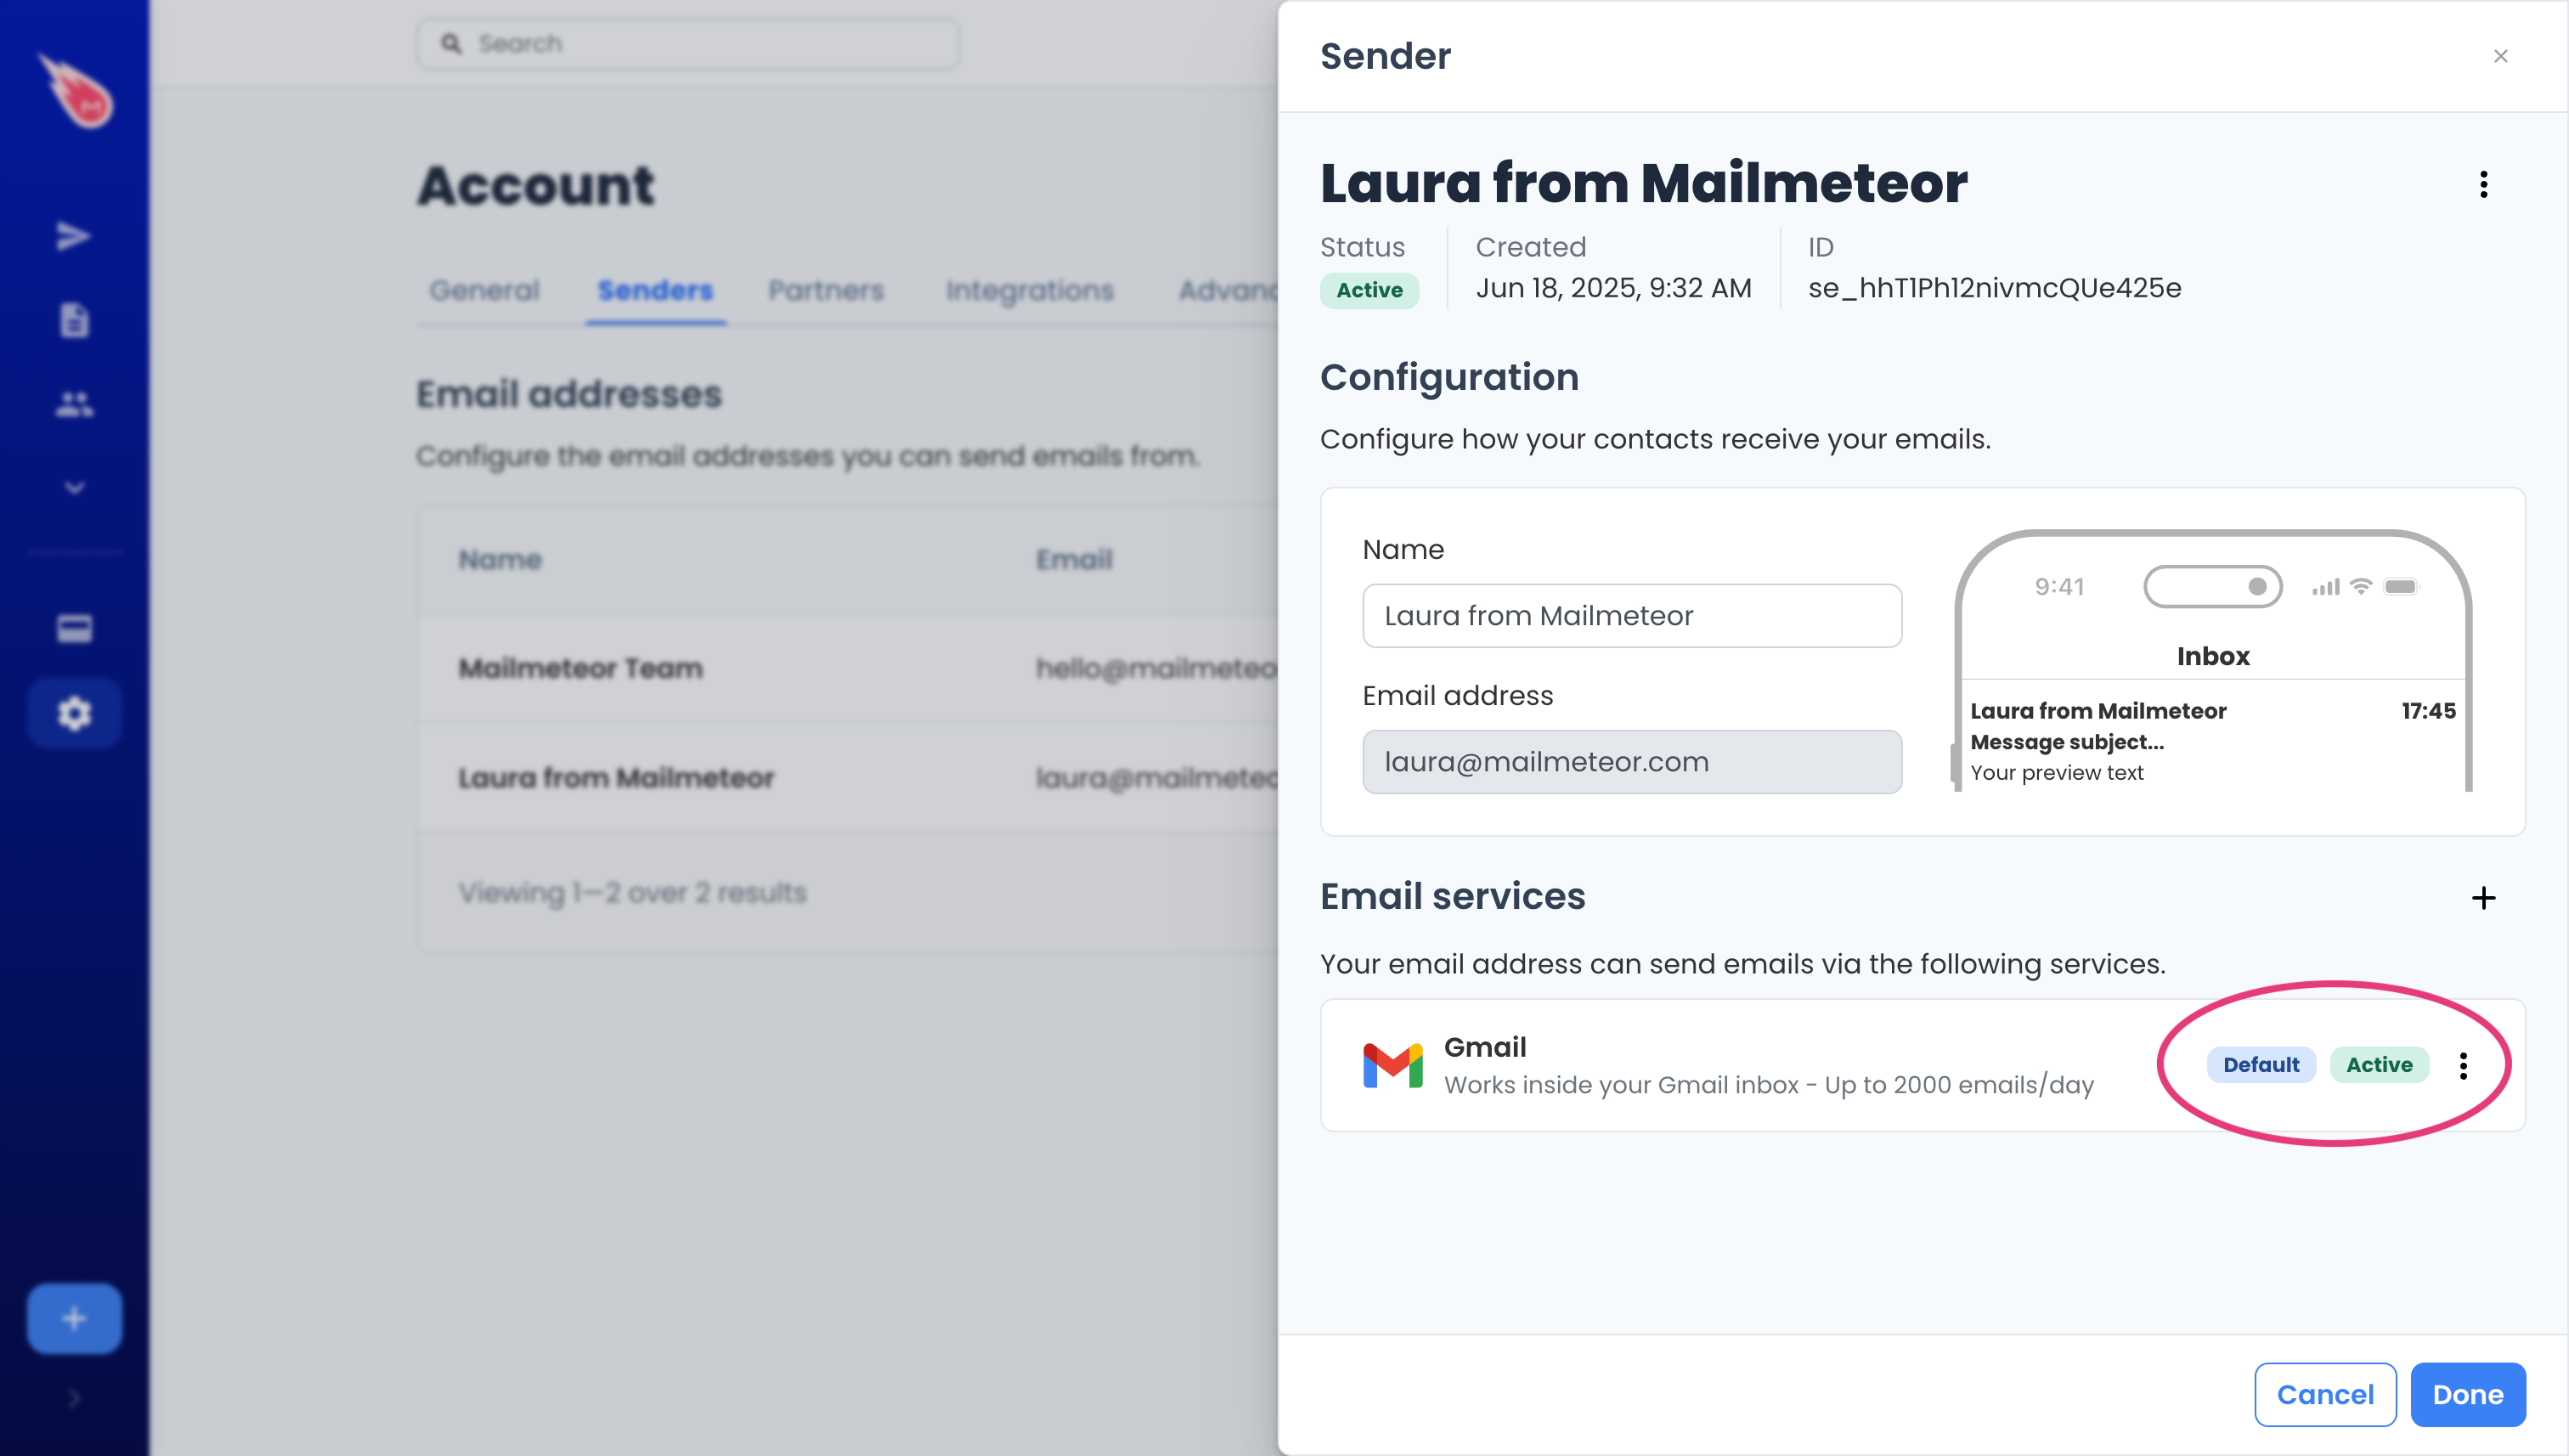
How to create a new sender?
You can configure a different sending email address in a few clicks. Here’s how to do it from the Mailmeteor Dashboard:
- Open Mailmeteor Dashboard.
- Create a new campaign.
-
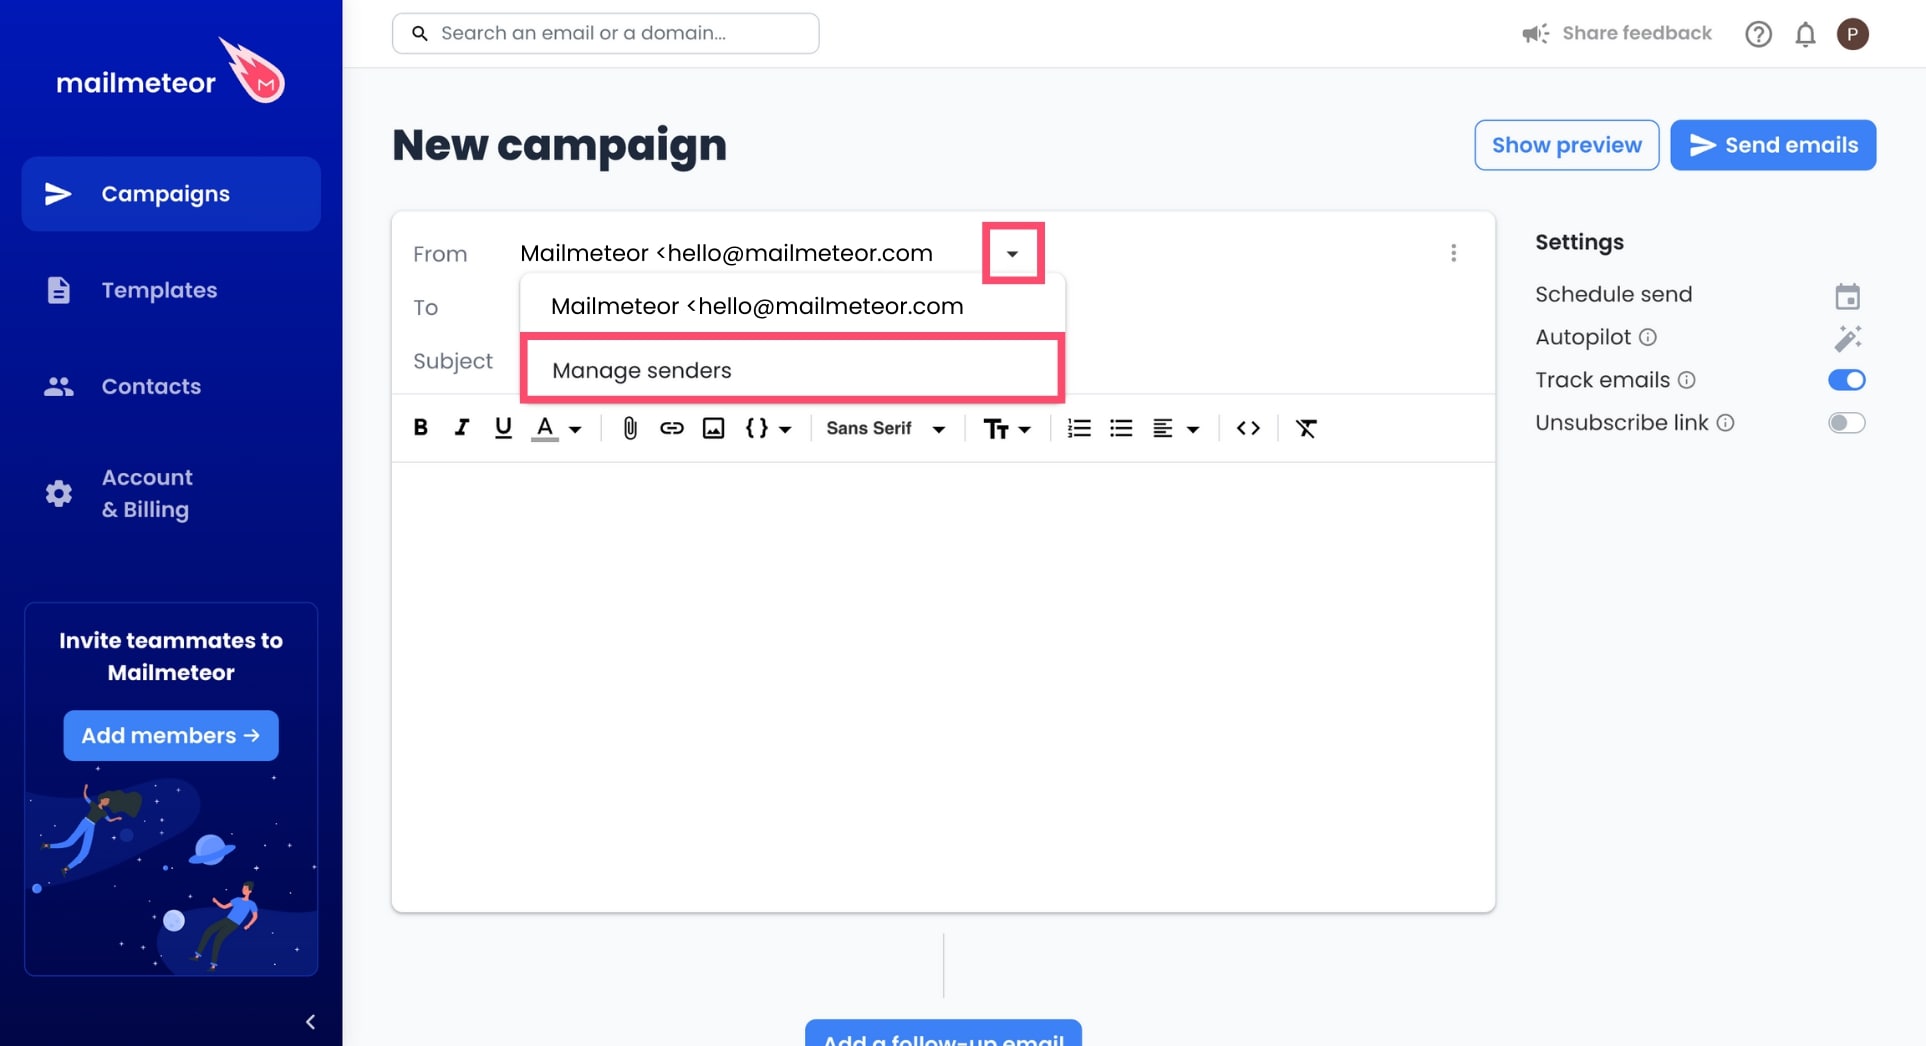
In the From field, next to your email address, click on the small caret symbol (“▼”) and select Manage senders.
-
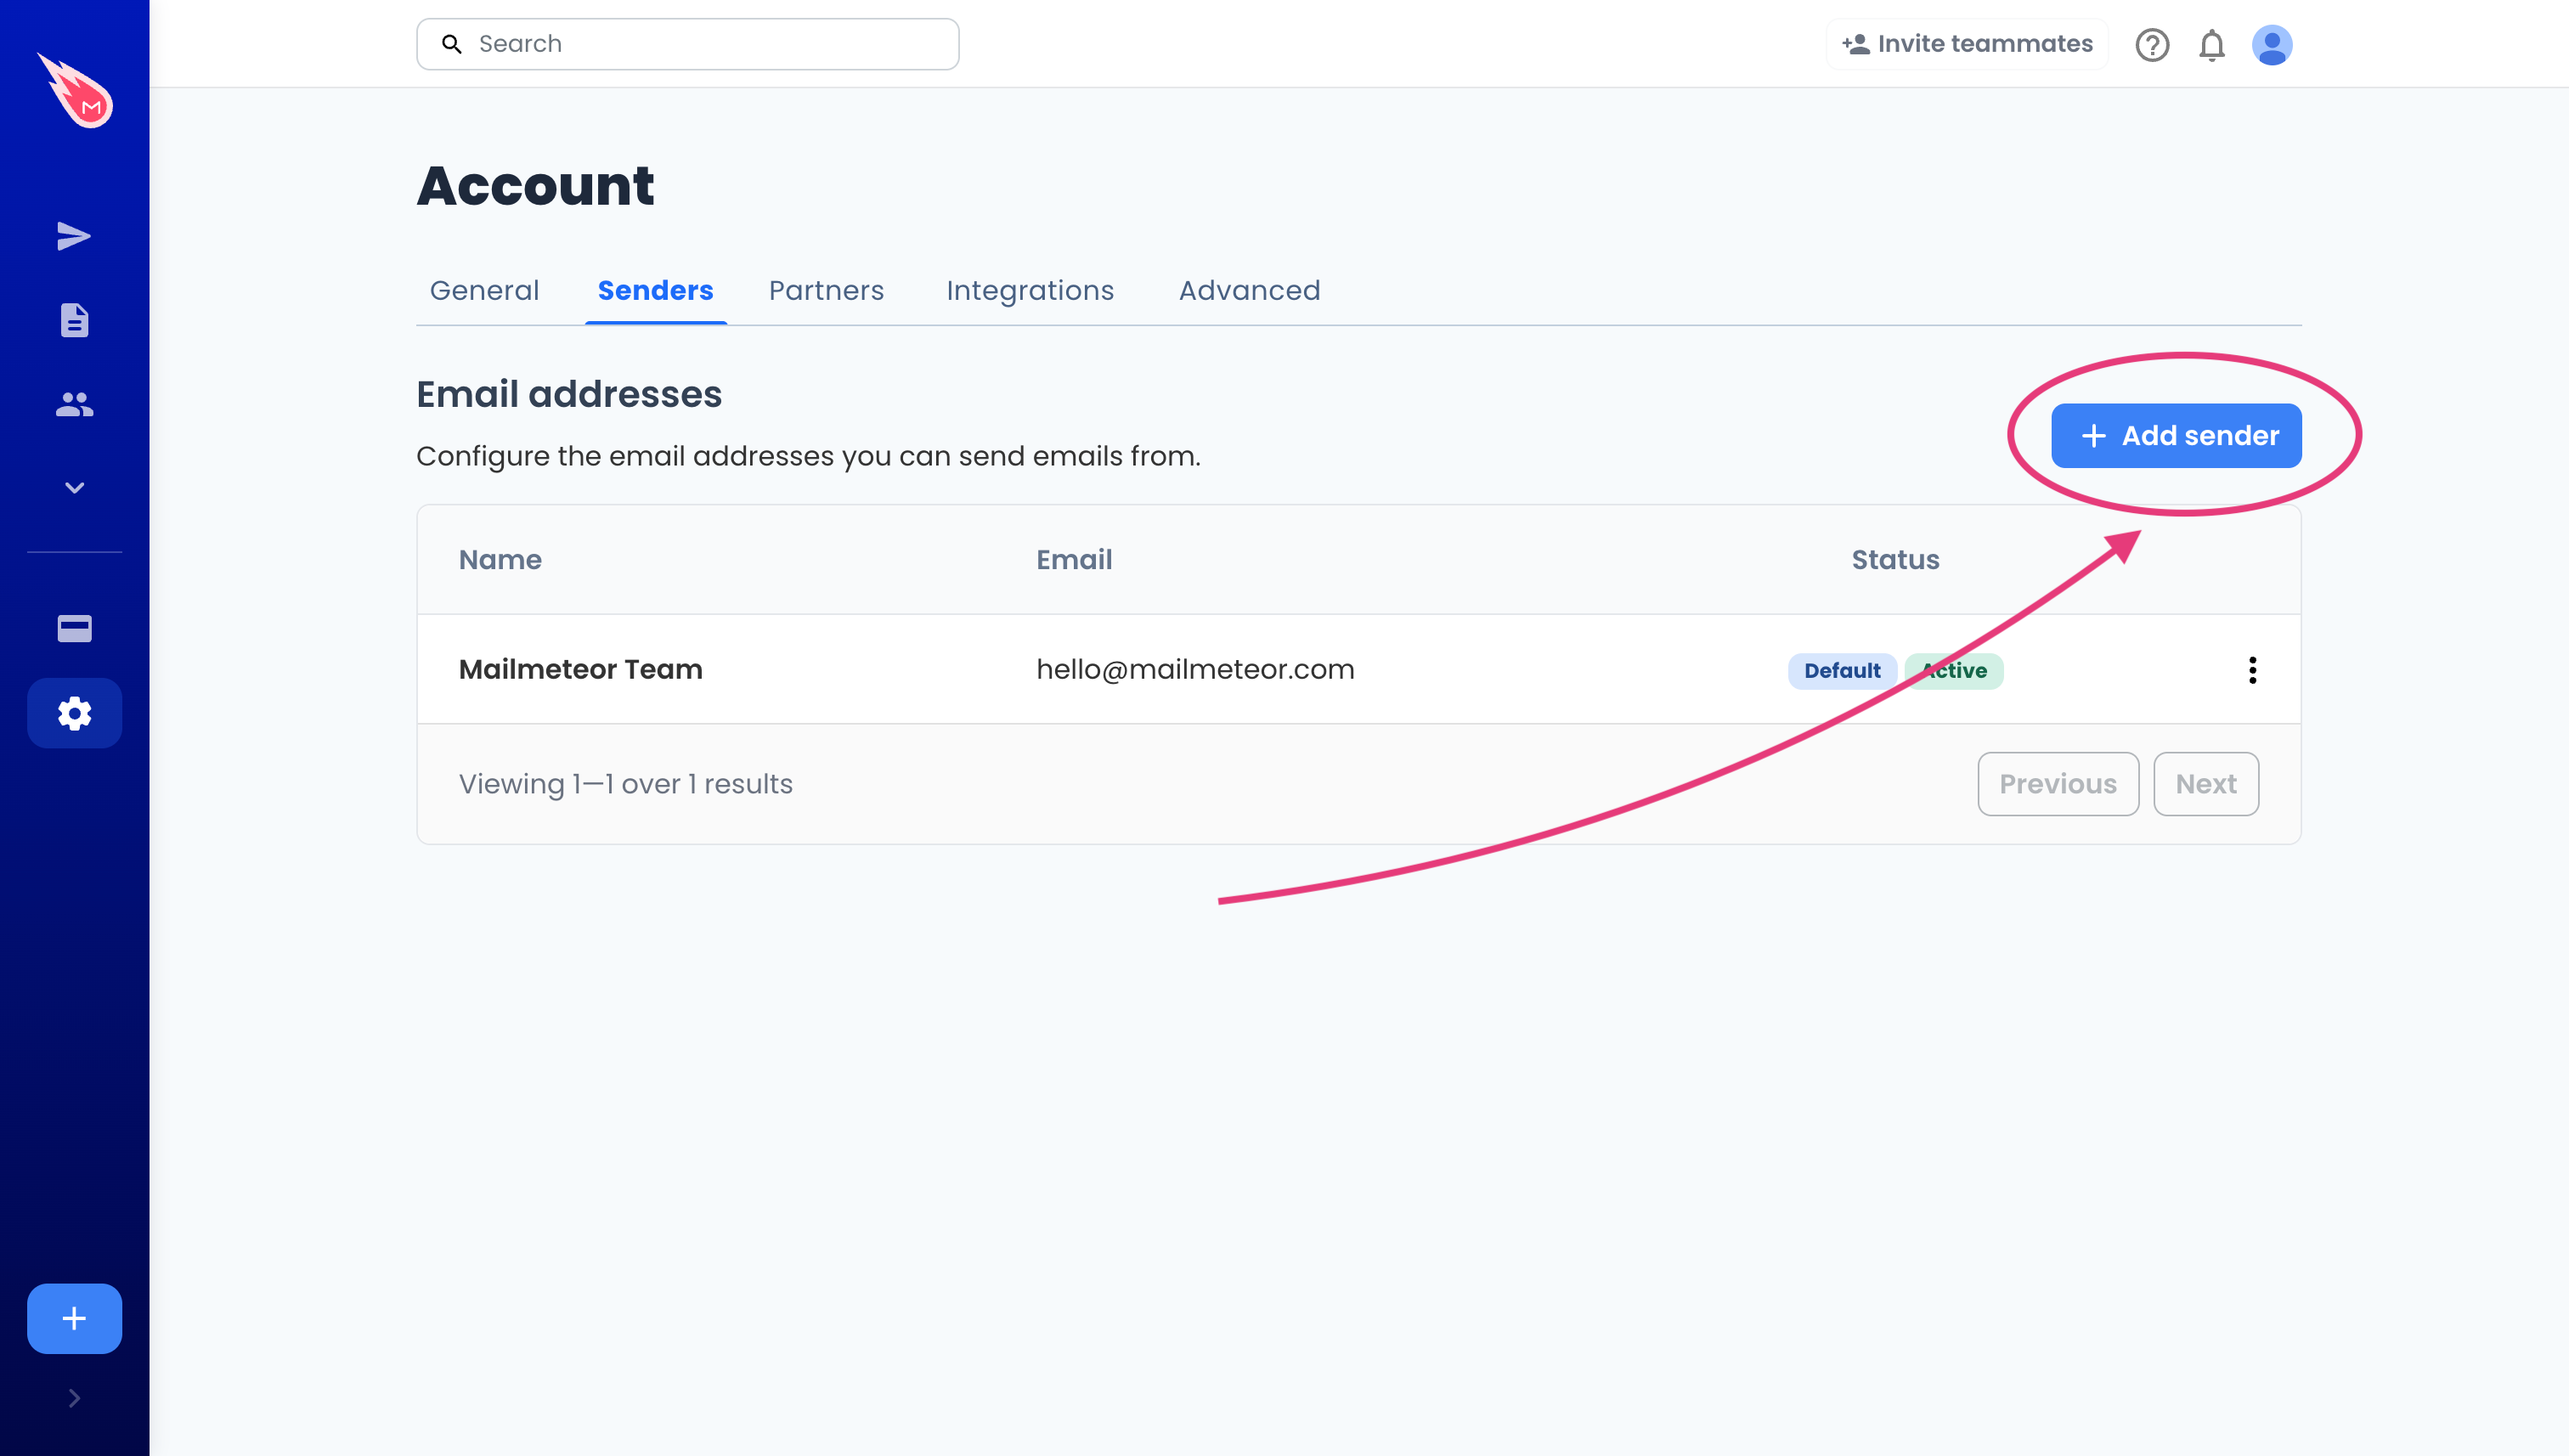
Click on Add sender.
-
Enter the name and email address of your new sender. Then click Save.

-
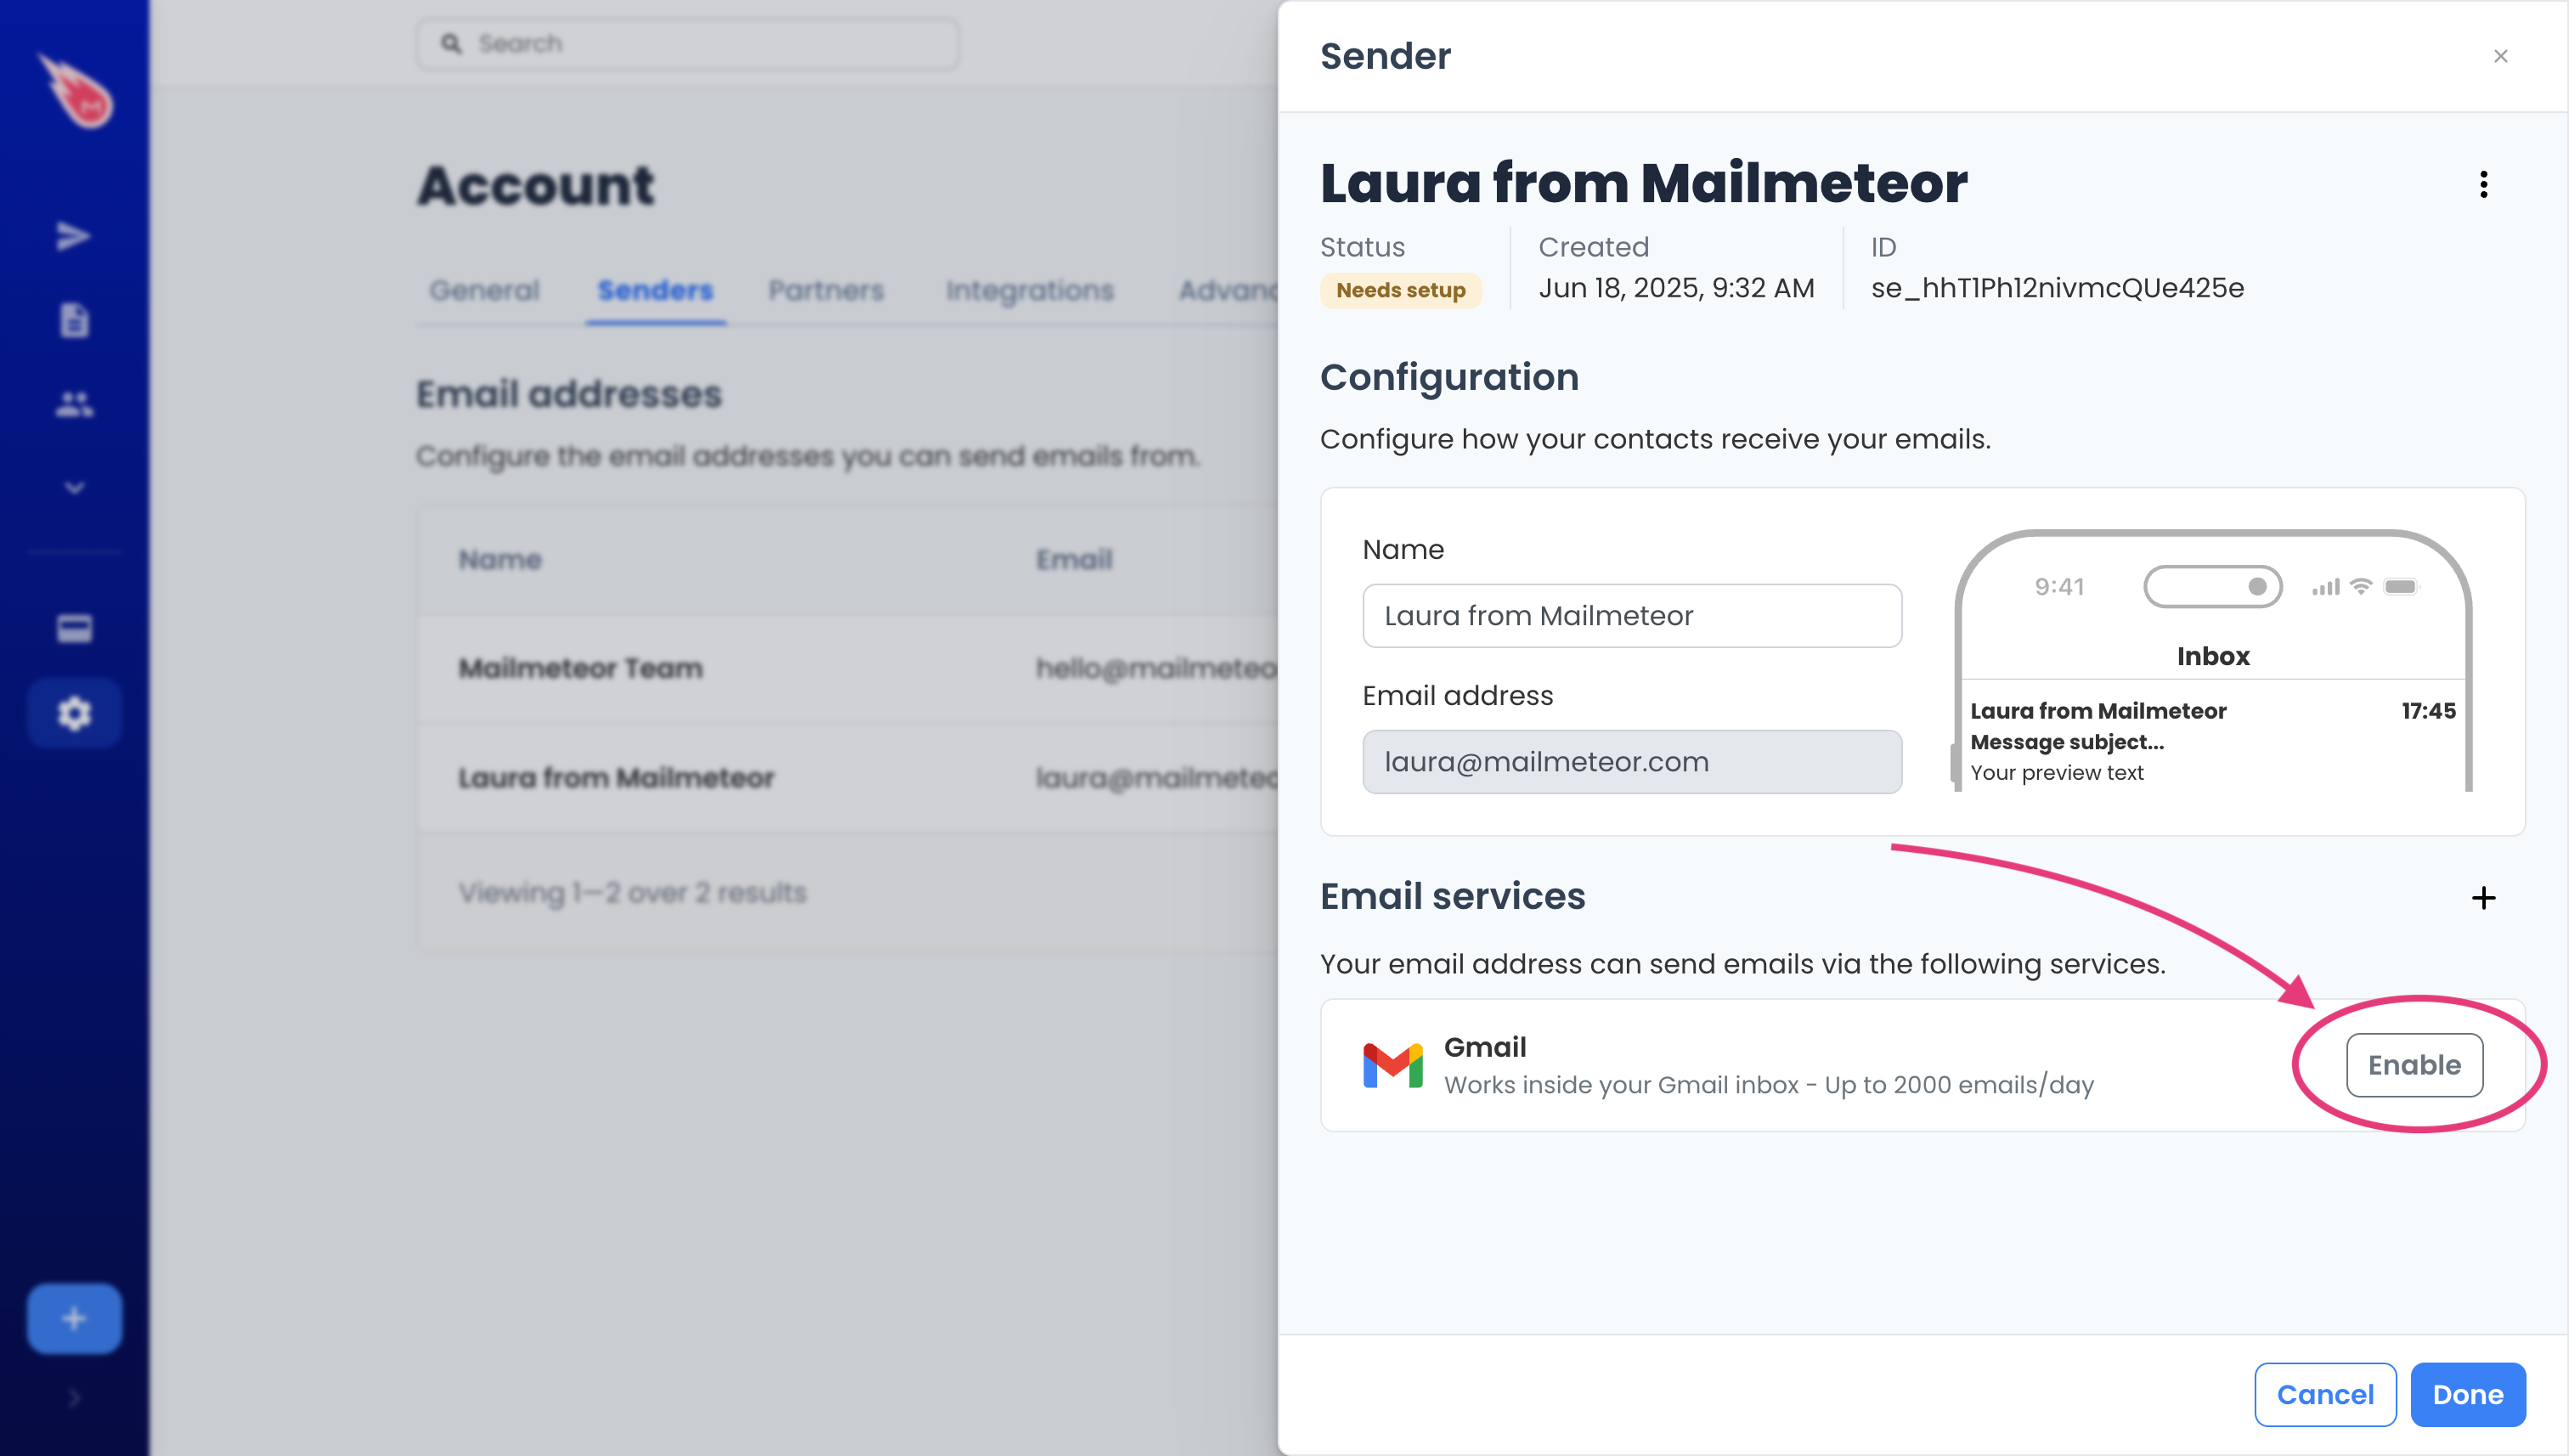
Configure the new sender with its email service. Only compatible sending services are shown. If this senders uses Gmail (or Google Workspace), click on Gmail. If it uses Outlook, you’ll see an Outlook option. Next to the sending service, click on Enable.
-
Follow the configuration steps until the sender is set as active.
Your sender is now ready. Congrats! 🥳 To send messages from this sending email address, click the caret symbol (“▼”) in the From field and select it.
You can send emails from different addresses in Mailmeteor. Here’s how to do it from the Mailmeteor extension for Google Sheets:
-
Open Mailmeteor in Google Sheets.
-
In the From: field, click the small caret symbol (“▼”) next to your email address. Then select Manage senders.
-
From the Mailmeteor Dashboard to fully manage your different sending email addresses (aka senders). Click on Add sender.
-
Enter the name and email address of your new sender. Then click Save.
-
Configure the email service used to send email by clicking Enable.
-
Follow the configuration steps until the sender is set as active.
-
Once your email alias is configured, get back to Google Sheets and select it: \
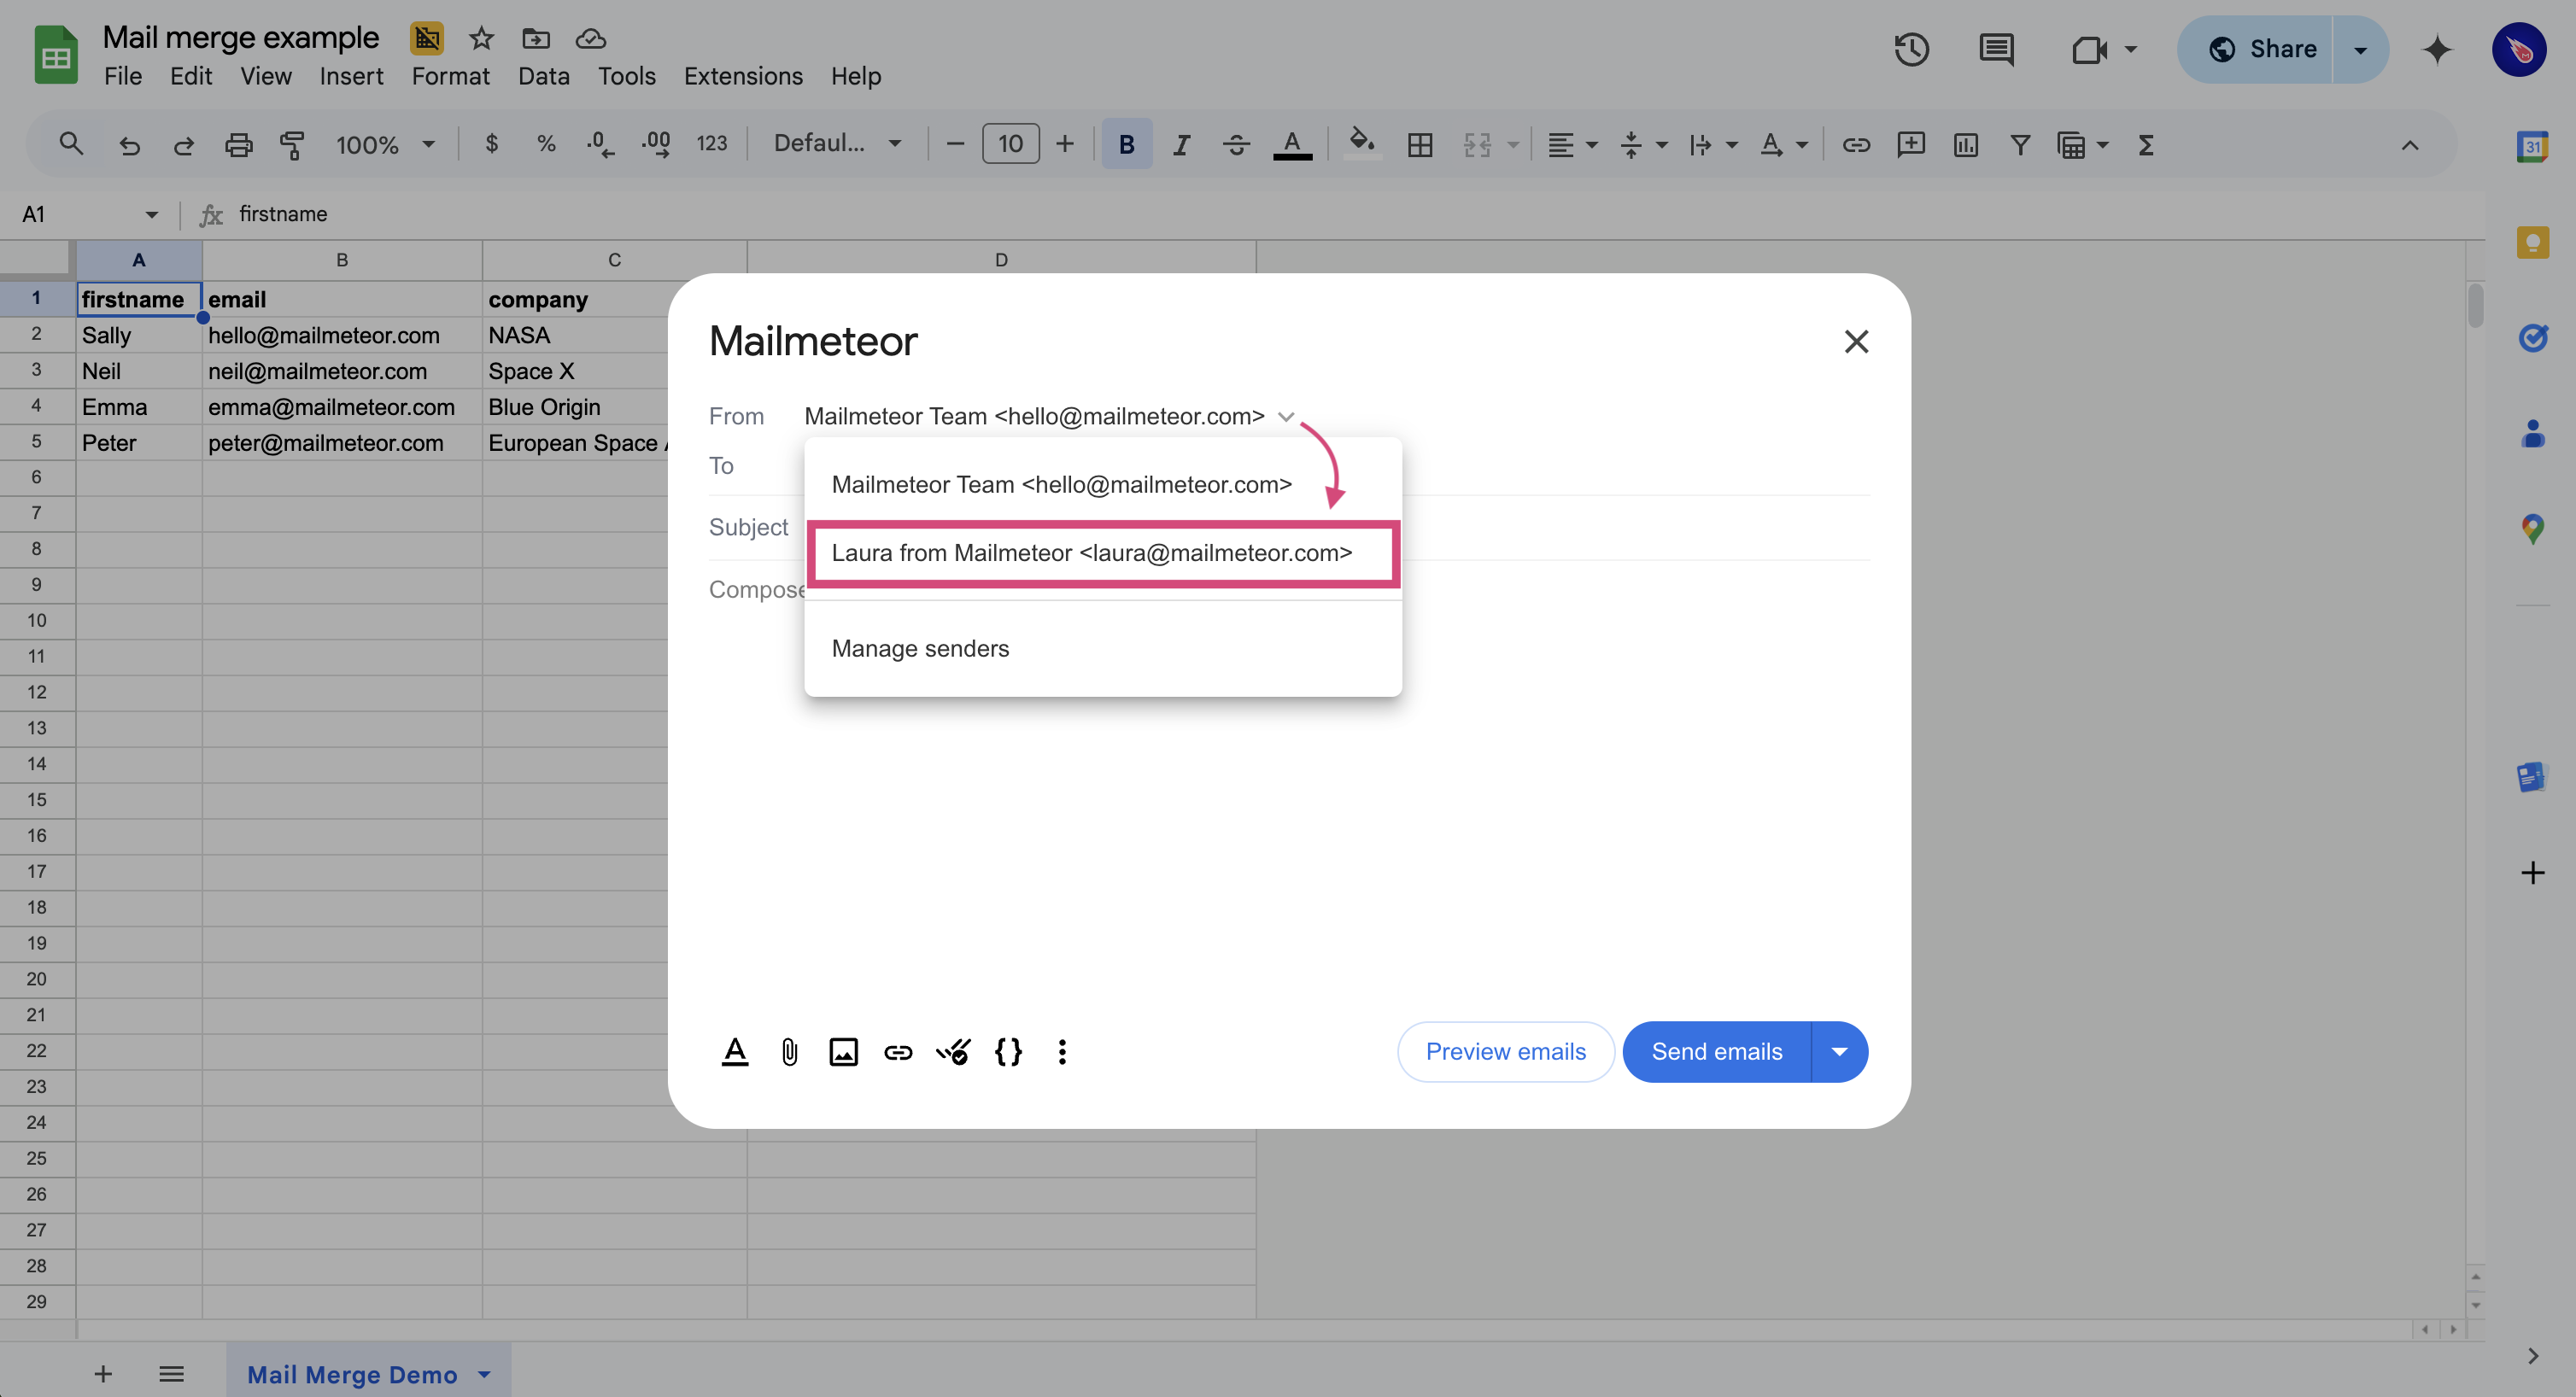
To send messages from your alias, open Mailmeteor in Google Sheets. Then click the (“▼”) symbol next to your email address (in the From: field) and select your alias.
Frequently asked questions
How to make a sender as default?
When you create a new campaign, Mailmeteor for Sheets automatically selects the default sender. You can change the default sender by following these steps:
- Sign in to the Dashboard.
- From senders list, next to a sender, click the three-dot menu (⋮).
- Select Set as default.
Which email services are available?
You can configure a sender with Gmail/Google Workspace, Outlook or Zoho. Other services (such as Yahoo, Apple Mail etc.) can not be directly configured within Mailmeteor. But you can add them as an alias to a compatible account and then use configure this account as a sender.
Can I use an alias configured in Gmail?
Yes! That’s totally possible. First, you need to configure an alias inside Gmail, then you just need to configure this alias as a sender in Mailmeteor. Check our guide on using an alias to send emails.
Checklist before using an email alias
- Make sure to copy and paste the exact email address in Mailmeteor. If there is a typo in your sending email address, your sender will not be configured and emails won’t be sent from it.
- Verify your email alias rate limits. If you want to send emails from a non-Gmail alias, like Yahoo, OVH, or Outlook, your sending limit may vary depending on the email service provider’s email quota.