Using an alias
What is an email alias?
In Gmail, an email alias is an alternate email address you can send emails from, without switching accounts. For example, you might be signed in with [email protected] but send emails from:
- Yahoo, Outlook, or other non-Gmail address.
- Your work, school, or business domain or alias, like
[email protected]. - Another Gmail address.
This is managed using Gmail’s “Send mail as“ feature.
What is a sender in Mailmeteor?
In Mailmeteor, a sender is an email identity (name + email address) you want to send emails from. Each sender can be connected to one or more email services (like Gmail or Outlook).
When using Gmail, you can either:
- Connect a sender directly using the matching Gmail account, or
- Connect it via a different Gmail account that has alias access to that email address.
This is where Gmail aliases and Mailmeteor senders work together.
When is a sender shown as an alias?
In Mailmeteor, if you connect a sender (e.g. [email protected]) using a different Gmail account (e.g. [email protected]), Mailmeteor checks whether the sender address is configured as a “Send mail as” alias in that Gmail account.
If it is, you’ll see a label under the sender:
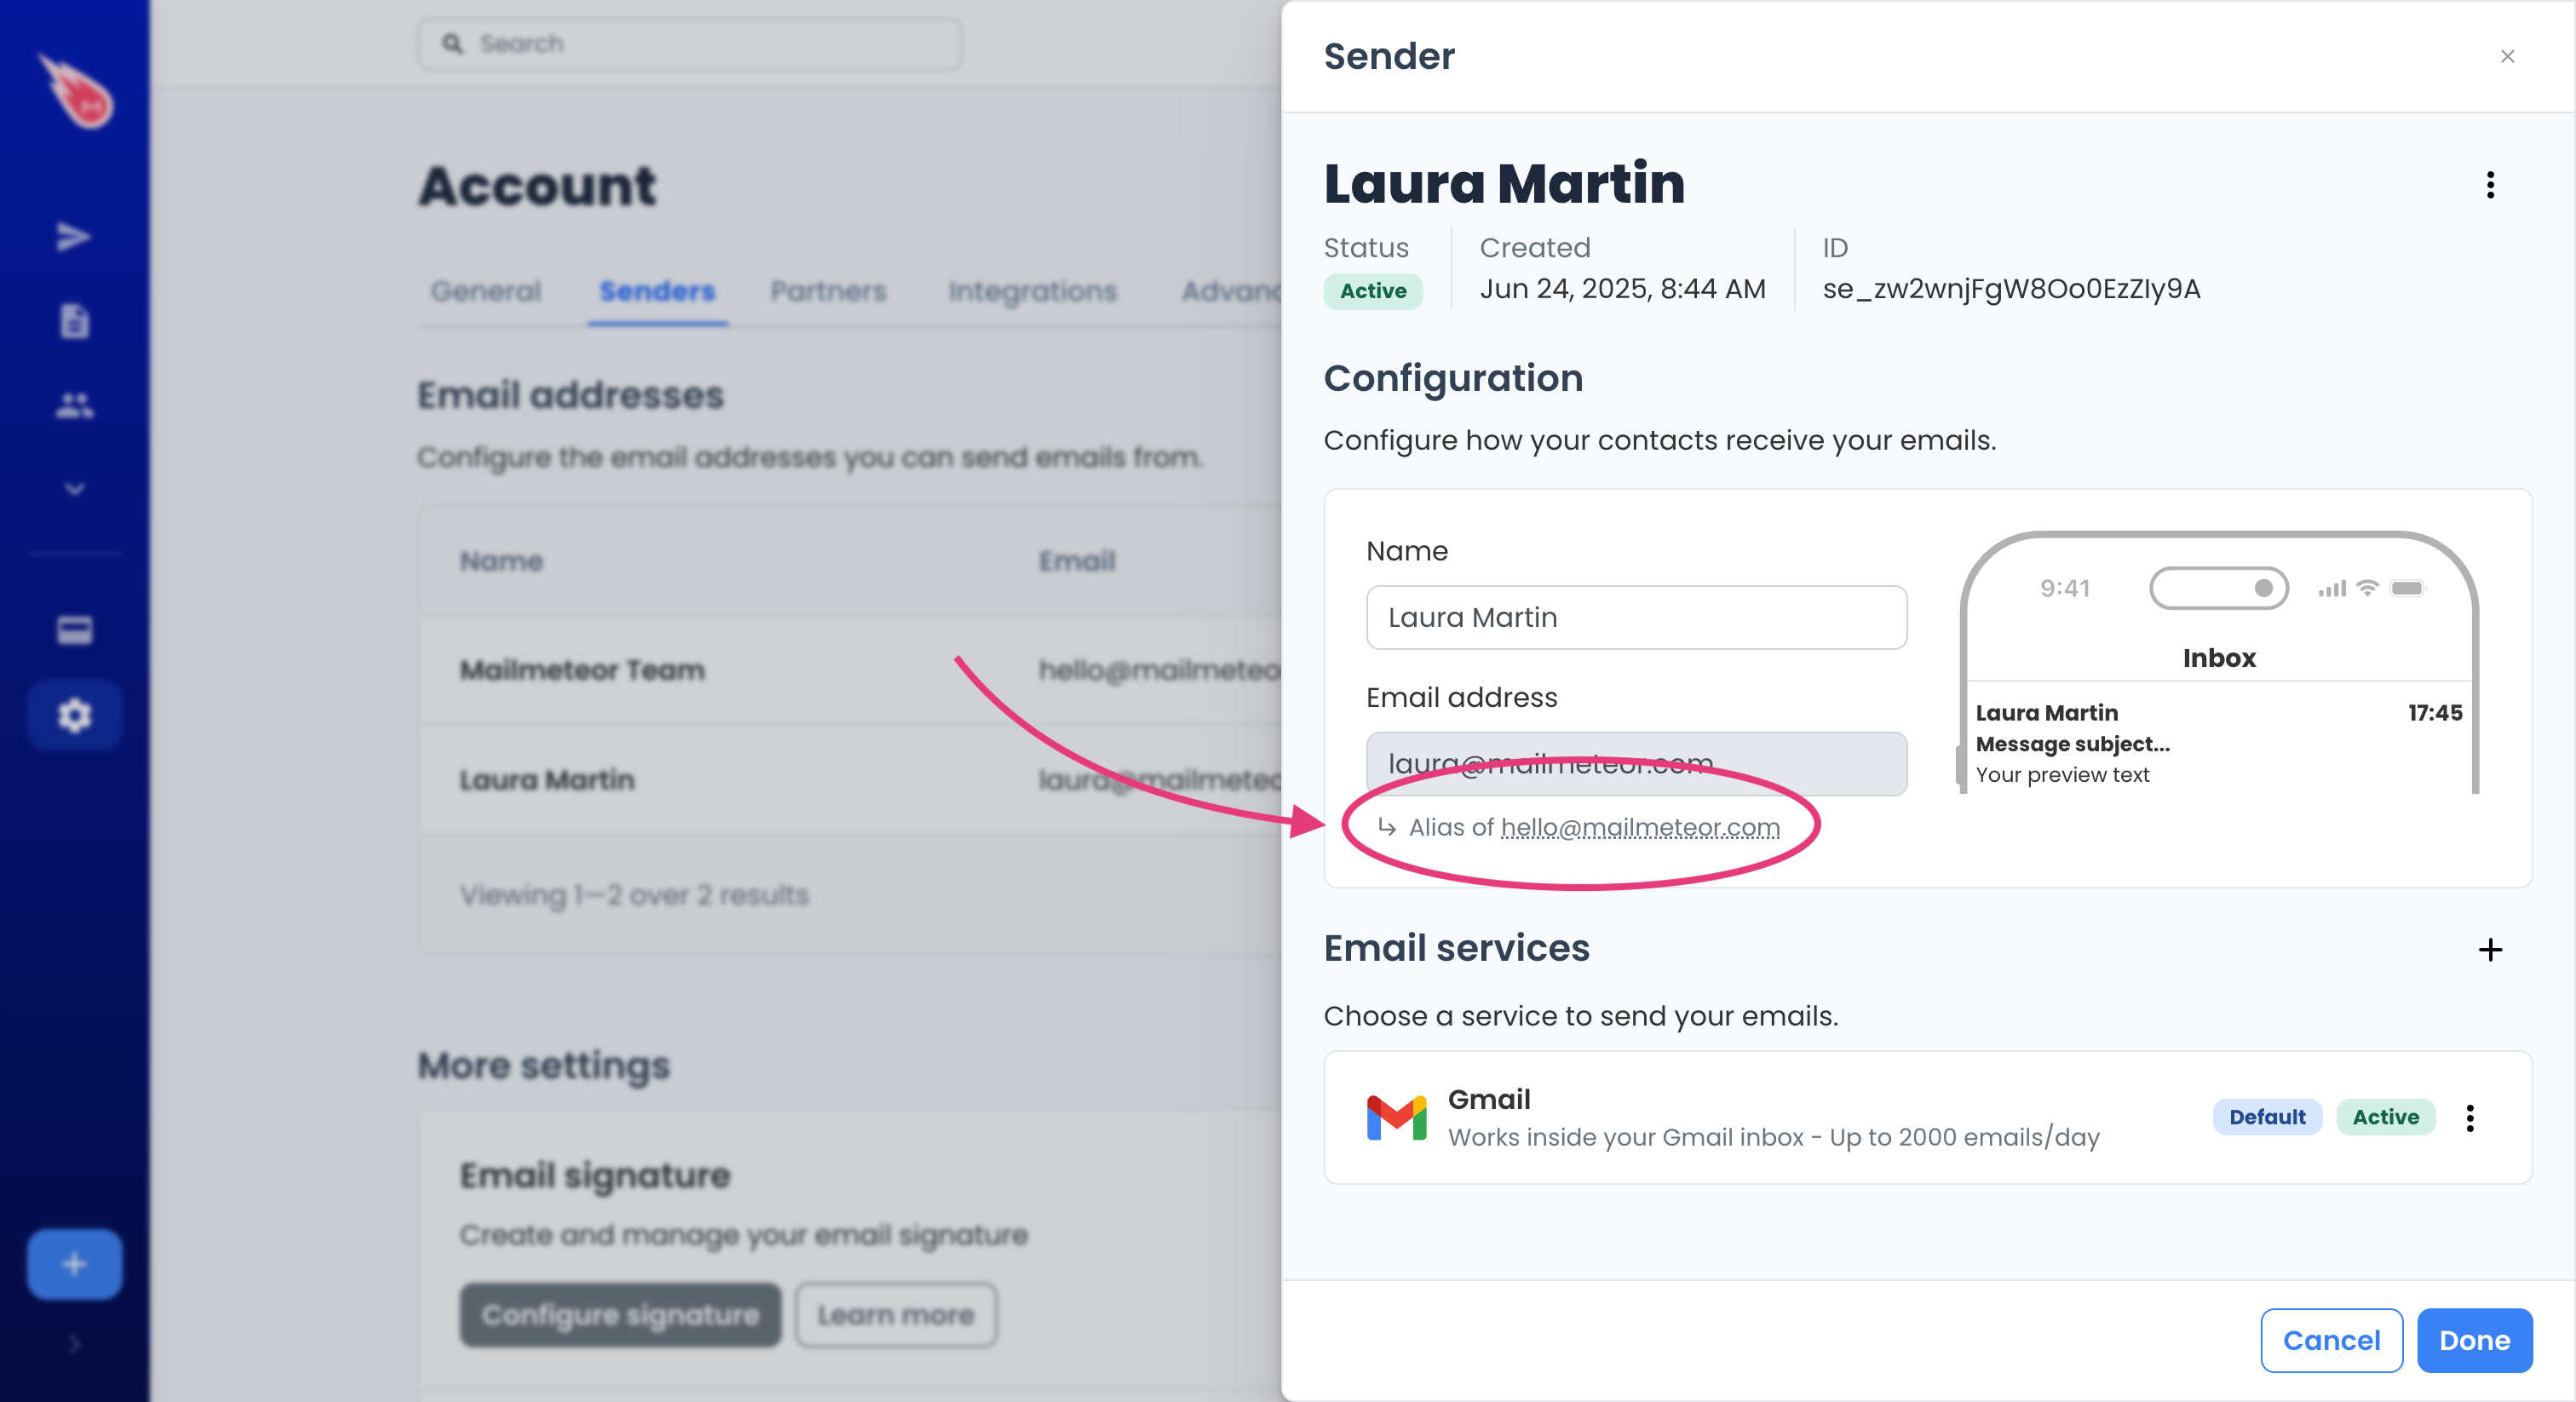
The label helps you understand which Gmail account will actually send the emails.
When the label is shown:
- Your recipients will see the email as sent from the sender (e.g.
From: laura@). - Technically, the email is sent from the connected account (e.g.
hello@). - It’s fully transparent to recipients (they won’t see the actual sending account).
When the label is not shown:
- Your recipients will see the email as sent from the sender.
- The email is also technically sent from the sender’s own account
When a sender is connected as an alias, opens and clicks are tracked, but replies are not. This is due to underlying technical limitations. If tracking replies is important for you, we recommend deleting the alias-based sender, and create a new sender that is not shown as an “Alias of”.
How to send from an email alias in Mailmeteor?
There are two different steps. First configure the email alias in Gmail, then create the sender in Mailmeteor. Let’s review them in-depth.
Add the email alias in Gmail
First, you need to configure the email alias in Gmail. Google has a very good guide about this. Here’s what it says:
- In Gmail, in the top right, click Settings
See all settings
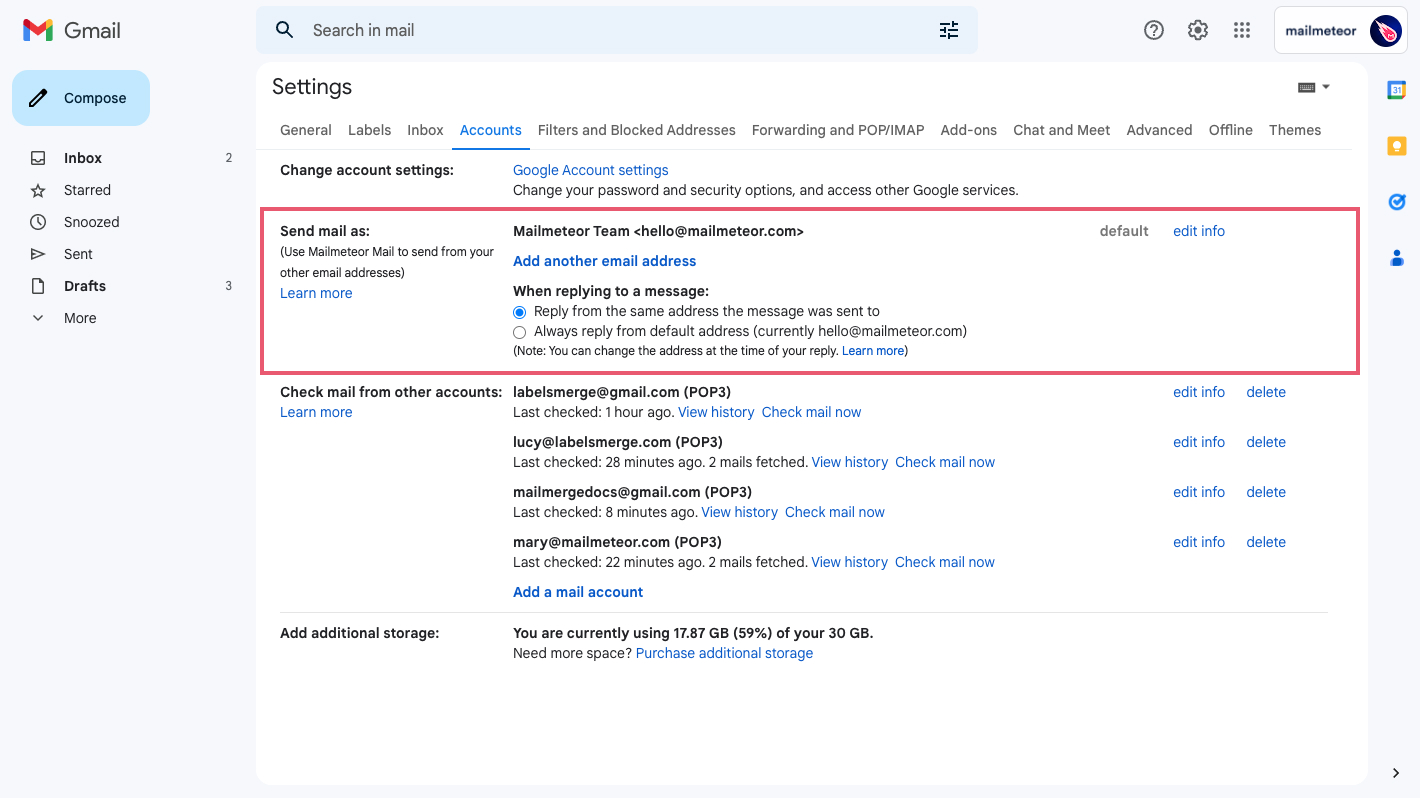
- Click the Accounts and Import tab.
-
Under Send mail as, click Add another email address.
-
Enter your name and the address you want to send emails from.
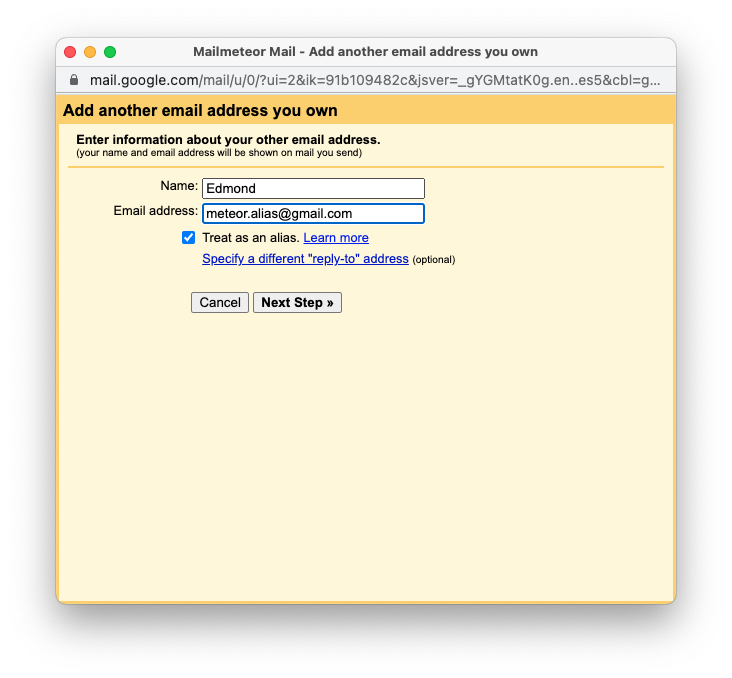
- Click Next Step, then Send verification.
- (optional) If you’re adding a school or work address, enter the SMTP server details. The SMTP server for Gmail addresses is
smtp.gmail.com, and the SMTP server for Outlook addresses issmtp-mail.outlook.com. - Click Add Account.
- Check both inboxes for the verification email and click the confirmation link.

Done! You’ve successfully added an email alias to your Gmail account. You can send a test email manually, or use our Gmail Alias Checker to verify it’s correctly set up.
Create a sender
Now that your alias is configured in Gmail, add it as a sender in Mailmeteor:
- Sign in to the Mailmeteor Dashboard.
- Go to your Account, then click on the Senders tab.
- Click on Add sender.
- Enter the name and the email address of the alias, then click Save.
- In the email services section, enable Gmail.
Video tutorial
If you prefer to watch a video, here’s a tutorial on how to use an alias with Mailmeteor: