
Want to control exactly when your emails are delivered? You’re in the right place. In this quick guide, we’ll help you delay send in Outlook, so you can time your emails perfectly and maximize their impact.
When it comes to emails, timing is everything. Maybe you’re coordinating with a team across different time zones, managing multiple projects, or trying to hit that perfect moment for a marketing email. Whatever the reason, being able to control when your emails go out can make a huge difference.
Luckily, Microsoft Outlook has a handy feature that lets you schedule your emails and delay their delivery. In this article, we’ll show you 5 ways to write an email now and send it later. Use these emailing tactics to reach your recipients at the best time, boost engagement rates, and increase your deliverability.
Here’s what we’re going to cover:
- How to Delay Delivery of One Email
- How to Delay Send All Emails with a Rule
- How to Delay Delivery of All Emails with Undo Send
- How to Schedule a Mass Email
- How to Throttle Emails
Sounds good? Then let’s dive in.
1. How to Delay Delivery of One Email
You can delay the delivery of a single Outlook email by scheduling it. This lets you choose the exact date and time when your recipient will receive your message. Here’s how it works.
How to schedule send in Outlook
Step 1: Go to Outlook.com.
Step 2: Click New mail.

Step 3: Compose your email as you normally would. Don’t forget to add a subject line and at least one recipient. You can also attach files (if necessary).

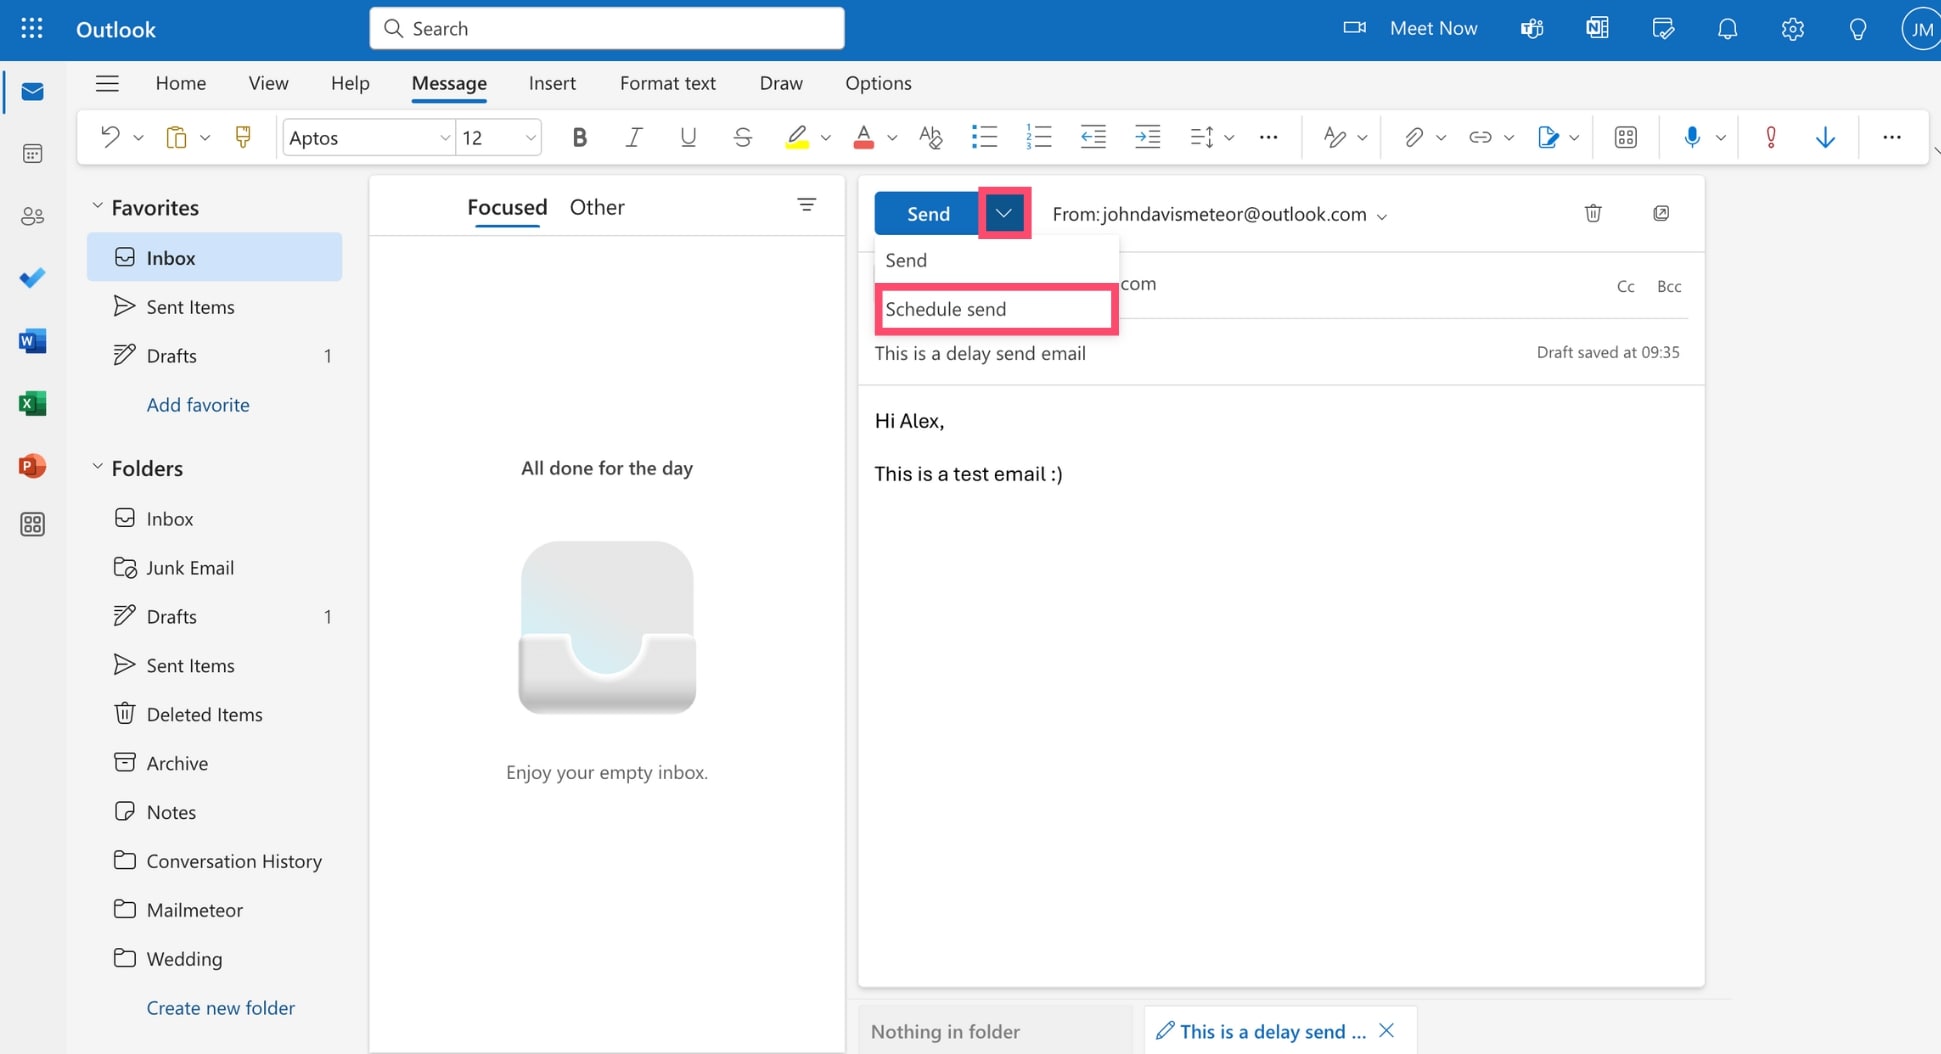
Step 4: Once you’re email is ready, click the arrow next to the Send button and select Schedule send.
Step 5: A new window will appear. From there, you can schedule your email by selecting one of Outlook’s default options (Tomorrow morning at 8AM or Sunday morning at 8AM). Or you can select Custom time to pick another date.
Step 6: Set a custom date and time. In this example, Outlook will delay the delivery of the email to Friday, the 31st of May, at 9AM.
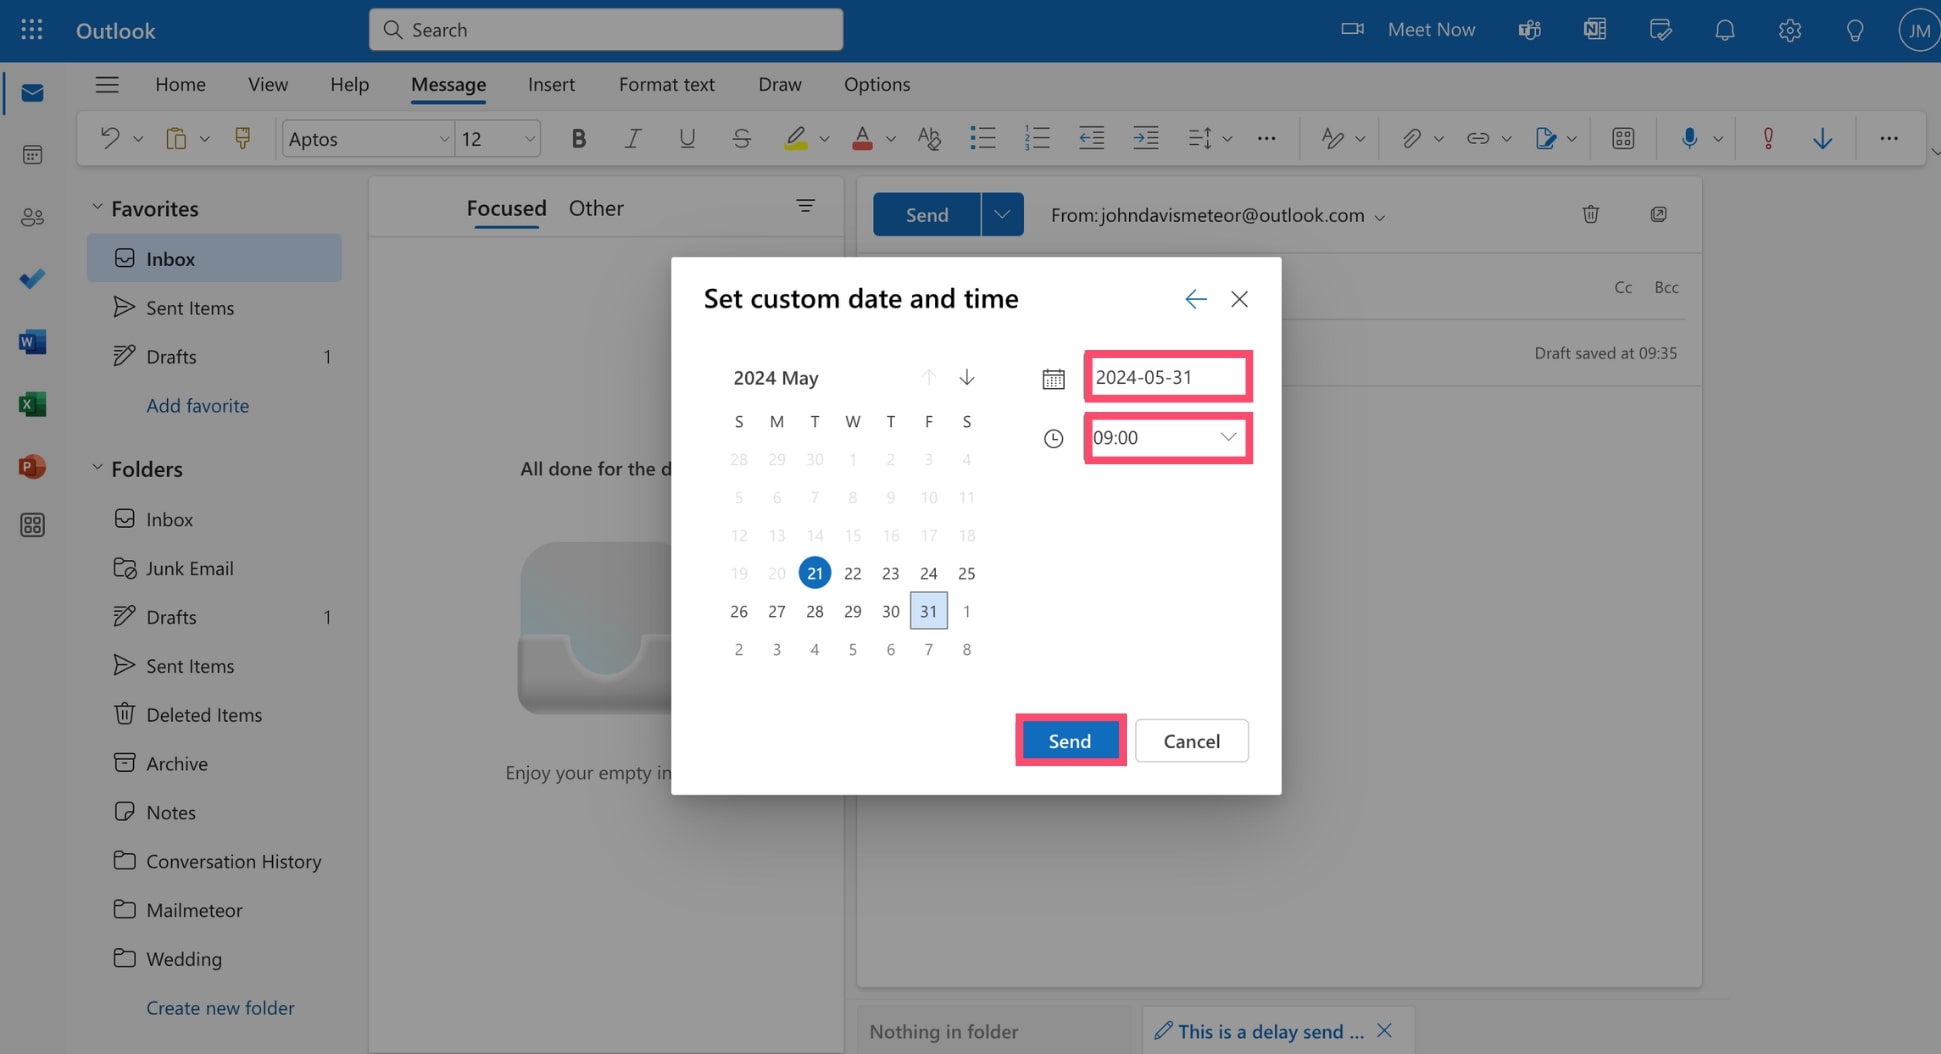
Step 7: When you’ve picked the right date and time, click Send to schedule your message in Outlook.
And voilà. Your email has been scheduled and Outlook will automatically send it at the appointed time. But what if you want to modify or cancel a scheduled email before it is delivered to your recipient’s inbox?
How to edit a scheduled email
You can edit a scheduled email at any time before its send date. Here’s how to do it in Microsoft Outlook.
Step 1: Open Outlook.
Step 2: Go to your Drafts folder.
Step 3: Select your scheduled message.
Step 4: Click the pencil next to the email and select Modify Email.
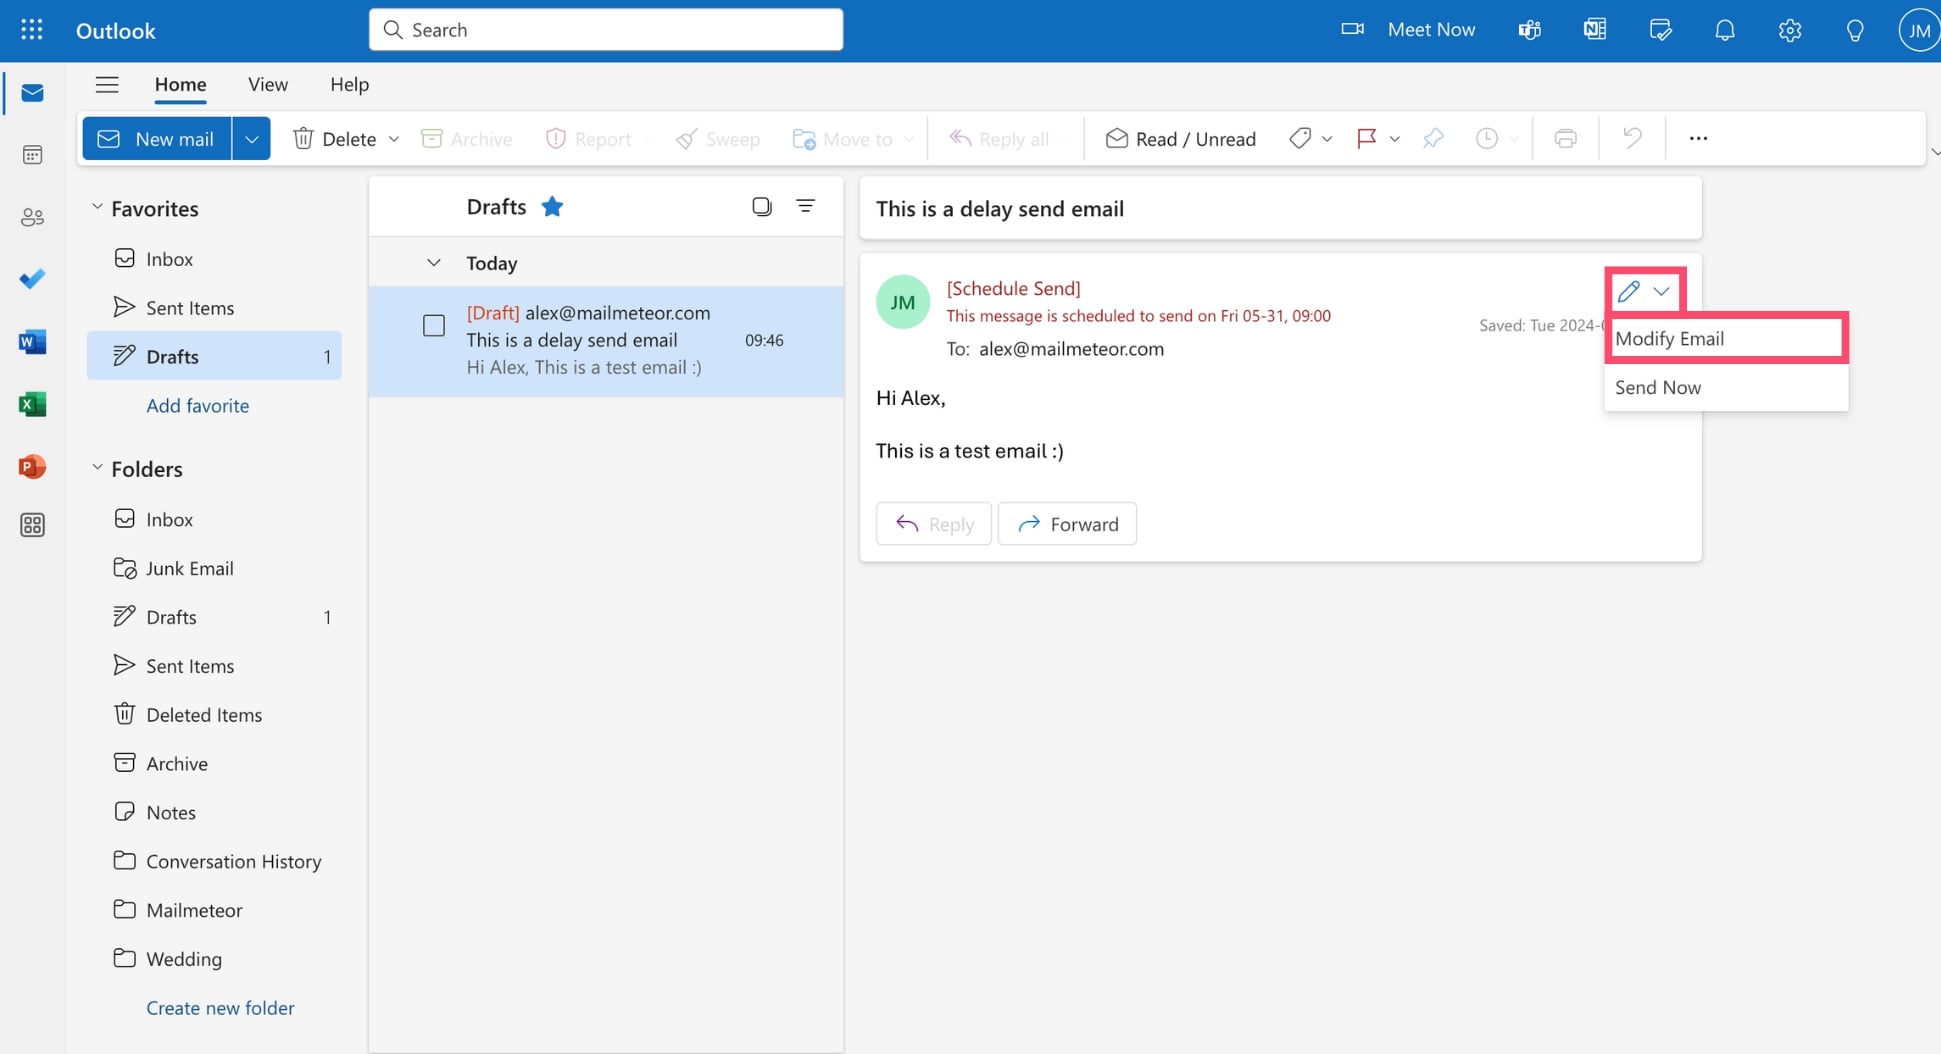
That’s it. You can now edit your Outlook email and reschedule it. This lets you control exactly when your emails are dispatched.
How to cancel a scheduled email
Made a mistake or changed your mind? You can cancel a delayed delivery email by deleting it from Outlook. Here’s how it works.
Step 1: Sign in to your Outlook account.
Step 2: Navigate to your Drafts folder.
Step 3: Hover over your scheduled email and click the bin icon.
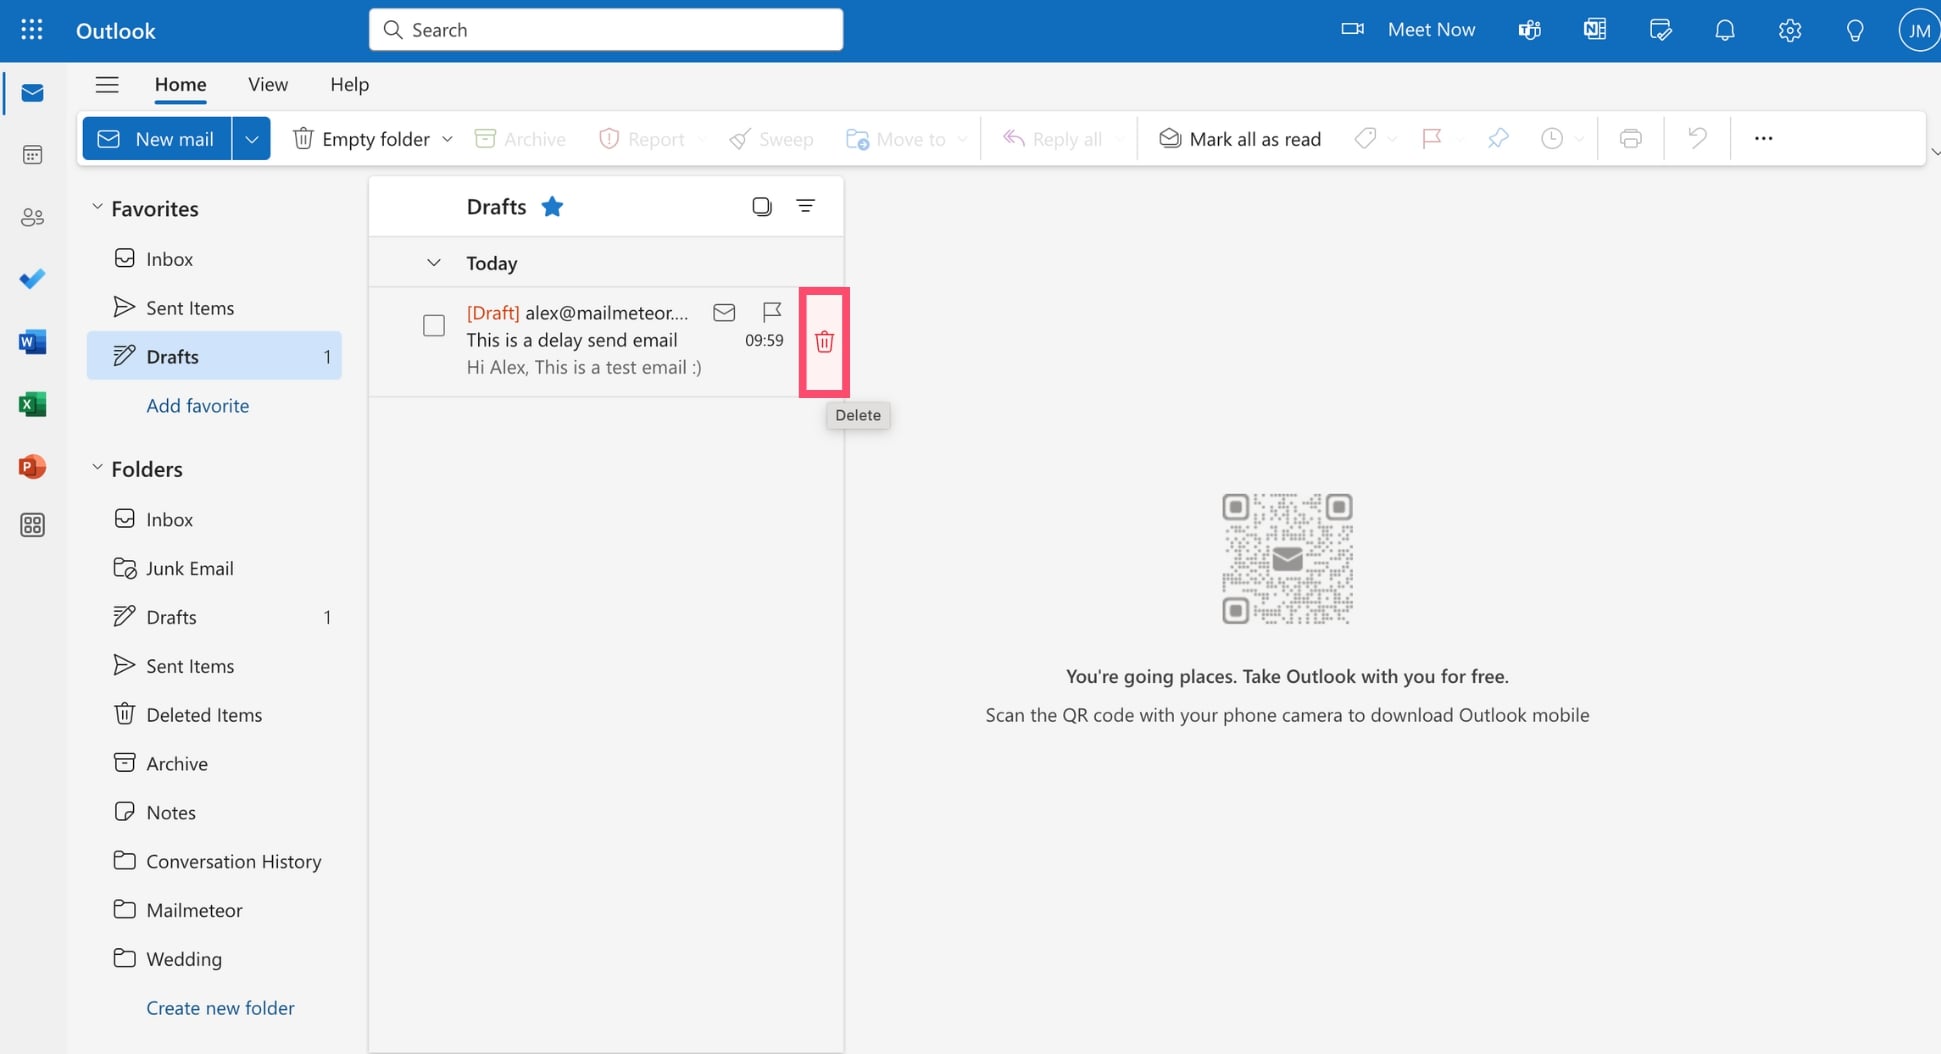
All done. You’ve successfully canceled the delivery of your message. You now know how to create, edit, and cancel a scheduled email in Outlook. But what if you want to delay the delivery of ALL your emails?
2. How to Delay Send All Emails with a Rule
If you want to add a delay between each email you send, scheduling them manually may seem tedious and time-consuming. Fortunately, there is another way to delay the delivery of your emails. If you’re using the Classic version of Microsoft Outlook, you can delay send thanks to another feature called Rules. Here’s how it works.
Step 1: Open Outlook.
Step 2: Navigate to File > Info > Rules.
Step 3: Go to Manage Rules & Alerts. Then click New Rule.
Step 4: Select Apply rule on messages I send. Then click Next.
Step 5: Under Select conditions, make sure that all the boxes are unchecked and click Next once more.
Step 6: A warning will appear to inform you that this rule will apply to all messages (which is what we want). Click Yes to confirm.
Step 7: Under Select actions, choose Defer delivery by a number of minutes.
Step 8: From there, you can specify the number of minutes you’d like to delay your emails. In this example, we’ll delay all emails for 5 minutes. Then click Next.
Step 9: Select exceptions (if any) to these rules and click Next. Then give a name to your new rule, check Turn on this rule, and click Finish.
And voilà. You’ve successfully added a delay to all your Outlook emails. Your emails will be stored in your Drafts folder until the appointed time. This gives you plenty of time to modify them or cancel them.
3. How to Delay Delivery of All Emails with Undo Send
Adding some delay to your emails is easier in the new version of Outlook since you don’t have to create a new rule by yourself. Instead, you can simply use another feature, which is called Undo Send. Here’s how it works.
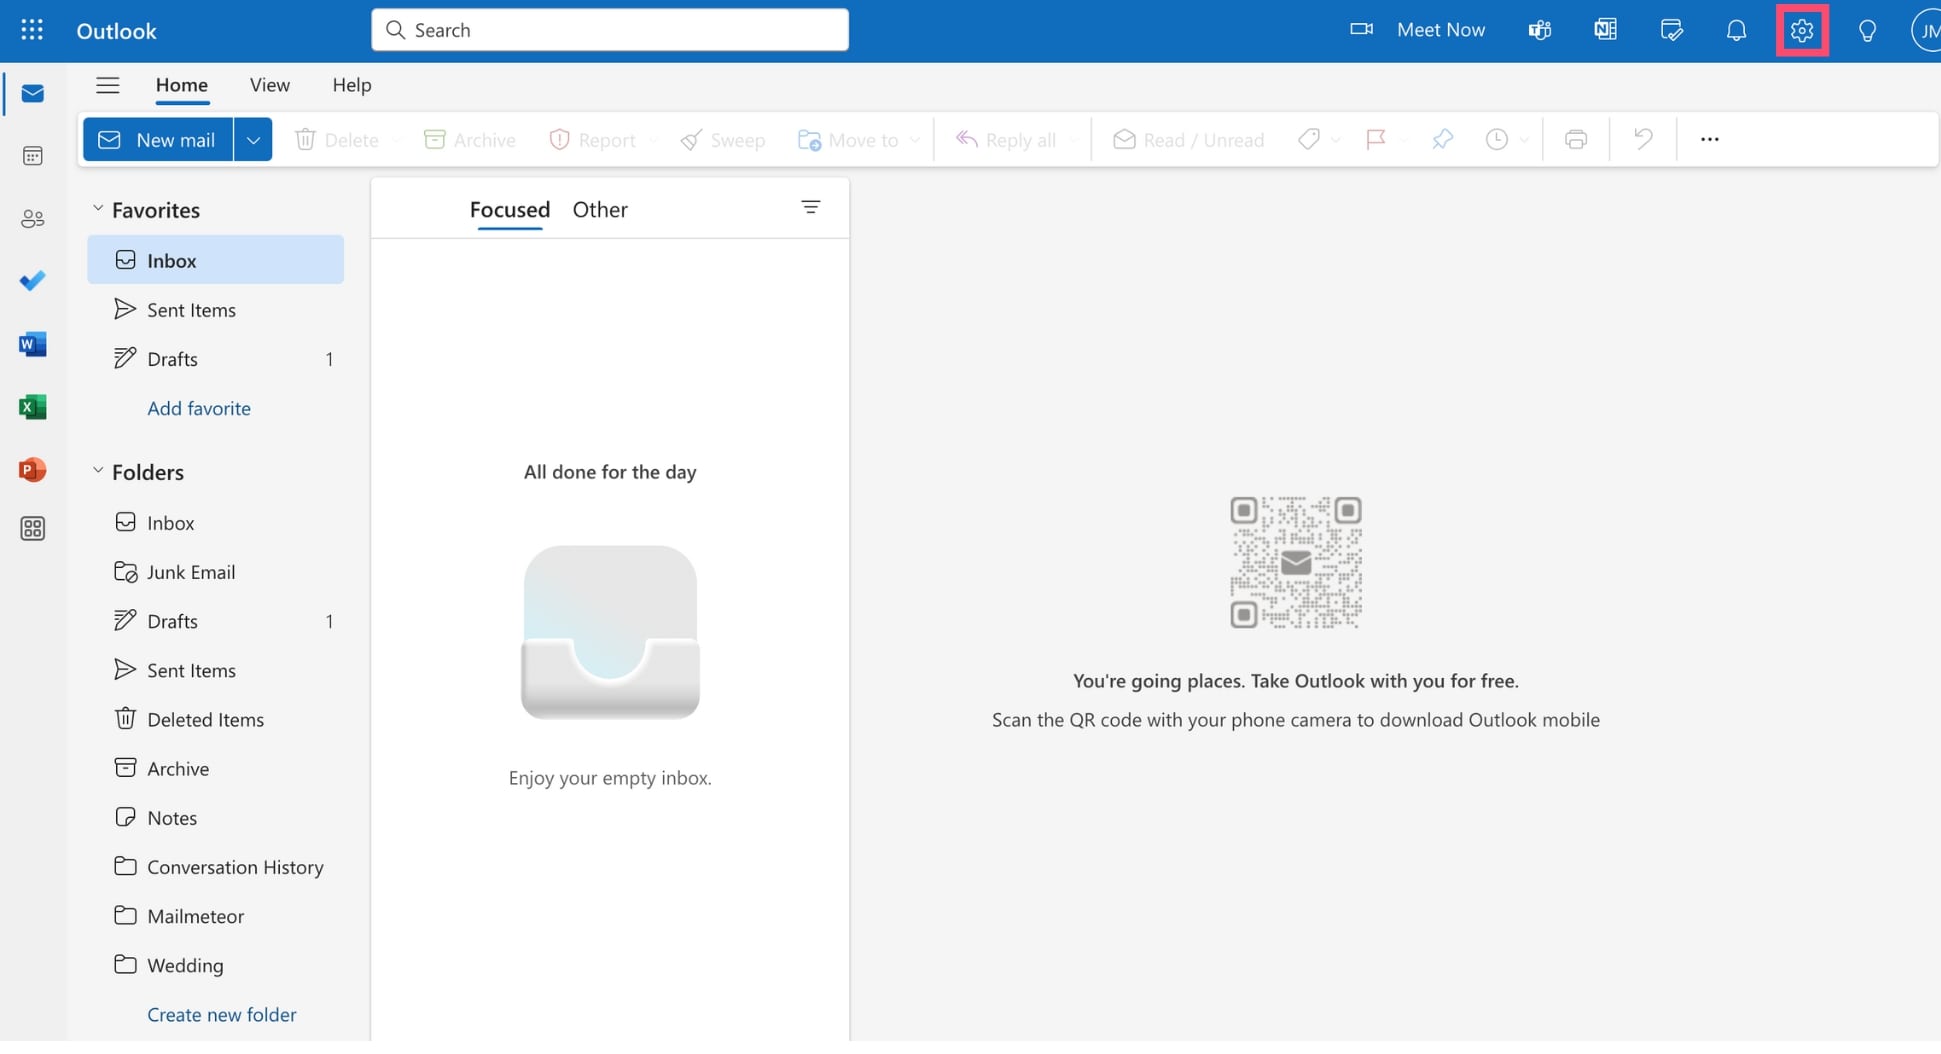
Step 1: Sign in to your Outlook account.
Step 2: Open the settings.
Step 3: Go to Compose and reply.
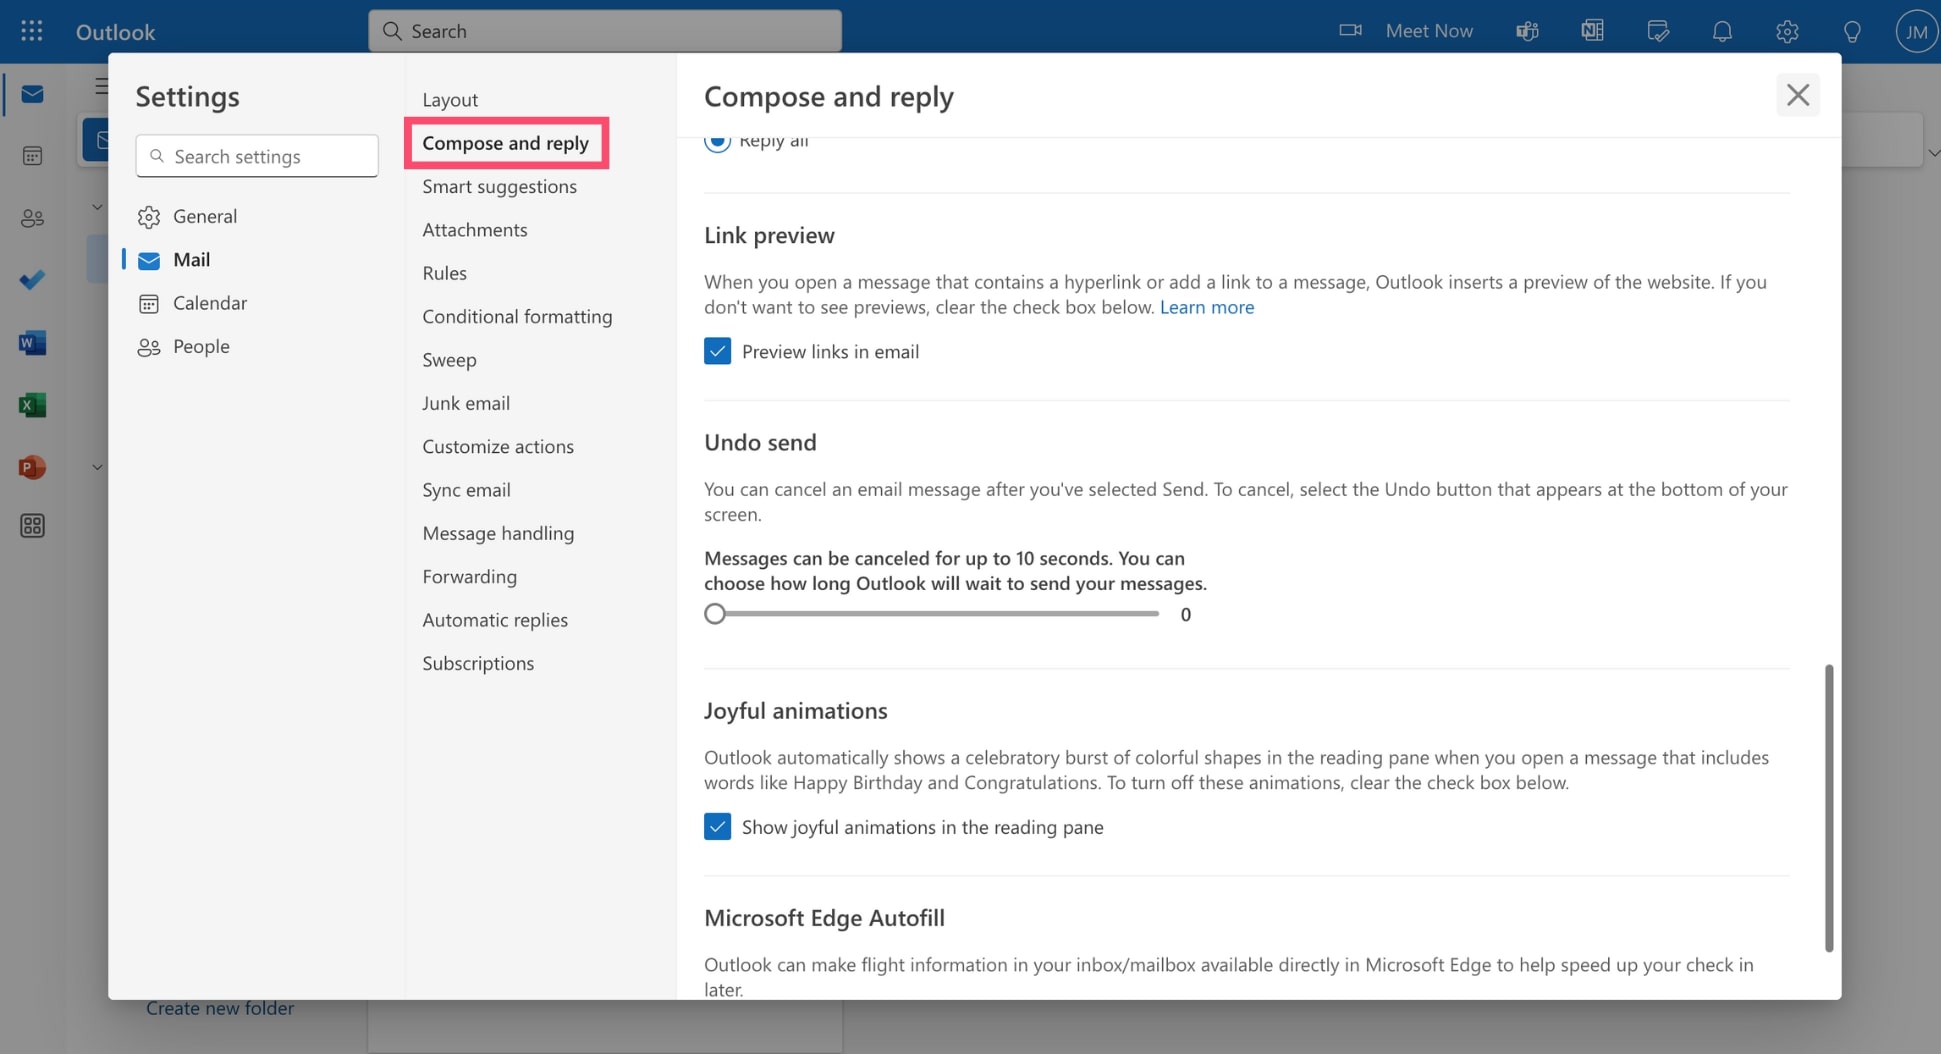
Step 4: Under Undo send, select how long Outlook should wait to send your message.
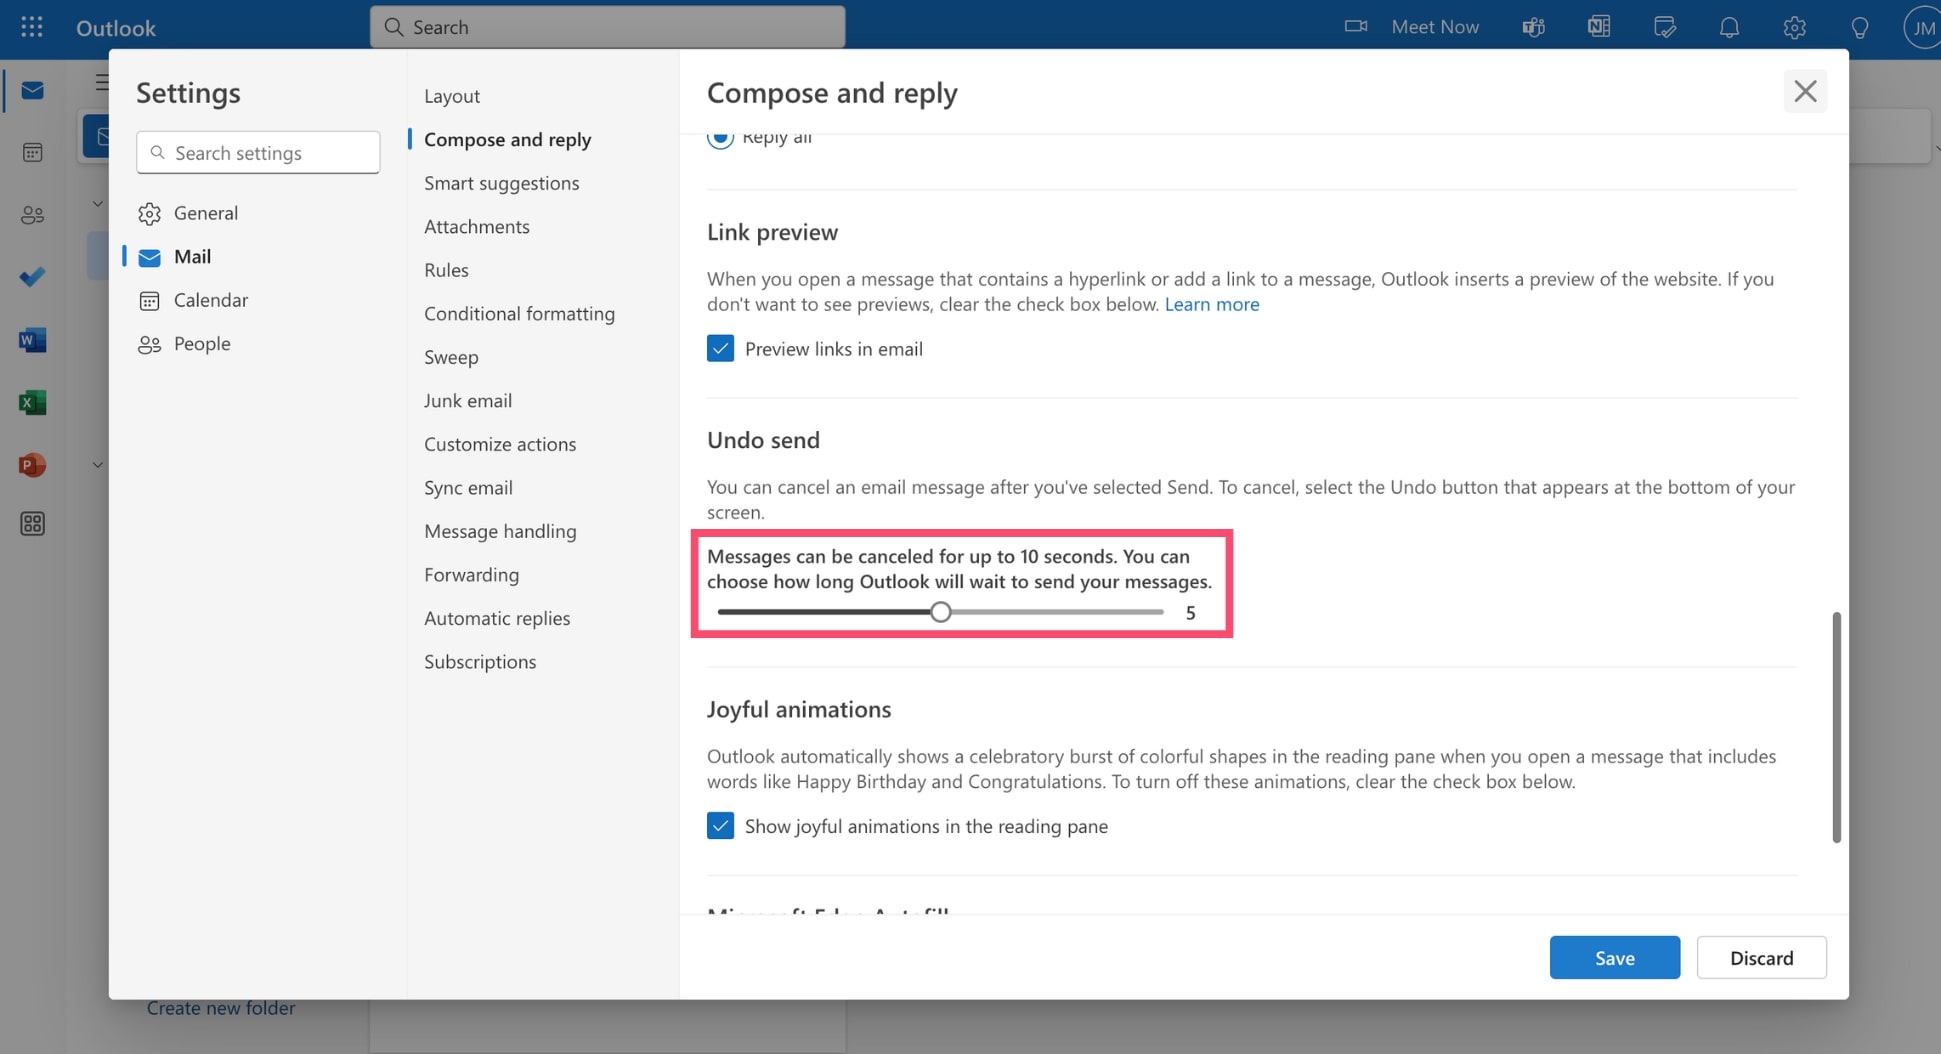
Step 5: To confirm, click Save.
And there you have it. This will add a (short) delay to ALL your Outlook emails, allowing you to minimize email mistakes. But what if you want to delay the delivery of an email campaign? Can you do this from Outlook?
4. How to Schedule a Mass Email
Turns out you can. With a little help from a tool called Mailmeteor. This simple mail merge lets you create personalized mass emails and send them directly from your Microsoft Outlook account. Here’s how it works.
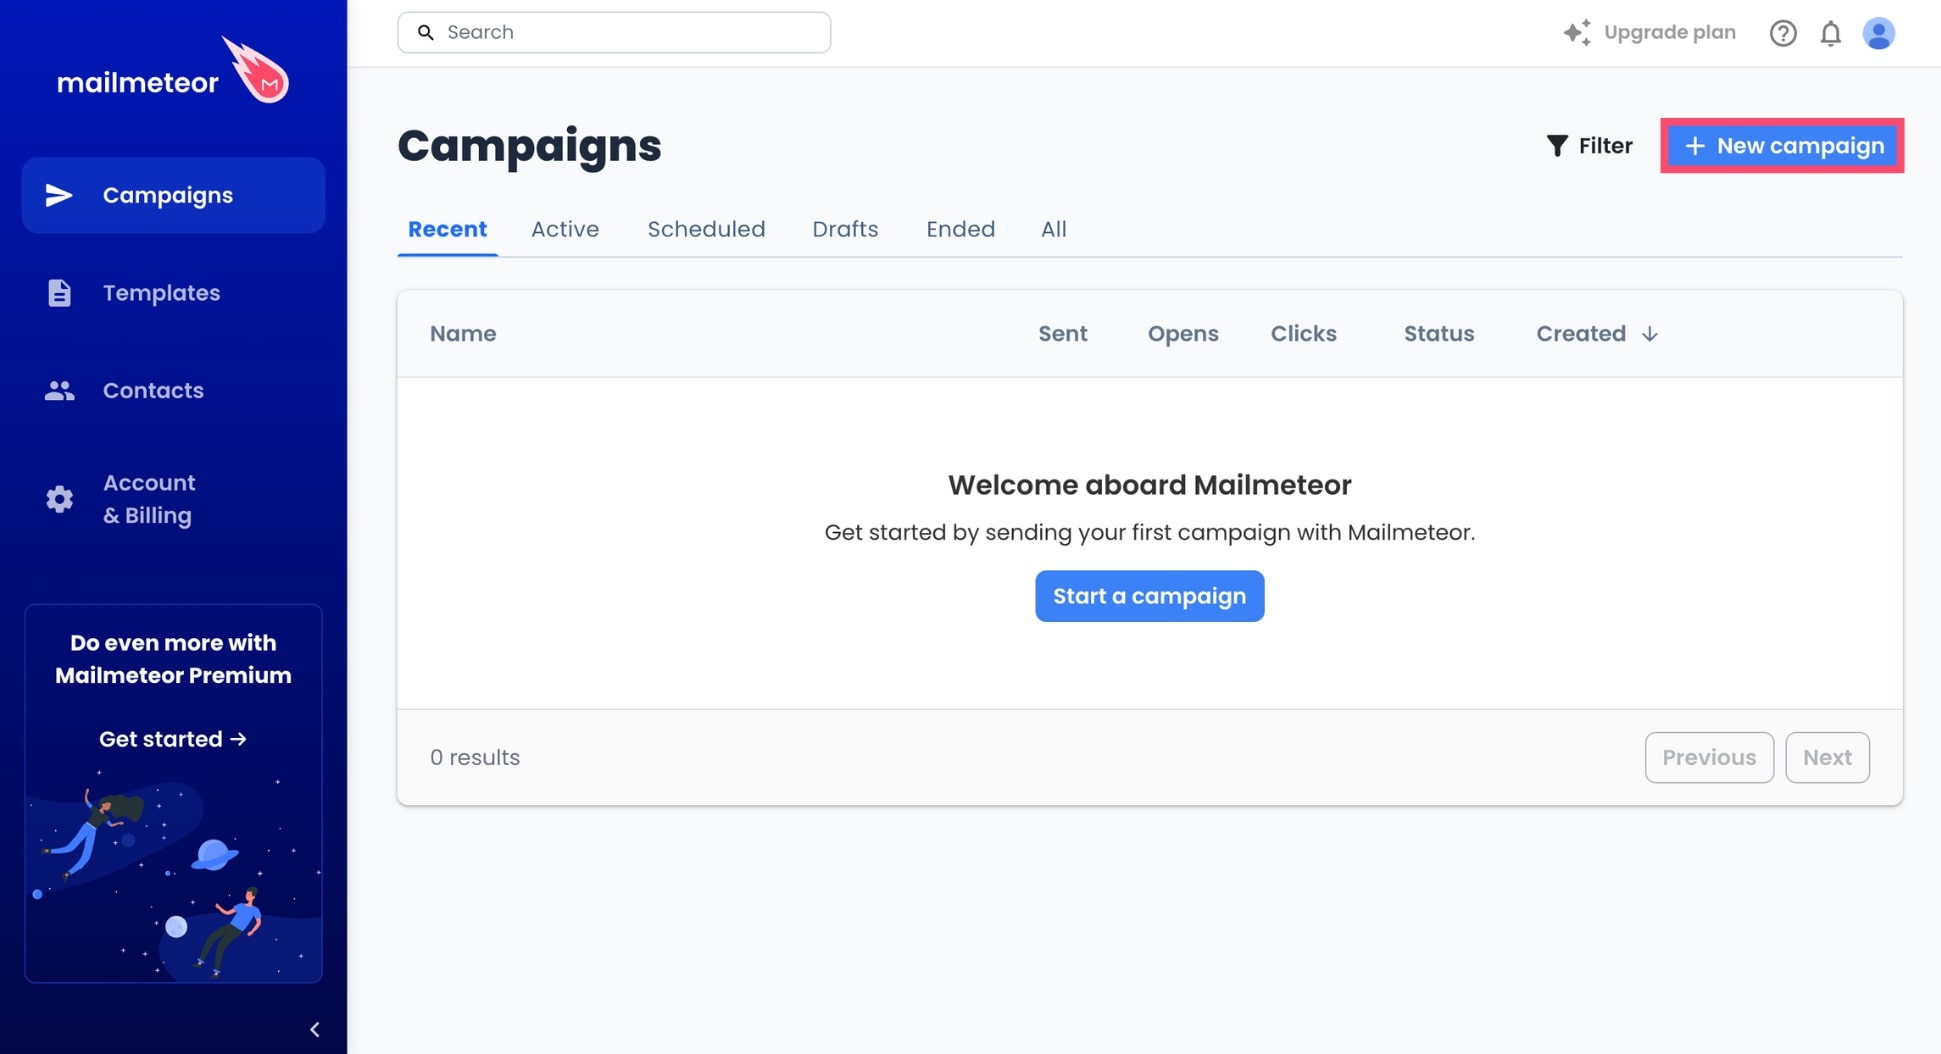
Step 1: Create a Mailmeteor account (it’s free) using your Outlook email address.
Step 2: Click New campaign.
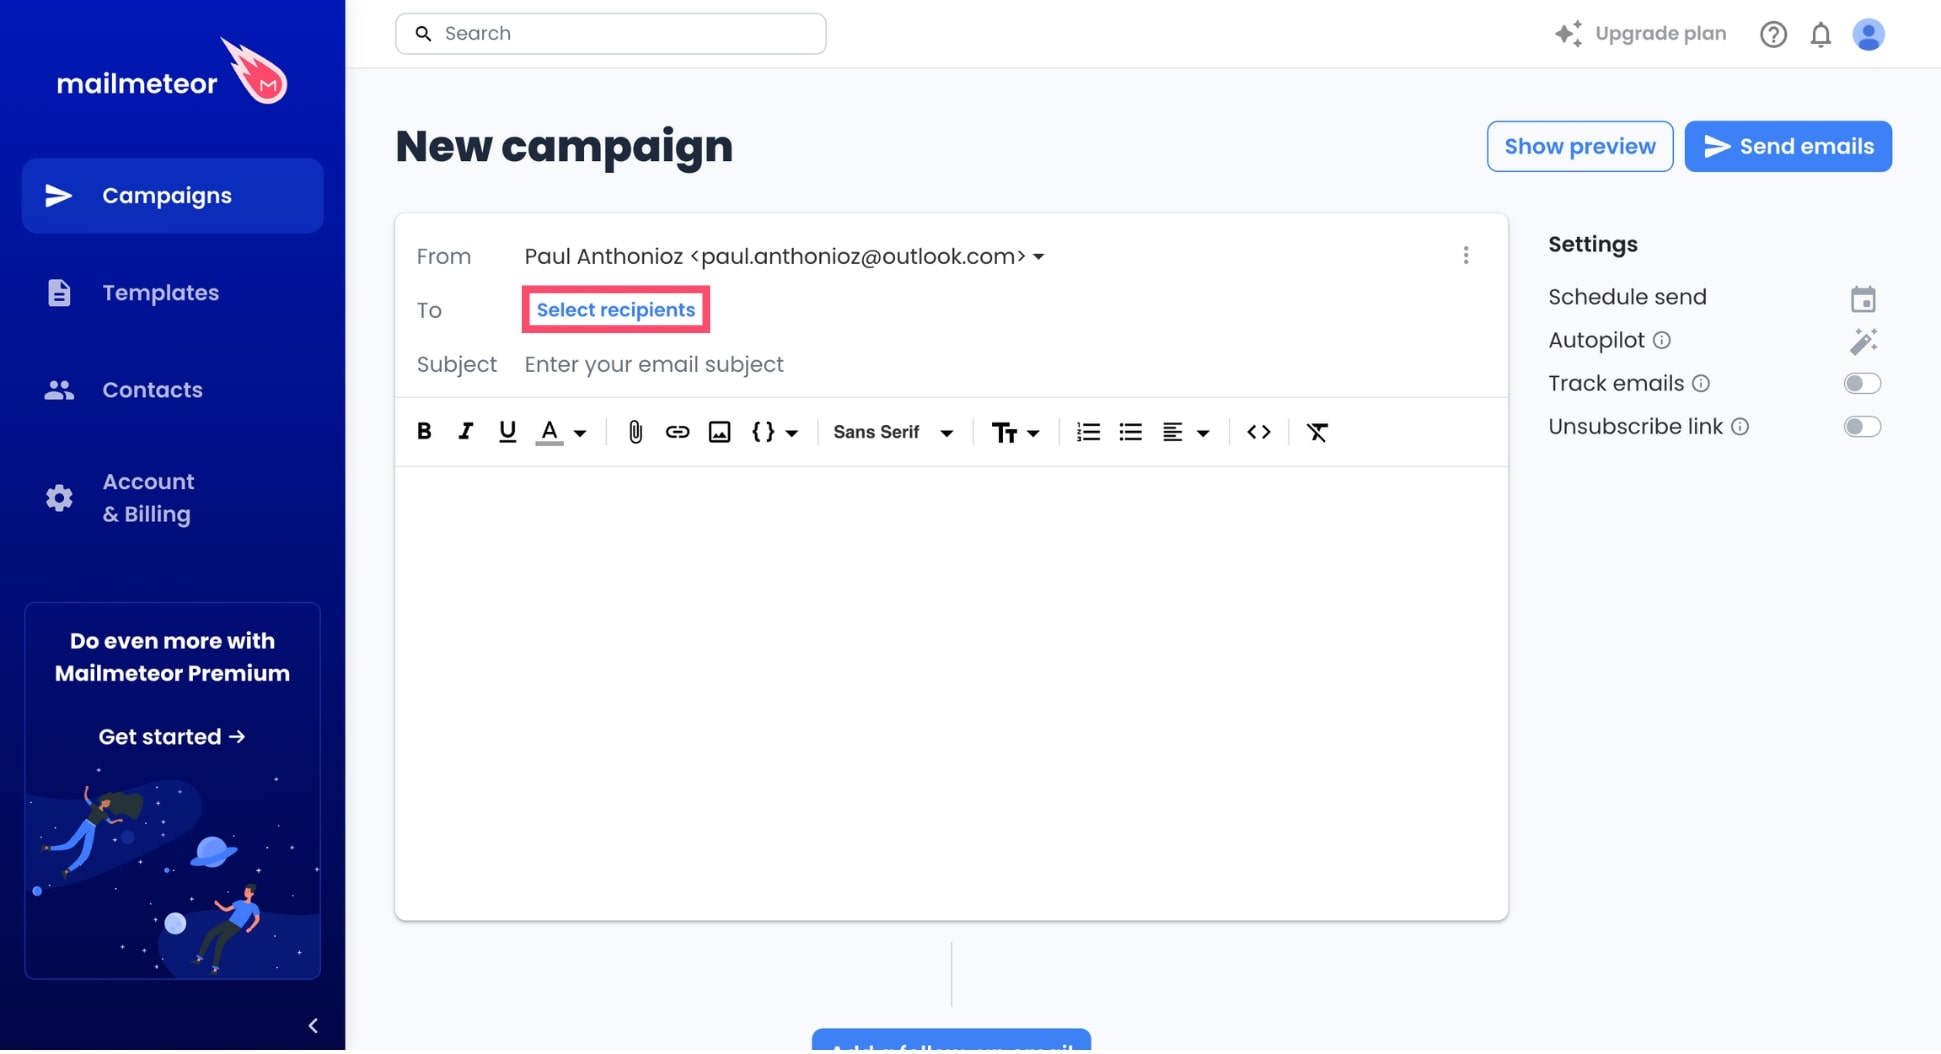
Step 3: To add recipients, click Select recipients. Then import your contact list or copy and paste the email addresses of your recipients.
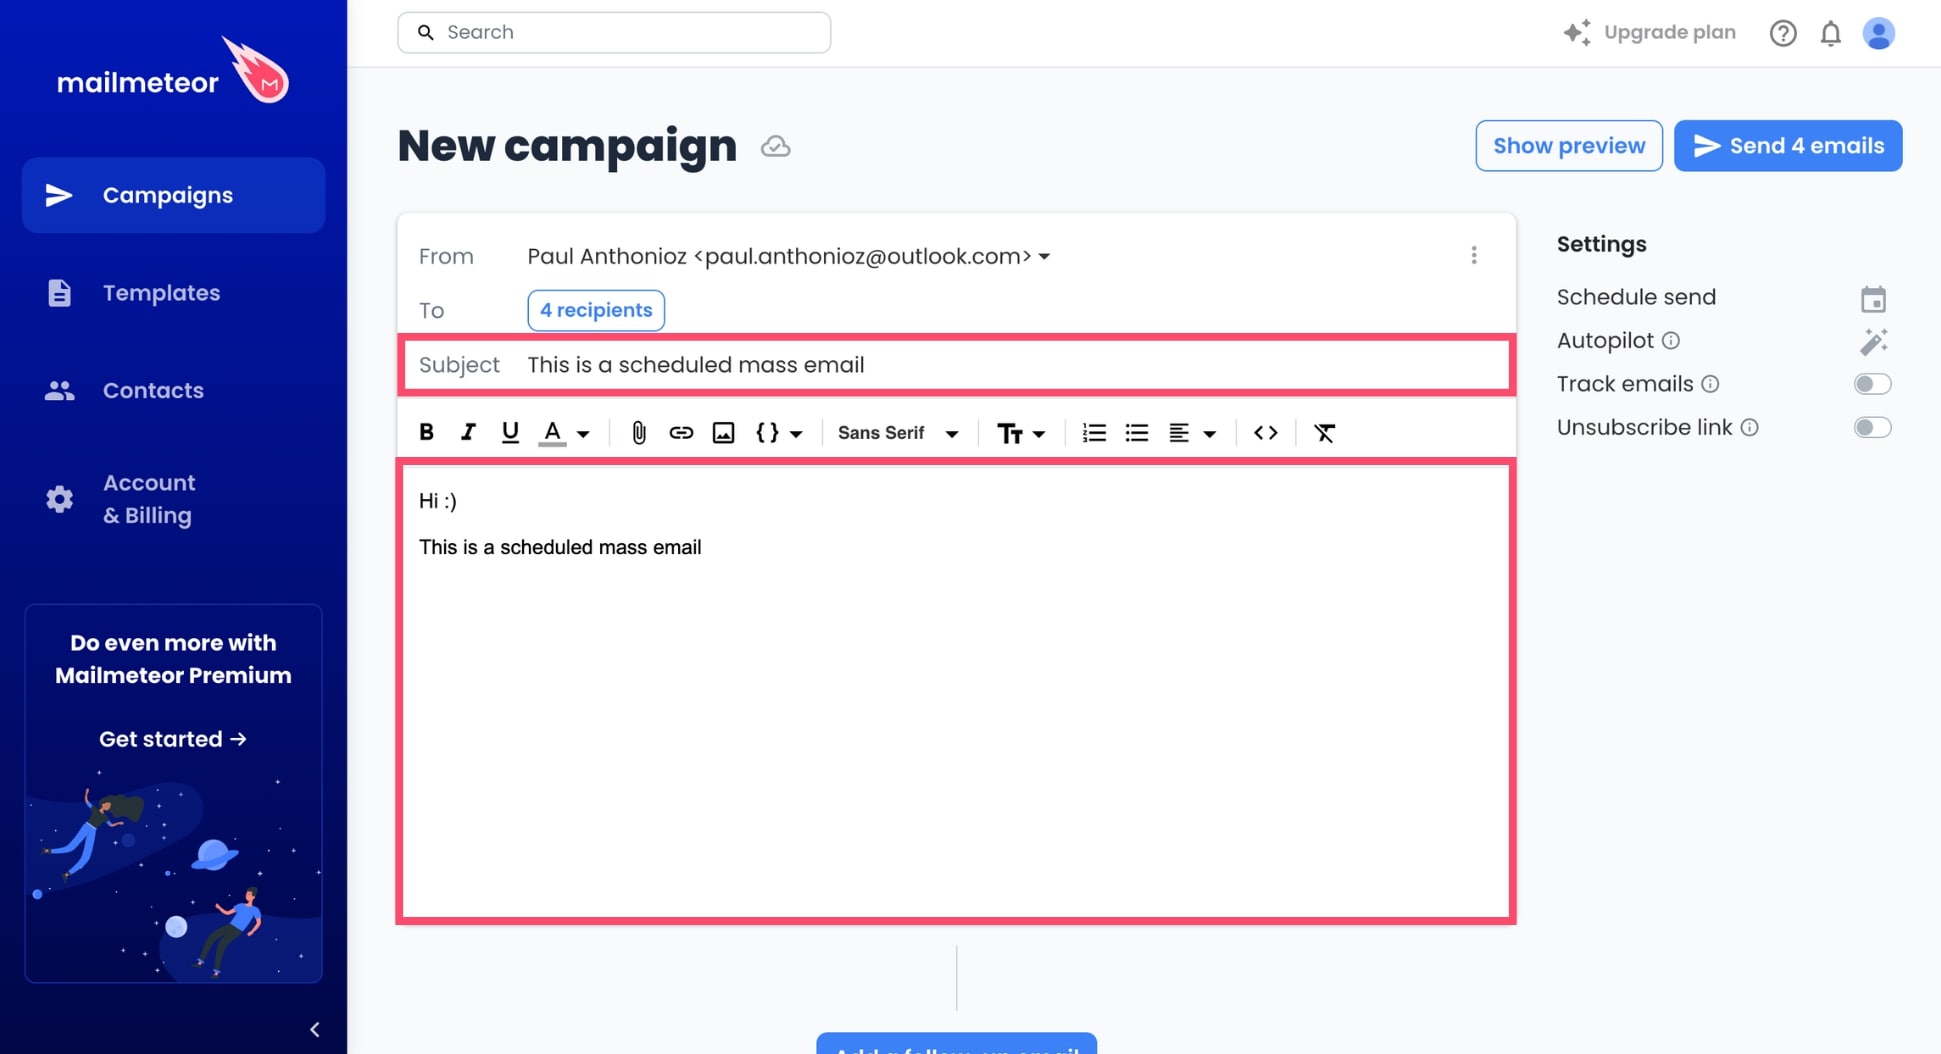
Step 4: Compose your email as you would normally and add a subject line.
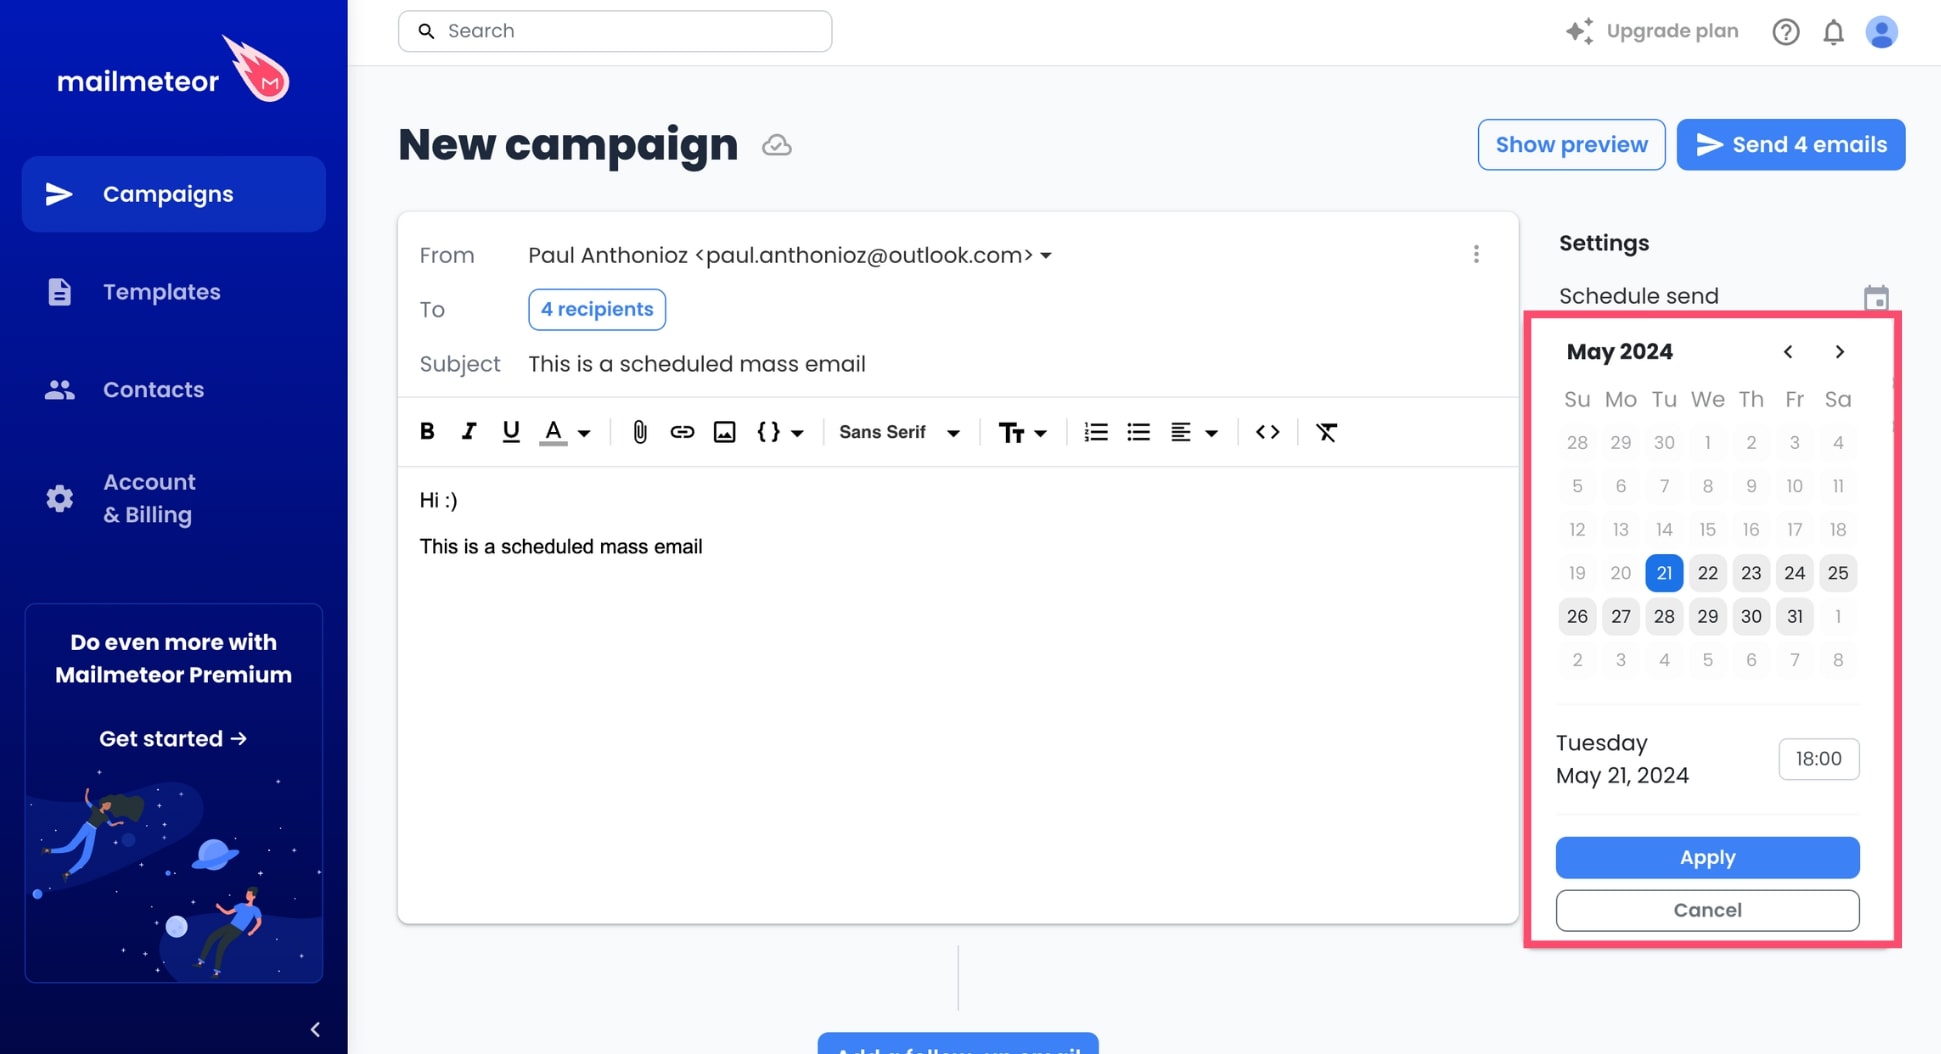
Step 5: When you’re done editing your campaign, click Schedule send. Select the date and time. Then click Apply.
Step 6: To schedule your mass email, click Send.
And voilà. Mailmeteor will take care of sending your emails from Outlook, and the tool will delay the delivery of your campaign until the appointed time. This technique will help you send personalized emails, at scale, while always making sure to reach your contacts at the perfect time.
5. How to Throttle Emails
Before we part ways, there’s one last trick I want to show you. Have you ever heard of email throttling? This advanced email marketing tactic lets you add a delay between each email you send to mimic a normal sending activity and improve your deliverability. Here’s how to use it.
Step 1: Log in to the Mailmeteor Dashboard using your Outlook account.
Step 2: Just like before, create a new email campaign, add recipients, compose your emails, and craft a subject line.
Step 3: Under Settings, click Autopilot.
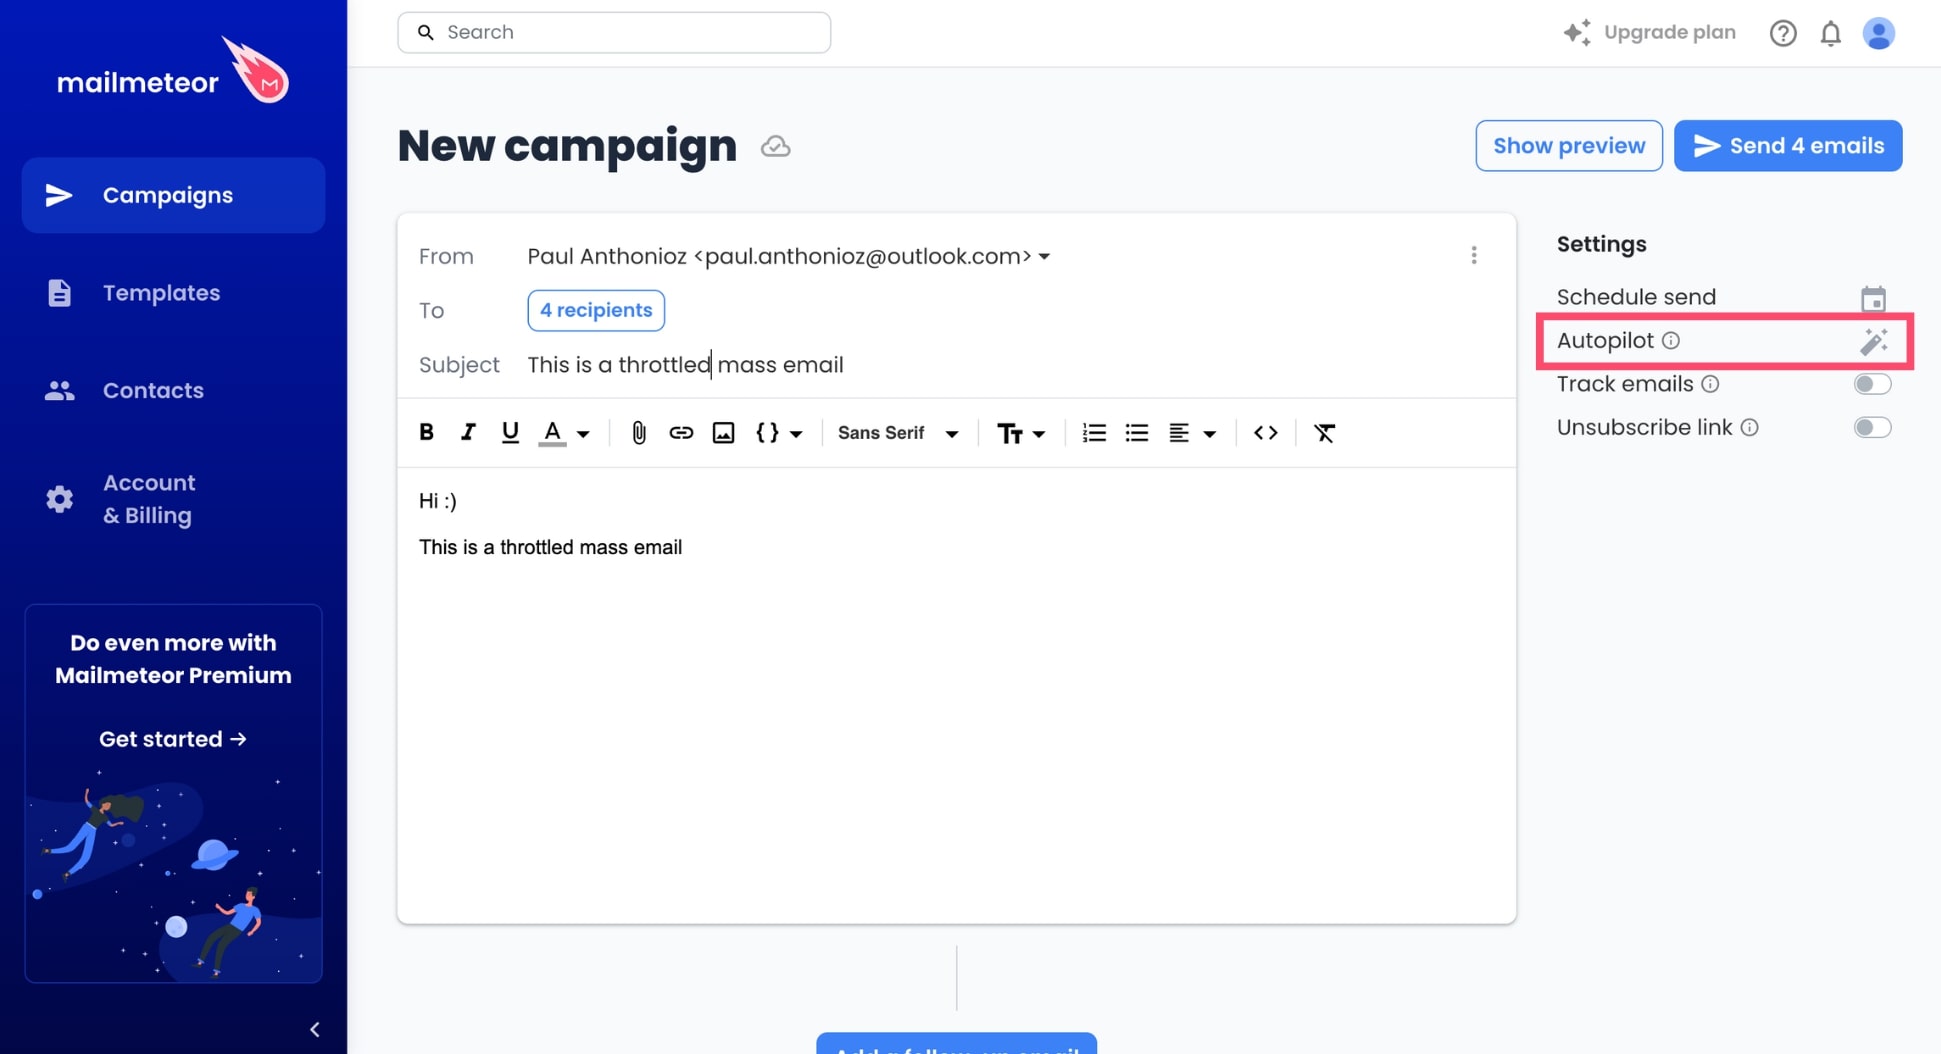
Step 4: Under Delay between emails, select the number of minutes Mailmeteor should wait before sending each email. In this example, we’ve added a 30-minute delay between each email.
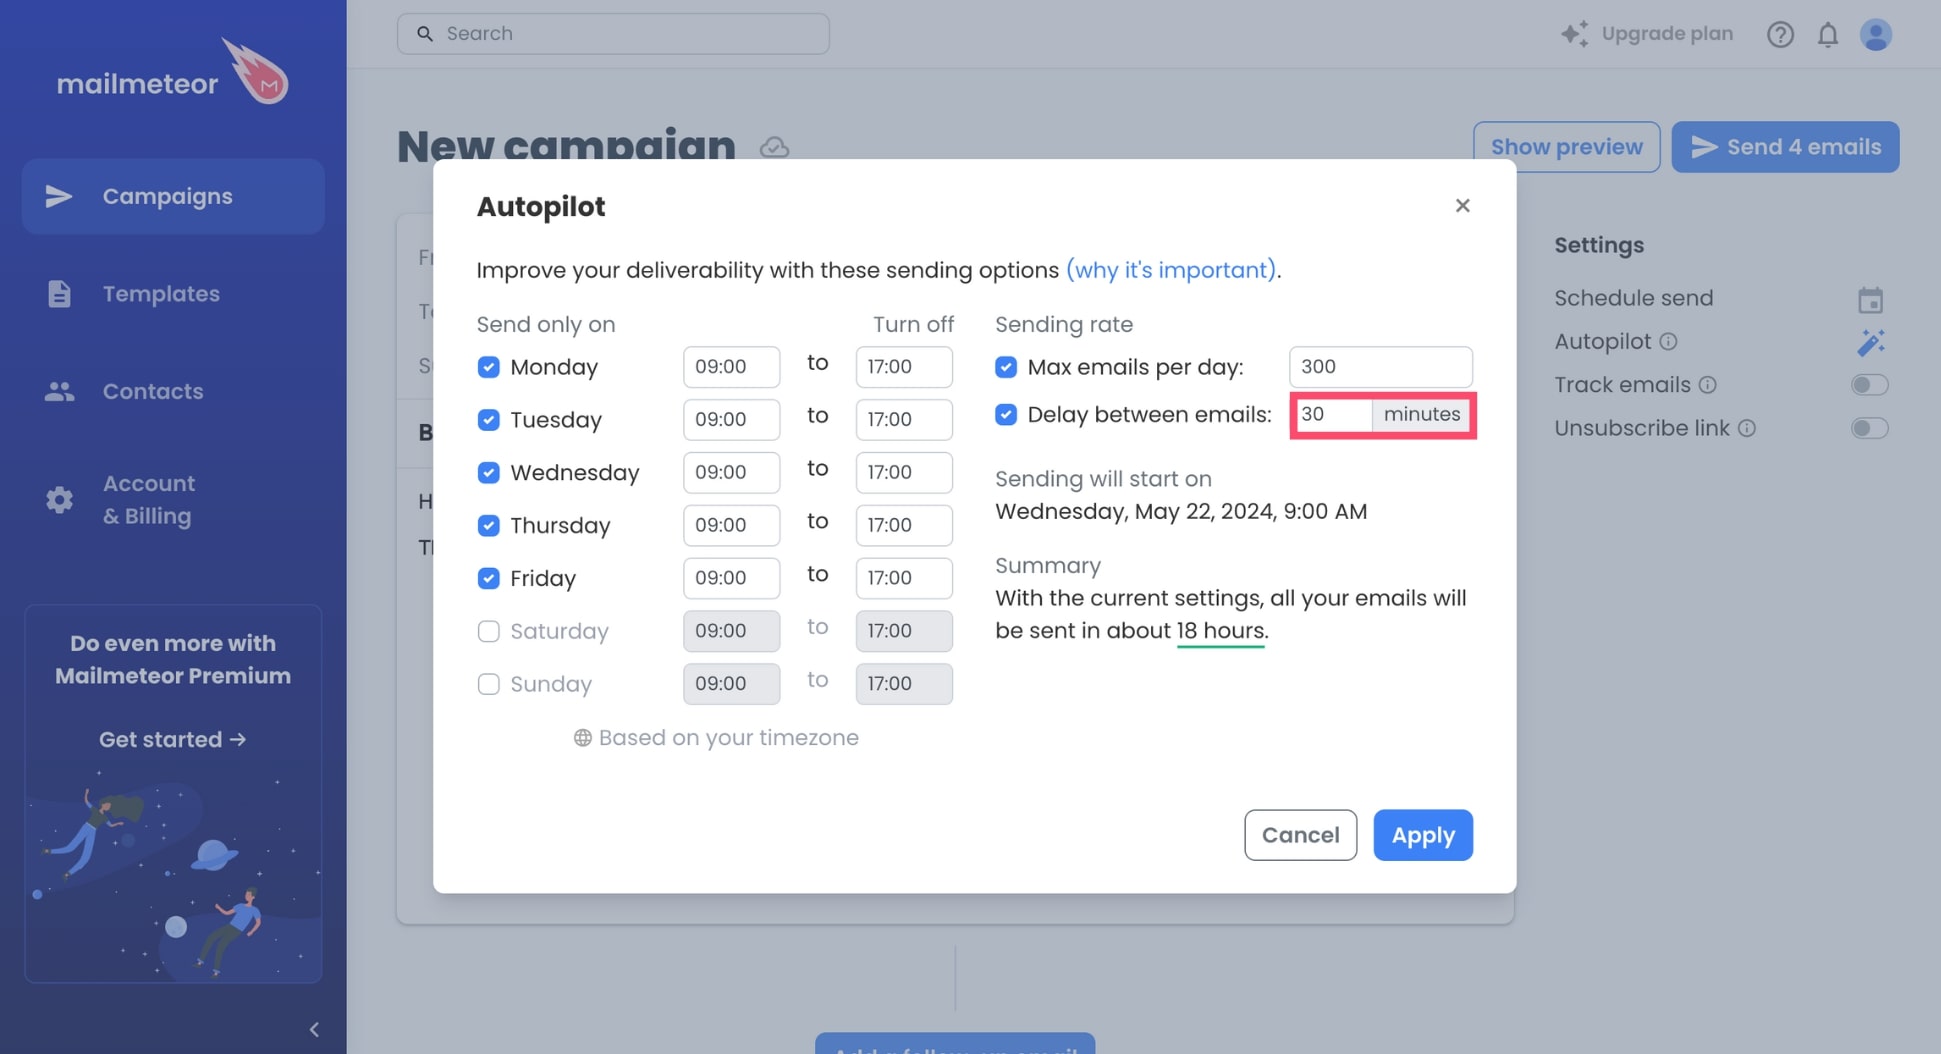
Step 5: To confirm, click Apply.
And voilà. By throttling your Outlook emails with a simple add-on, like Mailmeteor, you can replicate a human-like sending activity and dramatically improve the deliverability of your email campaigns. This feature can help you delay the delivery of your Outlook emails and navigate the spam filters like a pro.
Conclusion
Knowing how to delay the delivery of your emails can really up your email game. It lets you send emails at the right time, improve your deliverability, and avoid common mistakes resulting from hastily sent emails.
In this article, we’ve covered 5 simple, yet powerful ways to delay the delivery of your emails in Outlook, using Microsoft’s email client, or a popular mail merge called Mailmeteor. Here’s a quick overview of these methods, and when to use them:
-
Schedule a Single email: Need to send an email later? You can set the exact date and time. Write it now, and have it go out hours, days, or even months later.
-
Create a rule: Using Classic Outlook? You can create a rule to delay all your emails by up to 120 minutes. This gives you a little extra time to make sure everything’s perfect before it’s sent.
-
Activate Undo Send: If you’re on the new Outlook, the Undo Send feature is your friend. It lets you delay all emails by up to 10 seconds, so you can catch any last-minute errors.
-
Schedule a mass email: Planning a big email campaign? Use an add-on like Mailmeteor to schedule your emails to go out at the best time, ensuring they get the attention they deserve.
-
Throttle your emails: Sending to a large group? Throttling your emails with Mailmeteor adds a delay between sends, improving deliverability and making sure your campaign hits the mark.
Use these techniques to take full advantage of Outlook’s delay send feature and make sure your emails are timely. And if you want to do even more with your Outlook inbox, check out how Mailmeteor can help you send better emails.


