Struggling with a cluttered inbox? Discover 9 essential Outlook folder tricks to organize your emails efficiently. Learn how to create, sort, and manage folders in Microsoft Outlook to streamline your email management.
About 120 emails. That’s the number of messages the average person receives every day.
With so many emails flooding our inboxes, it’s easy to feel overwhelmed and end up with a chaotic mess.
Fortunately, Microsoft provides some tools to help you regain control over a cluttered inbox. My all-time favorite? The Outlook folders.
This feature allows you to create a folder in Microsoft Outlook and regroup some of your emails in a specific location.
In this guide, we’ll explore 9 essential tricks that will make email management a breeze thanks to Outlook folders, rules, and categories:
- How to create an Outlook folder
- How to organize your Outlook inbox using folders
- Declutter your Outlook inbox with folders
Sounds good? Then let’s dive in.
How to create an Outlook folder
Microsoft makes it super easy to create folders in Outlook. You can add as many folders as you want to your email account. Here’s how to do it.
Step 1: Sign in to your Outlook account.
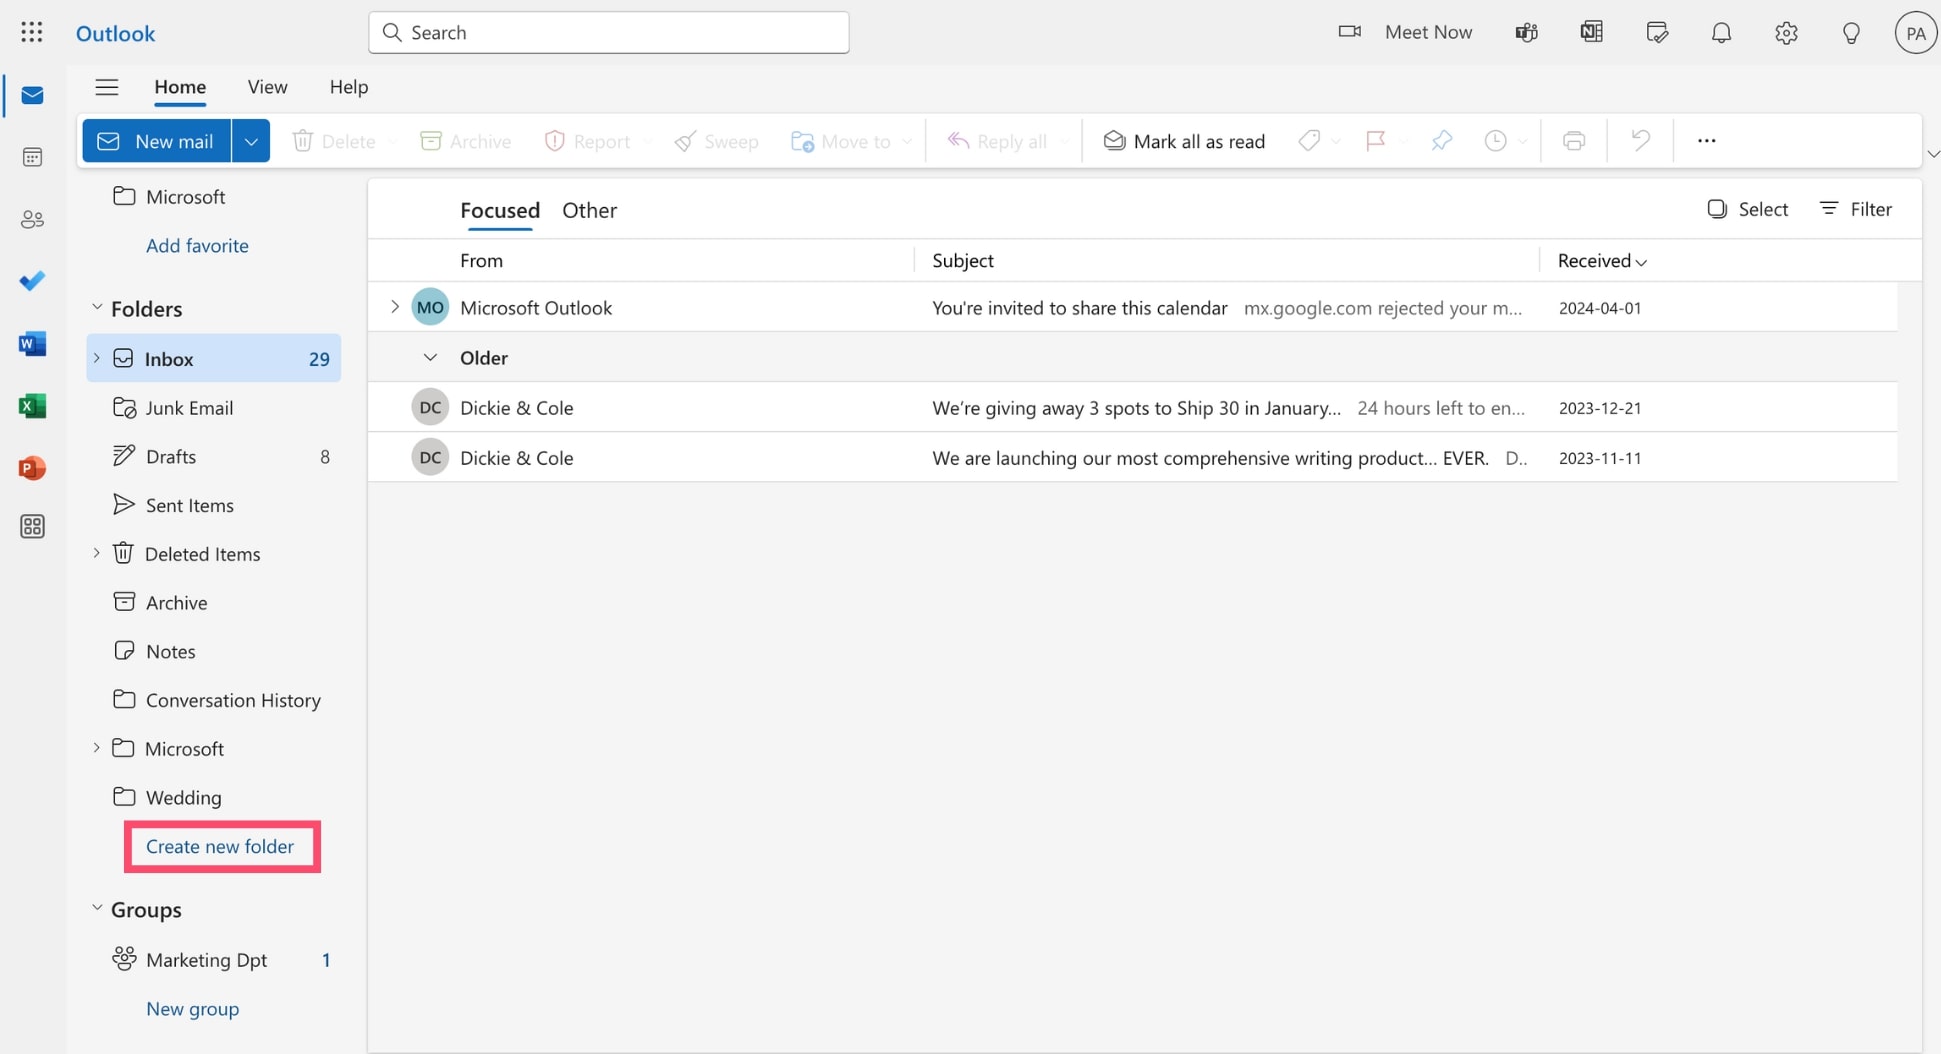
Step 2: Under Folders, select Create new folder.
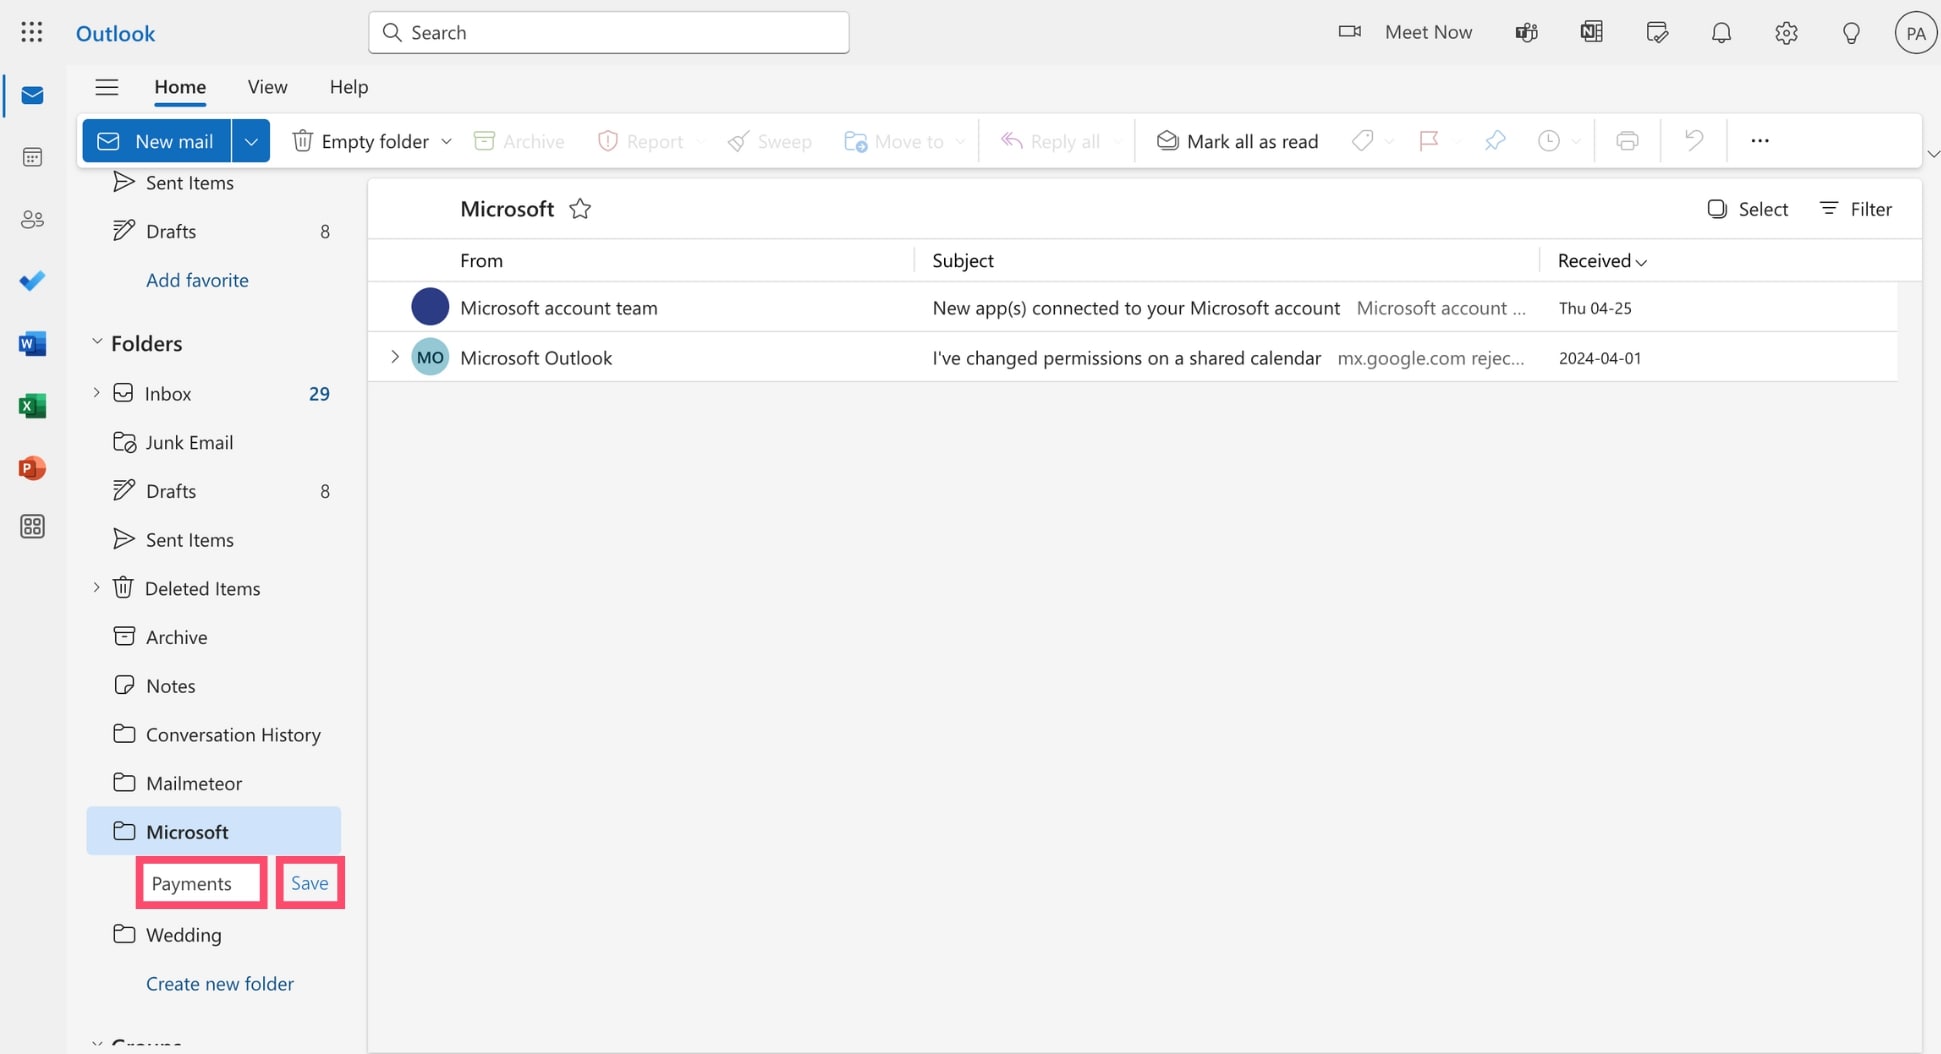
Step 3: Enter the name of your new folder. Then click Save.
That’s all there is to it. You’ve just created your first folder in Outlook. Congratulations 🎉 Now let’s see how you can use this folder to sort your emails efficiently.
How to organize your Outlook inbox using folders
Creating a folder is a great first step toward a cleaner inbox and smoother email management. But it’s just the beginning of your journey.
In this section, we’ll show you how to move, rename, nest, or delete folders, and more. We’ll also explore 2 new concepts: rules and categories.
Once you master these notions, you’ll be able to organize your Outlook email account like a seasoned veteran.
1. Add emails to a folder manually
Let’s start with the basics. Now that you’ve created an Outlook folder, you probably want to add emails to this folder, right. Here’s how to do it manually.
Step 1: Sign in to your Outlook account.
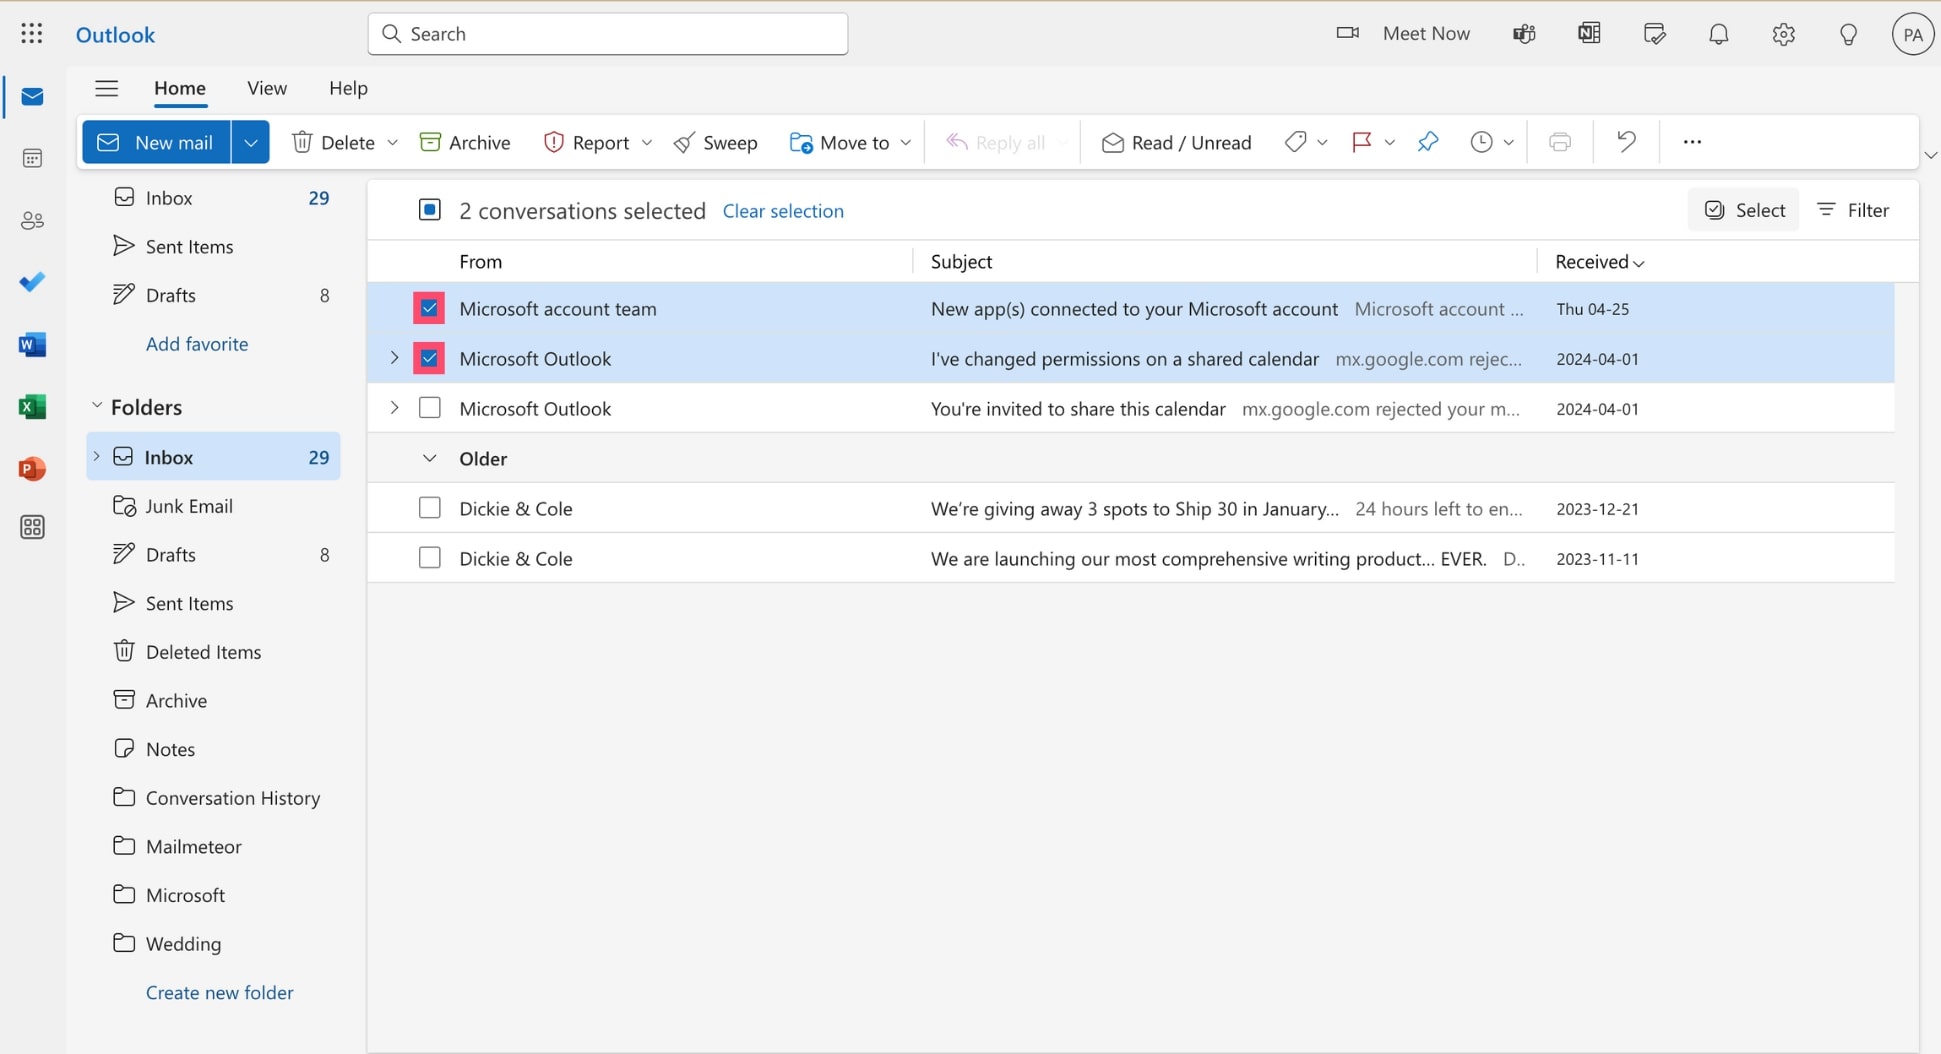
Step 2: Select the emails you want to move.
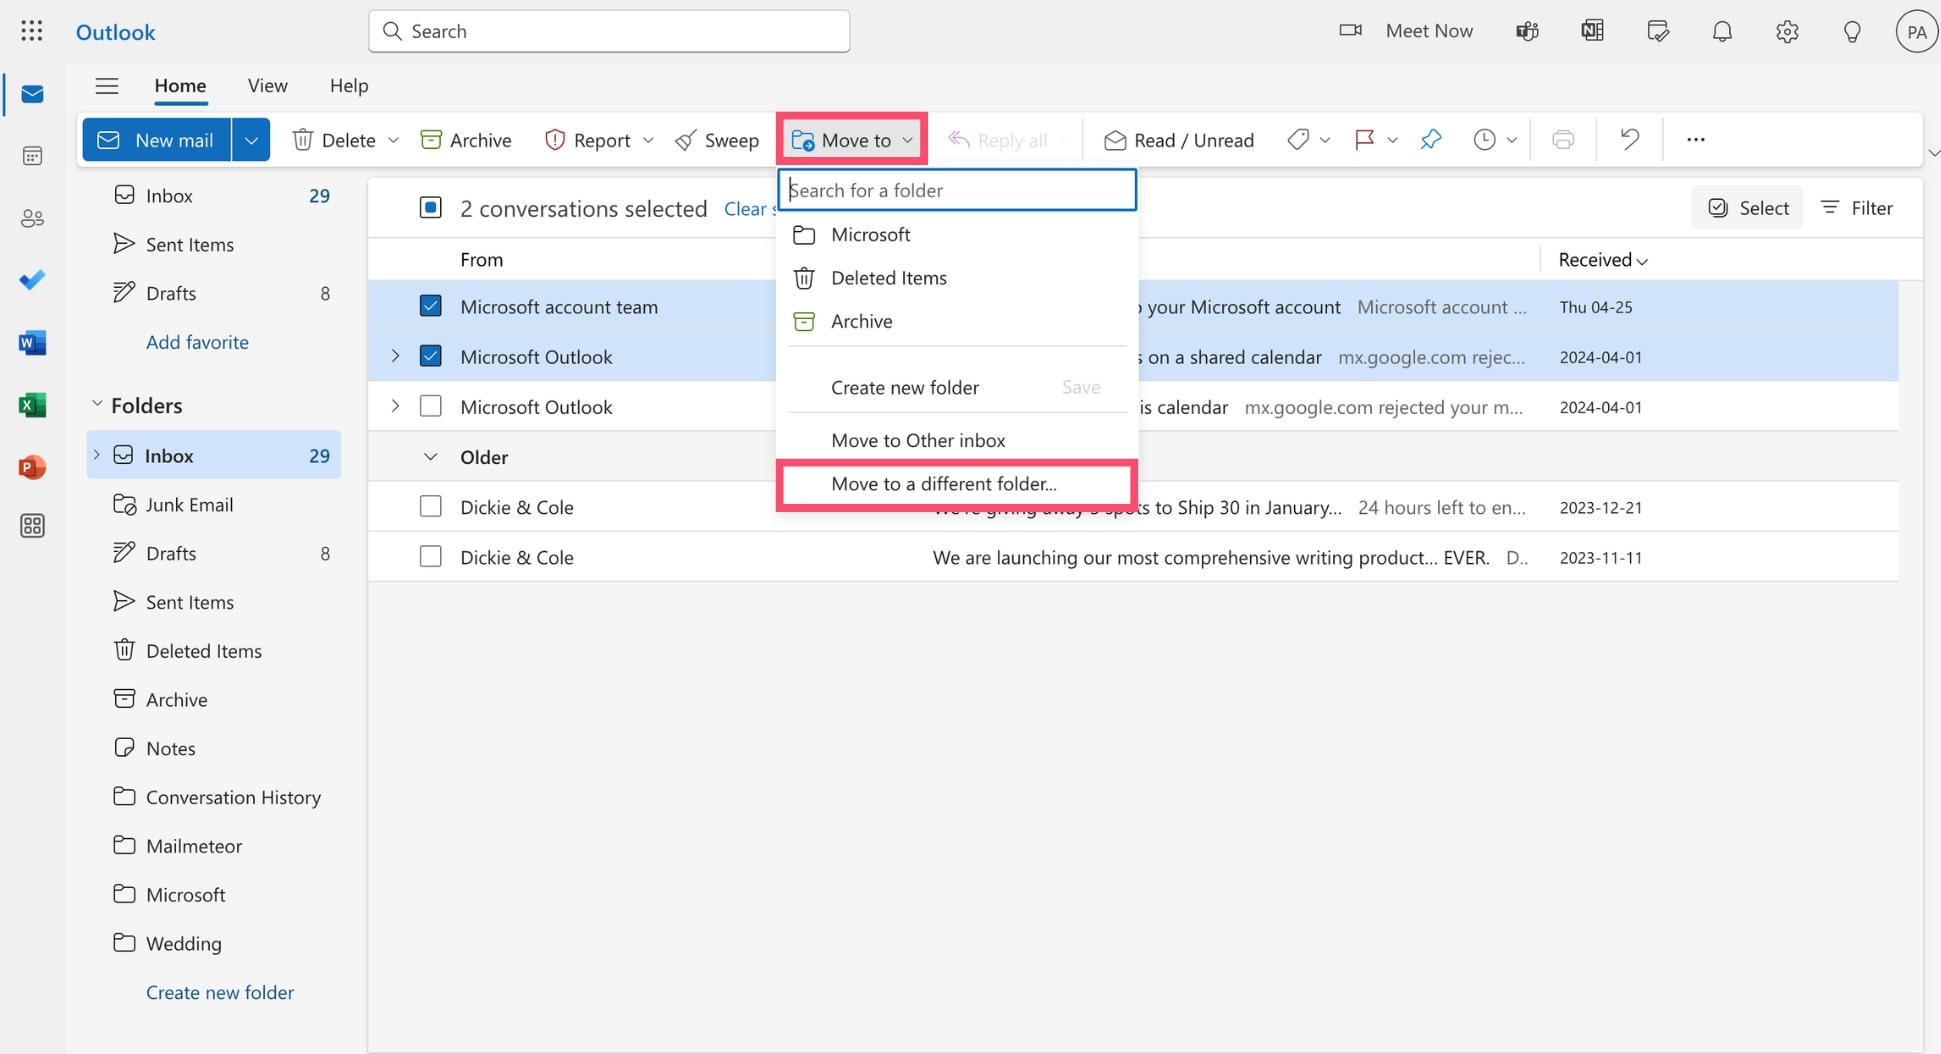
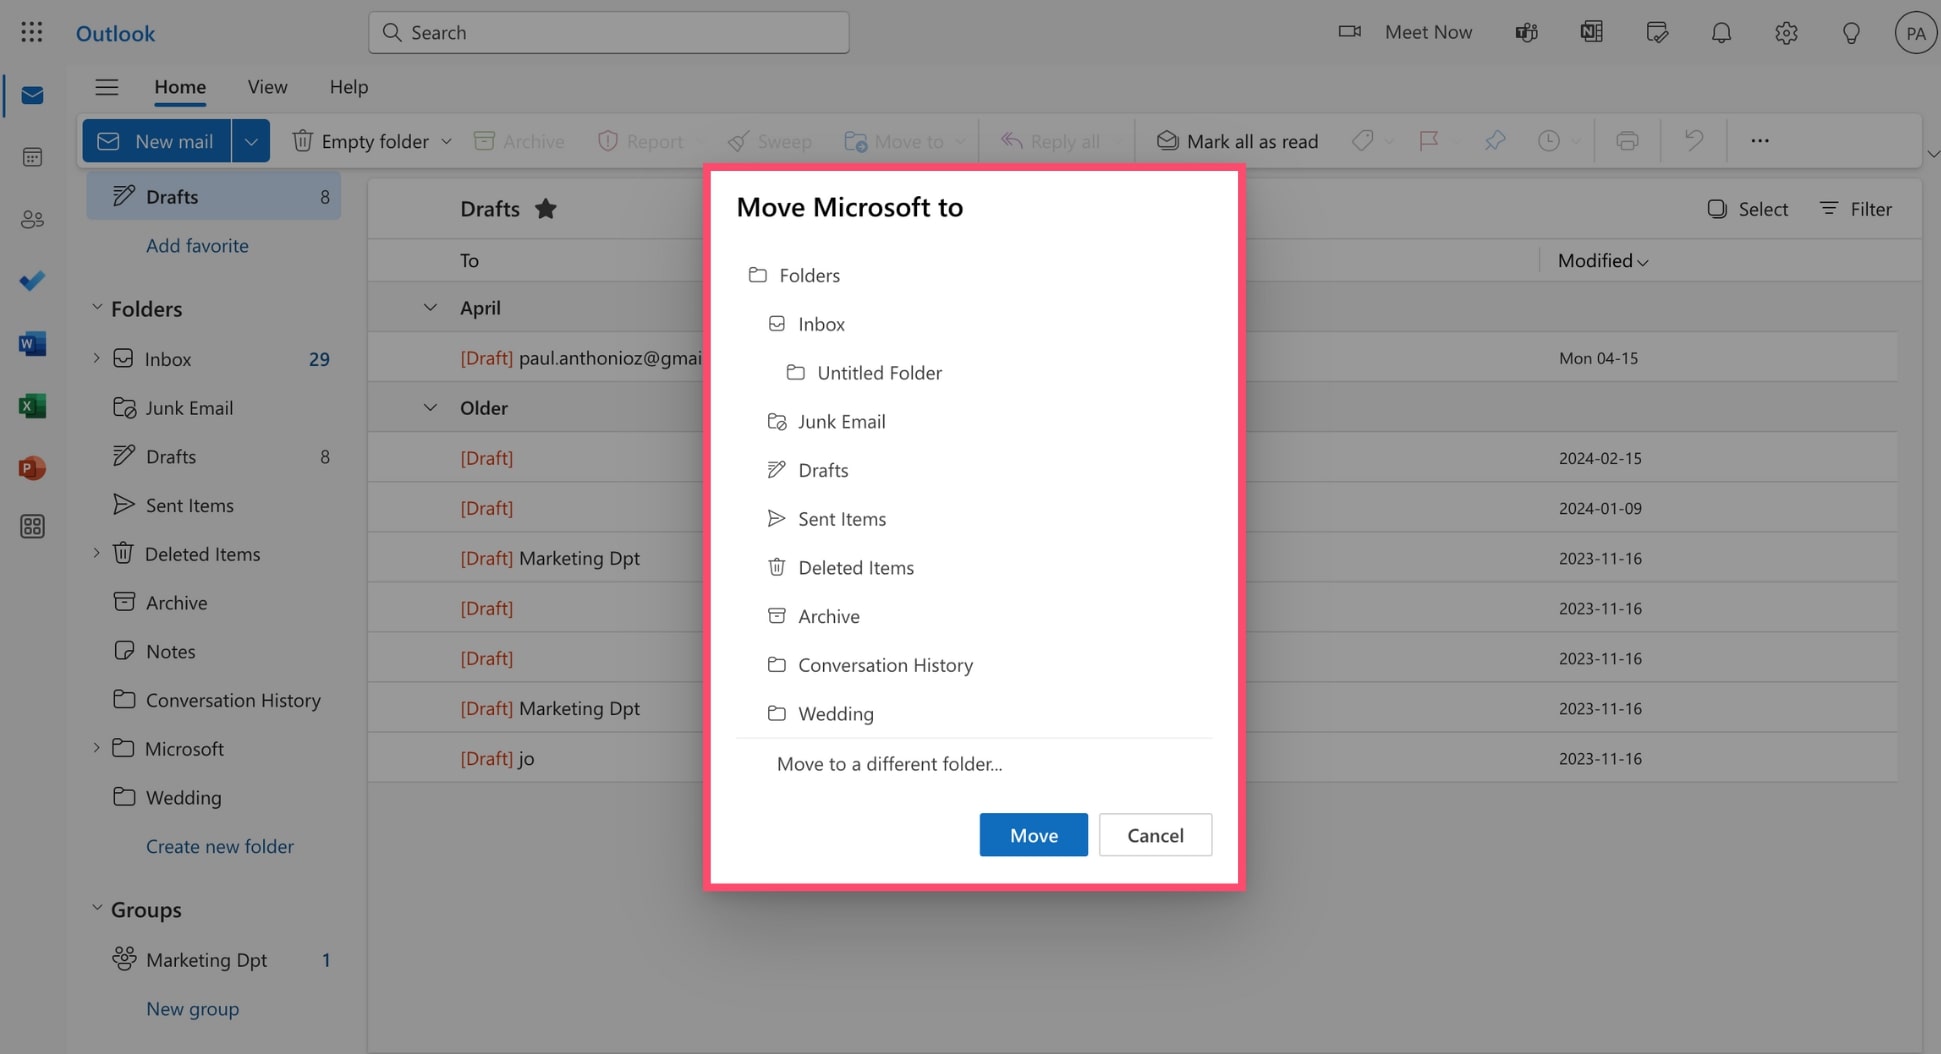
Step 3: In the navigation bar, click Move to. Then select Move to a different folder.
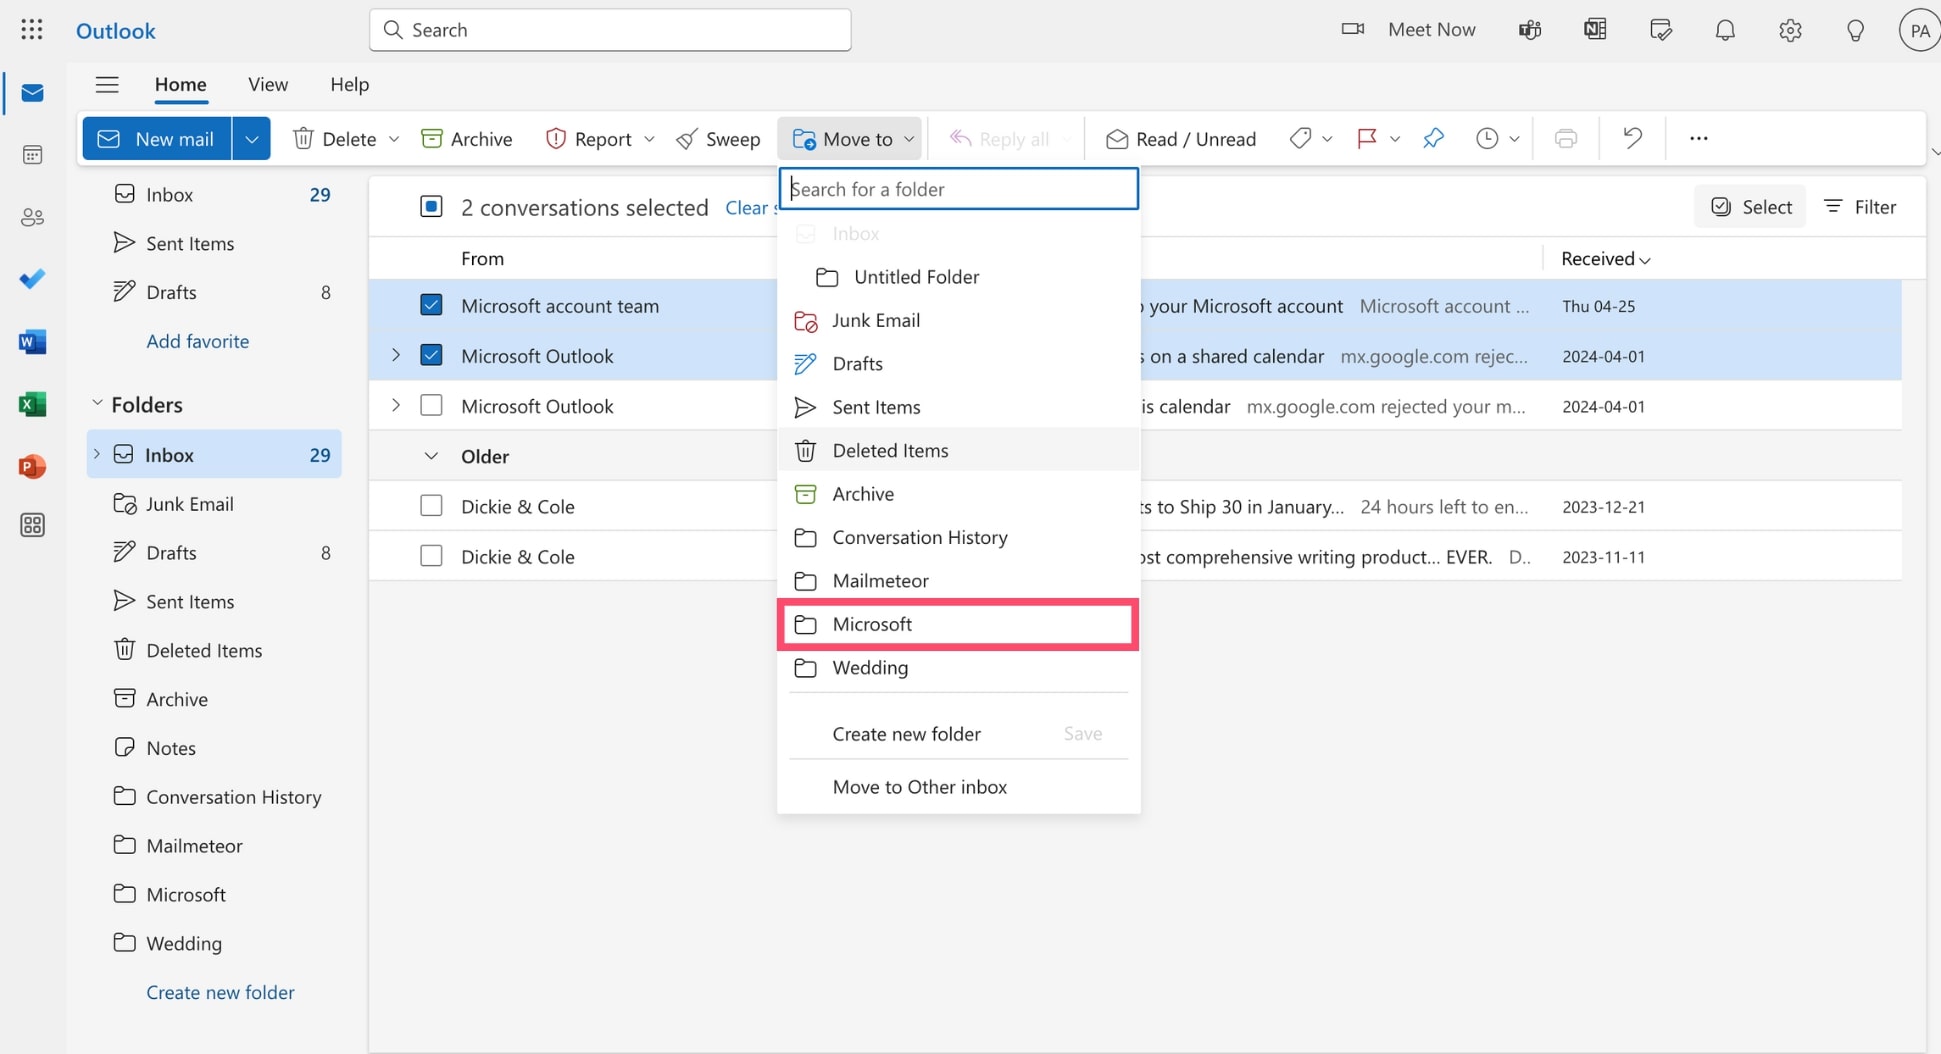
Step 4: Choose the folder where you want to move your email(s). In this example, we’ll select the Microsoft folder we created earlier.
And voilà. Now you know how to add emails to a folder. But if you receive A LOT of emails, you may want to automate this process to 10x your productivity and focus on more important tasks.
2. Create a rule to sort emails automatically
In Outlook, you can create something called Rules. This feature allows you to create a filter and automatically apply a certain action to the emails that match your search criteria. Here’s how it works.
Step 1: Open Outlook.
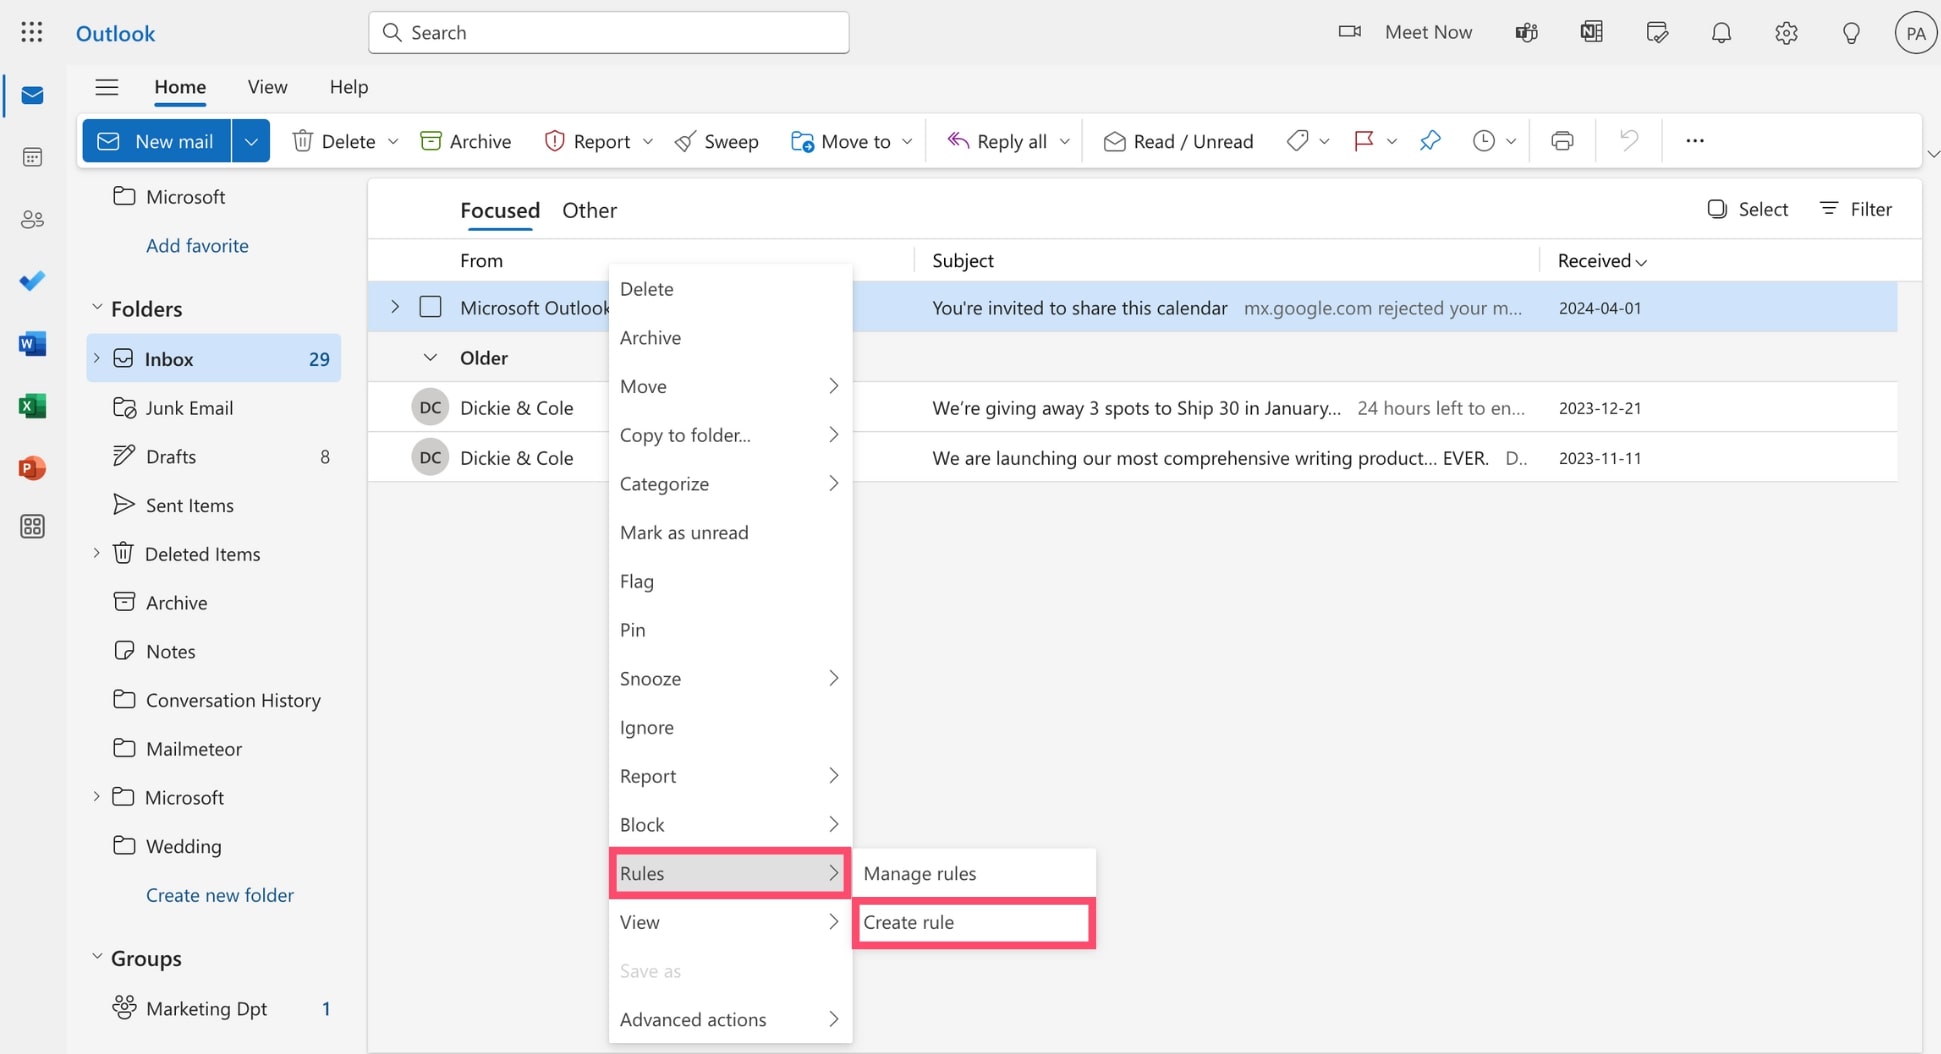
Step 2: Right click a message.
Step 3: Navigate to Rules > Create rule.
Step 4: Click More options.
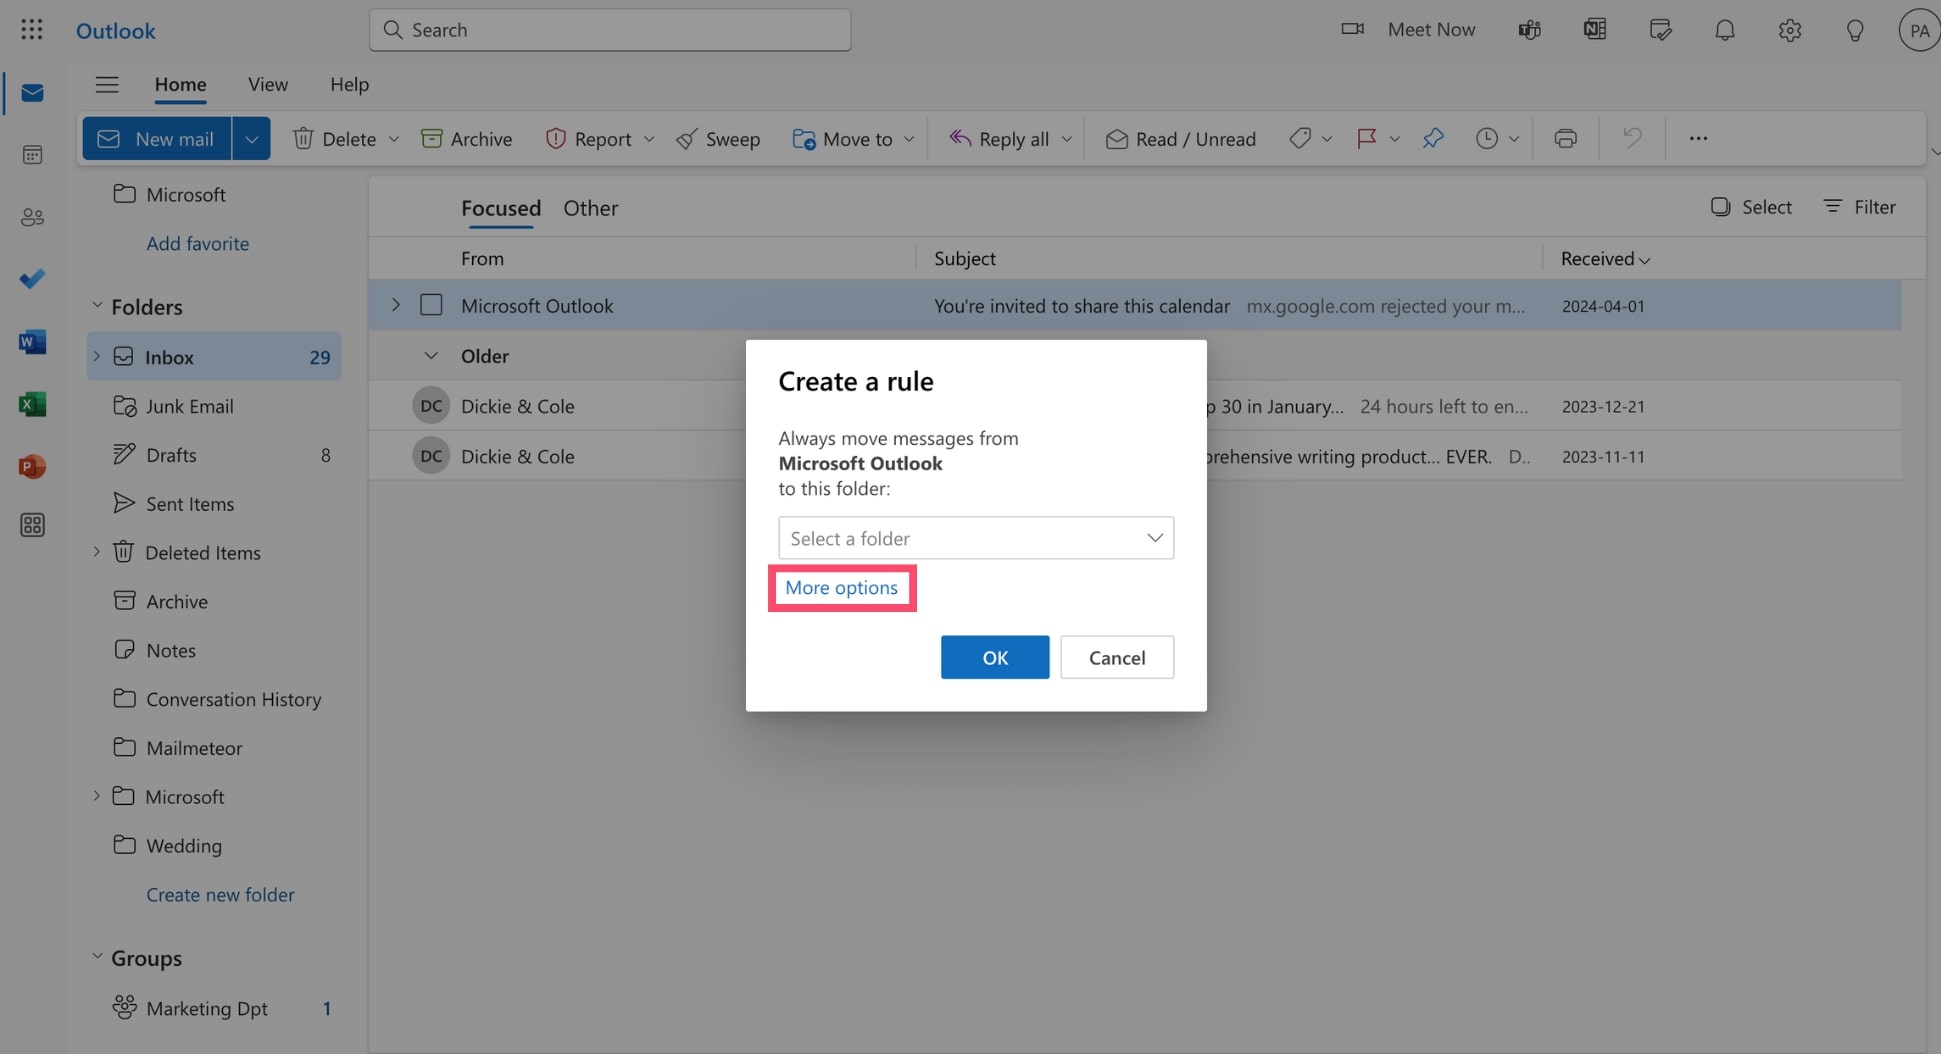
Step 5: Name your rule. Make sure to pick a descriptive name that’s easy to understand.
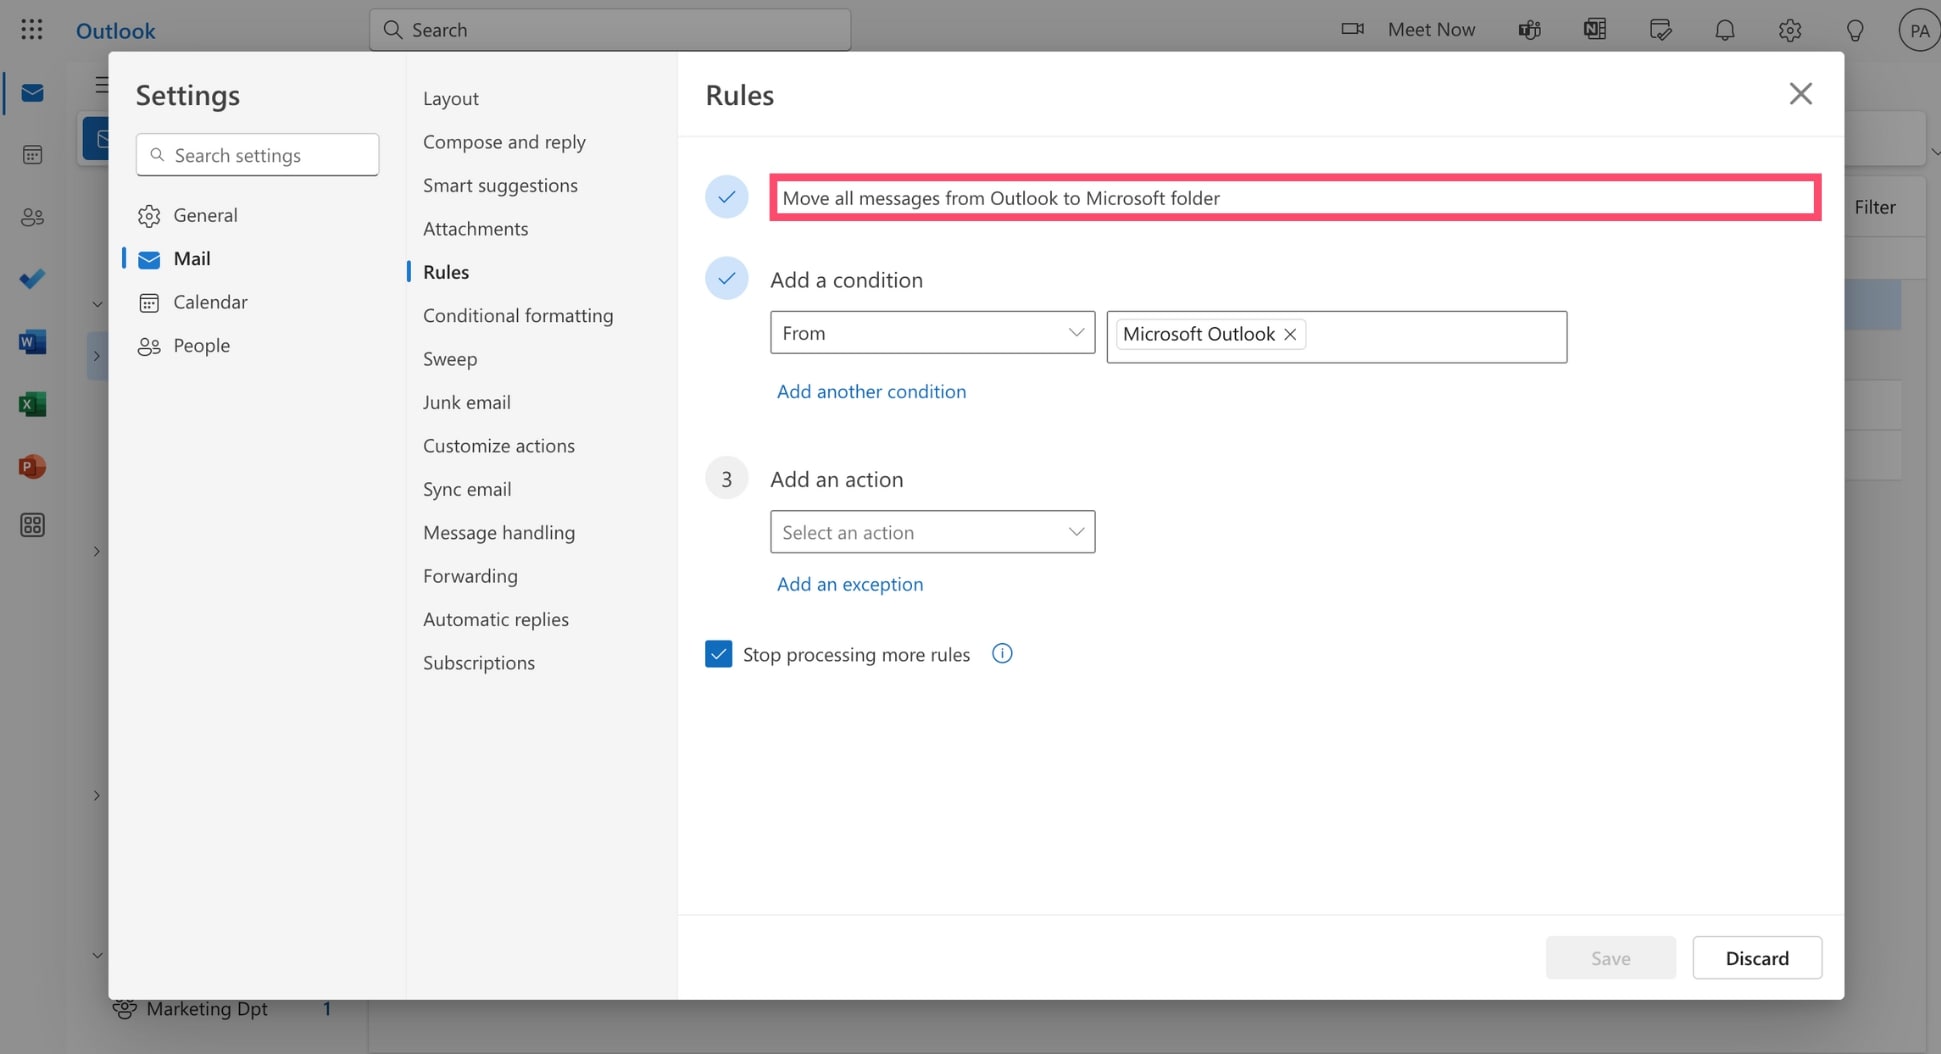
Step 6: Next, add a Condition This allows you to define to which emails this rule will apply. In this example, we’ve decided to use the From condition and to choose Microsoft Outlook as the sender. This means that the rule will apply to all the emails sent by Microsoft Outlook.
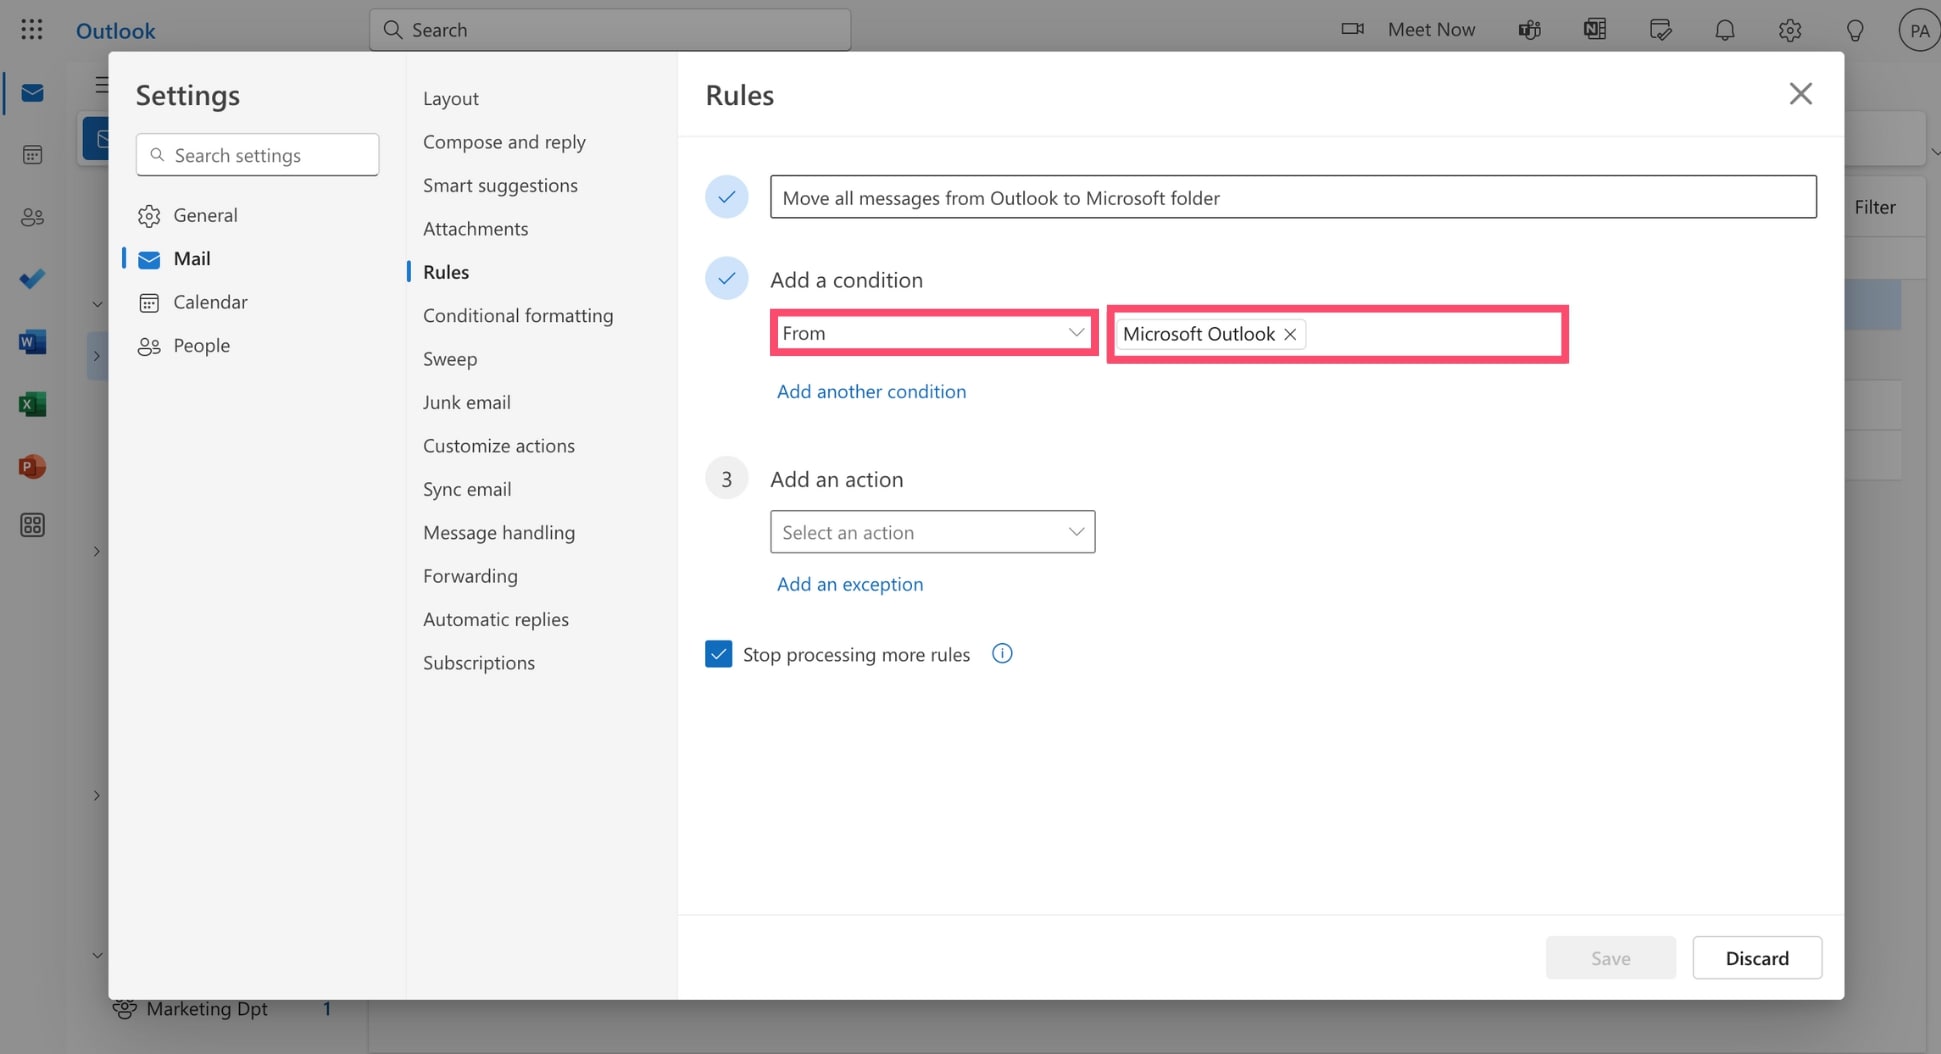
Step 7: Add an action. This lets you define what will happen to the emails that match your search criteria. In this case, we want to move the emails to a specific folder. So we’ll select Move and pick the Microsoft folder.

Step 8: Once you’re done configuring your Outlook rule, click Save to confirm your changes.
And that’s it. You can now automatically send certain emails to a specific Outlook folder thanks to the rules you’ve created. Want to learn more about this handy feature? We’ve created a complete guide to help you master Outlook rules.
3. Add subfolders in Outlook
If you’ve got more than 10 folders, your inbox might start to look a bit messy. But here’s a quick fix: try nesting your Outlook folders. By creating subfolders, you can neatly organize related emails and make them easy to find.
Step 1: Go to Outlook.
Step 2: Click the three horizontal dots next to the name of the email folder you want to use as the parent folder.
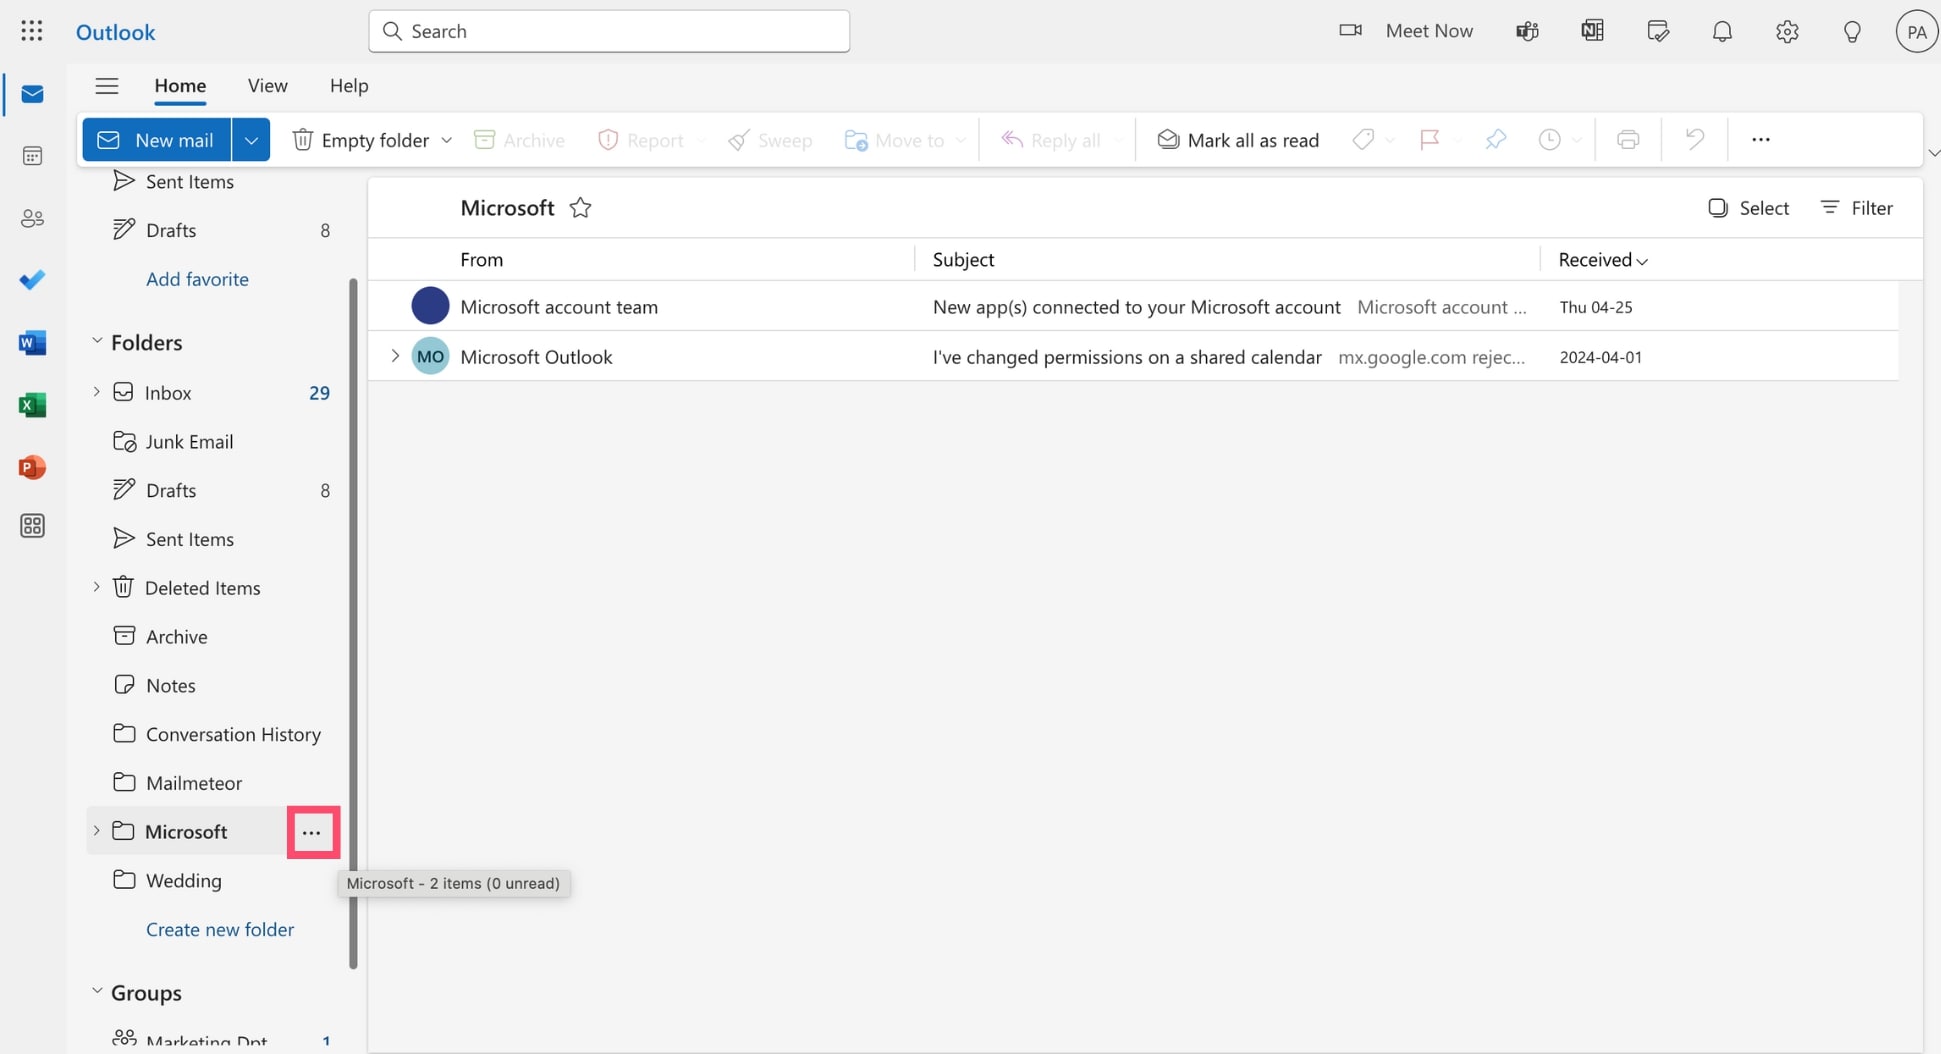
Step 3: Select Create new subfolder.
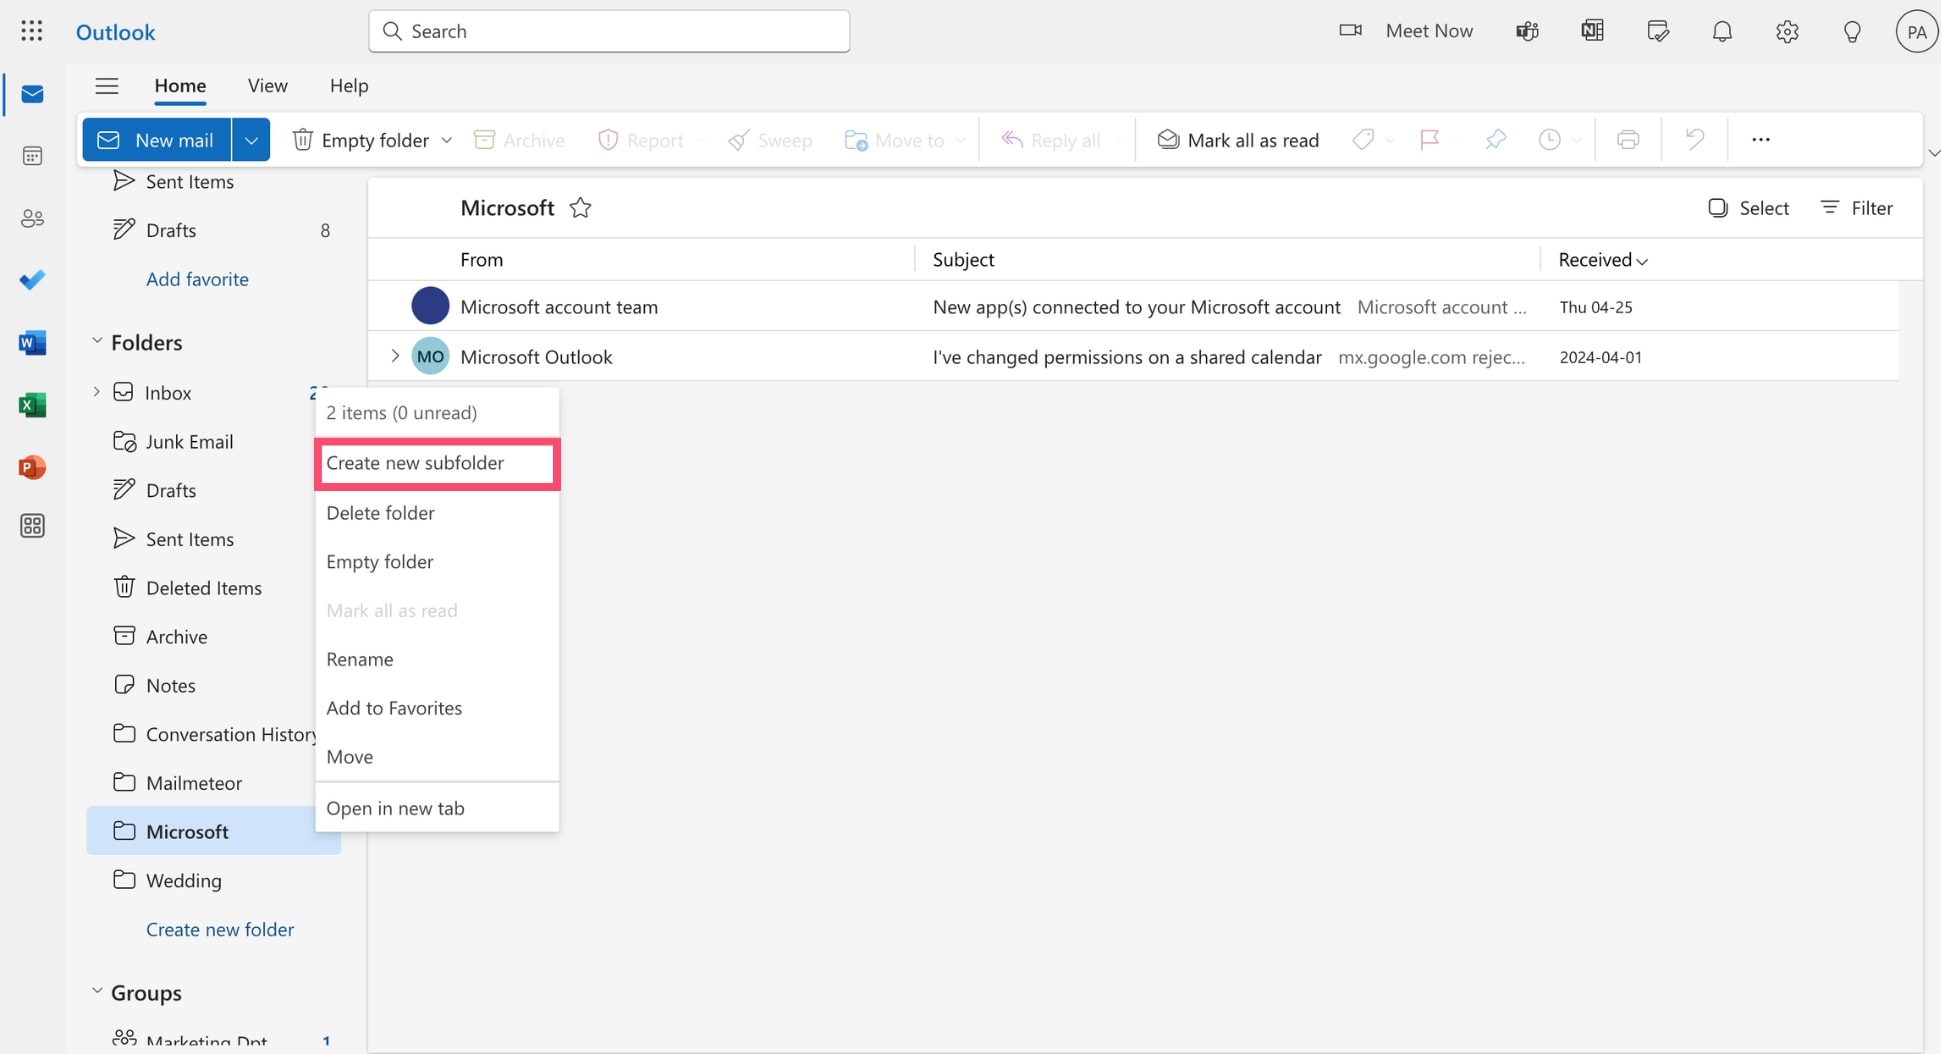
Step 4: Type the name of your subfolder. Then click Save.
And done. You’ve created a subfolder in Outlook. Use this simple trick to keep your inbox clean and organized.
4. Assign categories to your emails
Categories in Outlook are tags you can apply to your emails, calendar events, and tasks. These tags are color-coded and customizable, allowing you to visually mark and group related items across your Outlook data, regardless of their location.
The visual coding helps you quickly identify types of emails at a glance. You can combine it with folders to add a layer of organization to your email management system and boost your productivity.
In this section, we’ll show you how to assign a category to the emails stored in your Outlook folders. This technique is a bit more advanced. But it can make a real difference if you want to improve your workflow.
Step 1: Go to Outlook.
Step 2: Right click an email in your inbox.
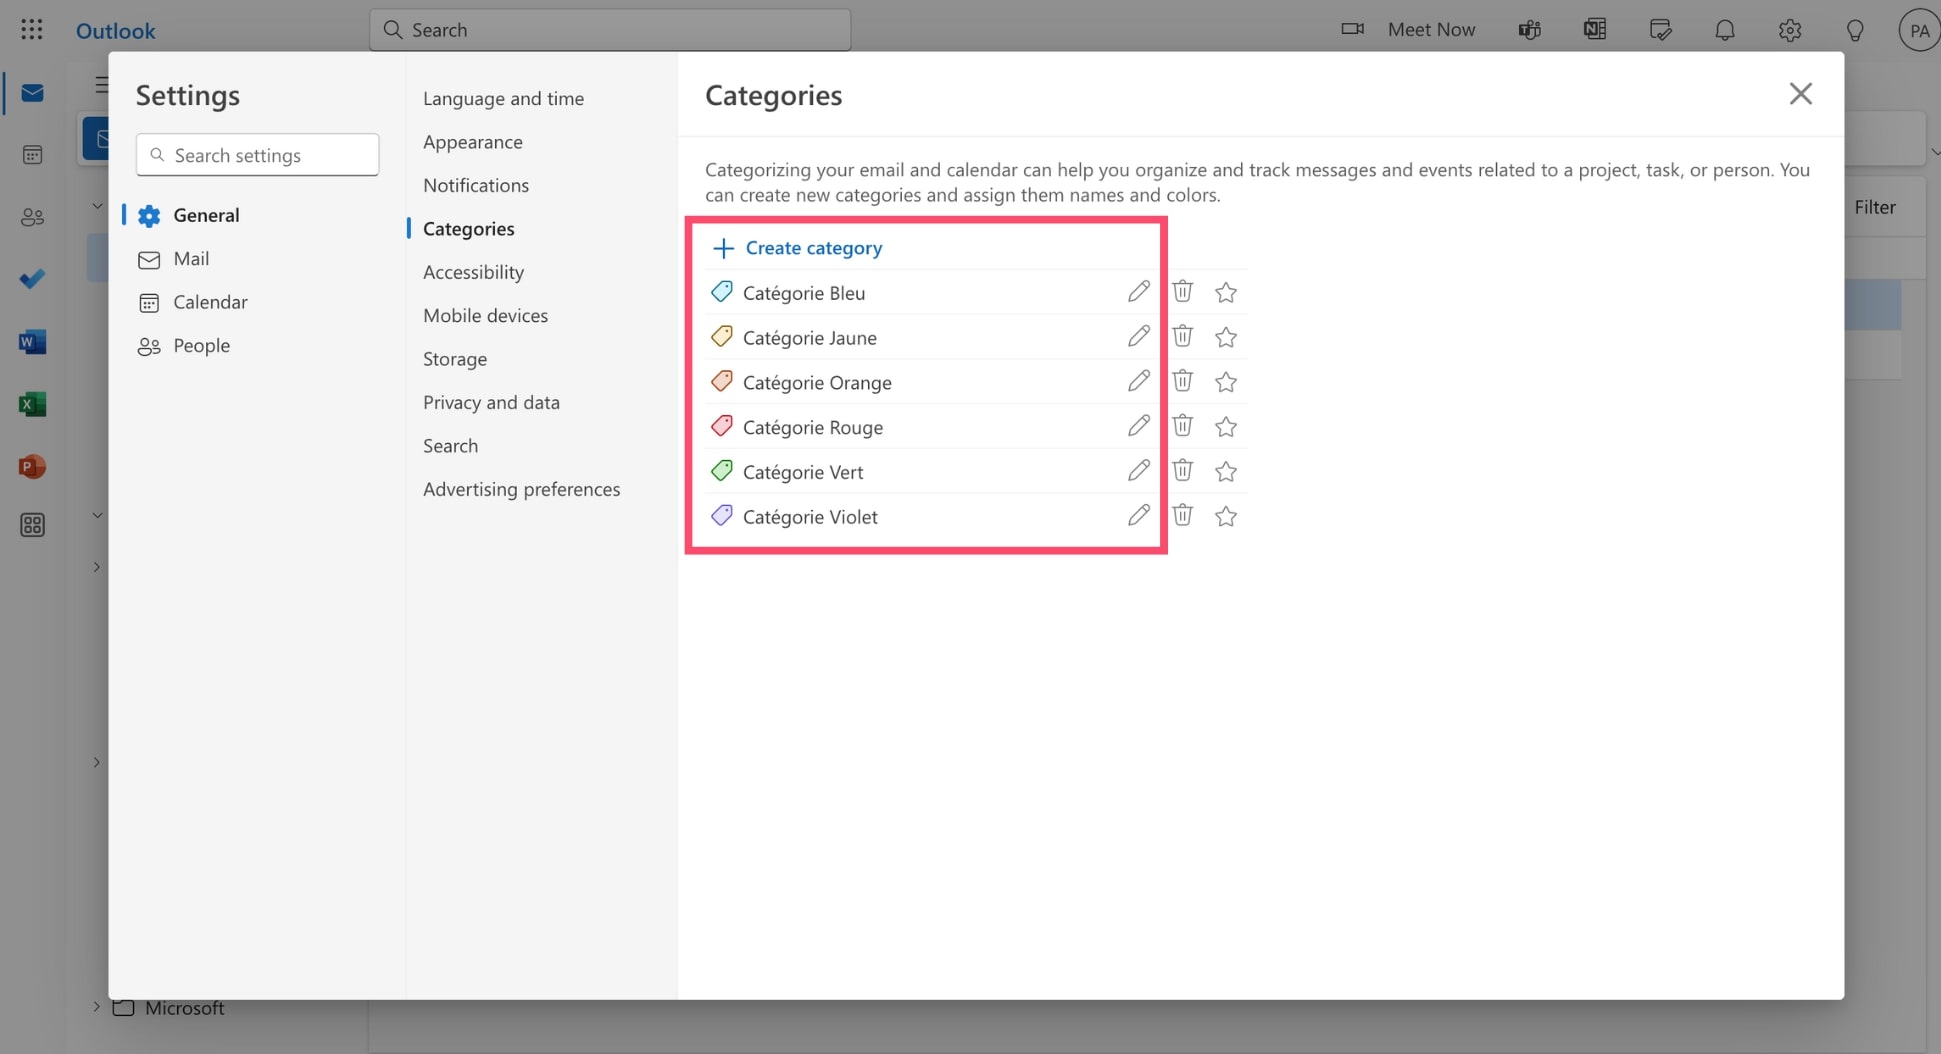
Step 3: Hover over Categorize and click Manage Categories.
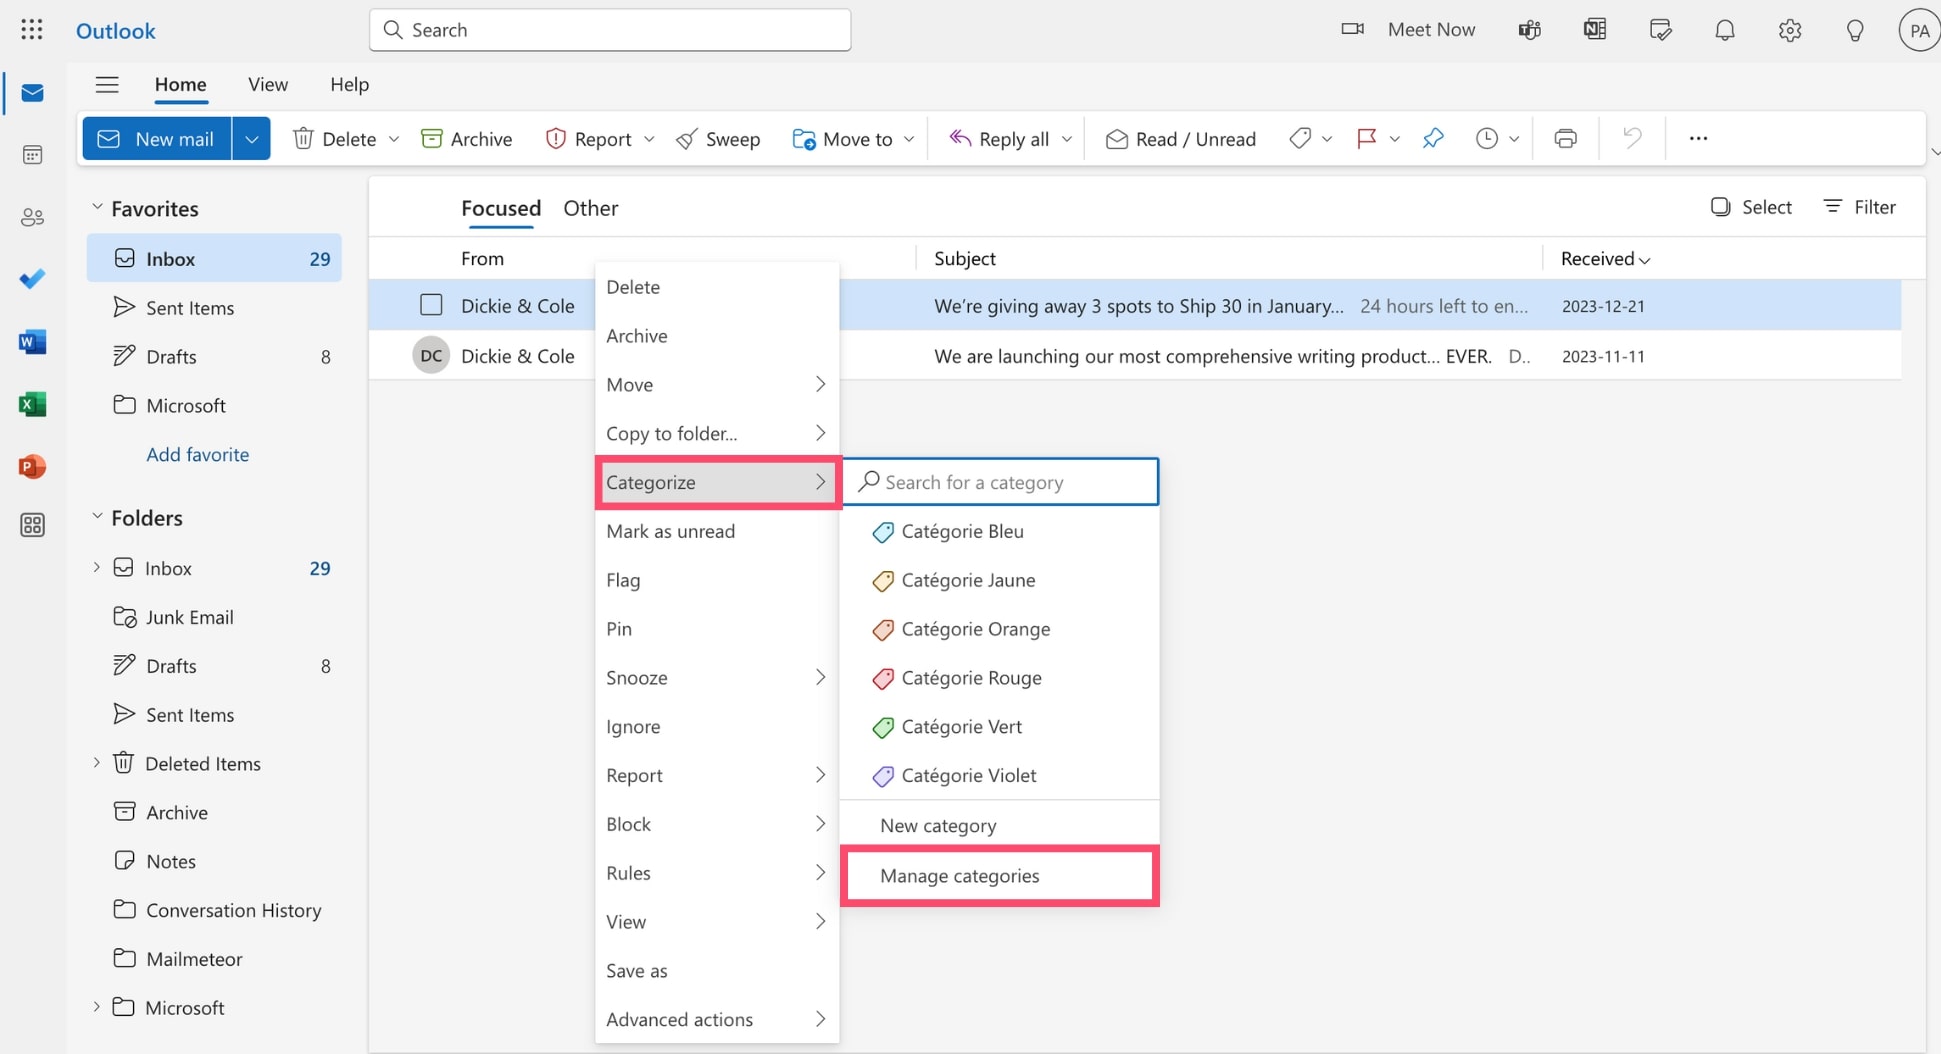
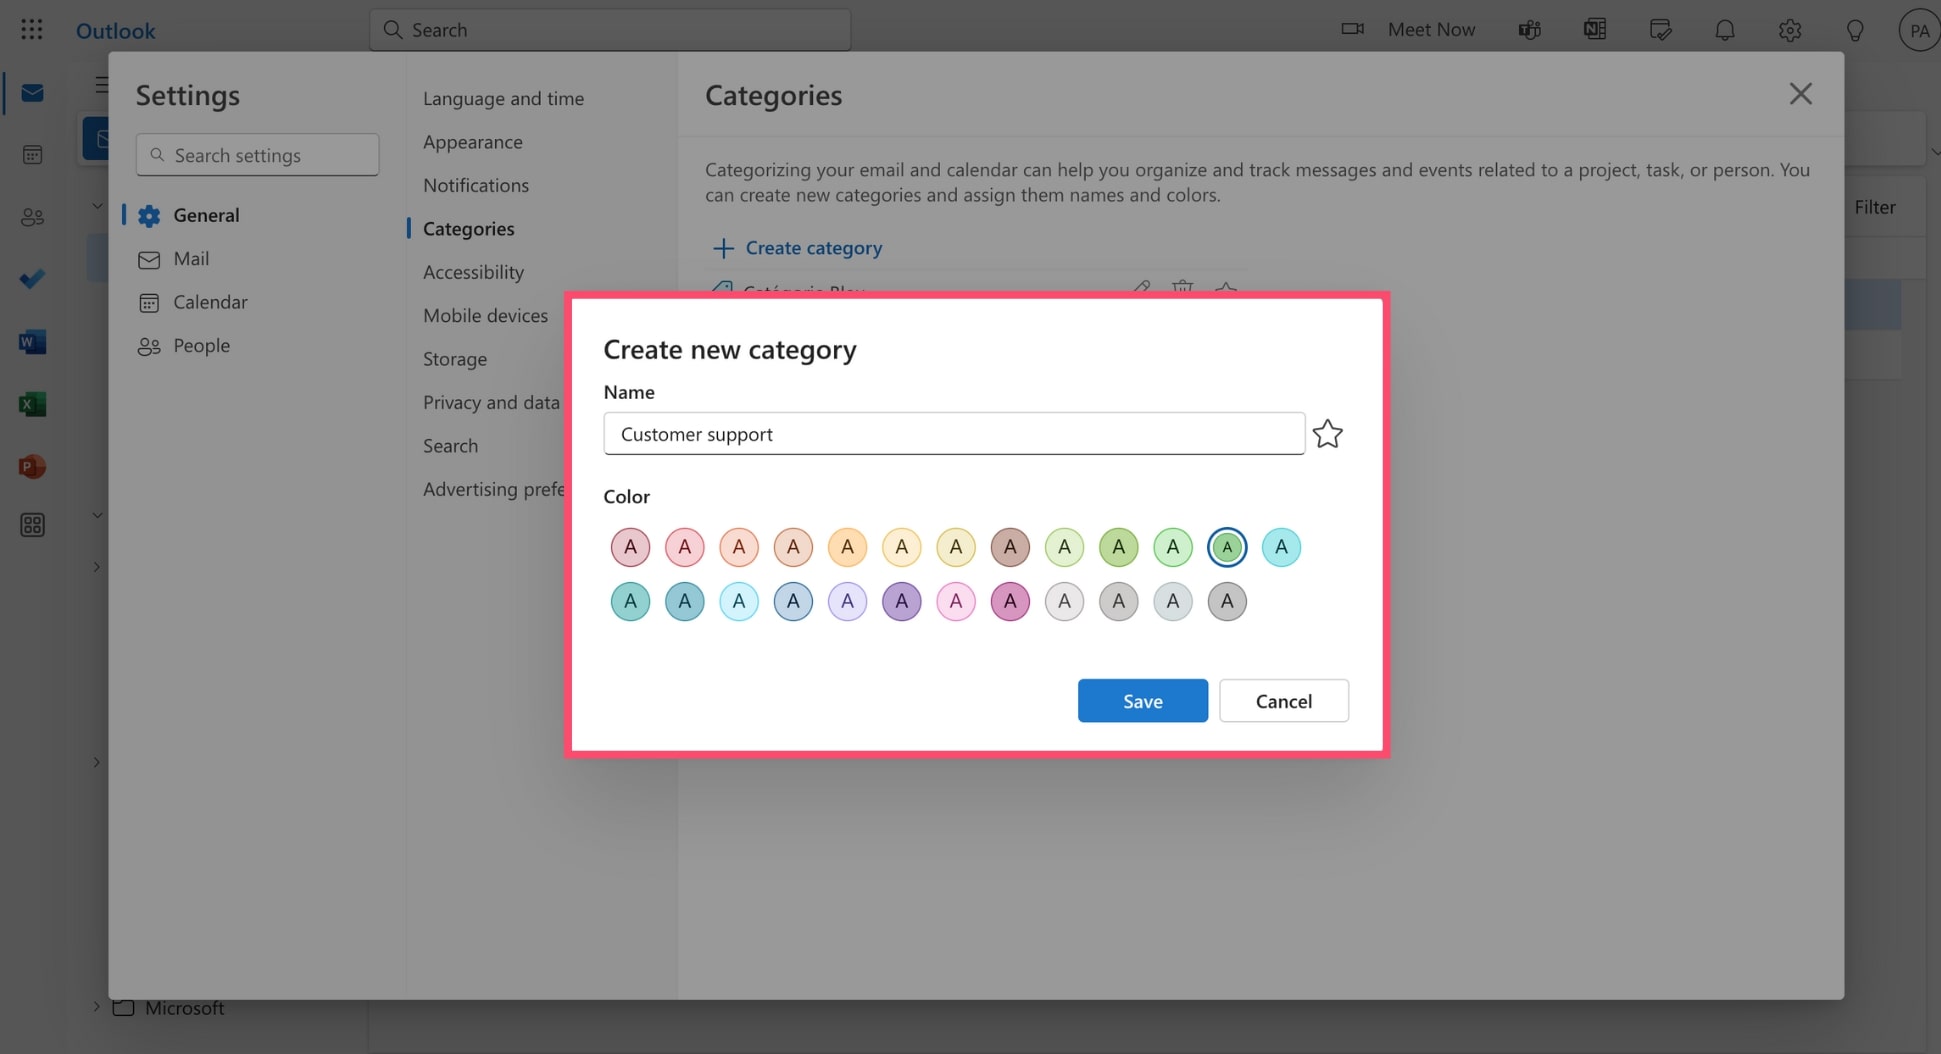
Step 4: Click Create category or edit an existing category.
Step 5: Name your category. Pick a color. Then click Save.
Step 6: Once you have your categories set up, you can apply them to emails within your folders for an extra layer of sorting. To do so, open a folder, right click an email, hover over Categorize and select the correct category.
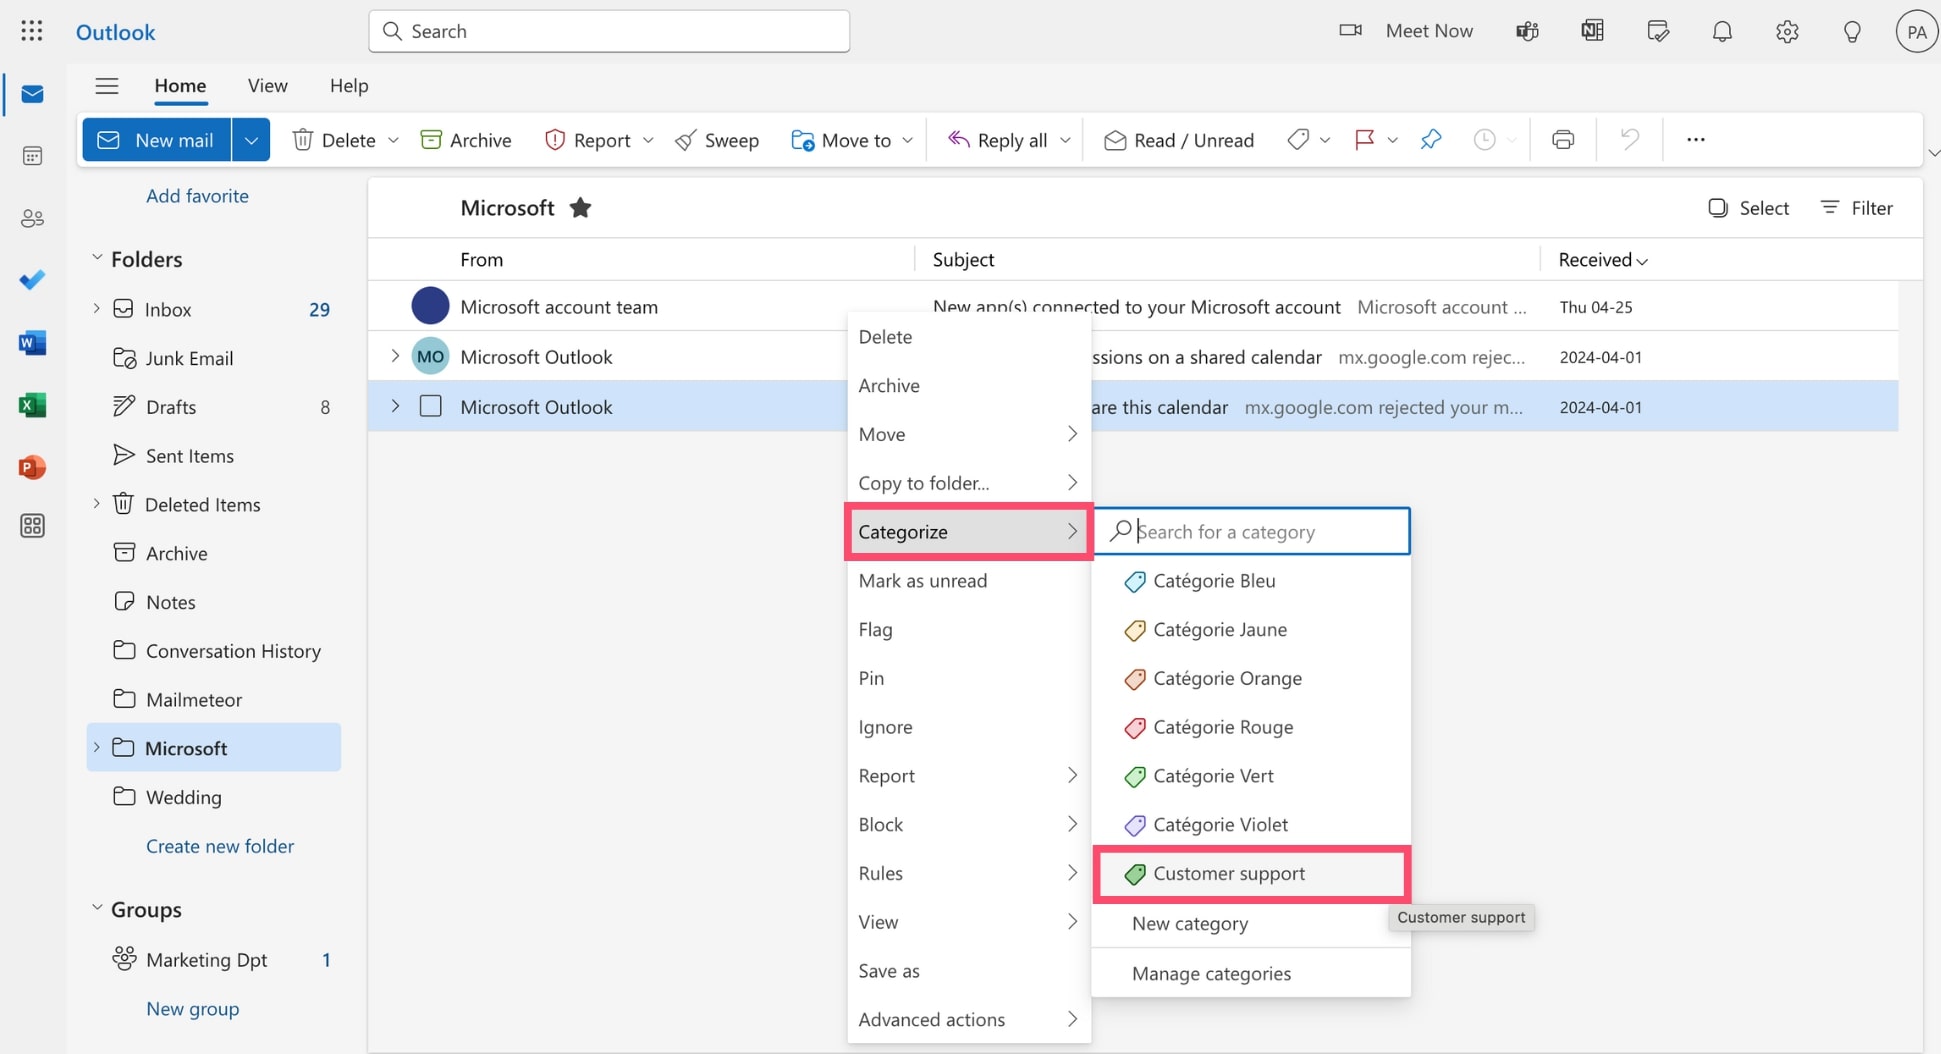
And done. You’ve just assigned a category to an email stored in an Outlook folder. This dual approach should allow you to quickly visualize different types of emails based on color, even within the same folder.
5. Move a folder
By default, Outlook organizes your folders alphabetically, which means a folder called AAA is going to show up before one called ZZZ. But here’s the cool part: you can rearrange them any way you like.
I like to bump my most important folders to the top so I can get to them quickly. Feel free to shuffle yours around in a way that works best for you. Here’s how to move a folder in Outlook.
Step 1: Open Outlook.
Step 2: In the folder list, click and hold the folder name.
Step 3: Then drag the folder to its new location.
That’s it. You can now rearrange your folders by dragging and dropping them. And the good news? This works within a single mailbox as well as between different mailboxes and Outlook Data Files (.PST).
6. Alphabetize folders in Outlook
Got carried away and moved your folders around a bit too much? No problem. You can revert their order back to default (i.e. alphabetically) in just a few clicks. Here’s how to do it.
Step 1: Launch Microsoft Outlook.
Step 2: Go to the Folder tab.
Step 3: Under Clean Up, select Show All Folders A to Z.
All done. Your folders should now be back to normal. You can leave them in alphabetical orders. Or move them around some more.
7. Add a folder to Favorites
Are there some Outlook folders that you’re using every single day? In that case, you may want to add these folders to your Favorites. This Outlook feature allows you to bookmark your favorite email folders, making them easy to access at all times. Here’s how to add an Outlook folder to Favorites.
Step 1: Sign in to your Microsoft Outlook account.
Step 2: Click the three dots next to the name of your folder.
Step 3: Select Add to Favorites.

Easy, right? Your folder will now appear in the Favorites pan of your Outlook inbox, allowing you to access it faster and more easily.
8. Rename an Outlook folder
Made a typo? Or want to edit the name of an email folder? You can easily rename your folders in Outlook. Here’s how it works.
Step 1: Open Outlook.
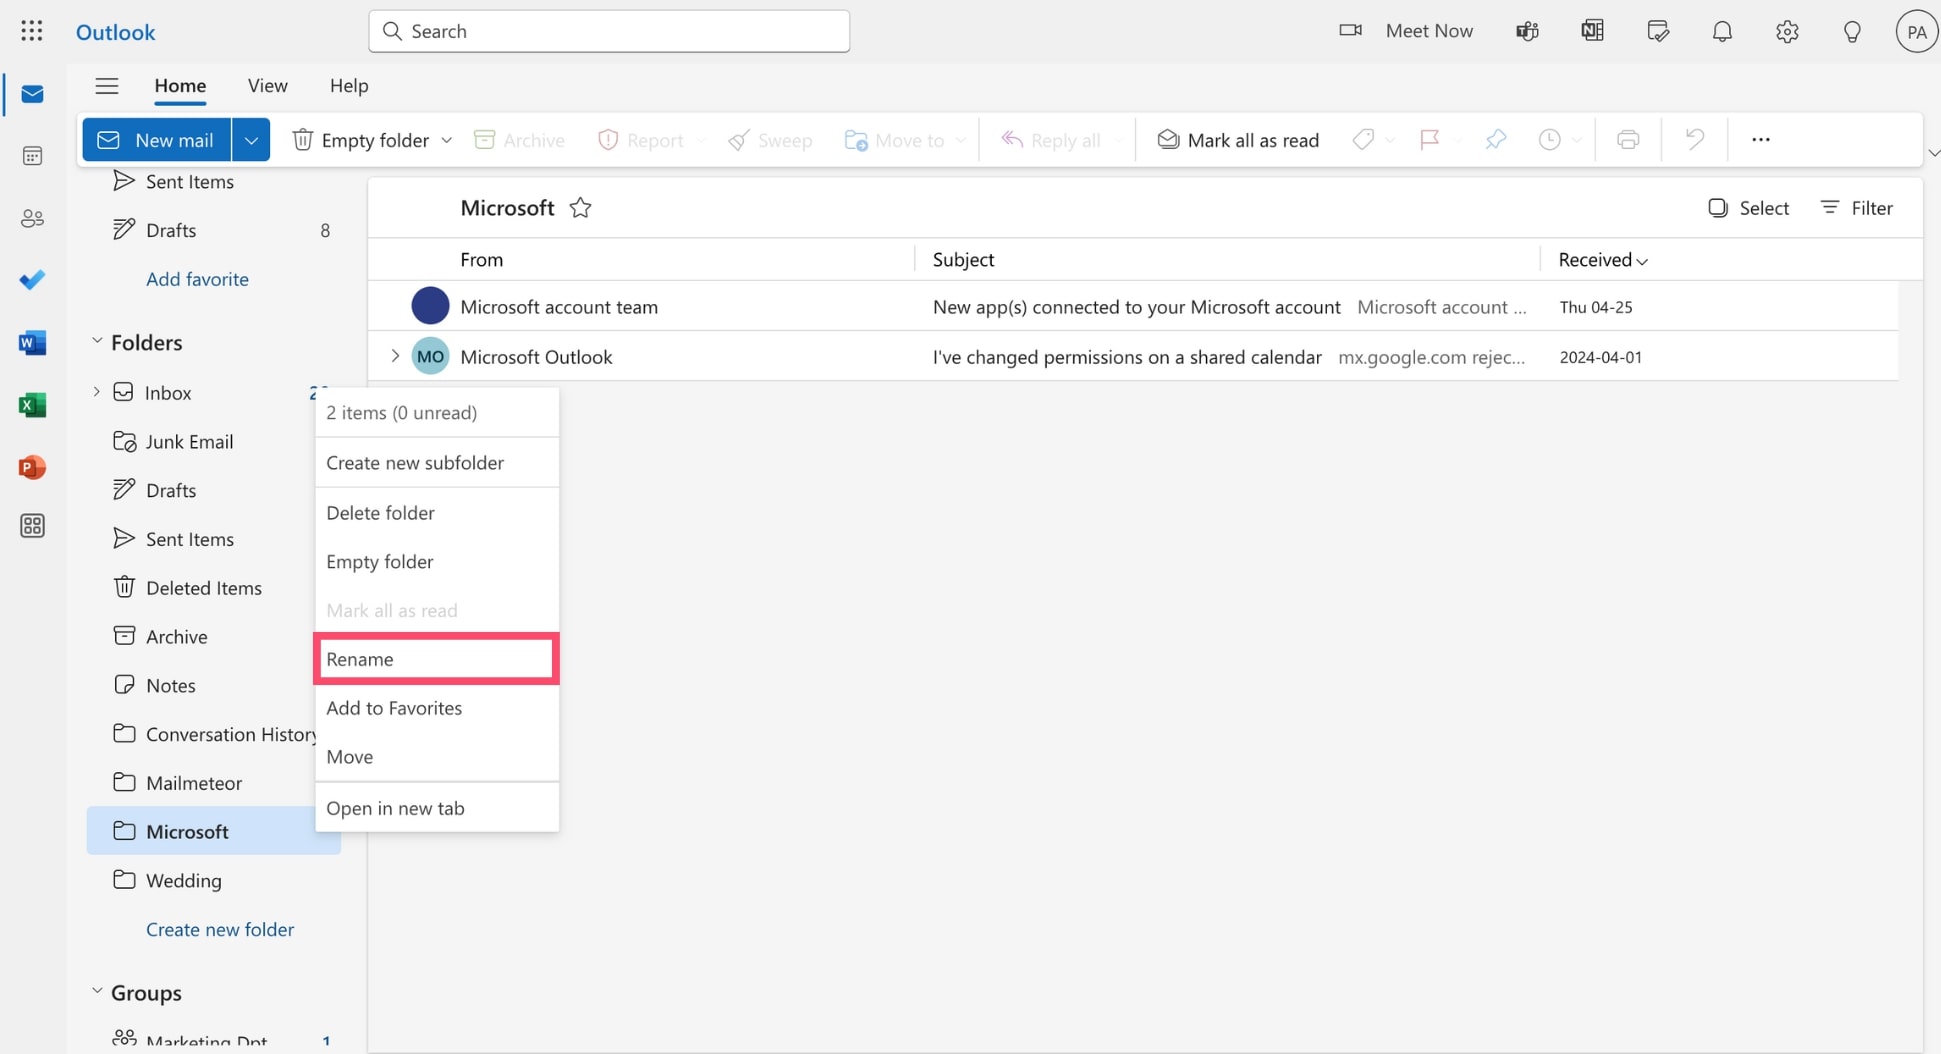
Step 2: Click the three dots next to the name of the email you want to rename.
Step 3: Select Rename.
Step 4: Edit the name of your folder. Then click Save.
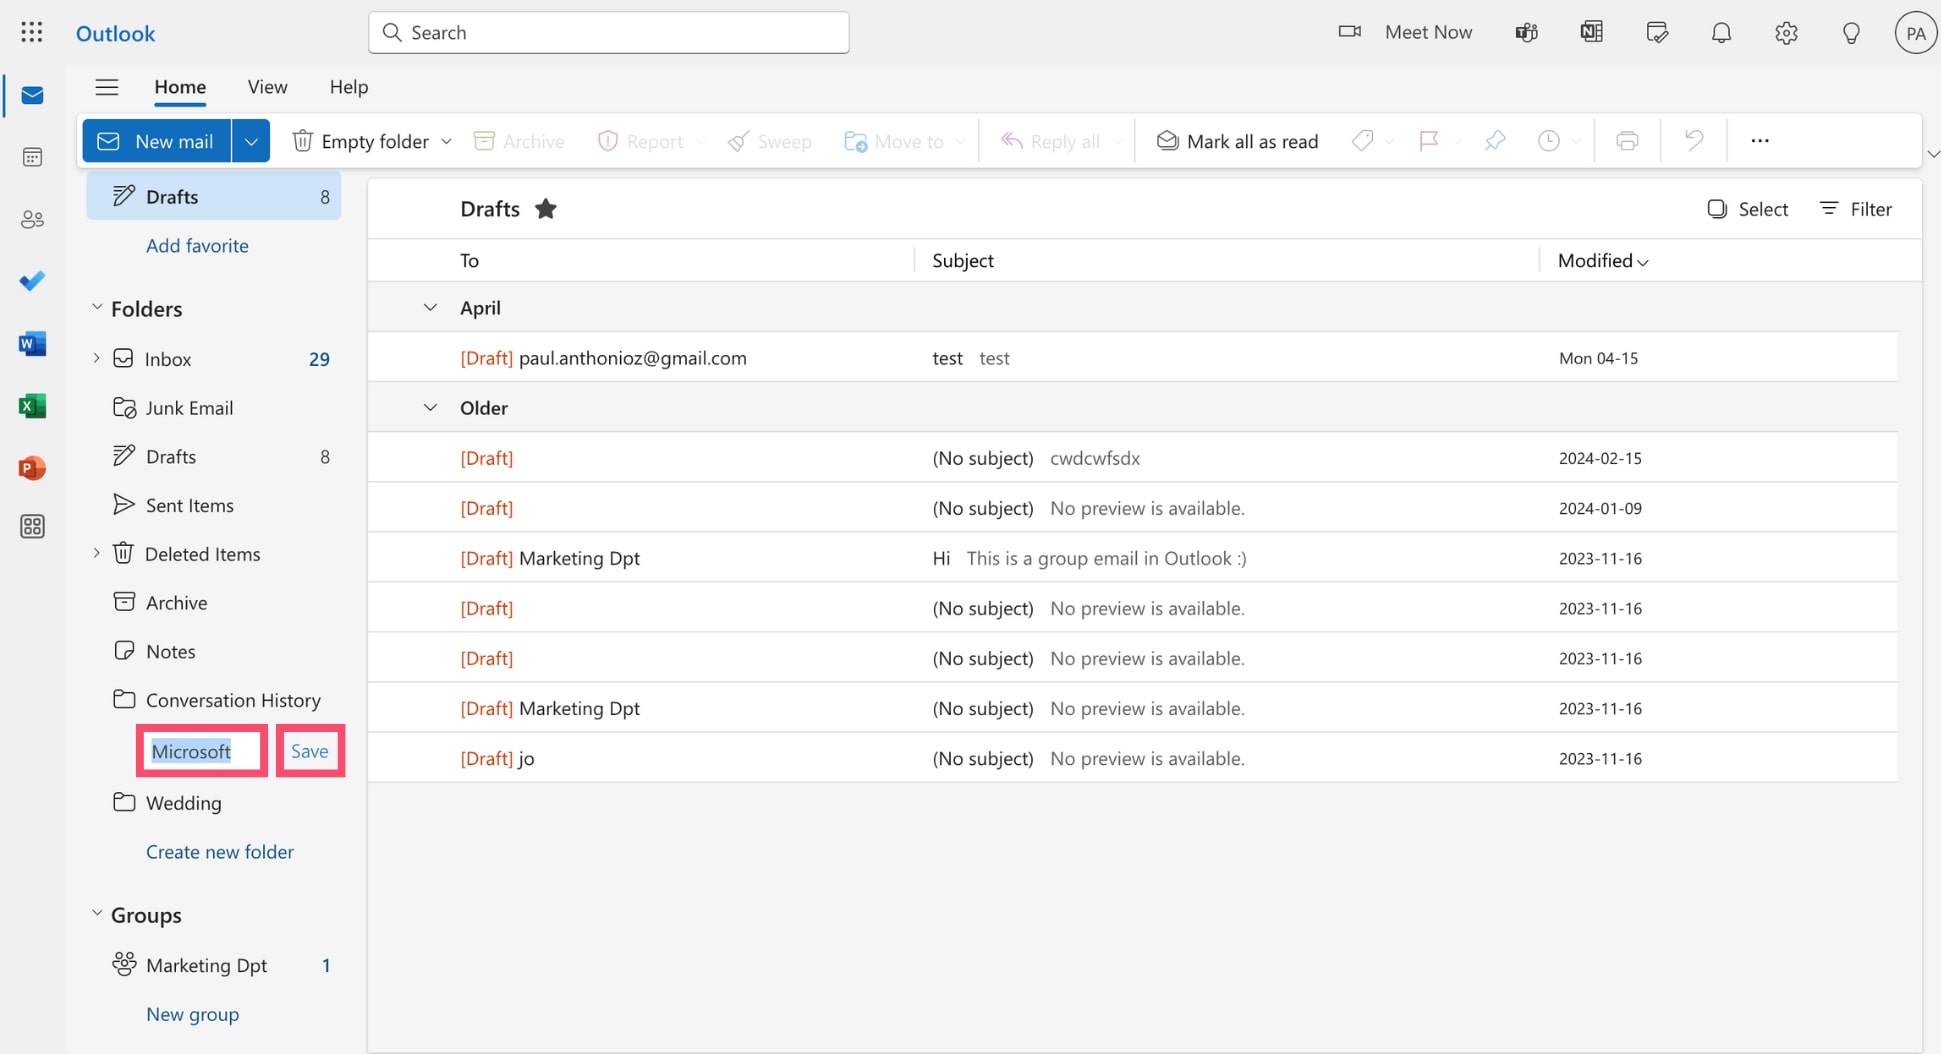
And done. You can rename your folders as many times as you want. Ideally, try to pick a name that’s easy for you to understand and accurately reflects the content of the folder.
9. Delete a folder
Lastly, if you want to get rid of a folder that you’re no longer using, you can delete it from Microsoft Outlook. Here’s how it works.
Step 1: Go to your inbox.
Step 2: Click the three dots next to the name of the folder you want to delete from Outlook.
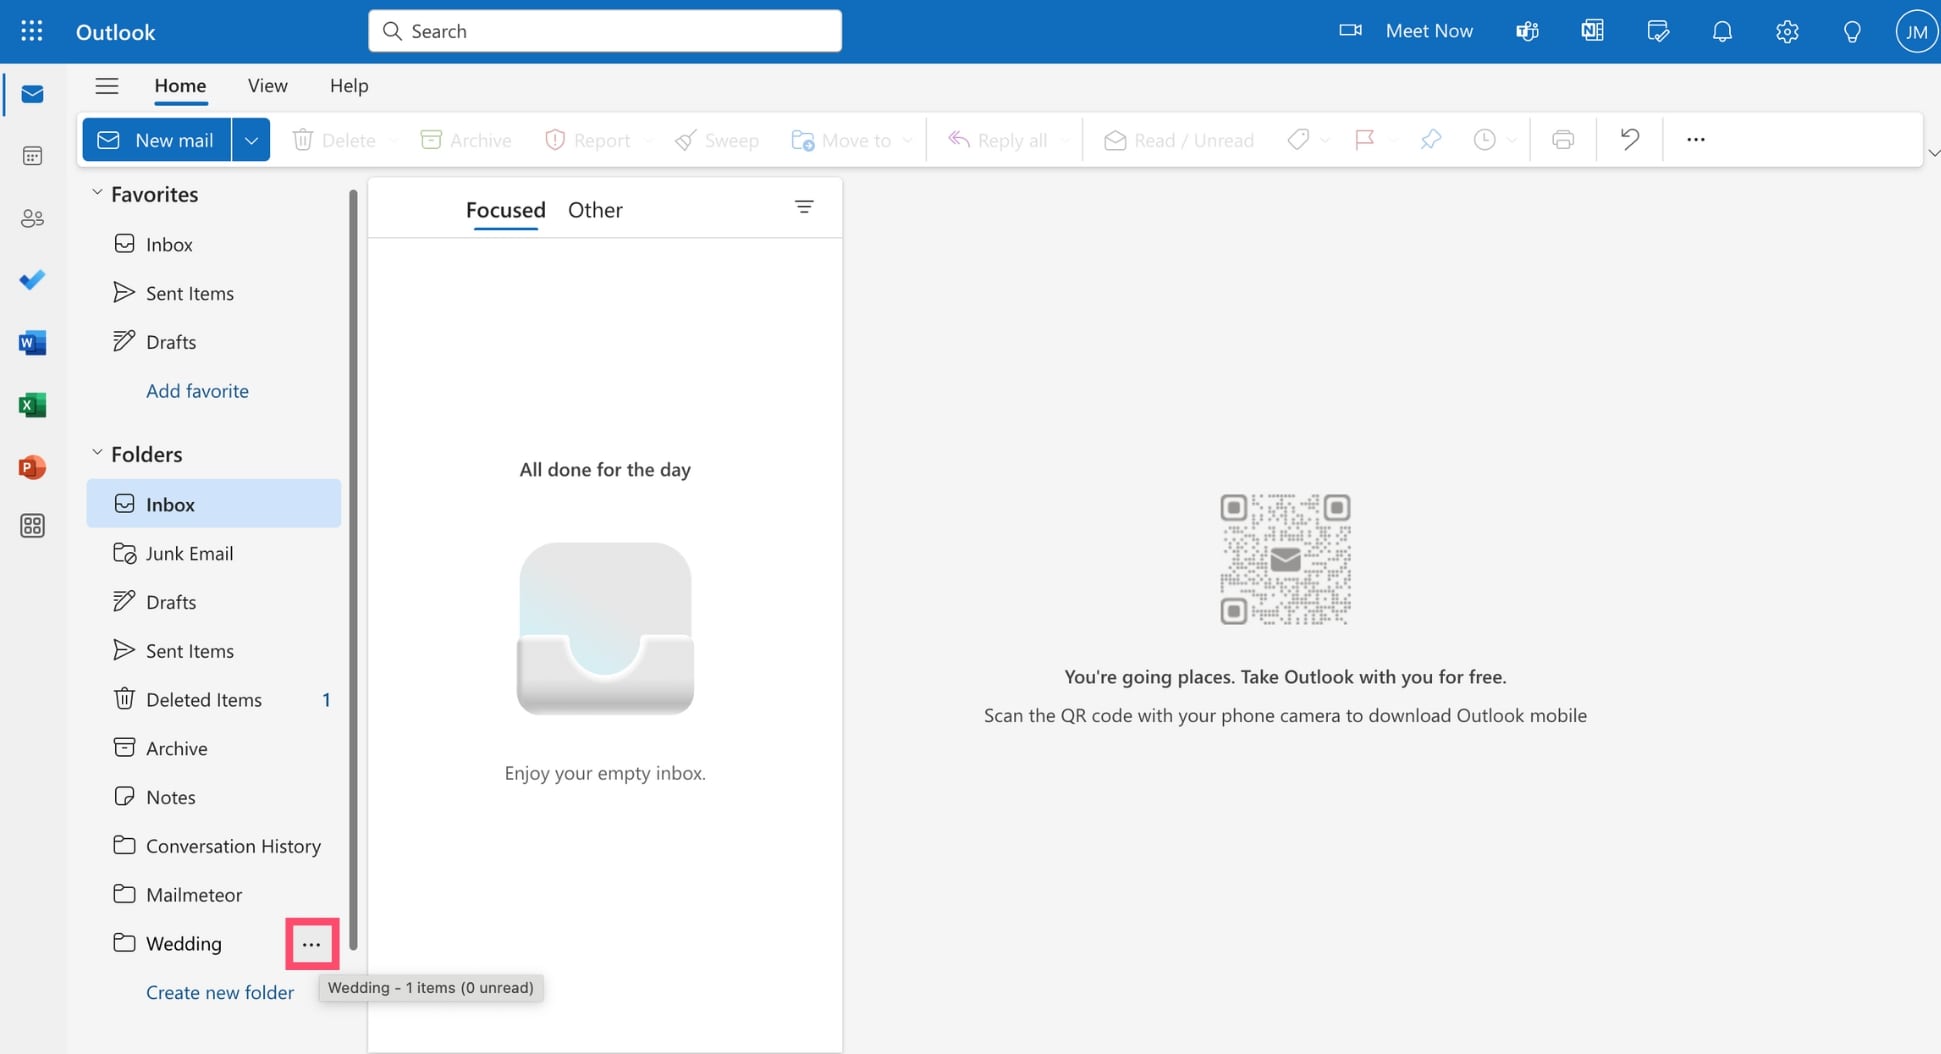
Step 3: Select Delete folder.

Step 4: To confirm, click OK.
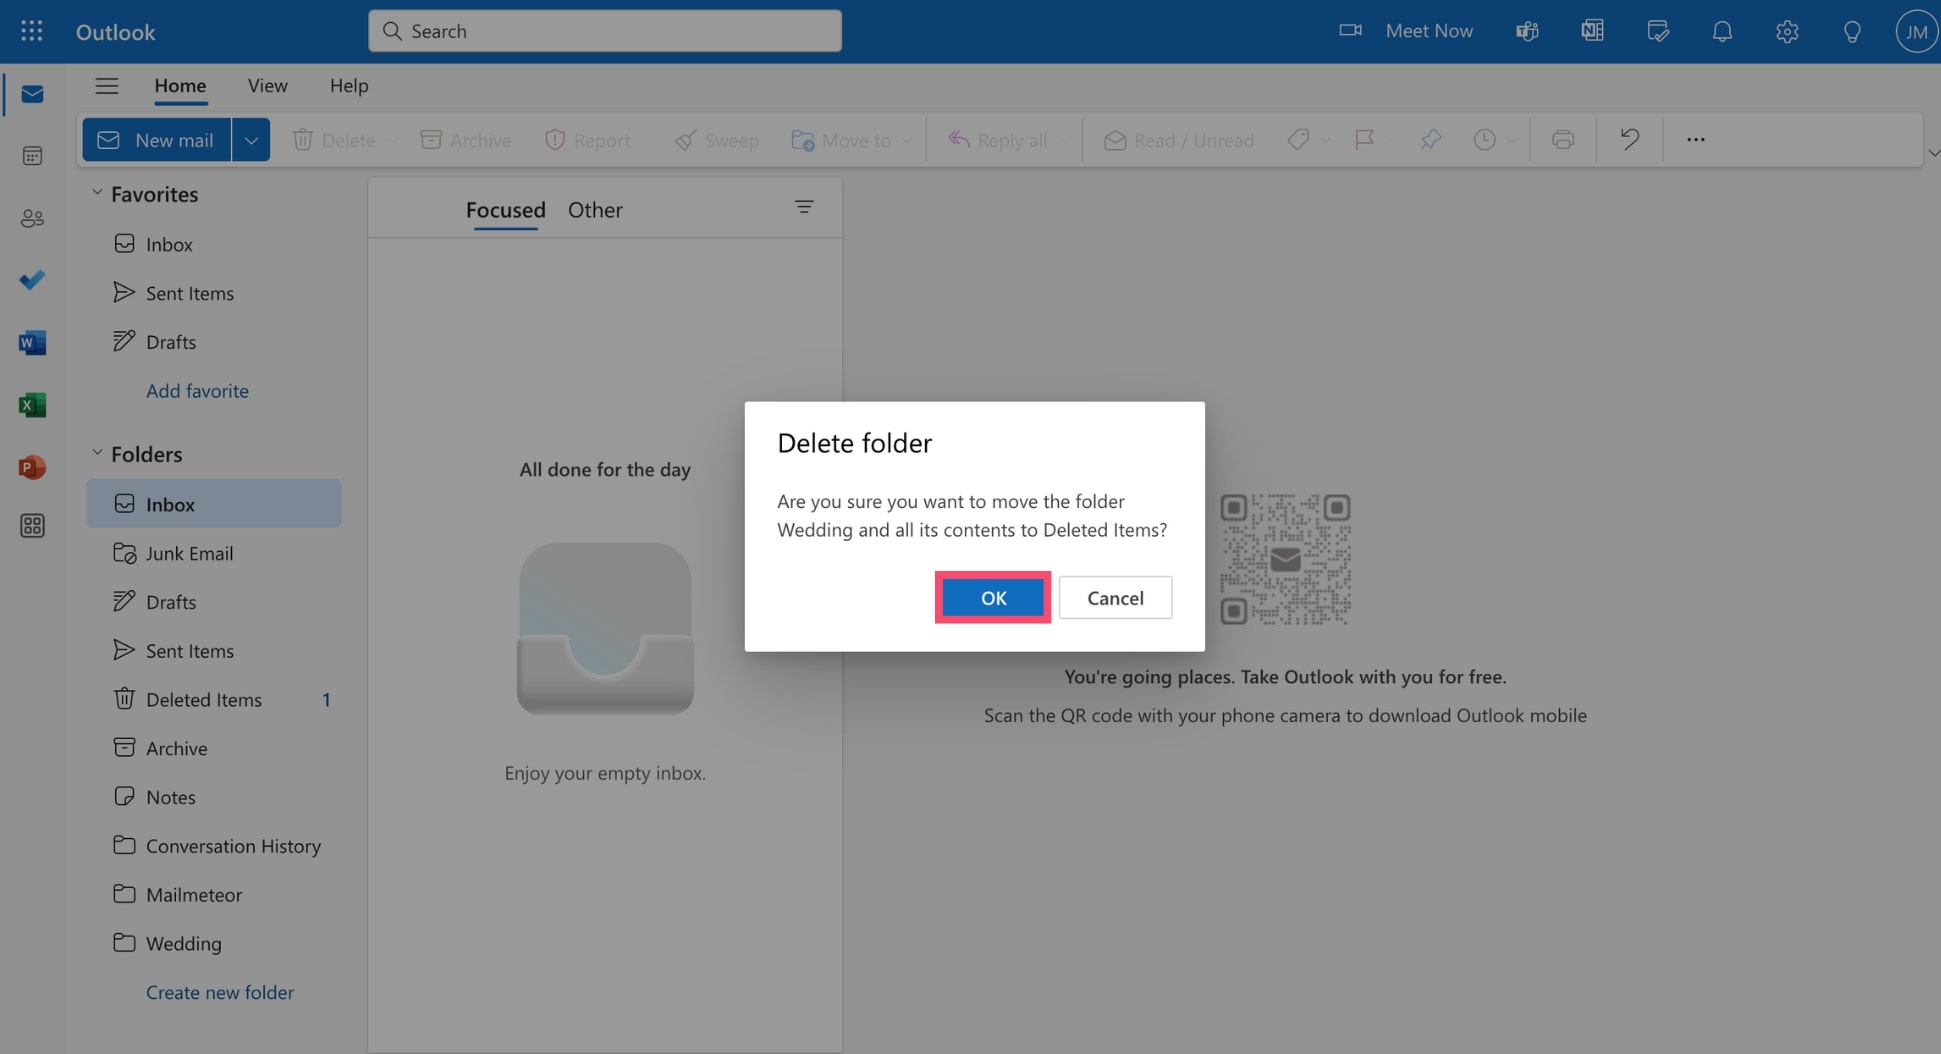
And voilà. This folder has been removed from your inbox. However, you can still find it in your Deleted Items folder.
To delete this folder and its content permanently, go to Deleted Items, right click the folder, and choose Delete again.
Declutter your Outlook inbox with folders
Folders are a powerful feature that helps you manage emails more efficiently and stay on top of your inbox. In this article, we’ve shown you how to create a folder in Outlook to start your journey towards a cleaner inbox.
We’ve also explained how you can transform your email management by combining folders with rules to sort your emails automatically. And how to apply categories to add an extra layer of organization to your folders in Outlook.
Lastly, we’ve seen how to rename, move, and delete your folders. So that you can create a hierarchic structure that perfectly fits your needs. Follow these tips, and you’ll regain control over your inbox in no time at all.
And if you want to take things one step further, you can try our Outlook add-on for free. This lets you dispatch mass personalized emails directly from your Office 365 or from Excel, allowing you to save time and send better emails.
FAQS – Outlook folders
What are the benefits of using folders in Outlook for email management?
Using folders in Outlook can be a game changer. It helps you keep your inbox under control and slice through the clutter by letting you group emails by project, client, or any priority you choose. This makes finding emails a breeze, allowing you to save time and stay on top of your tasks. No more digging through a messy inbox!
What is the shortcut for creating a new folder in Outlook?
You can create a new folder in Outlook even faster using this little-known keyboard shortcut : Ctrl+Shift+E. Want more shortcuts to 10x your email productivity? Take a look at our special guide on Outlook shortcuts.
How can I move multiple emails to a folder in Outlook quickly?
To quickly move multiple emails in Outlook, select them by holding Shift for a consecutive range or Ctrl for specific emails. Then, drag and drop them into your desired folder, or right-click, select Move, and choose the target folder. You can also use the Move to Folder button on the Home tab to organize your Outlook inbox even faster.
What is the difference between folders and categories in Outlook?
The difference between folders and categories in Microsoft Outlook lies in how they help organize and manage your emails:
-
Folders in Outlook are used to physically separate emails into different locations within your email client. Think of folders like actual folders in a filing cabinet, where each one can contain multiple emails organized by topic, project, or any other criteria you choose. You can create, rename, move, or delete folders as needed to customize your organizational structure.
-
Categories, on the other hand, are more like labels that you can assign to your emails, calendar events, and tasks within Outlook. Categories allow you to tag items with certain colors and keywords, enabling you to sort and view emails and other items grouped by these categories without moving them from their original location. This means an email can belong to multiple categories at once.
To sum up, folders can be used to physically organize and separate your emails, while categories provide a way to visually sort messages without altering their location. You can combine both methods for a more granular approach.
How to create a folder in Outlook for specific emails automatically?
You can automatically move specific emails to a folder thanks to a feature called Rules. In Outlook, rules allow you to create filters and automate certain actions. You can automatically delete messages, transfer them, or move them to a folder. To create a new rule, right click a message, and select Rules > Create Rule. Then name your rule, add a condition, and select Move to as the action. Lastly, choose the folder where you want to automatically send these emails.


