Looking for a simple way to stand out in crowded inboxes? In this quick guide, we’ll show you how to create personalized images in bulk and add them to your cold emails to get more opens, clicks, and replies.
Over the past few years, a growing number of email marketers and sales reps have been experimenting with tailored visuals.
Their idea was to create personalized visuals to surprise their recipient, capture their attention, and make them feel special.
This process used to require a lot of effort and resources. But with today’s tools, it can be automated almost completely.
In this quick guide, we’ll show you how to create personalized images for your cold emails one step at a time.
And most importantly, we’ll explore how this tactic can help you boost the engagement rates of your outreach campaigns.
Here’s what we’ll cover:
- Why use personalized images in cold emails?
- Can personalized images have a negative impact?
- How to add personalized images to cold email campaigns?
- Best practices to boost engagement rates with personalized images
- 3 high-ROI examples of cold emails with customized visuals
Sounds good? Then let’s dive in.
Why use personalized images in cold emails?
Your prospects receive dozens of cold emails every day, making it hard to cut through the noise. To grab their attention and increase your chances of getting a response, you need to stand out. This is where personalized images come in.
Here’s how personalized images can boost your cold emails:
- Capture attention: A personalized image catches the eye, especially in a crowded inbox. People are naturally drawn to visuals, and when they see something tailored for them, it piques their interest even more.
- Create a memorable impression: By including a customized image, you can create a refreshing experience that sets you apart from generic emails. This helps your message stick in their minds long after they’ve read it.
- Connect on a more personal level: A well-crafted personalized image shows that you’ve put in the effort. It can make your message feel more human and less like a mass marketing attempt, helping you build trust and a genuine connection.
- Increase engagement rates: Tailored images are more likely to spark a response. When prospects feel the message is directed specifically at them, they’re more inclined to click, respond, or take the action you want them to.
Can personalized images have a negative impact?
Custom images can help you get more clicks and responses, but they’re not a silver bullet. Like any tactic, there are potential drawbacks to adding personalized images to your cold email campaigns. Here are some issues to watch out for:
- Overused images: If your custom images feel too generic or templated, they can come across as insincere. Simply adding the recipient’s name to a stock photo might feel like a gimmick rather than a genuine attempt to connect.
- Low quality visuals: A hastily designed or low resolution image can reflect poorly on your brand. If your personalized image looks sloppy or amateurish, it may discourage prospects from engaging with your message.
- Increased email size: Large image files can significantly increase the size of your email, which may trigger spam filters or cause delivery delays. This can negatively impact your sender reputation.
- Blocked images: Some email clients block images by default, which means your personalized visuals may not display until the recipient manually enables them. This can cause people to miss out on your message.
Lastly, creating high-quality custom images can be time-consuming and resource-intensive, especially without a scalable process in place. And keep in mind that many executives still prefer text-based emails. So make sure to only use personalized visuals when they genuinely add value to your message.
How to add personalized images to cold email campaigns?
In this section, we’ll share our simple 3-step process to create custom visuals and add them to your cold email campaigns. This process is scalable and lets you send personalized images to hundreds of recipients in minutes.
1. Create custom images
For starters, let’s create personalized images in bulk using a simple tool called Canva. Go to Canva and create your account (if you don’t already have one).
To customize images in batches, you’ll need a premium plan. But don’t worry. Canva offers a 30-day free trial.
Create a new Canva document. Upload an image. Then add some text. Use placeholders for the elements you want to customize.
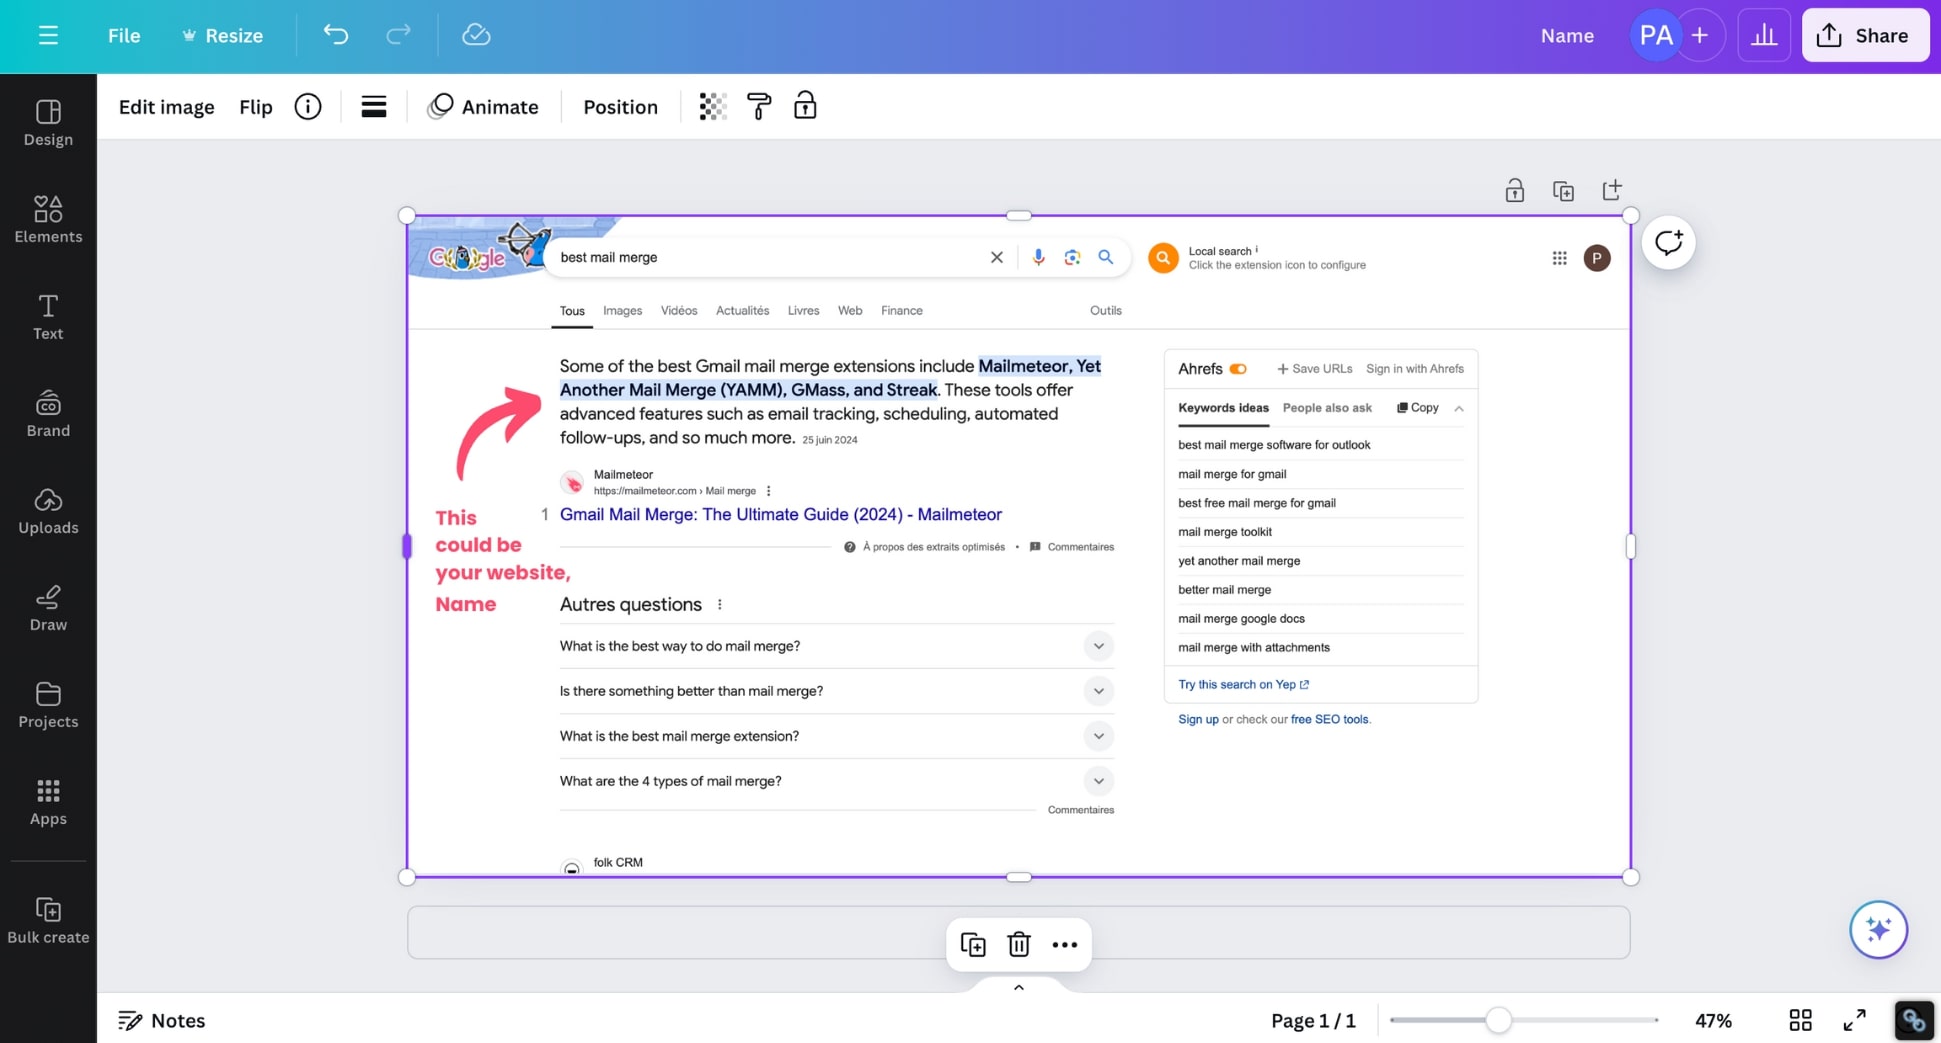
Next, click Bulk Create (in the sidebar on the right of your screen), and select Enter data manually.

Add information about your recipients to personalize the visuals. In this example, we’ve added the first names of our prospects.
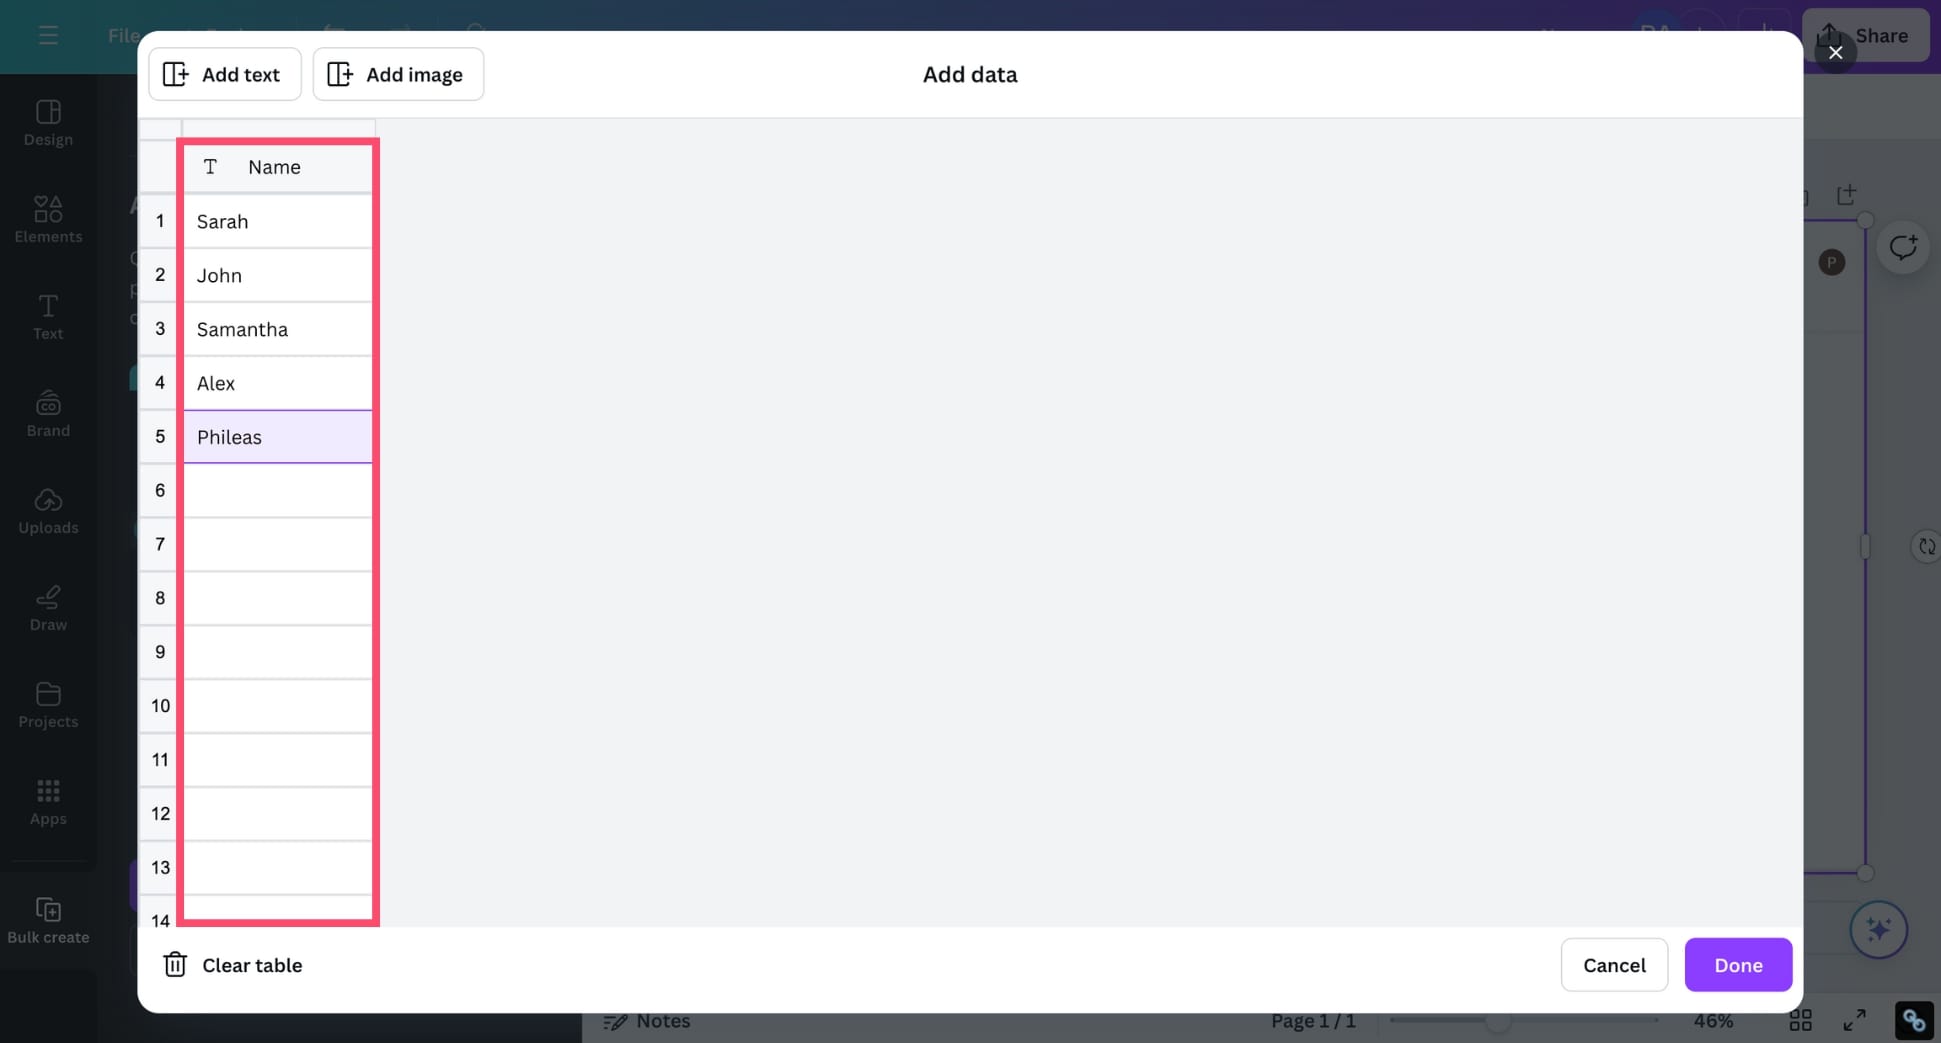
Click Done. Then click your placeholder, select Connect data, and choose the appropriate field.

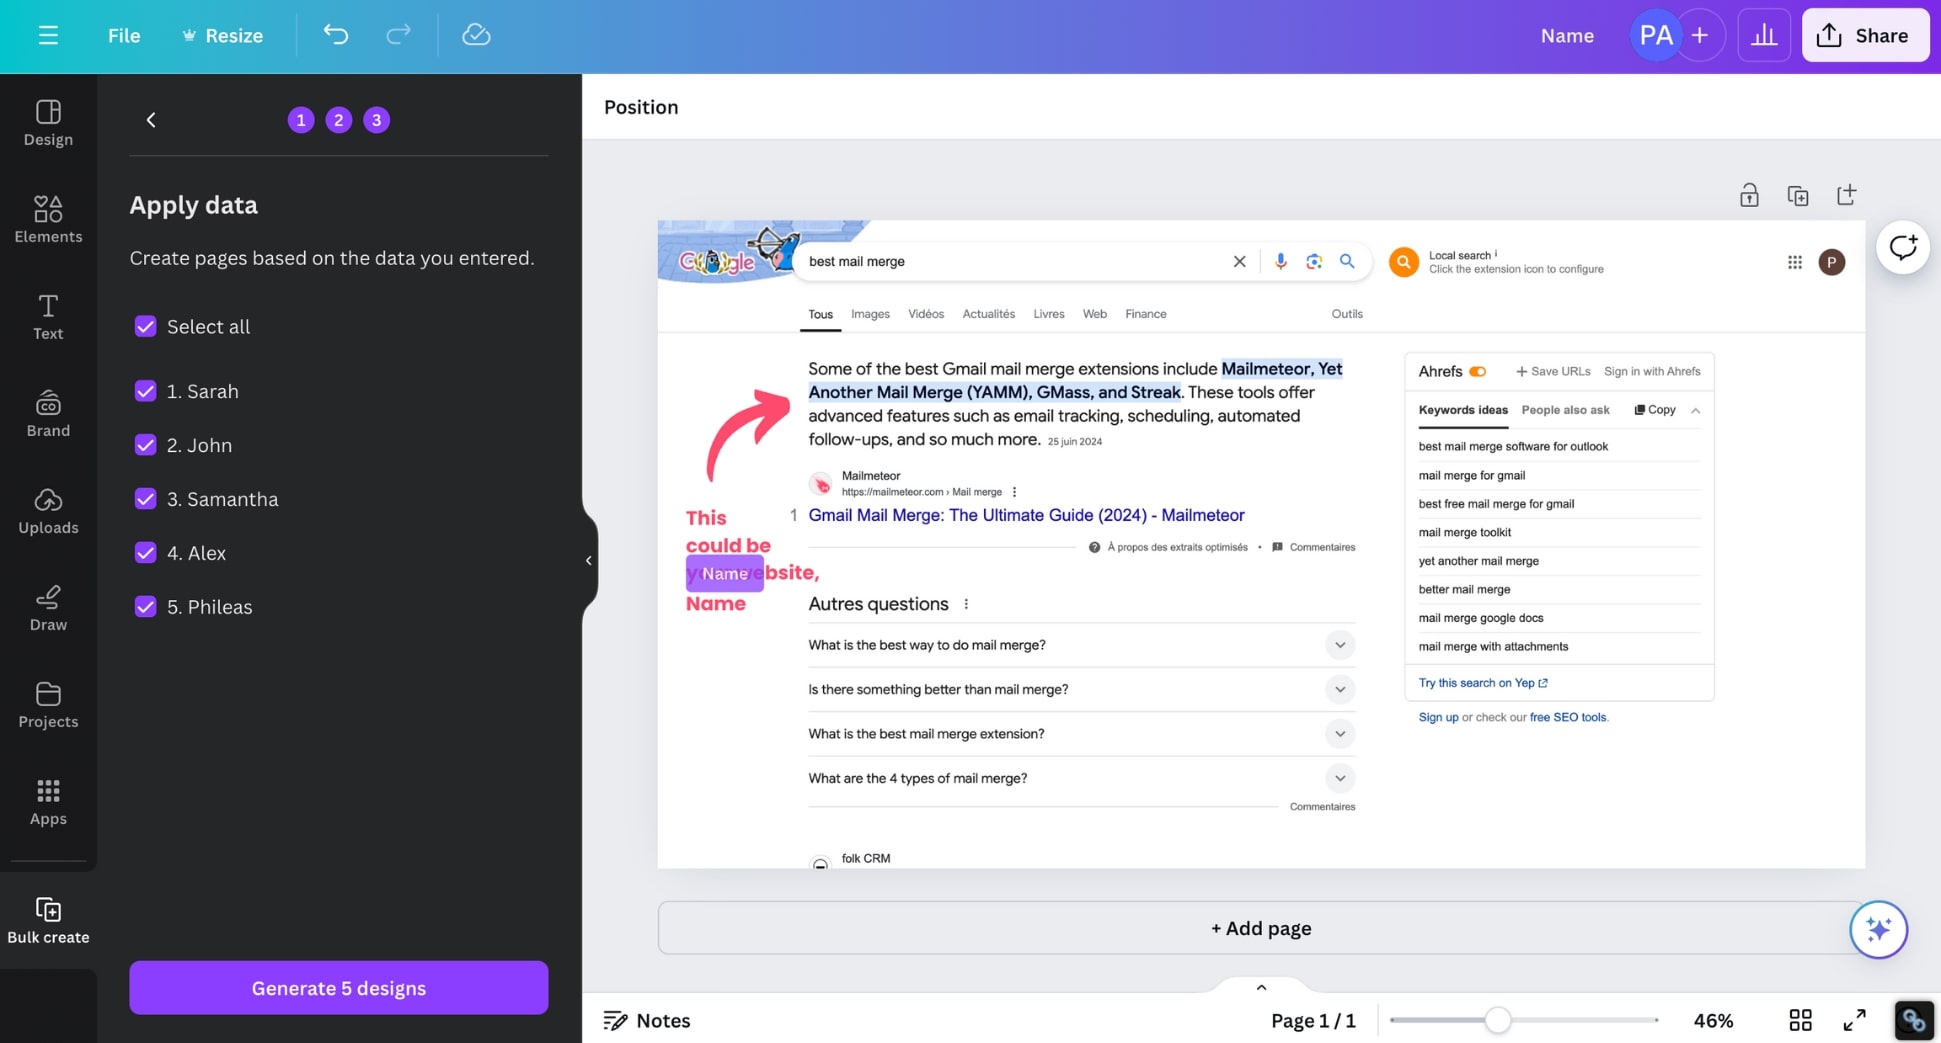
From there, click Continue, and select Generate designs. And voilà. Canva will automatically generate personalized copies of your image.
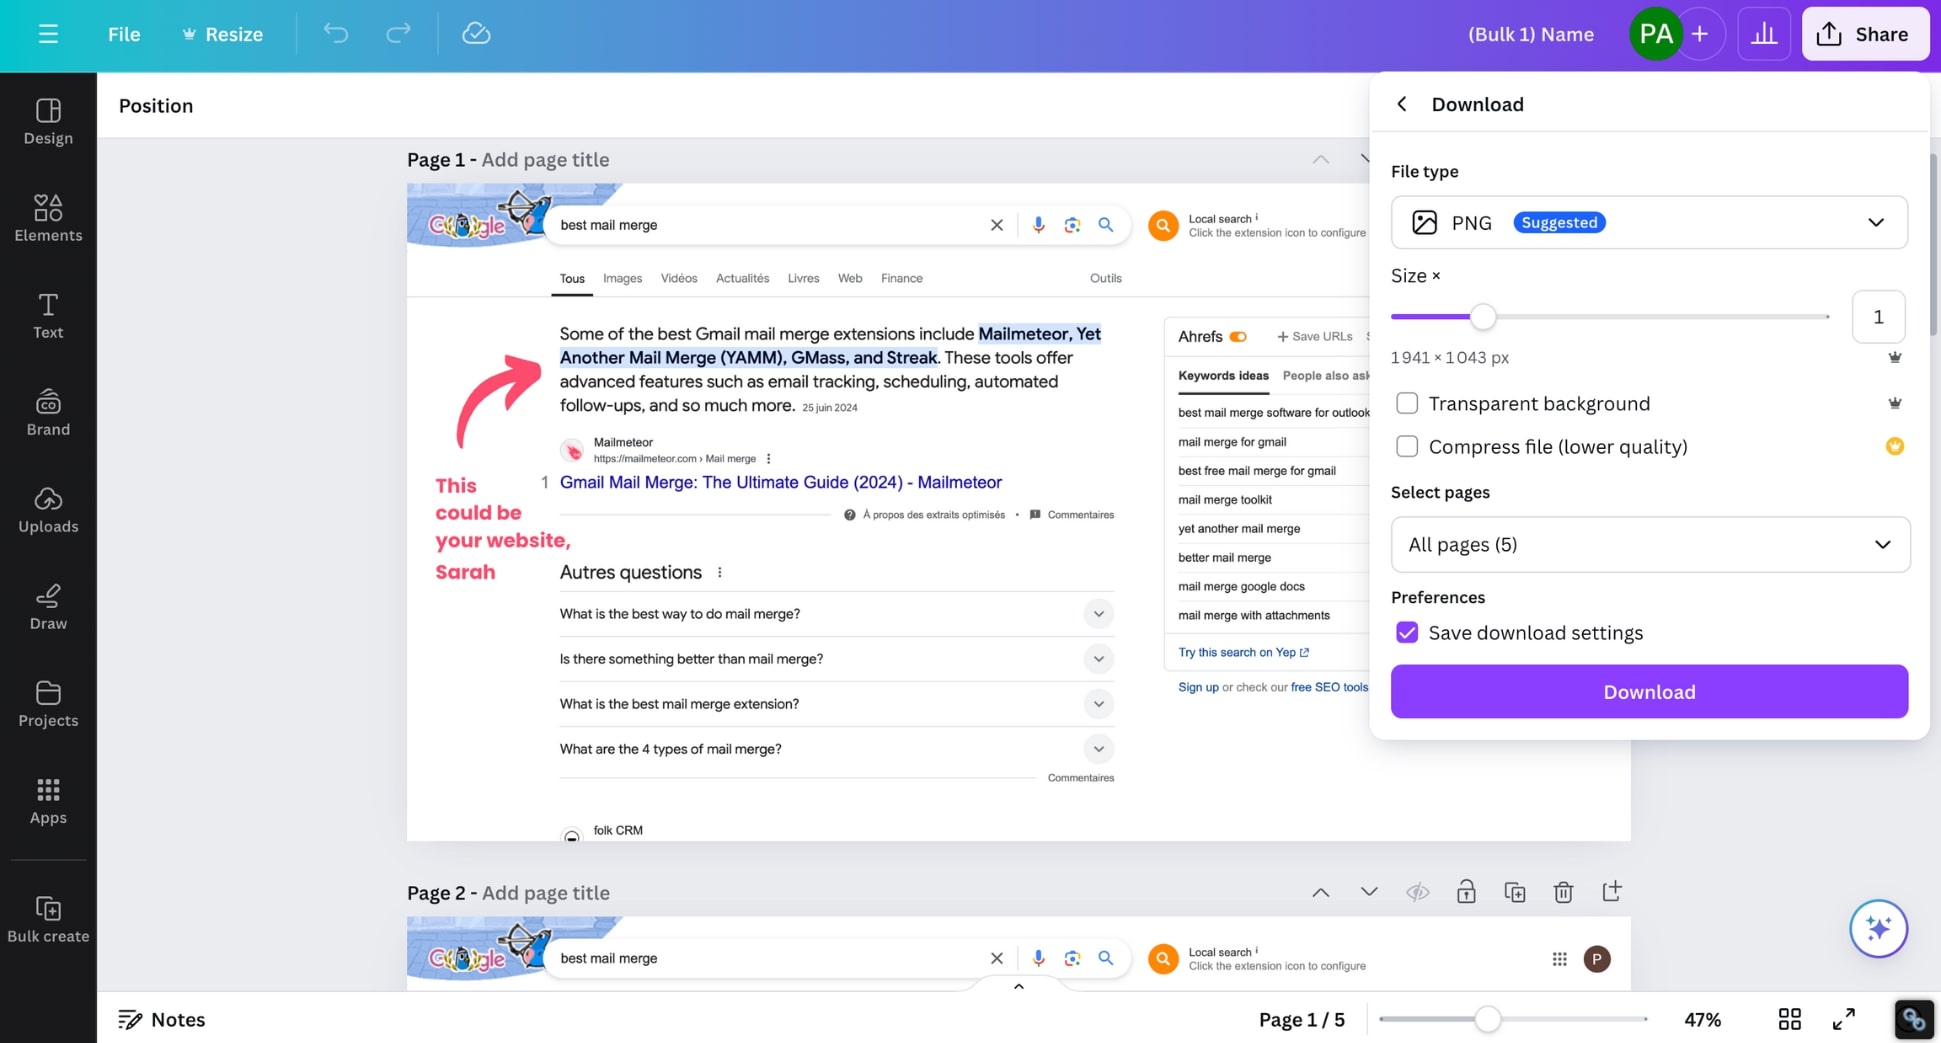
To export these images, click Share. Make sure to choose PNG as your file type. Then press Download.
2. Prepare your data source
Next, upload your custom images using free online services such as ImgBB or Imgur.
Create a Google Sheets spreadsheet with all the data required to personalize your cold emails.
Make sure to add a column named Image URL and paste the links to your custom images in front of each recipient.
If you’re using ImgBB, make sure to select HTML full linked. Then copy and paste the URL that ends with .png into your spreadsheet.
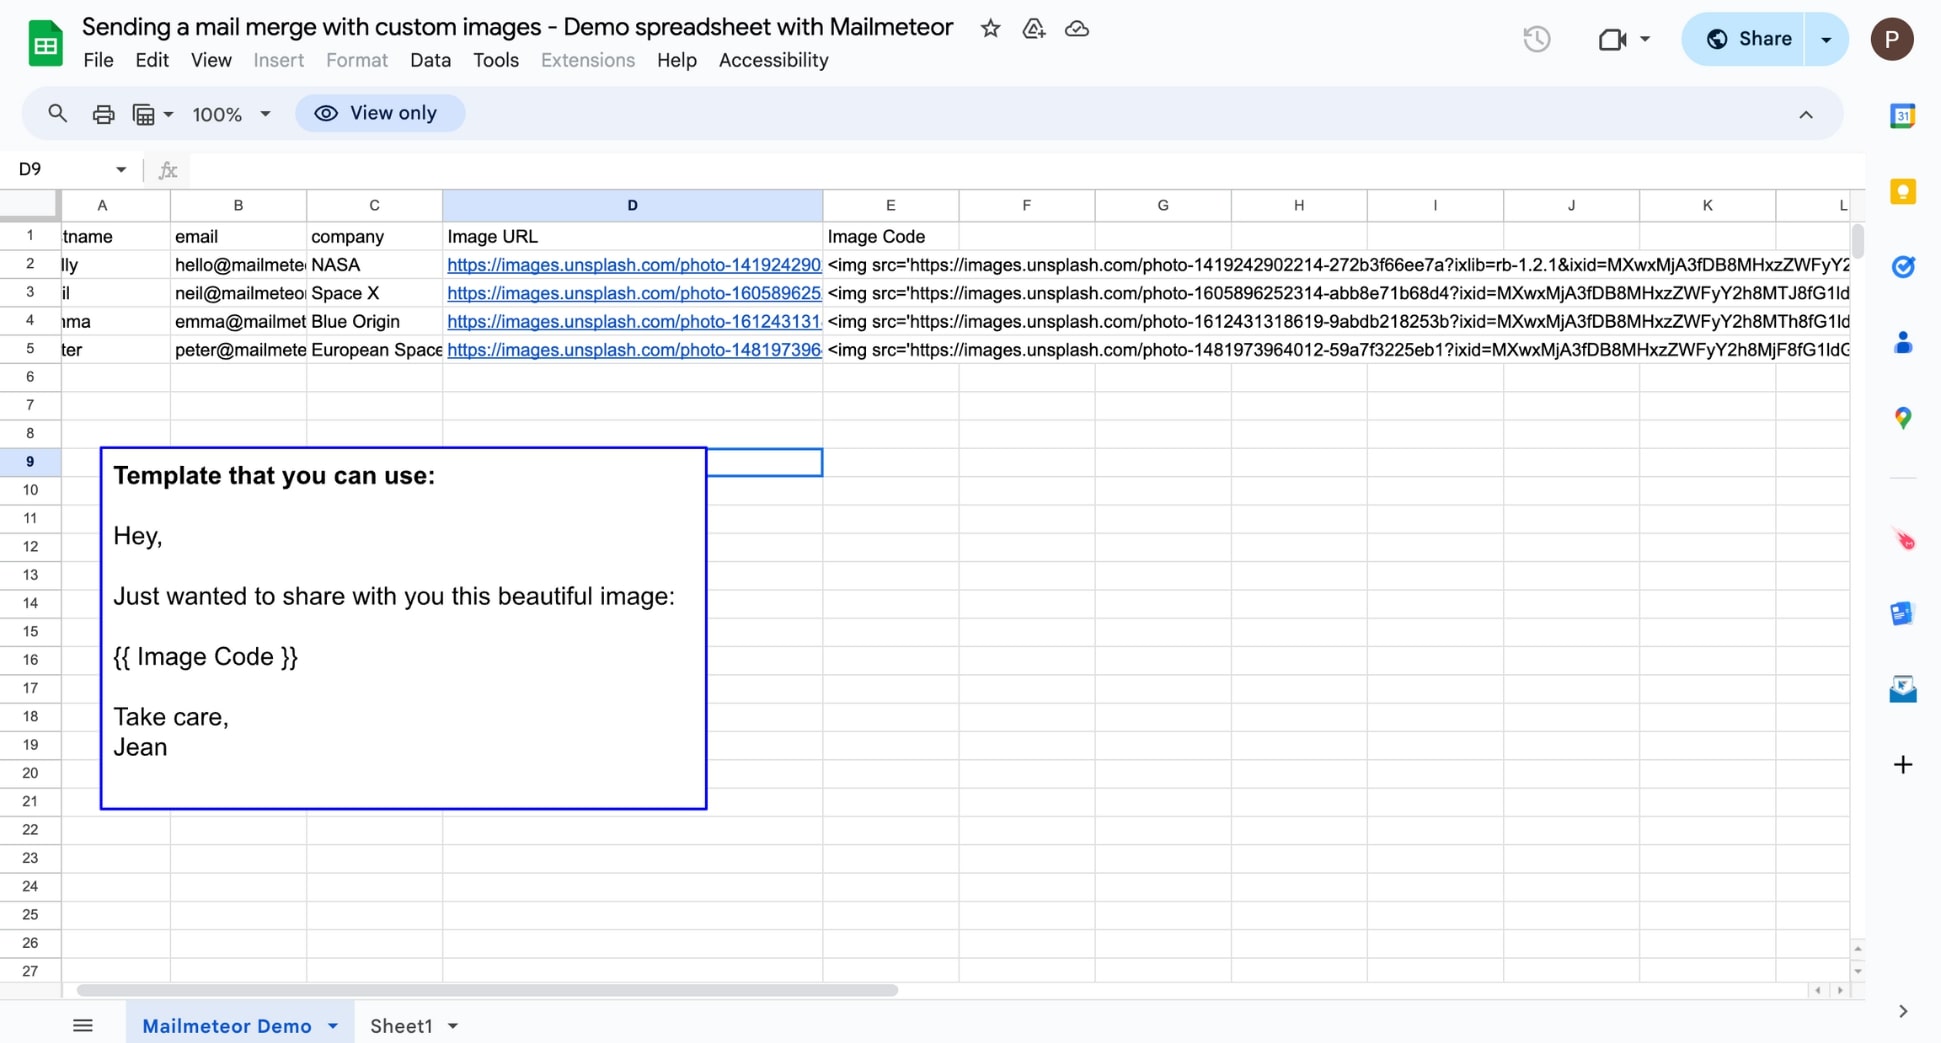
This is where things get a bit more tricky. Create a new column named Image Code and use this formula: =”“.
This lets you create an img HTML element that you can use to insert personalized images in your email campaigns.
3. Embed custom images in cold emails
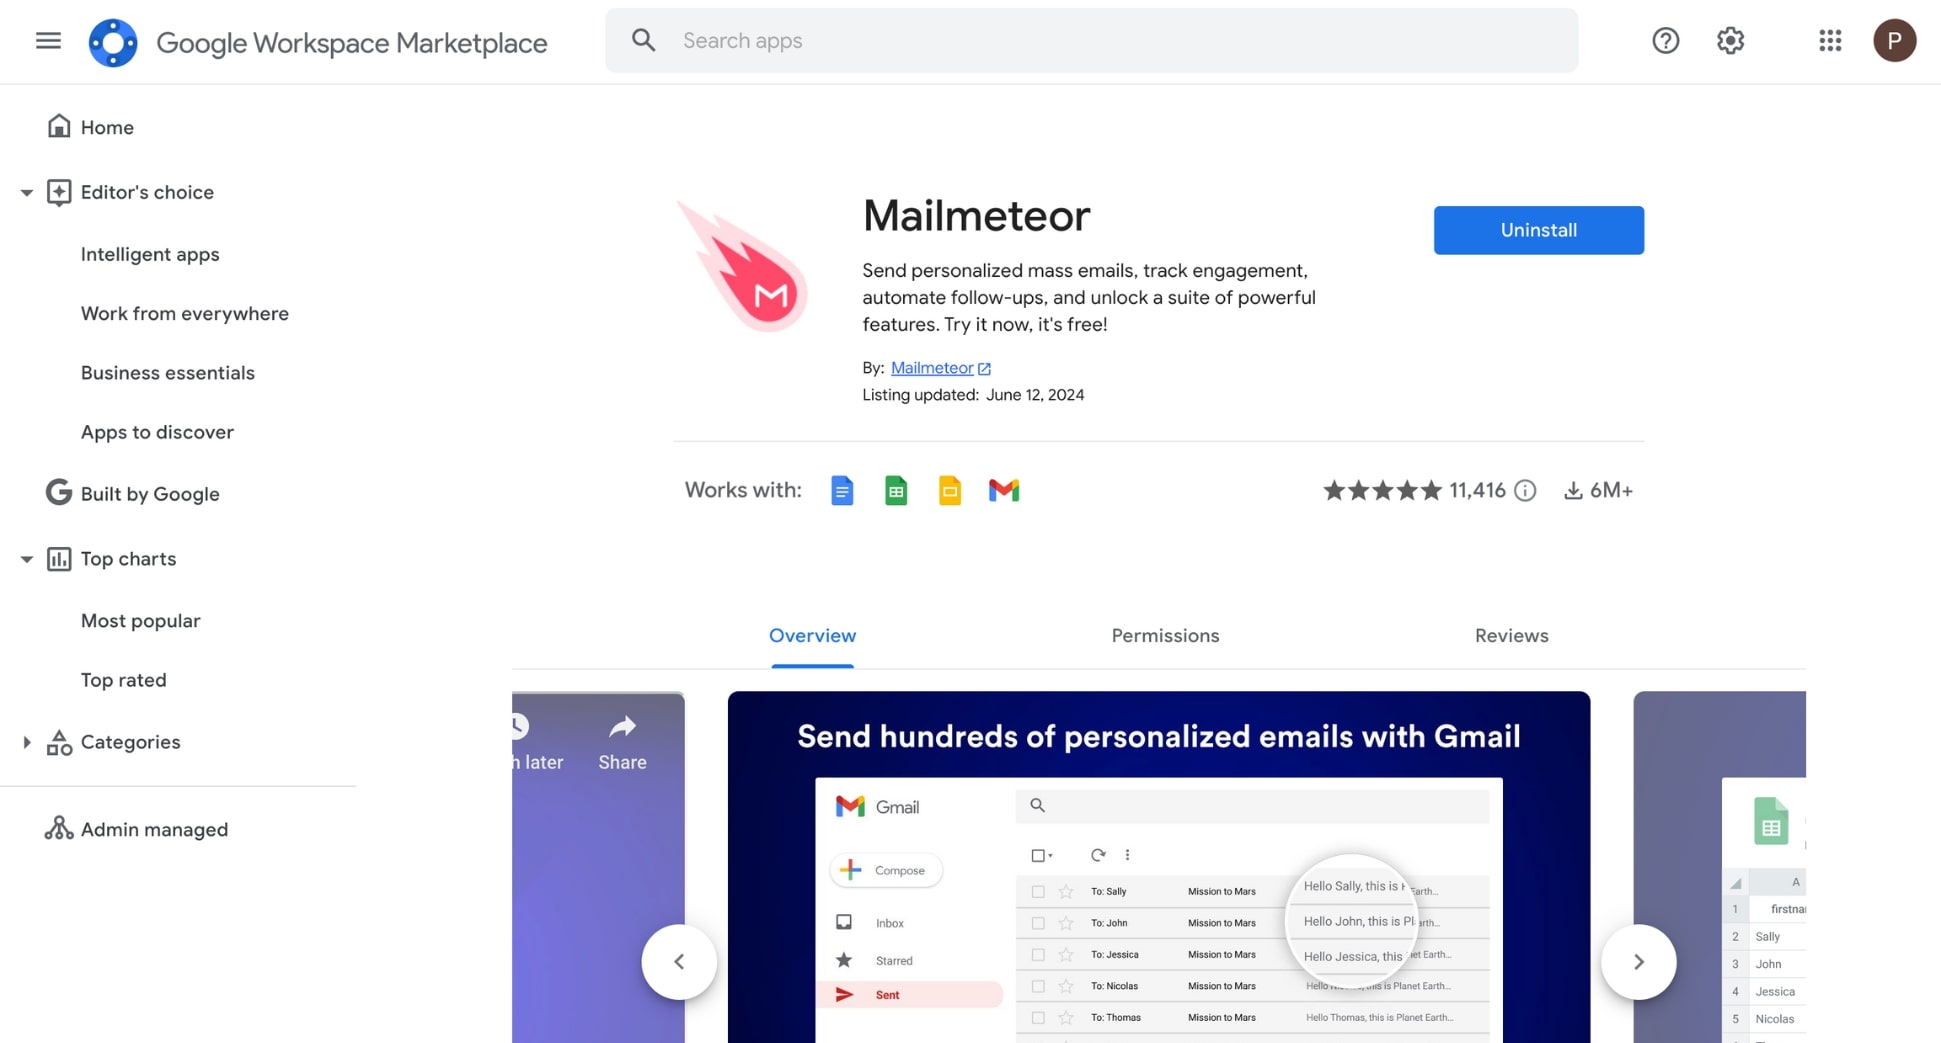
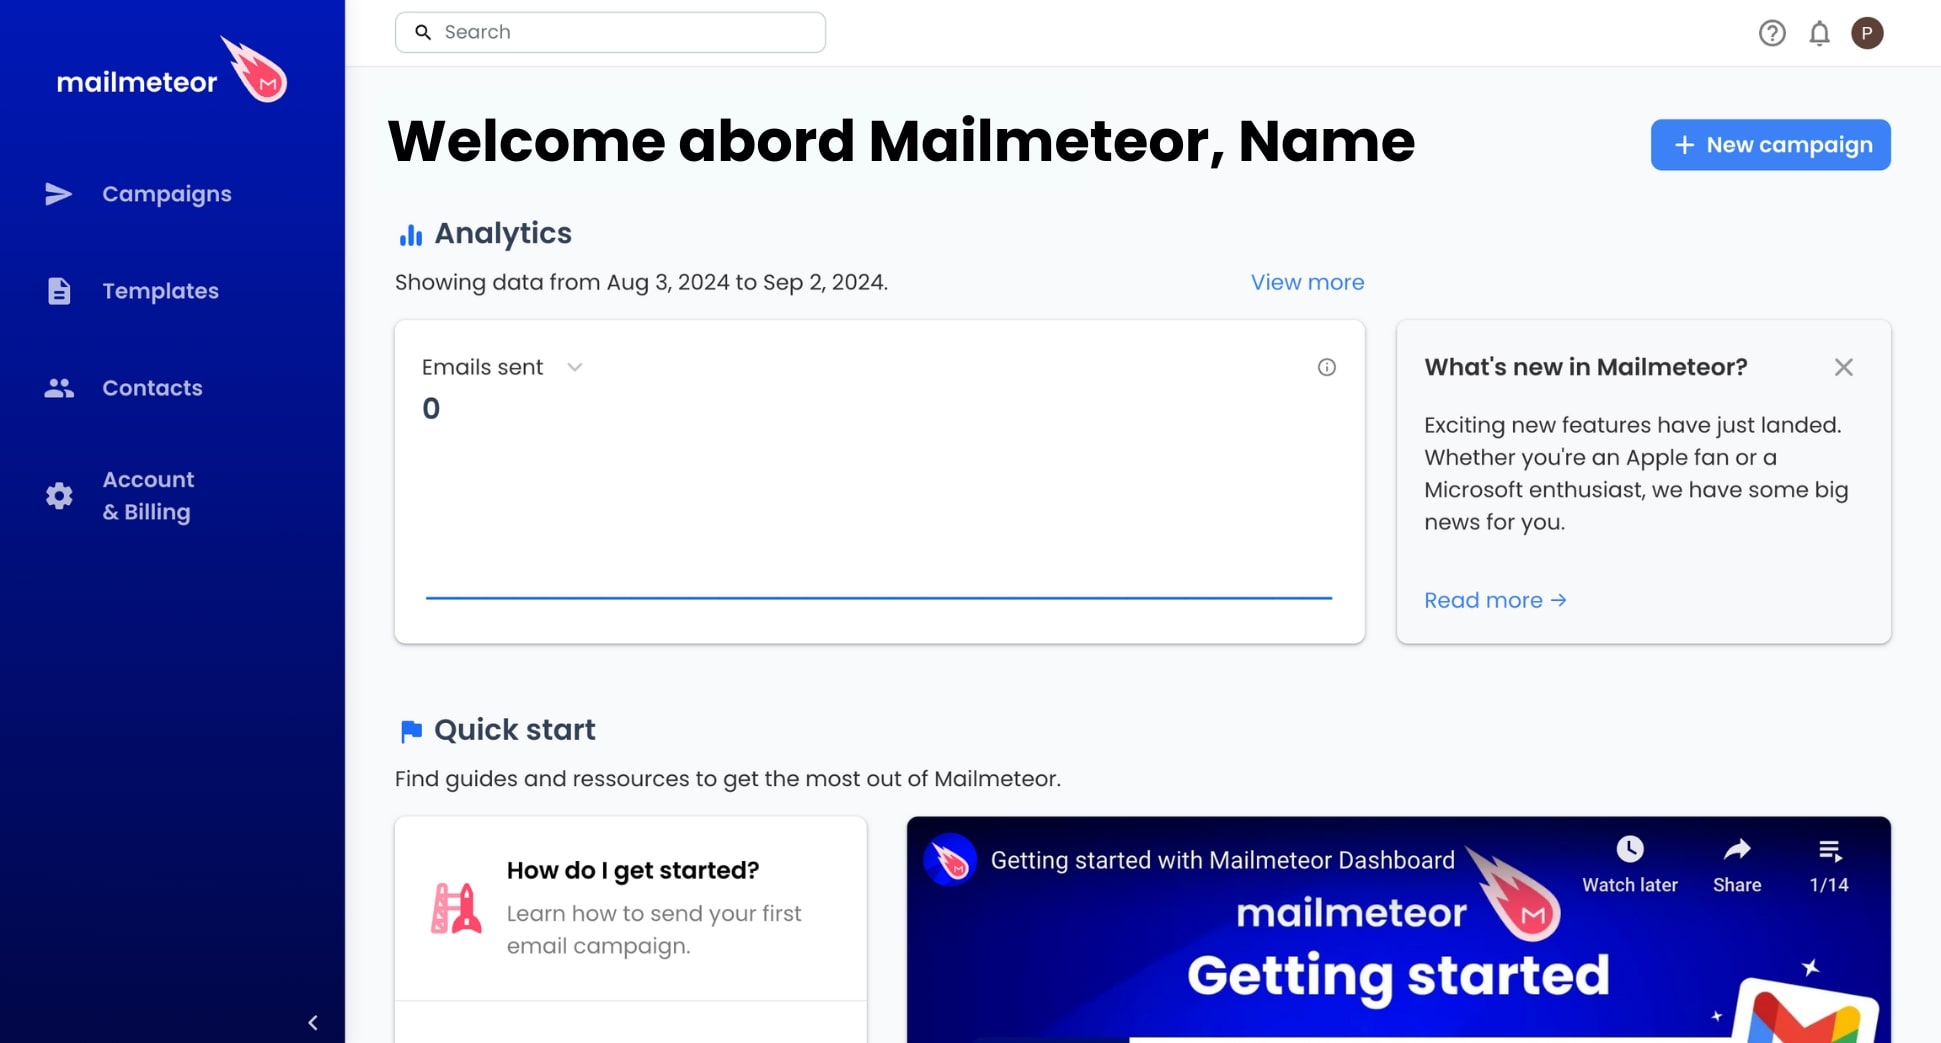
To create your first cold email campaign, install Mailmeteor for Google Sheets. This simple add-on has a 4.9 rating out of 11K+ reviews.
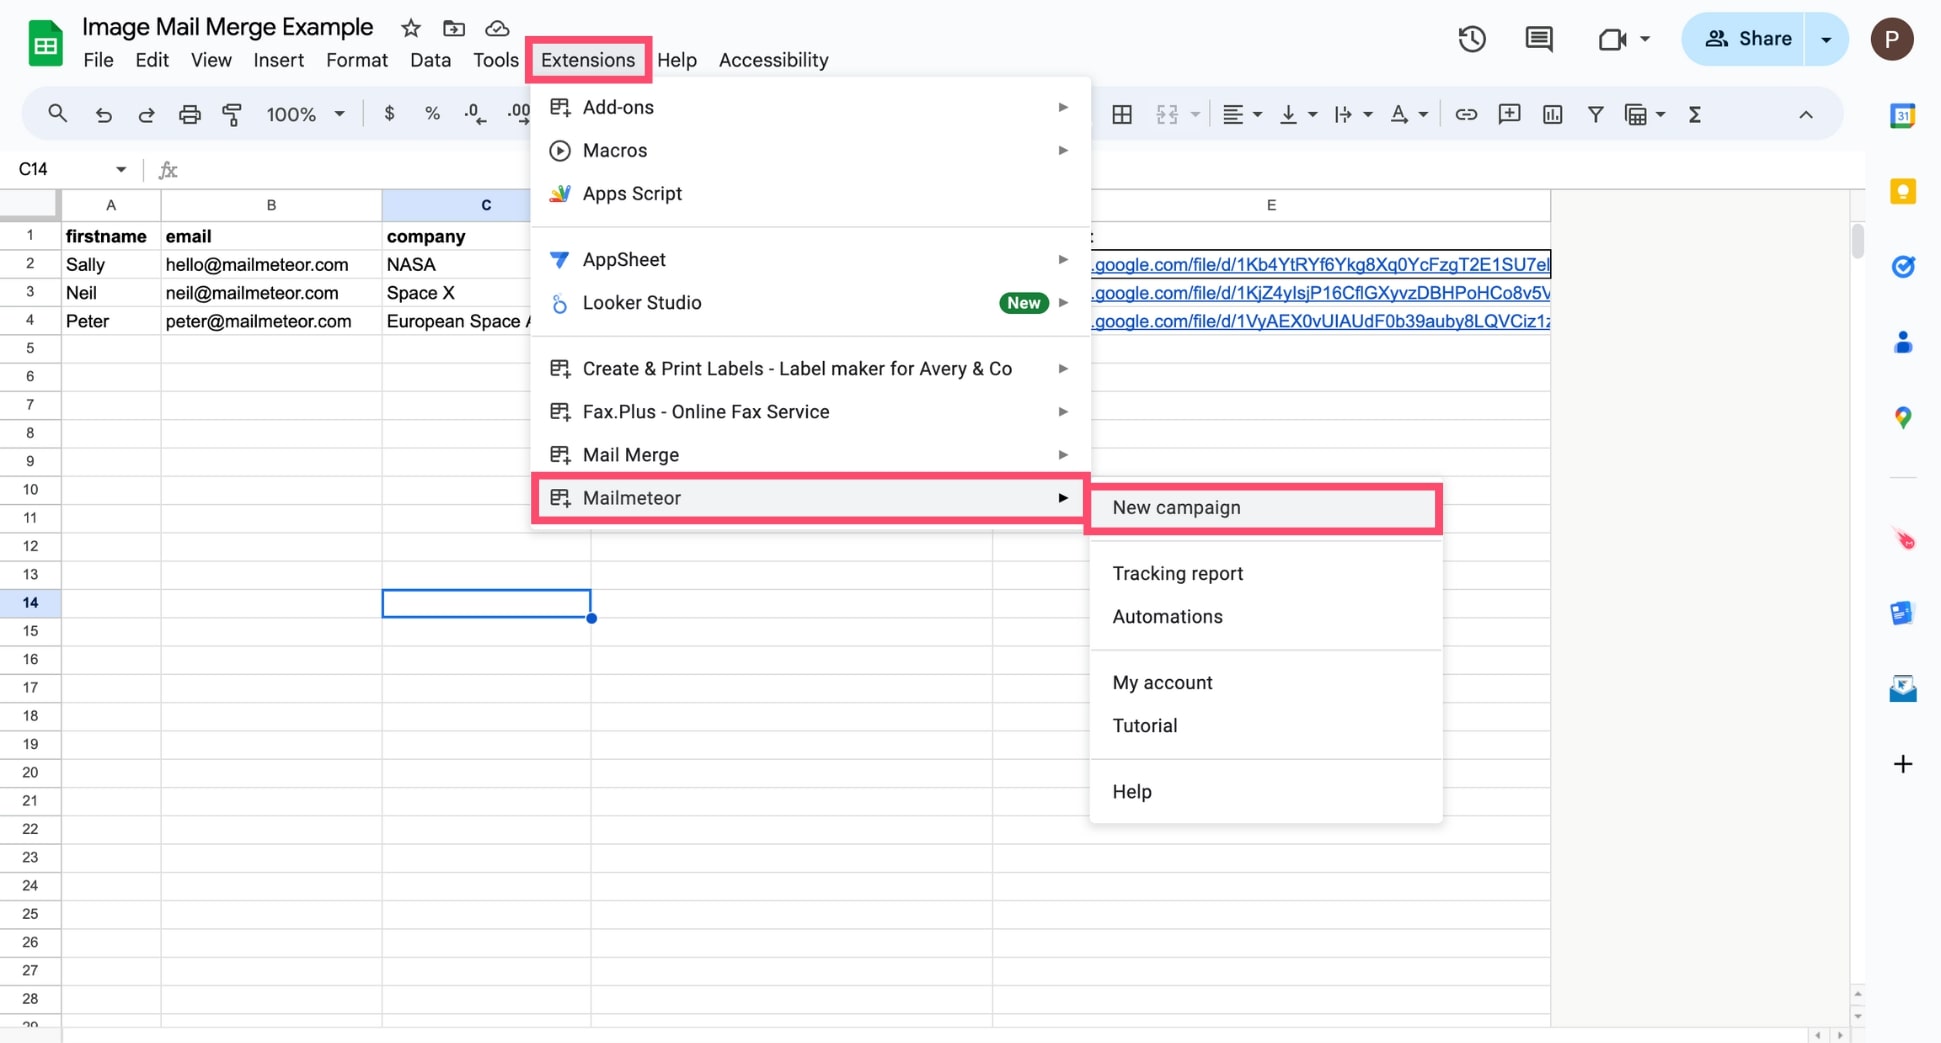
Next, go back to your Google Sheets. Then navigate to Extensions, and select Mailmeteor > New campaign.
From there, select Create a new template. To customize your message, click Insert variable and select a merge field. You can insert the personalized images into your cold emails using this merge field: \{\{ Image Code \}\}.

Once you’re done customizing your cold email, click Save template. Before sending, click Preview to check how your template looks.
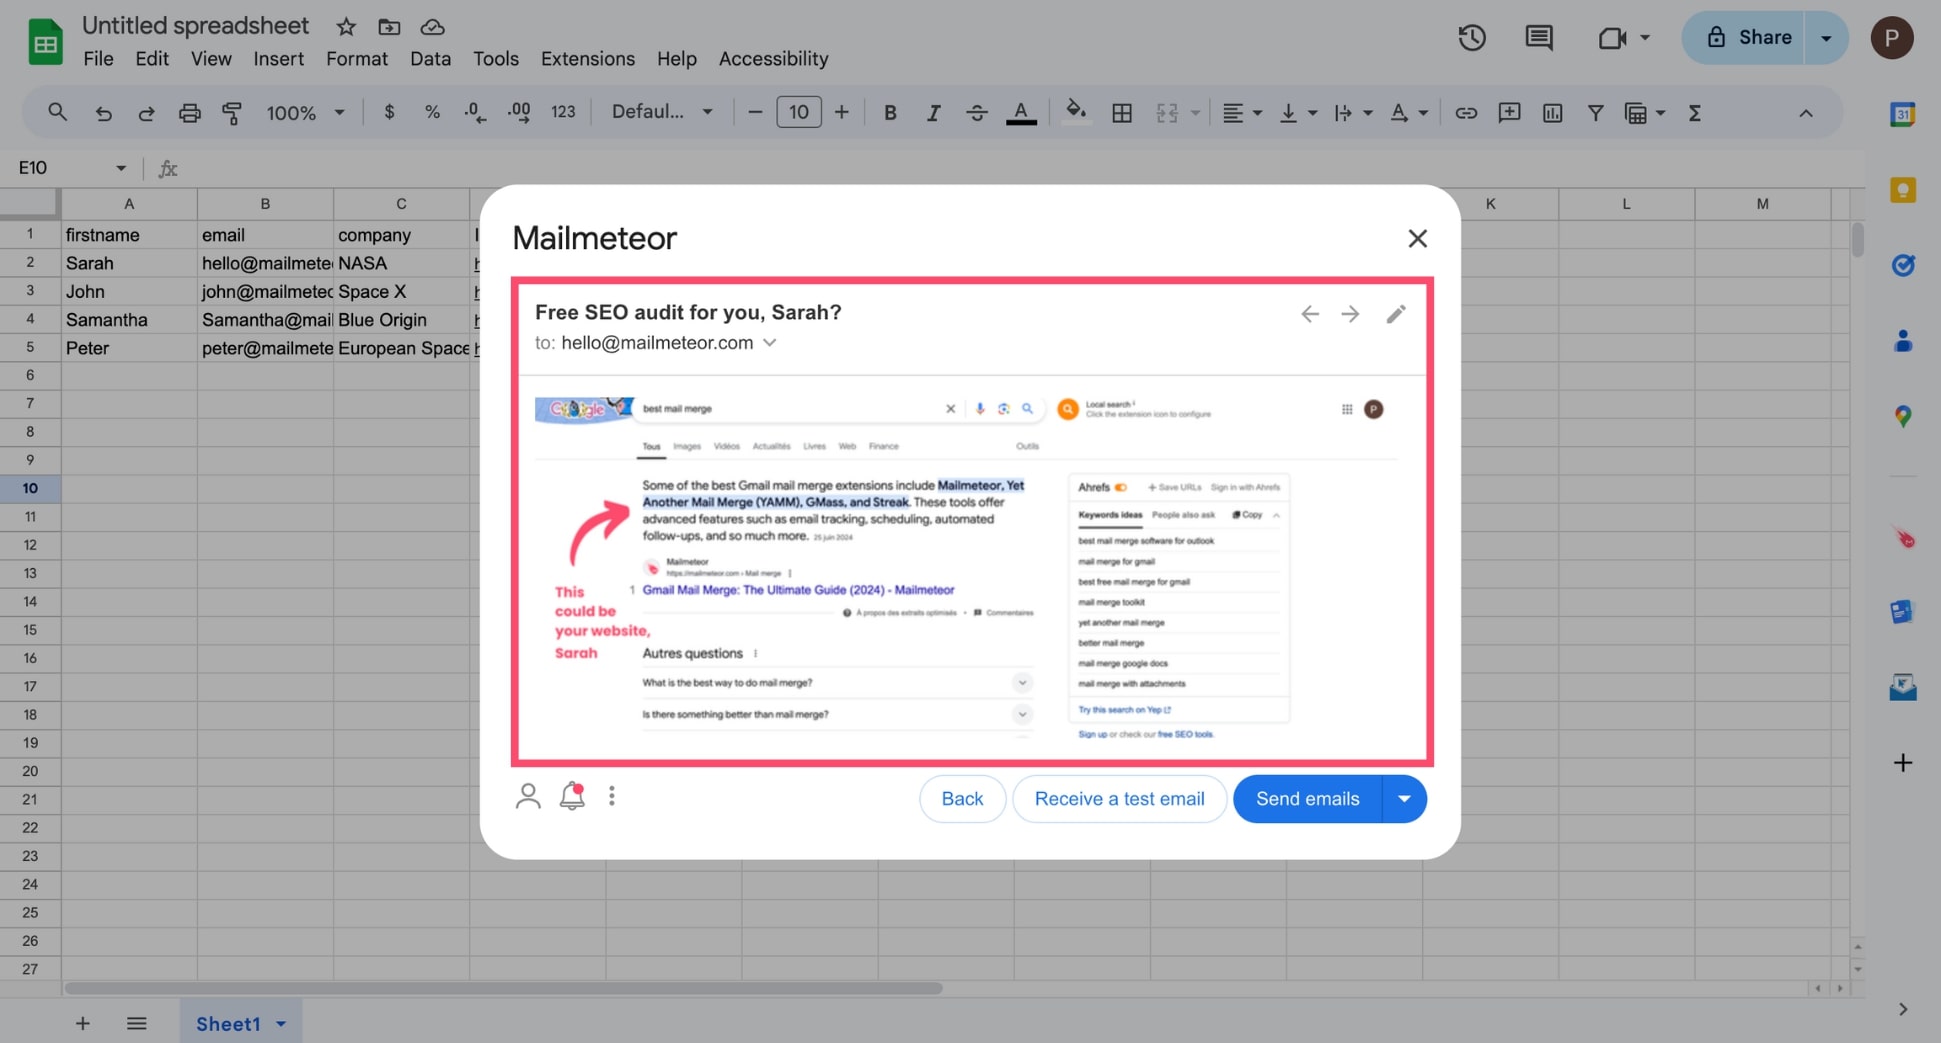
You can also send yourself a test email to make sure that your personalized images are displaying properly. If you’re happy with the results, click Send emails.
And voilà. Using this technique you can create dozens of custom images at once, and insert them into personalized cold emails. This lets you create tailored cold emails with stunning visuals that will attract attention and boost engagement rates.
Best practices to boost engagement rates with personalized images
After sending 10,000+ campaigns, here’s our personal take. Personalized images are a powerful weapon in your cold email arsenal. But only when they’re used in moderation and with the appropriate strategy.
Here are some best practices to effectively incorporate personalized images into your cold email campaigns:
- Use visuals to enhance, not replace: Personalized images should support a relevant message, not serve as the main focus. Make sure your visuals add value to your pitch without overshadowing it.
- Know your audience inside out: Dive deep into your target audience’s challenges, objectives, and preferences. Create images that resonate with their specific needs and capture their interest.
- Segment your audience: Different personas within your target audience may engage with different types of visuals. Adapt your images to suit the preferences of senior executives, practitioners, or other key decision-makers.
- Optimize images for email delivery: Reduce image file sizes without compromising quality to ensure fast loading times. Choose appropriate dimensions and formats that are compatible with most email clients (like JPEG or PNG).
- Strike the right balance: Include a balanced mix of text and images in your cold emails. Don’t rely too much on visuals, as this can trigger spam filters and impact the deliverability of your campaign.
- Optimize for accessibility: Include descriptive alt text for all images to convey your message even when images don’t load and to improve accessibility for recipients using assistive technologies.
- Test before sending: Use email testing tools such as Mailmeteor to preview how your personalized images render across various email clients and devices. Resolve any potential issues before launching your campaign.
- Track, analyze, and optimize: Monitor key metrics like click-through rates (CTR), reply rates, and conversions to identify the most effective image concepts for your audience. Refine your strategy based on this data.
By following these 8 best practices, you can create compelling personalized images that enhance your cold email campaigns and drive better engagement with your target audience. Easy, right?
3 high-ROI examples of cold emails with customized visuals
Need some inspiration to kick-start your next campaign? We’ve got you covered. Here are 3 proven cold email templates that harness the power of personalized images to skyrocket your open rates, click-through rates, and replies.
1. Free offer email template
Subject line: Free SEO audit, [Name]?
Hi [Name],
I’ve helped 20+ SaaS companies raise their traffic by 70% in under 6 months - with zero ads budget.
Wondering how my SEO tactics could help [Company] win more business? I’m offering you a free mini audit to explore what we could achieve together.
Let me know if you’re interested :)
Cheers, John
2. Short follow-up email template
Subject line: RE: [initial subject line]
Hi [Name],
I get it. You’re busy.
But isn’t [Desirable Outcome] worth 5 minutes of your time?
Just in case, I’ve created a free demo account so you can explore [Product] at your own pace and see for yourself why [Number] SaaS companies use our platform to overcome [Challenge].
Let me know if you’re interested and I’ll send you the codes to log in right away.
Cheers, John
3. Sales pitch email template
Hey [Name],
I noticed your awesome content on [Platform] and had a thought - what if you could turn your expertise into a stunning, branded magazine? 🤔
Hear me out - our platform helps businesses like yours create professional magazines that establish you as THE authority in your space.
In fact, our clients see an impressive 186% boost in engagement and leads after launching their magazine.
Picture this: your own magazine, delivered straight to your audience’s inboxes. It’s like a content marketing cheat code. 😉
Here’s a glimpse of what it could look like:
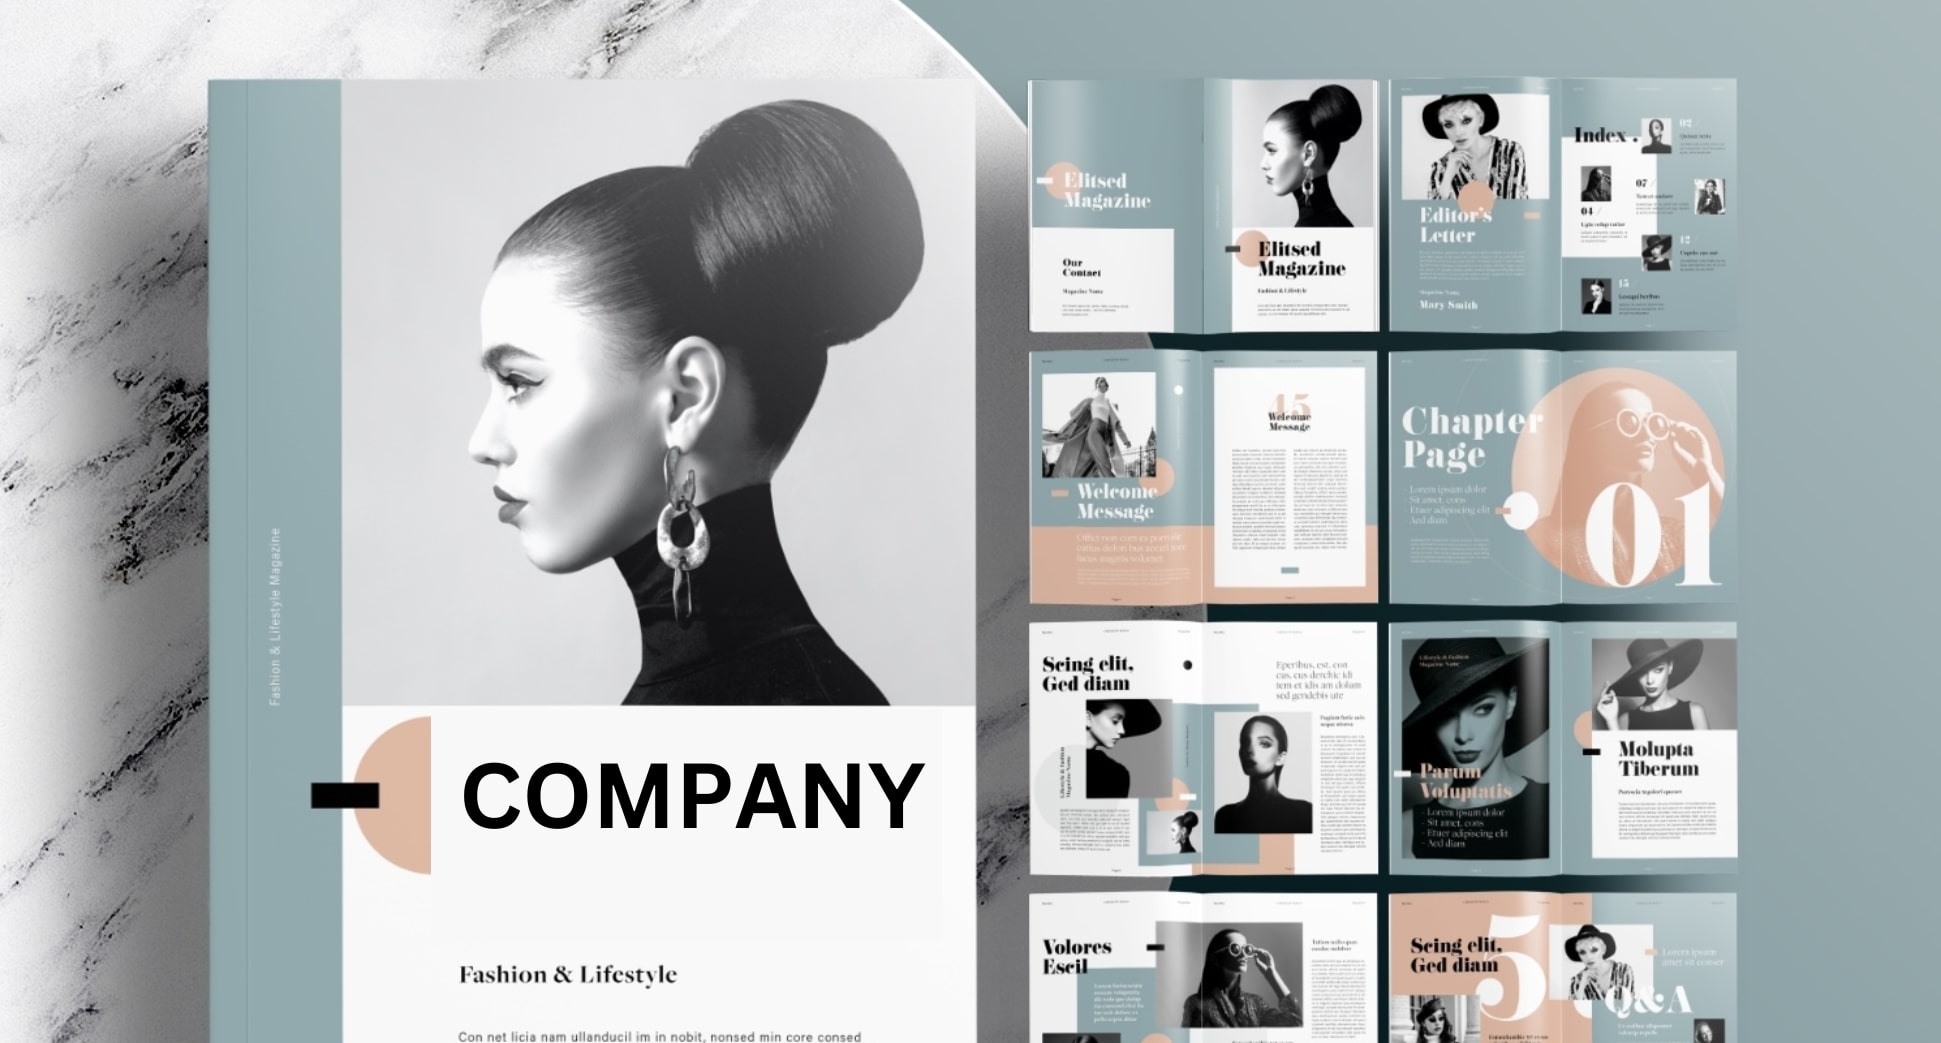
Curious to see how it works? Feel free to hit me up for a quick chat :)
Cheers, [Your Name]
The bottom line
Adding personalized images to your emails was once a complex task, but with tools like Canva and Mailmeteor, creating custom visuals for your cold email campaigns is now easier than ever.
This approach allows you to inject humor or creativity into your emails, helping them stand out in crowded inboxes and fostering a genuine connection with your prospects. As a result, you can achieve higher engagement rates.
What’s next? Sign up to Mailmeteor in 2 clicks and create your first outreach campaign today. Our free plan lets you send up to 50 personalized cold emails a day. No technical skills required.
You can also track your emails in real-time, schedule follow-ups, embed videos, send campaigns from multiple email aliases, verify email addresses in bulk, add delay between your emails to boost your deliverability, and so much more.
Happy sending 💌


