Need to send out a large batch of personalized invitations? Or create customized labels for your business? Or automate the process of addressing envelopes? Mail merge can help you do all that. And more. In this quick guide, we’ll show you how to do a mail merge using Microsoft Word.
When I started my first job, my boss asked me to organize the company’s 10th year anniversary. This implied inviting 350+ persons. So I started writing personalized invitations for each of our guests.
But this was taking forever. So after 2 hours of tedious work, I decided to search for a way to automate the whole process. That’s when I first discovered mail merge, a quick and easy way to personalized documents in bulk.
In this quick guide, we’ll show you how to perform a mail merge in Microsoft Word. This way, you’ll be able to create mass personalized letters, emails, labels, or envelopes. All this, in less than 5 minutes.
Here’s what we’ll cover:
- What is a mail merge?
- How to mail merge using Word?
- Is Word the best option to mail merge?
- Alternatives to Word mail merge
Sounds good? Then let’s dive in.
What is a mail merge?
Mail merge is a simple process that lets you create a large batch of personalized documents automatically.
Instead of customizing each copy manually, you can create a mail merge template, and link this document to a data source.
In this document, you can insert placeholders, also known as merge fields, or merge tags, such as {{ firstname }} or {{ company }}.
Then, using a mail merge extension, like Mailmeteor or Yet Another Mail Merge, you can generate customized copies for each recipient.
This technique allows you to significantly boost your productivity, and streamline your communication process.
I’ve used mail merges 1,000+ times to personalize envelopes, labels, emails, letters, invitations, and other types of documents.
And so far, it has saved me countless hours of work. Want to do the same? In this next section, I’ll show you the steps to mail merge in MS Word.
How to mail merge using Word?
Microsoft Word is a (very) popular online word processor, used by 750+ million people worldwide. But few users know that this software has a built-in mail merge feature. Here’s how it works.
1. Select a type of document
For starters, open a blank document in Microsoft Word. Then go to Mailings > Start Mail Merge > Step-by-Step Mail Merge Wizard.
Then, in the mail merge pane (on the right side of your screen), select the type of document you want to merge.
By default, Word gives you 5 options:
- Letters: Ideal for creating personalized letters. Each letter can include unique information to make your recipients feel special.
- E-mail Messages: This lets you send personalized bulk emails directly from Word. Perfect for email campaigns or newsletters.
- Envelopes: Print the addresses of your recipients on envelopes. This is the best option for mass mailings.
- Labels: Perfect to create and print address labels, name tags, or product labels with individualized information.
- Directory: This setting is useful for creating a directory or catalog that lists multiple items, such as a product inventory.
Select one. In this example, we’ll pick E-mail Messages to send personalized emails in bulk. Then click Next: Starting document.
2. Create a mail merge template
Microsoft Word will now prompt you to select a starting document.
You can either:
- Start from a template
- Use the current document
- Start from an existing document
In this example, we’ll choose Use the current document to walk you through the entire mail merge process from start to finish.
You can now start preparing your mail merge template. To do so, simply draft your email, letter, envelope, or label in Word.
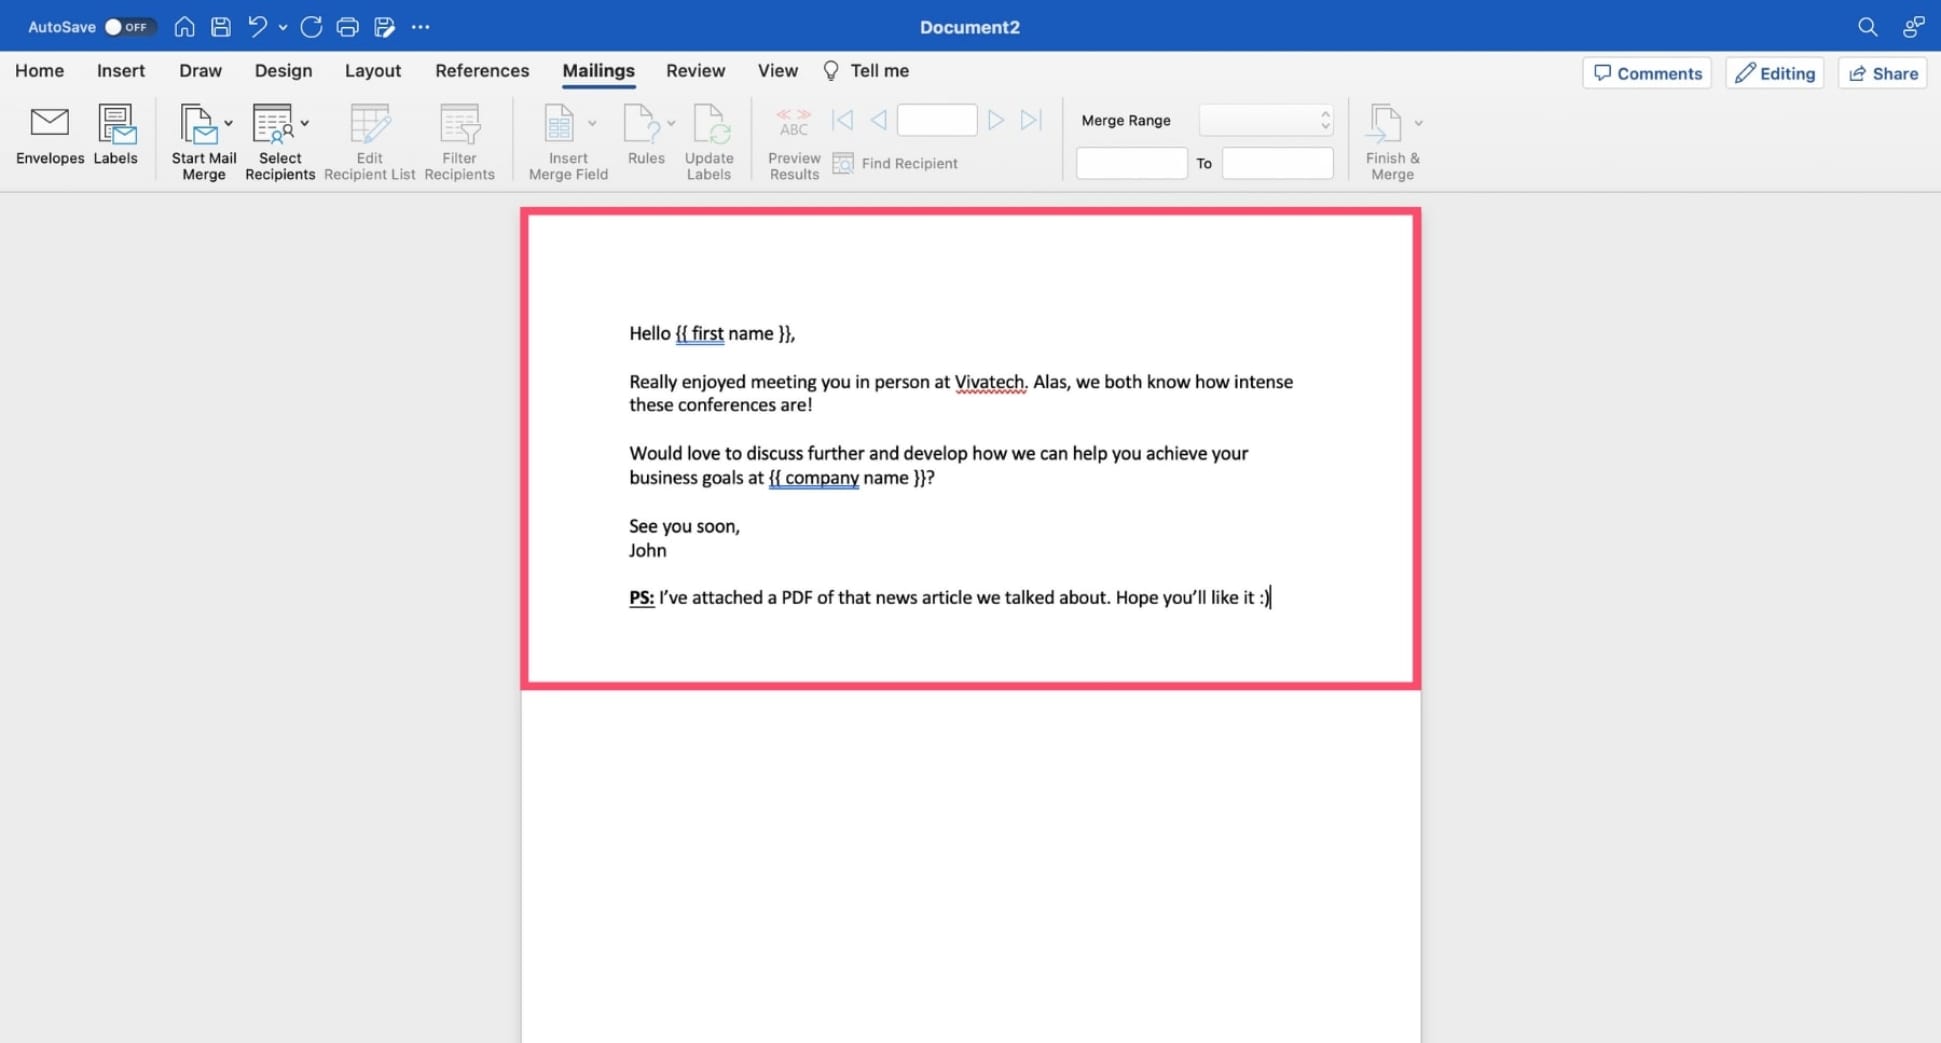
Don’t personalize your message just yet. Instead, use placeholders, such as {{ firstname }}, {{ email address }}, or {{ event }} to prepare your mail merge.
Here’s what your template should look like:
Once your MS Word document is ready, click Next: Select recipients.
3. Connect to a data source
To perform a mail merge, you need to link your template document to a data source, typically a spreadsheet.
At this stage, Word gives you 3 options:
- Use an existing list: Select this option if you already have a data source, such as an Excel spreadsheet or an Access database, complete with all the information you need for the merge.
- Select from Outlook contacts: Choose this option if you have your contacts stored in Microsoft Outlook. Word will connect to your Outlook address book, allowing you to select the contacts you want to include in your mail merge.
- Type a new list: If you don’t have an existing data source, you can create a new one directly within Word. Select this option to open a dialog box where you can manually enter the information for each recipient.
In this example, we’ll use an existing Excel spreadsheet as our data source. Here’s what it looks like:

To import data from an existing spreadsheet, click Browse. Then locate your file and click Open.
A Mail Merge Recipients window will appear in Microsoft Word. From there, use the checkboxes to add or remove recipients from the merge.
When your list of recipients is ready, click OK. Then, in the sidebar of the mail merge wizard, press Next: Write your letter.
4. Customize your template
You can now personalize your document using merge fields, a special type of placeholders that lets you insert dynamic content.
Once you complete the mail merge, your merge fields will be replaced with individualized information for each recipient.
To customize your Word document, click where you want to add dynamic content, select Insert Merge Field, and choose a variable.
You can also add merge fields directly from the wizard:
-
Address block: This block combines merge fields such as first name, last name, and postal address. Ideal for envelopes and letters.
-
Greeting line: This block combines merge fields such as title, first name, and last name. Perfect to start a letter or an email.
-
Electronic postage: This lets you add electronic postage to your Word mail merge, using a third-party program.
Repeat these steps until your MS Word document is ready for merging. Then click Next: Preview your emails.
5. Preview your Word mail merge
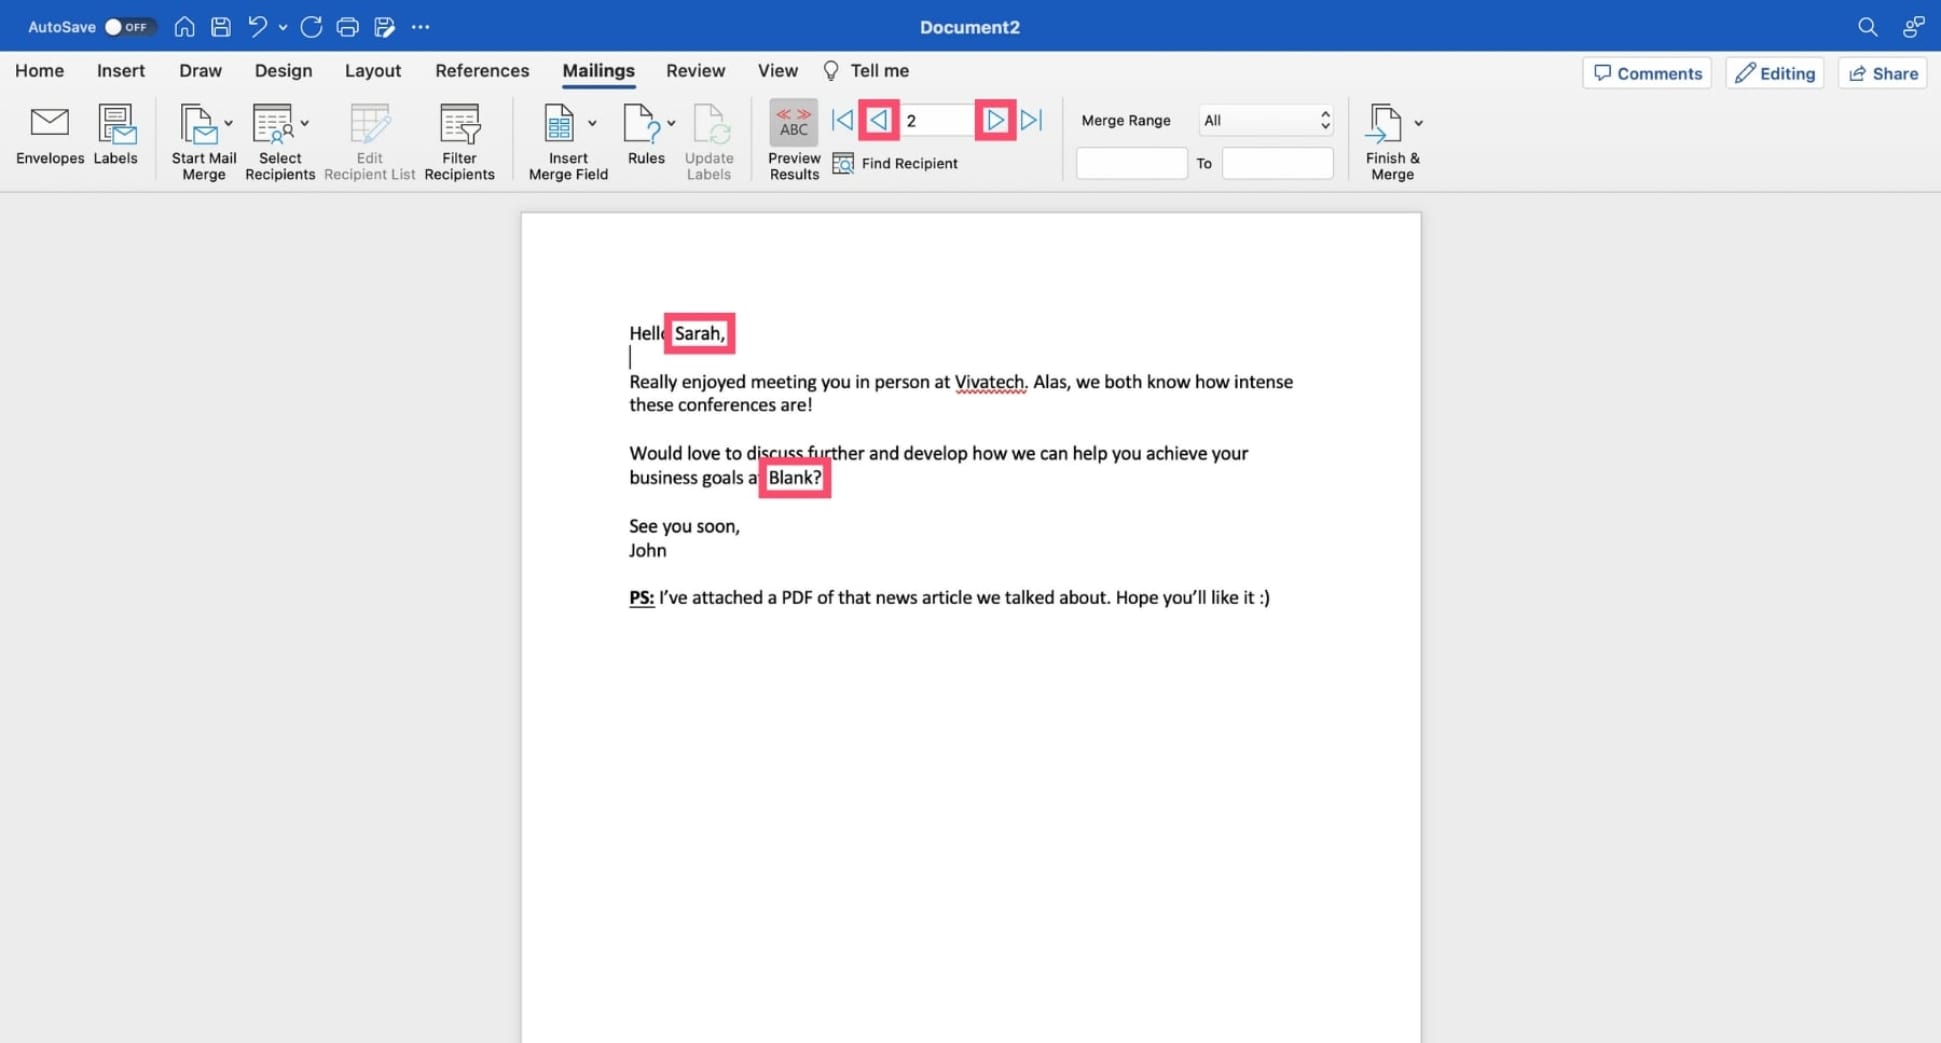
You are now in preview mode, which allows you to see how your mail merge will appear for each recipient.
Click the Next and Previous arrows to navigate through each merged document and make sure that Word correctly replaces your merge fields with the appropriate data.
Review the content of your Microsoft Word mail merge to verify that the data is accurate and formatted correctly.
If you notice any issues, you can go back and edit your Word document or your data source before finalizing the merge
Fixed all the issues? Great! Once you’re ready, click Next: Complete the merge to move on to the final step.
6. Print or send your mail merge
To complete your mail merge, click Finish & Merge. From there, MS Word gives you 3 options:
-
Edit individual documents: This option lets you modify, save, and print individual records of your mail merge, just like any other Word document.
-
Print Documents: This option lets you merge to printer, allowing you to print customized letters, labels, or envelopes for each recipient.
-
Merge to Email: Select this option to send mass personalized email directly from Word. Ideal for email campaigns and newsletters.
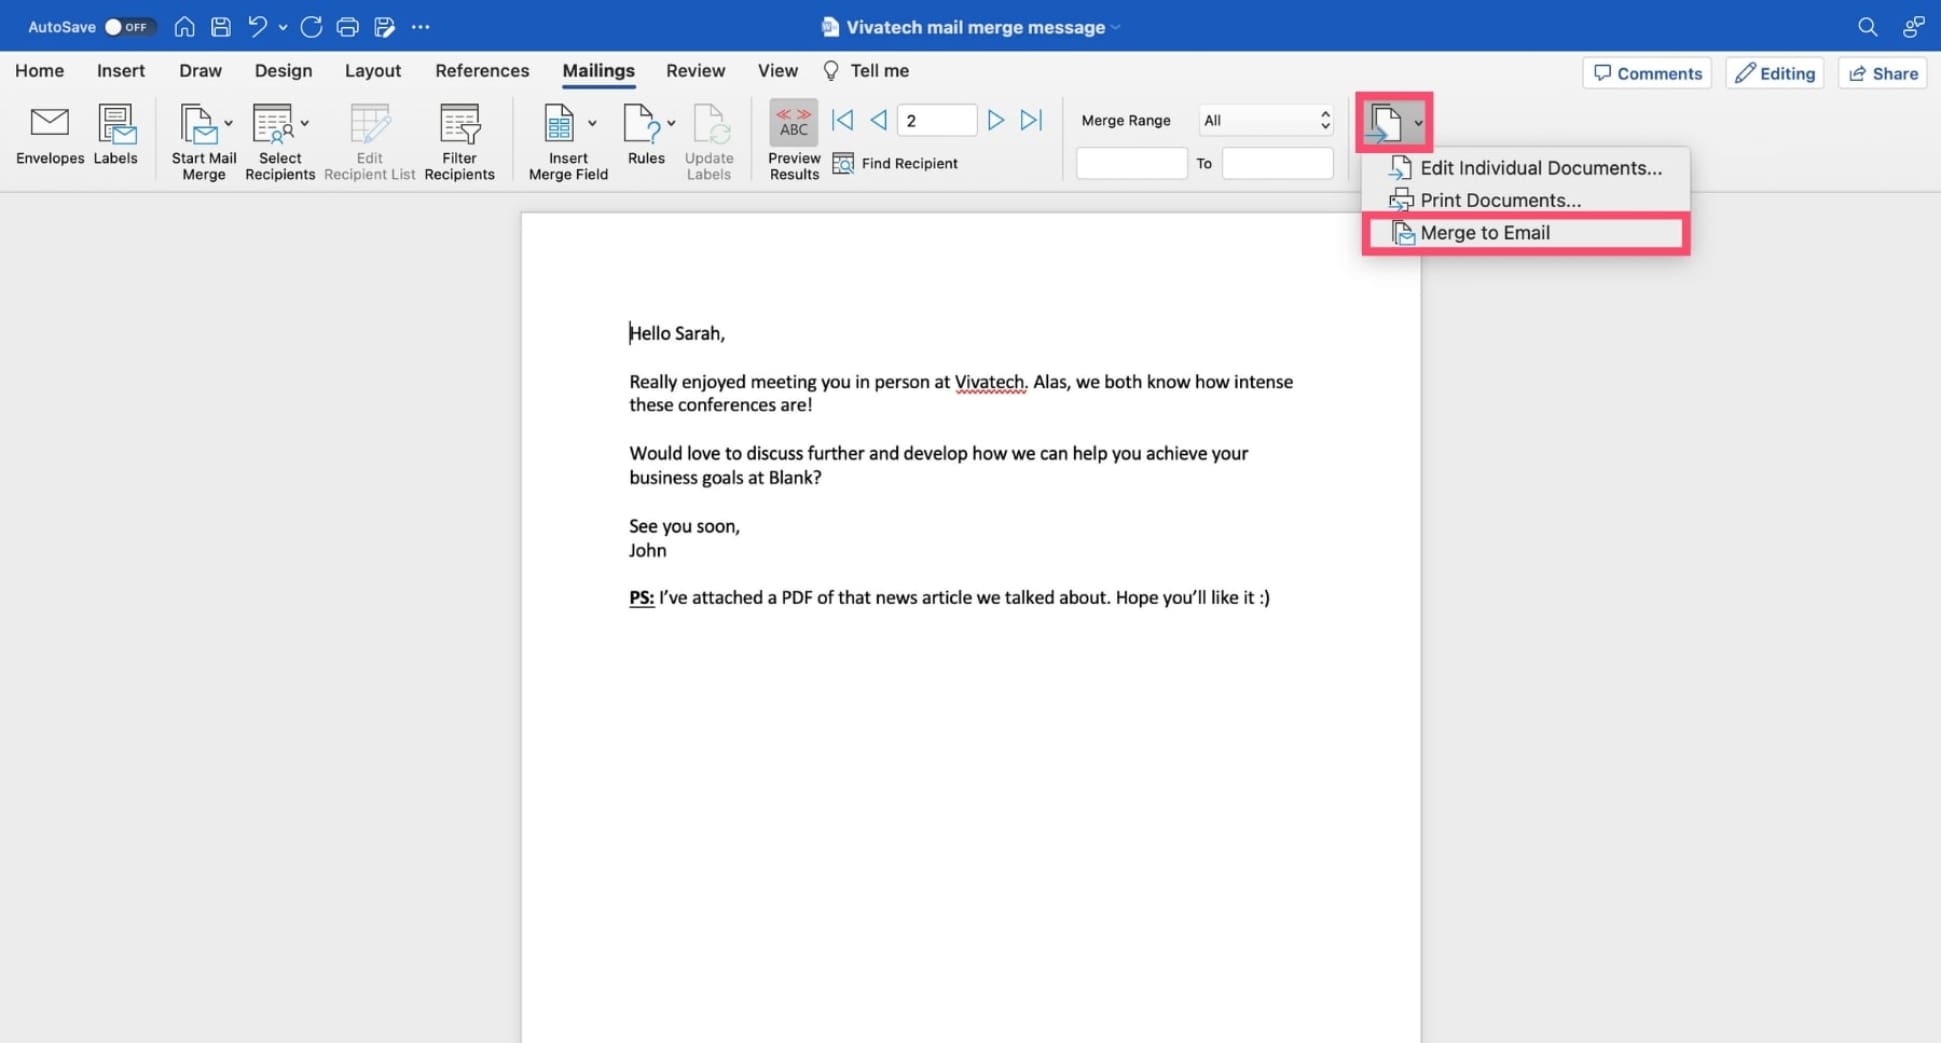
In this example, our goal is to send personalized emails in bulk. So we’ll choose Merge to email.
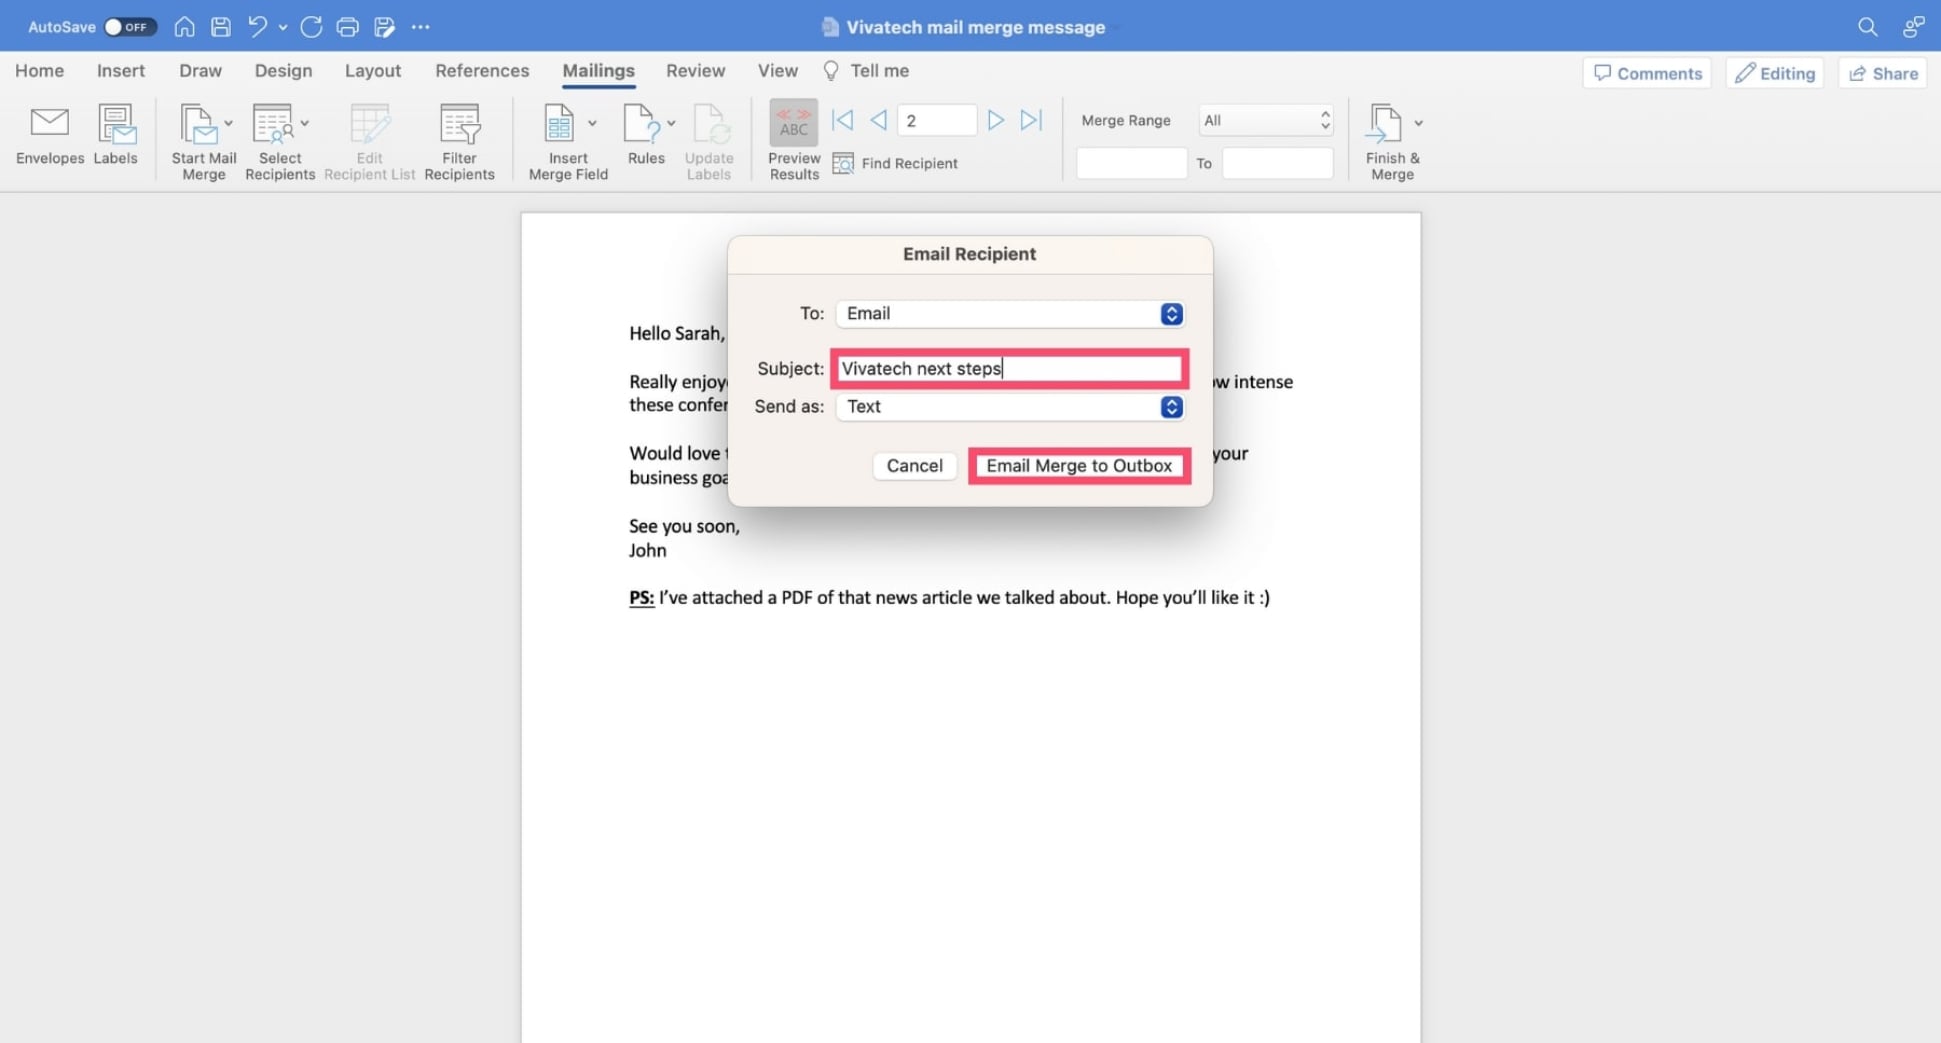
From there, Word prompts you to select the column of your spreadsheet that contains the recipients’ email addresses.
You can then enter the subject line of your message. Lastly, click Email Merge to Outbox to complete the merge.
And voilà. Your Word mail merge is finalized. Congratulations 🎉 Microsoft will now generate customized copies of your mail merge and send them to each recipient, allowing you to make them feel special, and connect with them. At scale.
Is Word the best option to mail merge?
Word is a robust choice to create a mail merge. Especially if you’re already used to using the Microsoft 365 suite.
At Mailmeteor, we love using this software to mail merge labels, or any document that requires to be printed, like envelopes, or letters.
However, Word is not ideal if you plan to send personalized emails in bulk. Here’s why we don’t recommend it for your email campaigns:
-
No attachments: Word doesn’t let you mail merge with attachments, meaning you can’t send personalized videos, images, or PDF to your recipients.
-
Sending quotas: Microsoft limits daily email sends to 1,000 non-relationship recipients (i.e. people you’ve never emailed before).
-
No analytics: Word doesn’t have a built-in email tracking feature, which means you won’t know if your recipients clicked or opened your campaigns.
-
No reply-to: Word doesn’t allow you to set a different reply-to email address, so all replies will automatically go to the sender’s address by default.
-
No email aliases: Microsoft doesn’t let you select an alias, meaning that you must use your primary email address for all communications.
-
No follow-ups: Lastly, Word doesn’t let you schedule follow-ups and create automated email sequences to get more replies, clicks, and opens.
Fortunately, there are other options that you can use to create personalized emails in bulk for your newsletters or your cold emails.
Alternatives to Word mail merge
Here are some popular alternatives to MS Word for your mail merges. Each has its strengths, and its weaknesses:
-
Spreadsheets: Love spreadsheets? You can mail merge from Excel (or Google Sheets) to customize documents en masse.
-
Google Docs: Used to working with Google apps? You can mail merge using Google Docs and a third-party -add-on.
-
Email clients: In a rush? You can mail merge from Gmail, or using other popular email service providers, like Outlook.
-
Mailmeteor Dashboard: Love simplicity? Mailmeteor lets you send up to 2,000 personalized emails. No technical skills required.
-
Email marketing platforms: Got a big budget? You can mail merge in Constant Contact, or Mailchimp to unlock advanced features.
Wrapping Up
Microsoft Word is a stellar productivity app, and it’s definitely one of the best tools to mail merge labels, envelopes, and letters.
However, when it comes to mass emails, this app doesn’t quite cut it, unless you have (very) basic needs.
You can’t track the performances of your mail merge, customize the sender identity, or schedule automated follow-ups.
What’s more, you must abide by Microsoft’s sending limitations, which can hinder large-scale mail merge campaigns.
Fortunately, there are ways to overcome some of these limitations. One of them, is the Mailmeteor Dashboard, a simple tool that lets you:
- Send up to 2,000 personalized emails a day
- Mail merge images, videos, and PDFs
- Track your emails in real-time
- Schedule follow-ups
- And more
What’s next? Create your free Mailmeteor account in 2 clicks and start sending customized emails today to make your recipients feel valued, and boost conversions.
Happy merging 💌
FAQs - Mail merge in Word
Is mail merge in Word or Excel?
You can mail merge in Microsoft 365 (also known as Office 365) using both Word and Excel. Word is often used as the primary tool for creating the template document (letters, envelopes, labels, etc.). Excel, on the other hand, is typically used as a data source, meaning it stores the personalized information (names, addresses, etc.) that will be merged into the MS Word template.
How do I create a mail merge envelope in Word?
-
Open Word.
-
Start with a blank document, or an existing document.
-
Go to the Mailings tab.
-
Click Start Mail Merge.
-
In the dropdown menu, select Envelopes.
-
Specify the size of your envelopes.
-
Click Select Recipients and choose a data source.
-
Place the cursor where you want the address to appear. Then click Insert Merge Field and select the appropriate fields.
-
Click Finish & Merge. Then choose Print Documents and select a printer to finalize the envelopes.
How do I create mailing labels in Word?
-
Create a blank document in MS Word.
-
Navigate to Mailings > Start Mail Merge.
-
Choose Labels from the dropdown menu.
-
Select your label type. Then the vendor (e.g., Avery).
-
Click Select Recipients and pick your spreadsheet or a data source.
-
To customize a label, click Address Block or Insert Merge Field. Then select the correct variables.
-
To finalize the labels, click Update Labels.
-
Click Finish & Merge > Print Documents.
How do I keep formatting from Excel to Word in mail merge?
To preserve your Excel formatting in a Word mail merge, format your data in Excel and use the Dynamic Data Exchange (DDE) method in Word. To do so, go to Mailings > Select Recipients > Use an Existing List. Then click Confirm file format conversion on open and select the MS Excel Worksheets via DDE option.


