Wondering how merge fields can help you get more work done, in less time? In this quick guide, we’ll show you how you can use merge tags to create hundreds of personalized emails, labels, or documents.
Need to send an email (or a letter) to a single recipient? No problem. Just compose your message and send it. No tools needed. But what if you need to send that message to 1,000 recipients? In that case, you have 3 options:
- You can create each email (or letter) manually. But this is going to take ages. And your boss probably won’t be happy about it.
- You can send a generic message starting with “Dear customer” and press send. This is much faster. But most recipients will ignore you.
- Or you can use merge fields to automatically generate a personalized message for each recipient. In just a few clicks.
If (like us) you think that option 3 is (by far) the best choice, you’re in the right place. In this guide, we’ll show you everything you need to set up merge fields and use them to create personalized emails, letters, labels, or envelopes. In bulk.
Here’s what we’ll cover:
- What are merge fields?
- Common uses of merge fields
- Examples of merge fields
- Benefits of using merge fields
- How to set up merge fields?
- How to use merge fields in popular tools?
- How to handle missing data in merge fields?
Sounds good? Then let’s dive in.
What are merge fields?
Merge fields, also known as merge tags, or variables, are placeholders that you can insert in a template document to generate personalized copies. In most cases, they are displayed between double curly brackets, like this: {{ FirstName }}.
During the mail merge process, merge fields are replaced with specific information from a data source (typically a spreadsheet). This allows you to create customized documents for each recipient without editing each file manually.
Common uses of merge fields
Merge fields are a game-changer when it comes to automating repetitive tasks and creating personalized copies of a document. These smart placeholders can help you streamline your processes and save hours of work.
Here are some common uses of merge fields:
- Emails: Personalize bulk email campaigns by addressing each recipient by name, mentioning specific details relevant to them, or customizing content based on their preferences to get more responses.
- Letters: Automate the creation of personalized letters for different recipients. This can include anything from business correspondence and fundraising appeals to holiday greetings and thank-you notes.
- Invoices: Streamline your billing process by generating invoices that automatically populate with specific customer details, such as name, address, invoice number, and amount due.
- Certificates: Create personalized certificates for events, courses, or achievements by using merge fields to insert recipient names, dates, and specific accomplishments.
- Labels: Produce mailing labels in bulk by using merge fields to insert recipient names and addresses. Ideal for businesses that need to send out promotional materials, or product shipments.
- Envelopes: Customize envelopes by printing recipient addresses directly onto them using merge fields and make sure that each envelope is accurately addressed. Perfect for mass mailings.
Examples of merge fields
Here are some examples of merge fields that professionals like to use in their mail merge to create personalized documents, save time, make their recipients feel unique, scale their outreach, and boost their productivity:
{{ Firstname }}: Inserts the recipient’s first name.{{ Lastname }}: Inserts the recipient’s last name.{{ Email }}: Inserts the recipient’s email address.{{ Company }}: Inserts the name of the recipient’s company.{{ Address }}: Inserts the recipient’s address.{{ ProductName }}: Inserts the name of a specific product.{{ Date }}: Inserts a specific date.{{ Value }}: Inserts the amount of money owed by the recipient.{{ Event }}: Inserts the name of an event.{{ PhoneNumbner }}: Inserts the recipient’s phone number.{{ JobTitle }}: Inserts the recipient’s job title.{{ OrderNumber }}: Inserts the order number related to the recipient.{{ DueDate }}: Inserts the due date for a payment or task.{{ MembershipID }}: Inserts the recipient’s membership ID.{{ Anniversary }}: Inserts the date of the recipient’s anniversary.{{ DiscountCode }}: Inserts a personalized discount code for the recipient.{{ AppointmentTime }}: Inserts the time of an appointment.{{ CourseName }}: Inserts the name of a course the recipient is enrolled in.{{ SubscriptionEndDate }}: Inserts the end date of a subscription.
Want more merge fields examples? Make sure to visit our library of 100+ customizable email templates and discover how we use merge tags to create tailored email campaigns with a 20%+ response rate.
Benefits of using merge fields
Merge fields are a simple way to create personalized documents in bulk. Here’s why you should consider using them daily to streamline your workflow, save time, or refine your outreach strategy:
- Personalization: Create a unique experience for each recipient, making your communications more memorable.
- Productivity: With merge fields, you can automate your document creation process and save hours of work.
- Engagement: Personalized messages are more likely to capture the recipient’s attention and prompt a response.
- Accuracy: Reduce the risk of errors by pulling data directly from a reliable source. With merge fields, each piece of information is correctly inserted.
- Consistency: Merge fields can help you maintain consistent formatting, ensuring that all communications are uniform and professional.
- Scalability: Easily scale your communications, whether sending to a few dozen or thousands of recipients, without additional effort.
Once you get familiar with this technology, there’s no turning back. Merge fields are incredibly versatile tools that businesses of all sizes can use to get more work done, in less time, and create tailored experiences.
How to set up merge fields?
To create a merge field, you need data. And the easiest way to organize a set of data is to create a spreadsheet using Microsoft Excel or Google Sheets. In this section, we’ll set up a data source for your merge fields.
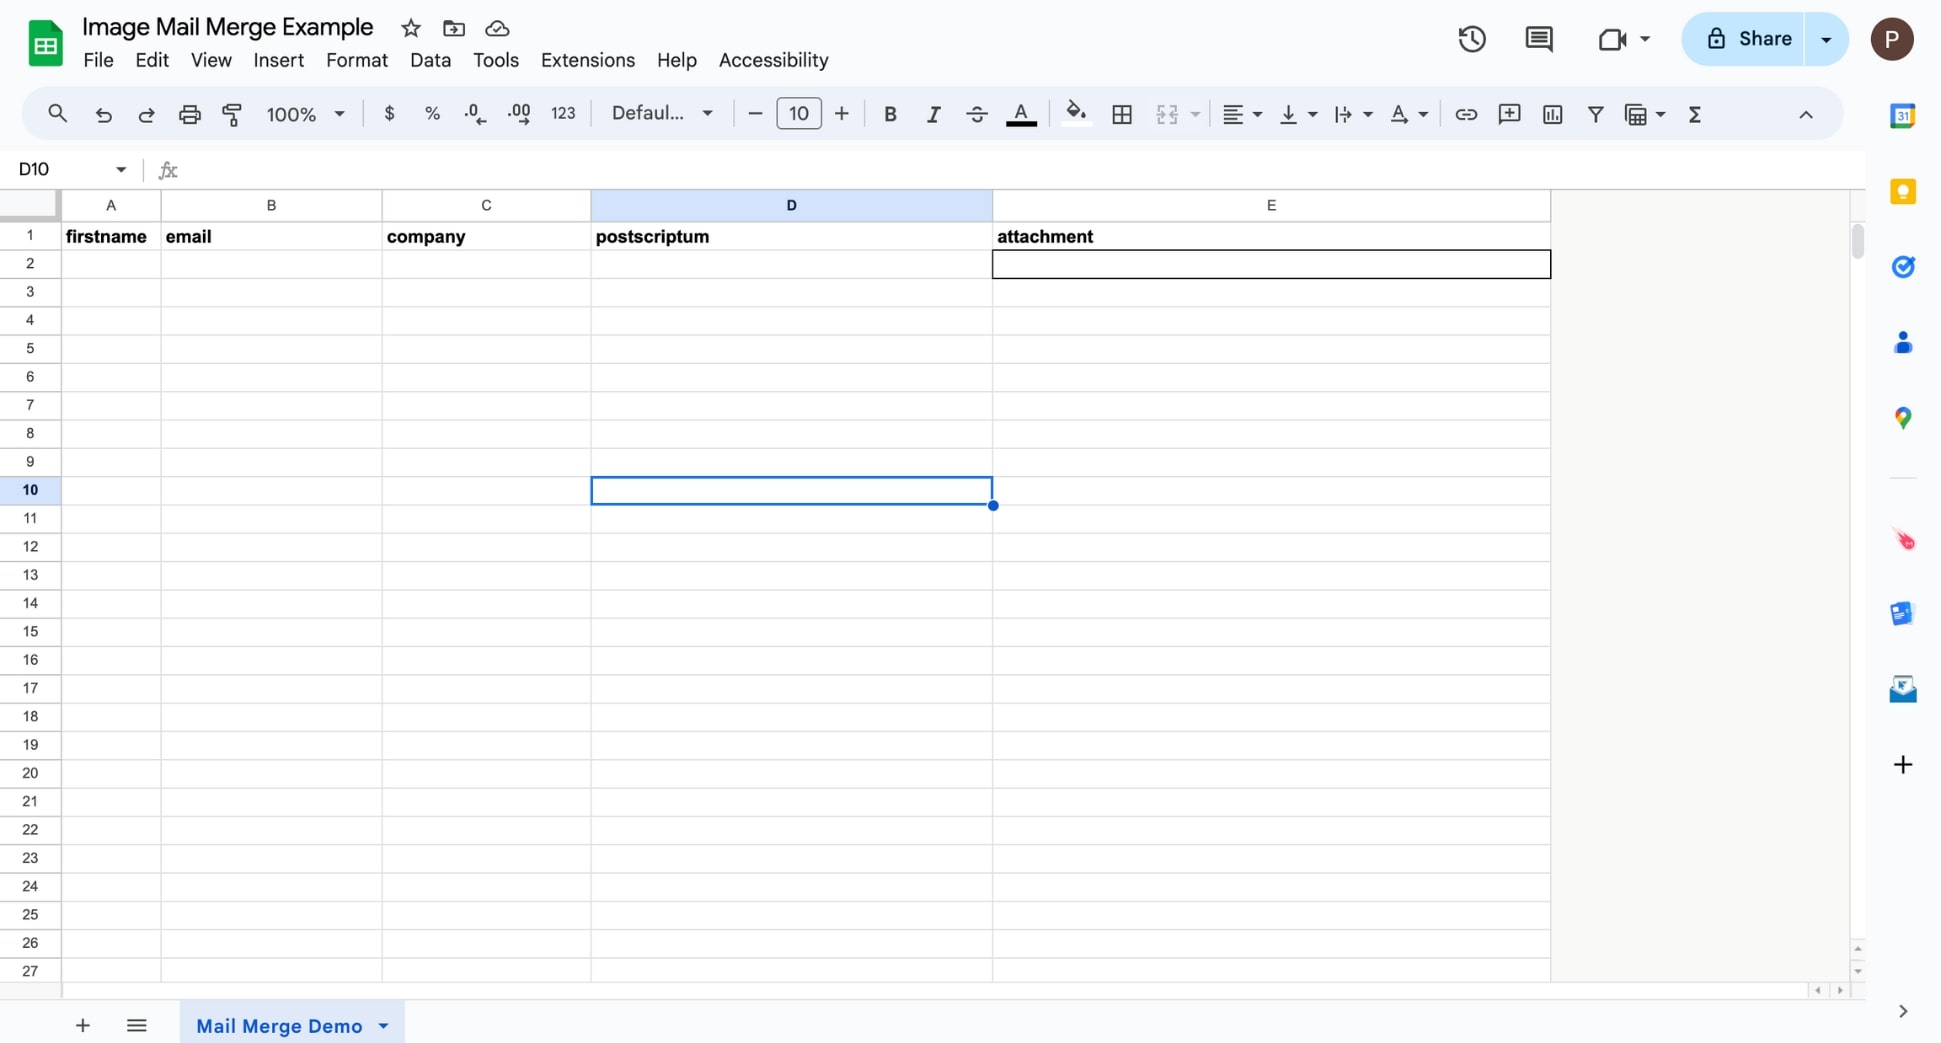
Step 1: Open a new spreadsheet in Google Sheets.
Step 2: Create a column for each piece of information you want to include in your mail merge. Then give a descriptive name to your columns. In this example, we have 5 columns. So, we’ll be able to insert 5 different merge fields into our documents.
Step 3: Fill the spreadsheet with data about your recipients. Each row represents one recipient. In this example, we have 3 rows. So we’ll be able to create personalized documents for 3 recipients.
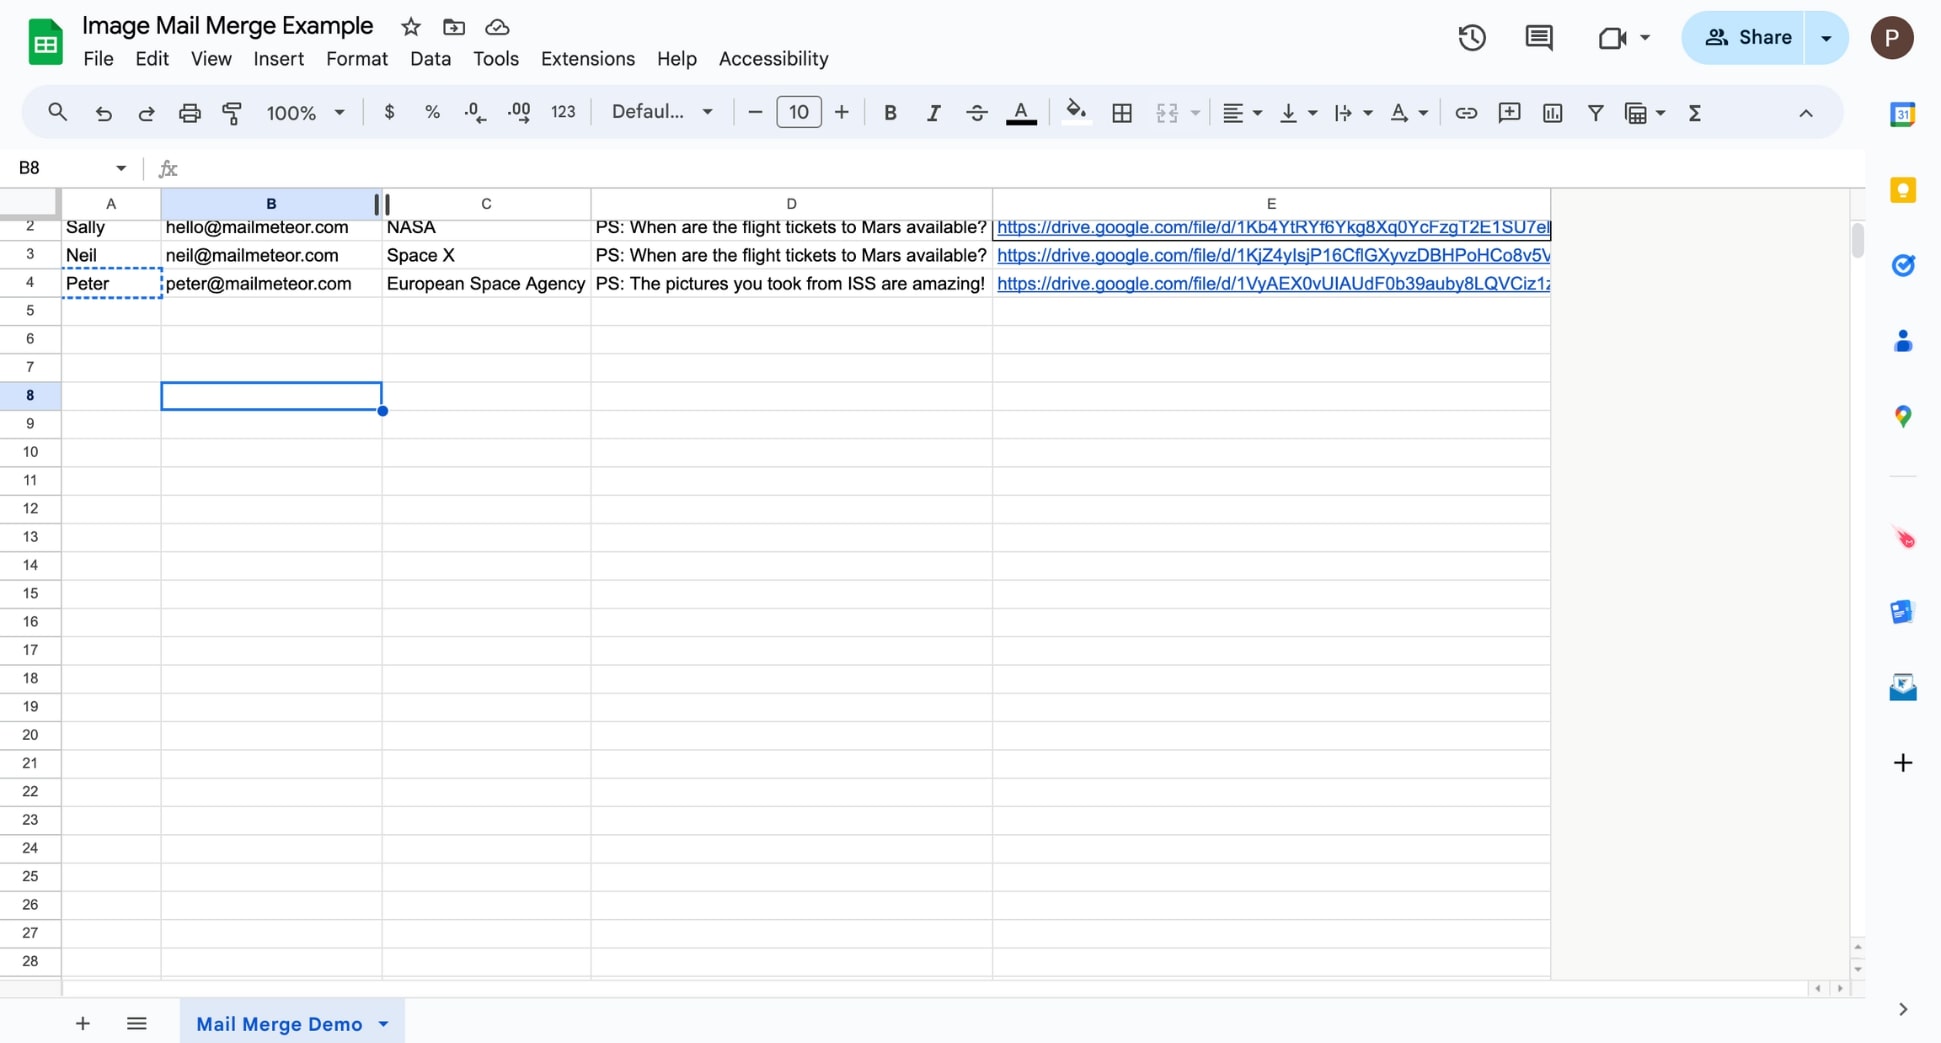
Step 4: Review your data to make sure there are no missing or incorrect entries.
And voilà. Your data source is ready. You can now create a document and personalize it using the information you’ve collected in your spreadsheet. To do so, you’ll need to use a mail merge tool, such as Mailmeteor.
How to use merge fields in popular tools?
In this section, we’ll show you how to insert your merge fields into a template document, and replace them with your recipients’ data using a mail merge platform such as Gmail, Google Sheets, Word, or Mailmeteor.
In Gmail
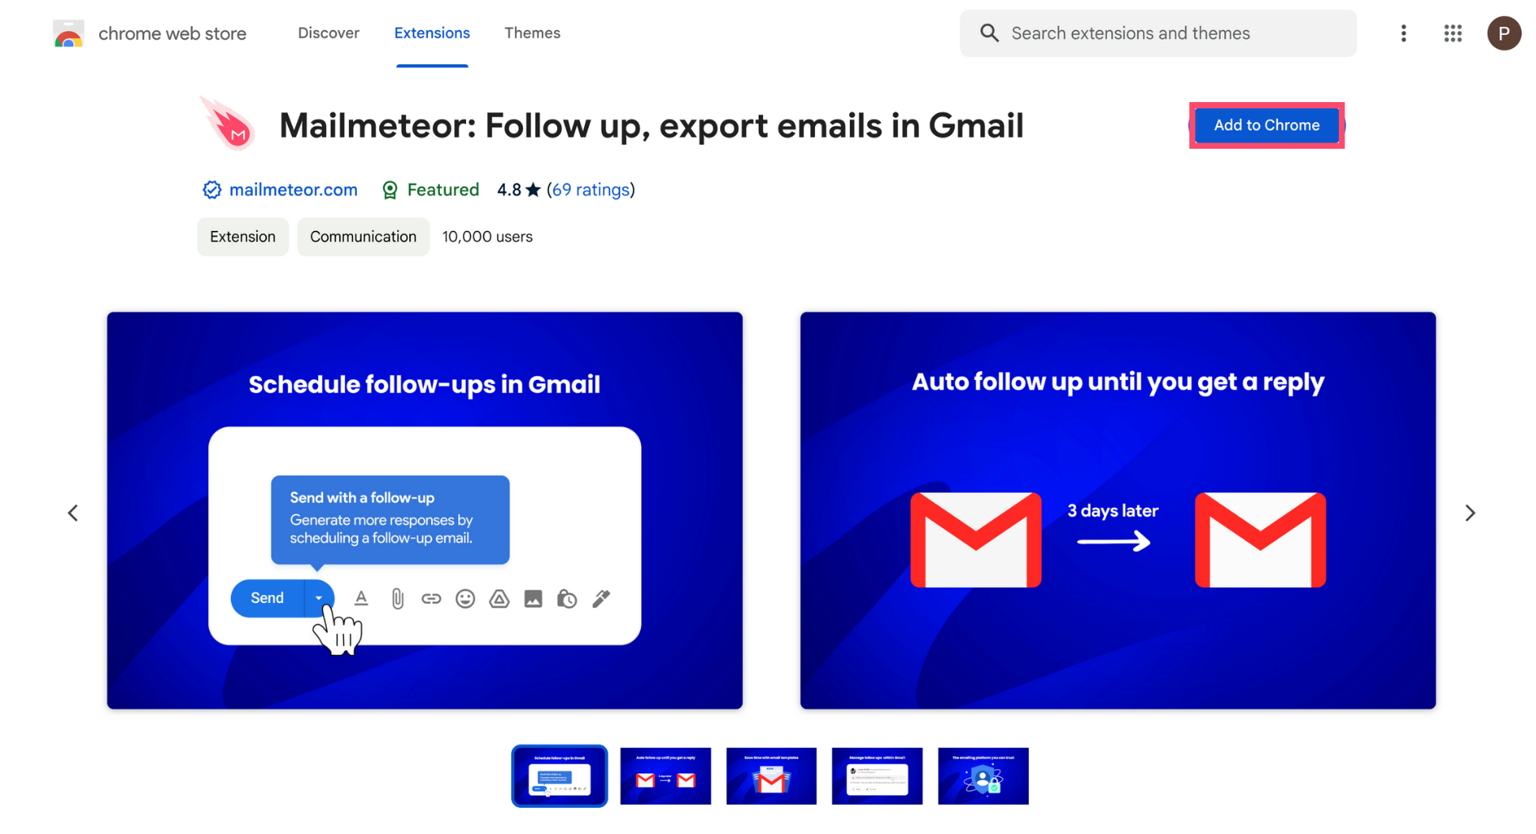
You can send mass personalized emails from Gmail using a simple Chrome extension called Mailmeteor. This tool lets you create bulk emails, schedule follow-ups, and track your emails directly from your Gmail inbox.
Step 1: Go to the Chrome web store and install Mailmeteor for Gmail.
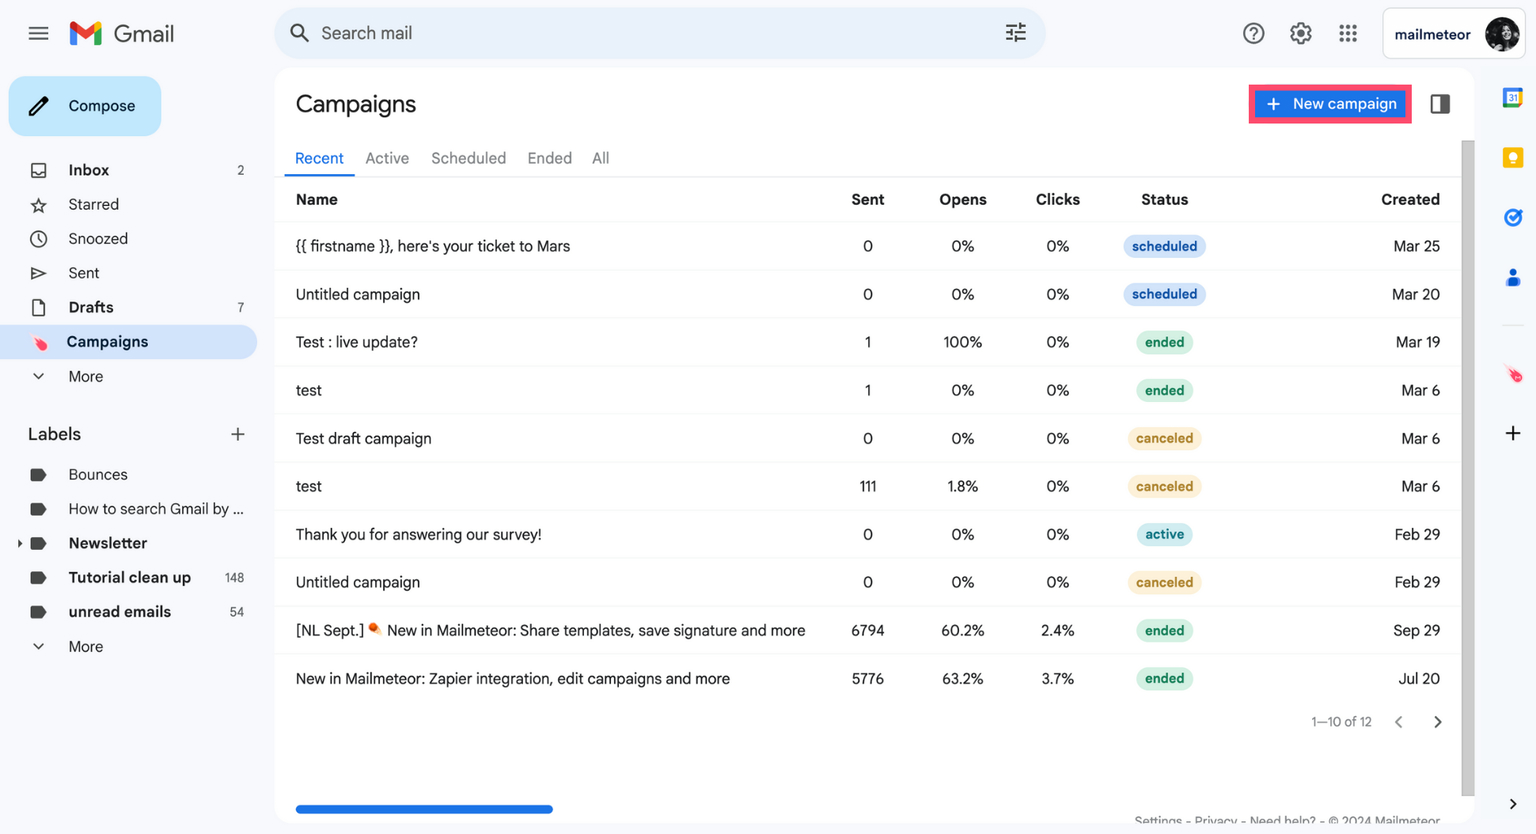
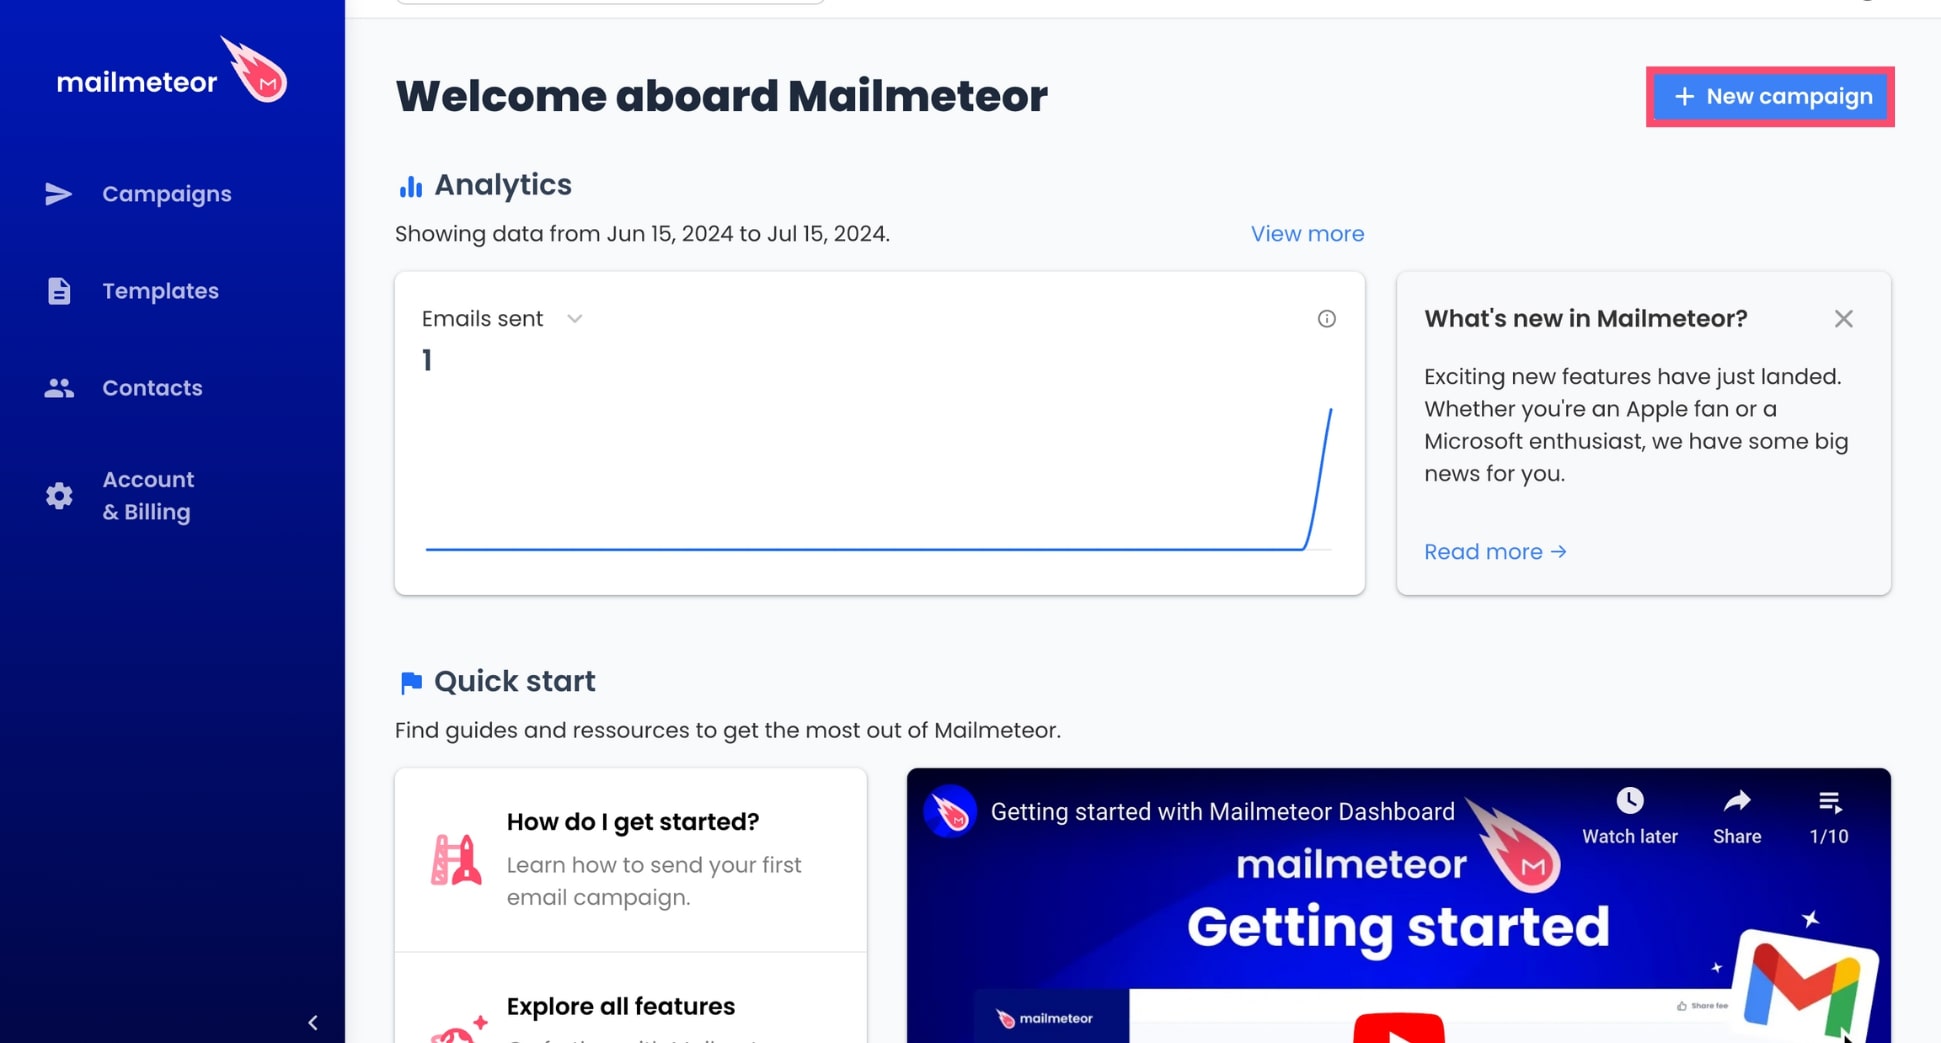
Step 2: Grant the add-on permission to access your Gmail inbox. Then go to the Campaigns tab and click New campaign.
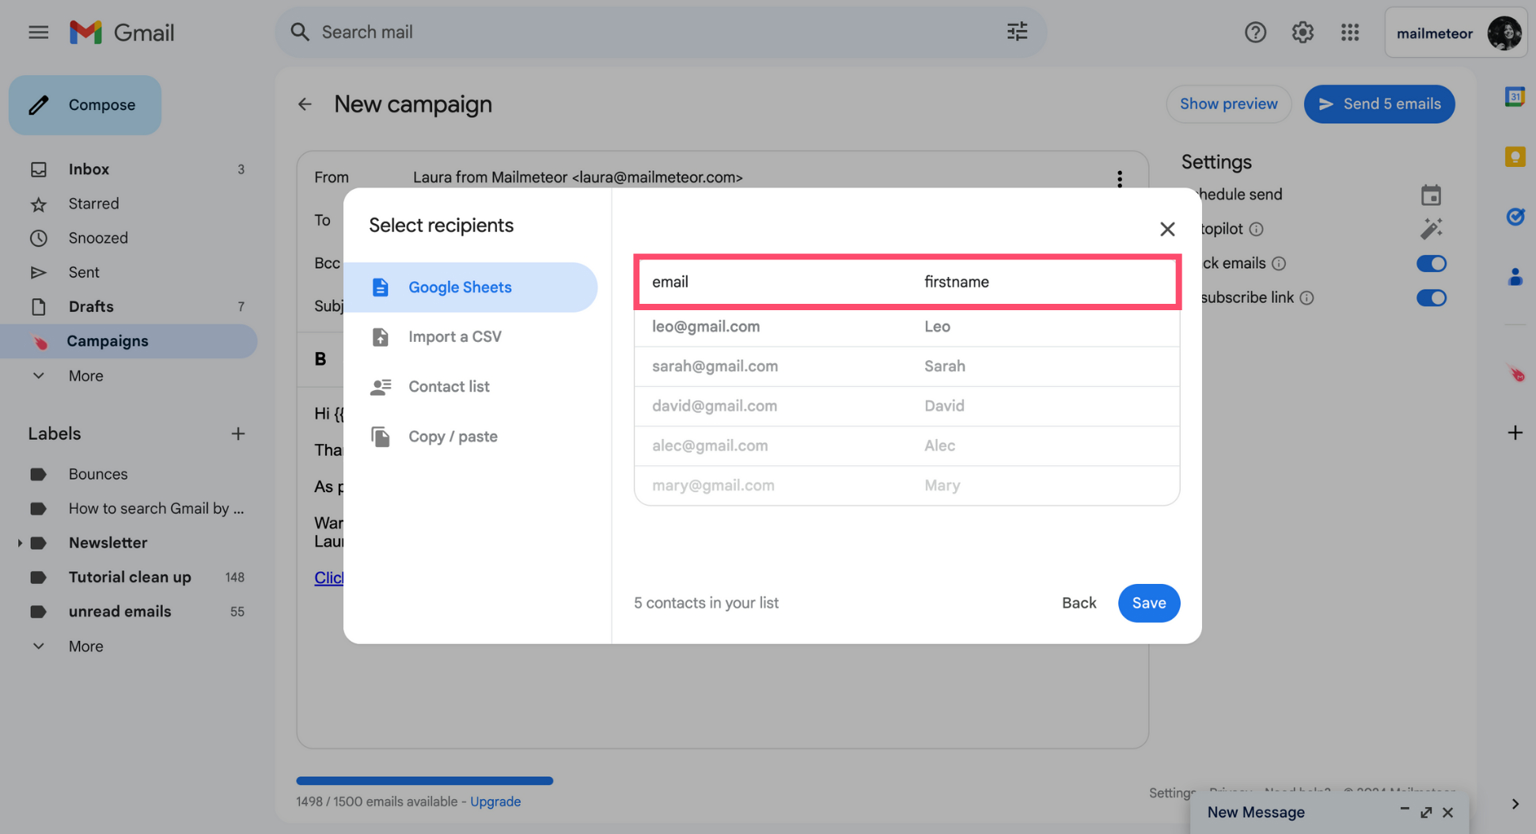
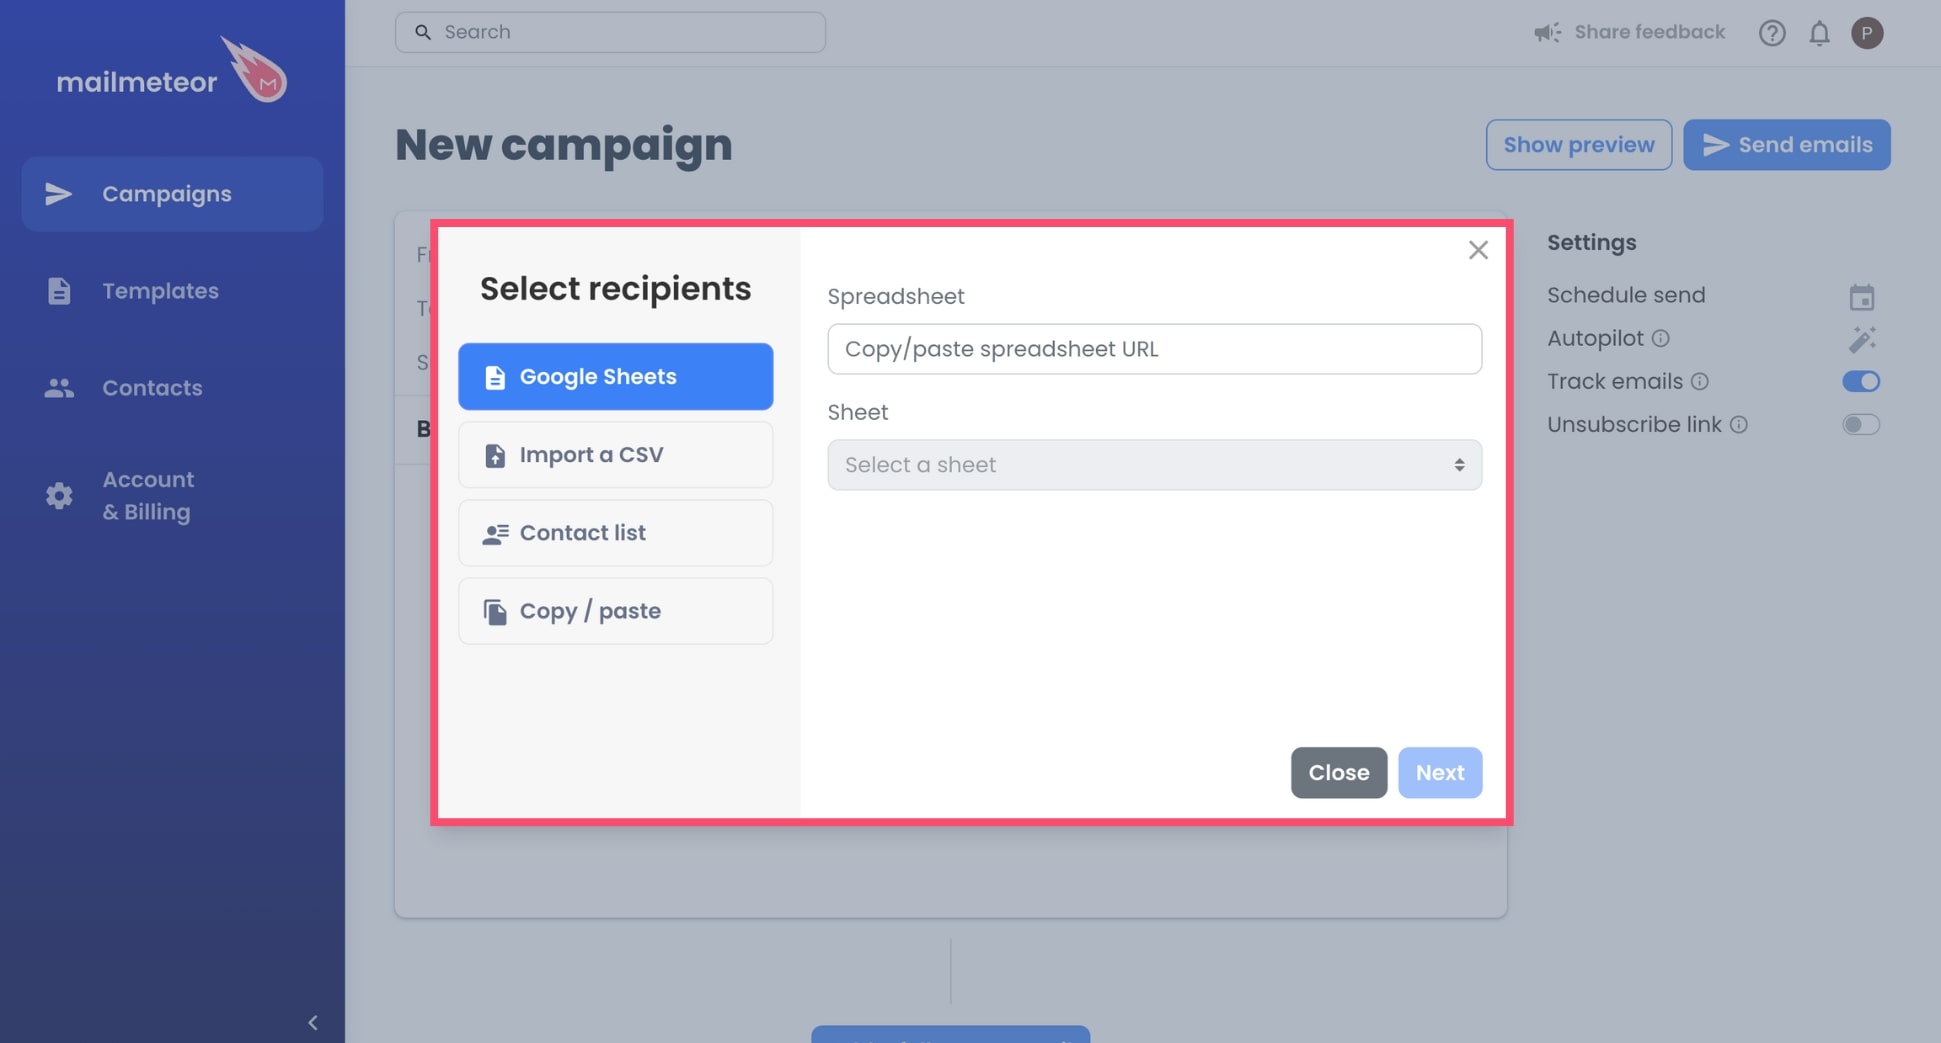
Step 3: To connect your data source, click Add recipients. Then select Google Sheets and paste the link to your spreadsheet. Or import your mailing list as a CSV file.
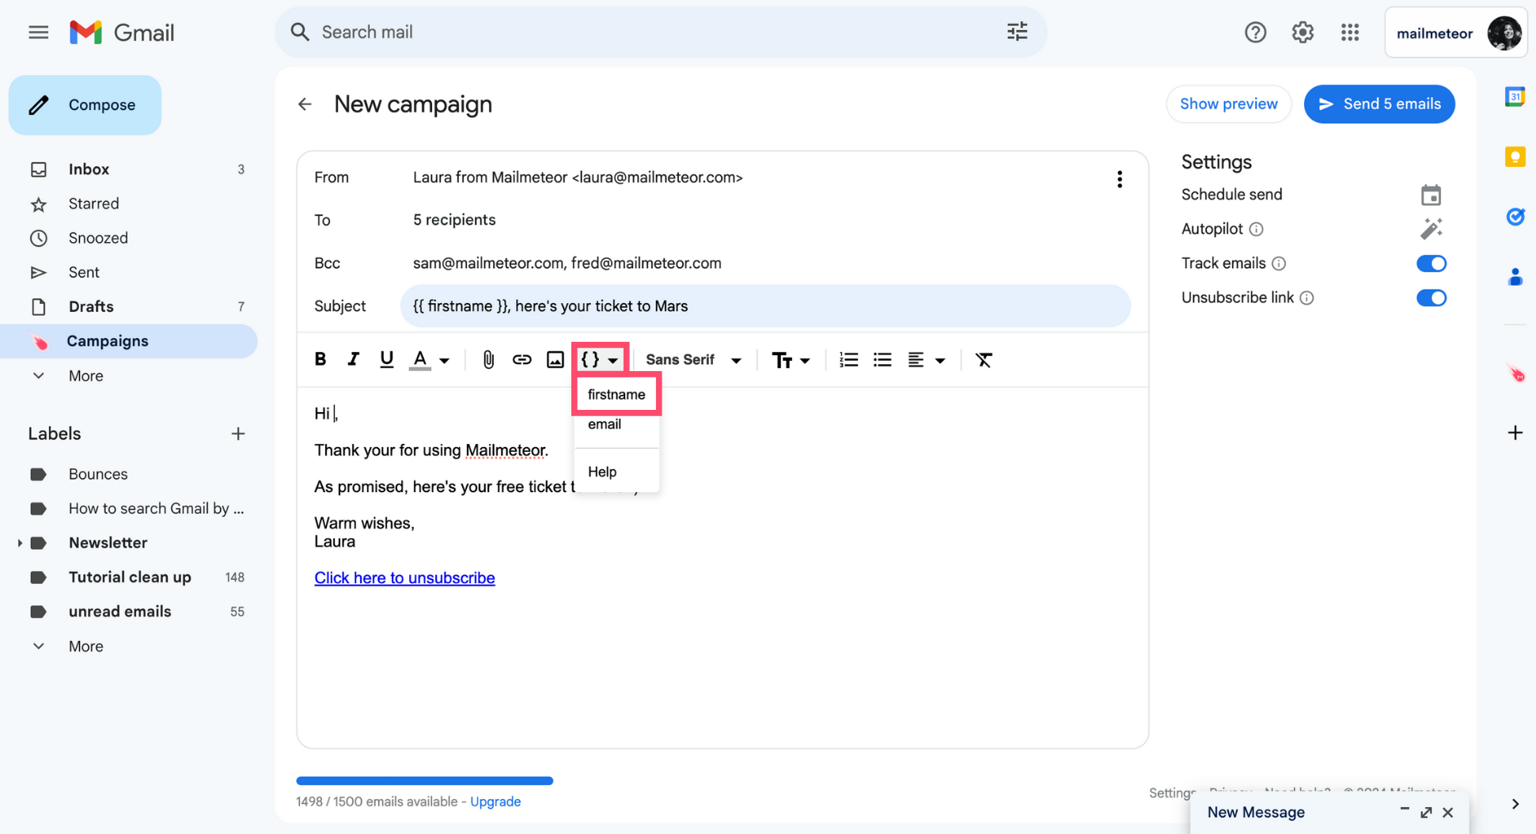
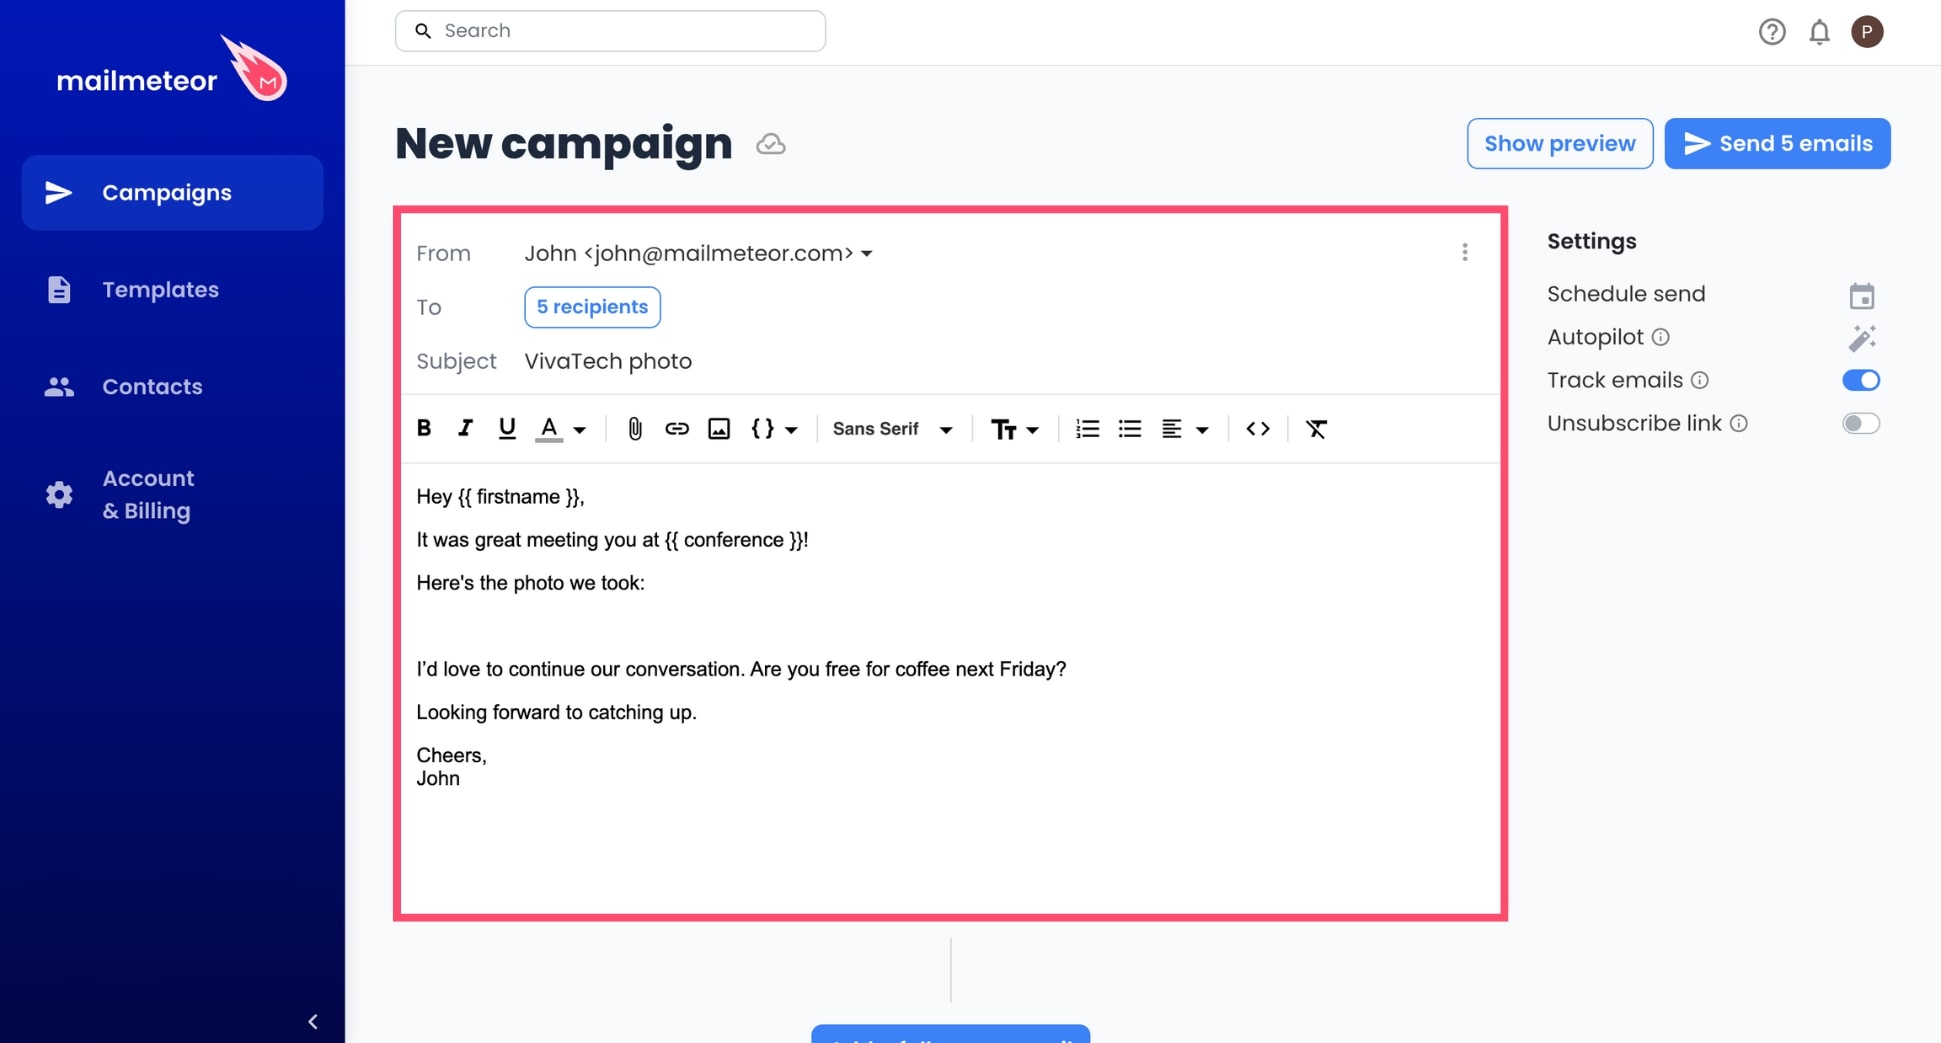
Step 4: To insert a merge field in your Gmail message, click Insert a variable, and select the appropriate tag.
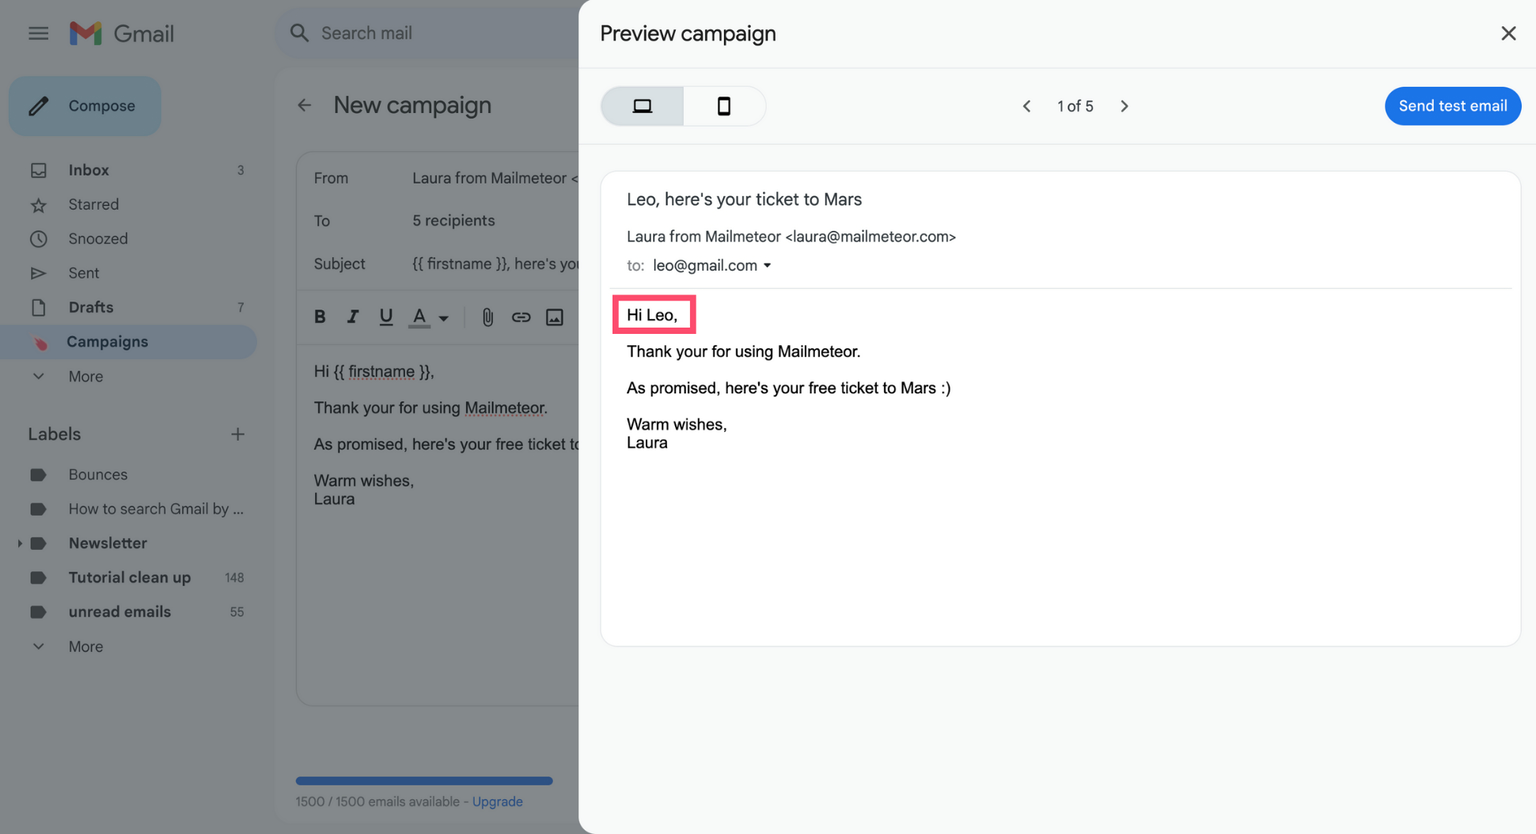
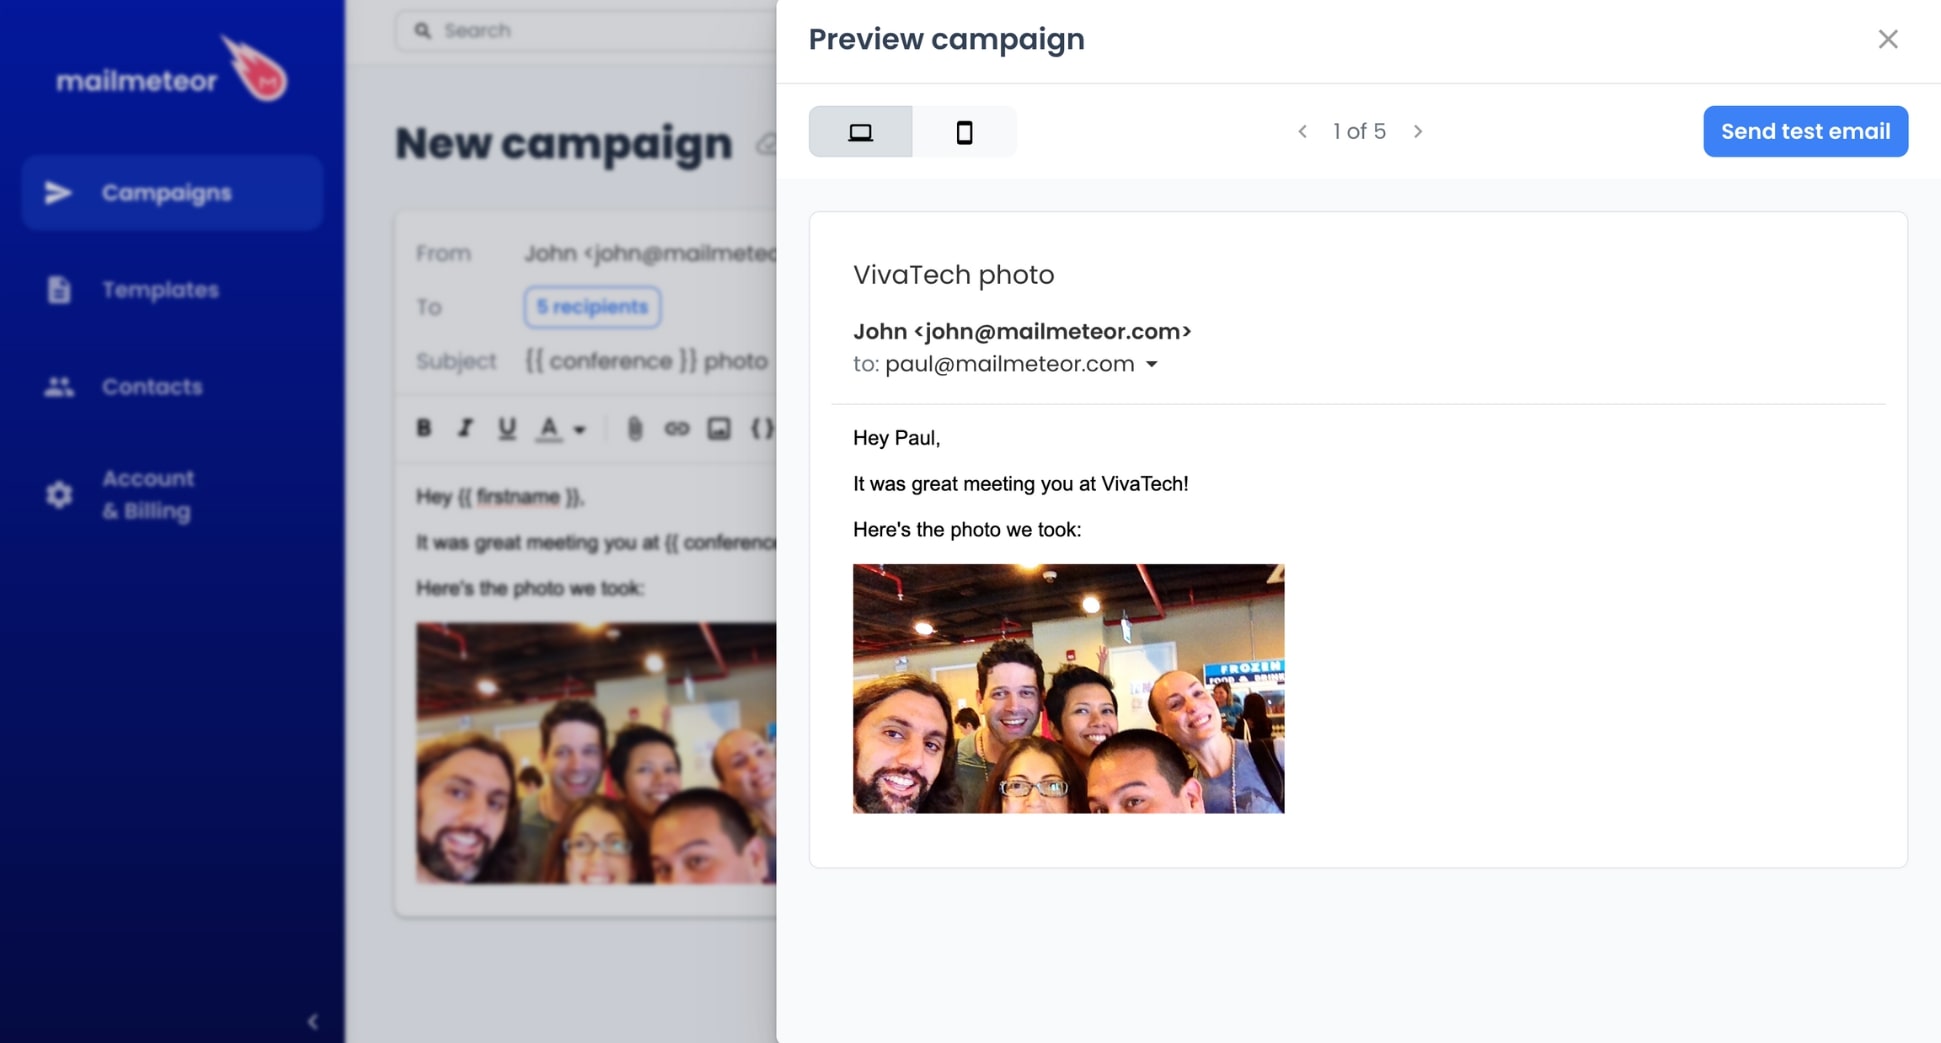
Step 5: Once you’re done customizing your email, click Show preview and check that your merge fields are being replaced with the correct data.
Step 6: Click Send emails to complete your mail merge.
And done. You can now create targeted email campaigns and make your recipients feel special. In just a few clicks. Mailmeteor abides by the Gmail send limitations, meaning you can send up to 2,000 emails a day.
In Word
Don’t want to use an add-on? No problem. You can perform a mail merge using Microsoft Word. Here’s how to insert your merge fields in a Word document to generate personalized copies.
Step 1: Open a blank document in MS Word.
Step 2: Go to Mailings > Start Mail Merge > Step-by-Step Mail Merge Wizard.
Step 3: Select the type of document you want to merge (emails, letters, envelopes, labels…). Then click Starting document.
Step 4: Choose Use the current document. Then prepare your template document. Click Select recipients.
Step 5: Link your Word document to an existing data source, create a new one, or select recipients from your Outlook contacts. Then click Write your letter.
Step 6: To customize your document, click where you want to add dynamic content, select Insert Merge Field, and choose a variable. Then click Preview emails.
Step 7: Click the Next and Previous arrows to navigate through each merged document and make sure that Word correctly replaces your merge fields with the appropriate data. Then click Complete the merge.
Step 8: Click Finish & Merge. Then select Print documents or Merge to emails to send mass personalized emails from Word.
And voilà. You can now use merge fields to personalize documents in bulk from Microsoft Word. Use this technique to merge invoices, quotes, letters, emails, labels, envelopes, and more.
In Google Sheets
You can also create your mail merge from Google Sheets. To do so, you’ll need to install a small plug-in called Mailmeteor. This add-on lets you insert merge fields and customize documents using data from a spreadsheet.
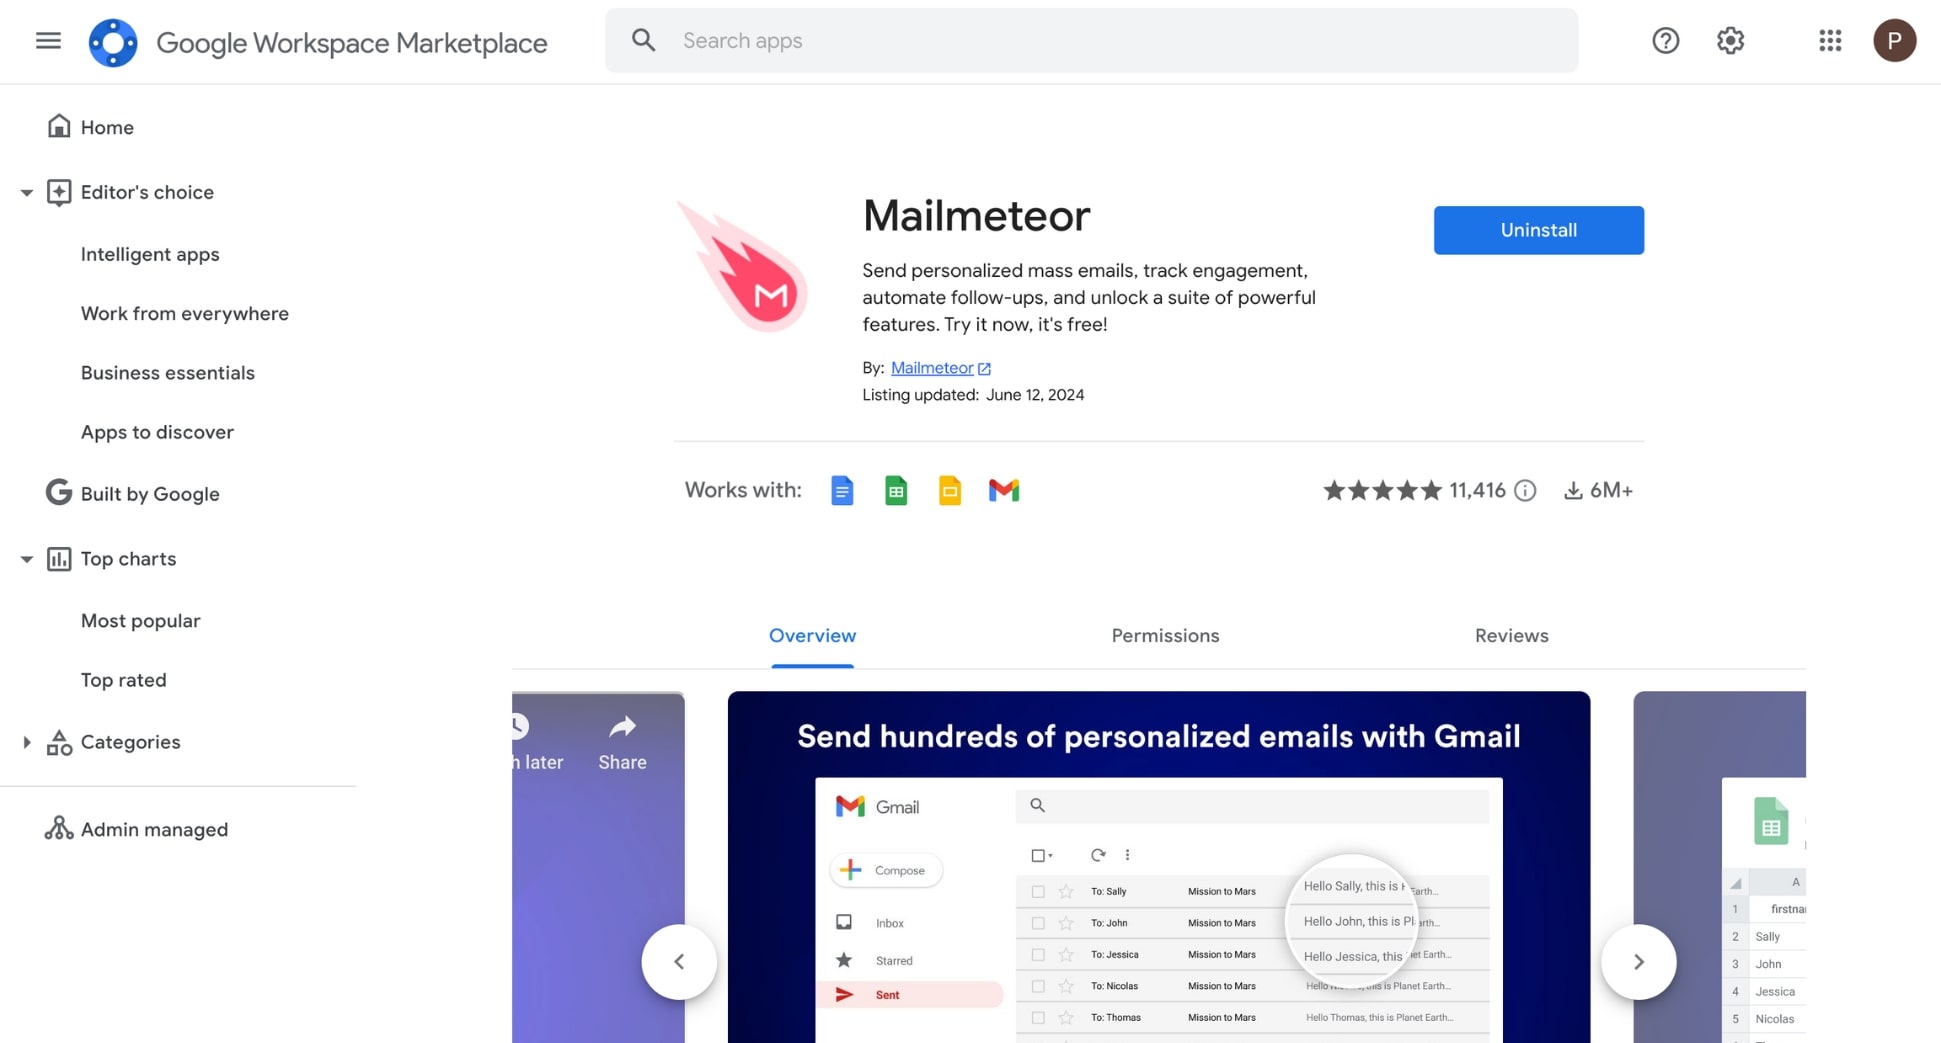
Step 1: Go to the Google Workspace Marketplace and download Mailmeteor for Google Sheets.
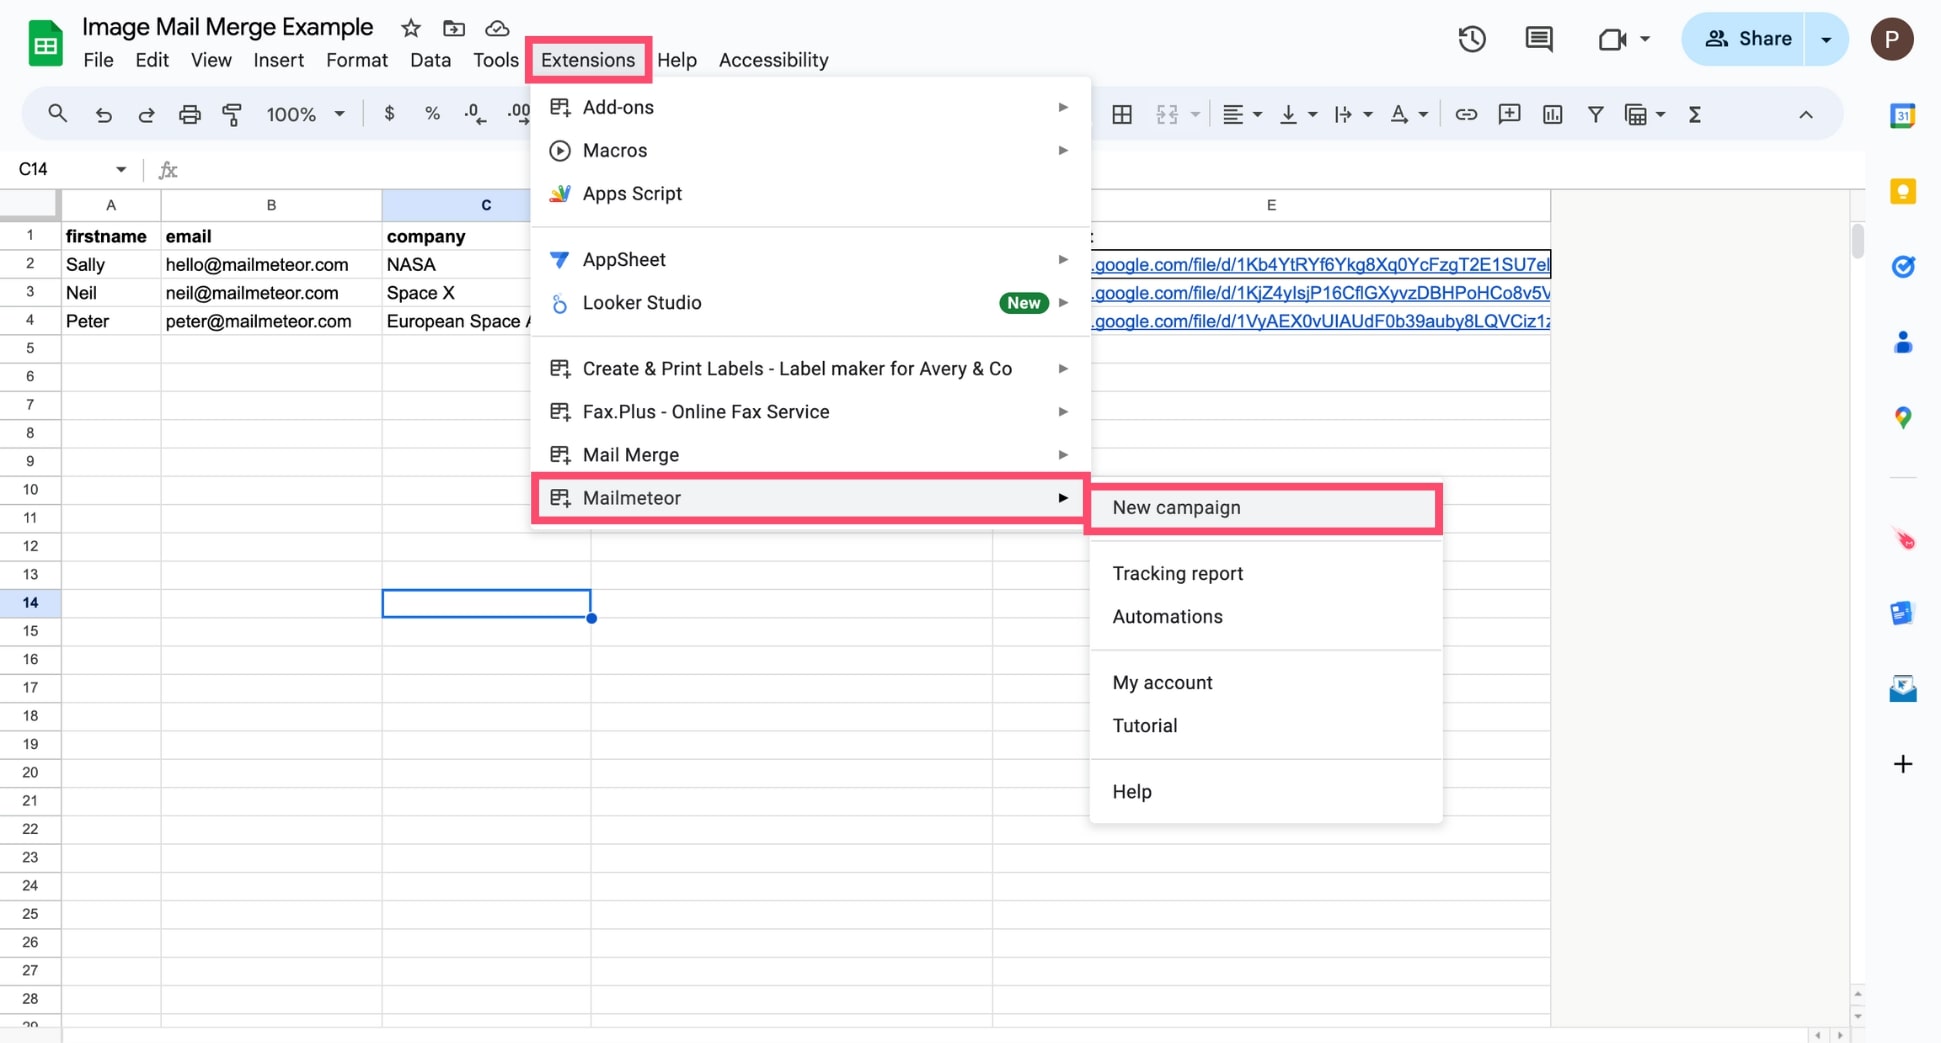
Step 2: Open your Google Sheets spreadsheet and navigate to Extensions > Mailmeteor > New campaign.
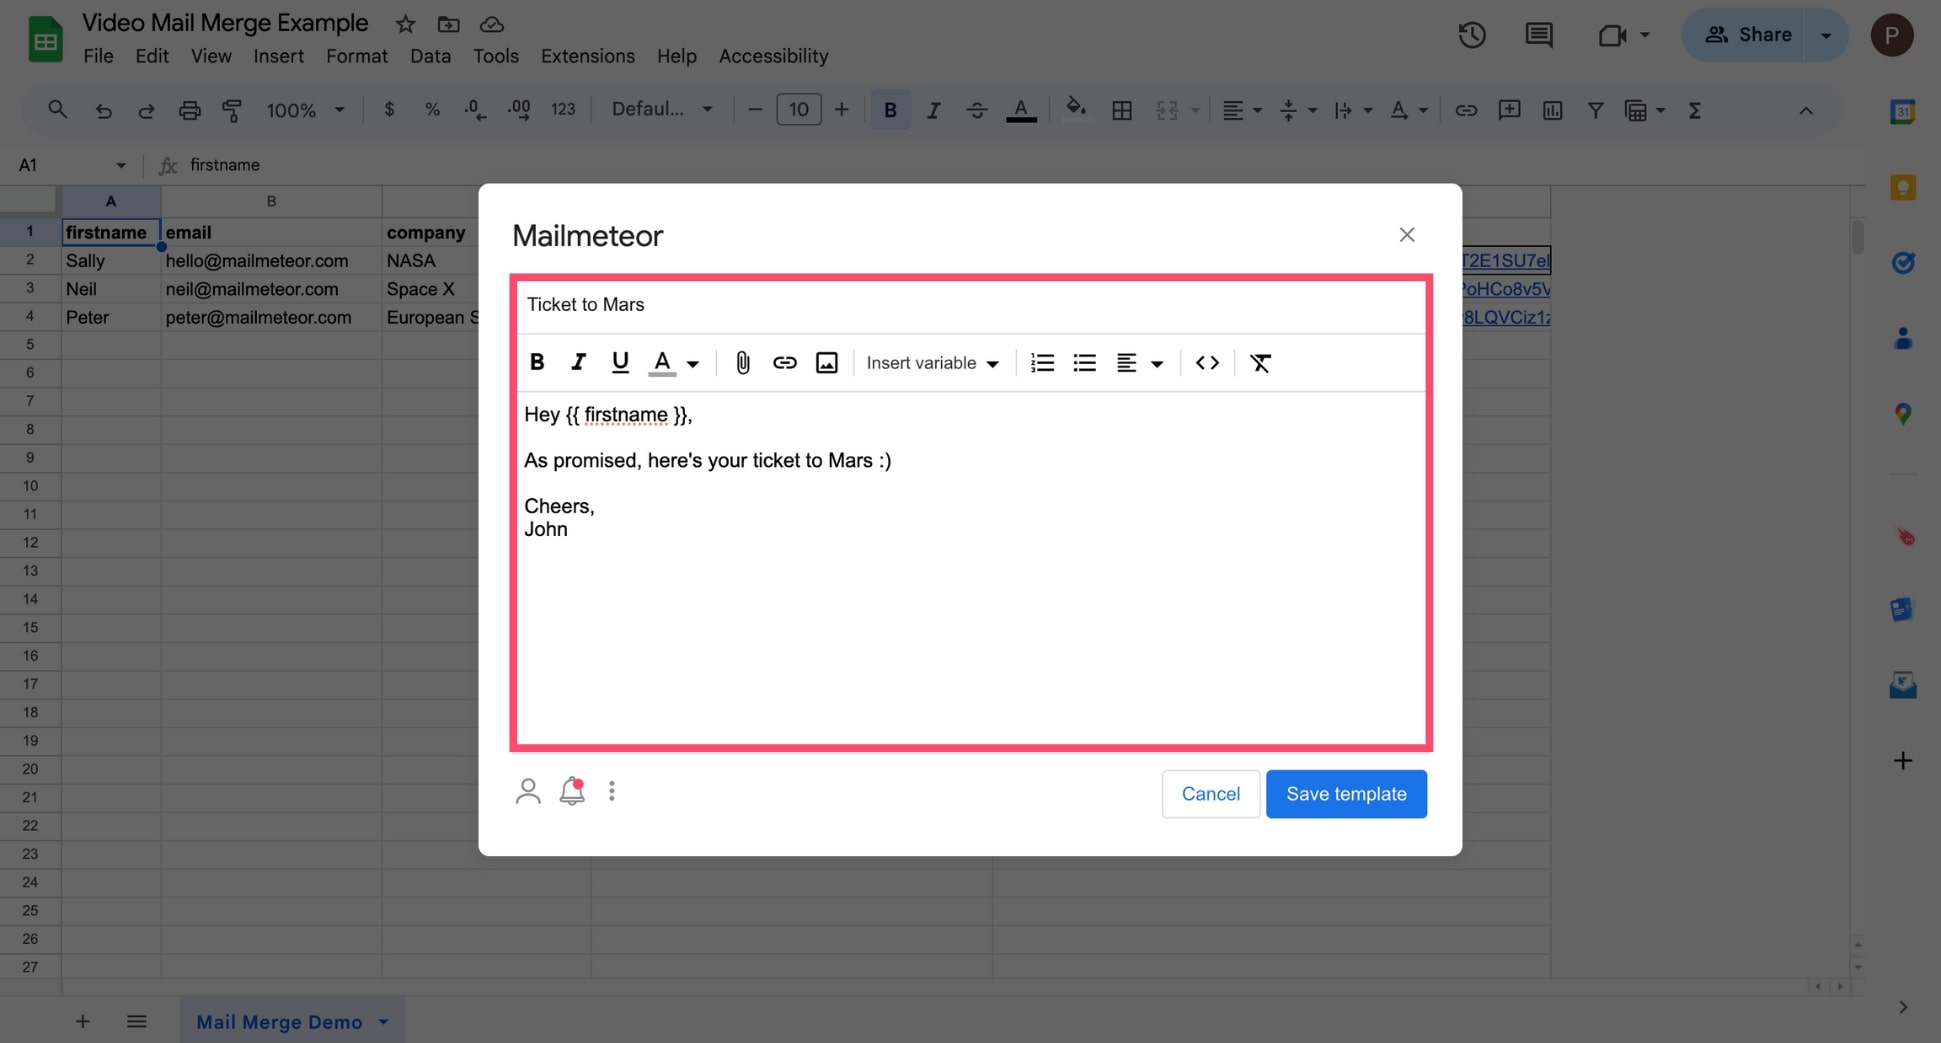
Step 3: Click Create a new template. Then compose your message and customize it with merge fields. To do so, click Insert a variable and choose the appropriate merge tag. When you’re done, click Save template.
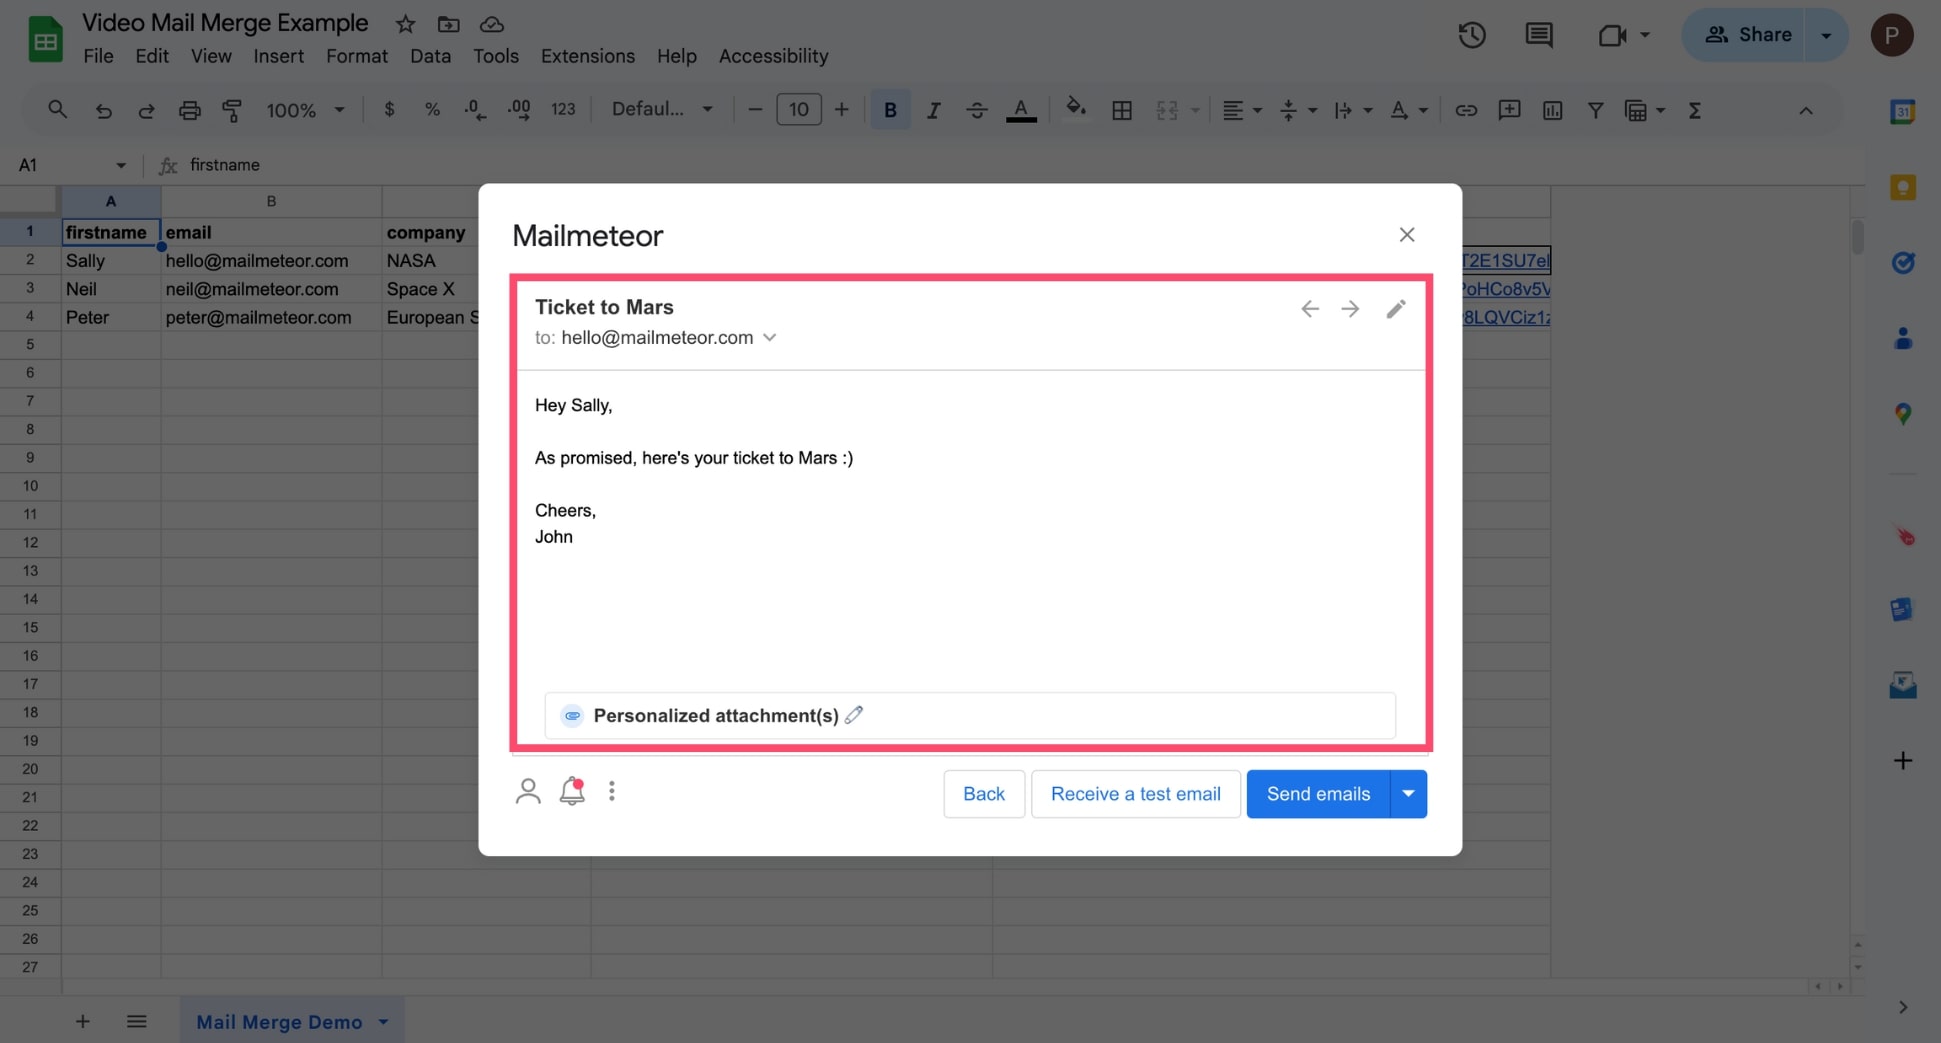
Step 4: Click Show preview to see how your email will appear in your recipients’ inboxes. Look for typos and make sure that your merge fields are being replaced with the intended data.
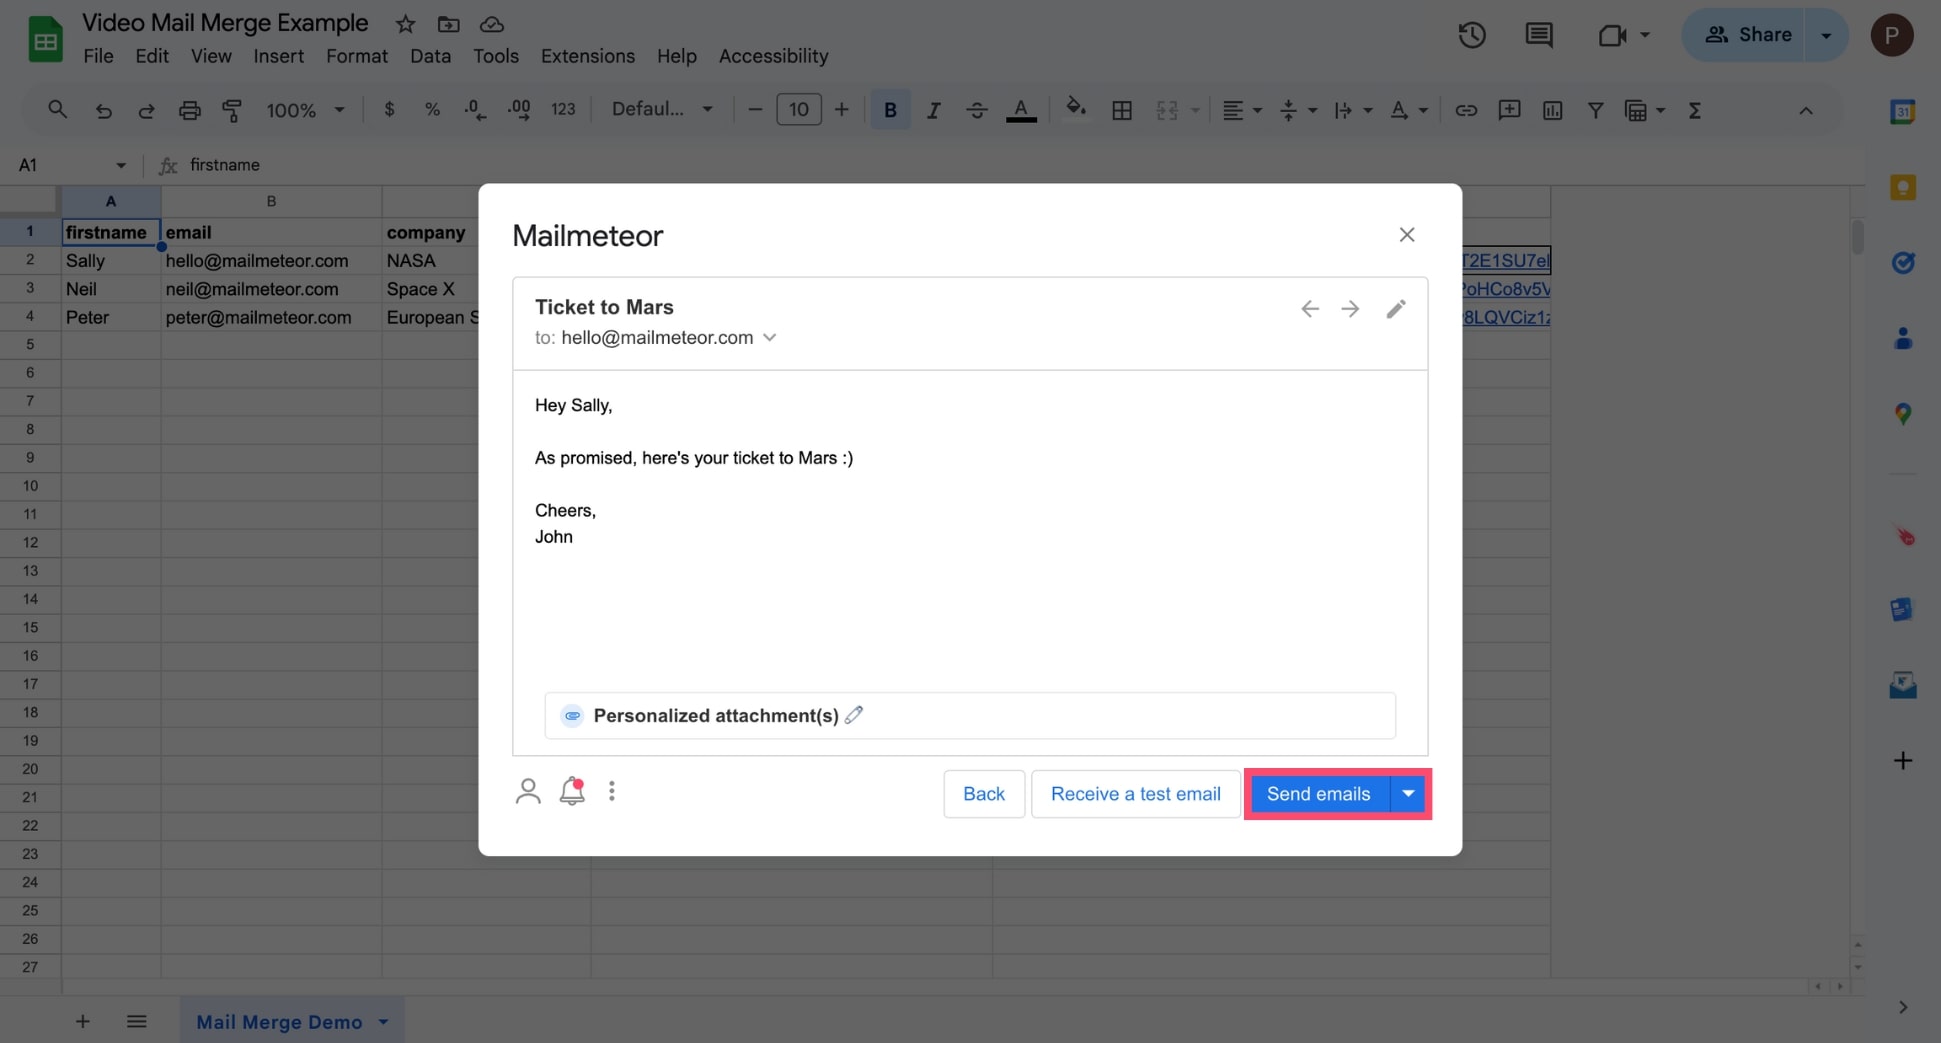
Step 5: Click Send emails.
And that’s it. Mailmeteor will now automatically retrieve the corresponding data from Google Sheets, then use it to replace your merge fields and create personalized copies of your template document.
In Mailmeteor
Last but not least, you can use merge fields in a mail merge platform such as Mailmeteor to create customized emails in bulk. This app lets you send up to 2,000 individualized emails a day. In just a few clicks. Here’s how it works.
Step 1: Sign up to Mailmeteor using your Google or Microsoft 365 email account.

Step 2: Create a new campaign.
Step 3: Click Select recipients. Then copy the link of your Google Sheets spreadsheet and paste it into Mailmeteor.
Step 4: To personalize your message, click Insert a variable. Then select the appropriate merge field.
Step 5: Click Show preview and use the Previous and Next arrows to view each email individually. Verify that, for each recipient, the merge tags are replaced with the corresponding data.
Step 6: Once you’re ready, press Send emails.
And voilà. Using merge fields and Mailmeteor, you’ve just created a personalized email campaign. You can now track the performance of your mail merge directly from the Mailmeteor Dashboard and schedule follow-ups.
How to handle missing data in merge fields?
When you send a mail merge with missing data (i.e. blank cells in your data source), the merge fields are left empty. This is not ideal. Because instead of starting with “Hi Neil” or “Hey Sarah”, your message will look like this: “Hi ,”.
To prevent this from happening, you can add a fallback value (also known as a default value) to your merge fields. The fallback is separated from the variable name using a vertical bar, like this: {{ variable | default }}.
So, for example, you can start your email with : Hi {{ firstname | there }}. This means that:
- When your recipient’s first name is known, we will use it.
- But when it’s unknown, we will default to the value “there”.
As a result, the emails will start with something like “Hi Sally”, “Hi Neil”, or default to “Hi there”. Fallbacks help you make sure that your emails look right in every situation. Make sure to use them when you’re missing data.
The bottom line
Merge fields can help you create better content, much faster. You can use them to create personalized letters, labels, emails, or other documents. At scale. By automating this process, you will save time, reduce errors, and create a more engaging experience for your recipients.
With tools like Mailmeteor, using merge fields becomes a (very) straightforward task. Even for those new to mail merges. Our free plan lets you send up to 50 customized emails a day. You can also track emails in real-time and schedule follow-ups. Give it a try and let us know what you think. No strings attached :)
Happy merging 💌


