
You’ve built a great add-on for the Google Workspace ecosystem (Google Docs, Google Sheets, Gmail & co.). It’s getting a lot of traction and you feel like you can monetize it. If this is your current situation, great! We were in the same situation a few years ago at Mailmeteor and we totally understand how excited you can feel today.
Below is the guide I wish I had found a few years ago when I was researching how to monetize our mail merge add-on for Google Sheets.
There are several ways to manage how you monetize add-ons. I’ll share with you how we do it at Mailmeteor. Our approach is - I believe - one that provides the best user experience (for your users) and high security (for you, the developer).
Also, at Mailmeteor, we heavily rely on Firebase, which has a NoSQL database (Real-time Database) and can run serverless functions (Cloud Functions). We use both to handle the licensing. If you aren’t familiar with Firebase yet, feel free to read on. The general concept still applies even if you prefer AWS or other cloud providers.
Step 1. Authentication
First, you need to authenticate your users. When you build an add-on, sometimes you don’t have a way for your users to authenticate. That’s especially true for narrowed add-ons (that provide a limited set of features). The thing is as soon as you want to monetize your add-on, you need to provide a signup flow to safely authenticate users and retrieve their status (e.g. free vs. paid).
Google Apps Script already provides an authentication mechanism, so there’s no need to start from scratch. Using UserSession.getEmail() you can safely know which user is running your code. That’s a very good start. Plus, if you take this path (which we did at Mailmeteor) you don’t need to prompt to users an email/password form. The user is already logged in. That’s a high-five for your users, plus this will save you hours of work.
This being said, now you need to make Google Apps Script communicate with your backend. As I said, at Mailmeteor, we use Cloud Functions for our backend. This has the benefit of being relatively cheap at the start and scaling automatically as the add-on grows. But, Cloud Functions is not a requirement, you could grab a cheap $4 droplet on DigitalOcean and that would work just as well.
To make Google Apps Script work with your backend, you can create a User class in your Apps Script code. And add a getProfile method in it. That method will fetch the user profile every time you call the function. Here’s a gist of our user.gs file in Apps Script:
export class User {
  public getProfile() {
    const userId = this.getUserIdFromEmail(Session.getEffectiveUser().getEmail())
    const request = {
      url: BACKEND_ENDPOINT_ + '/user?uid=' + (email),
      options: {
        method: 'GET',
        headers: {
          Authorization: 'Bearer ' + BACKEND_TOKEN_
        }
      }
    }

    const response = UrlFetchApp.fetch(request)
    const profile = JSON.parse(response.getContentText())

    return profile
  }

  public getUserIdFromEmail(email) {
    const hash = `SOME_RANDOM_STRING-${email.toLowerCase().trim()}`
    const digest = Utilities.computeDigest(Utilities.DigestAlgorithm.SHA_256, hash);

    return digest
      .map(function(byte) {
        const v = byte < 0 ? 256 + byte : byte;
        return ("0" + v.toString(16)).slice(-2);
      })
      .join("");
  }
}
To retrieve the authenticated user profile, you would run new User().getProfile(). As you can see, we rely on Session.getEffectiveUser().getEmail() to safely retrieve the authenticated user email. This method is made available by Google Apps Script via the Session class.
Also, you might have noticed that the user’s ID is generated by the getUserIdFromEmail which is just an SHA-256 of the user email. That won’t resist brute force, so we prefix it with a random string to make it harder to guess.
Sometimes, your addon might use Apps Script to create and serve HTML, for example by showing a modal or sidebar. In such a case, you would have to create a function in your user.gs file: function getUserProfile() { return new User().getProfile() }. Then, you can retrieve the user profile from the HTML page by running google.script.run.getUserProfile().
Now that you know how to retrieve a user profile, let’s see how to create a user.
Step 2. User creation
In your backend, you will need to create the /user endpoint that will retrieve the user profile. Again, Firebase provides a great environment to do just that:
export const profile = async (request, response, next) => {
  try {
    // Retrieve params
    const userId = request.query.uid;

    // Validation
    if (typeof userId !== 'string' || !userId) throw new Error('invalid_params');

    // Retrieve the profile from Firebase Real-time Database
    const userRef = FirebaseDatabase.ref(`users/${uid}`);
    const userSnap = await userRef.once('value');
    const profile = userSnap.val() || {};

    // Send response to client
    response.status(200);
    response.send(profile);
    response.end();
  } catch (error) {
    next(error);
  }
};
The user ID generated in Apps Script. We use it as a key in our Firebase Real-time Database to retrieve the user profile. That’s very easy to implement. Before releasing to production, make sure to secure your application by protecting your database from read/write (learn how to do it.
If you are already familiar with Firebase, you might have noticed that this example doesn’t use Firebase Authentication - Firebase’s user management feature. That’s because it way easier to do like that and at Mailmeteor we have some applications that run just this code. Mailmeteor is a bit different as we provide a Dashboard where users can sign in to send emails and manage their accounts. So we do use the Firebase Authentication layer.
What’s great about using Firebase, is that it lets you build lots of things easily. For example, Firebase lets you run a function as soon as a new field is created in your database. This can help you send an onboarding email sequence for example.
Step 3. Integrating with Stripe
So let’s recap, from your add-on, using Apps Script and Firebase, you can now safely retrieve a user profile. All you need to do now is to update the user profile when someone pays you.
We use Stripe because that’s a relatively intuitive payment platform, but the following would work just as well with a PayPal account or any other service. We use Stripe Checkout at Mailmeteor to handle the checkout flow. If you want to manage the checkout flow yourself, you can do so according to their docs.
What we will focus on here are Stripe webhooks. In Stripe, you can create webhooks, so that Stripe can inform you whenever something happens. There are webhooks for just about anything (new customer, new subscription, new payment, new invoice, etc.).
The webhook that you will use depends on the business model:
- for lifetime subscriptions (i.e. the user pays you once and gets full access to the software for the rest of its life), you need to listen to the
checkout.session.completedevent. - for recurring subscriptions (i.e. you are building a SaaS), you need to listen to multiple webhooks. At least:
webhook.checkout.session.completedandcustomer.subscription.deleted. And depending on how advanced your SaaS is, you might need as wellcustomer.subscription.updatedandinvoice.*events.
To keep things simple, I’ll show you how to listen to checkout.session.completed. And if the business model of your add-on requires more, it’s up to you to handle more webhooks events.
export const webhook = async (req, res, next) => {
  // Stripe webhook request signature
  const sig = req.get('stripe-signature')

  // Stripe webhook raw request
  // Note: "rawBody" is a Firebase method
  // @see: https://firebase.google.com/docs/functions/http-events
  const rawBody = req.rawBody

  try {
    // Verify Stripe request
    const event = stripe.webhooks.constructEvent(rawBody, sig, STRIPE_WEBHOOK_SECRET)

    // Handle the event
    switch (event.type) {
      case 'checkout.session.completed':
        const session = event.data.object
        const customer = (await stripe.customers.retrieve(session.customer))

        // Update profile in Firebase RTDB
        const uid = getUserIdFromEmail(customer.email)
        const userRef = await FirebaseDatabase.ref(`users/${uid}`);
        await userRef.update({ paid: true, customer: customer.id })

        break
    }
  }
}
The webhook function updates the user’s profile with the status paid = true and the customer’s ID (more on that later). This means that starting from now, whenever you retrieve the user’s profile, you can show it all your paid features.
Once you have deployed the webhook function to Firebase, you can configure the webhook in Stripe Dashboard. Just retrieve the URL of your function in the Firebase console and paste it into Stripe.
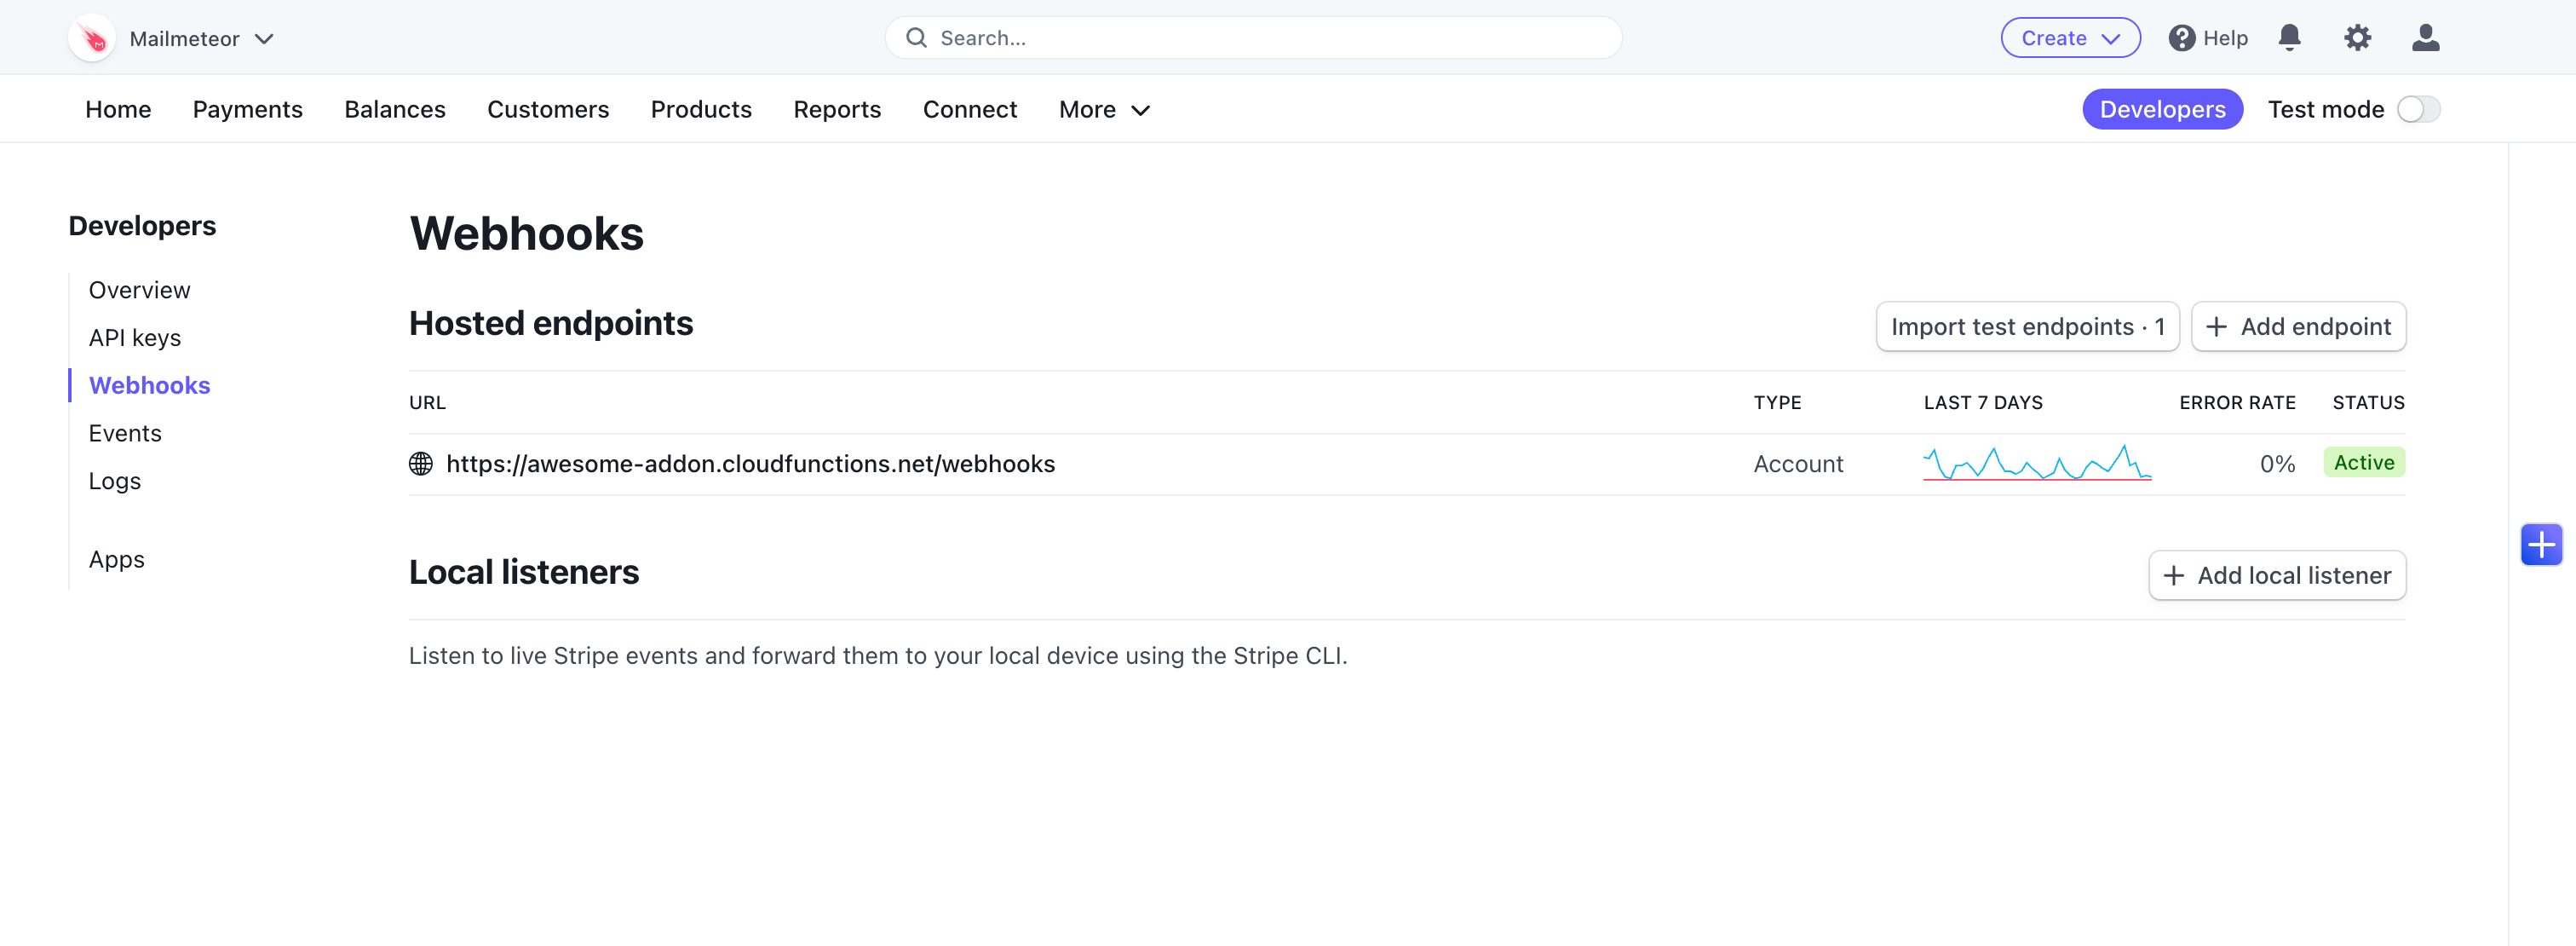
I would highly recommend you use Stripe’s test mode to make sure everything works great.
Bonus: Customer portal
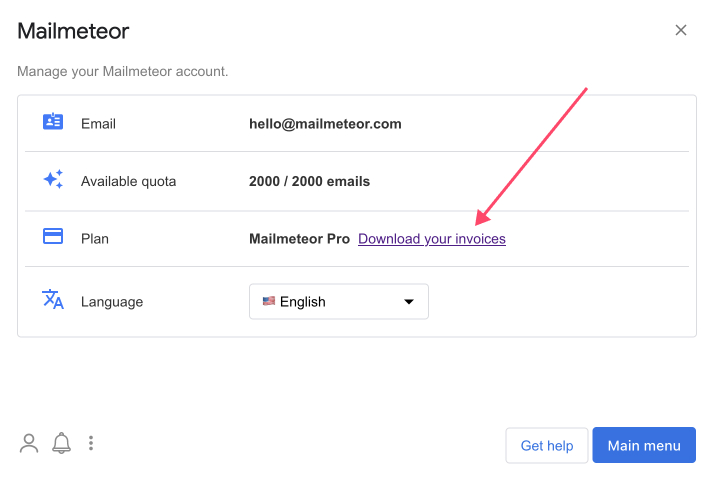
When you start to monetize your add-on, your users will regularly ask you for their invoices. If you don’t want to spend 50% of your support on these requests, it’s best to create a customer portal where users can retrieve their invoices on their own.
Good news: Stripe can help you with that! From your add-on, in the UI, you could add a new view where users can manage their accounts.
To add a link to the customer portal, you need to redirect your users to Cloud Functions which will create the Stripe URL to the customer’s portal. The portal function looks similar to this one:
export const portal = async (re, res, next) => {
  const userId = req.body && req.body.user;
  const customerId = req.body && req.body.customer;

  if (typeof userId !== 'string' || !userId) throw new Error('invalid_params');
  if (typeof customerId !== 'string' || !customerId) throw new Error('invalid_params');

  const customer = await stripe.customers.retrieve(customerId);
  const userEmail = getUserIdFromEmail(customer.email);

  if (userId !== userEmail) throw new Error('invalid_customer');

  const session = await stripe.billingPortal.sessions.create({
    customer: customer.id,
  });

  res.redirect(session.url);
};
The customer value is saved at the webhook step, so you can reuse it easily. Also, for better security, we double-check that the customer’s email in Stripe matches the provided user ID.
Well, that was a lot?! You’ll probably need a few things here and here to finalize the process. But I hope that’s a good starting point to help you monetize your Google Workspace add-on.
If you need more help to connect-the-dots, please feel free to reach out to me. And if you haven’t an add-on yet, find some inspiration in our best Google add-ons directory.

This article was written by Corentin Brossault, Mailmeteor's CEO. Mailmeteor is a simple & privacy-focused email marketing software. Trusted by millions of users worldwide, it is often considered as the best Gmail mail merge to send mass personalized emails.


