Want to email multiple people at once? In this quick guide, we’ll show you how to create an email group in Outlook.
When you want to email multiple recipients at once in Outlook, you need to add each email address in the To field. Which can be quite time-consuming.
Fortunately, there’s a way around this. If you’re emailing the same group of people regularly, you can create an email group in Outlook.
In this quick guide, we’ll share everything we’ve learned about Outlook email groups during our 5+ years of experience in the email industry, including:
- How Do Outlook Email Groups Work?
- How to Create an Email Group in Outlook
- How to Send an Email to a Contact Group in Outlook
- How to Edit an Email Group in Outlook
- How to Add or Remove Contacts from your Outlook Email Group
- How to Delete an Email Group in Outlook
Sounds good? Then let’s get started.
How Do Outlook Email Groups Work?
Once you’ve created an email group in your Microsoft Outlook account, you no longer need to type each email address manually.
Instead, you can email all the members of your Outlook email group by simply typing the name or the ID of your group in the To field of your email.
Outlook groups are a handy feature to improve your productivity and save time on a daily basis. Here are some examples of how to use them ⤵️
- Communicate with your team – Let’s say you work for the marketing department of your company. In that case, you may want to create an email group to communicate with the members of your team, share your feedback, and keep them in the loop.
- Share your interest – Imagine you have a shared interest with a group of colleagues. Like basketball, for example. And you often email them to talk about the last big match. Or to organize a small basketball tournament within the company.
- Keep your family close – Lastly, you could also create an Outlook email group with the members of your family. This way, you can send messages to your parents, your siblings, or your children, and have a group conversation with them.
Overall, Outlook email groups are a powerful and flexible tool, that allows you to communicate more clearly and efficiently with a group of people.
Want to create your first email group in Outlook? In this next section, we’ll help you to get started on your emailing journey.
How to Create an Email Group in Outlook
Microsoft has made it very easy to create an email group in Outlook. However, the process may vary depending on which device and which version of Outlook you’re using. Here’s how to create email groups on Windows, Mac, and Outlook.com.
On the Web
Step 1: Go to Outlook.com.
Step 2: In the sidebar, on your left, click the People icon.
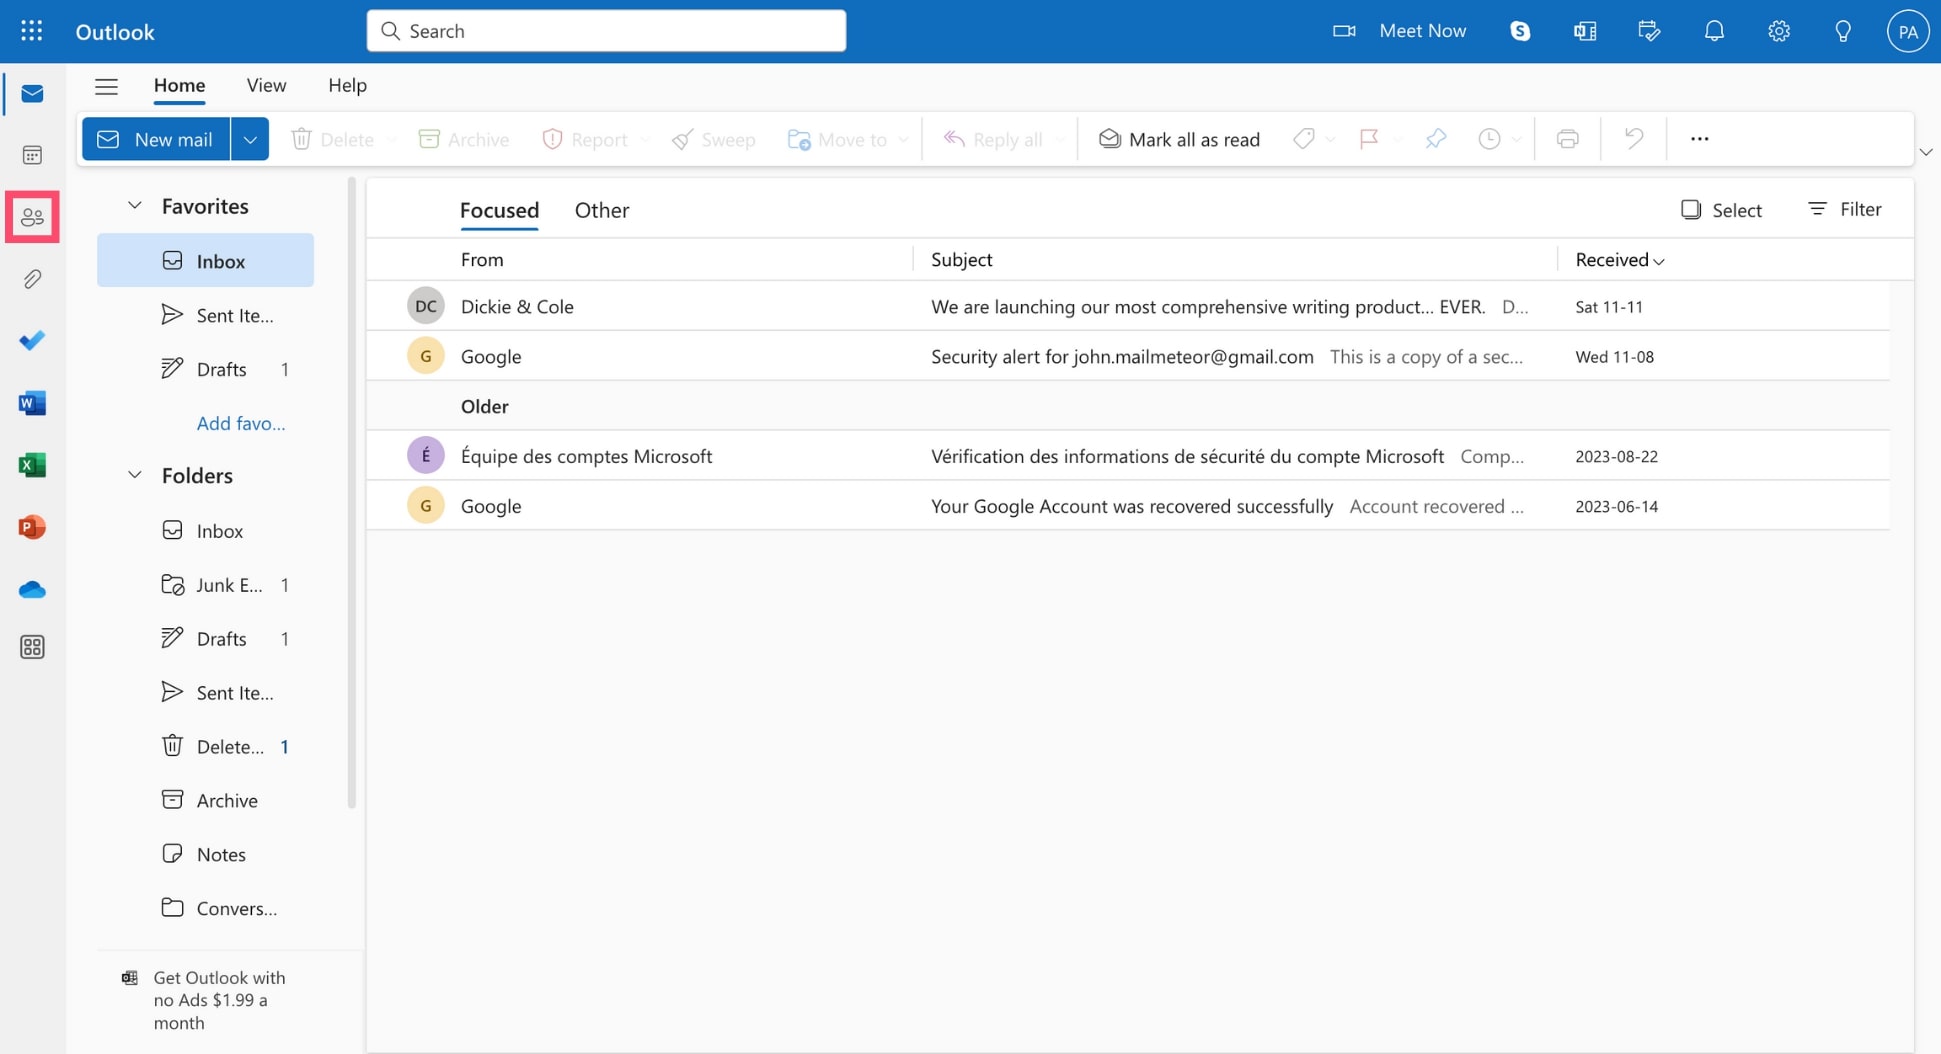
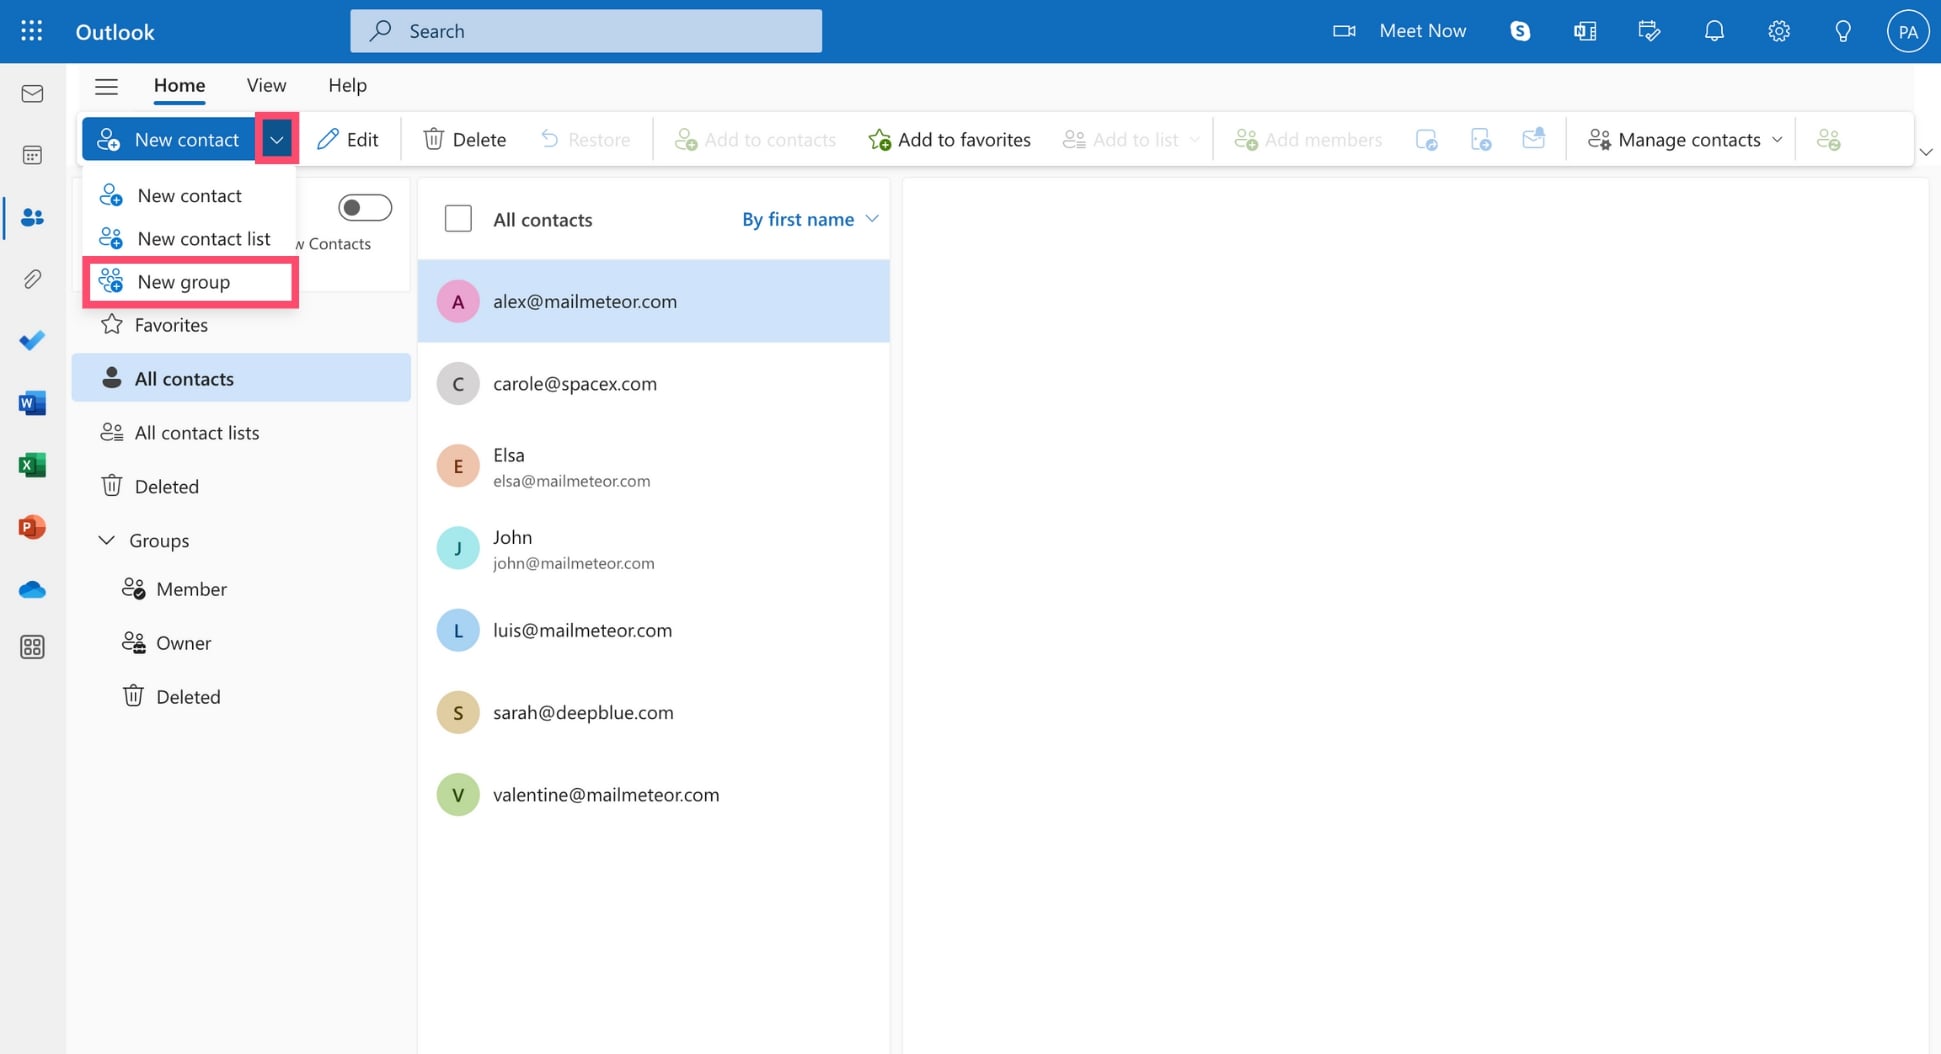
Step 3: From there, click the down arrow next to the New contact button. A dropdown menu will appear. To create an email group, select New group.
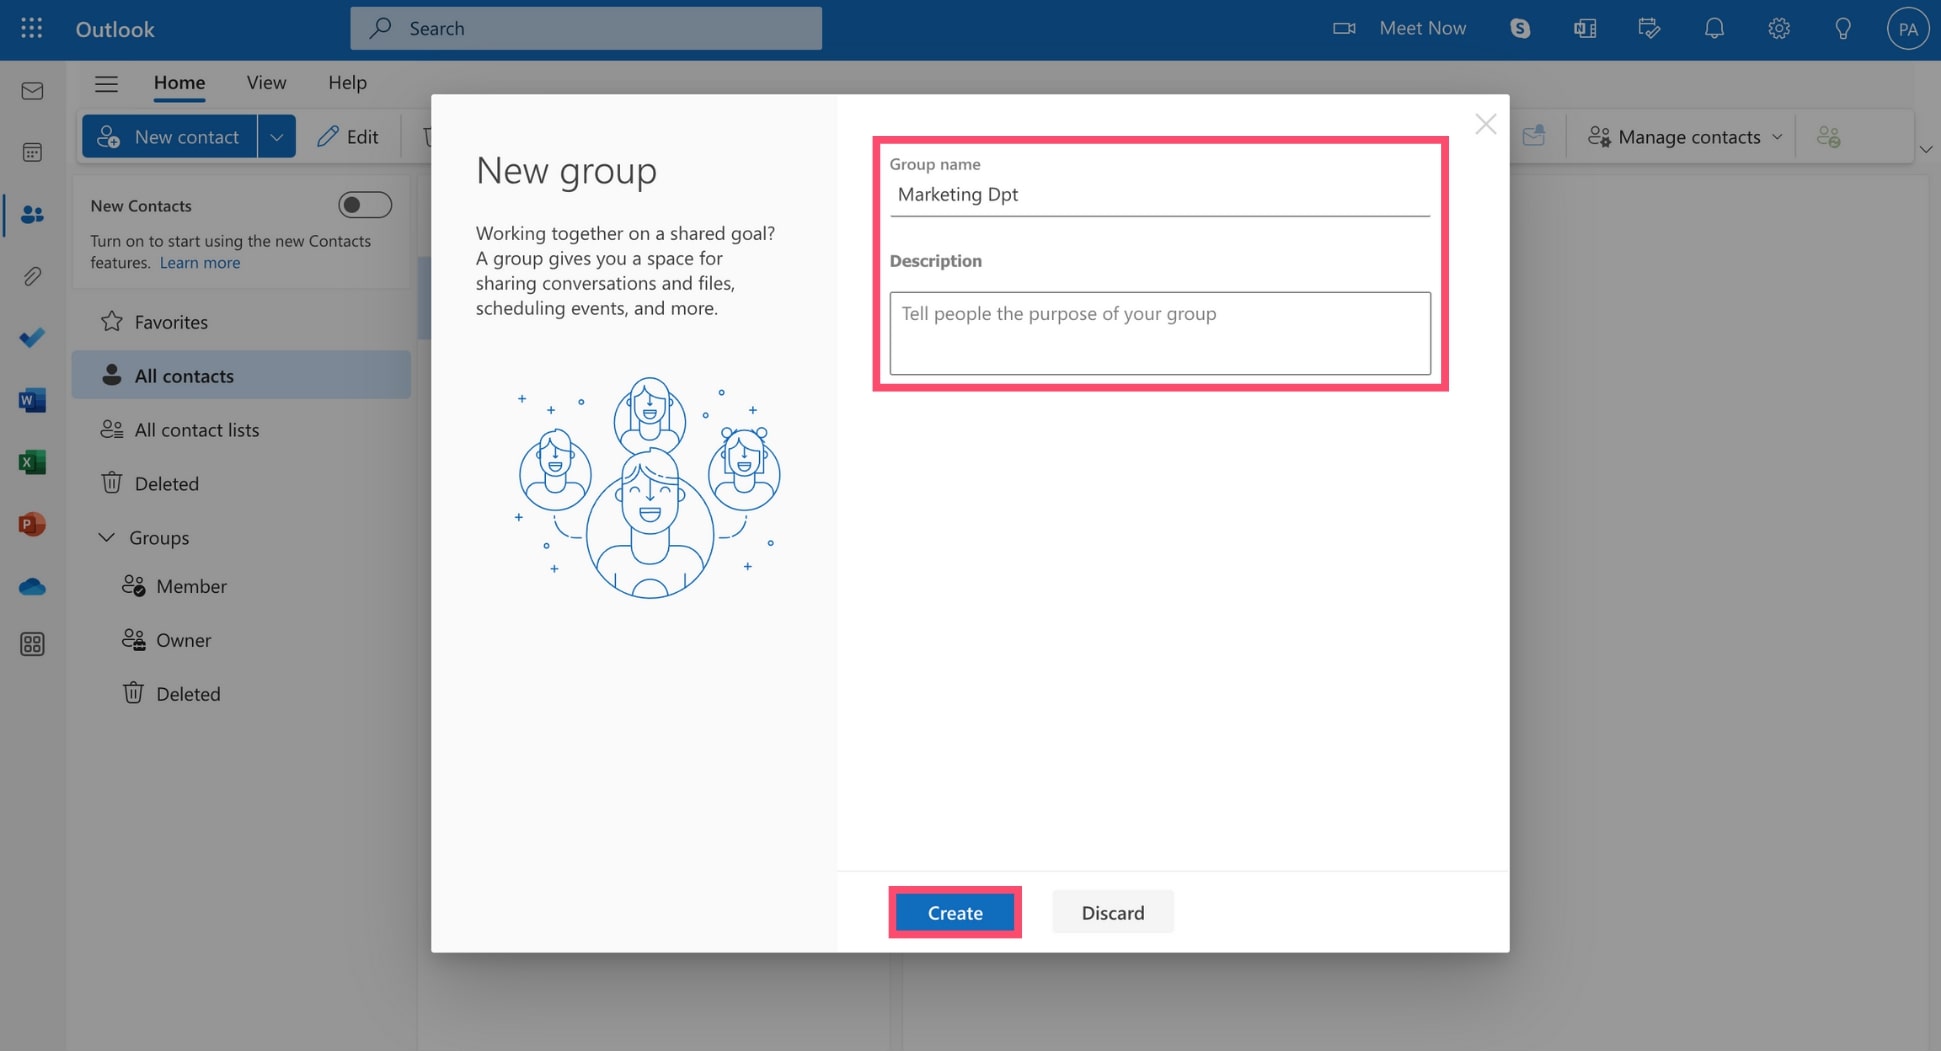
Step 4: Enter the name of your contact group in Outlook. You can also add a description to tell people the purpose of your group. Then click Create.
Step 5: Next, add some people to your group. To add a new member, type their name or email address. Once you’re ready, click Add.
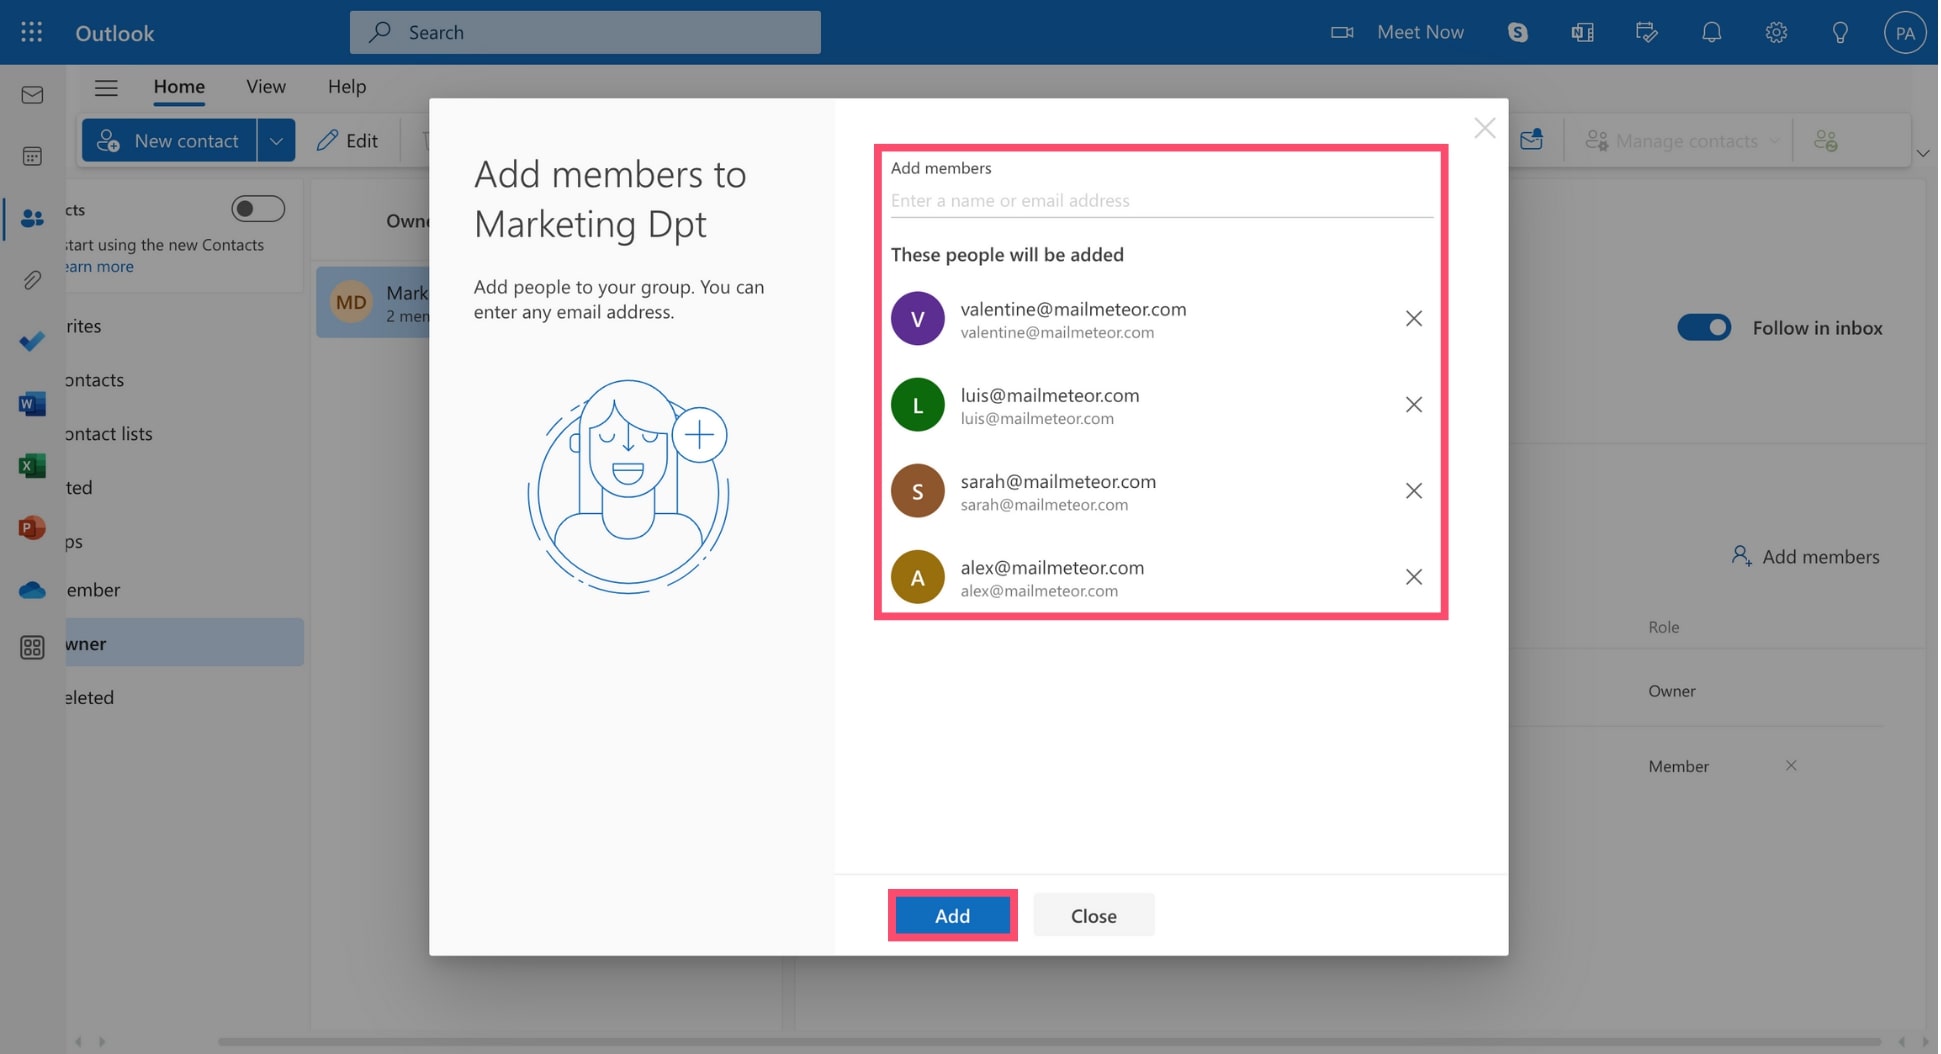
Great job, your Outlook email group is now ready 🎉 The members of your group will receive a welcome email. Here’s what it looks like ⤵️
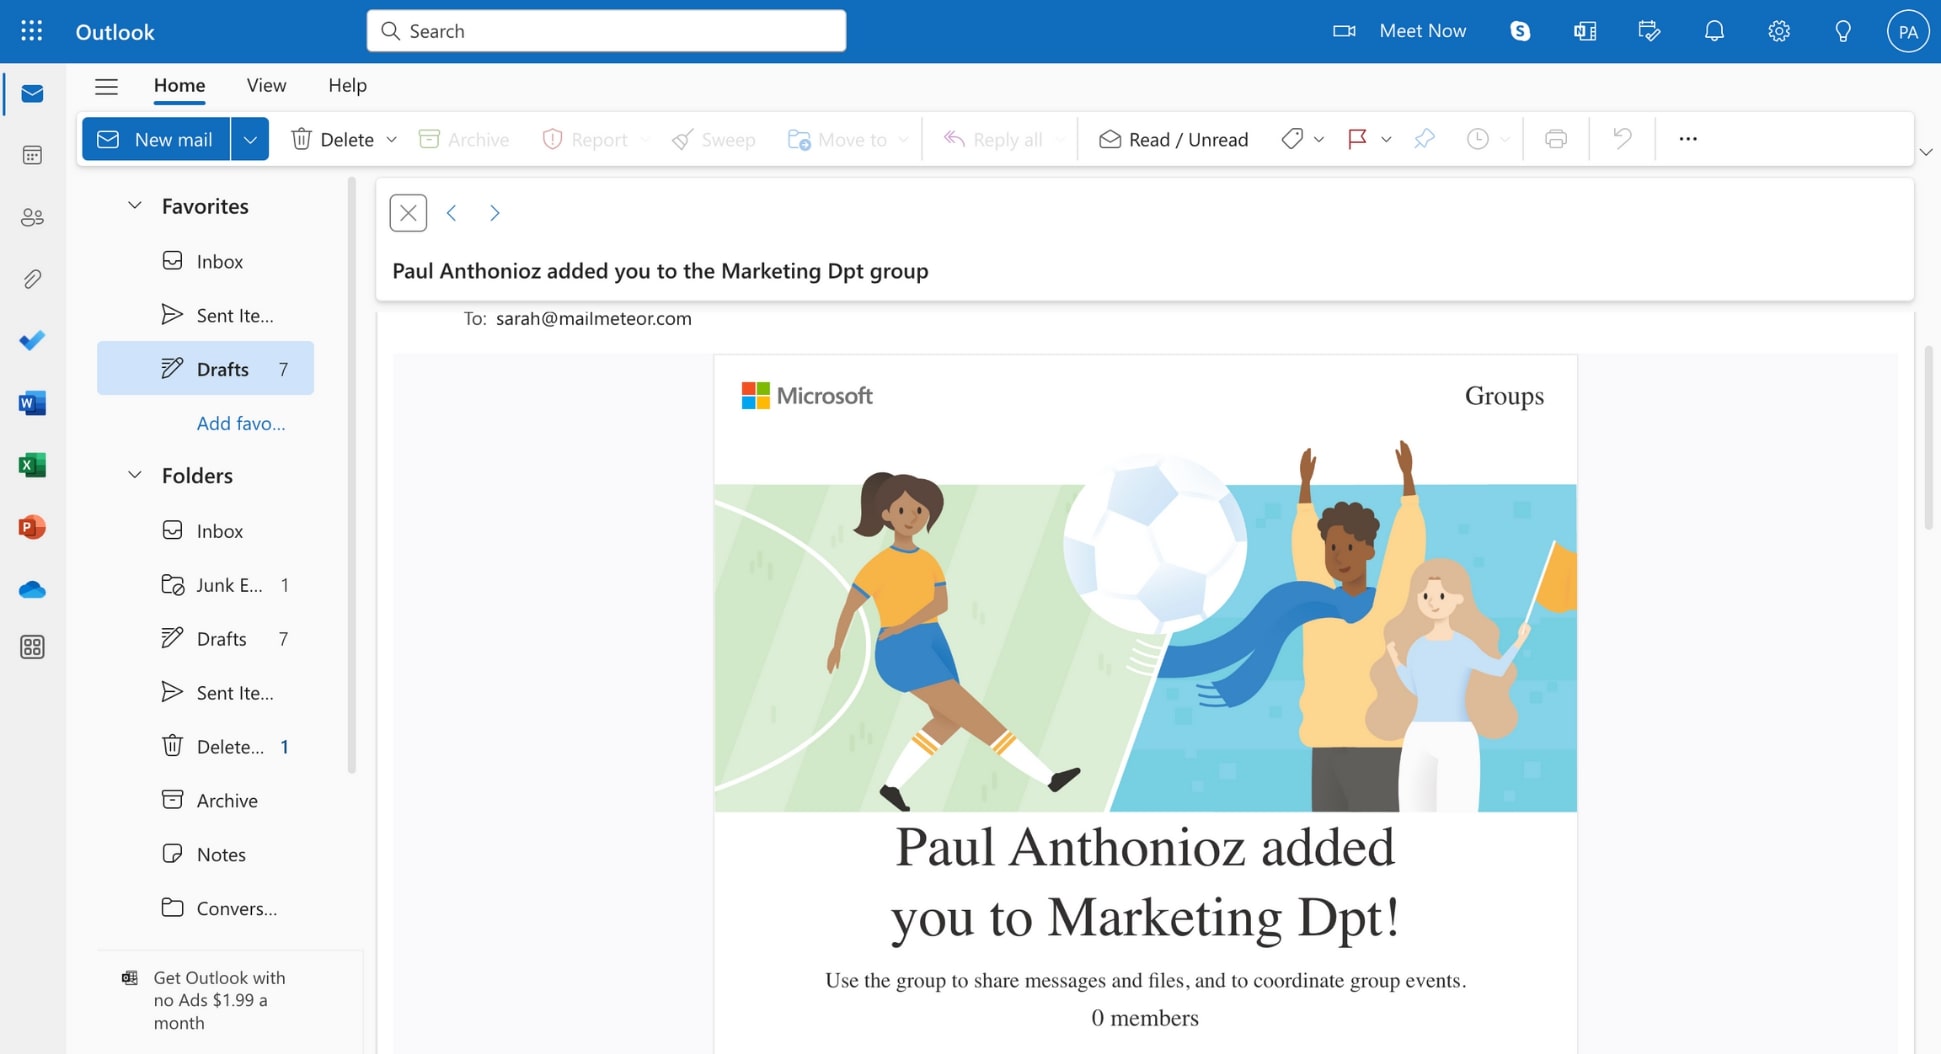
You’re now ready to send bulk emails in Outlook. But first, let’s see how to create an email group if you’re using the Outlook app on Windows or Mac.
On Windows
You can also create an email group directly from the Outlook app for Windows. Here’s how it works.
Step 1: Sign in to your Outlook account.
Step 2: Click the People icon, in the bottom left of your screen.
Step 3: Select New Contact Group (in the Home tab).
Step 4: Enter the name of your Outlook email group.
Step 5: Next, click Add members.
You have 3 options to add members to your group ⤵️
- From Outlook Contacts
- From Adress Book
- Create a new contact
Step 6: Once you’re done adding members, click Save & Close.
On Mac
Last but not least, you can create an email group in Outlook from your Mac. Here’s how to do it.
Step 1: Open Outlook.
Step 2: Go to File > New > Group.
Step 3: Name your group and add a description if you want to.
Step 4: Click create.
How to Send an Email to a Contact Group in Outlook
Once you’ve created your email group, you can use it to start group conversations, share files, and plan group events. Here’s how to send an email to your new contact group in Outlook ⤵️
Step 1: Open Outlook.
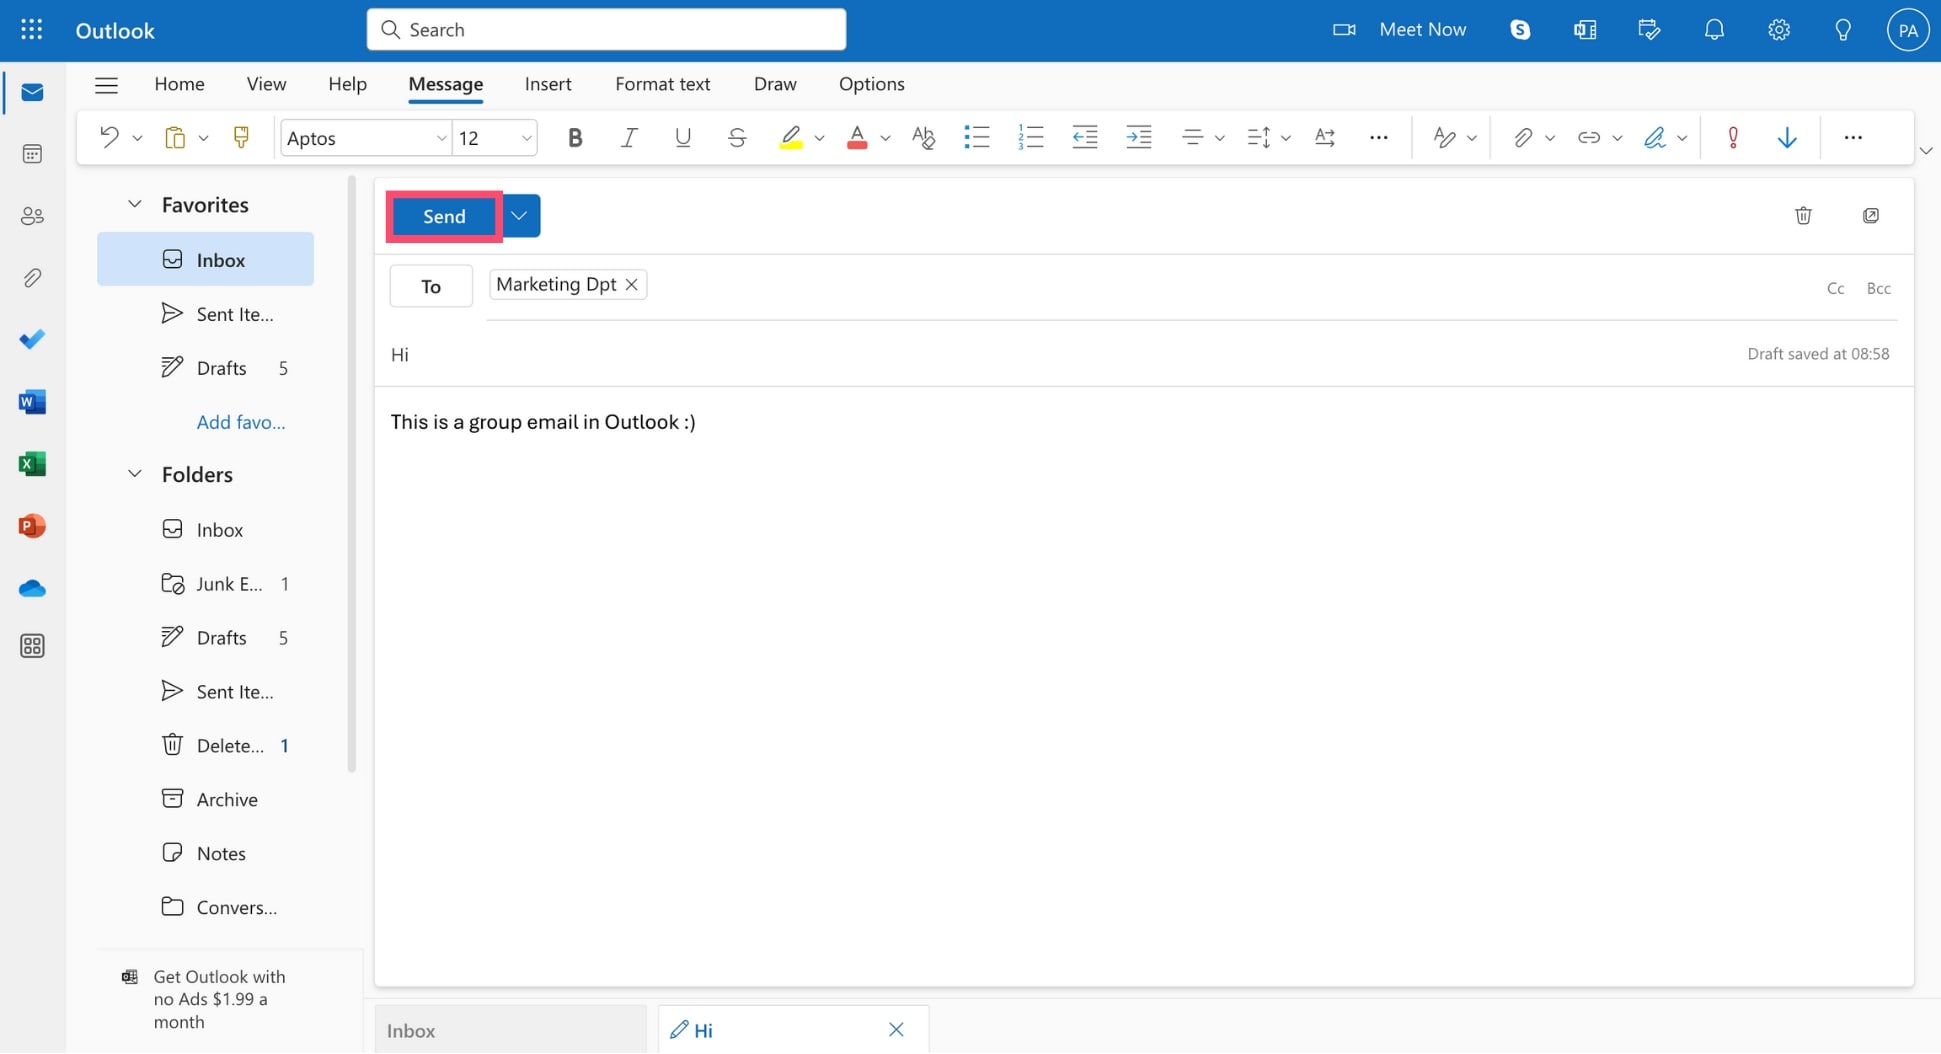
Step 2: Click New email.
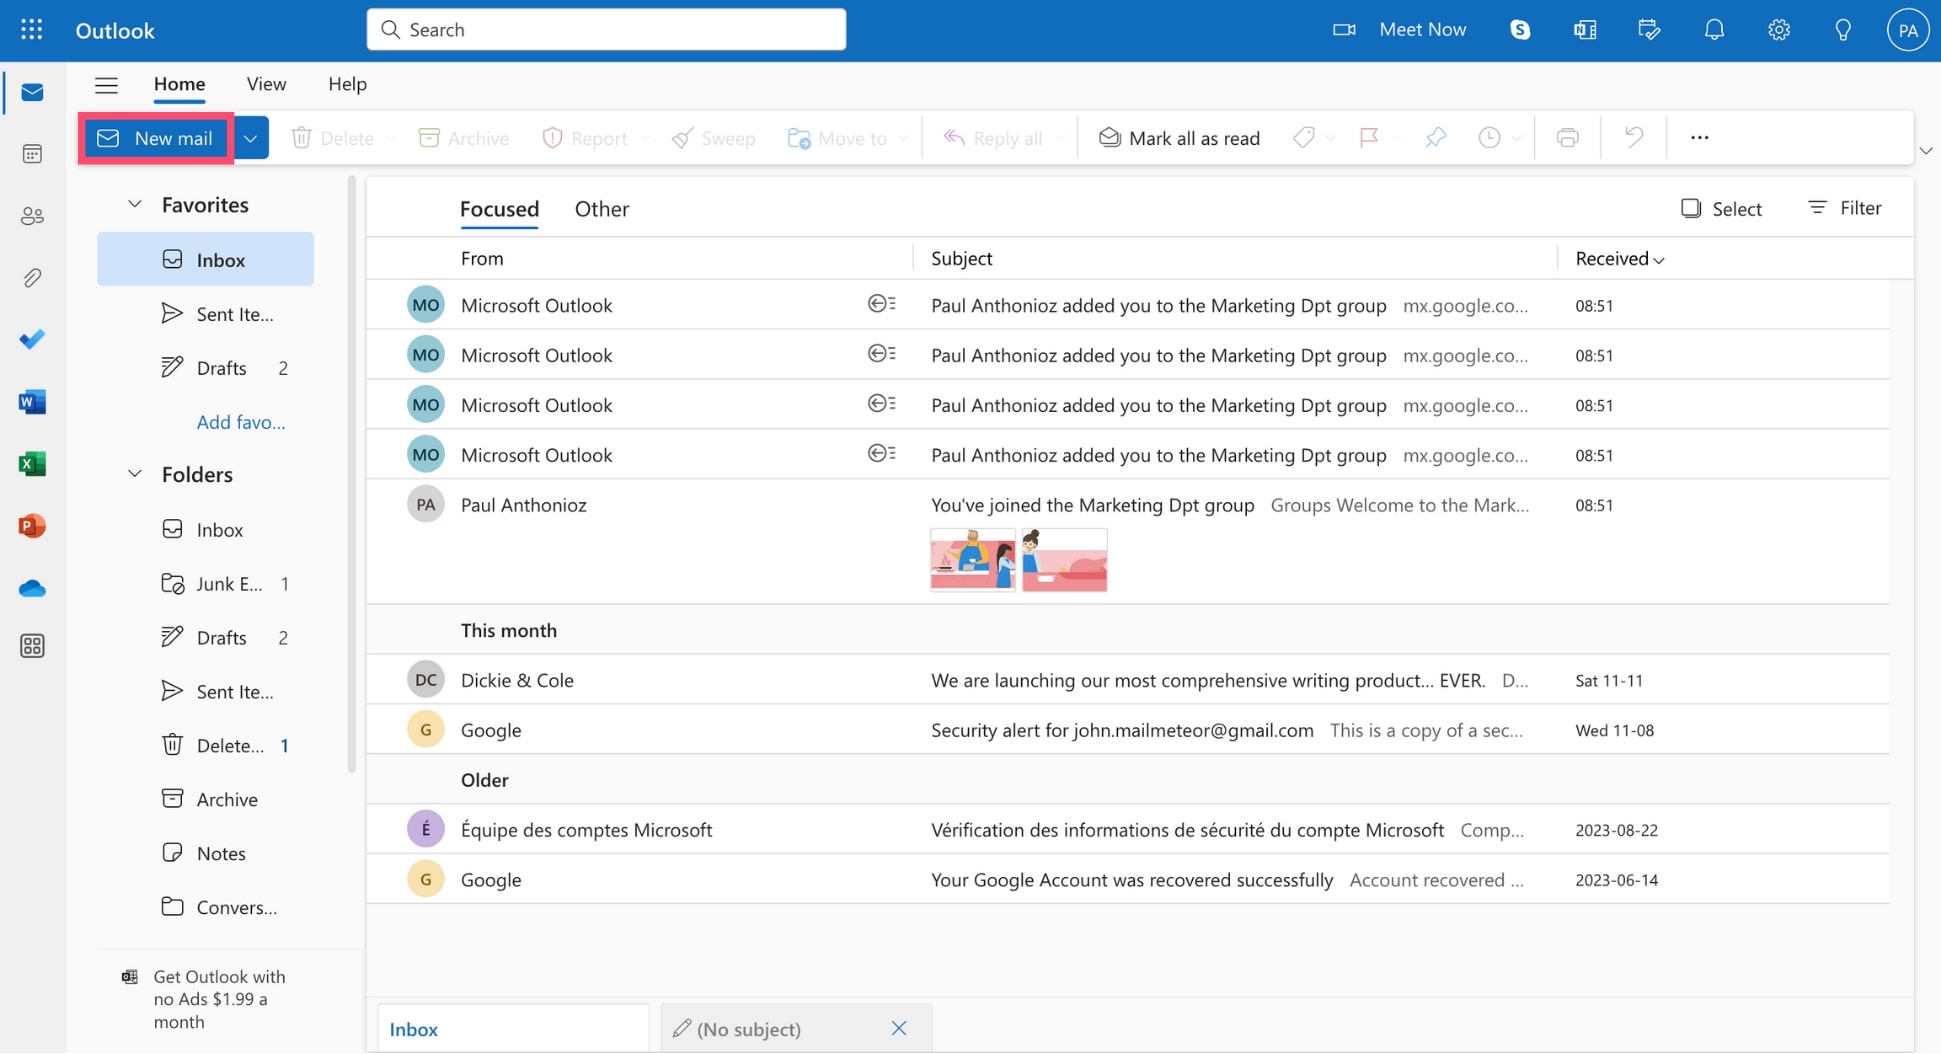
Step 3: Compose your email as you normally would. Then, in the To field, enter your contact group’s email address.
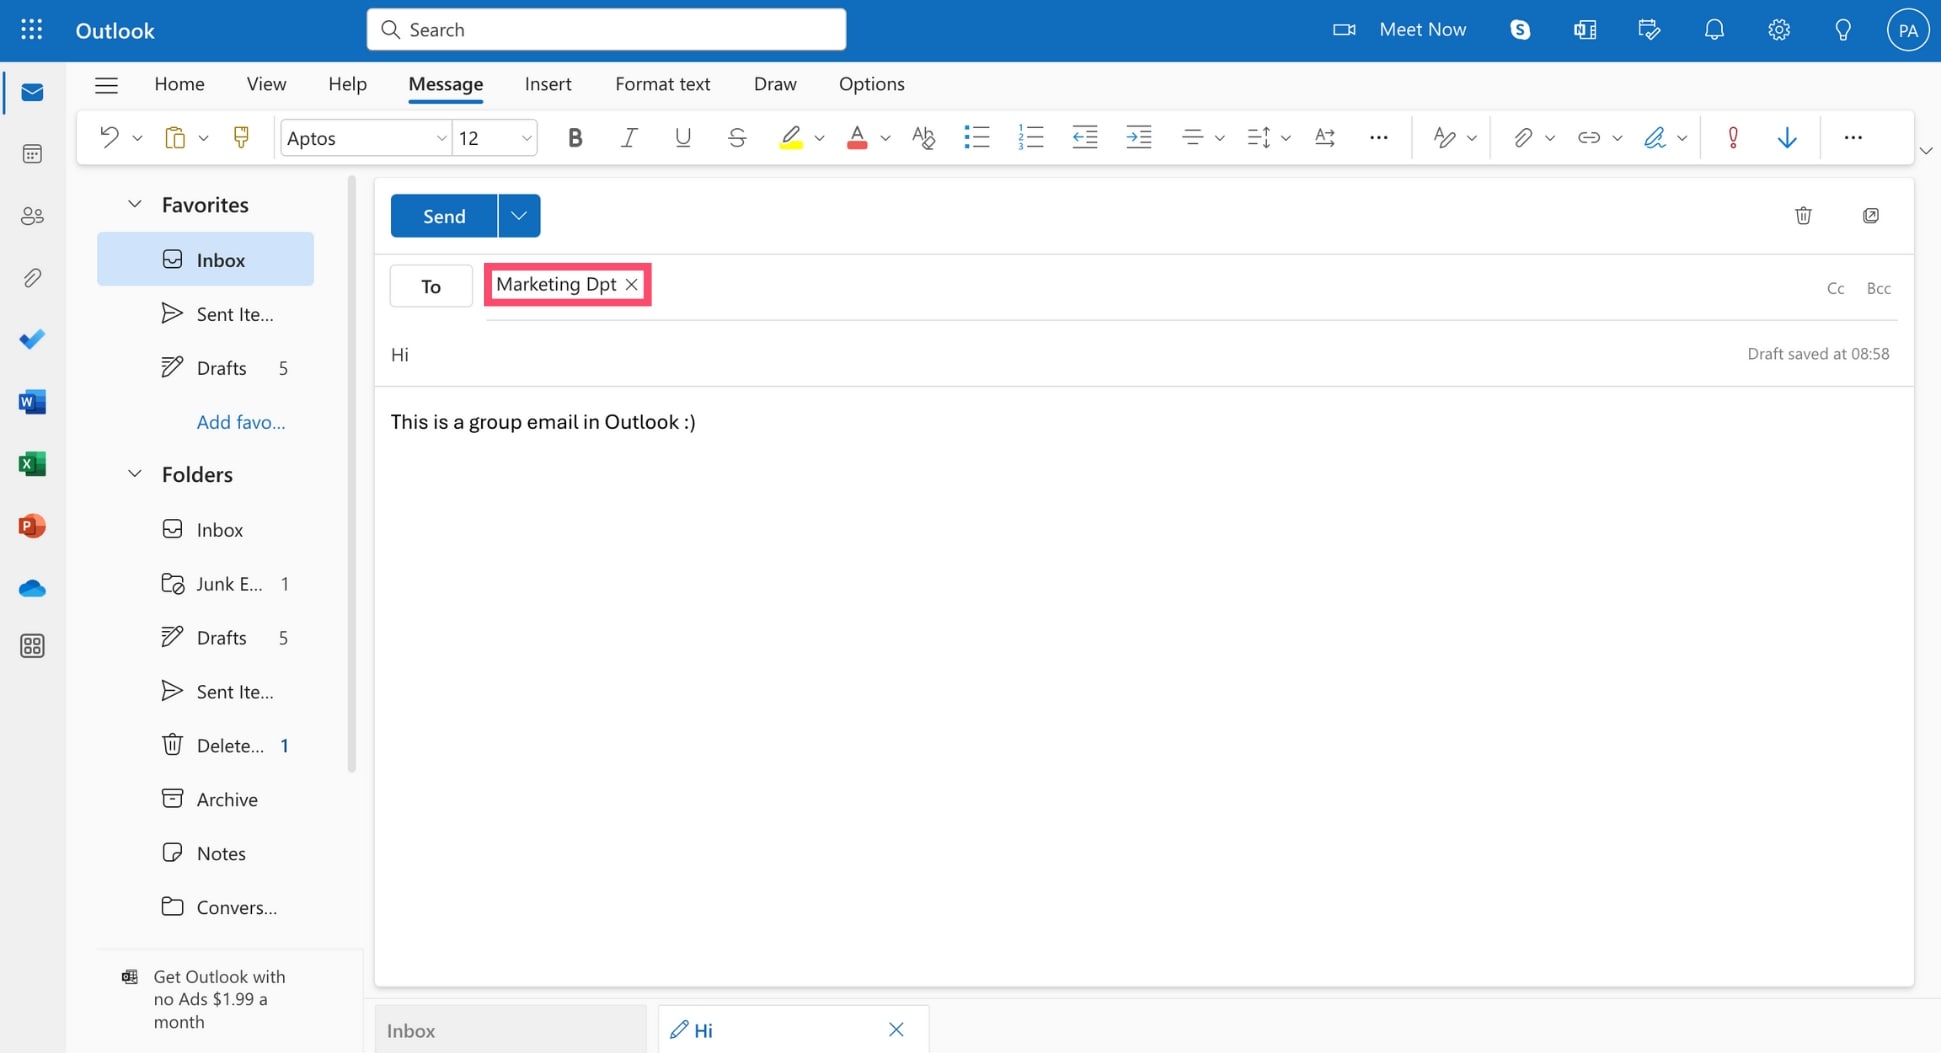
Step 4: Once you’re ready, press send. Outlook will automatically send a copy of your message to each member of your email group.
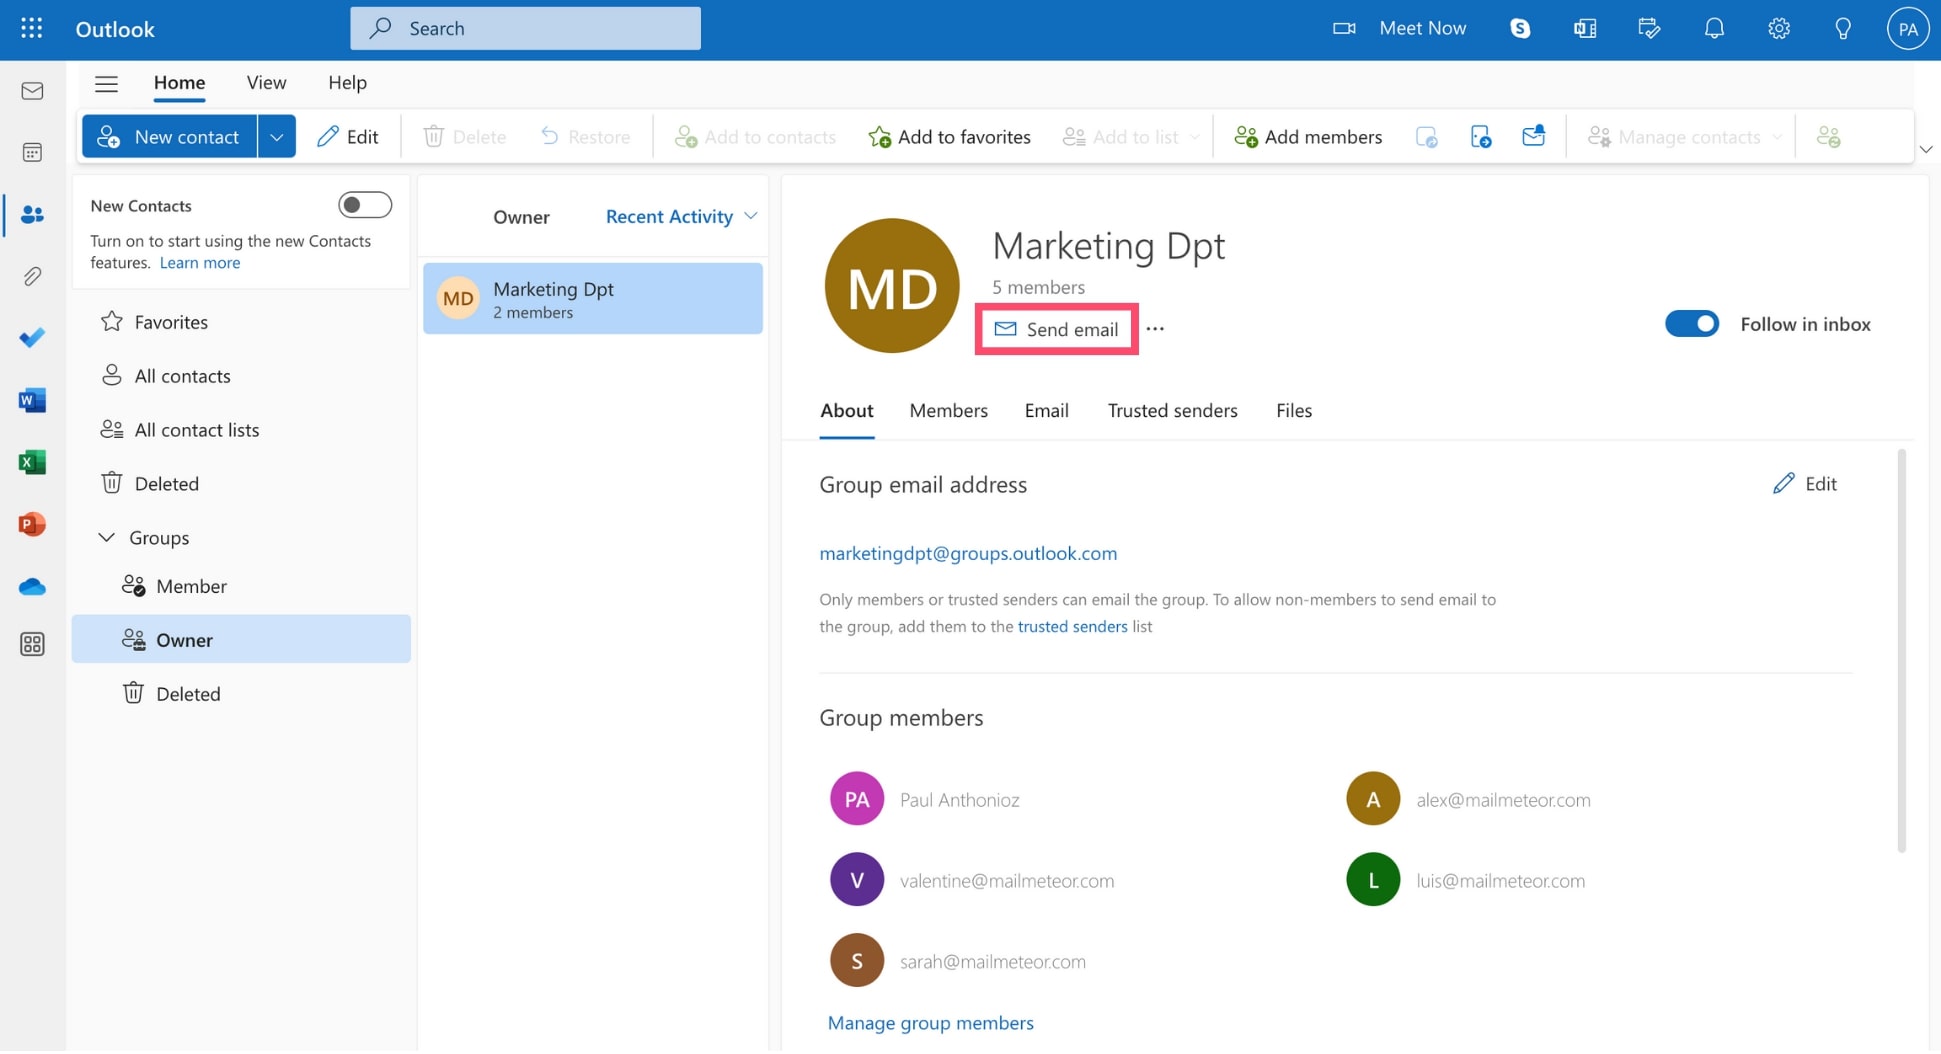
Alternatively, you can also go to People, select your email group, and click Send email to open a new group conversation.
How to Edit an Email Group in Outlook
You can easily edit the name of your Outlook email group. Or the email address associated with it. Or its profile picture. Here’s how it’s done ⤵️
Step 1: Open Outlook.
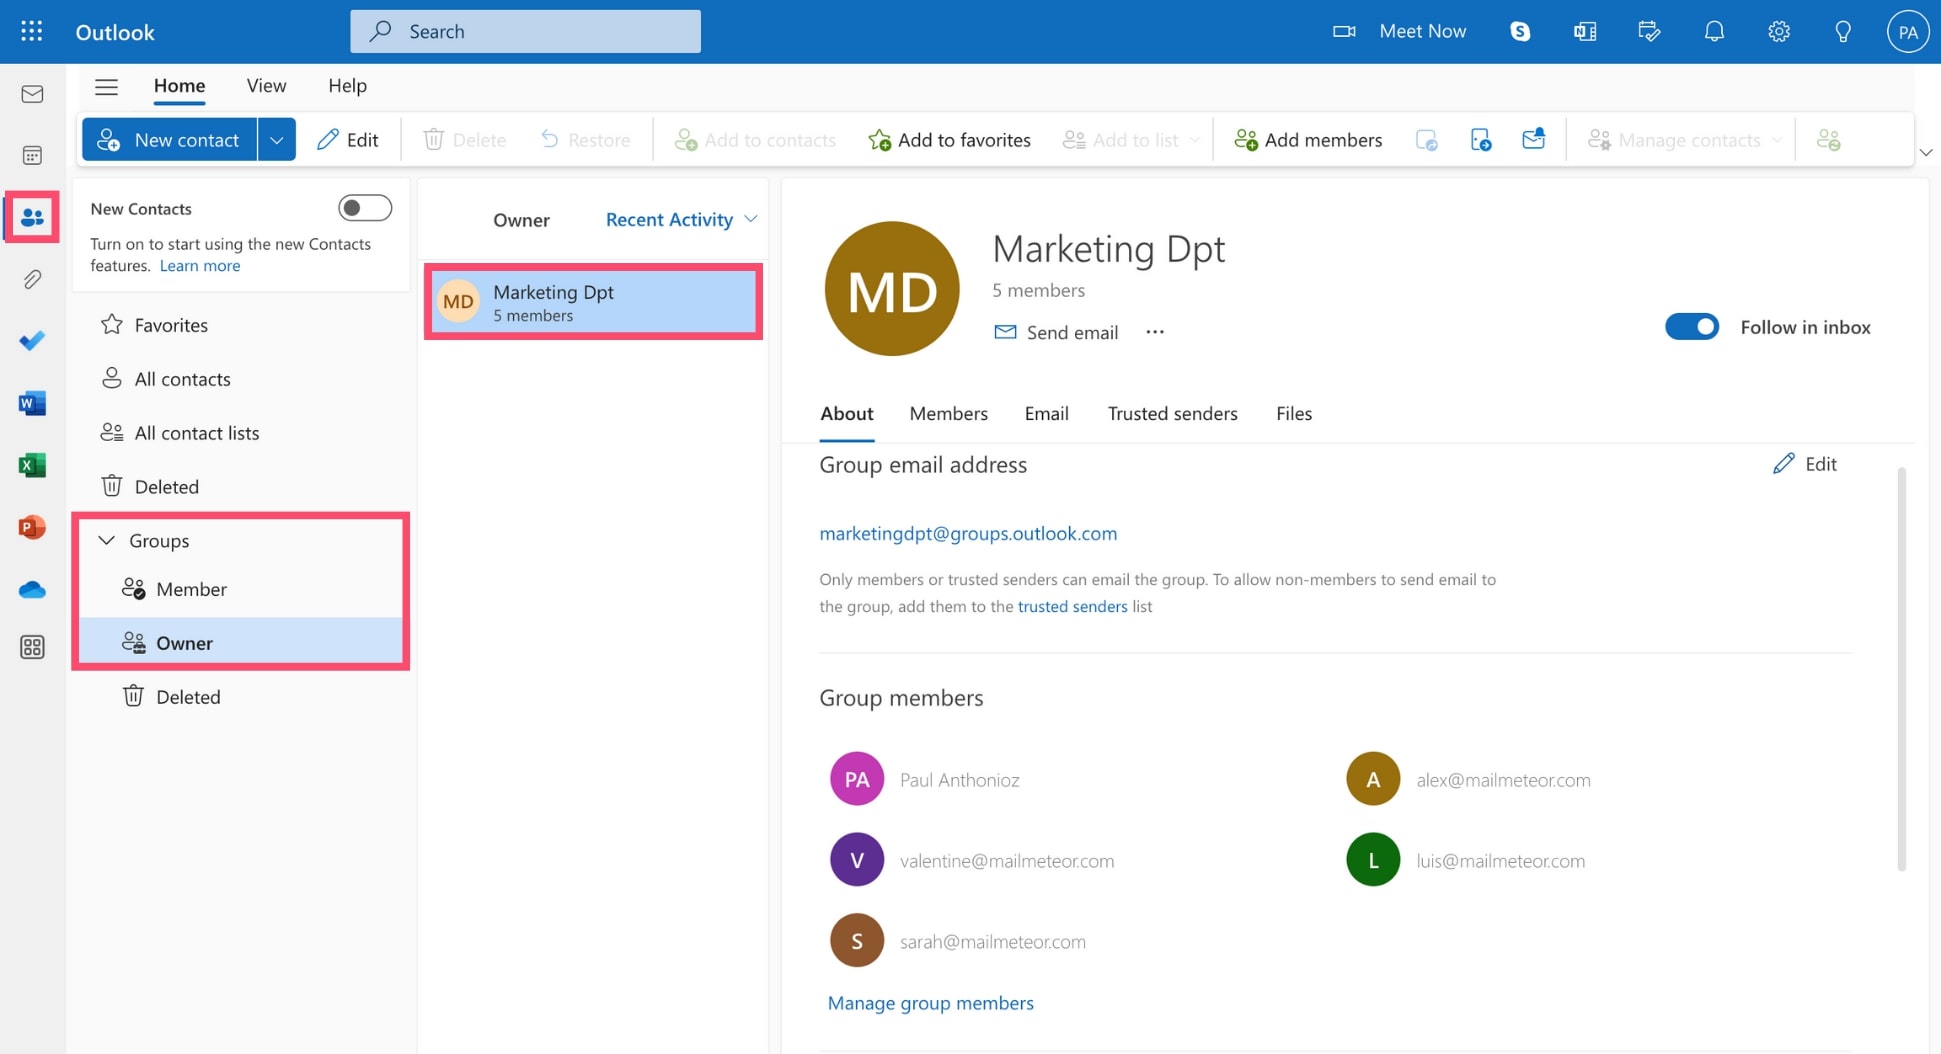
Step 2: Go to People. Then, under Groups, select Owner to display the contact groups you’ve created, or Member to view the groups you’re part of.
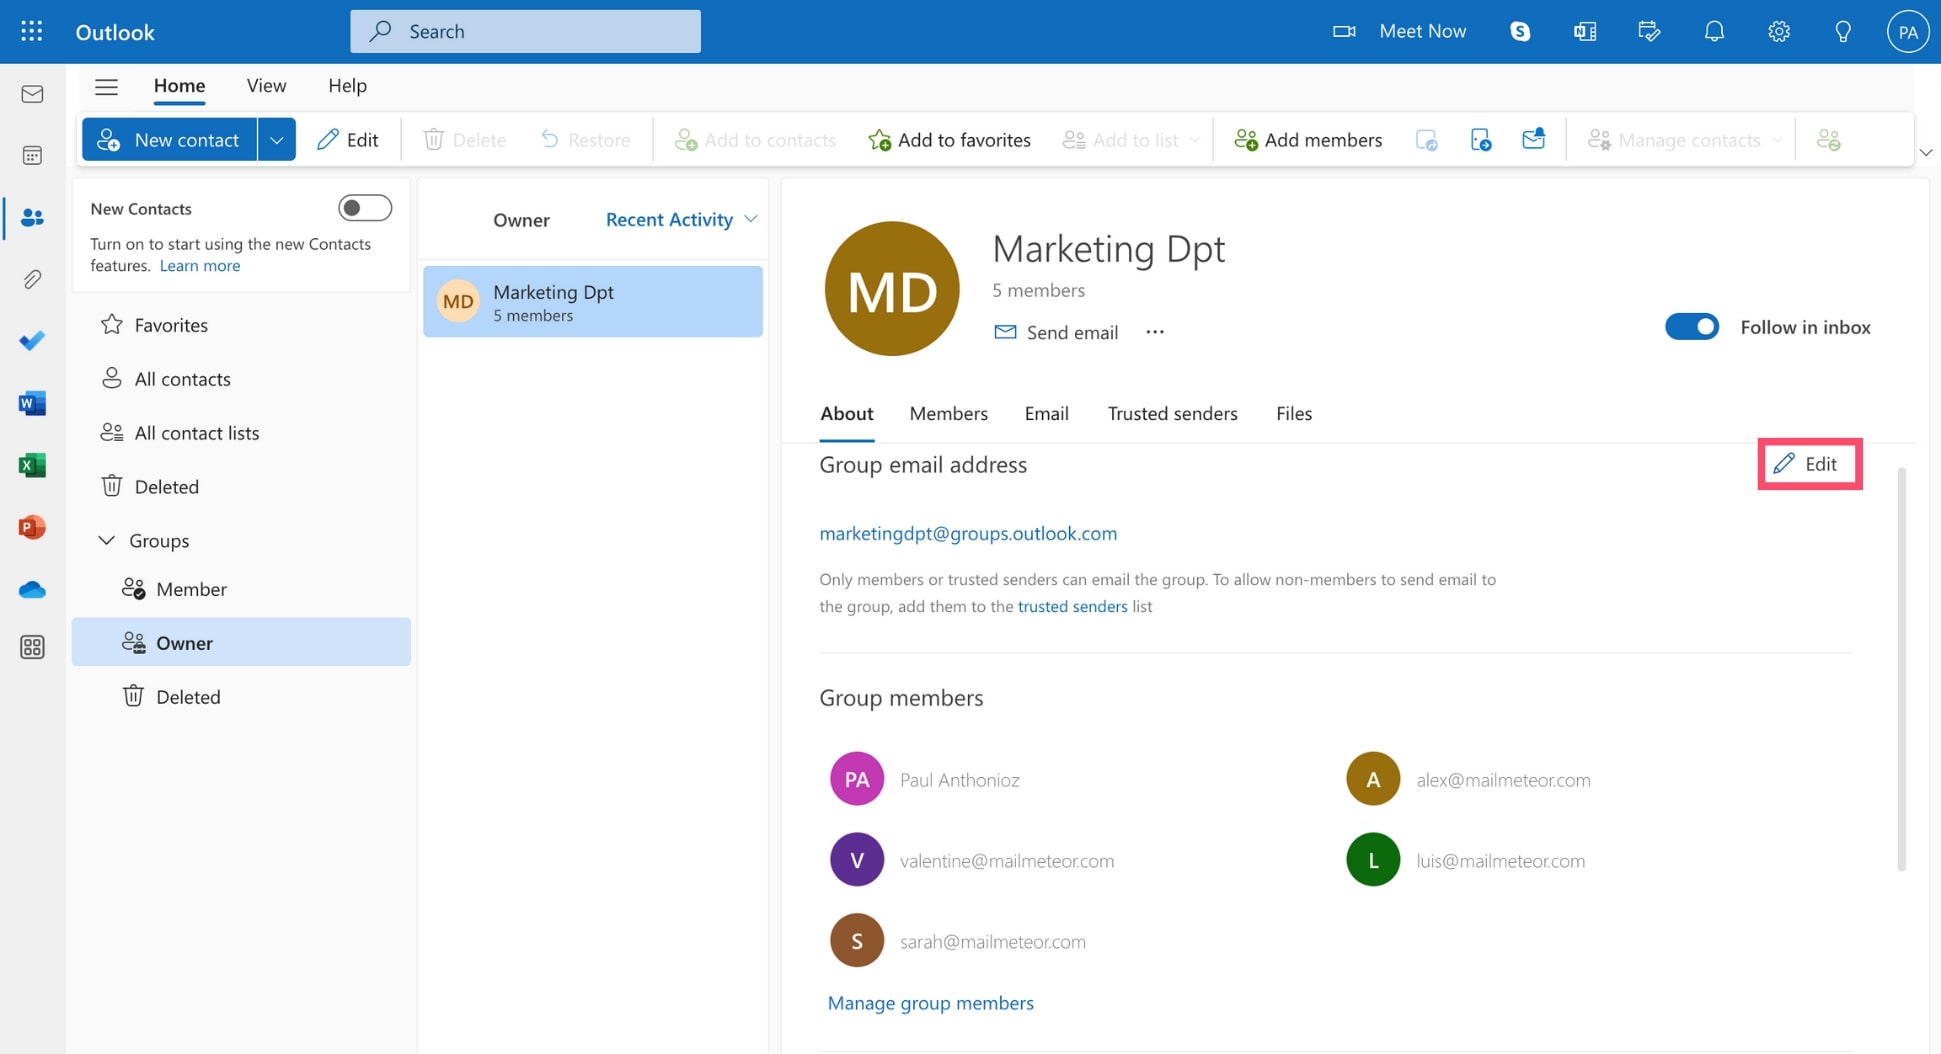
Step 3: Once you’ve found the email group you wish to edit, click the pencil icon to edit its name, description, profile picture, or email address.
Step 4: All done? Then press Save.
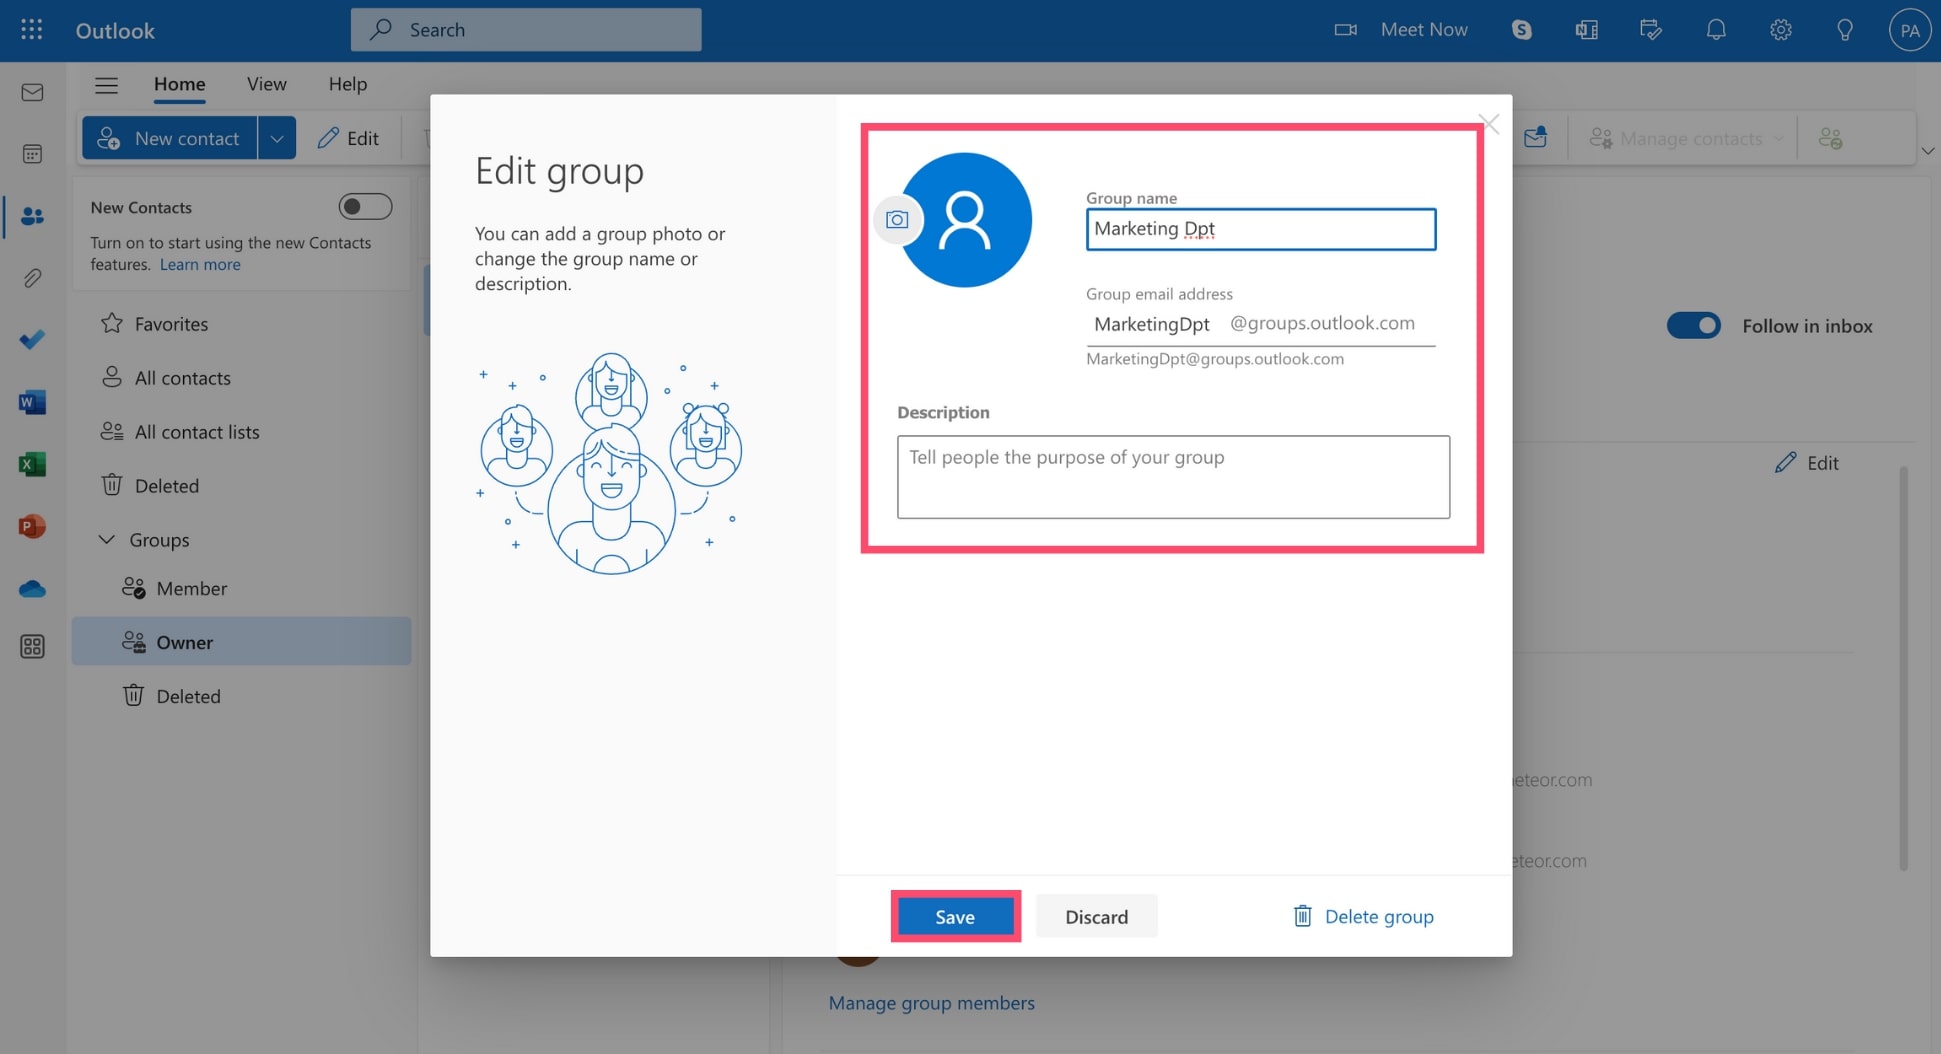
Your changes should now appear in your Outlook email group. The other members of the group can see these changes.
How to Add or Remove Contacts from your Outlook Email Group
You can also easily add or remove some members from your group. Even after it’s been created. Here’s how.
Step 1: Start Outlook.
Step 2: Go to People.
Step 3: Select your Outlook email group.
Step 4: Click Manage group members.
Step 5: To remove a member from the group, click the little X next to the person’s role. Then press Yes to confirm. To add a new member, click Add members, enter their name or email address, then press Add.
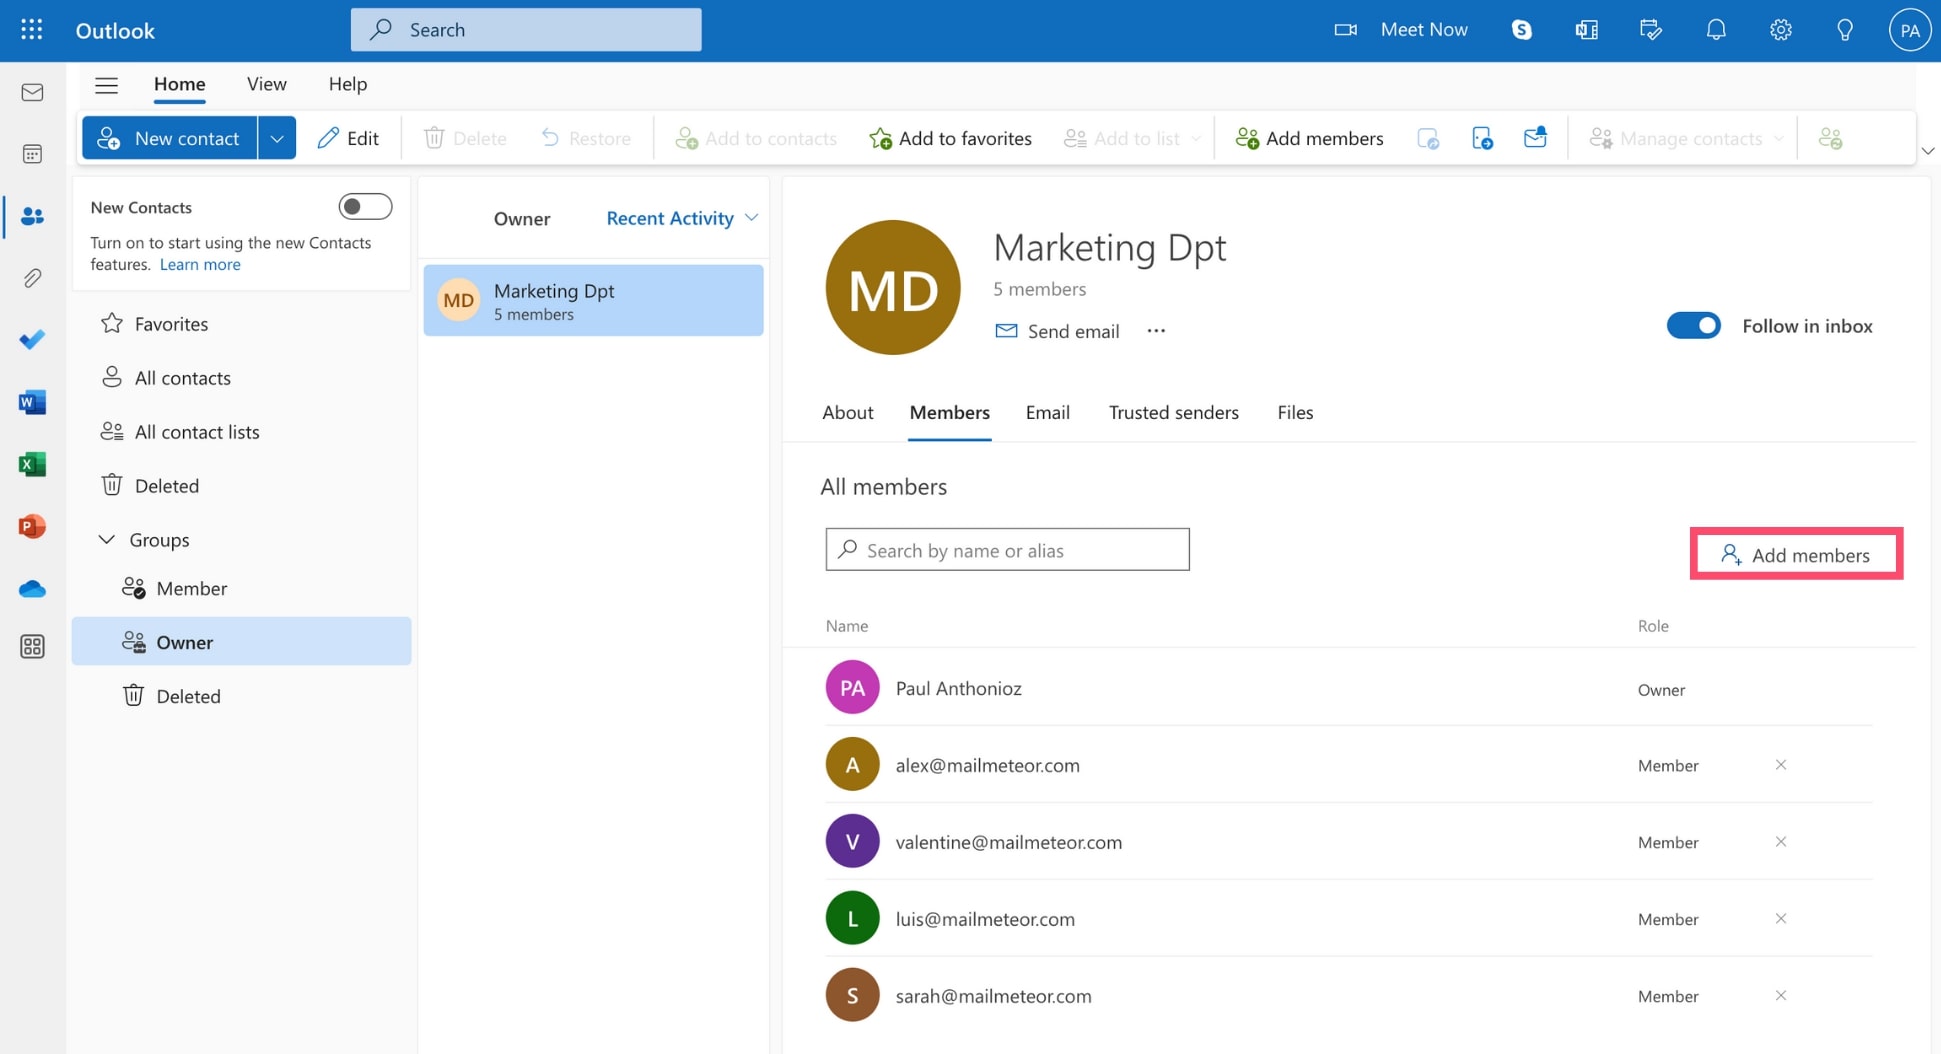
And that’s it. Add new members to your group to include them in your upcoming plans and keep the conversation going.
How to Delete an Email Group in Outlook
If you’re no longer using an Outlook email group, you can delete it in just a few clicks. Here’s how to do it ⤵️
Step 1: Open Outlook.
Step 2: Go to People.
Step 3: Open your email group.
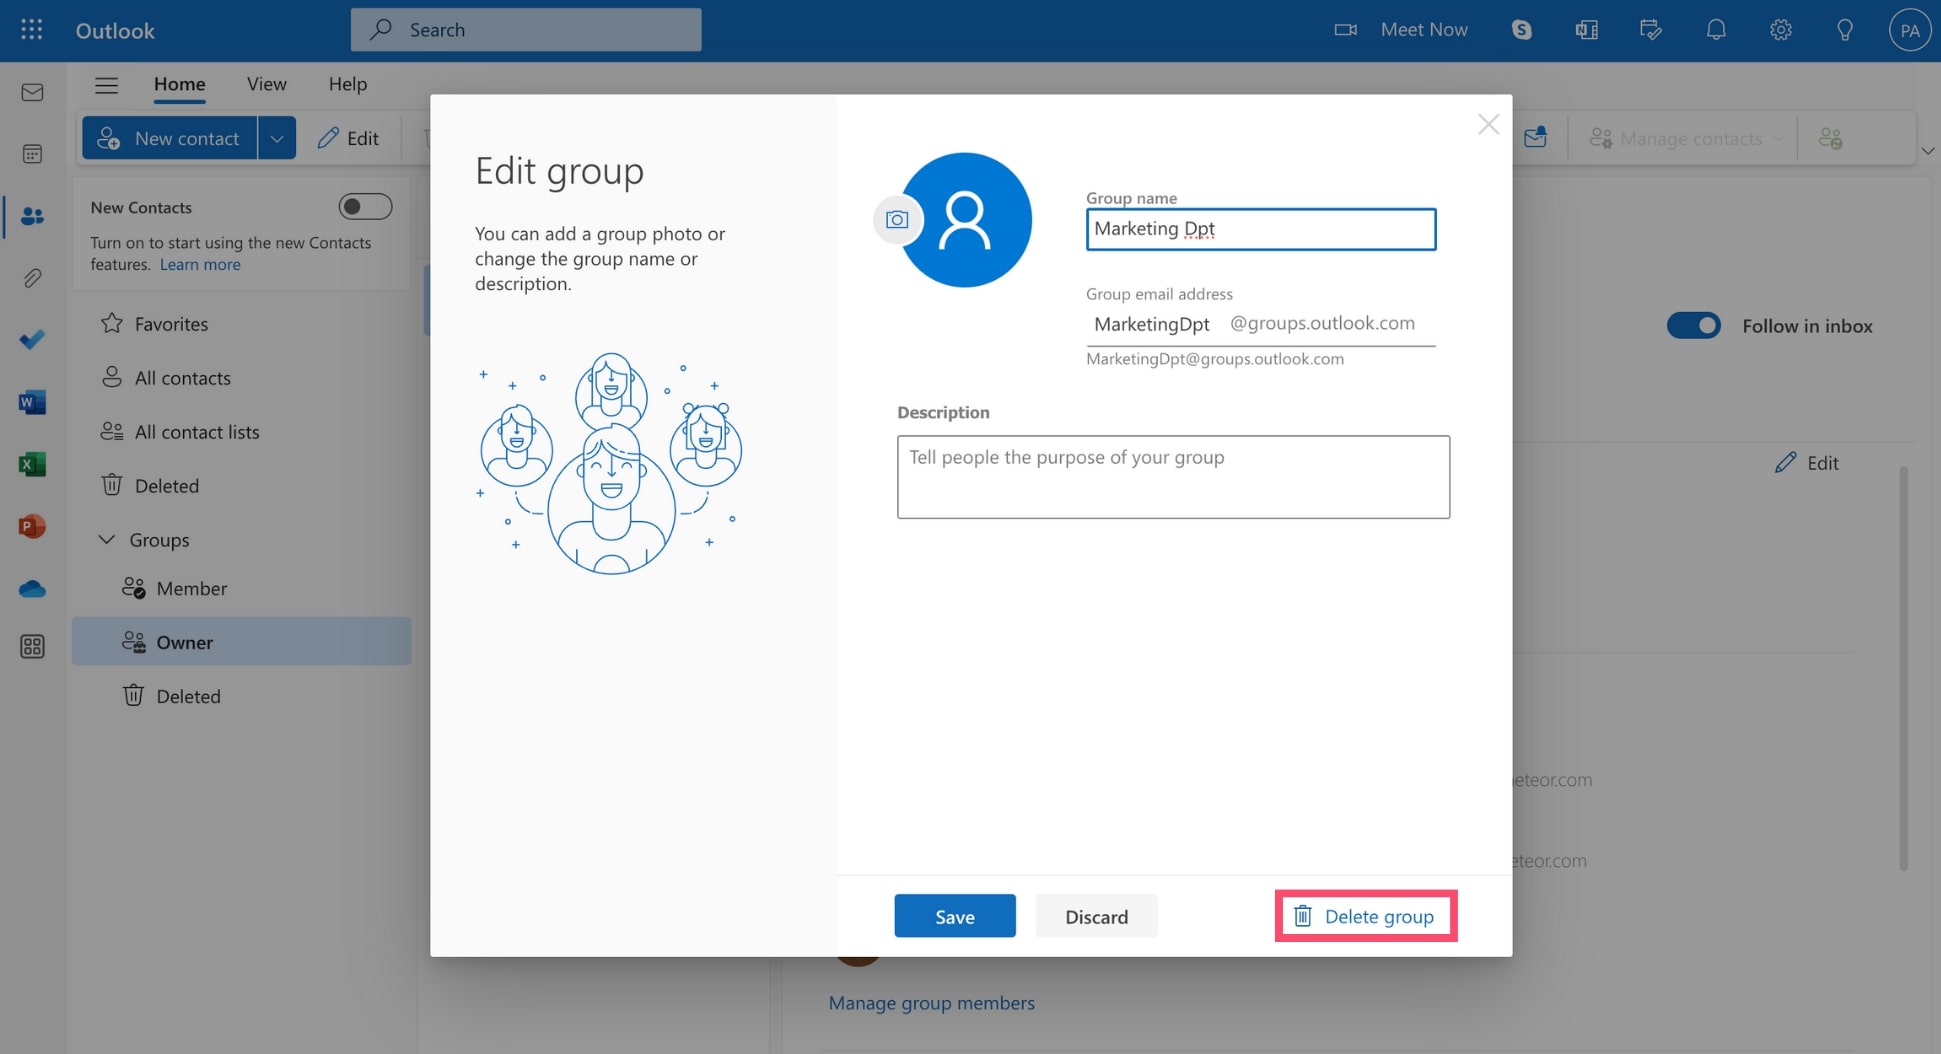
Step 4: Click Edit.
Step 5: From there, select Delete group.
Step 6: Tick the box that says I understand that all group content will be deleted. Then press Delete.
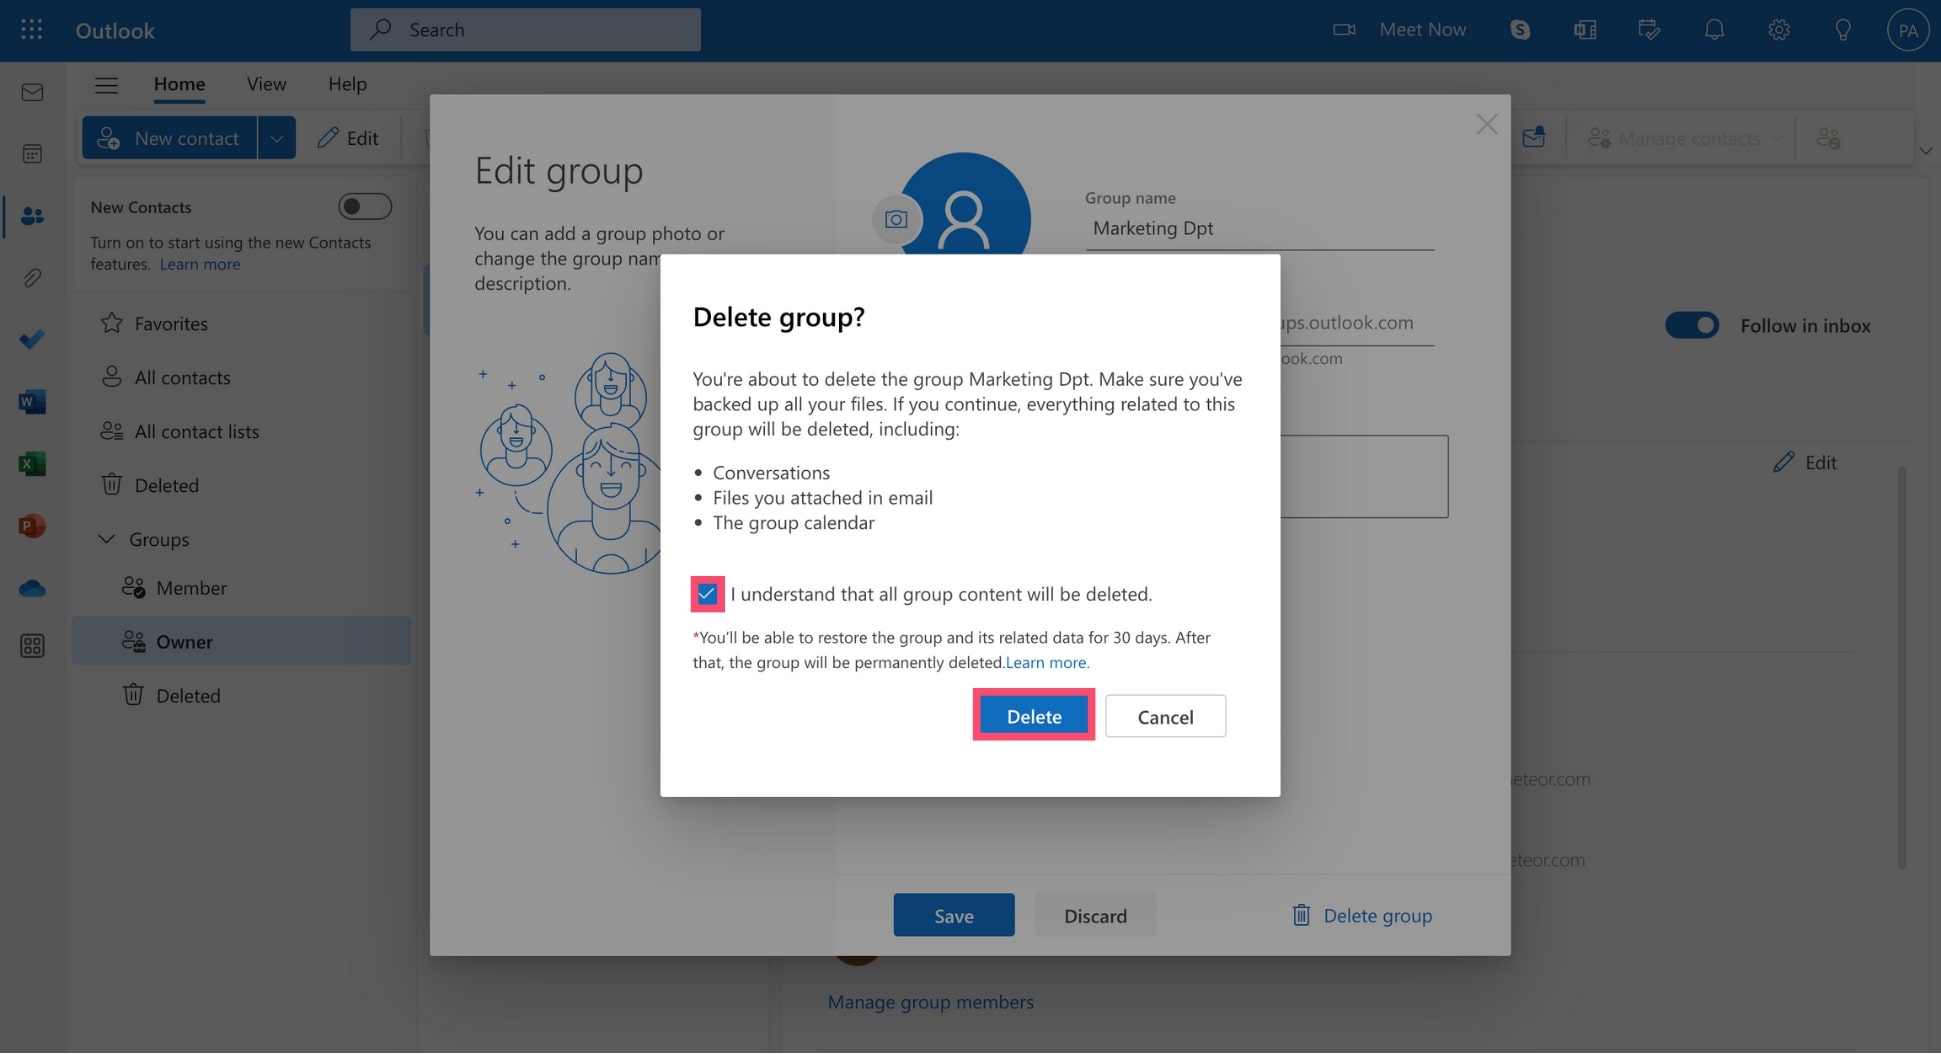
Keep in mind that deleting your group will delete everything related to this group. This includes:
- Your group conversations
- Your group calendar
- The files attached
Frequently Asked Questions
What is the difference between a contact list and a group in Outlook?
A contact list is a list of email addresses that you can edit when you’re sending an email. A contact group, on the other hand, has its own email address. So you can only email the entire group.
Contact groups used to be known as distribution lists. They come with more collaboration options and permission settings than contact lists. You can for example have a group calendar and share files.
How many people can you have in an Outlook contact group?
An email group in Outlook can have a maximum of 50 to 70 members. A lso you can only message up to 500 people at once in Outlook.
How do I get group emails in my Outlook inbox?
To receive your group emails directly in your Outlook inbox, navigate to the group from Outlook, open the settings, and click Edit Group. Then, under Subscription, make sure to check the box that says Members will receive all group conversations and events in their inboxes.
Are Outlook groups private?
By default, your groups are created as Private. This means only the members of the group can see what’s inside. Other people in your organization can’t view its content unless they get approved.
You can also create Public groups in Outlook, where anyone within your organization can see what’s inside the group and become a member. Choose the appropriate setting while creating your email group in Outlook.
