Tired of your old Gmail address? Good news — you might finally be able to change it.
For years, Google didn’t allow users to edit their @gmail.com username. Once you created an account, you were stuck with it forever. But in 2026, Google started rolling out a long-awaited feature that lets some users change their Gmail address — without losing emails, contacts, or Google Drive data.
If you don’t see the new option yet, don’t worry — you still have safe, reliable ways to switch addresses without losing anything.
Let’s break them down:
- Use Google’s new Gmail address change feature
- Create a new Gmail address and set up forwarding
- Add an alias to your Gmail account
- Change your display name in Gmail
- Add or remove dots in your Gmail address
- Import your old emails and contacts to a new account
Can You Change Your Gmail Address?
Short answer: Yes — but only in certain cases.
If Google’s new 2025 Gmail update is available on your account, you can change your @gmail.com address directly from your Google Account settings.
If you don’t see that option, you can’t edit your existing Gmail address. Instead, you’ll need to create a new Gmail account and either forward your emails or import your data to switch to the new address safely.
Below, we explain all available methods step by step.
1. Use Google’s New Gmail Address Change Feature
For the first time ever, Google is rolling out the ability to change your @gmail.com address directly — without creating a new account. But not everyone has access to this feature.
How to Check If You Have Access
- Go to your Google Account
- Click Personal info.
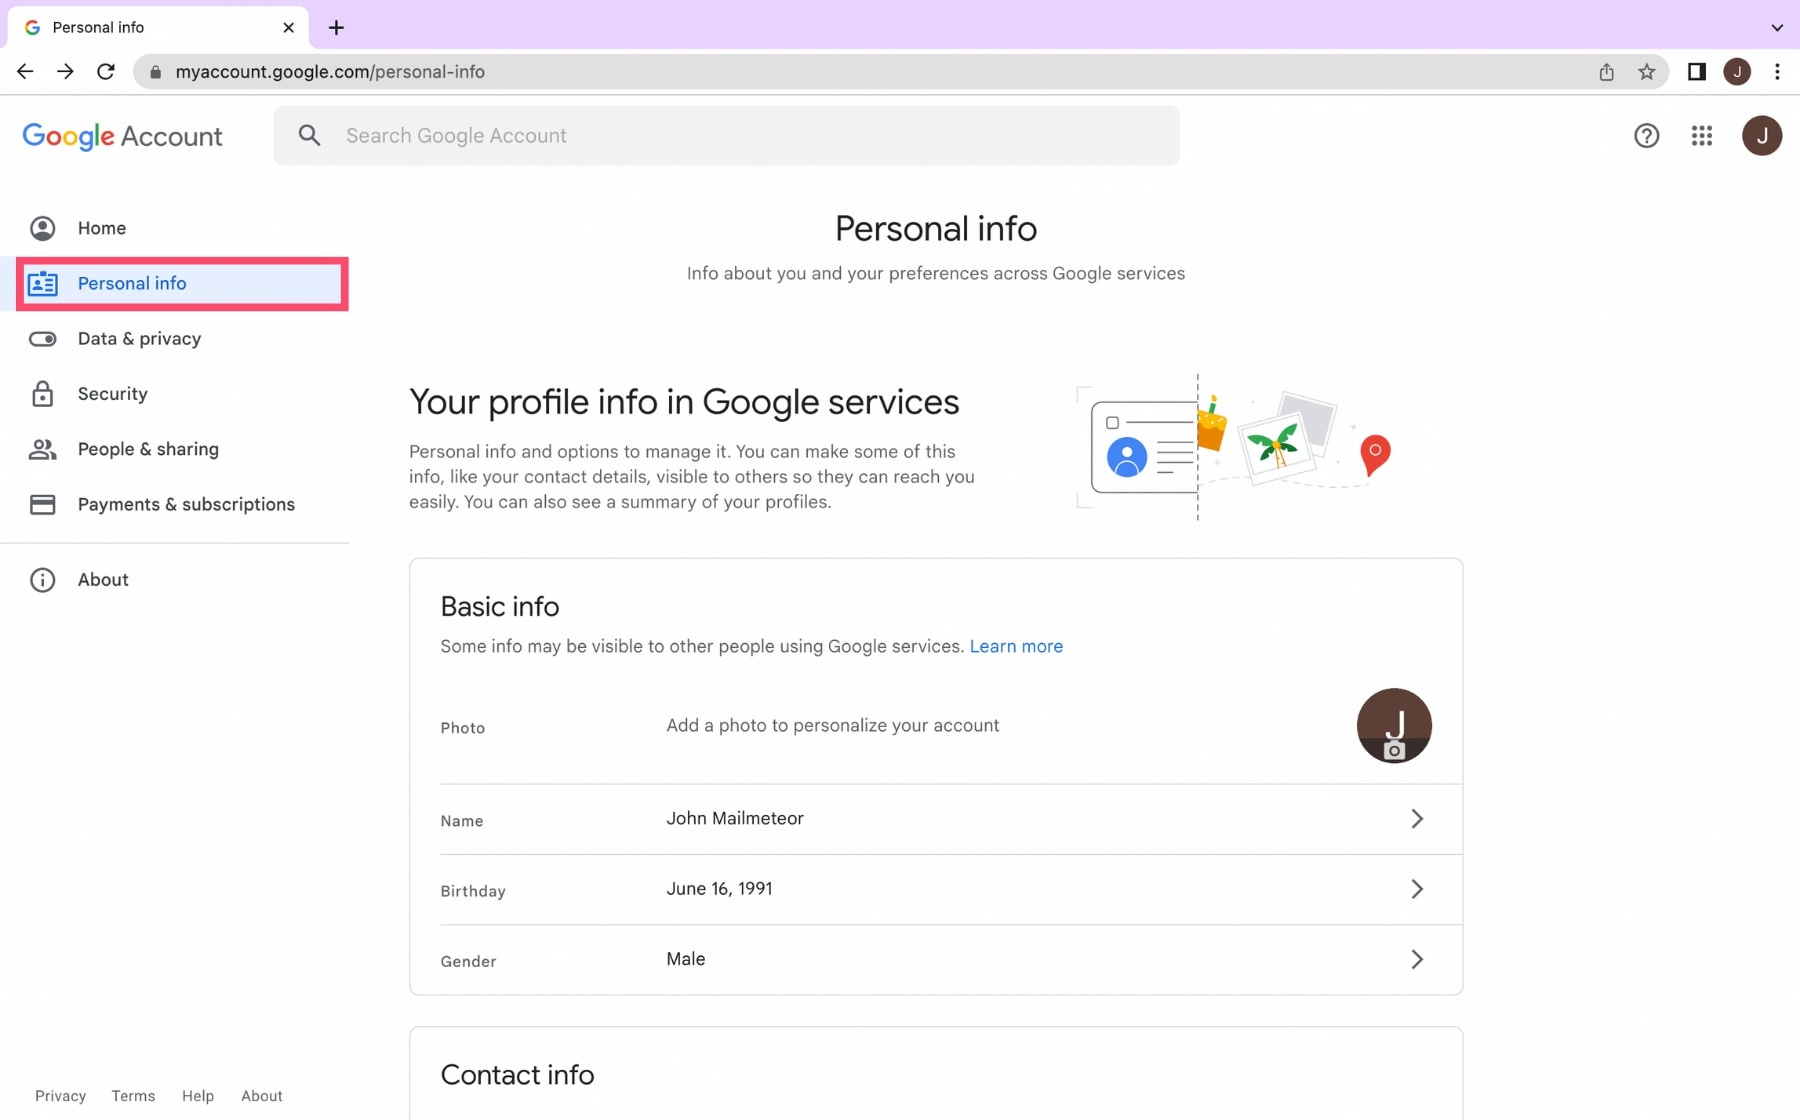
- Under Contact info, select Email.
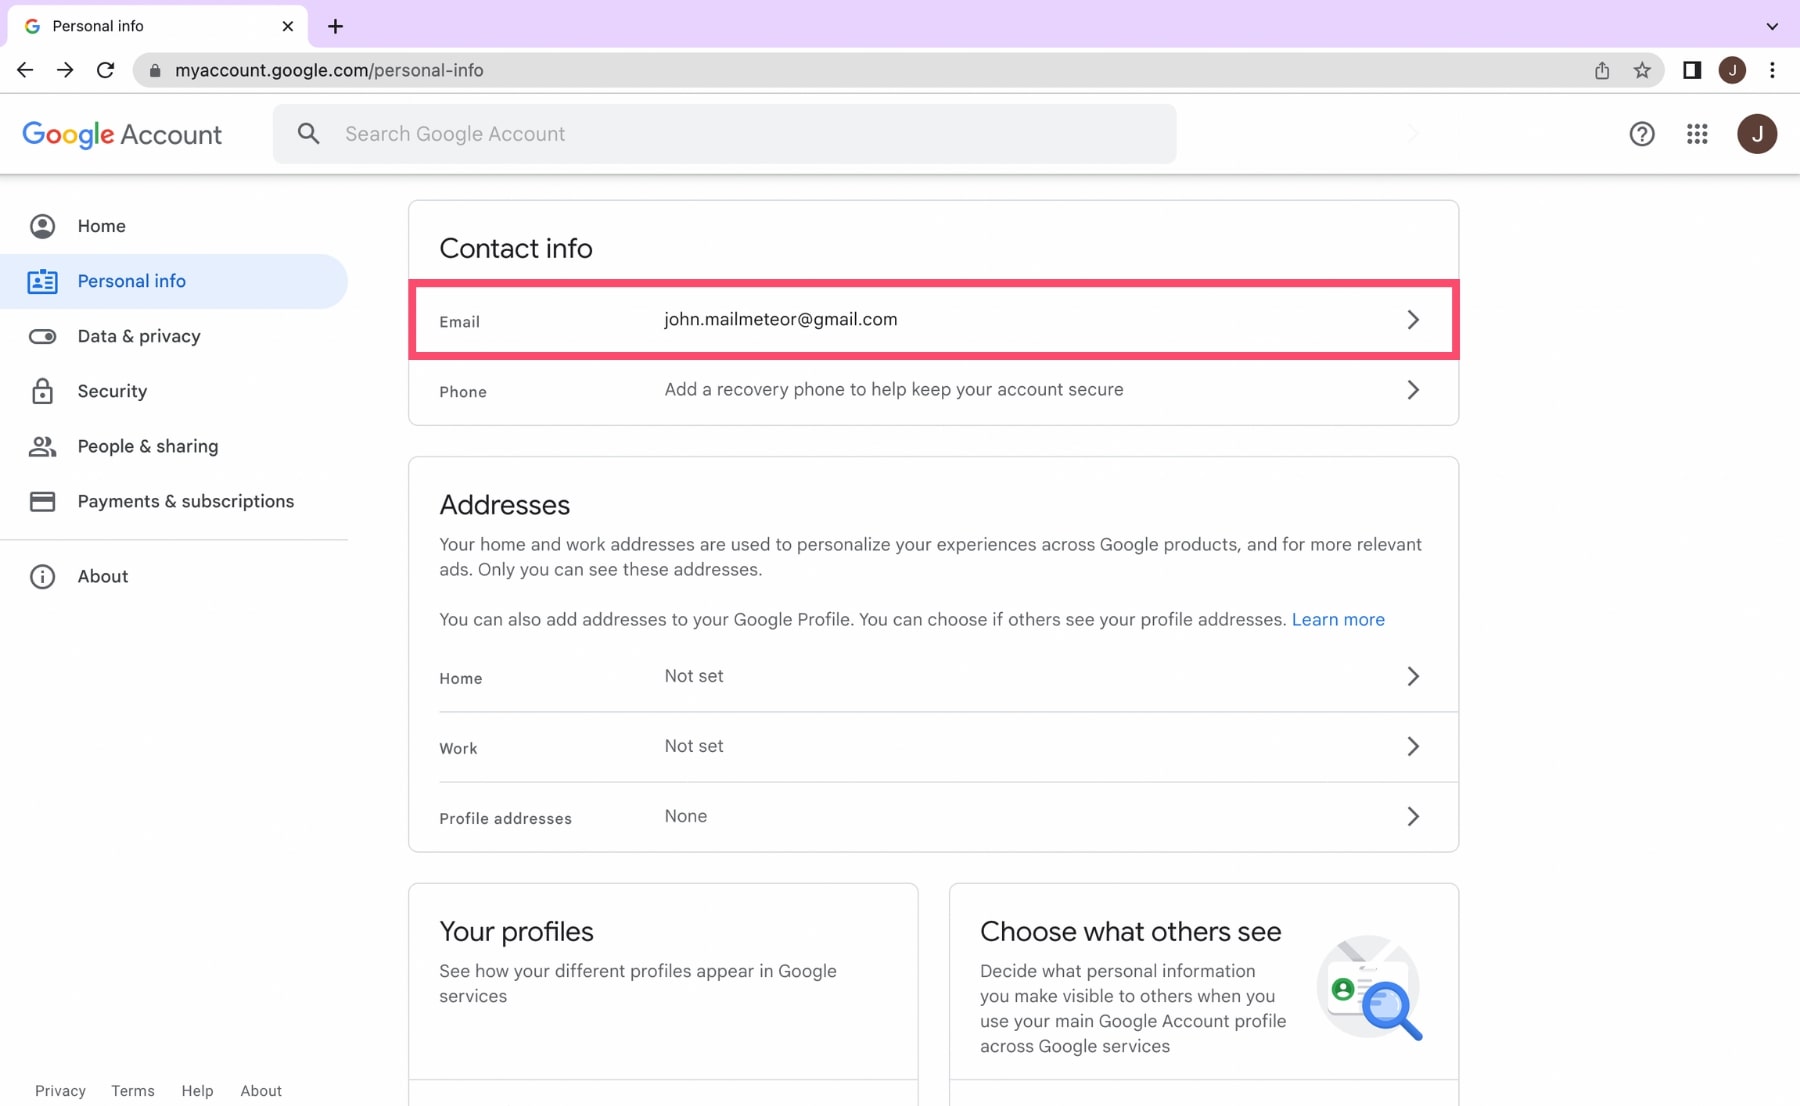
- Click on Google Account email. If you see the option “Change your Google Account email address”, you’re eligible.
- Enter your new Gmail username (the part before @gmail.com).
- Confirm the change.
Your new address becomes your primary Gmail address. Your old address stays linked to your account as an alias.
This means:
- You keep your Gmail inbox
- You keep Google Drive, Photos, YouTube, purchases, and subscriptions
- Emails sent to your old address still arrive
- You can sign in using either address
Important things to know
- You can only change your Gmail address once every 12 months
- You can only change it up to 3 times total
- Your old Gmail address cannot be claimed by someone else
- The feature is rolling out gradually — not all users see it yet
Don’t see the option? Here’s the next best solution.
2. Create a New Gmail Address and Set Up Forwarding
If you don’t have access to Google’s new address change feature yet, the safest alternative is to create a new Gmail account and automatically forward emails from your old address.
This ensures you don’t miss any messages during the transition.
Step 1: Create a New Gmail Account
First, you’ll need to create a new Gmail address. If you’re not sure how to do that, follow our step-by-step guide on how to create a new Gmail account.
Or go directly to: https://accounts.google.com/signup
Fill out the form and choose your new Gmail username.
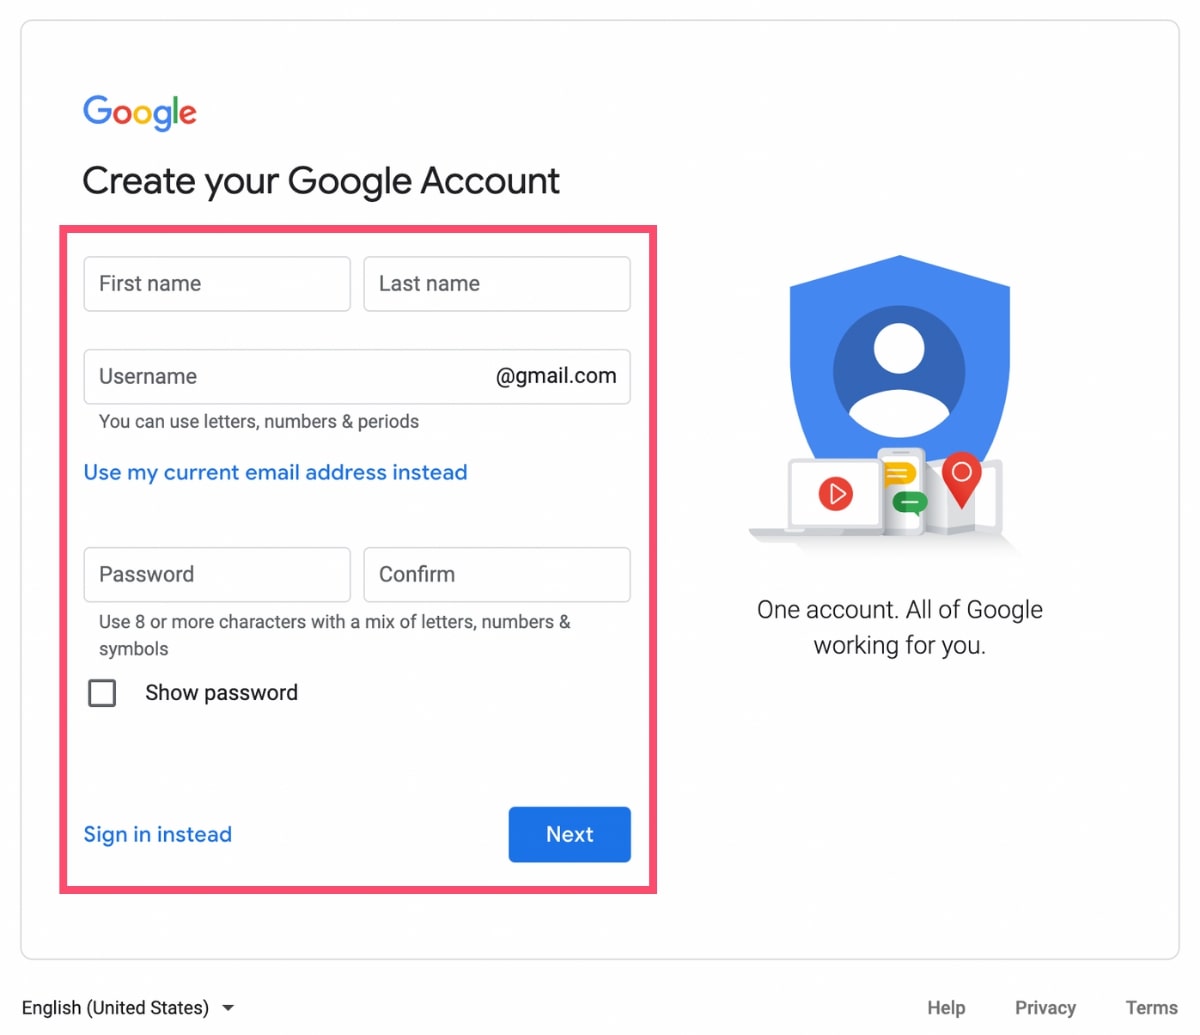
Once your account is created, log into it.
Step 2: Enable Email Forwarding From Your Old Account
Now let’s connect your old Gmail address to the new one.
- Log into your old Gmail account.
- Click the settings icon > See all settings.
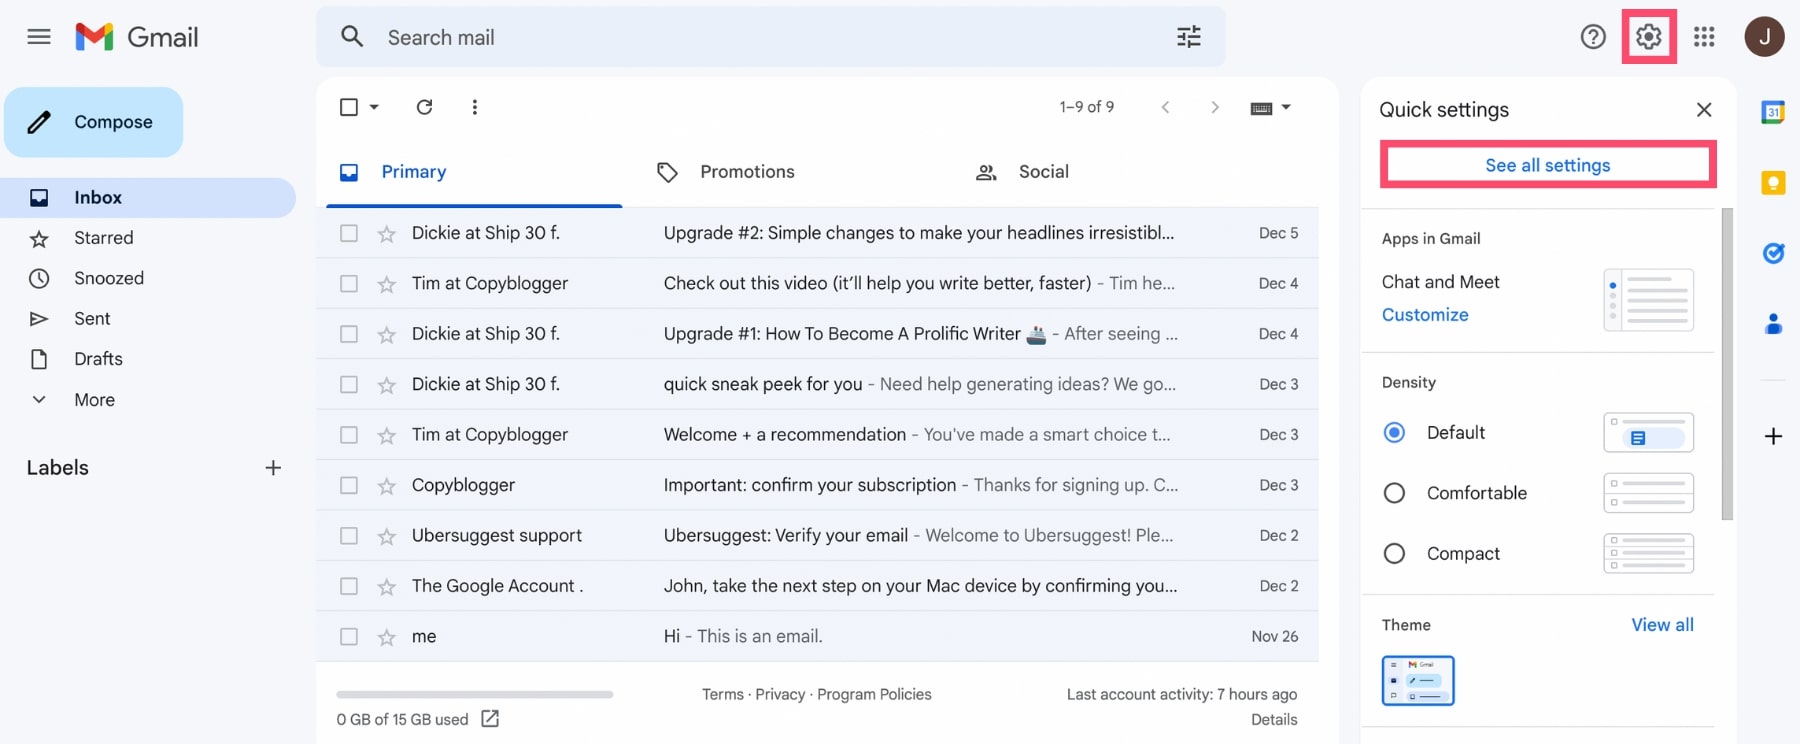
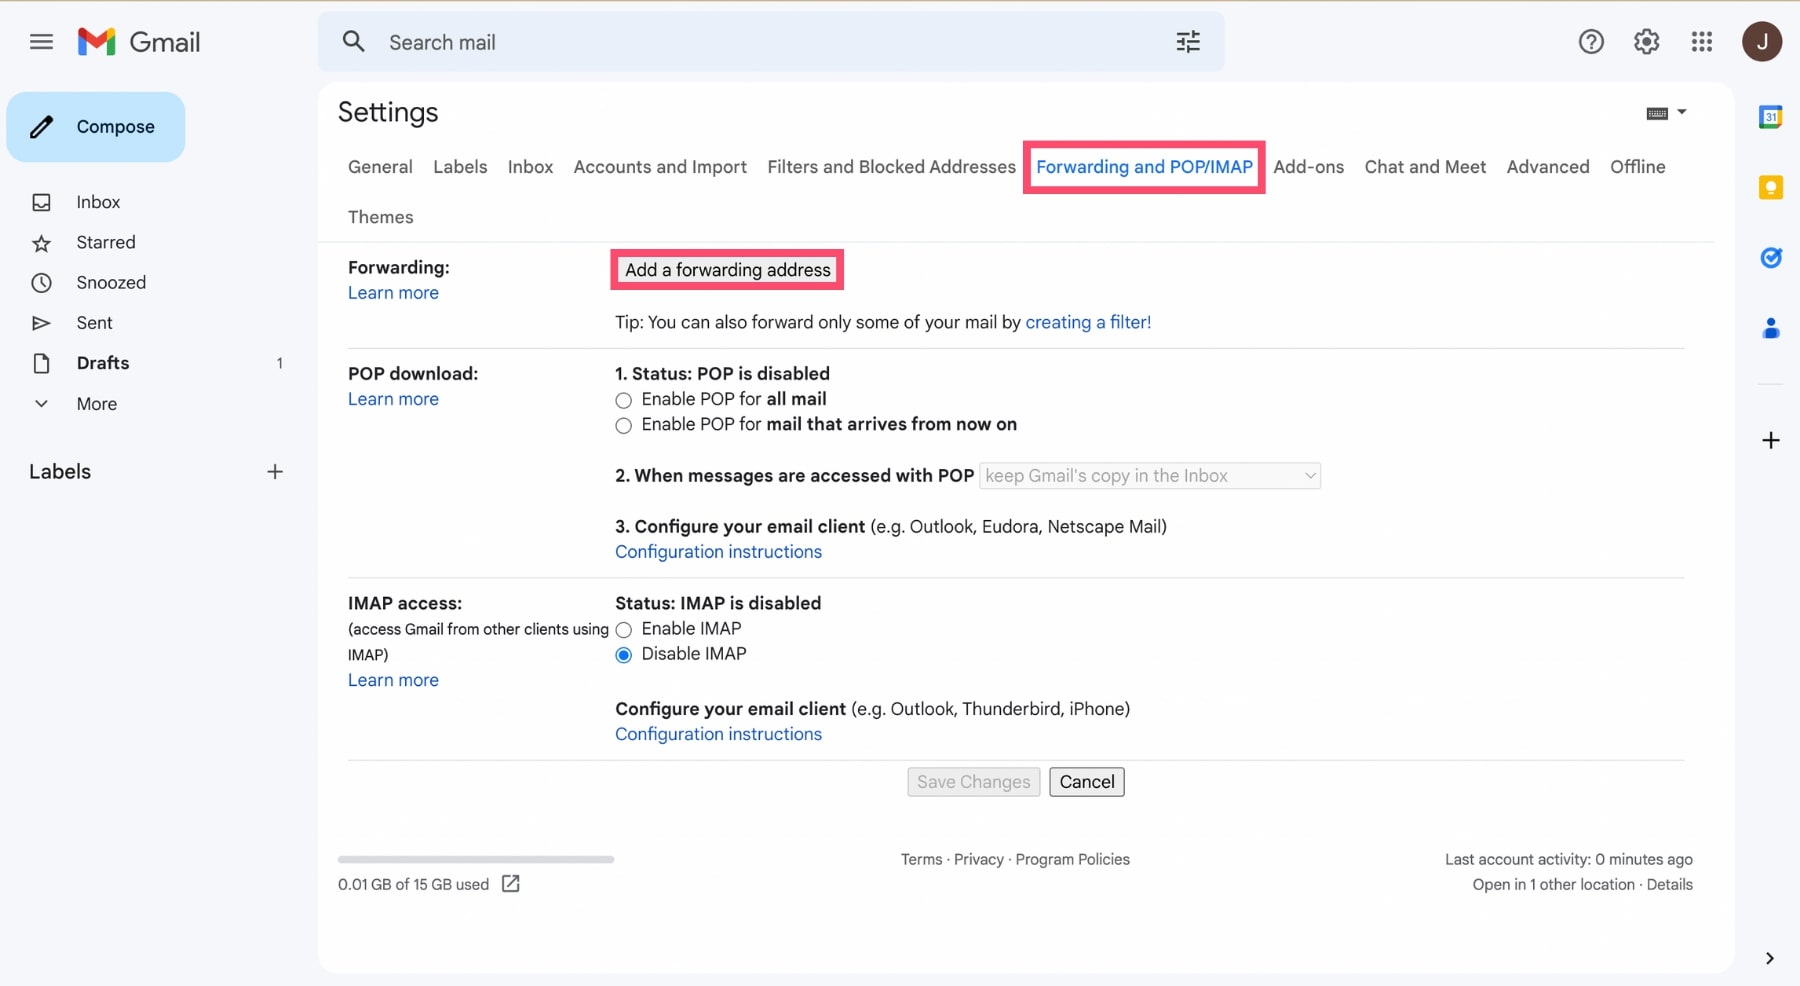
- Open the Forwarding and POP/IMAP tab.
- Click Add a forwarding address.
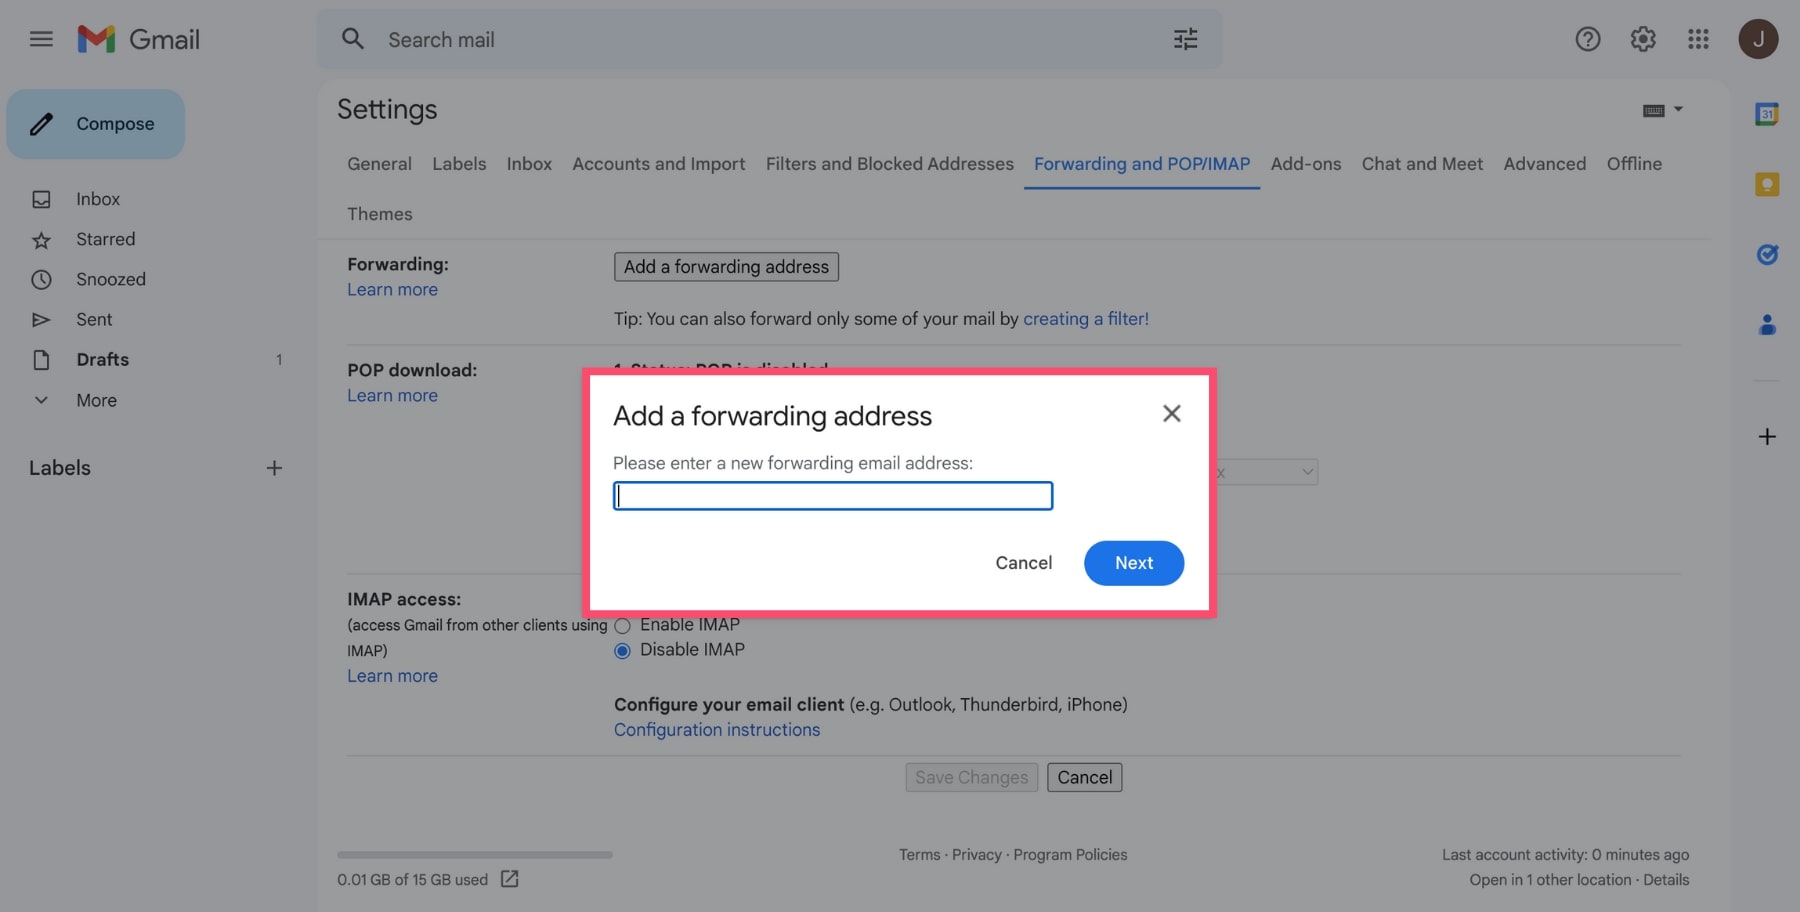
- Enter your new Gmail address and confirm.
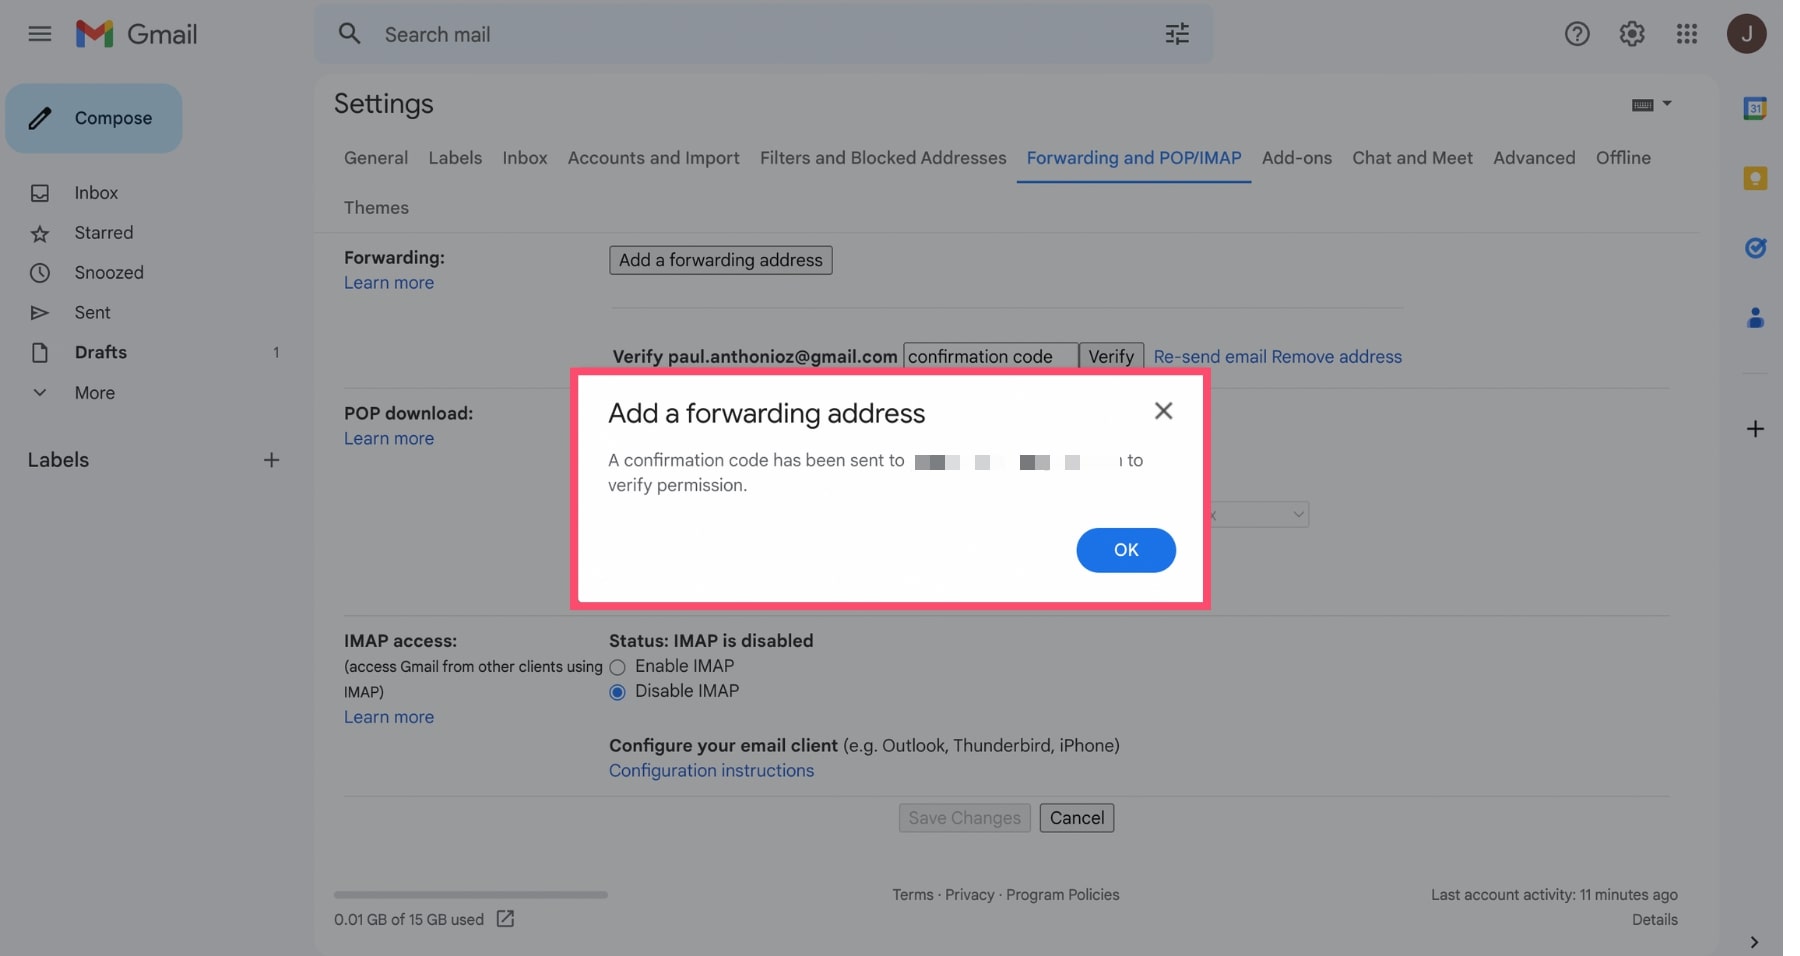
- Verify the confirmation email sent to your new account.
- Select Forward a copy of incoming mail to and save changes.
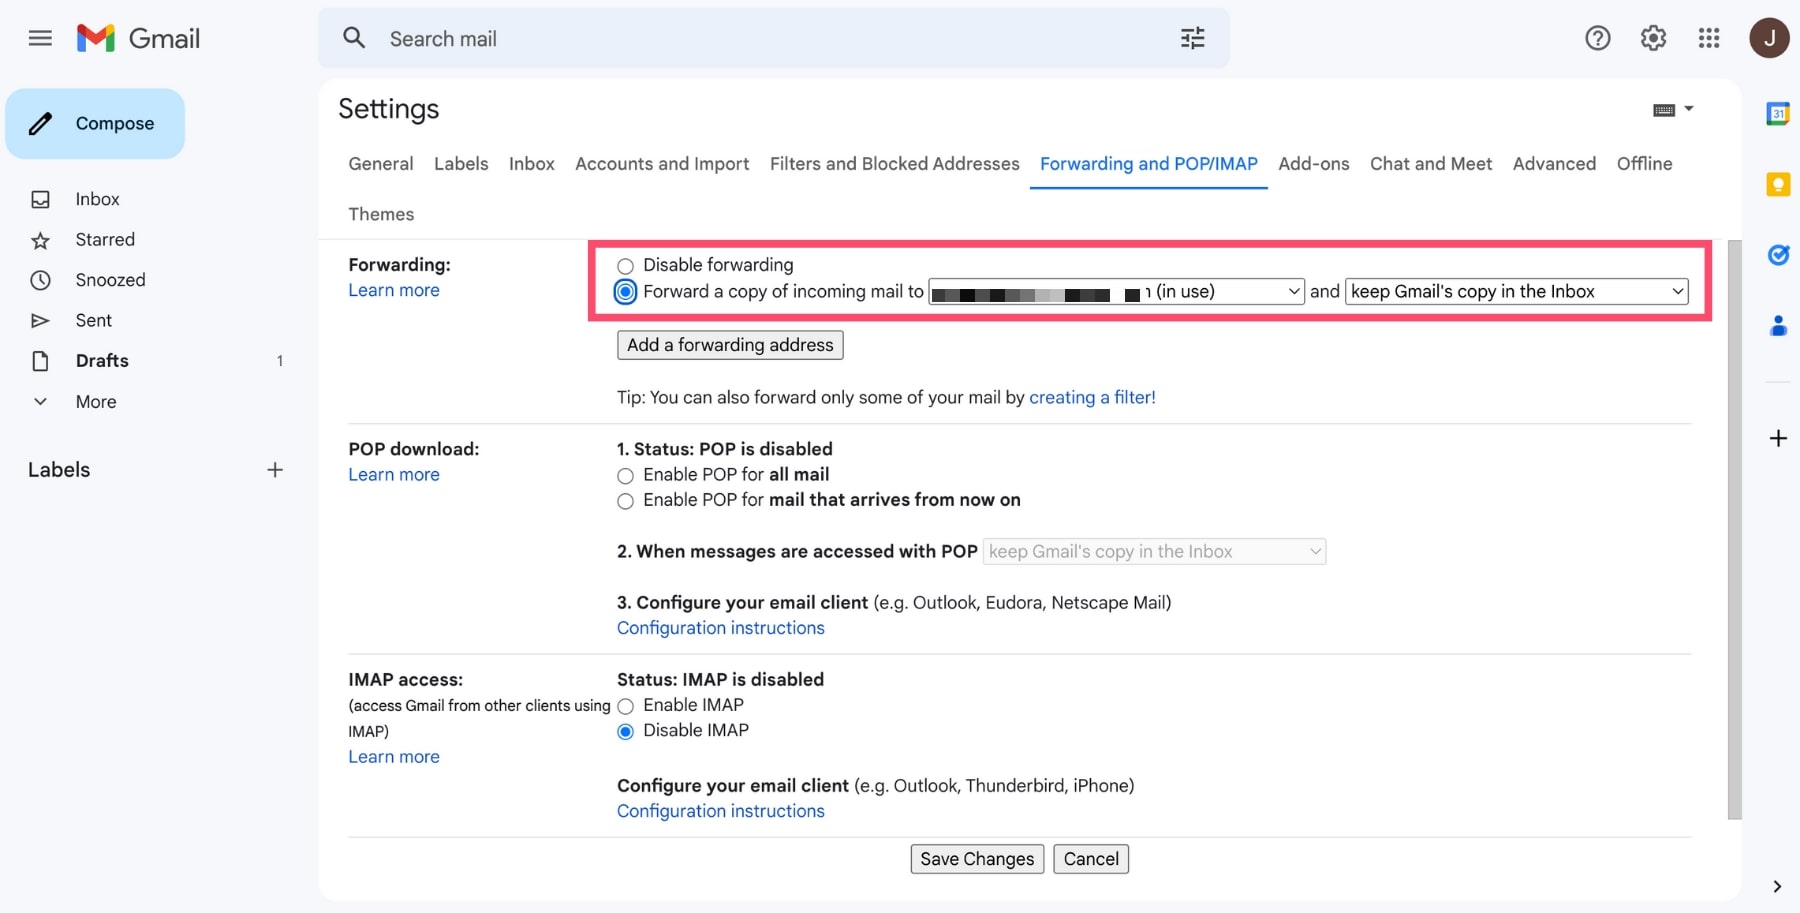
- Click Save changes.
And voilà. From now on, every email sent to your old Gmail address will automatically appear in your new inbox.
Want something simpler — without creating a new account?
Here’s an alternative.
3. Add an Alias to Your Gmail Account
If you don’t actually need to change your Gmail account — but just want a different sending address — adding an alias can be a smart move.
What Is a Gmail Alias?
A Gmail alias is an additional email address linked to your main account. When you send an email, you can choose which address appears in the From field — but everything is managed from one Gmail inbox.
A Gmail alias lets you:
- Send emails from another address
- Manage multiple email identities in one inbox
- Avoid creating a completely separate Google account
- Keep your original Gmail address active
This is especially useful if:
- You want a more professional email identity
- You run a side project or business
- You’re transitioning slowly to a new address
👉 Learn more about how Gmail aliases work.
How to Add an Alias in Gmail
- Open Gmail.
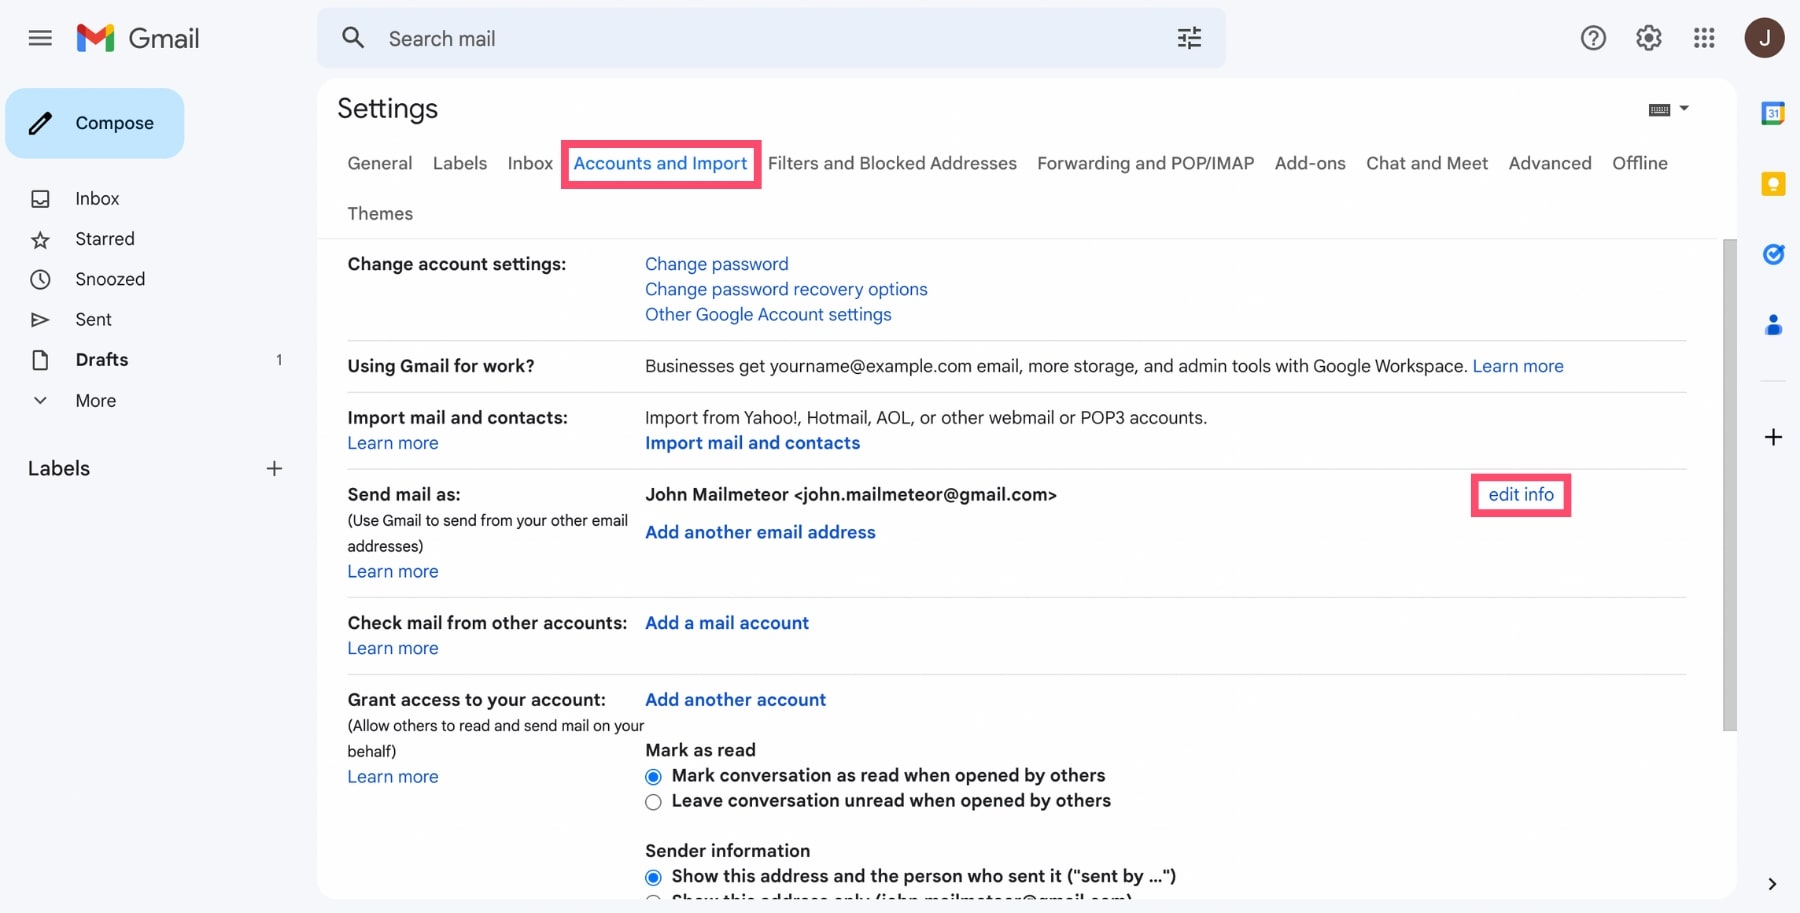
- Click Settings > See all settings.
- Go to the Accounts and Import tab.
- Under Send mail as, click Add another email address.
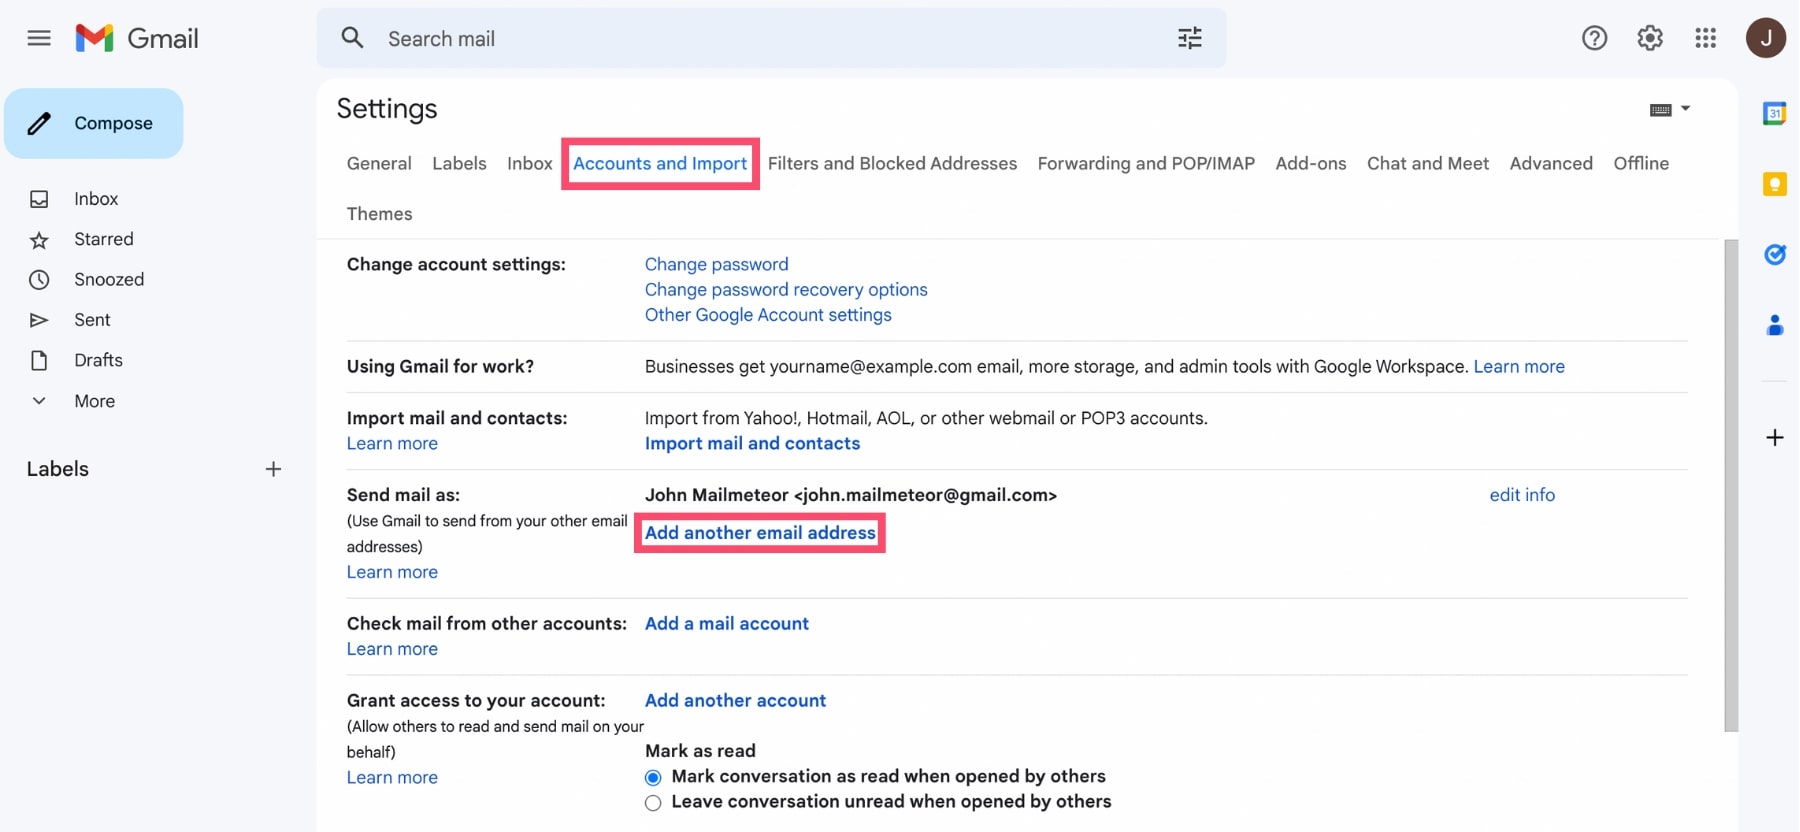
- Enter the email address you want to use.
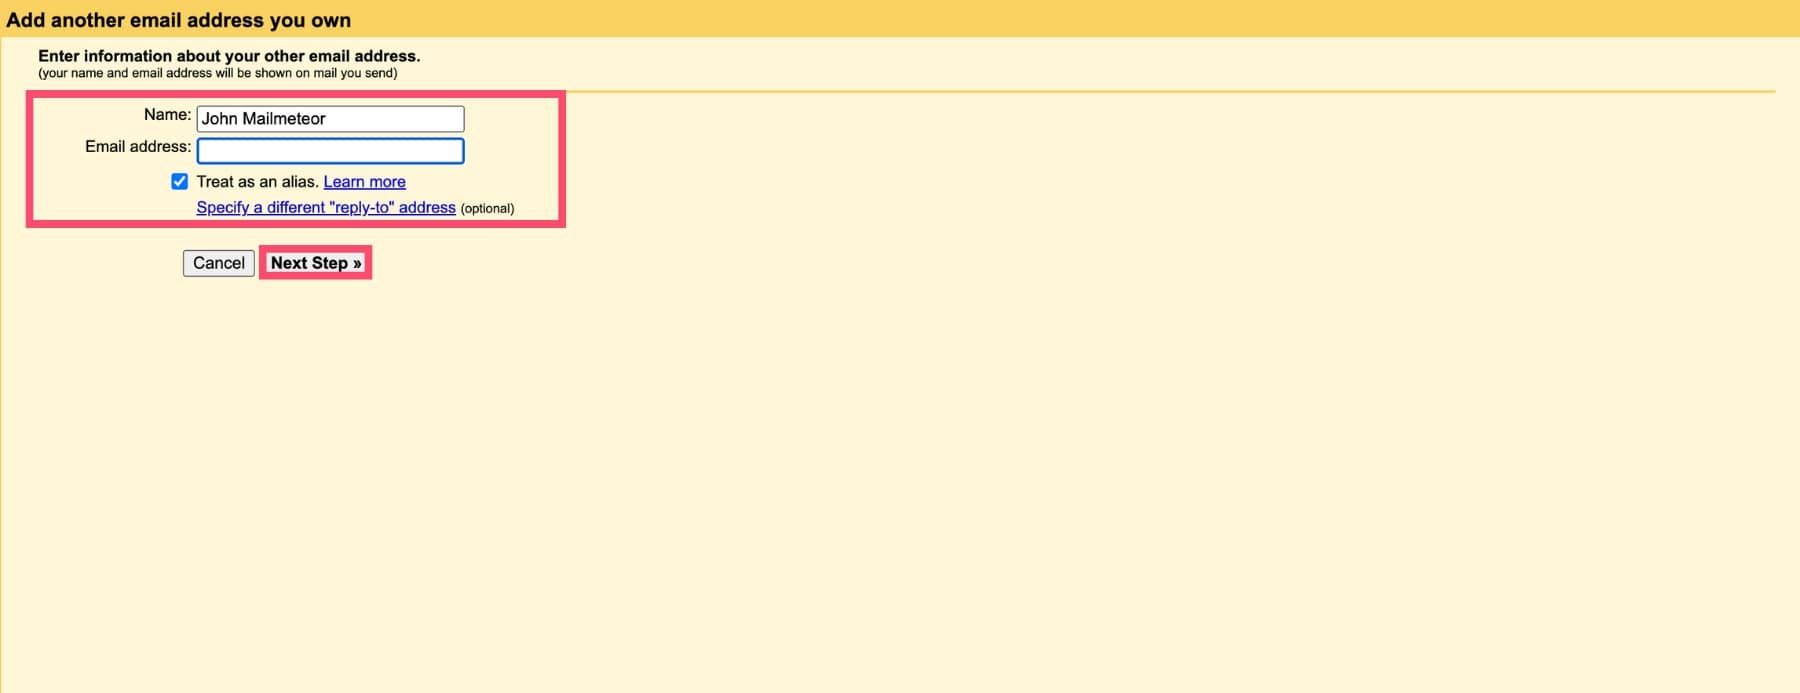
- Keep Treat as alias checked.
- Click Next step and verify the address via the confirmation email.
All done. Once verified, you can select your alias in the the from field when composing a new message.
When Should You Use an Alias Instead of Changing Your Gmail Address?
Use an alias if:
- You want flexibility without losing your main address
- You need multiple identities under one inbox
- You don’t want to deal with forwarding or importing data
- You don’t yet have access to Google’s new Gmail address change feature
However, keep in mind:
- Your original Gmail address still exists
- Logins and account identity remain tied to the primary address
- It’s not a true replacement — just an additional sending option
If you want a completely new primary Gmail identity, Method #1 or #2 may be better.
4. Change Your Display Name in Gmail
If you don’t need to change your actual Gmail address — but just want people to see a different name when you send emails — you can update your display name instead. This is the name that appears in recipients’ inboxes, next to your email address.
For example:
Old:
[email protected] → johnnyboy1998
New:
[email protected] → John Smith
Your Gmail address stays the same — but your public identity looks cleaner and more professional.
When Does Changing Your Display Name Make Sense?
Changing your Gmail display name is a good option if:
- You got married and changed your last name
- You want a more professional identity
- Your current name looks outdated or informal
- You don’t want to create a new Gmail account
It’s fast, reversible, and doesn’t affect your inbox or data.
How to Change Your Name in Gmail
- Open Gmail.
- Click the Settings icon.
- Select See all settings.
- Go to the Accounts and Import tab.
- Under Send mail as, click Edit info next to your email address.
- Enter your new display name.
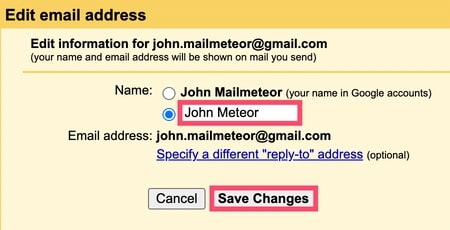
- Click Save Changes.
That’s it. From now on, recipients will see your updated name when you send emails.
Important to Know
- This does not change your actual Gmail address.
- Your login email stays the same.
- Replies still go to your original address.
If you need a brand new email identity (not just a new name), go back to Method #1 or #2 instead.
5. Add or Remove Dots in Your Gmail Address
Here’s something most Gmail users don’t know:
Gmail ignores dots in email addresses.
That means:
All go to the exact same inbox.
Google treats them as identical addresses.
Can You Really “Change” Your Gmail Address With Dots?
Technically, yes — but only visually. You can start giving people a version of your email address with or without dots, and you’ll still receive the same messages in the same account.
For example:
If your Gmail address is:
You can also use:
No setup required. No settings to change. No forwarding needed.
When Is This Useful?
Adding or removing dots can help if:
- You want a slightly cleaner version of your address
- You prefer a more readable format
- Someone mistyped your email with dots
- You’re standardizing how your address appears on business cards or websites
Important Limitations
- This does not create a new Gmail account.
- You cannot claim a dotted version of someone else’s Gmail address.
- You cannot use dots to change your username entirely.
In other words, dots are just formatting — not a real address change. If you want a completely new Gmail identity, use Method #1 (Google’s new feature) or Method #2 (create a new account and forward emails).
6. Import Your Old Emails and Contacts to a New Account
If you’ve created a brand-new Gmail address, forwarding ensures you don’t miss future emails. But what about your old emails, contacts, and history?
Instead of starting from scratch, you can import everything from your old Gmail account into your new one — safely and automatically.
This is the best option if you want a completely fresh primary Gmail address without losing your past data.
What You Can Import
Gmail lets you transfer:
- Old emails (from your inbox and folders)
- Contacts
- New incoming mail (for up to 30 days)
This way, your new account becomes your main hub — while keeping access to your old conversations.
How to Import Emails and Contacts in Gmail
- Log into your new Gmail account.
- Click the settings icon > See all settings.
- Open the Accounts and Import tab.
- Click Import mail and contacts.
- Enter your old Gmail address.
- Sign into your old account in the popup window.
- Click Allow to grant access.
- Choose what you want to import:
- Contacts
- Old mail
- New mail for the next 30 days
- Click Start import.
Gmail will begin copying your emails and contacts into your new account in the background. Depending on how much data you have, the process can take several hours (or even a couple of days).
Important Things to Know
- Imported emails appear in your inbox with a label showing they were imported.
- You can continue using both accounts during the import.
- You should enable forwarding (Method #2) to ensure you don’t miss new messages long-term.
- Once everything is migrated, you can gradually stop using your old account.
When Should You Use This Method?
Choose this method if:
- You want a completely new Gmail identity
- You’re moving to a more professional email address
- You want all past emails available in one place
- You don’t have access to Google’s new direct change feature
If you simply need another sending identity, an alias (Method #3) may be enough. But if you want a full transition, importing your data is the cleanest solution.
Which Method Should You Use to Change Your Gmail Address?
Not sure which option fits your situation? Use this quick guide:
| If you want to… | Best option |
|---|---|
| Change your existing @gmail.com address without creating a new account | Use Google’s new built-in Gmail address change feature (if available) |
| Create a completely new Gmail address and move everything over | Create a new Gmail account, enable forwarding, and import your data |
| Keep your current inbox but send from another address | Add a Gmail alias |
| Make your name look more professional without changing your email address | Update your Gmail display name |
| Slightly adjust how your Gmail address looks (formatting only) | Add or remove dots in your Gmail address |
Bonus: Video Tutorial
FAQs
Can you change your Gmail email address?
In most cases, you can’t change your Gmail address. However, you can create a new Gmail address and set up email forwarding. That way, any messages sent to your old Gmail address will be automatically forwarded to your new account.
Can I change my Gmail address without creating a new account?
To change your Gmail address you’ll have to create a new account. But there are a few exceptions. For example, you can add or remove some dots in your Gmail address. Or change the name associated with your email address.
Can I have two Gmail addresses on one Google Account?
No. A Google Account can only have one primary @gmail.com address. However, you can add email aliases or connect additional email addresses under Send mail as in Gmail settings. You can also stay signed into multiple Google accounts at the same time.
Can you transfer all emails to a new email address?
Yes. You can transfer your emails by enabling Gmail’s Import mail and contacts feature. This allows you to copy old emails and contacts into your new account. To avoid missing future messages, you should also enable email forwarding from your old Gmail address.
How to change your recovery email in Gmail?
Forgot your Google ID and password? No sweat. You can still get access to your account thanks to your recovery email address. This address is important, so make sure to keep it up to date.
If you no longer have access to your recovery details, here’s a step-by-step guide on how to recover your Gmail password without a phone number or recovery email.
And if you simply want to update your recovery email address, here’s how:
- Open Gmail.
- Click on your profile picture (in the top-right of your screen).
- Select Manage your Google Account.
- Go to the Personal Info tab.
- Click the arrow next to Email.
- Select Recovery email.
- Sign into your account.
- Enter the address you want to use as your recovery email.
How to change Gmail address on iPhone or Android?
To change the Gmail address on your iPhone or Android device, you’ll have to follow a similar process. Start by checking if you can change your Gmail address. Here’s how to do it.
- Go to myaccount.google.com.
- Tap Personal info.
- In the Contact info section, tap Email.
- From there, select Google Account email. If nothing happens, this means you can’t change your email.
In that case, you can always add a second Gmail account to your device. Or create a new Gmail address and set up email forwarding.


