Want to unlock the full potential of your Outlook experience? In this quick guide, we’ll show you how to change views in Outlook and turn your inbox into a personalized command center for all your email communications.
On average, American workers receive a whopping 121 emails per day, according to Venngage. That’s a lot of emails. And if you’re not prepared for this, it can quickly become overwhelming.
To help you stay organized, Microsoft Outlook, a powerful email client, has found a simple solution: a feature called Views that lets you transform your cluttered inbox into a streamlined workspace with just a few clicks.
In this quick guide, we’ll show you 10+ easy ways to change views in Outlook, so that you can create a personalized email experience, prioritize important messages, track team communications, and clean up your inbox.
Here’s what we’ll cover:
- What are views in Outlook?
- How to switch views in Outlook?
- How to customize views in Outlook
- 1. Turning on conversation threads
- 2. Enabling dark mode for eye comfort
- 3. Customizing the reading pane position
- 4. Adjusting column width and order
- 5. Turning on Focused Inbox
- 6. Optimizing the Outlook Ribbon
- 7. Change text size and spacing
- 8. Customizing the to-do bar for task management
- 9. Personalizing the quick access toolbar
- 10. Configuring email preview settings
- 11. Customizing the folder pane
Sounds good? Then let’s dive in.
What are views in Outlook?
Outlook views are pre-configured arrangements of your email interface. These settings let you determine how information is displayed within your inbox.
Thanks to views, you can customize your Outlook experience, making it easier to manage your emails, calendar events, and tasks.
Whether you prefer a minimalistic inbox or a detailed view that highlights every aspect of your messages, Outlook’s view settings let you adjust everything.
From the width of columns to the grouping of emails by conversation, you can arrange your inbox in a way that best suits your workflow.
How to switch views in Outlook?
Outlook offers three predefined views, such as Compact, Single, and Preview, which you can use right out of the box:
- Compact: This view is designed to save space by displaying emails in a more condensed format. It shows your messages with minimal details, allowing you to see more emails at a glance, which is particularly useful if you have a busy inbox.
- Single: The Single view displays one email at a time in a full-width layout, providing a clear and focused view of the selected message. It’s ideal for users who prefer to read and manage one email at a time without distractions.
- Preview: In the Preview view, you can see a snippet of the email content alongside the list of messages in your inbox. This layout allows you to quickly scan the first few lines of each email without opening it.
To change your default view in Outlook and switch from Compact to Single or Preview:
-
Sign in to your Outlook account.
-
Navigate to the View tab.
-
Click Change view.
-
Select a view.
And voilà. You can now change views in Outlook to streamline your email management, boost your productivity, and save time.
However, the real power of Outlook lies in the ability to customize these views to match your personal or professional needs.
How to customize a view in Outlook
Microsoft gives you dozens of options to personalize your views in Outlook and create a workspace that fits your style. In this section, we’ll show you 10+ simple ways to customize your Outlook view.
1. Turning on conversation threads
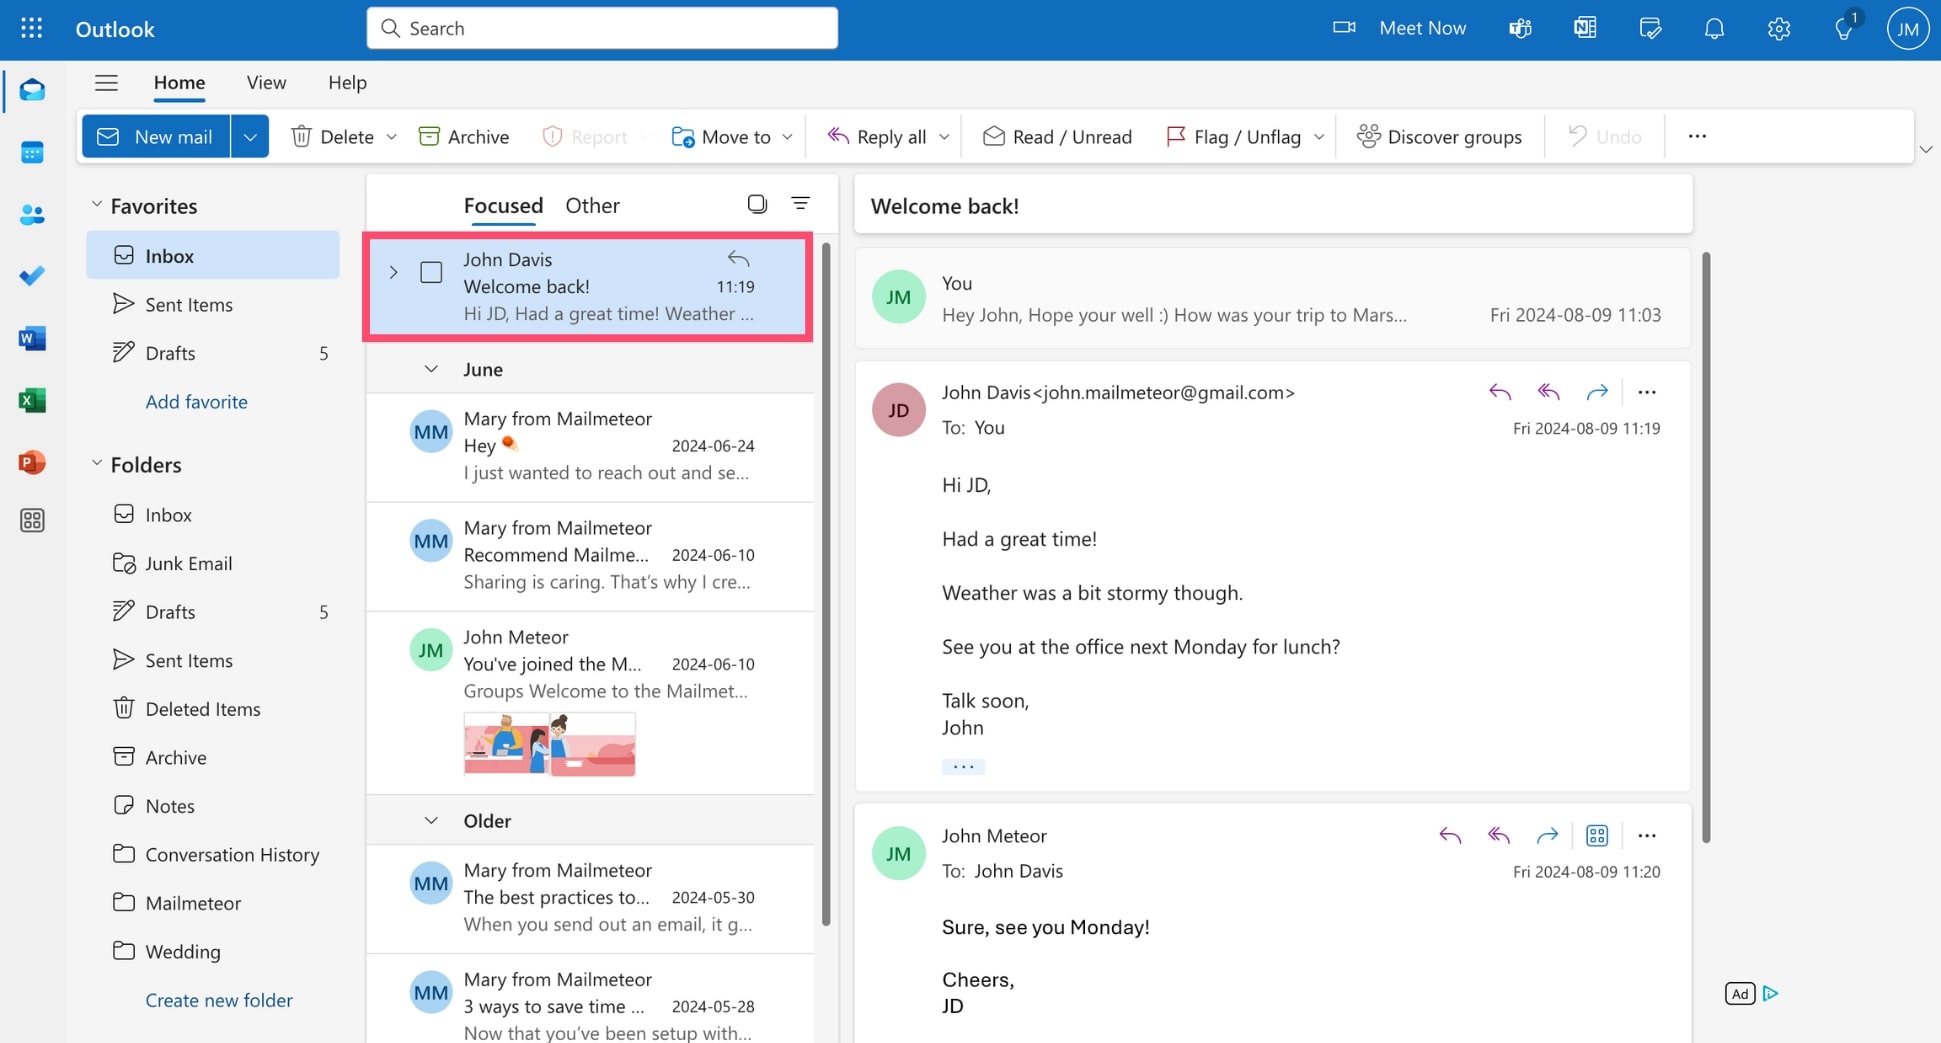
Turning your conversations into threads is a powerful feature in Outlook that automatically groups related emails together, making it easier to follow long email chains and keep track of important discussions. Here’s how to turn it on.
-
Open Outlook.
-
Go to the View tab.
-
Check the box next to Show as Conversations.
-
Select All mailboxes.
And done. This view change will help you browse old emails to find important messages in a snap. To quickly see all messages in a conversation, click the arrow to the left of the topmost email in the thread.
Use this Outlook view if: You often collaborate with team members or work on projects with multiple parties involved. You have to deal with lengthy email discussions and want to easily keep track of old emails.
2. Enabling dark mode for eye comfort
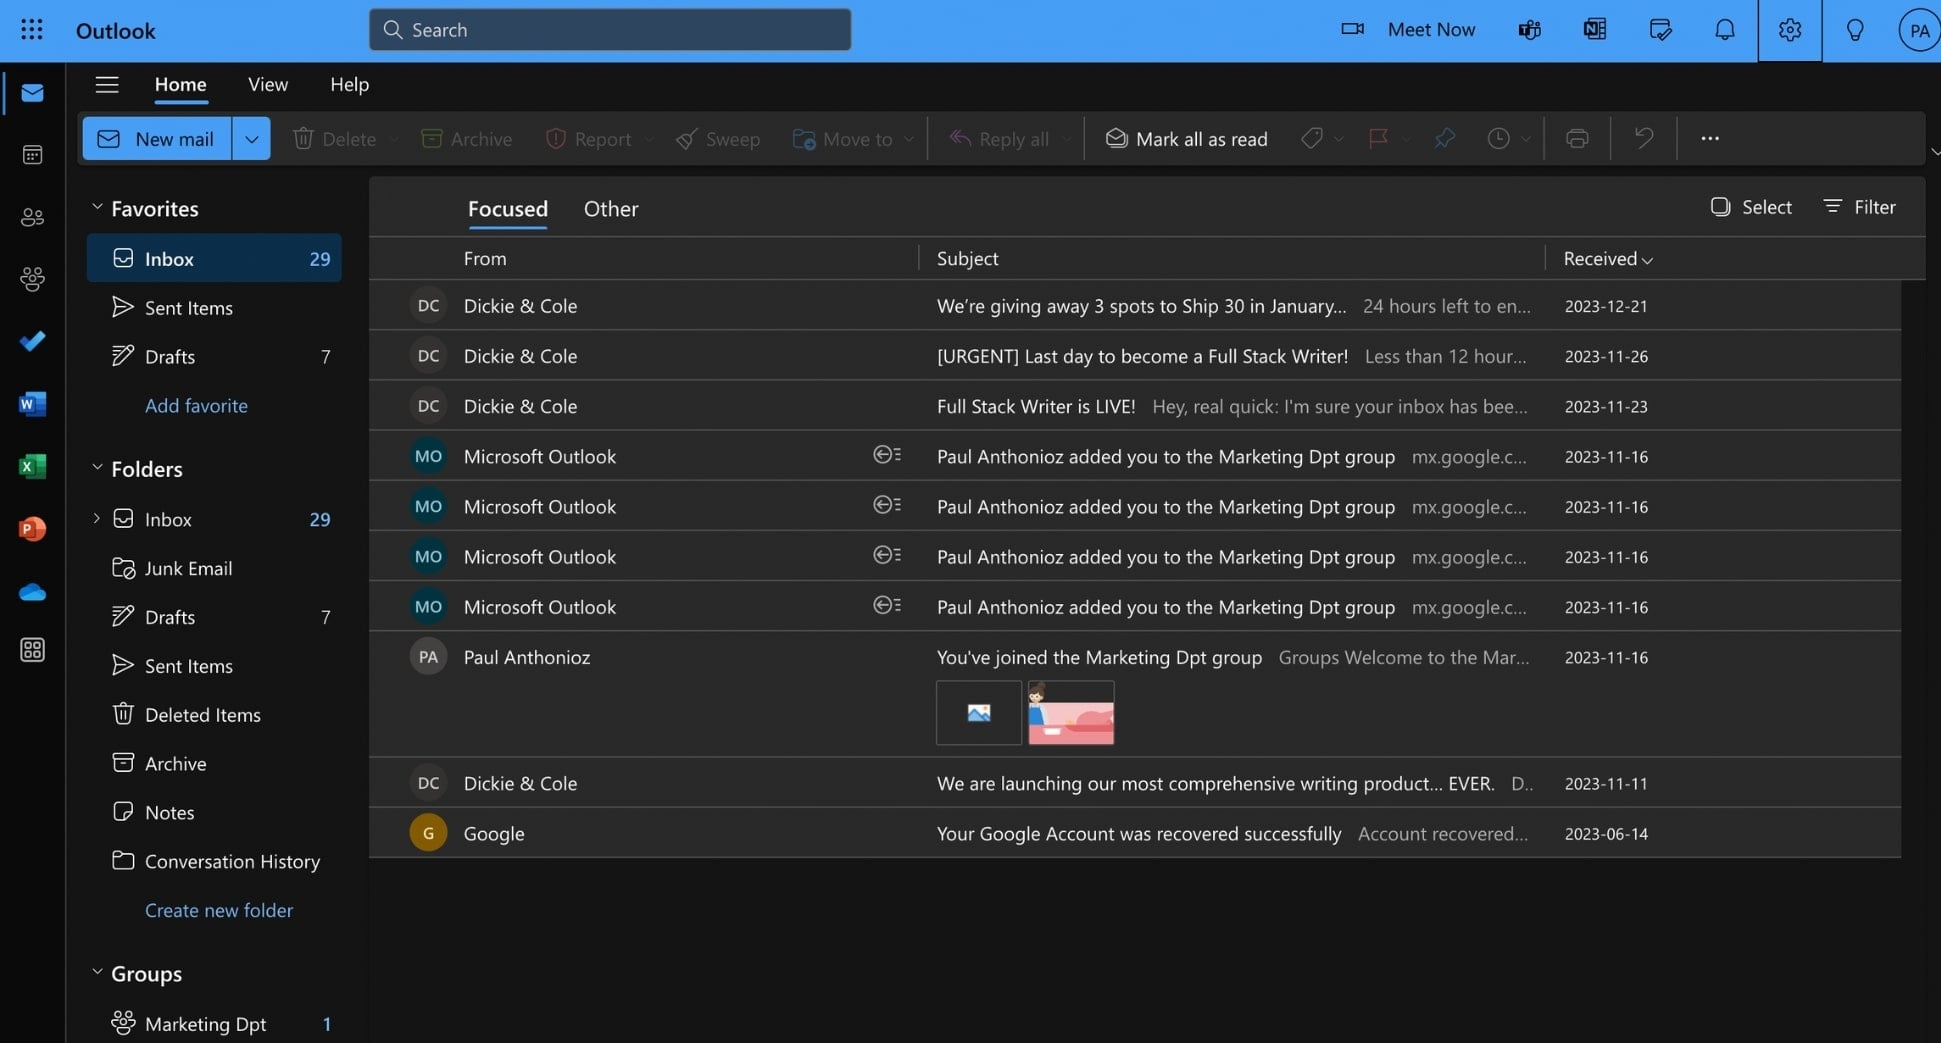
Outlook dark mode is a popular feature that can reduce eye strain, especially when working in a low-light environment or during long email sessions. Here’s how to customize your view with dark mode.
-
Sign in to Outlook.
-
Click the Settings gear icon in the top-right corner of Outlook.
-
Go to General > Appearance.
-
Under “Dark mode”, select Dark.
-
Click Save.
All set. Your Outlook interface will now have a sleek, dark appearance that’s easier on the eyes. You can further personalize your theme by adding a background image or selecting a theme color.
Use this Outlook view if: You work late hours, spend extended periods reading emails, or simply prefer a darker interface for aesthetic reasons. This view also reduces blue light exposure, which can interfere with sleep patterns.
3. Customizing the reading pane position
The reading pane is where you preview and read your emails without opening them in a new window. Customizing its position can significantly impact your email workflow. Here’s how to adjust it.
-
Open Outlook.
-
Go to the Settings.
-
Navigate to Mail > Layout.
-
Under Reading pane, select Right, Bottom, or Hide reading pane.
-
Click Save.
And done. Your reading pane will now appear in your chosen position (or disappear if you selected “Hide reading pane”).
Use this Outlook view if: You have a widescreen monitor and want to see more emails in your list while reading (right). You prefer seeing more details about each email in your list before reading (bottom). You like to focus on one task at a time or want to maximize your email list view (hide reading pane).
4. Adjusting column width and order
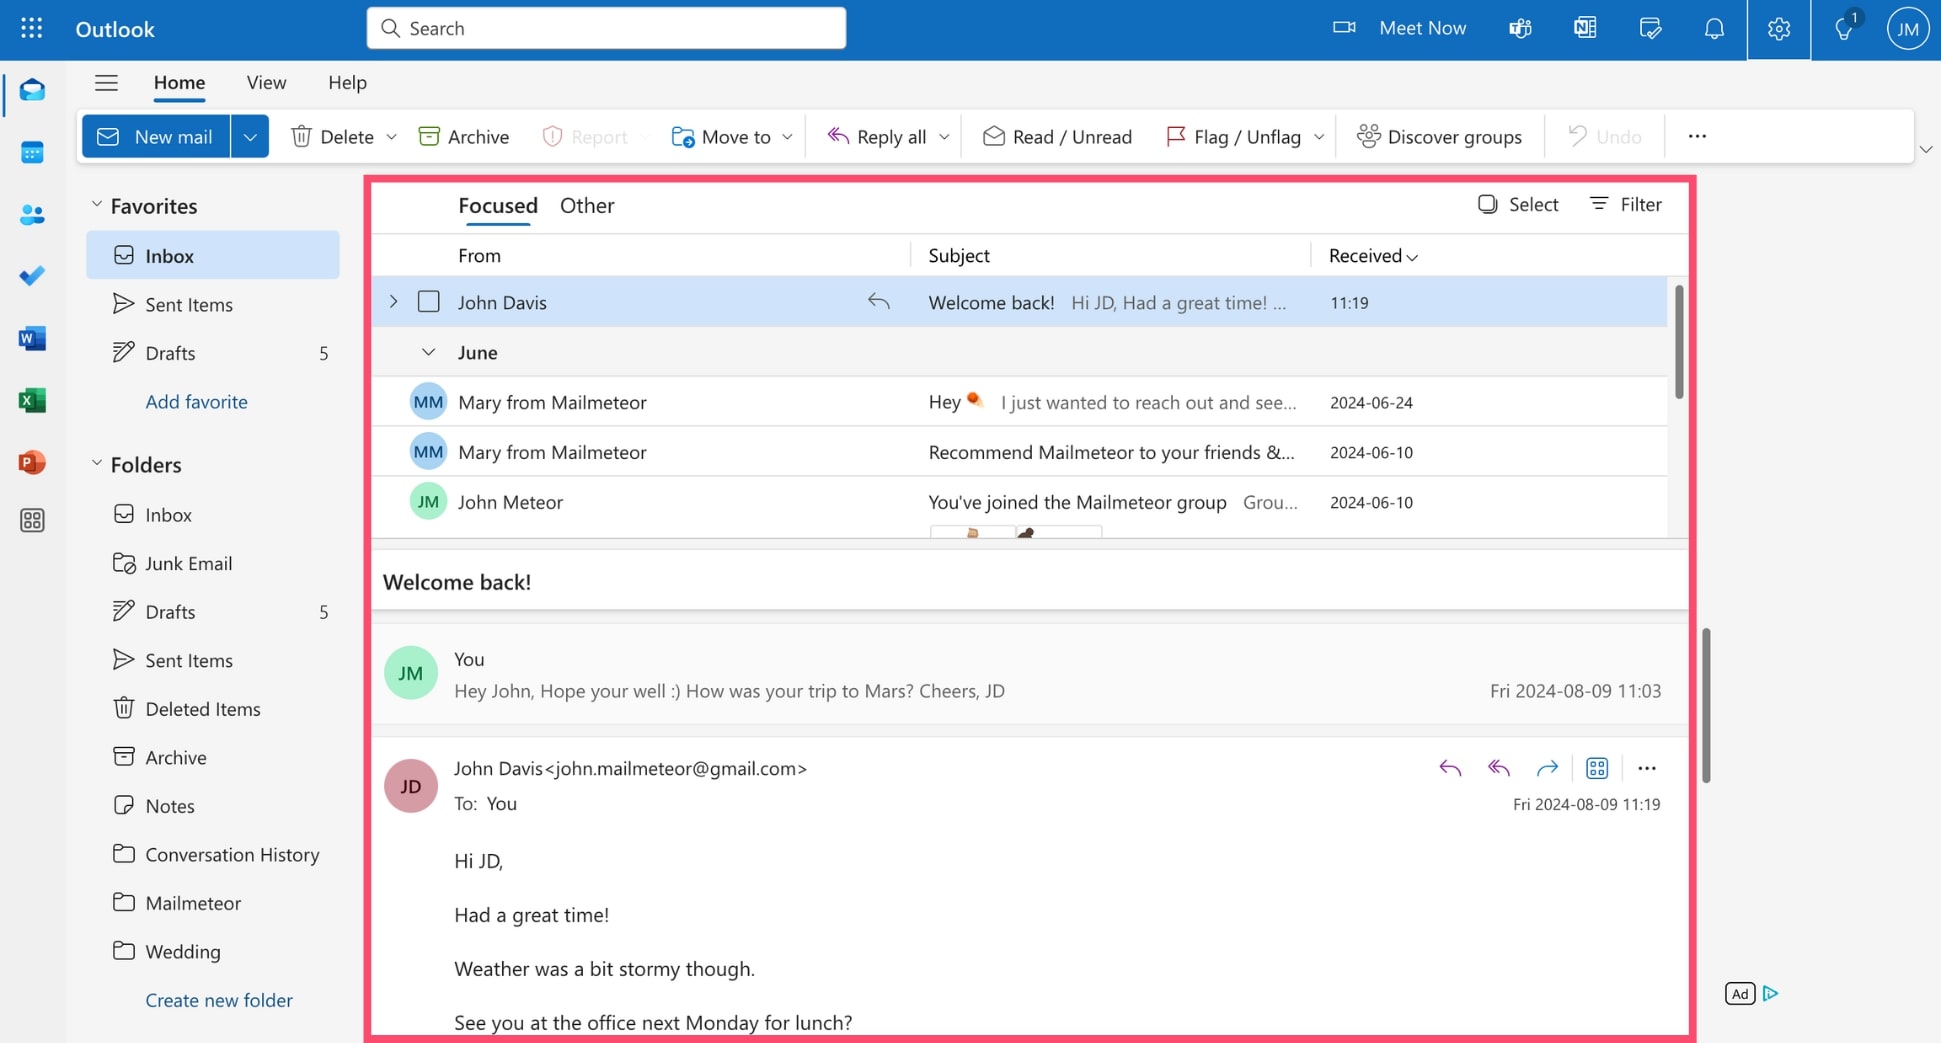
Customizing your inbox columns can help you see the most important information at a glance and streamline your email management process. Here’s how to adjust the width and order of columns in Outlook.
- Open Outlook on Desktop.
- Go to the View tab.
- Select View Settings.
- Click Format Columns
- Specify the size and order of your columns.
- Press OK.
And done. Your inbox will now display the columns you’ve chosen, in your preferred order and size. You can also resize your columns by clicking, dragging and releasing the line between each column.
Use this Outlook view if: You want to prioritize certain information in your email list view. For example, you might want to see the sender and subject first, or add a “Size” column if you’re managing your mailbox storage.
5. Turning on Focused Inbox
Focused Inbox is a smart Outlook feature that automatically sorts your incoming messages into two tabs. The Focused tab is dedicated to your most important emails. The Other tab is for the rest.
To change your view to Focused Inbox:
-
Open Outlook.
-
Click on the Settings gear icon.
-
Navigate to Mail > Layout**.
-
Select Sort messages into Focused and Other.
-
Press Save.
And that’s it. Your inbox will now be divided into Focused and Othertabs. Outlook uses machine learning to determine which emails are most important to you, but you can also manually move emails between tabs to train the system.
Use this Outlook view if: You receive a high volume of emails and want to quickly identify the most important ones. Ideal to prioritize client or team communications amidst newsletters, notifications, and other less urgent emails.
6. Optimizing the Outlook Ribbon
The Outlook ribbon contains all the commands you need to work with your emails, calendar, and other features. Optimizing it can help you access your most-used commands more quickly. Here’s how to personalize your ribbon:

- Open Outlook.
- Click the three horizontal dots in the ribbon.
- Select Customize.
- Edit, remove, or create groups.
- Then add or remove buttons from each group.
- Save your changes.
And done. Your Outlook ribbon will now display your custom tabs and commands. Made a mistake? You can reset the ribbon to its default state at any time by clicking the Reset button.
Use this Outlook view if: You often use specific Outlook commands that are buried in submenus, or you want to create a streamlined interface with only the tools you use most often.
7. Change text size and spacing
Adjusting the text size and spacing in Outlook can greatly improve readability and reduce eye strain. Here’s how to customize these settings.
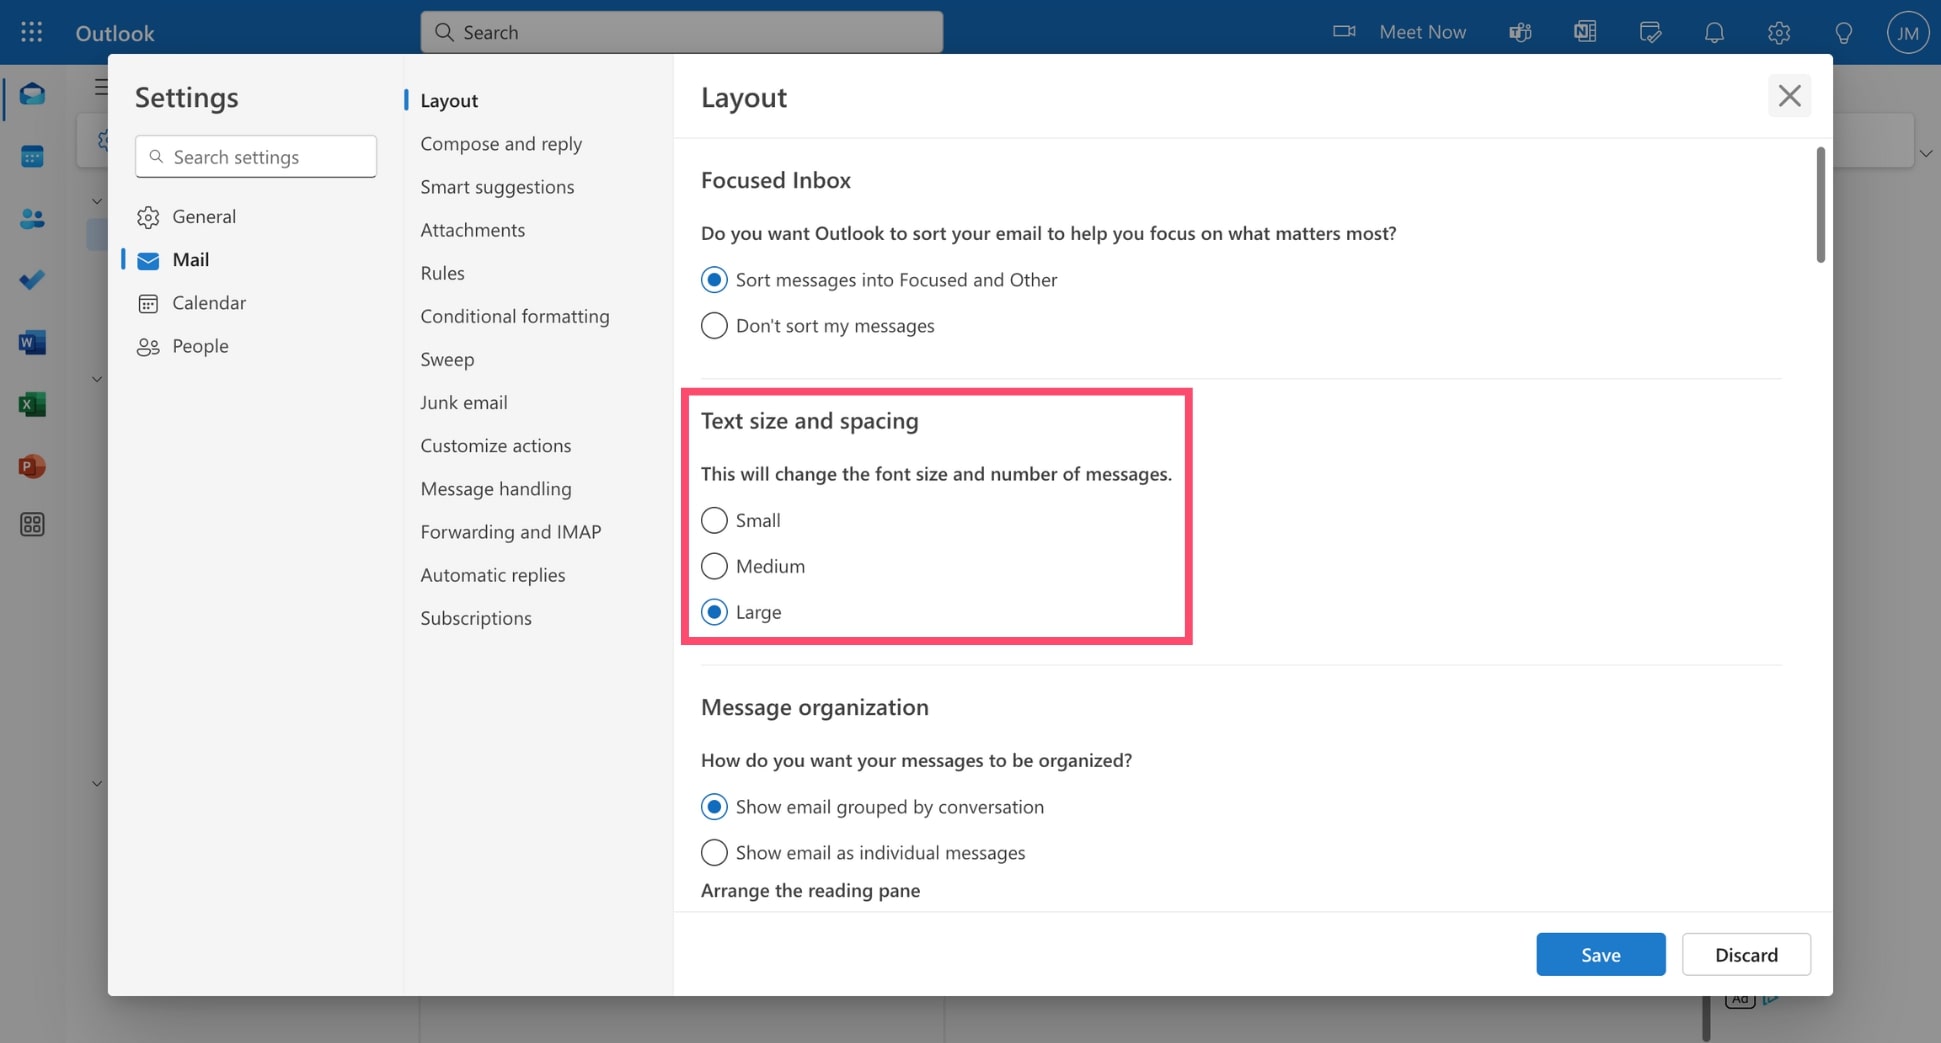
- Go to Outlook.
- Click on the Settings gear icon.
- Head over to Mail > Layout.
- Under Text size and spacing, select Small, Medium, or Large.
- In the Outlook ribbon, click Density.
- Choose Roomy, Cozy, or Compact.
And voilà. Your Outlook interface will now display text at your preferred size and spacing. You can also use Outlook keyboard shortcuts to quickly zoom in or out. Press Ctrl and use the + or - keys to adjust zoom level.
Use this Outlook view if: You find the default text size too small or too large, or if you prefer more or less space between lines for easier reading. Ideal if you spend long hours reading emails or if you have visual impairments.
8. Customizing the to-do bar for task management
The to-do bar in Outlook is a versatile tool that can display your calendar, tasks, and people, helping you manage your schedule and priorities without leaving your inbox. Here’s how to customize it to fit your needs.
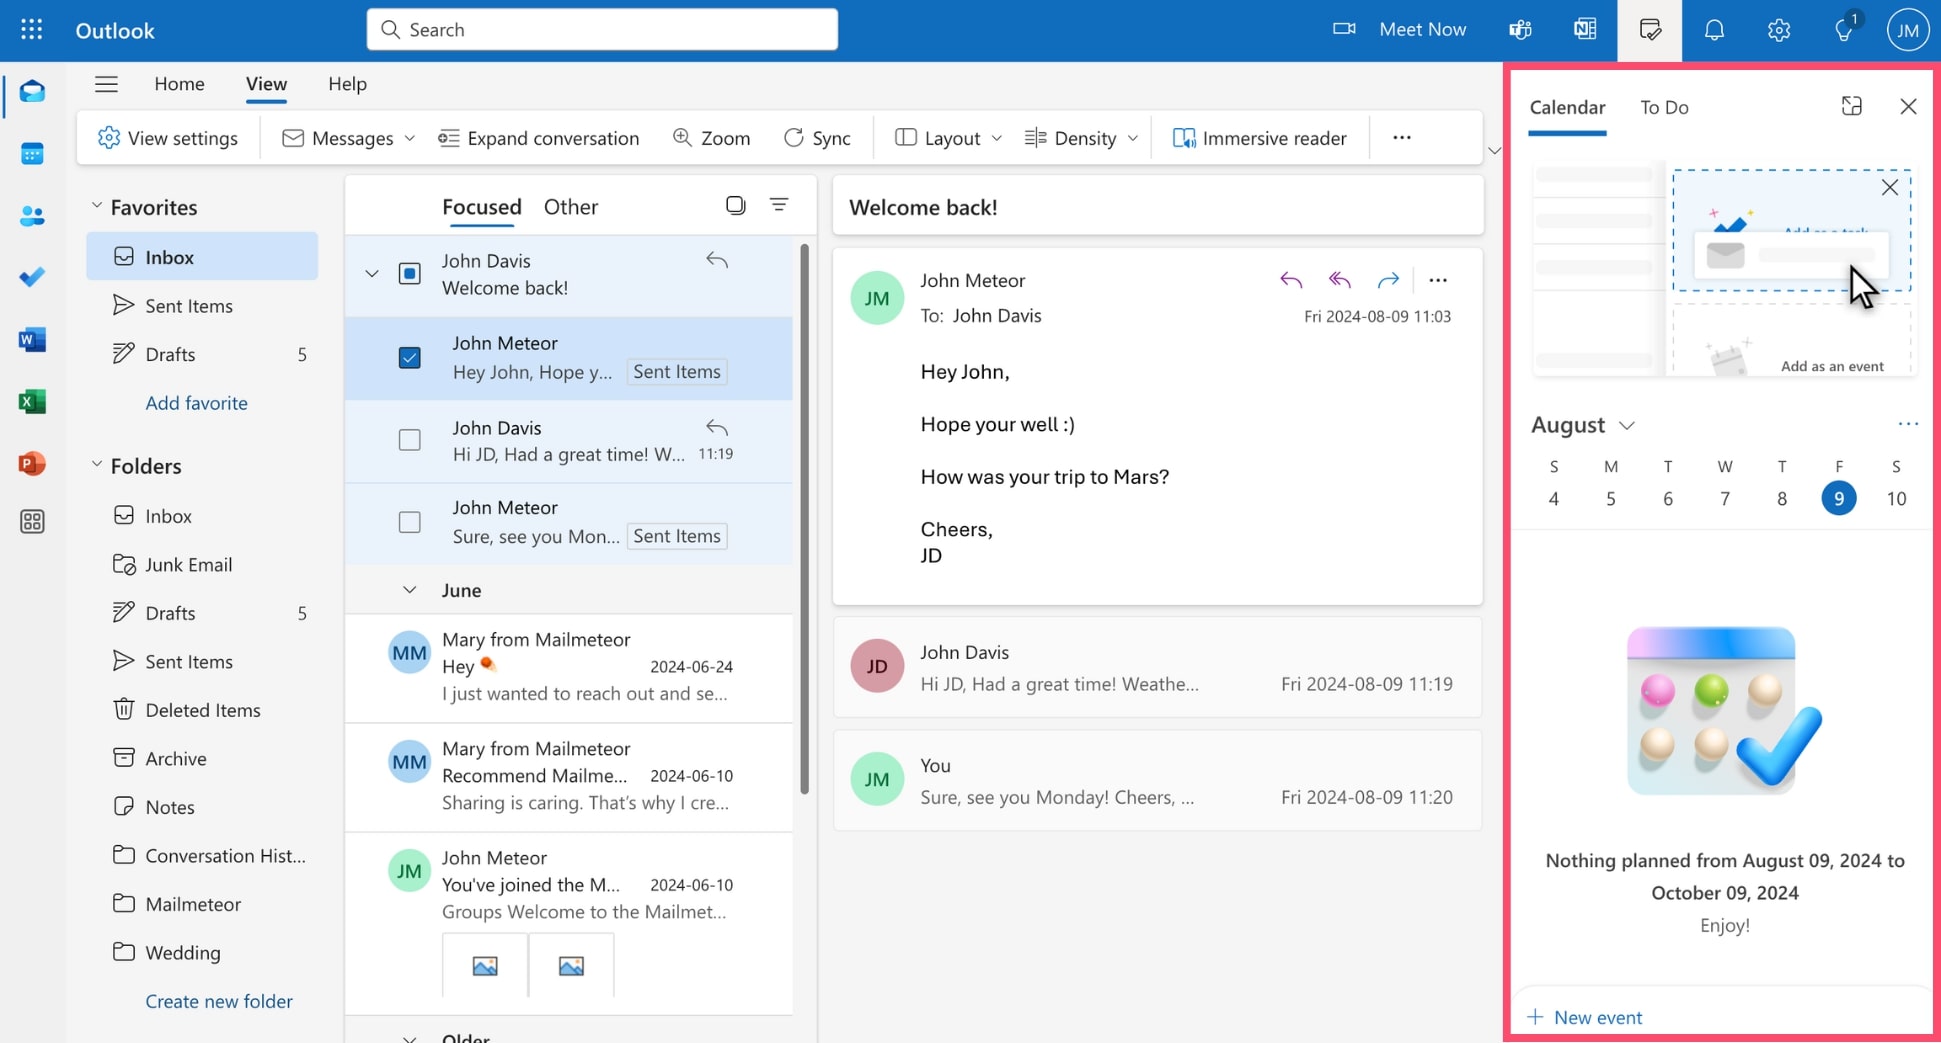
-
Open Outlook.
-
Go to the View tab.
-
In the Layout group, click To-Do Bar.
-
Select which elements you want to see (Calendar, People, or Tasks).
And voilà. You can now view your calendar, your favorite contacts, or your tasks directly from your Outlook inbox. You can quickly add emails to your task list by dragging them from your inbox to the Tasks section of the to-do bar.
Use this Outlook view if: You like to have a birds-eye view of your schedule, tasks, and contacts while managing your emails. You don’t want to constantly switch between Outlook’s different sections.
9. Personalizing the quick access toolbar
The Quick Access Toolbar is a customizable toolbar that gives you instant access to your most frequently used commands. By personalizing it, you can streamline your workflow and save time. Here’s how to change this view in Outlook:
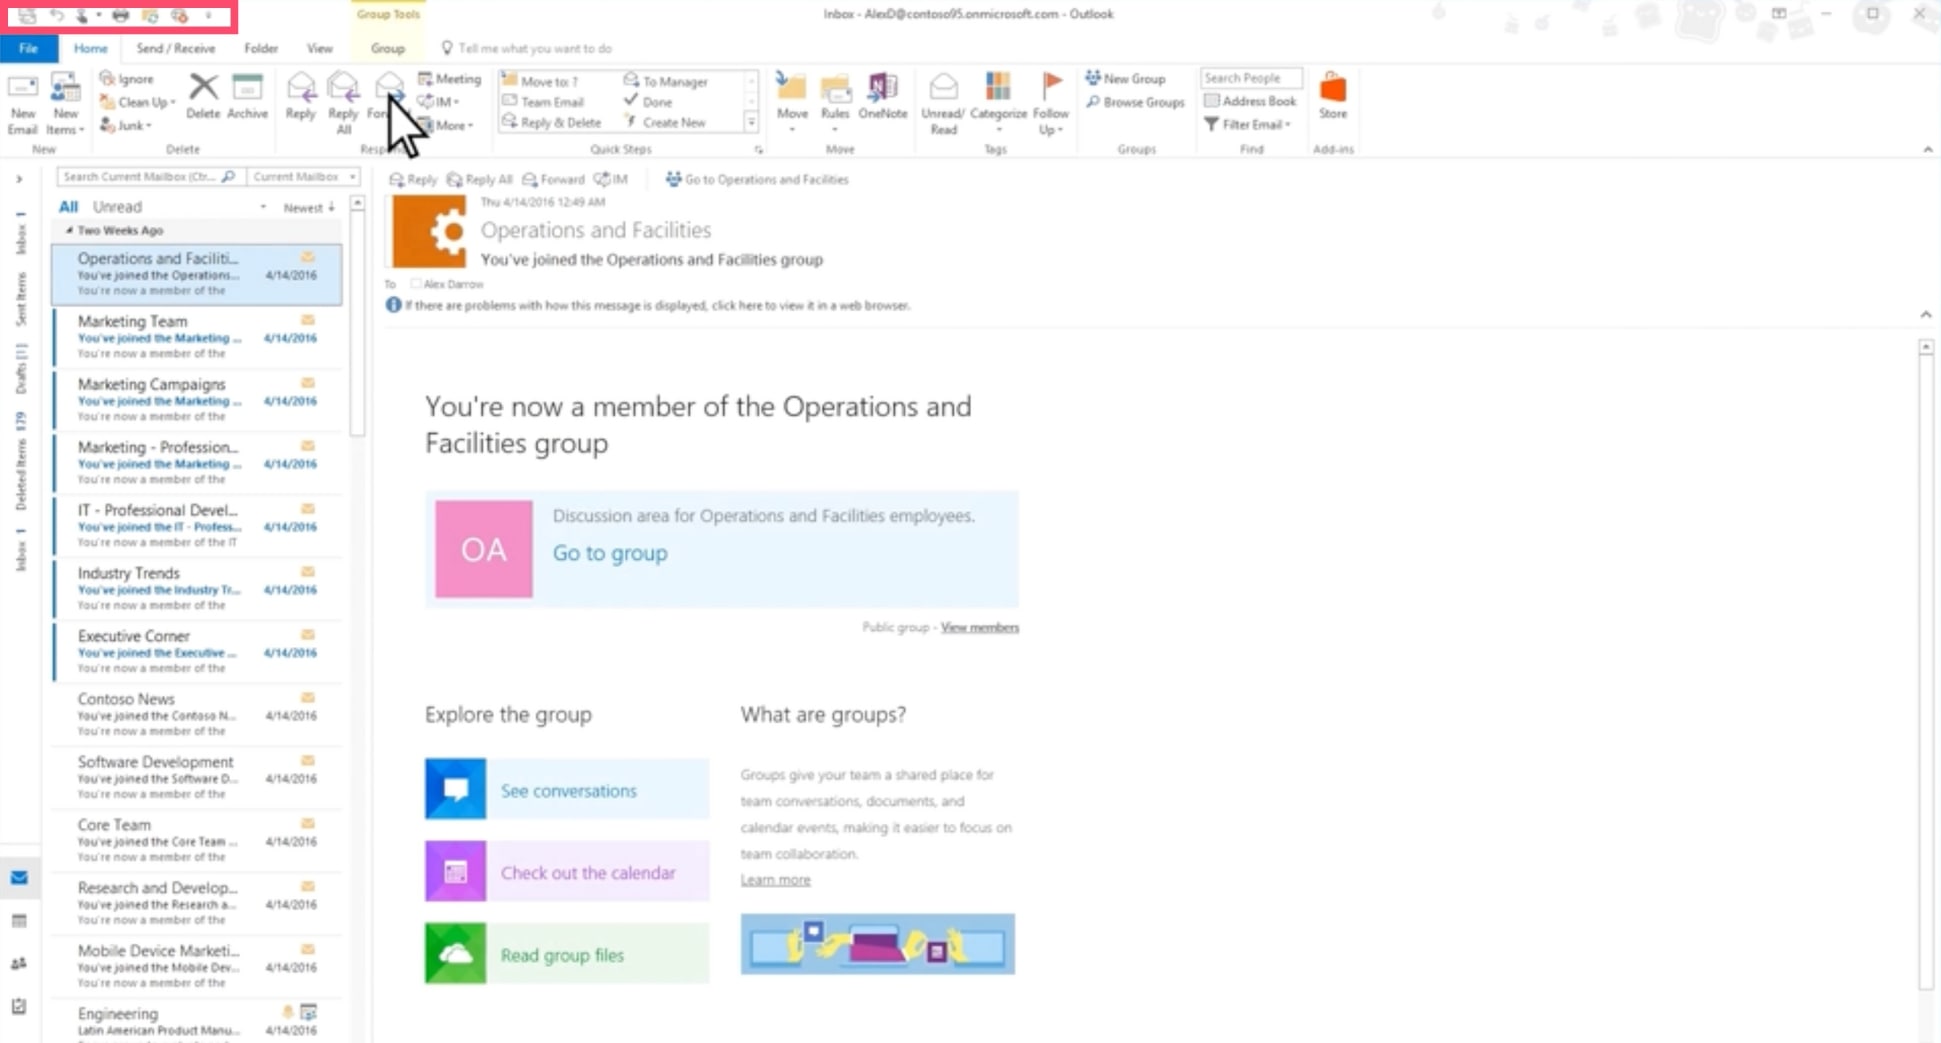
-
Open Outlook on Desktop.
-
Click the small arrow in the Quick Access Toolbar.
-
Select More Commands.
-
Choose the commands you want to include in your Quick Access Toolbar. Then click Add.
-
Press OK to save your changes.
All set. Your Quick Access Toolbar will now display your chosen commands for easy access. You can also add commands to the Quick Access Toolbar by right-clicking a command in the Outlook ribbon and selecting Add to Quick Access Toolbar.
Use this Outlook view if: You often use specific commands and want them always available, regardless of which tab you’re on in the Outlook ribbon. This will help you reduce the number of clicks needed to perform common actions.
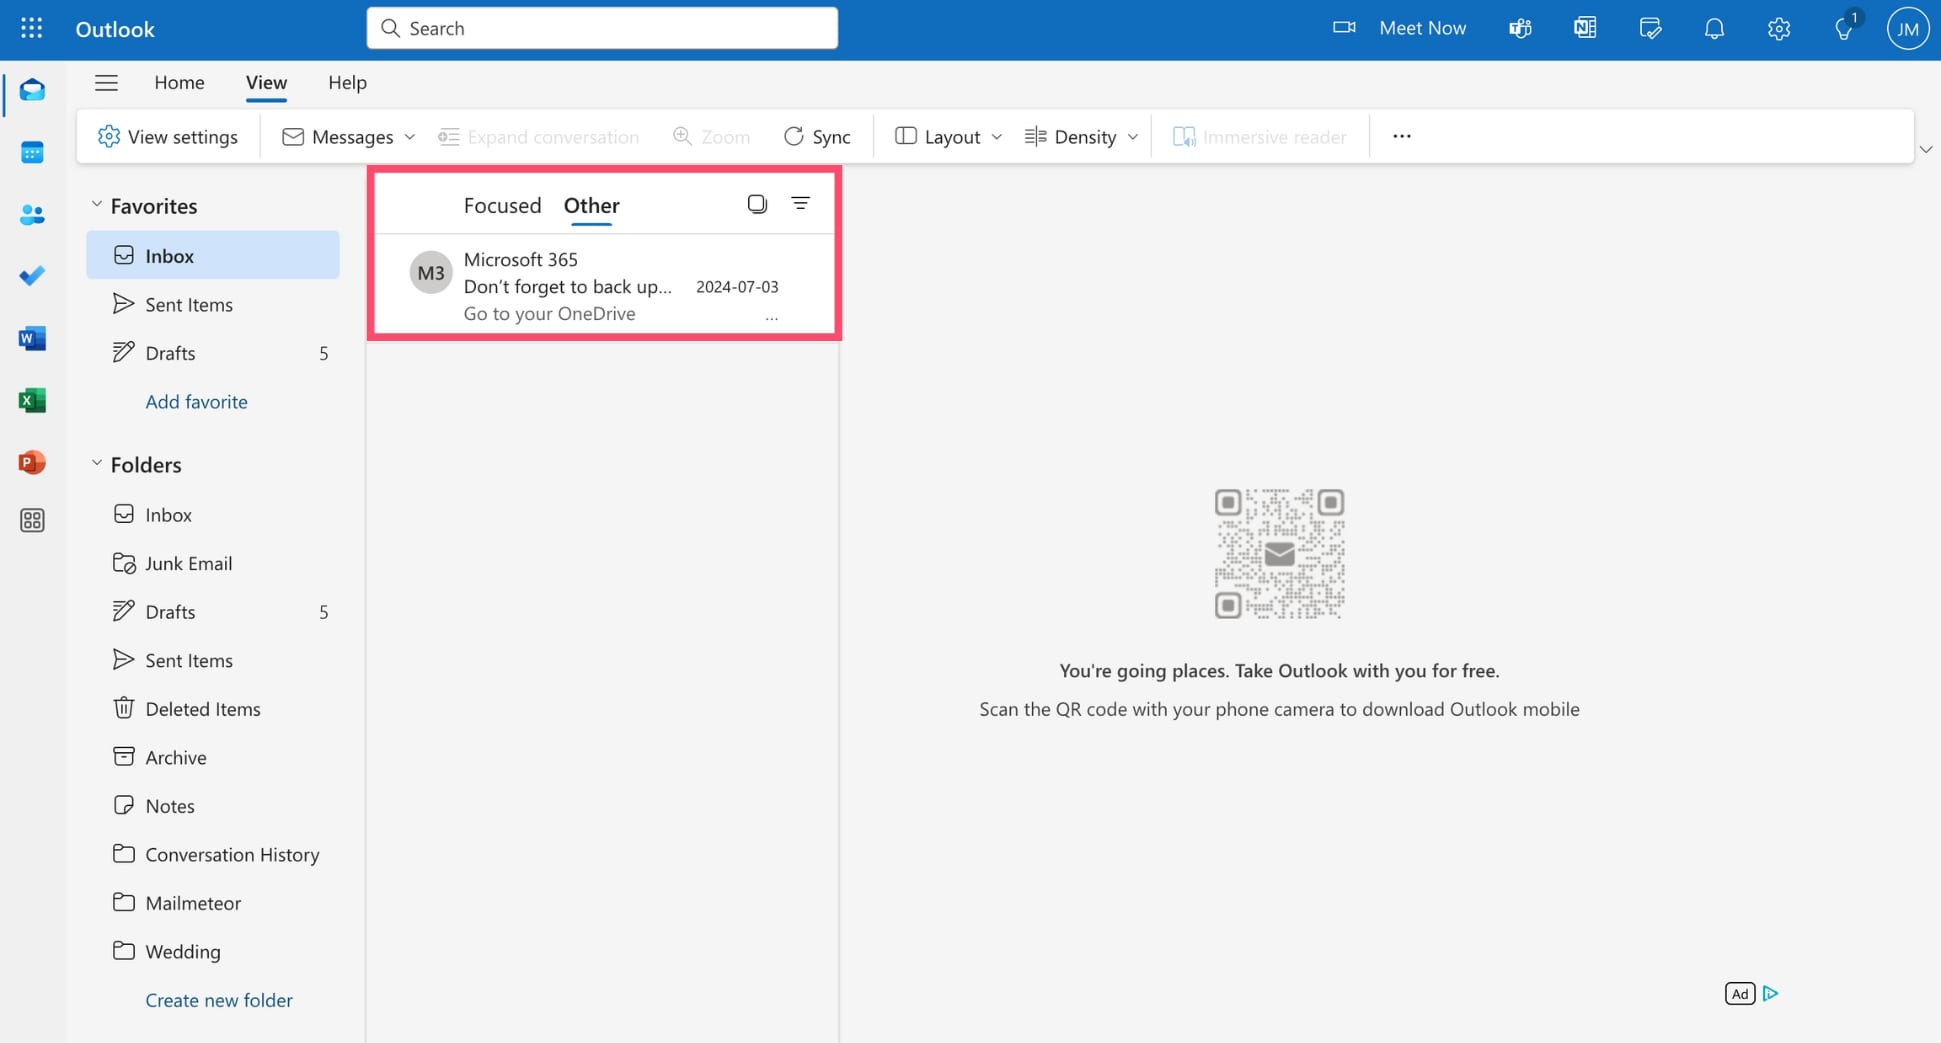
10. Configuring email preview settings
Email preview settings allow you to see a snippet of your emails without opening them, helping you quickly assess which messages need your immediate attention. Here’s how to configure this aspect of your Outlook view.
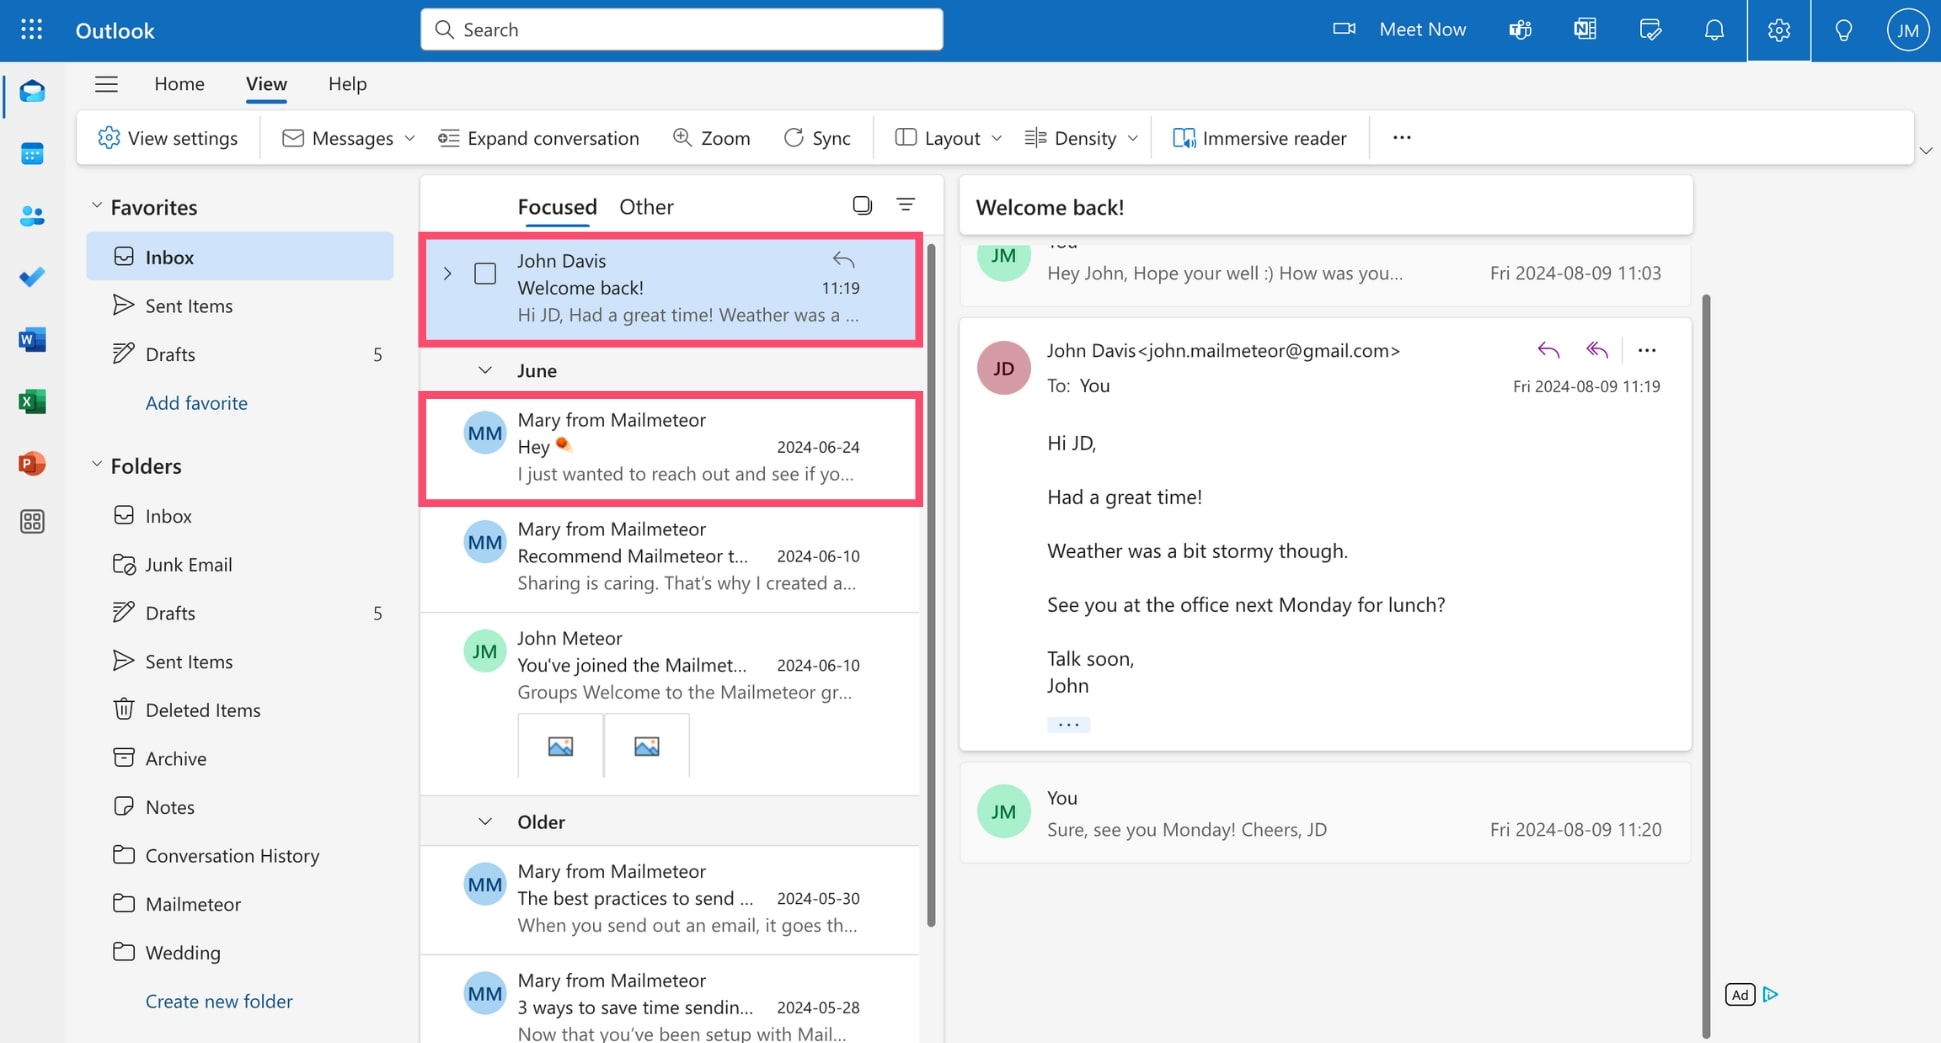
- Open Outlook.
- Go to Settings.
- Navigate to Mail > Layout.
- Under Message preview, choose to show 1, 2, or 3 lines of text. Or select Hide preview text to see only the subject line.
- Click Save at the bottom of the page.
And that’s it. Your inbox will now display email previews according to your preferences. If you’re using Outlook on mobile, you can swipe left or right on a message preview to quickly archive, delete, or flag emails without opening them.
Use this Outlook view if: You receive a high volume of emails and need to quickly triage your inbox. More preview lines can help you decide which emails need immediate action, while fewer lines allow you to see more emails at once.
11. Customizing the folder pane
The folder pane in Outlook is your gateway to different folders. Customizing it can help you access your important emails faster, organize your inbox, and keep your workflow smooth. Here’s how to tailor it to your needs.
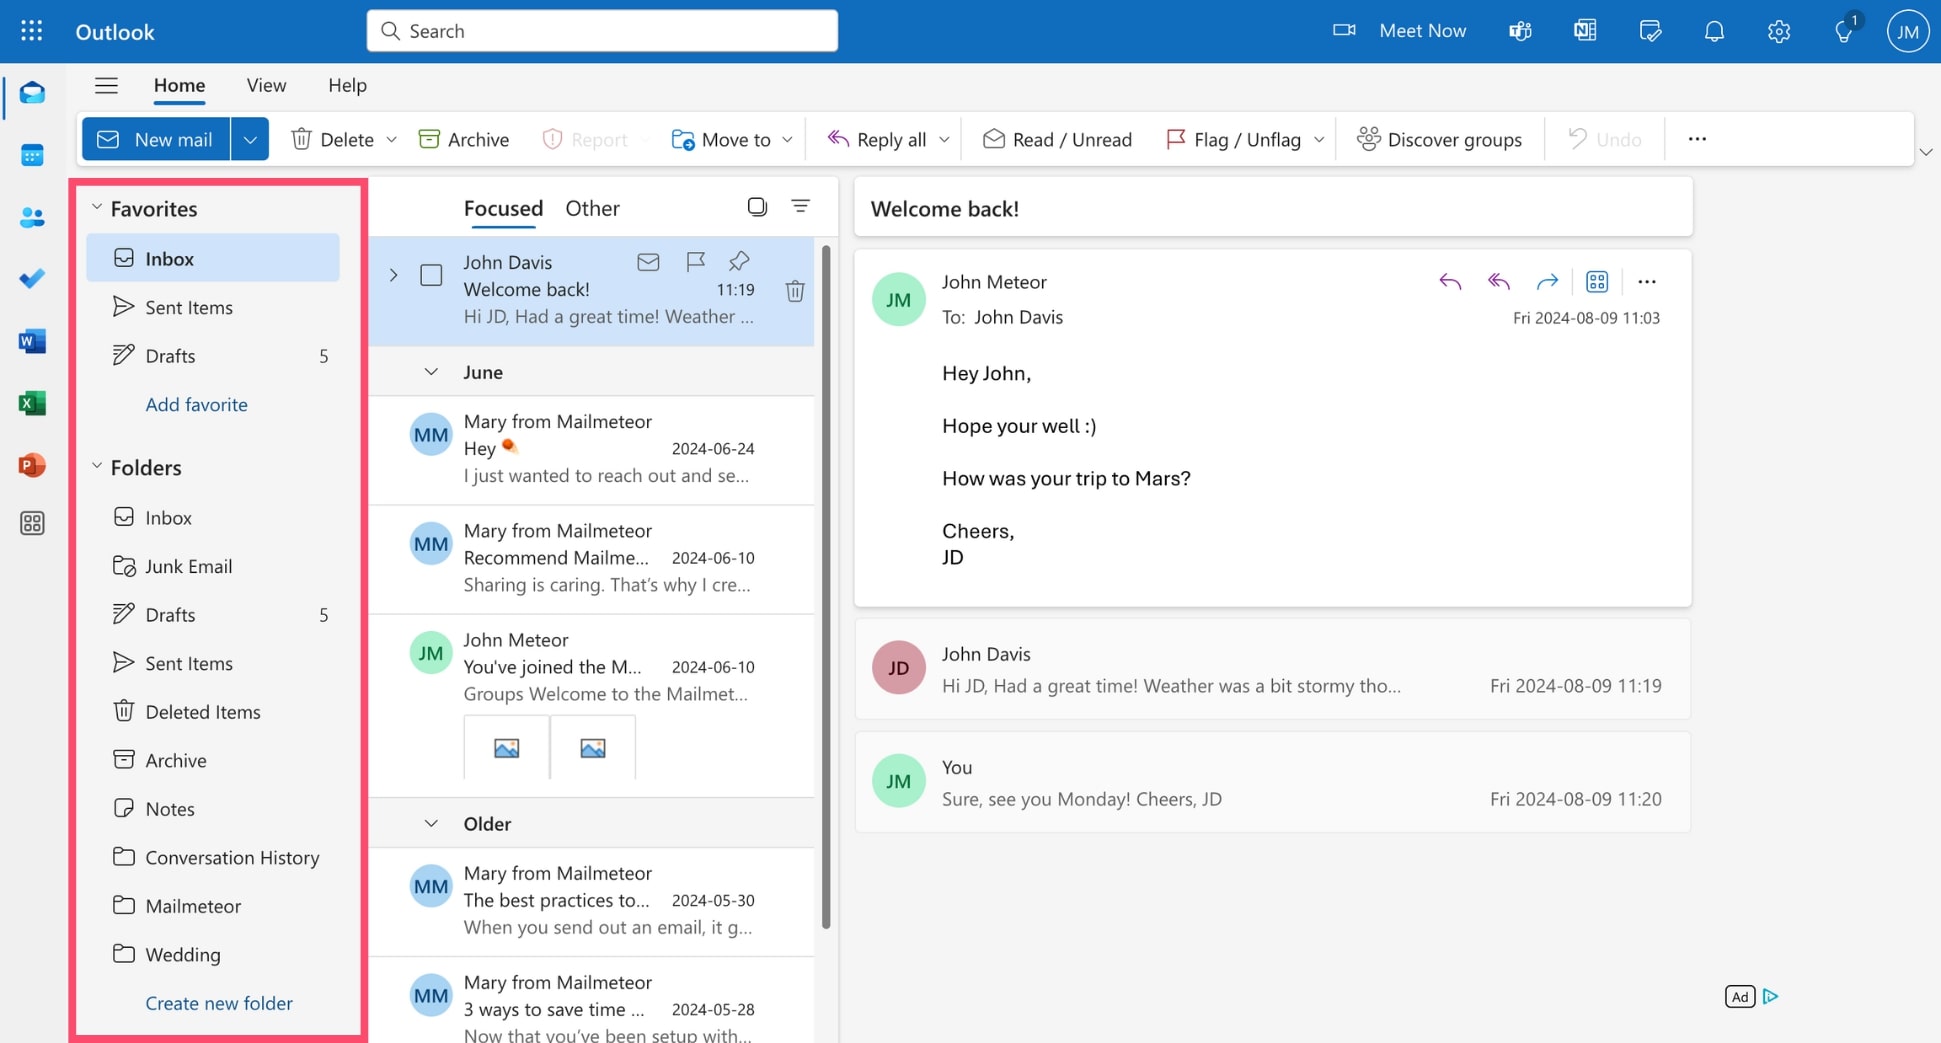
- Sign in to Outlook.
- Go to the View tab.
- Click Folder Pane.
- Select Normal, Minimized, or Off.
- Click Favorites to display your favorite folders at the top.
All done. You can display or hide your folder pane, and choose whether or not you want to display your favorite folders at the top for easy access.
Use this Outlook view if: You want quicker access to your Outlook folders. Or if you work on multiple projects at once and want to keep your inbox organized and clutter-free. Or if you often need to find old emails.
The bottom line
Changing views in Outlook is far more than a simple cosmetic adjustment. It’s a powerful tool that allows you to create a personalized workspace, transform your email management, and boost your productivity.
In this article, we’ve covered how to switch between the predefined views. We’ve also shared 10+ tips to customize specific elements of your Outlook views, like the navigation pane, the quick access toolbar, or the reading pane.
Want to become even more productive when sending emails from Microsoft Outlook? Mailmeteor lets you send up to 2,000 personalized emails a day, schedule automated follow-ups, track your emails, and more.
Sign up to Mailmeteor with your Microsoft 365 account (it’s free), join 6M+ happy professionals, and start sending better email campaigns today. No strings attached :)
Happy sending 💌


