Want to transfer a message you received earlier to another email address? In this quick guide, we’ll show you how to forward emails in Gmail. And how to use Gmail’s automatic forwarding feature.
With Gmail, you can forward a single email in just a few clicks. You can also forward up to 50 emails at once (with a Chrome extension).
Or you can ask Gmail to automatically forward some of your incoming messages to another email account.
These features can save you a lot of time. As long as you know how to use them properly. In this guide, we’ll show you:
- How to forward a single email in Gmail
- How to forward multiple emails at once in Gmail
- How to automatically forward all your Gmail messages
- How to forward certain types of messages in Gmail
- How to disable automatic email forwarding in Gmail
Sounds good? Then let’s jump right in.
How to forward a single email in Gmail
Just received a new message? You can forward it from your Gmail account to another email address. Even if it’s not a Gmail address. And all it takes is a few clicks.
Step 1: For starters, sign in to your Gmail account.
Step 2: Click on the message you want to forward to open it.
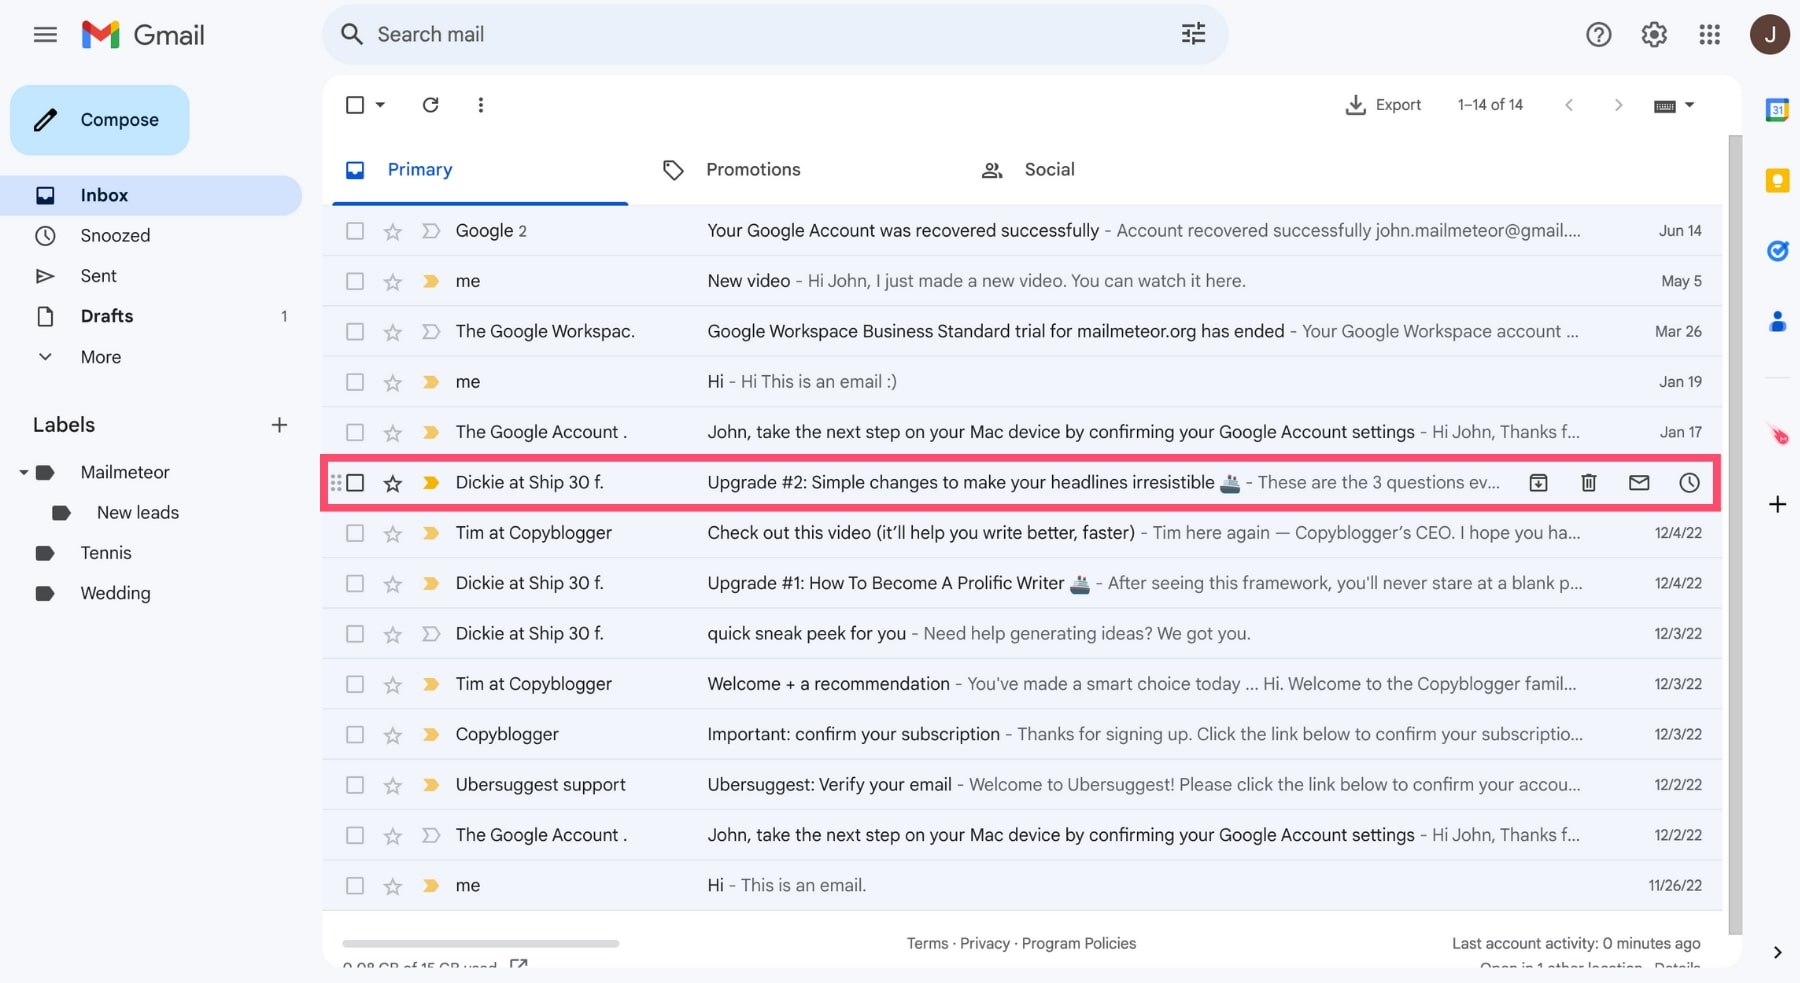
Can’t find the email you’re looking for? Try to do a quick search based on the sender’s username. Or search Gmail by date.
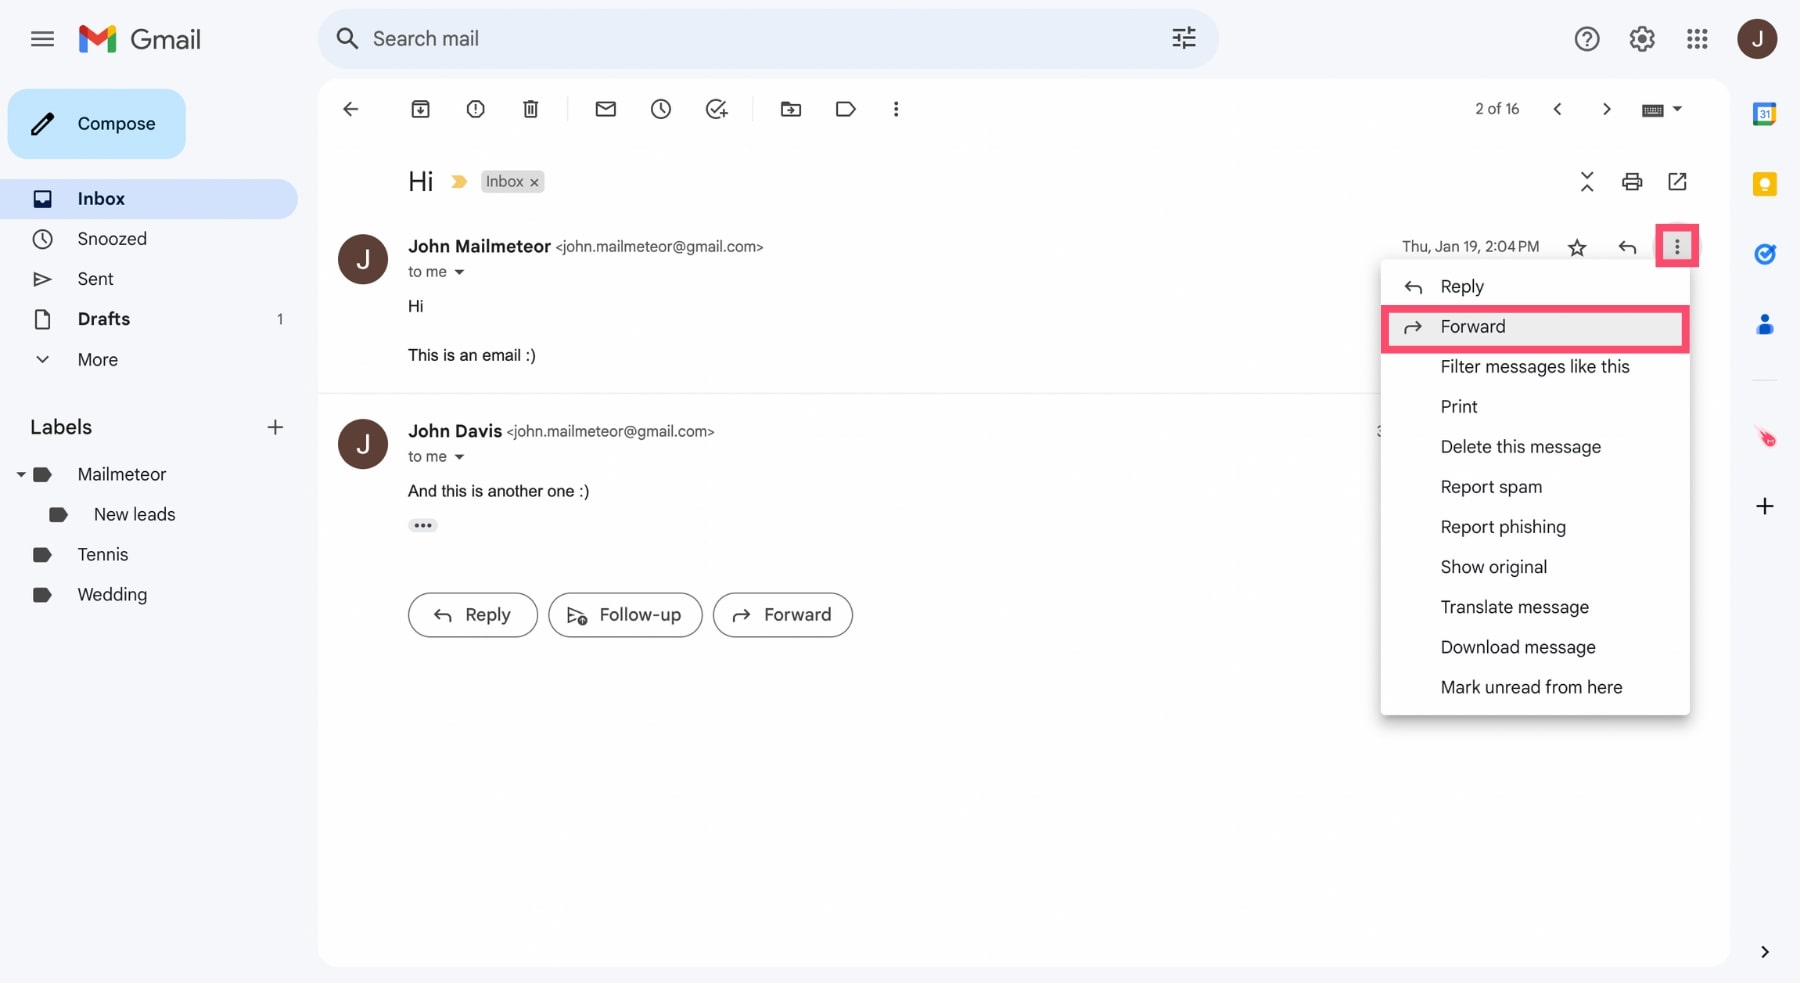
Step 3: Once you’ve opened the email you want to forward, click on the three vertical dots (in the top right corner). And select “Forward” .
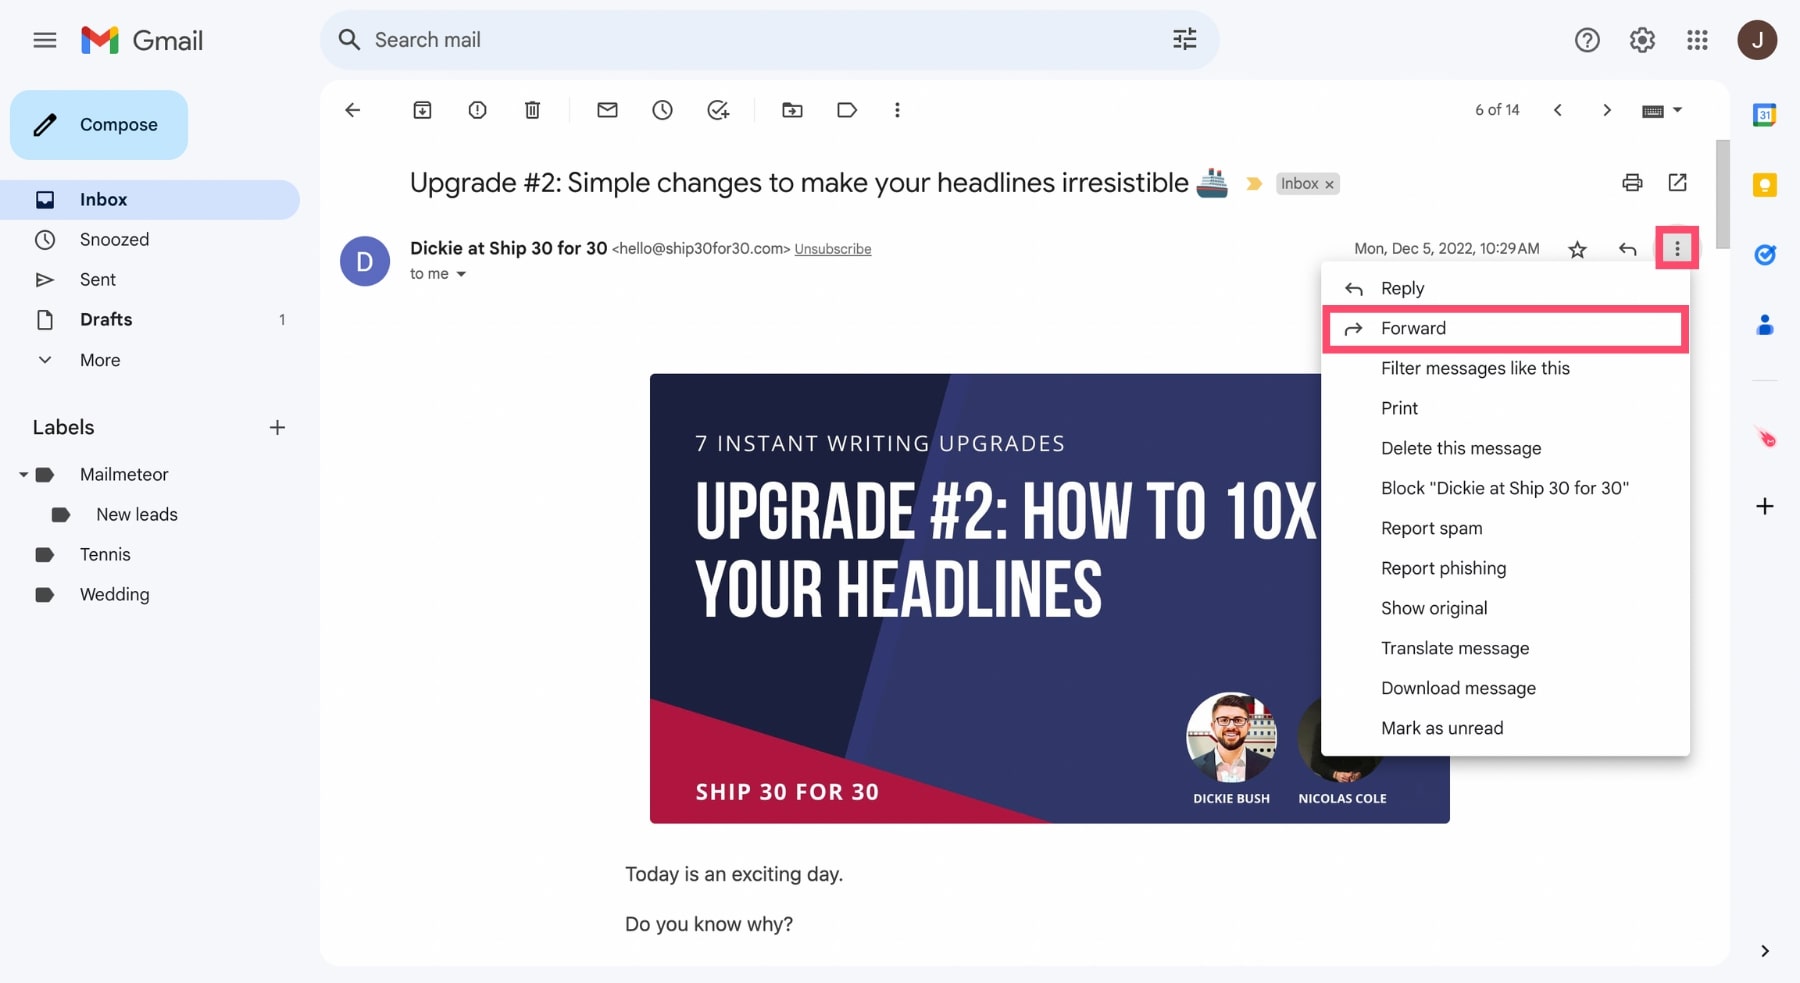
Step 4: Enter the email address to which you want to forward the message. And then press the “Send” button.
Congratulations, you’ve just forwarded an email in Gmail. Your message should now shortly reach its destination 🙌
How to forward multiple emails at once in Gmail
Gmail doesn’t let you forward emails in bulk. You can only forward your messages one at a time. Which may be very frustrating in certain cases.
Fortunately, there is a way to work around Gmail’s limitations. You can use a Chrome extension called Multi Email Forward by cloudHQ.
Their free plan lets you forward up to 50 emails per day. And they have a premium plan which allows you to mass forward unlimited emails.
Here’s how it works ⤵️
Step 1: Go to the Chrome Web Store.
Step 2: Install the Multi Email Forward by cloudHQ Google Chrome extension.

Step 3: Open Gmail. Agree to cloudHQ’s terms of use and privacy policy. And create your cloudHQ account.
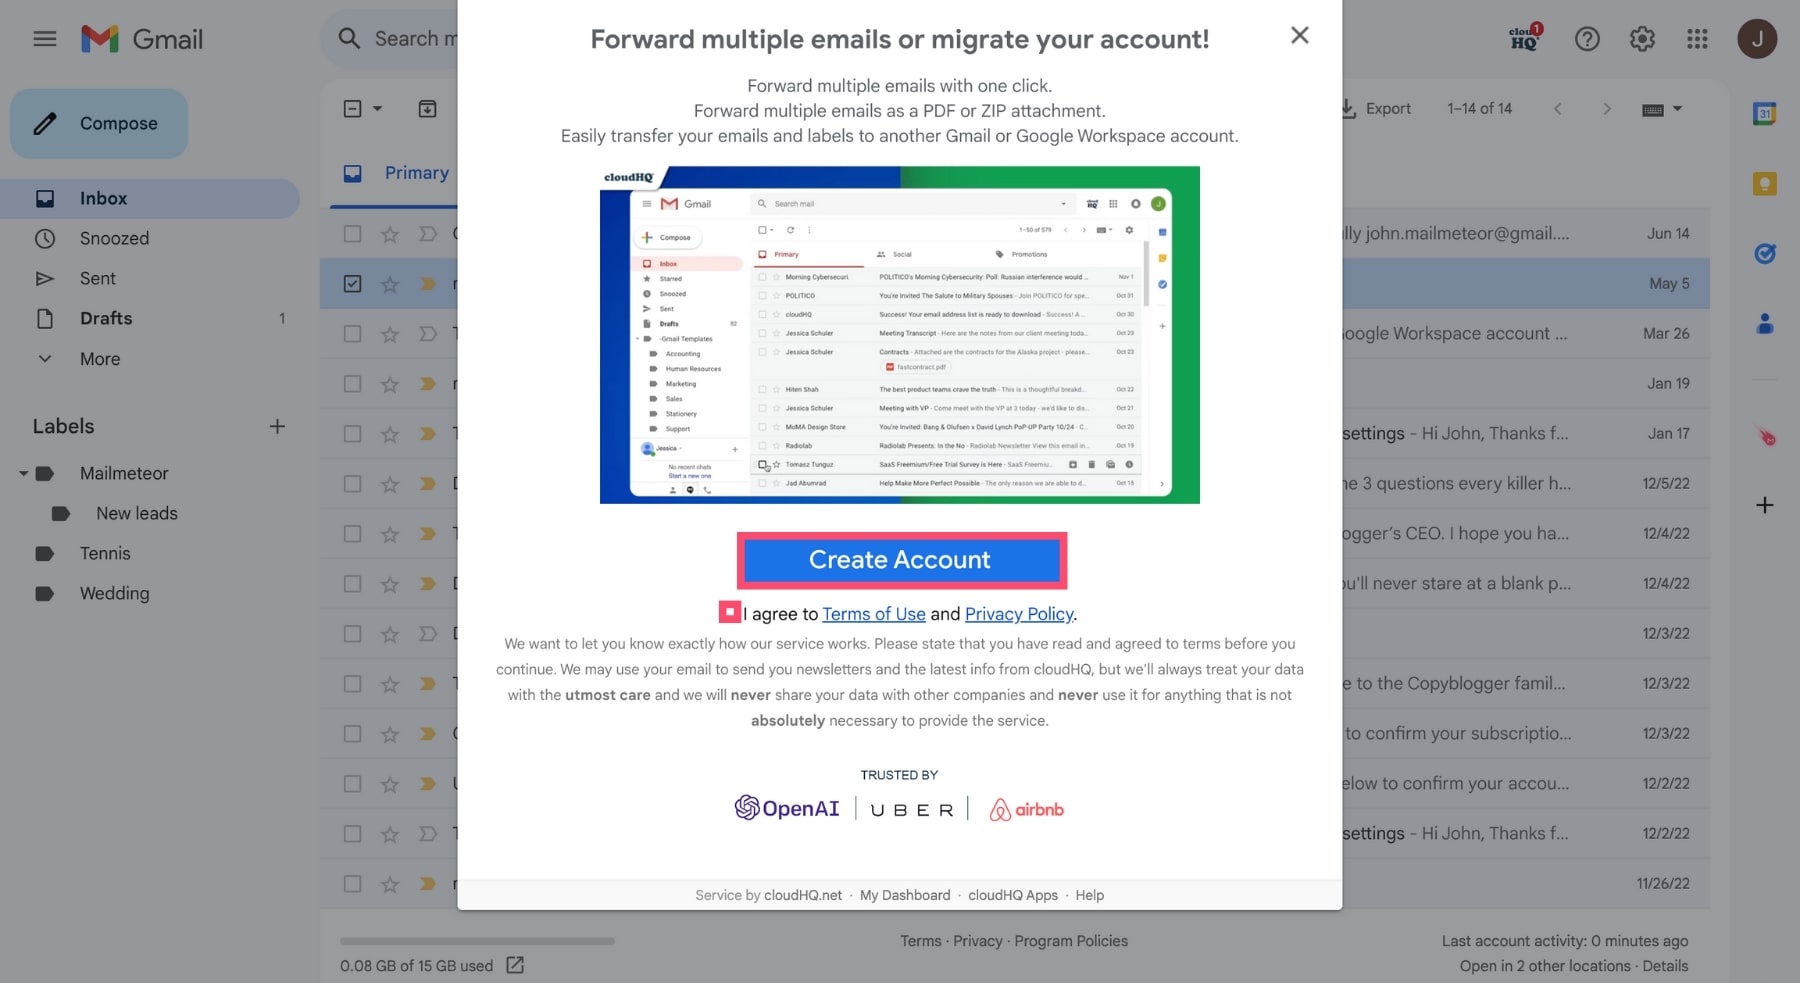
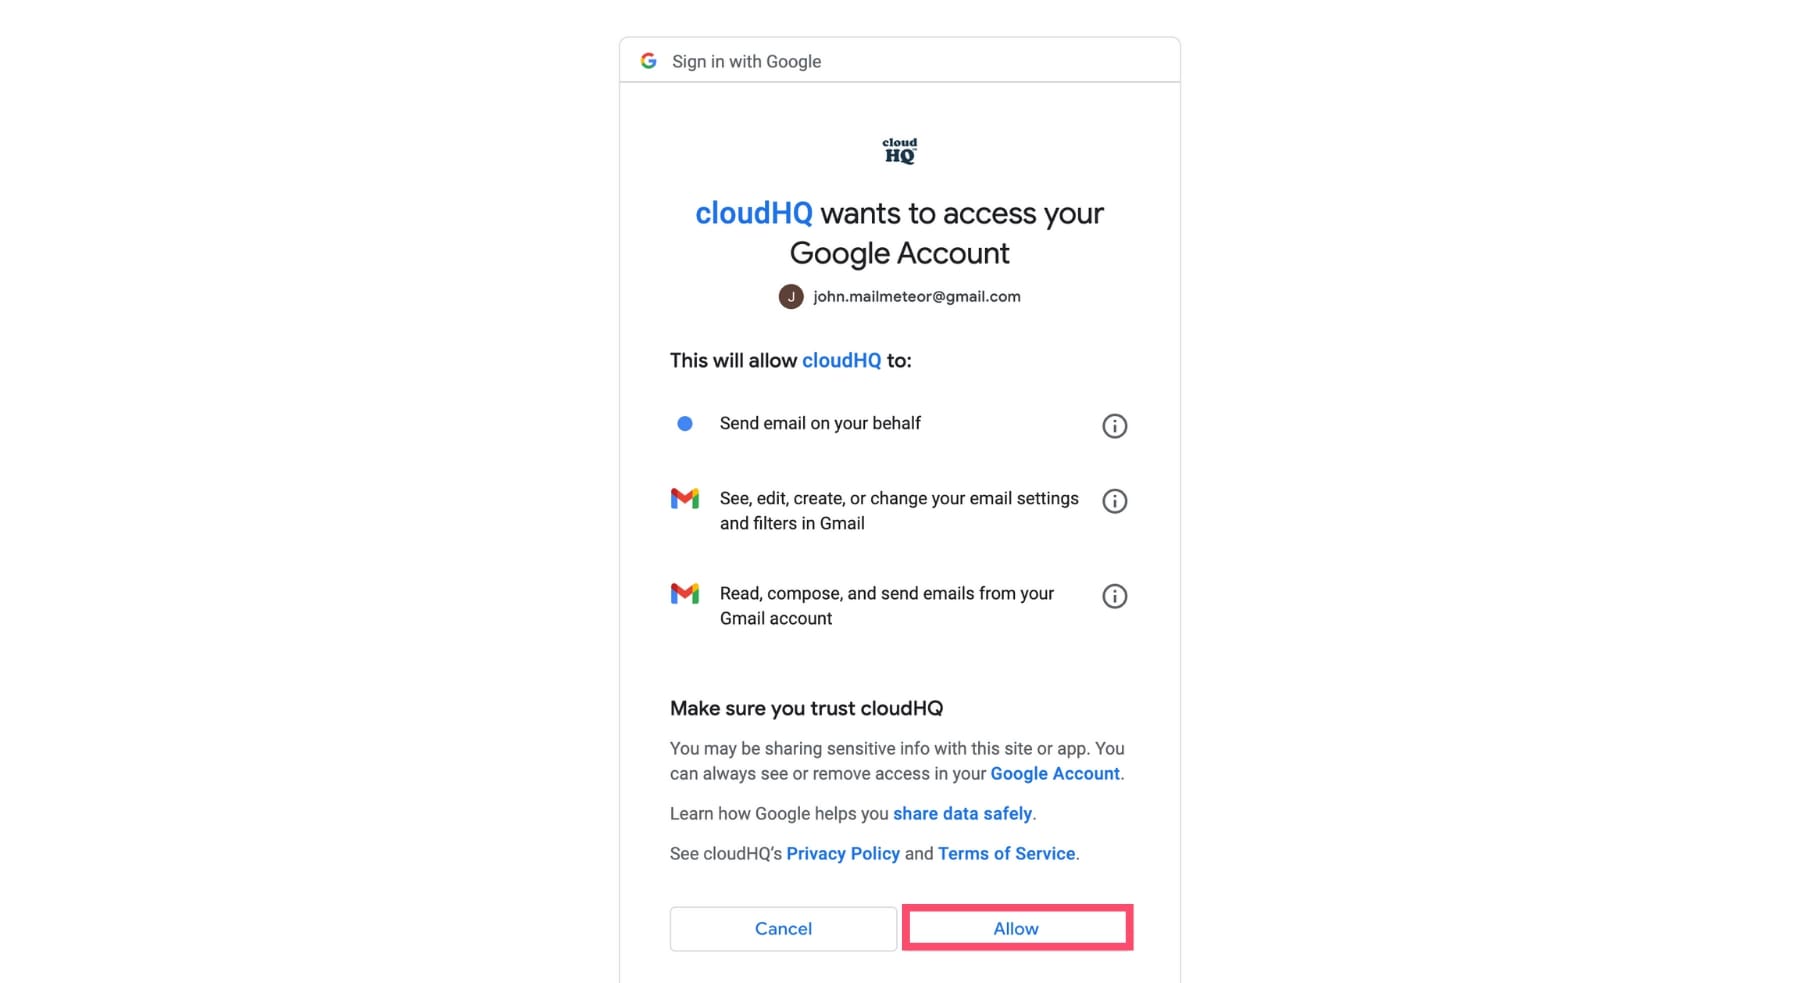
Step 4: Allow cloudHQ to access your Google Account. You may need to sign in to your Gmail account.
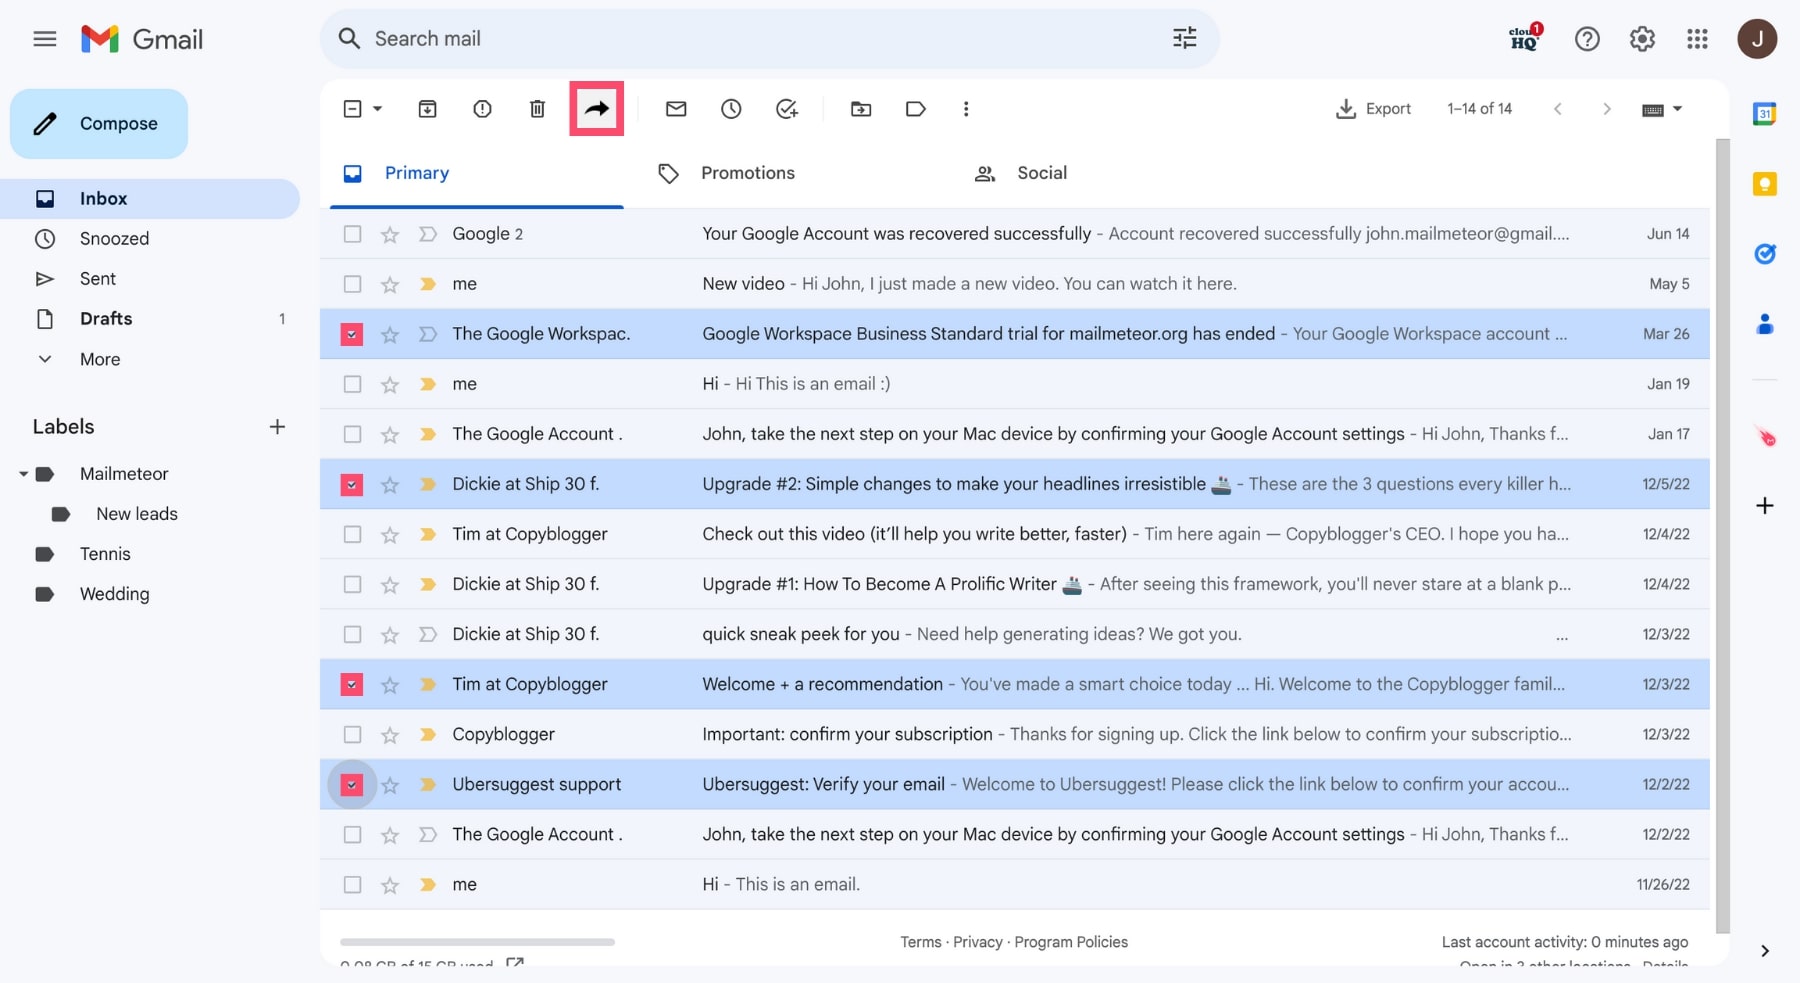
Step 5: Once you’re done, select the emails you want to forward. And click on the “Multi Email Forward” button. It looks like an arrow.
Step 6: In the dropdown menu, choose “Forward selected emails individually” to forward each email as a separate message.
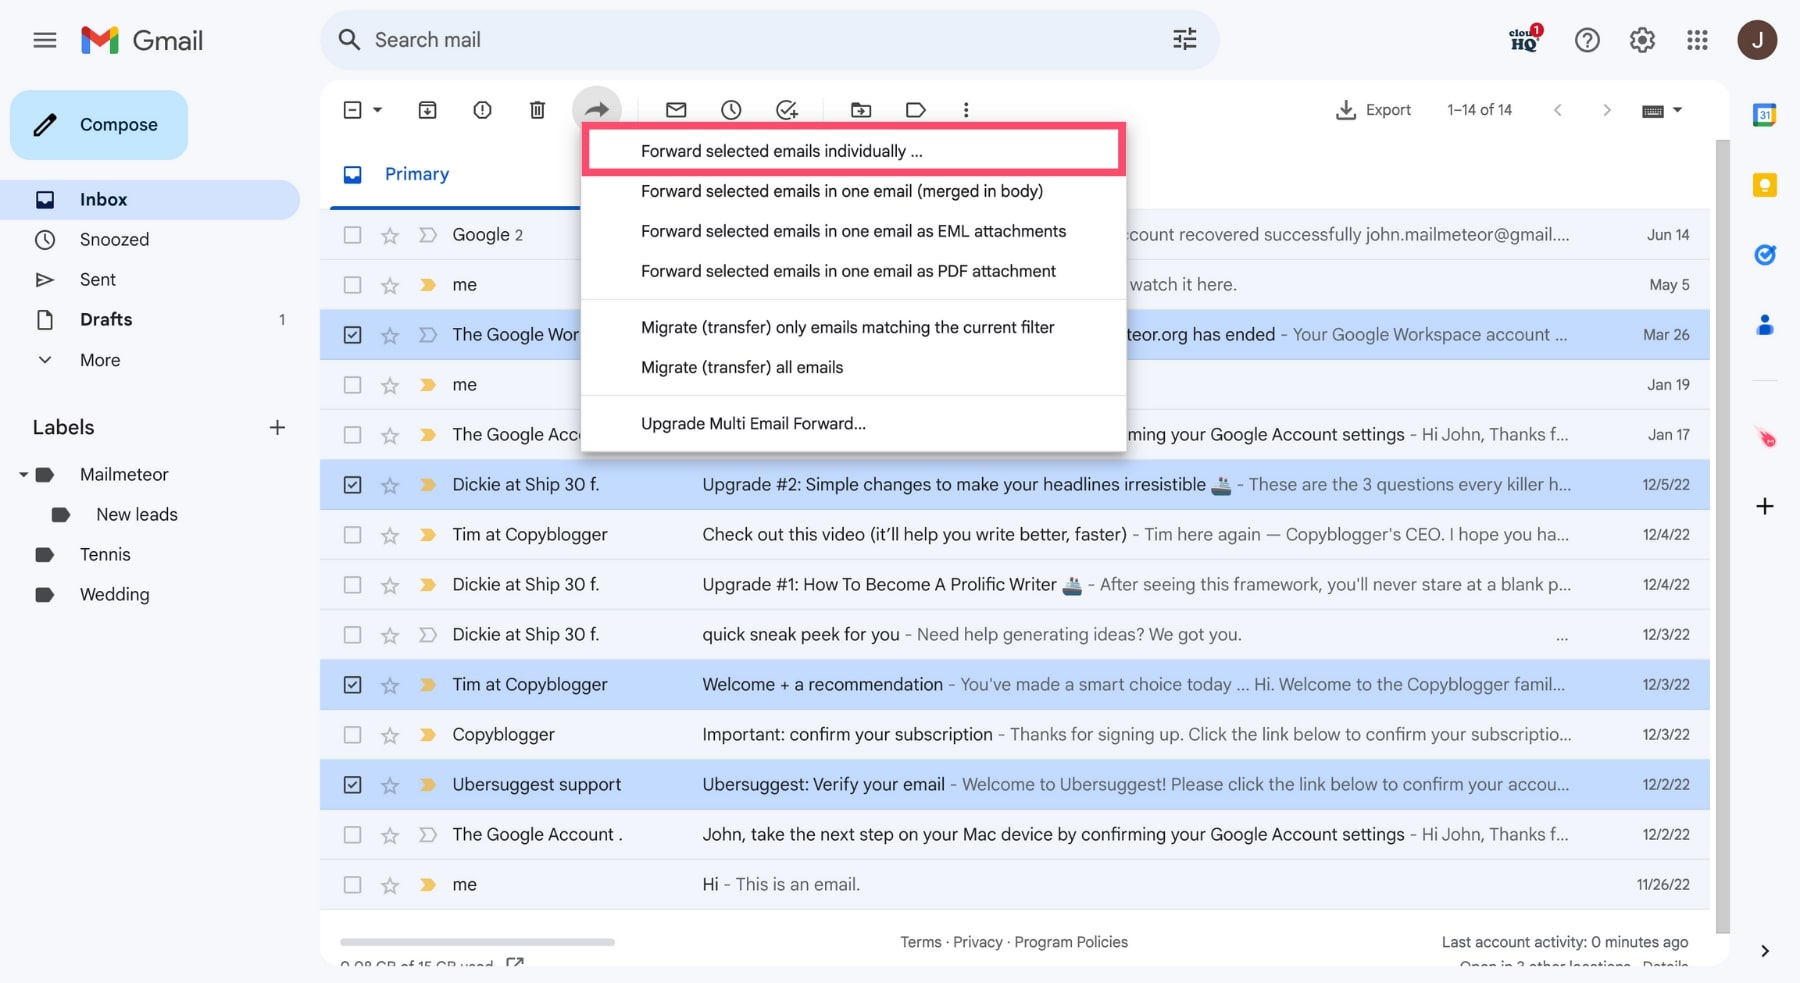
Alternatively you can merge all the emails you selected into a single message. And then forward that email to your recipient.
You can also forward the selected emails as PDF or EML attachments. Or migrate all your emails to another Gmail account.
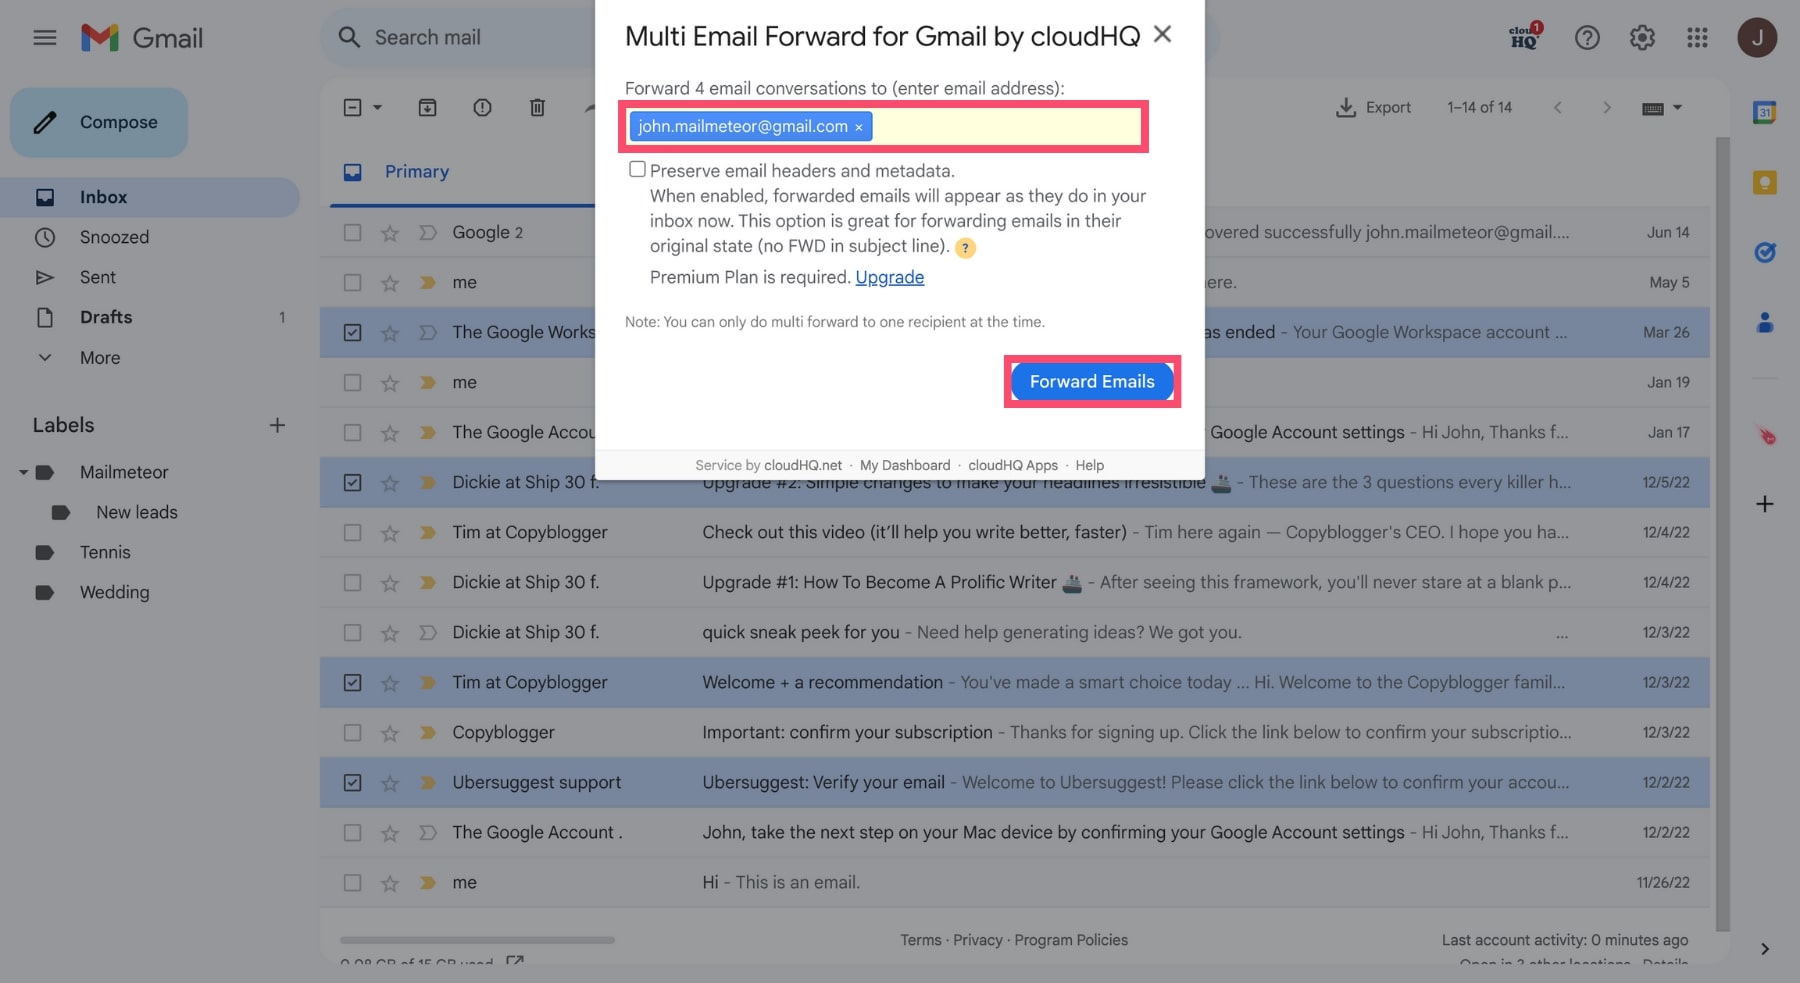
Step 7: Enter the email address of your recipient. And click on “Forward Emails” to send your messages.
And voila. This is how you can forward multiple emails in Gmail. And share information with the people you care about. In just a few clicks.
How to set up automatic email forwarding in Gmail
Want to take it up a notch? You can use Gmail’s automatic forwarding feature to transfer all of your incoming messages to another email address.
Here’s how to do it ⤵️
Step 1: Sign in to your Gmail account.
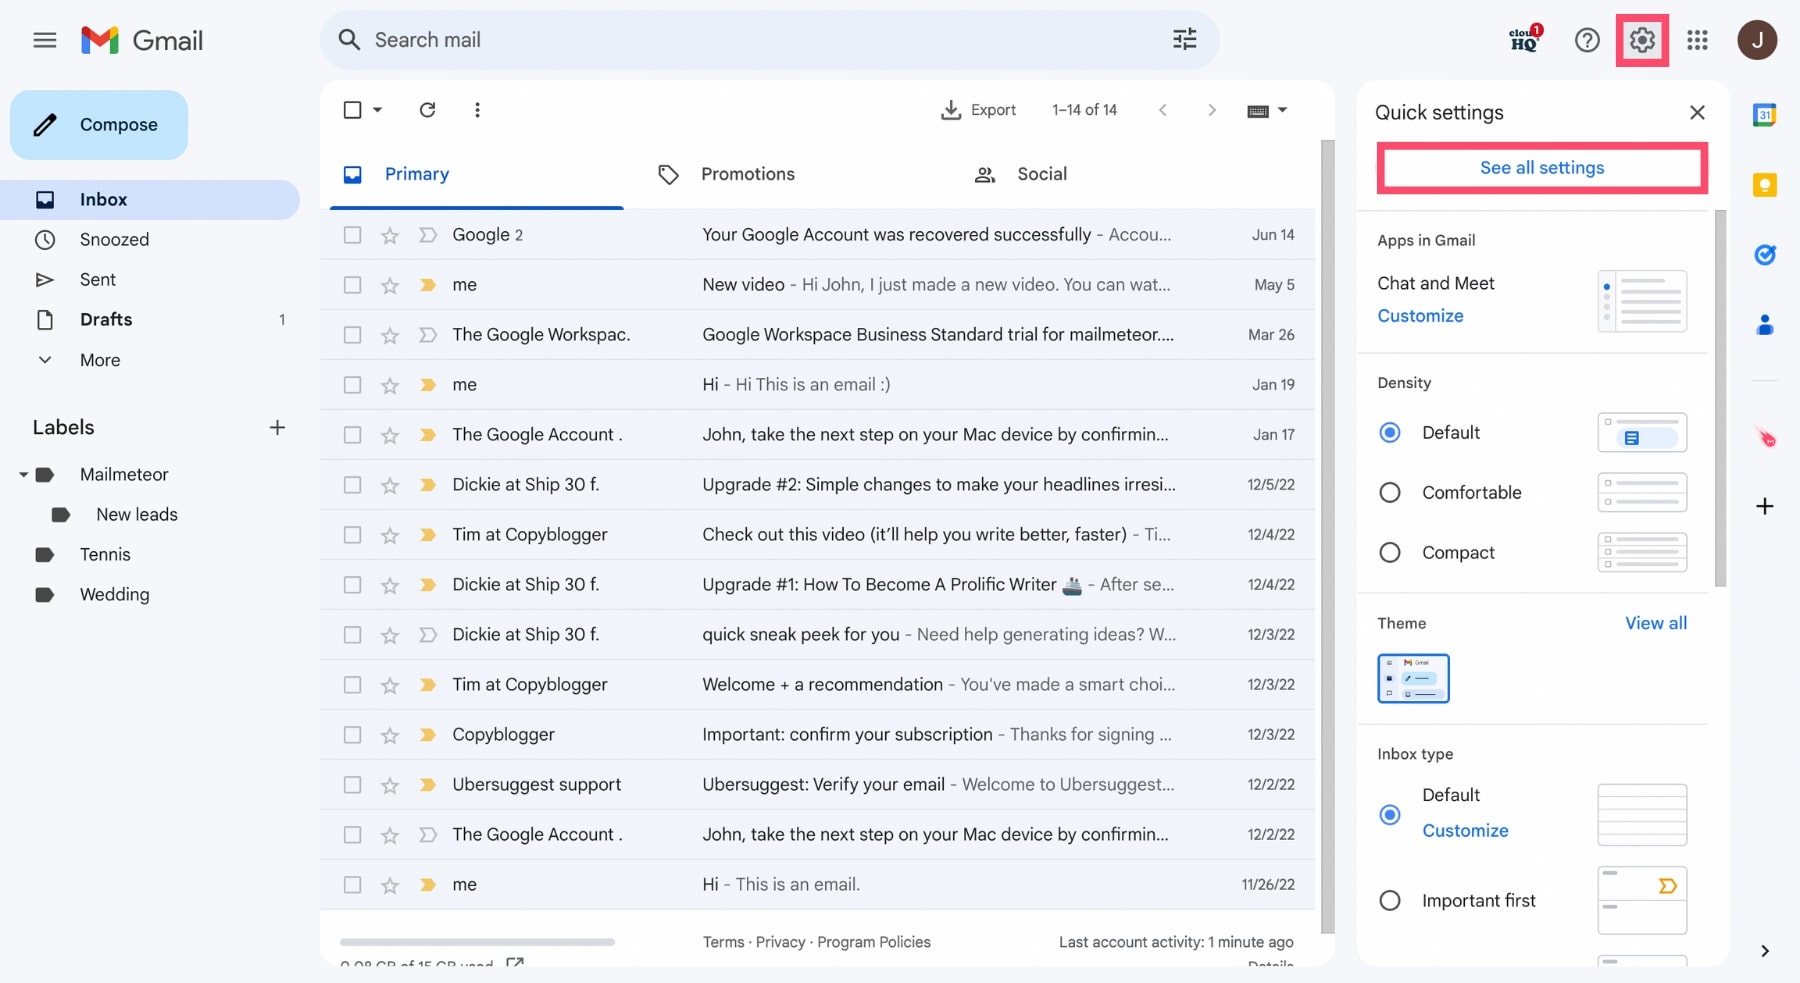
Step 2: Open the Gmail “Settings” (in the top right corner of your screen). And click on “See all settings”.
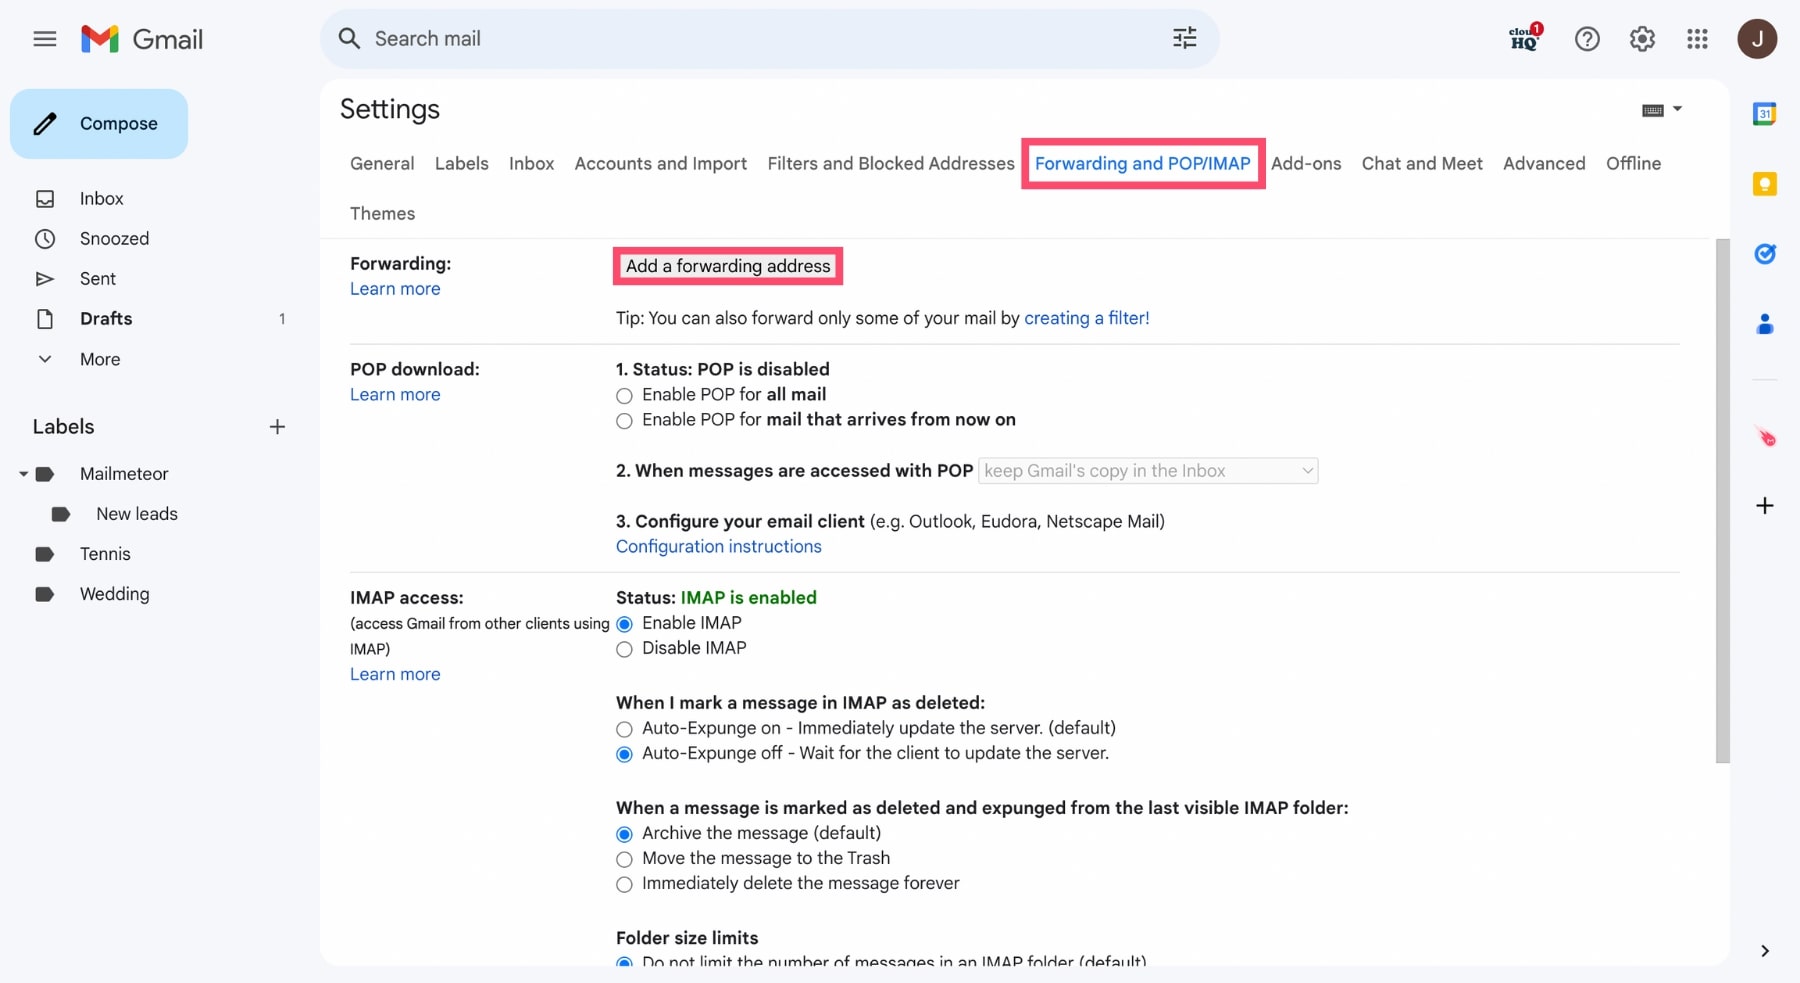
Step 3: Navigate to the “Forwarding and POP/IMAP” tab. And in the “Forwarding” section, click on “Add a forwarding address”.
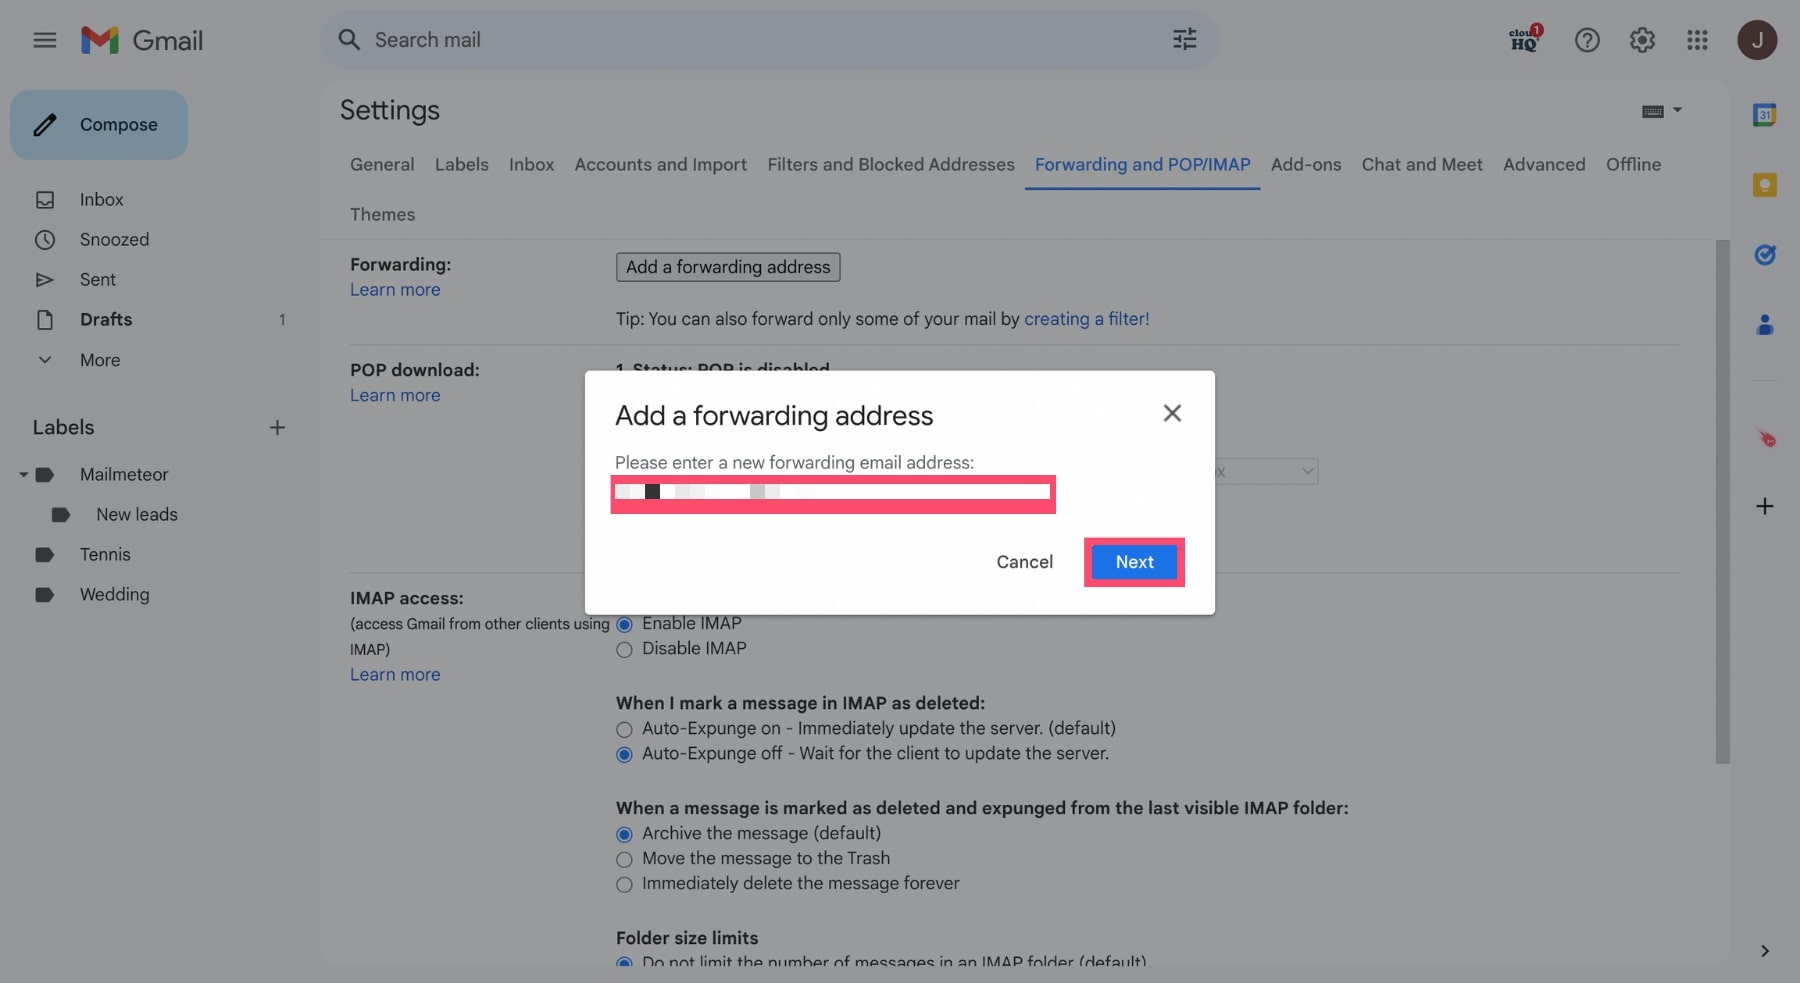
Step 4: Enter a forwarding email address. And click on “Next”.
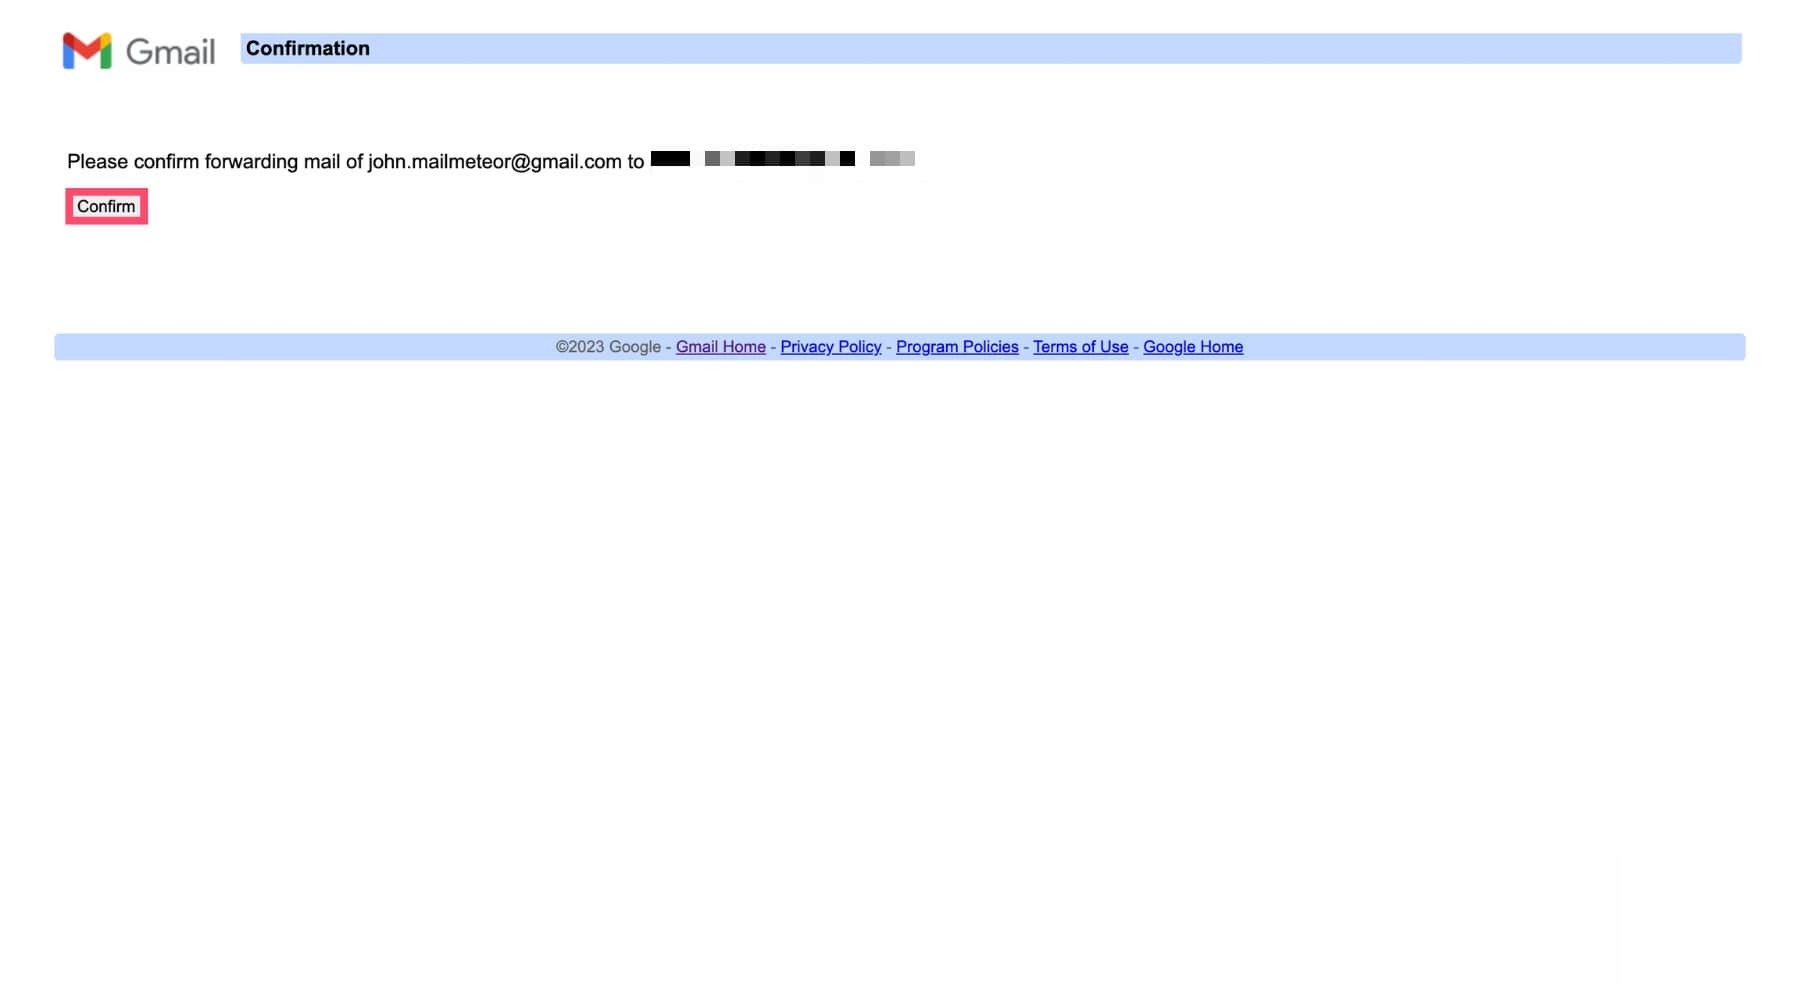
Step 5: Gmail will then send a confirmation code. So you’ll need to sign in to your other email account to verify permission.
To do so, open the email that Google sent you. Click on the verification link. And then click on “Confirm”.
Step 6: Go back to the Gmail account you want to forward messages from. And click on “Settings” > “See all settings” > “Forwarding and POP/IMAP”.
In the “Forwarding” section, select “Forward a copy of incoming mail to”. And choose the email address to which you wish to forward your incoming messages.
Gmail only lets you forward your new emails to a single account. This means that you can’t automatically forward your messages to multiple email addresses.
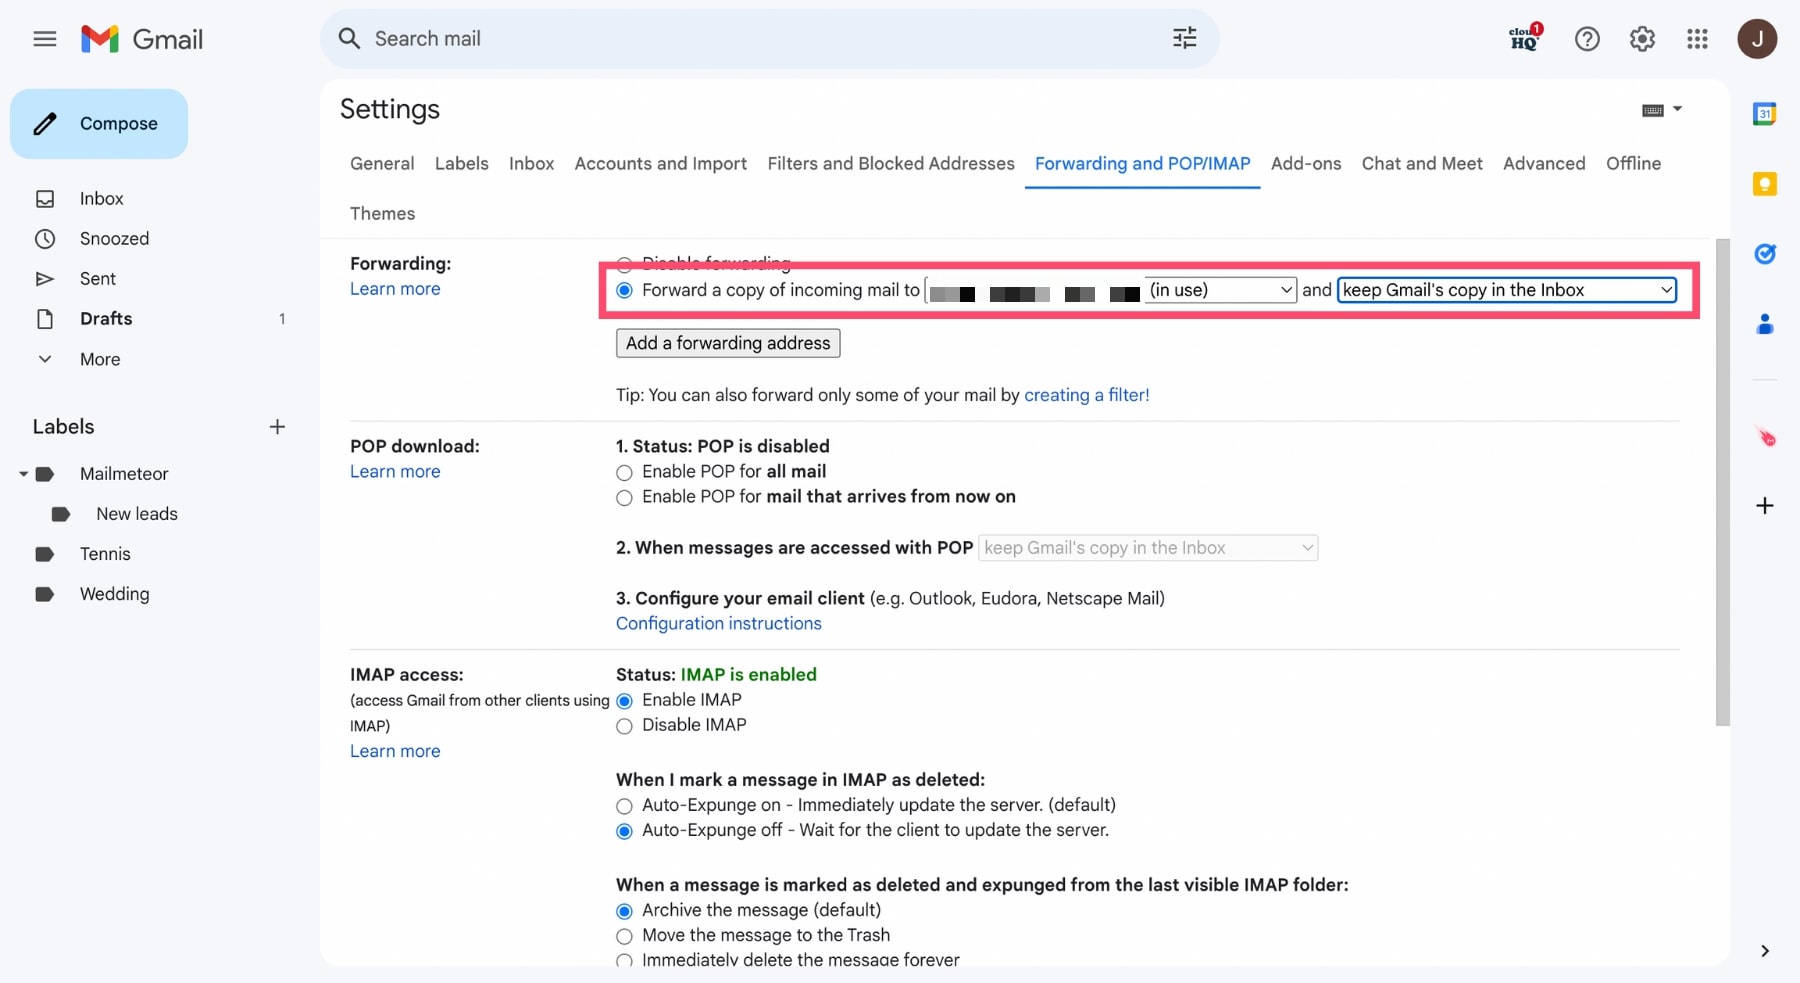
Lastly, you can choose to:
- Keep a copy of the email in the original inbox
- Mark Gmail’s copy as read
- Archive Gmail’s copy
- Or delete it
We recommend sticking with Gmail’s default option (i.e. “Keep Gmail’s copy in the Inbox”). Just to be on the safe side.
Step 7: Once you’re done, scroll all the way down. And click on “Save Changes”.
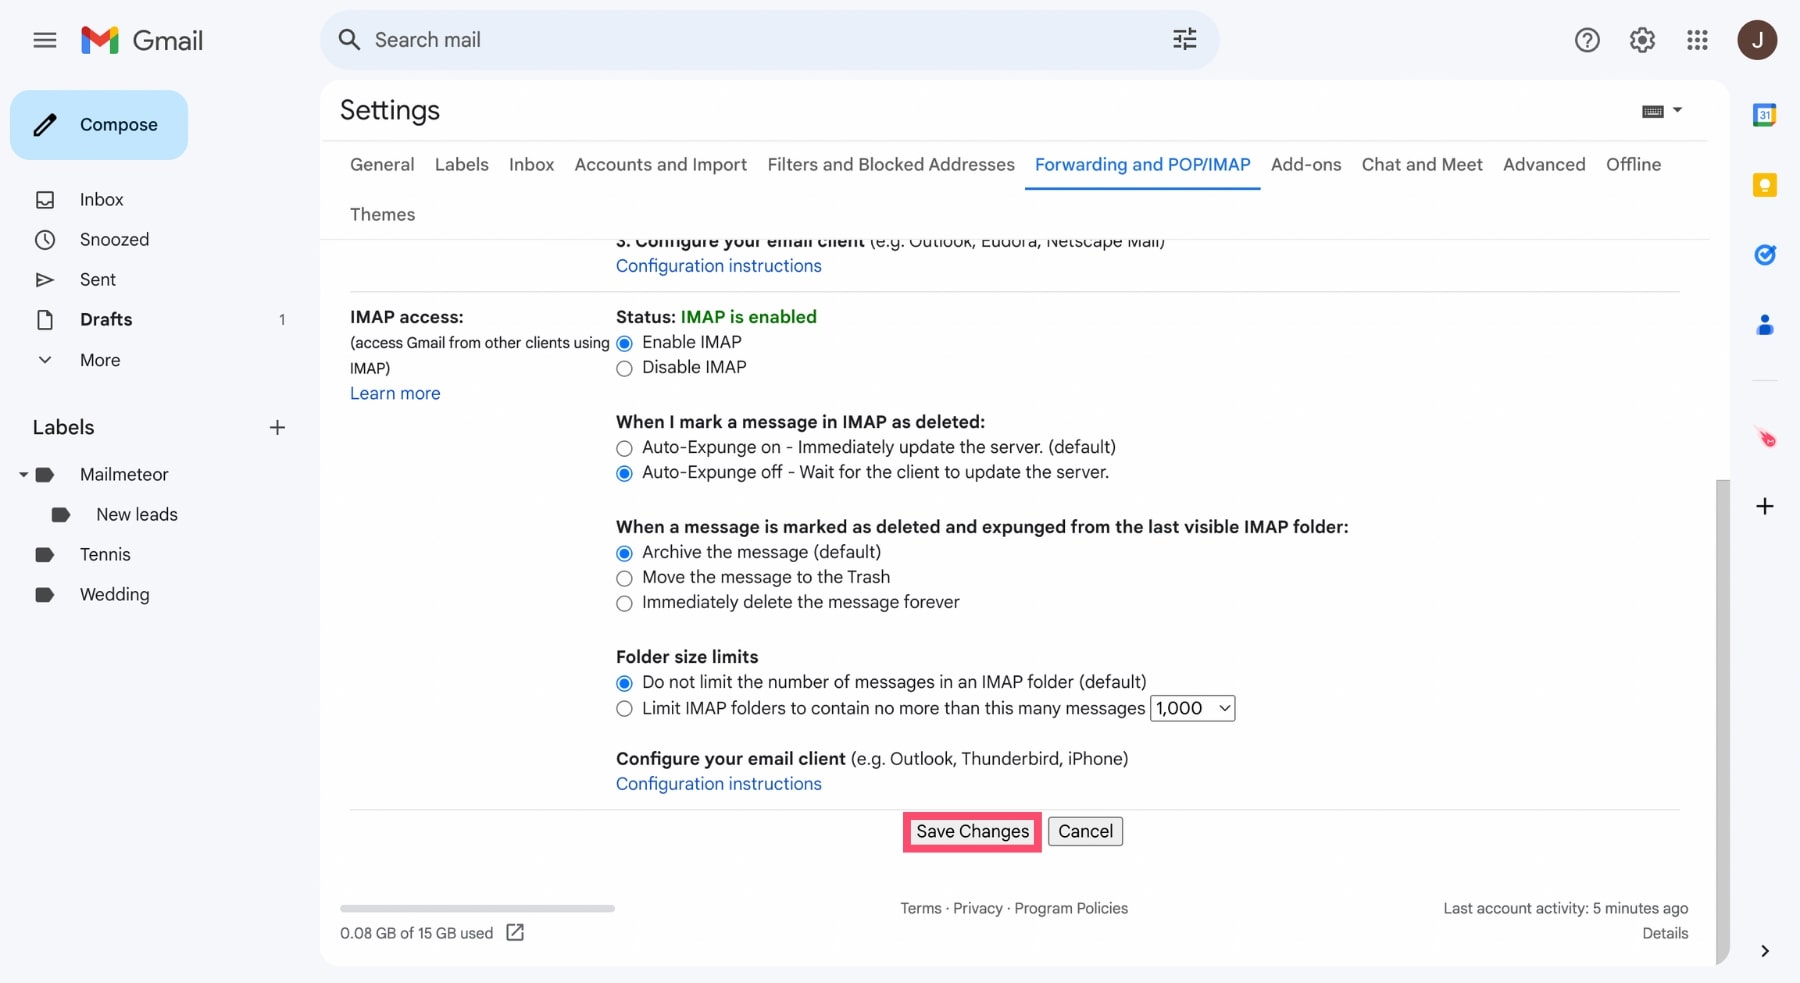
That’s it. From this point on, all of the emails sent to this Gmail account will automatically be transferred to the forwarding email address you’ve just added.
This can be a convenient way to smoothly transition to a new email address. Or to monitor your Gmail messages while you’re out of office.
But keep in mind that Gmail will forward ALL the emails sent to that account. Which can be a bit overwhelming.
So if you want to keep your inbox streamlined and clutter-free, you may want to set up an auto-forward filter.
This way, Gmail will only forward messages that match the exact criteria of the filter you’ve created. Pretty cool, uh?
How to create a forward filter in Gmail
Want to transfer only certain Gmail messages to another email address? You can do that by creating an forward filter in Gmail.
Here’s how it works ⤵️
Step 1: Sign in to your Gmail account.
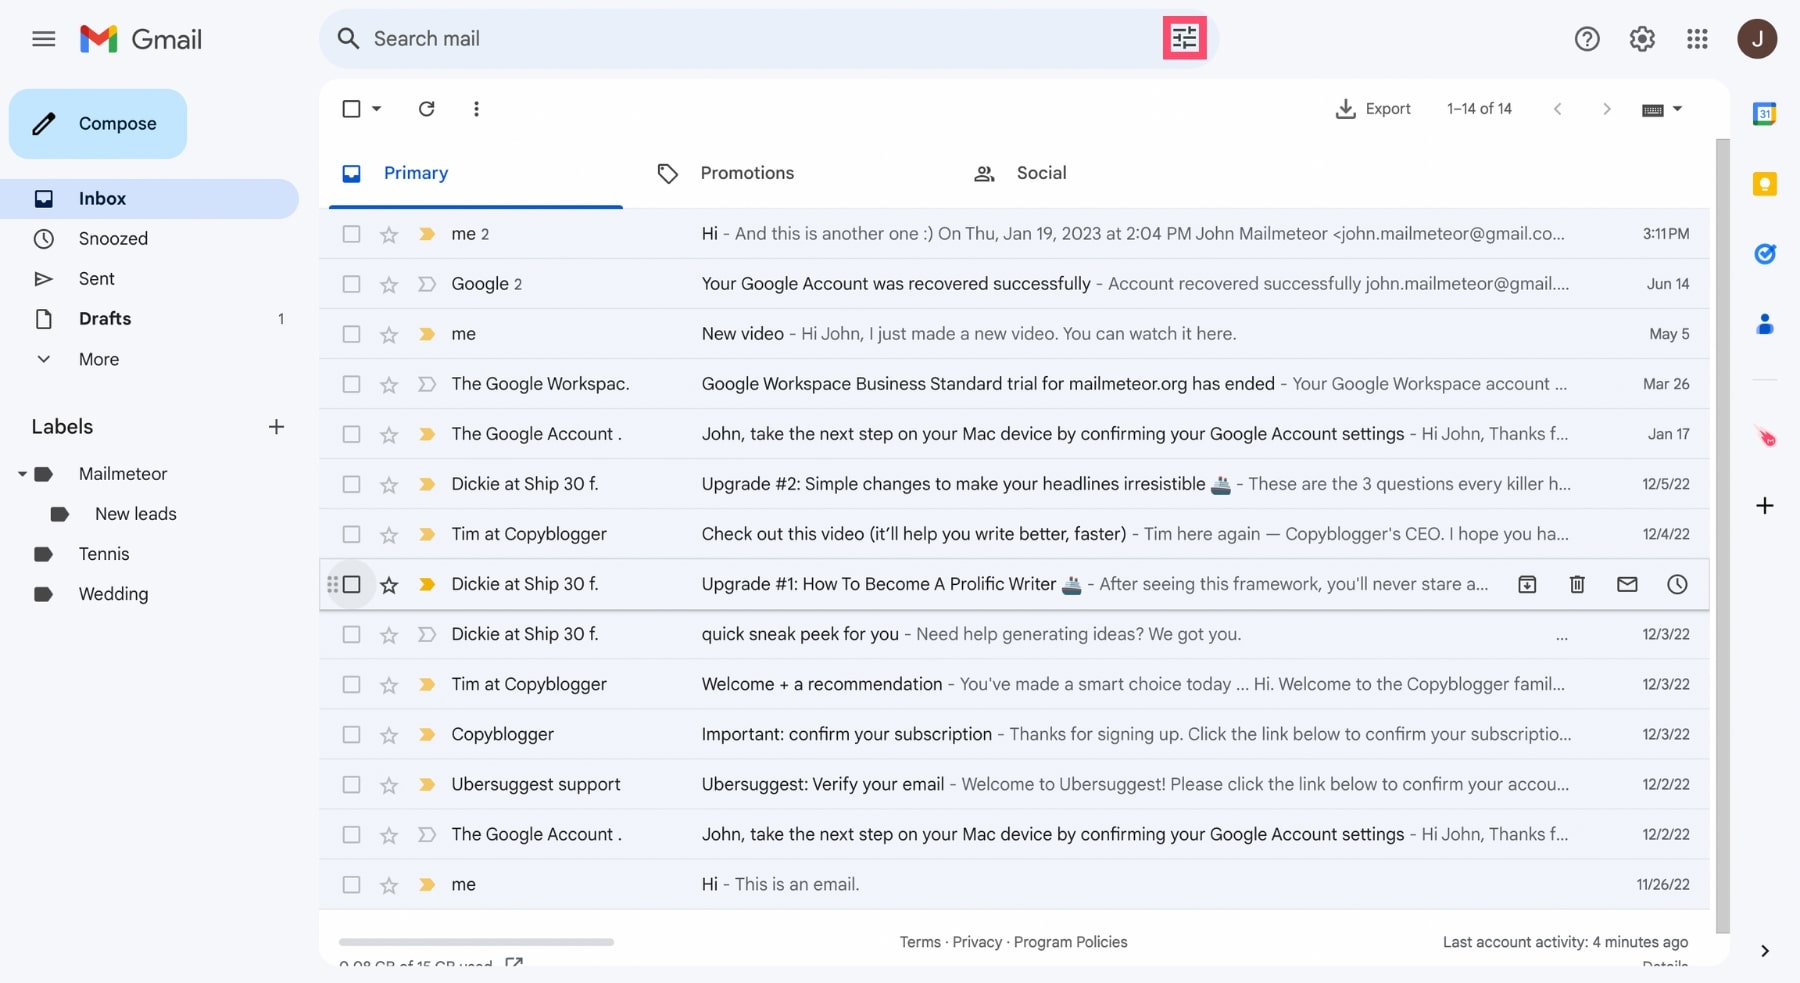
Step 2: Click on “Show search options” (right next to the Gmail search bar).
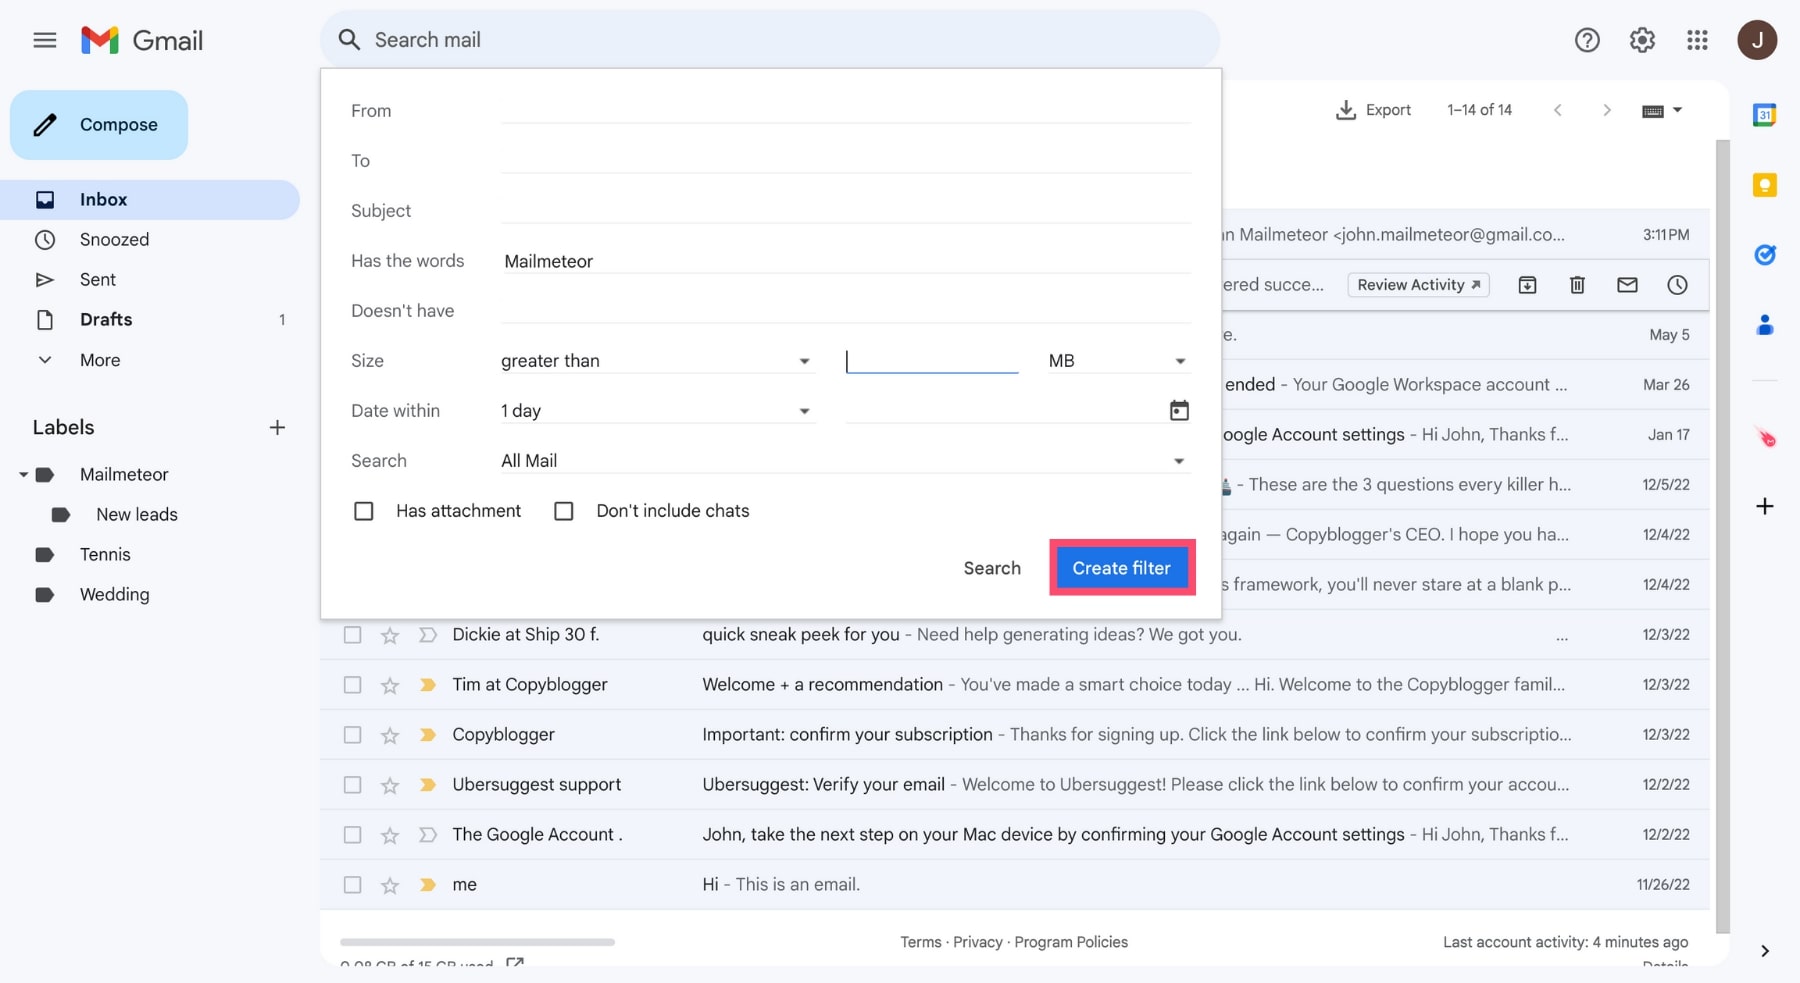
Step 3: Create your filter.
Gmail lets you filter your emails by:
- Recipients
- Subject
- Size
And more. For example, you can filter emails that contain certain keywords. Or emails with attachments. Once you’re done, click on “Create filter”.
Step 4: Activate the “Forward it to” option. And select the email address you want to forward your messages to.
If you can’t find the email address you’re looking for, click on “Add forwarding address” and configure your forwarding address. The steps are the same as the one we mentioned earlier.
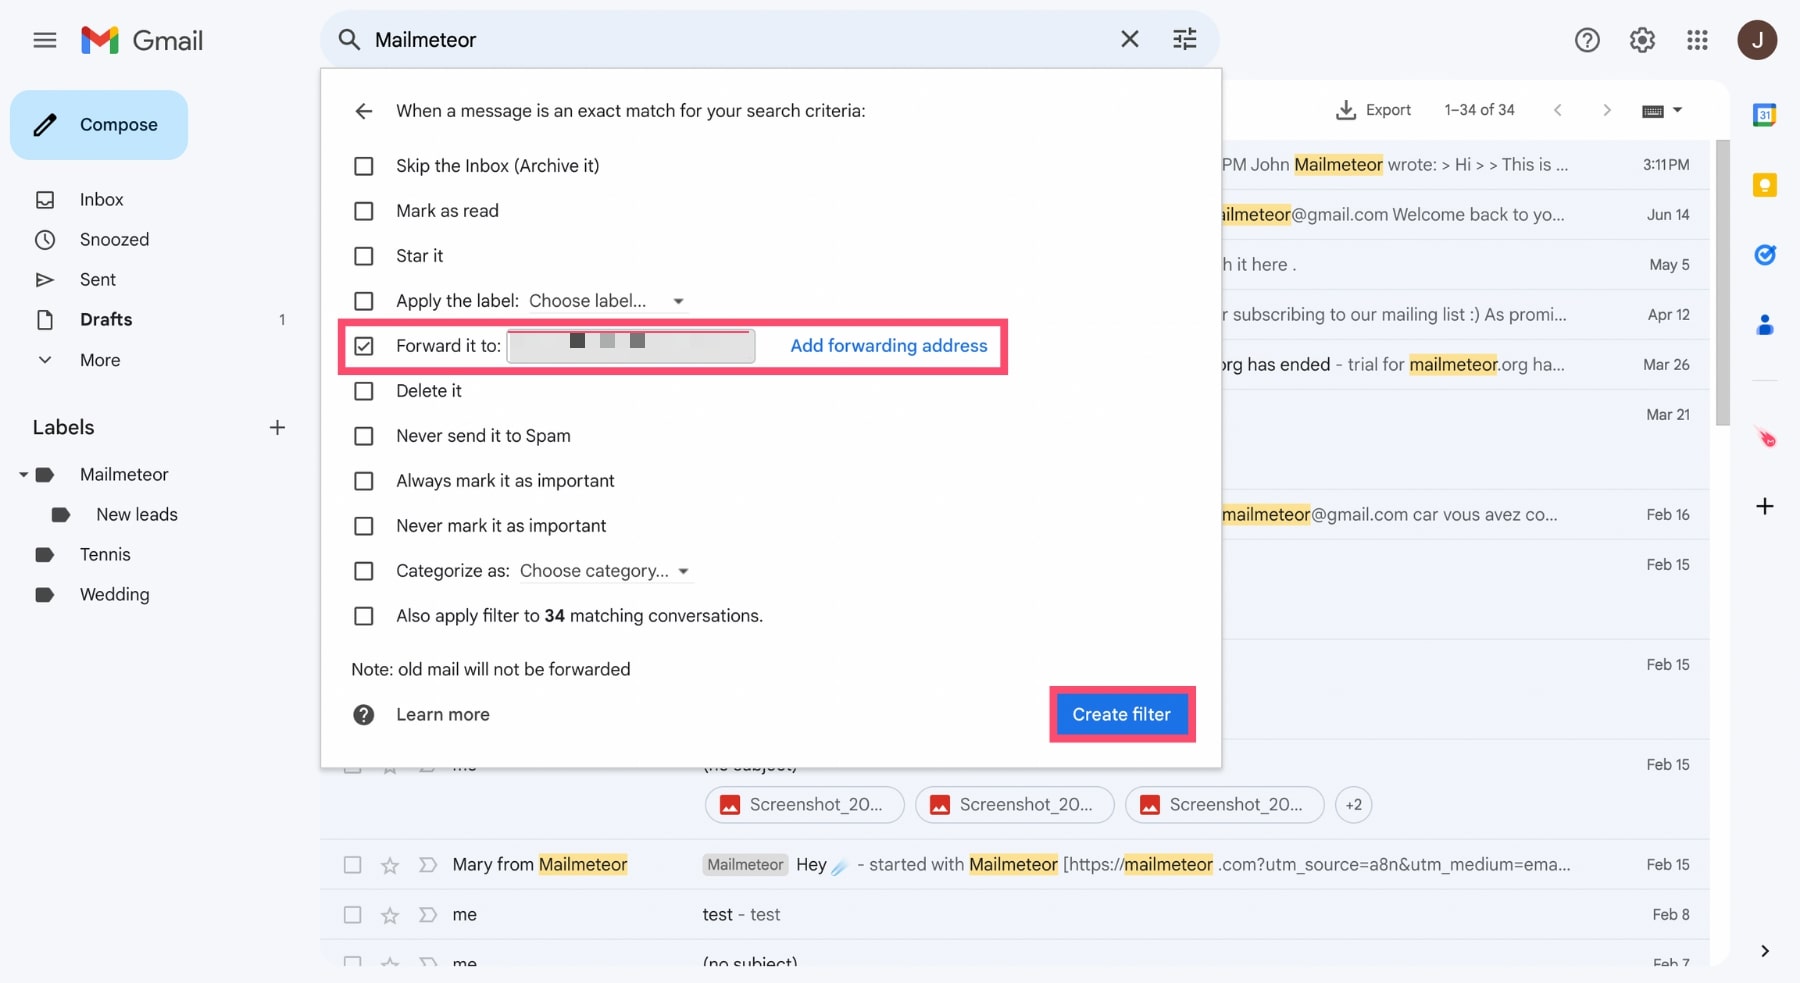
Once you’re ready, click on “Create filter”. And Gmail will automatically forward any incoming message that matches your search criteria to that email address.
You can set up as many Gmail filters as you want. Use them to automatically forward your incoming messages to the right email accounts.
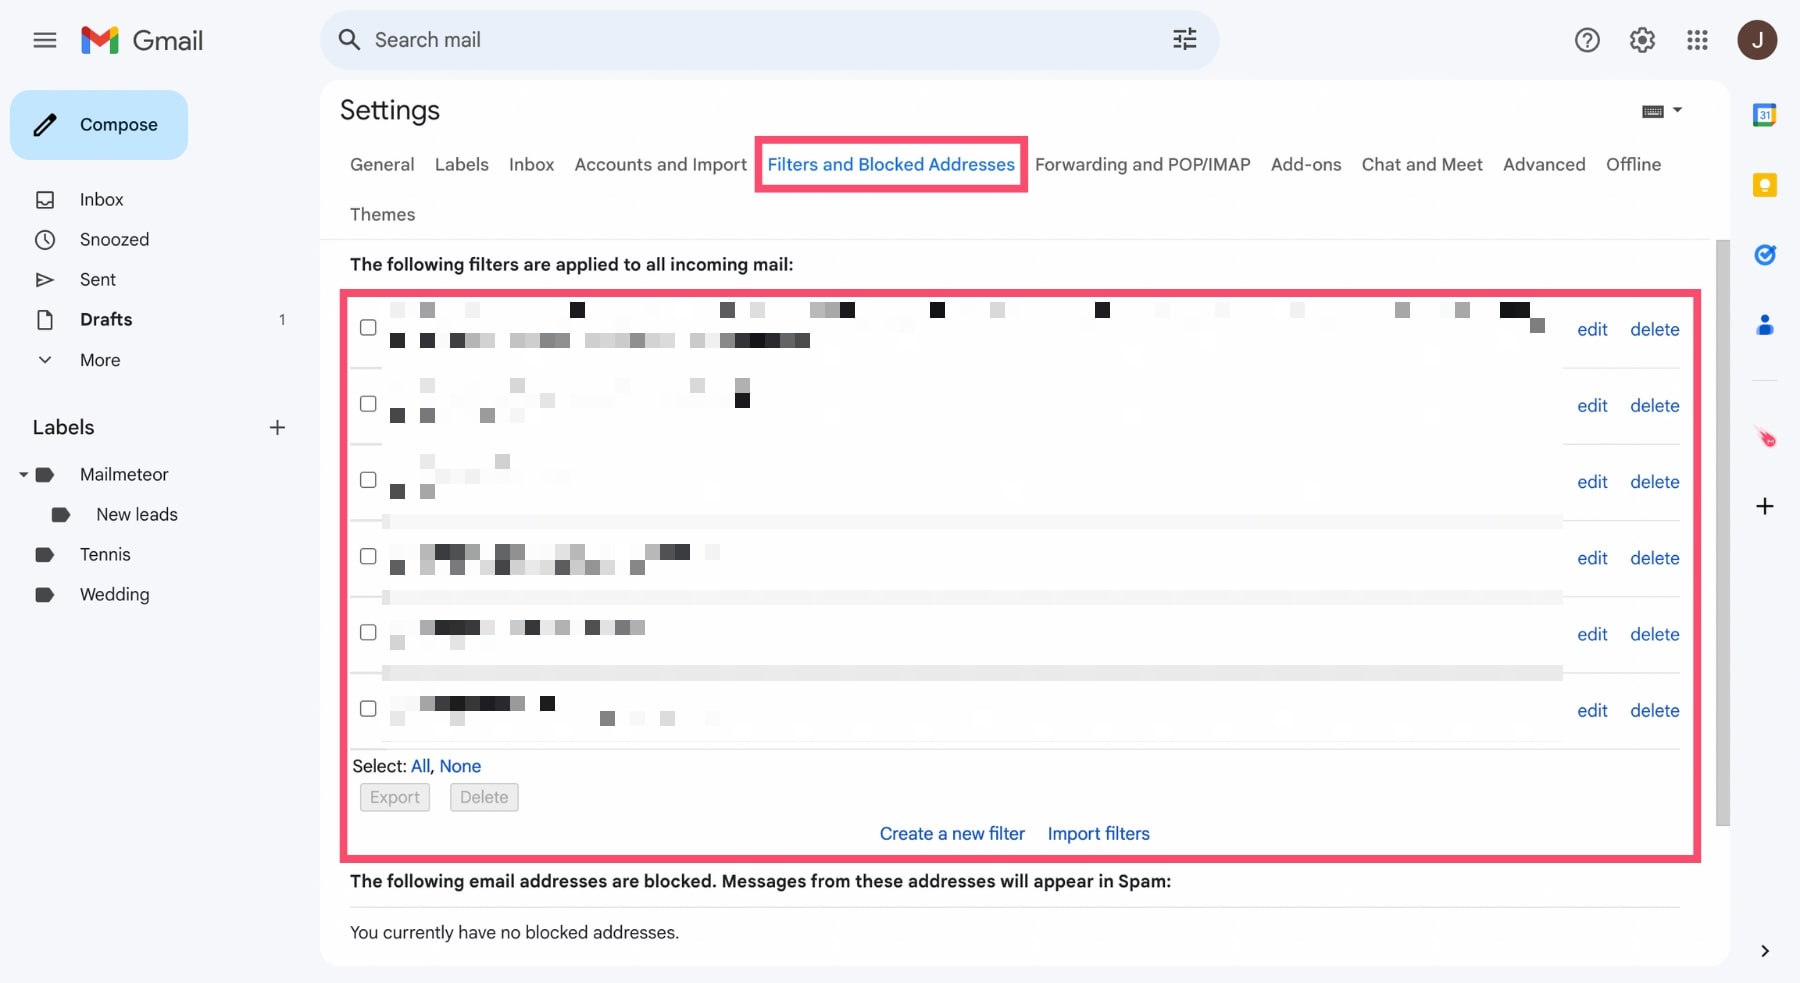
And if you ever change your mind? Go to “Settings” > “See all settings” > “Filters and Blocked Addresses”. From there, you can easily edit or delete your filters.
How to disable automatic email forwarding in Gmail
You no longer want to forward all your Gmail messages to another email account? Here’s how you can disable auto-forwarding in Gmail.
Step 1: Sign in to your Gmail account.
Step 2: Go to Settings. And click on “See all settings”.
Step 3: Head over to the “Forwarding and POP/IMAP” tab.
Step 4: In the “Forwarding” section, select “Disable forwarding”.
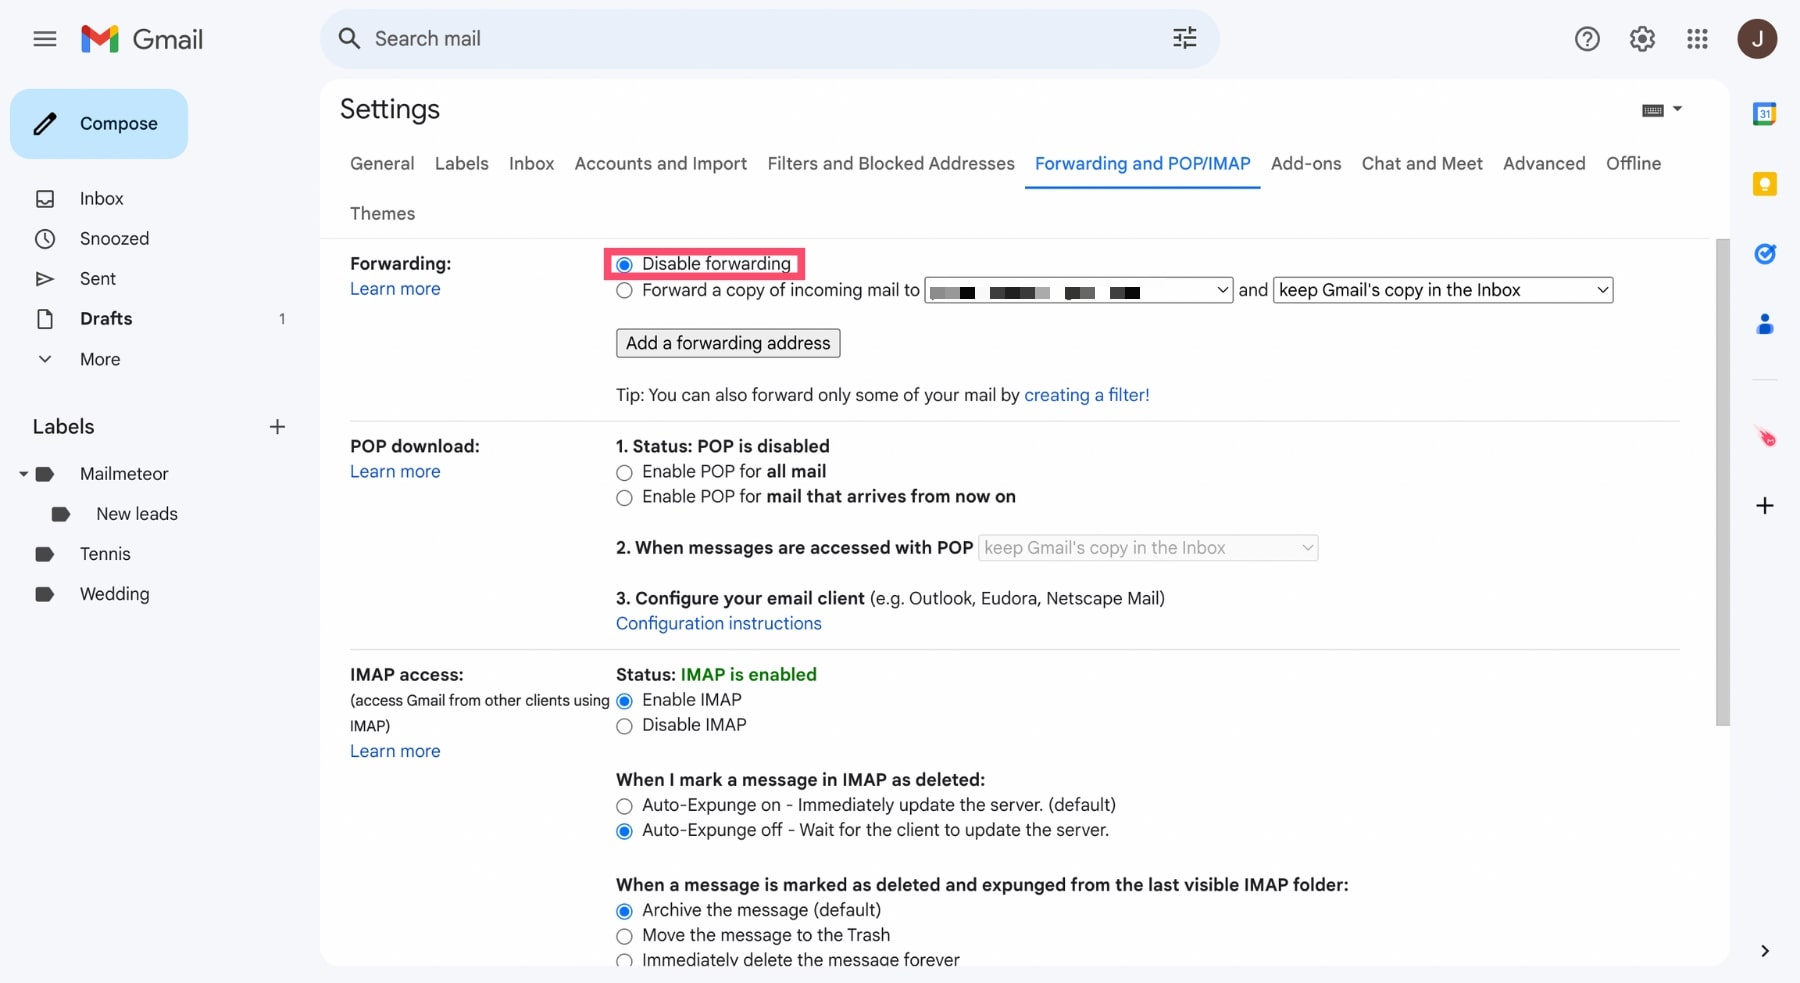
All done. Gmail will no longer automatically forward your incoming emails to another email account.
Frequently Asked Questions
Where is the forward button on Gmail?
When you receive one (or several) emails, open them. And scroll all the way down. There, you’ll see a “Forward” button.
Use this button to forward an entire email chain. That way, you won’t have to forward each reply manually.
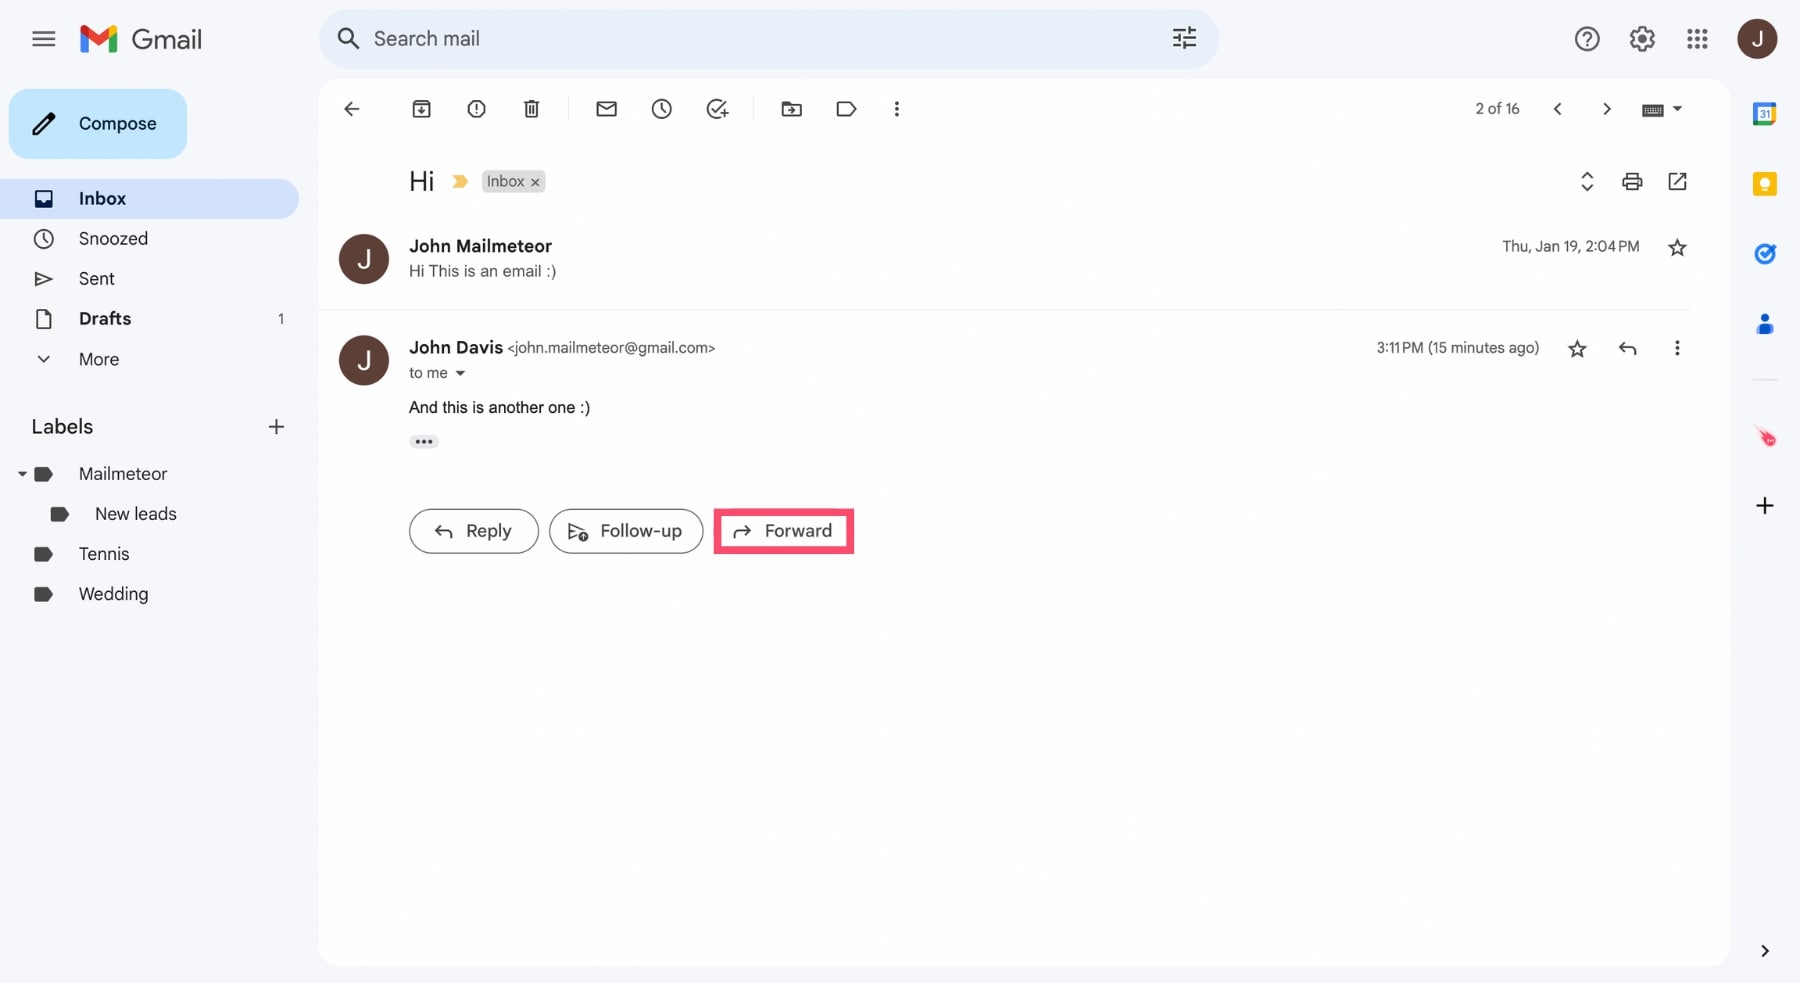
However, if you want to forward just one of the replies in that email chain, open that email, click on the three vertical dots and select “Forward”.
How do I forward an email in the Gmail app?
The steps to forward an email in the Gmail app are pretty much the same as on Desktop. Here’s how to do it.
Step 1: Launch the Gmail app on your mobile.
Step 2: Open the email you want to forward.
Step 3: Scroll down and tap on the “Forward” button.
Step 4: Enter the email address of your recipient. And hit “Send”.
Does the original sender see when I forward an email?
No. The original sender won’t know that you forwarded their email. Gmail doesn’t notify them when that happens.


