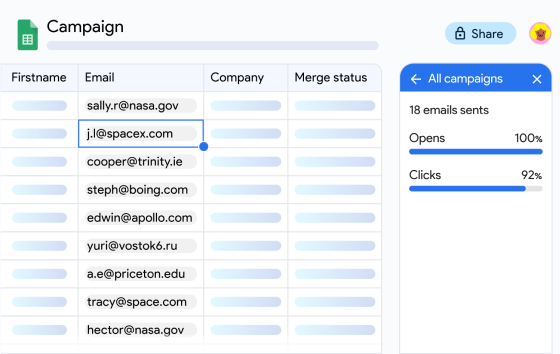
Imagine you’ve got an email you need to send out to all of your customers, students, or employees.
Writing out one email per person would take up a lot of time. The good news is, your computer can send all of those emails at the same time with just the click of a button. We call this process a mail merge.
As one of the biggest email providers, Gmail allows anyone, anywhere to mail merge. Business, institutions and individuals all use Gmail to mail merge on a daily basis to make their lives easier.
However, one of your first questions might be: how to do a mail merge in Gmail?
A better question might be: what’s the best way to mail merge in Gmail properly? Well, there are 2 ways you can approach creating a mail merge in Gmail. The first is by using a Google add-on that will do everything for you, and the second is to create your own mail merge script within Gmail. In this mail merge tutorial, we’ll show you how to do both methods.
Method 1 – Use Mailmeteor to mail merge in Gmail
Mailmeteor is the top-rated Google mail merge add-on, designed to make mail merging in Gmail quick and easy. Clients and businesses of all-sizes use Mailmeteor to reliably deliver their emails to extensive lists of recipients without any hassle. Here’s a step-by-step guide to how it works:
-
Install Mailmeteor
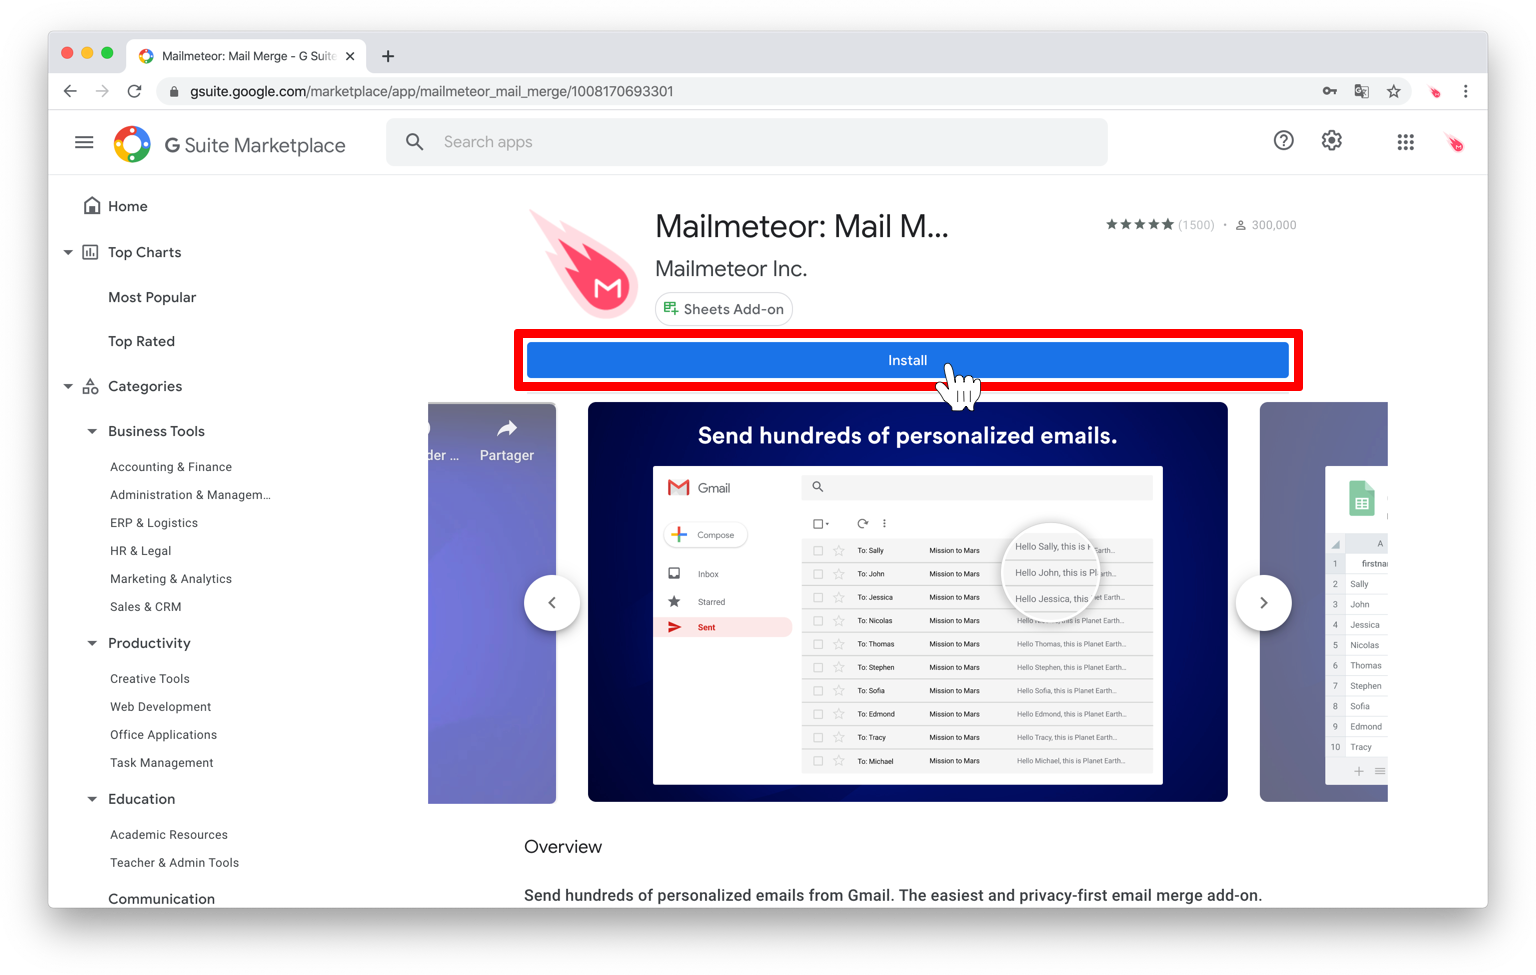
Let’s start right at the beginning. Download and install Mailmeteor on your Gmail account from the Google Workspace Marketplace. Mailmeteor effortlessly integrates with your current Google Suite setup, specifically in Sheets and on Gmail.
-
Create a contact list on Google Sheets
Now you’ve got Mailmeteor installed, go ahead and open a new Google Sheets spreadsheet.
Once you’ve got the blank sheet in front of you, you’ll need to make a mailing list of the audience you want to target. You can do this manually yourself as a table or you can just import an existing contact list onto the sheet.
To import your recipients, simply click on Menu > File > Import, and pick out your mailing list from your computer. Files can be in Excel or .csv formats.
If you’re choosing to do things manually, here’s how it should go:
➤ Create column headers
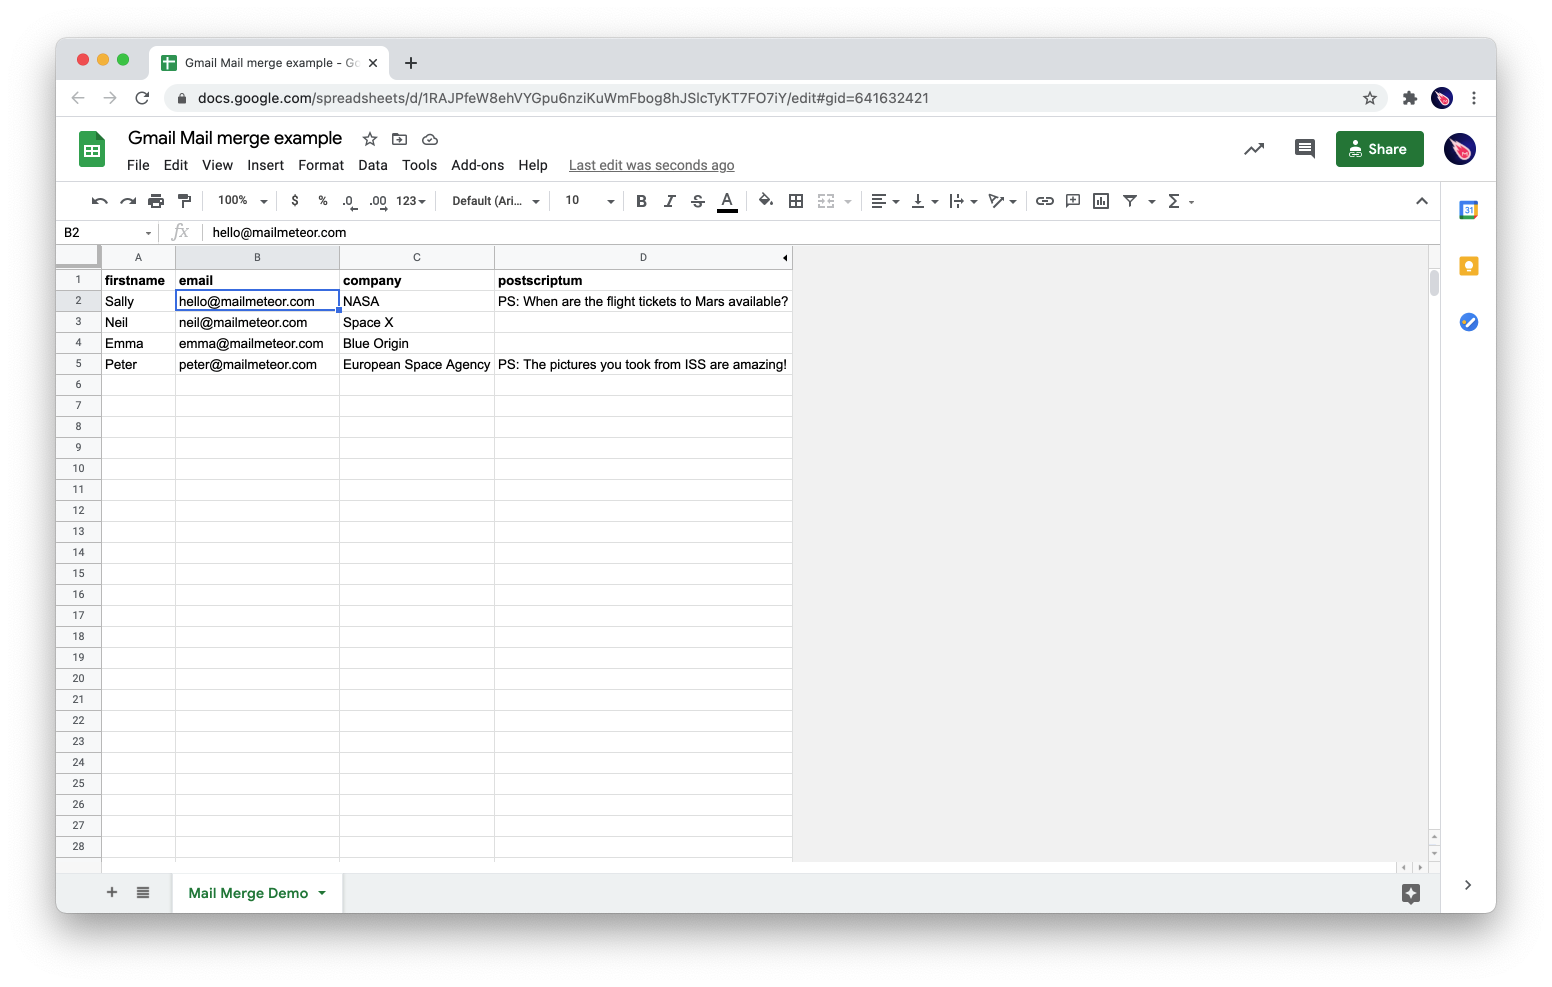
Having column headers for your contacts lists enables the Mailmeteor add-on to add more personalization to your mail merge emails with each column representing a field. You can have, and name, as many of these columns as you want, but you should have at least one that contains the email addresses of your contacts – call this column ‘email’.
➤ Add your contacts’ information
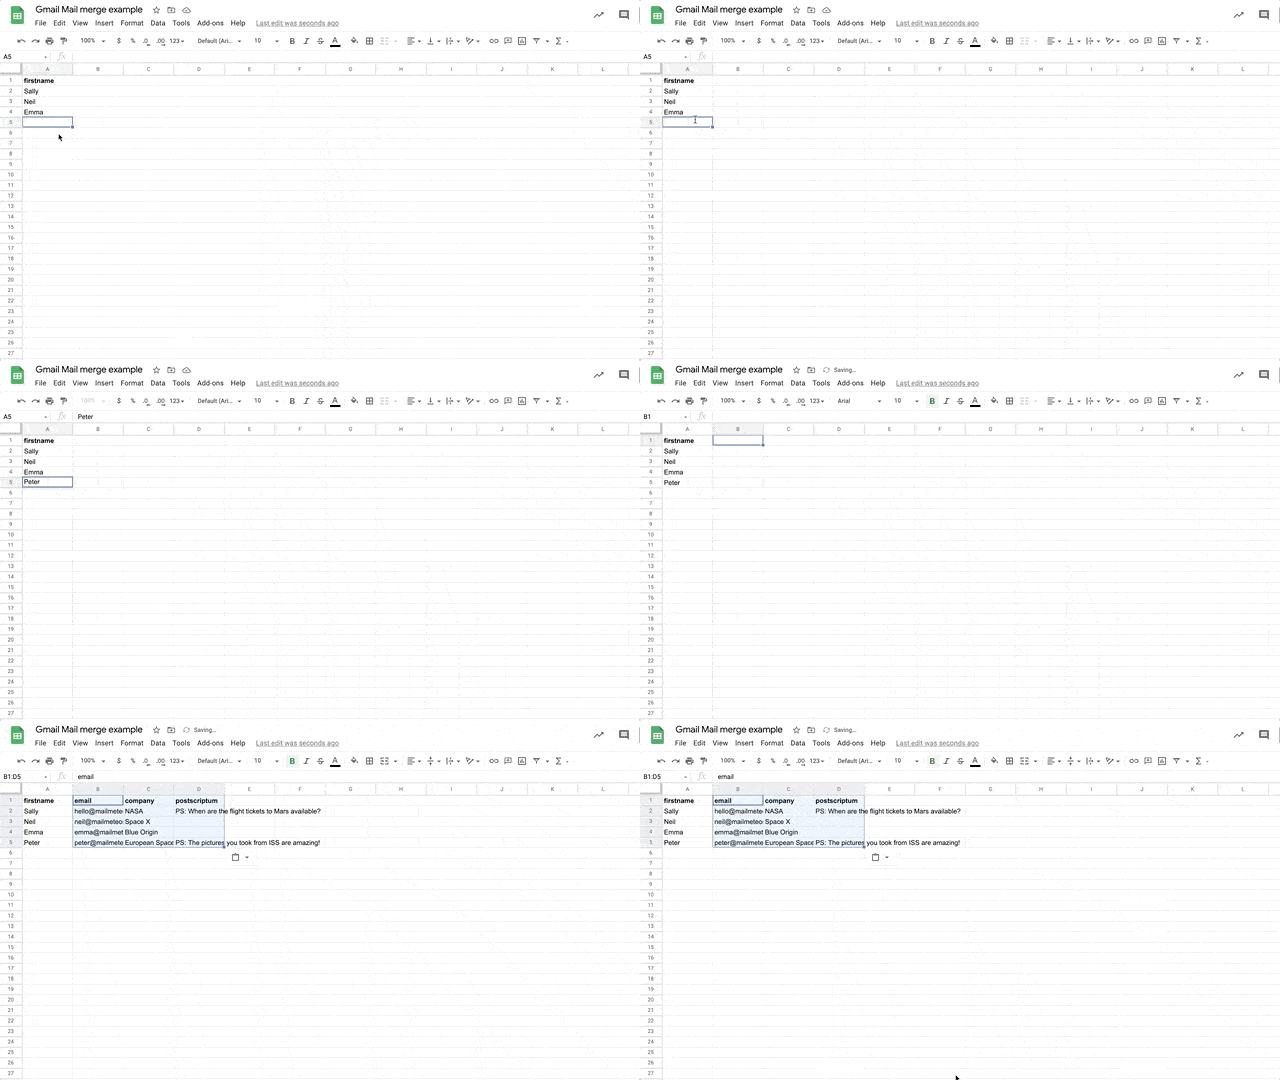
Here you’ll need to add all of the data you have for your recipients into your table under the appropriate columns.
Pro tip: Don’t worry if you can’t fill all of the columns - if you don’t have all the necessary information for example – the only one that needs filling completely is the email column, so we know who to send the email to. -
Open Mailmeteor in Sheets
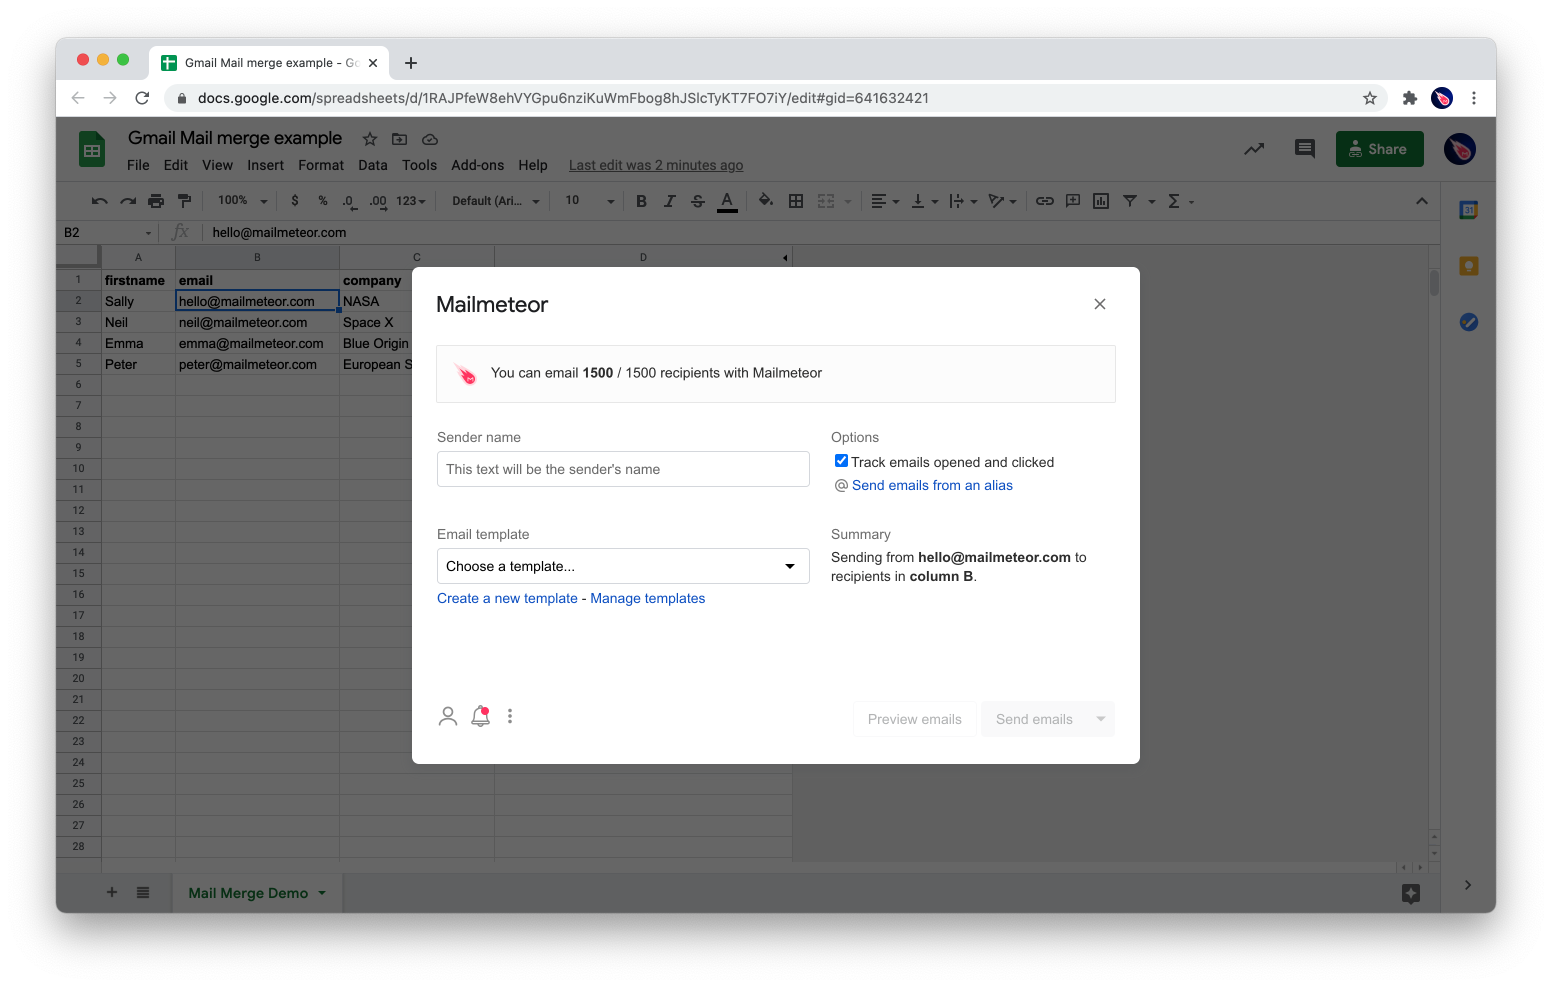
This is where the Mailmeteor add-on comes in. Click on the ‘Add-ons‘ tab in the bar between ‘Tools’ and ‘Help’ and select Mailmeteor from the list. Click ‘Open Mailmeteor’ and an interface should pop up, with the number of emails you can send as part of your mail merge.
-
Create an email template
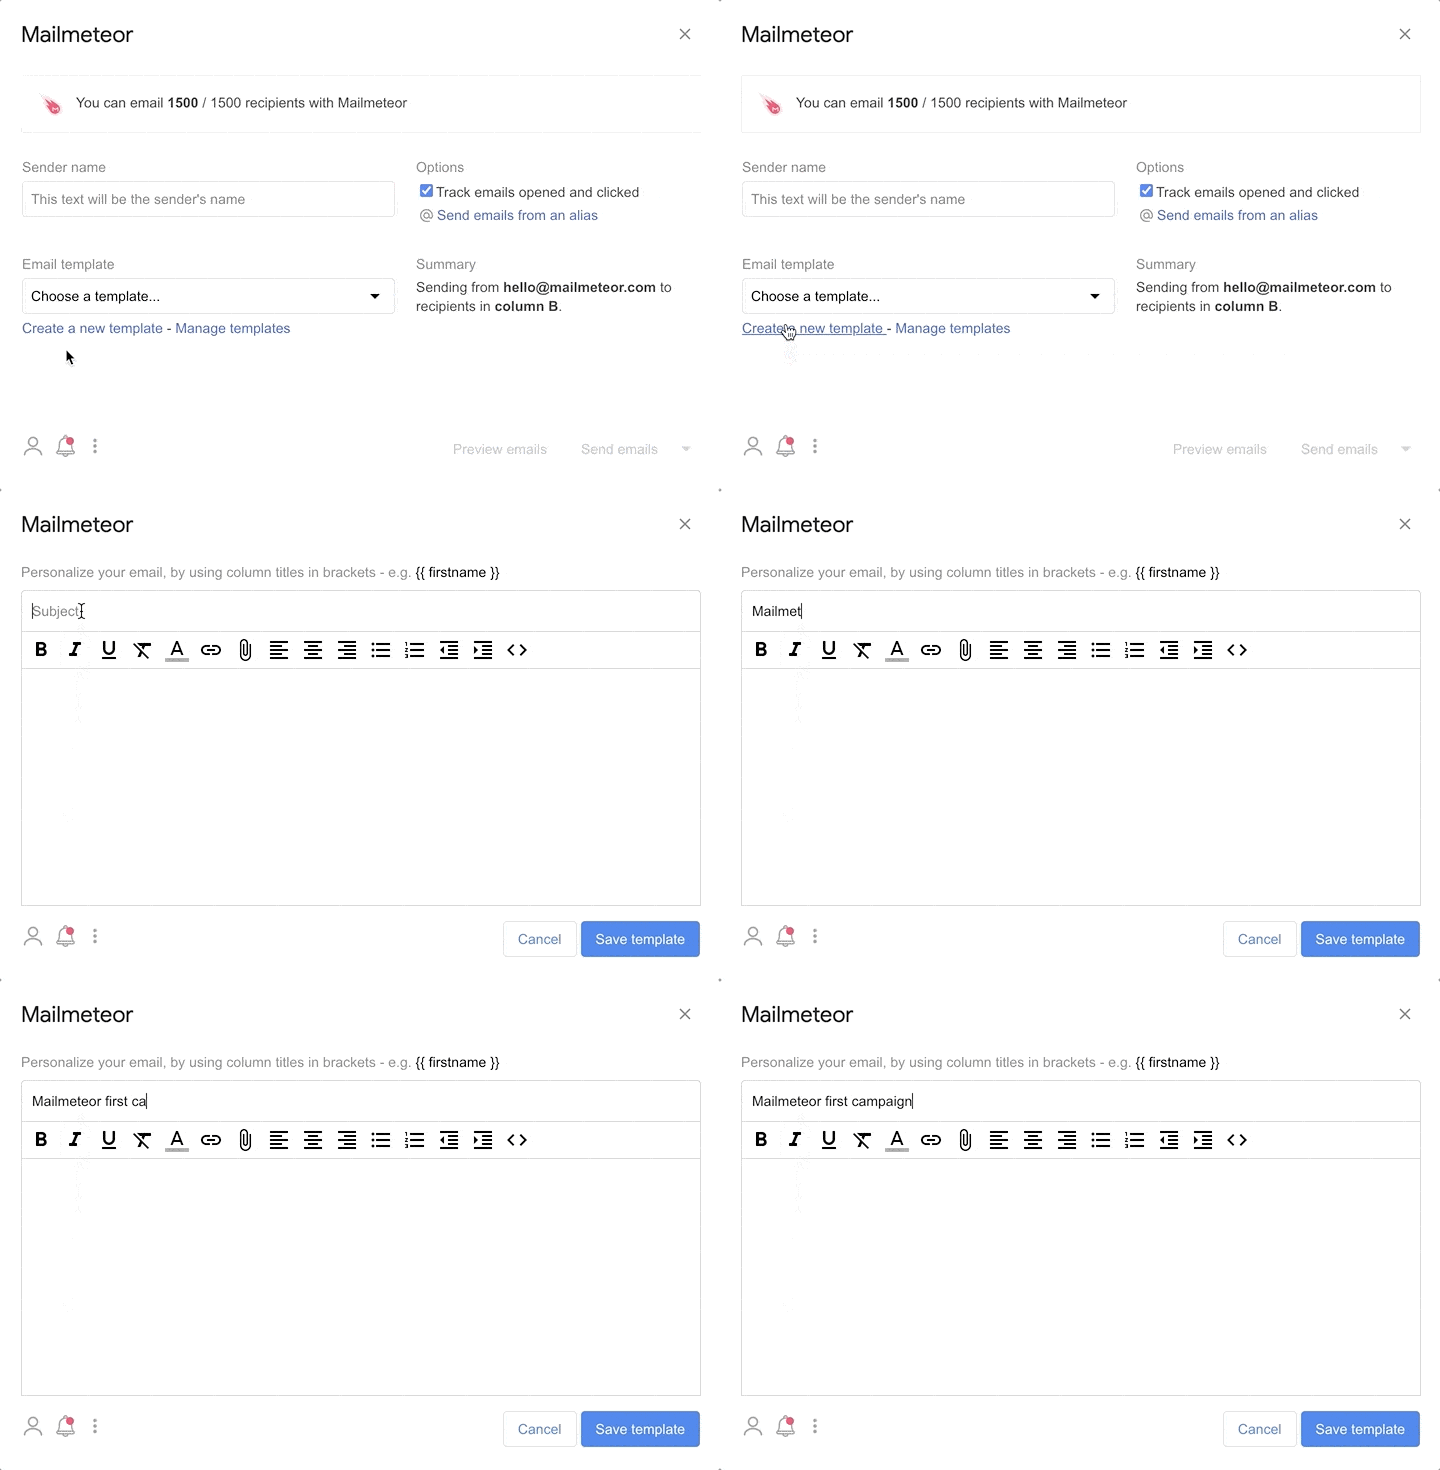
Once we’ve got to this point, you’ll need to write out the email you intend to send to your recipients. This is a template, and we call it a template because some sections will be filled in by our personalization service. Click ‘Create a new template’ and you’ll be shown an interface for writing your email, similar to the Gmail editor we’re all used to.
-
Personalize your email
This is where the magic happens. Personalized emails improve open rates and make readers feel like the email is written to them specifically, so it’s pretty important. Mail merges like those offered by Mailmeteor replace certain variable fields in the email with personalized content from your contact list that you provided earlier.
To add in variable fields into your email, just write the variable you need and add double brackets one either side. For example: Hi {{ firstname }}. Mailmeteor will automatically fill in the variables when you send your mail merge.
Here’s a template you can copy-paste:
Hello {{ firstname }},
I'm glad we could meet lately. As discussed, we are using a brand new mail merge solution called Mailmeteor.
Mailmeteor lets you send hundreds of personalized emails, right from Gmail.
I’d love to let you see some of the features to get your feedback. We want to ensure Mailmeteor would actually help you do your job better at {{ company }}.
Would you have 10-15 minutes free to chat? (I promise to keep the time!). Let me know the time that suits you best.
Once you’ve written your email template and added your variables, go ahead and click ‘Save‘.
-
Give your email a quick check
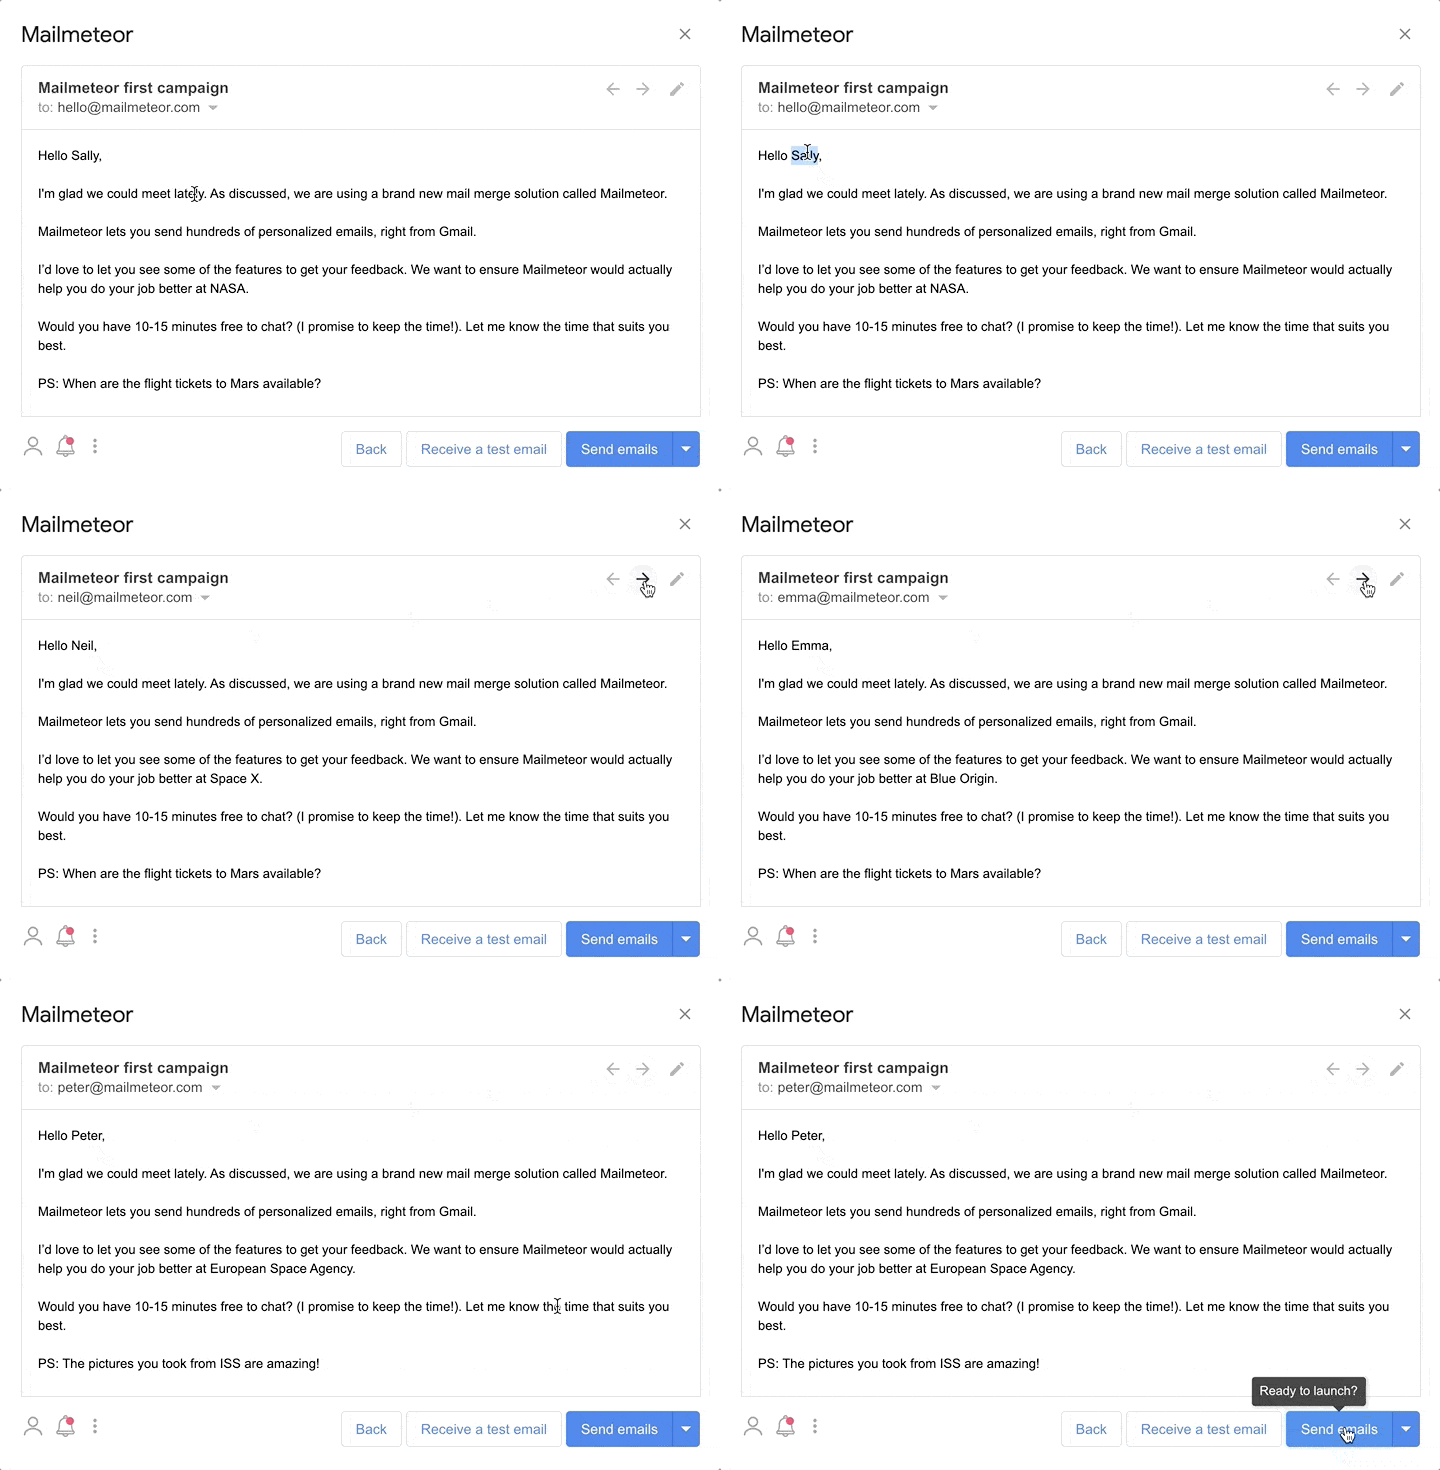
Before you press send, you’ll want to check your emails before they go. Mailmeteor’s preview options lets you do just that, showing you exactly what your personalized emails will look like when they land in the inboxes of your contacts. Use this to make sure your email reads like you want it to, and more importantly, that all of the variables are correctly filled out without any stray brackets.
Pro tip: You should also take the opportunity to send test emails to your phone, email, tablet and any other platform you expect your email to be read on. Take the time to ensure your email looks great whatever the device. -
Send your emails!
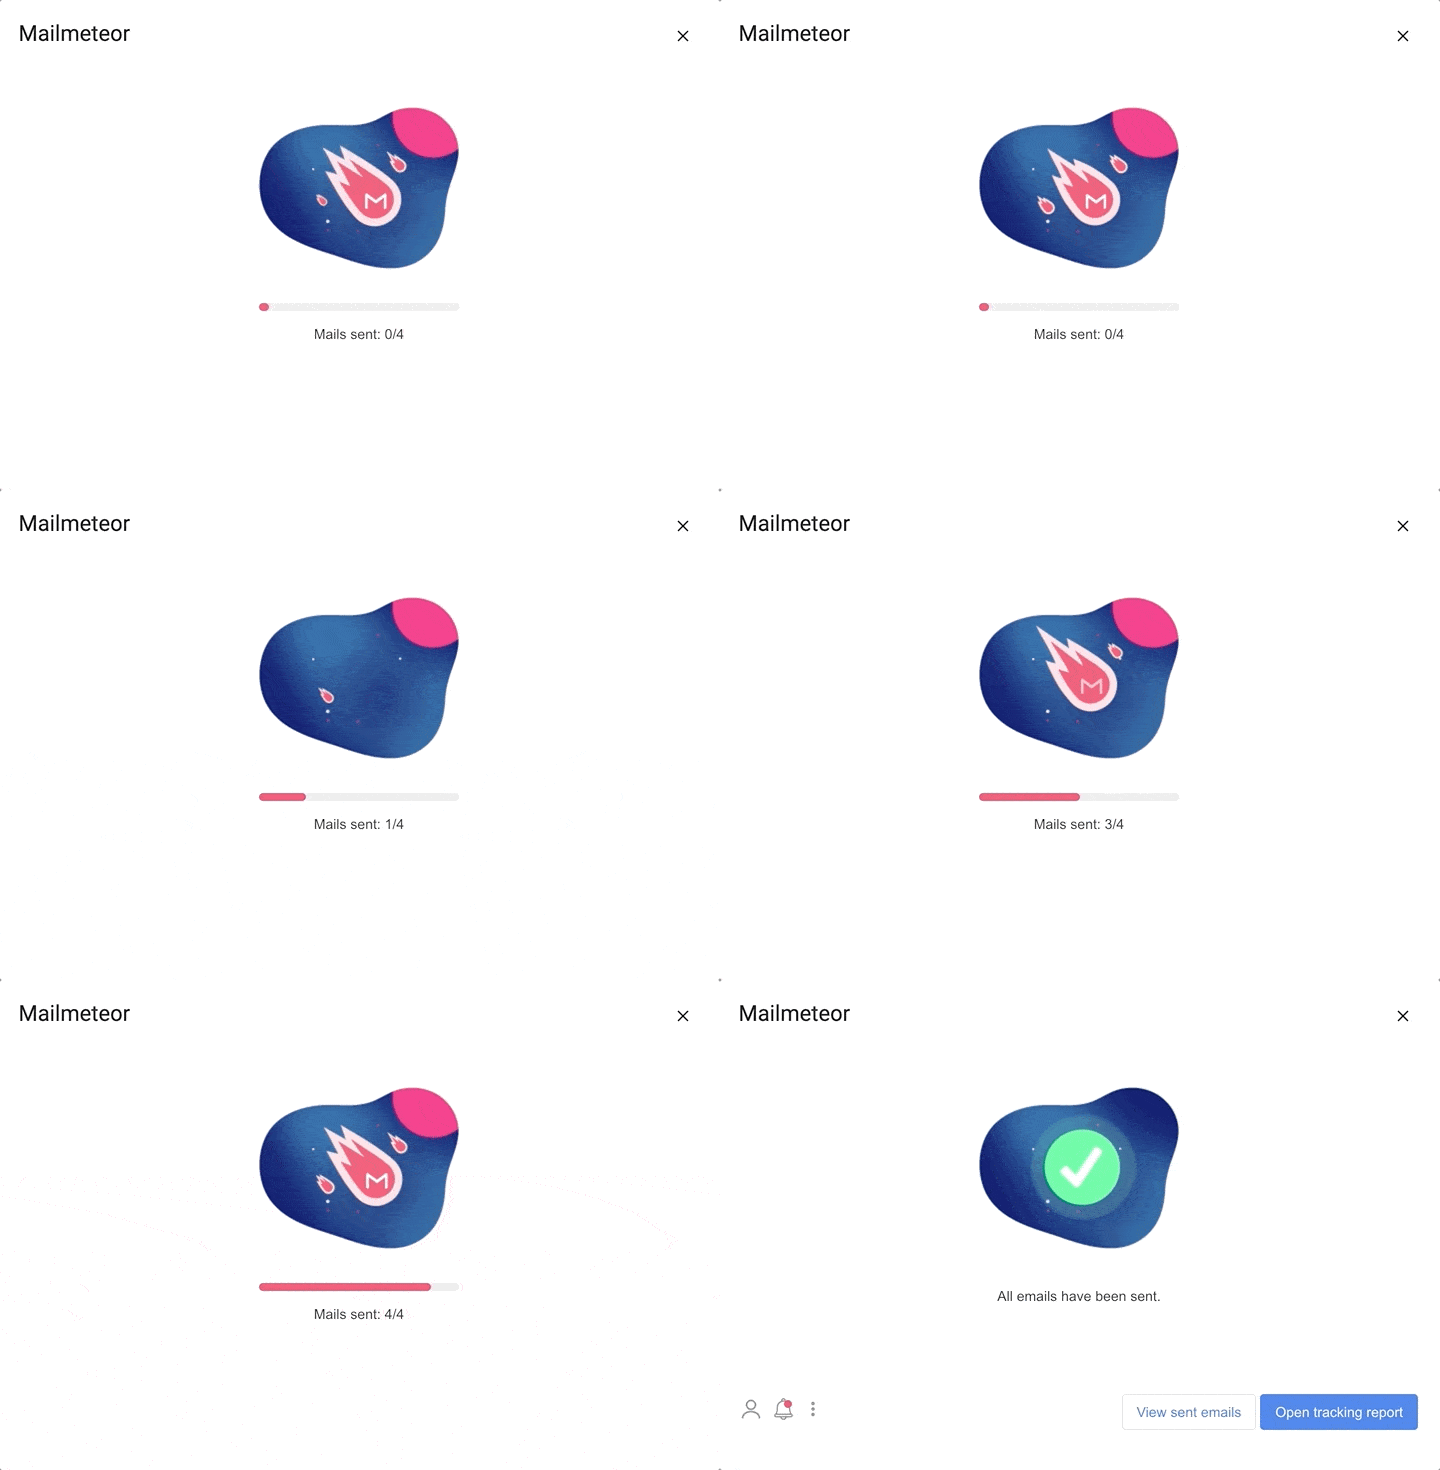
Let’s go: Get your first ever Mailmeteor mail merge sent off!
If you’ve followed our mail merge instructions above, your mail merge will get people reading your emails and engaging with your brand. It’s that simple.
With that, you’re all set! Mailmeteor is the top-rated Gmail mail merge add-on for sending high-quality, personalized email content to up to 2000 recipients with just a click of a button. Start your mail merge in Gmail with Mailmeteor.
Method 2 – Mail merge with Gmail through Google Apps Scripts
For those that prefer to handle the technical details themselves, the other way to create a mail merge for Gmail is to build a Gmail mail merge yourself. This is a somewhat more advanced method, so you’ll need a bit more tech knowhow if you’d prefer to go down this route rather than through an easy add-on like Mailmeteor.
To start, you’ll need the Google Apps Script which you’ll use to build your own Google add-on. You can find the open-source code for Google Apps Script on GitHub, written by Martin Hawksey (@mhawksey).
Here’s our quick guide to creating your own mail merge without an add-on:
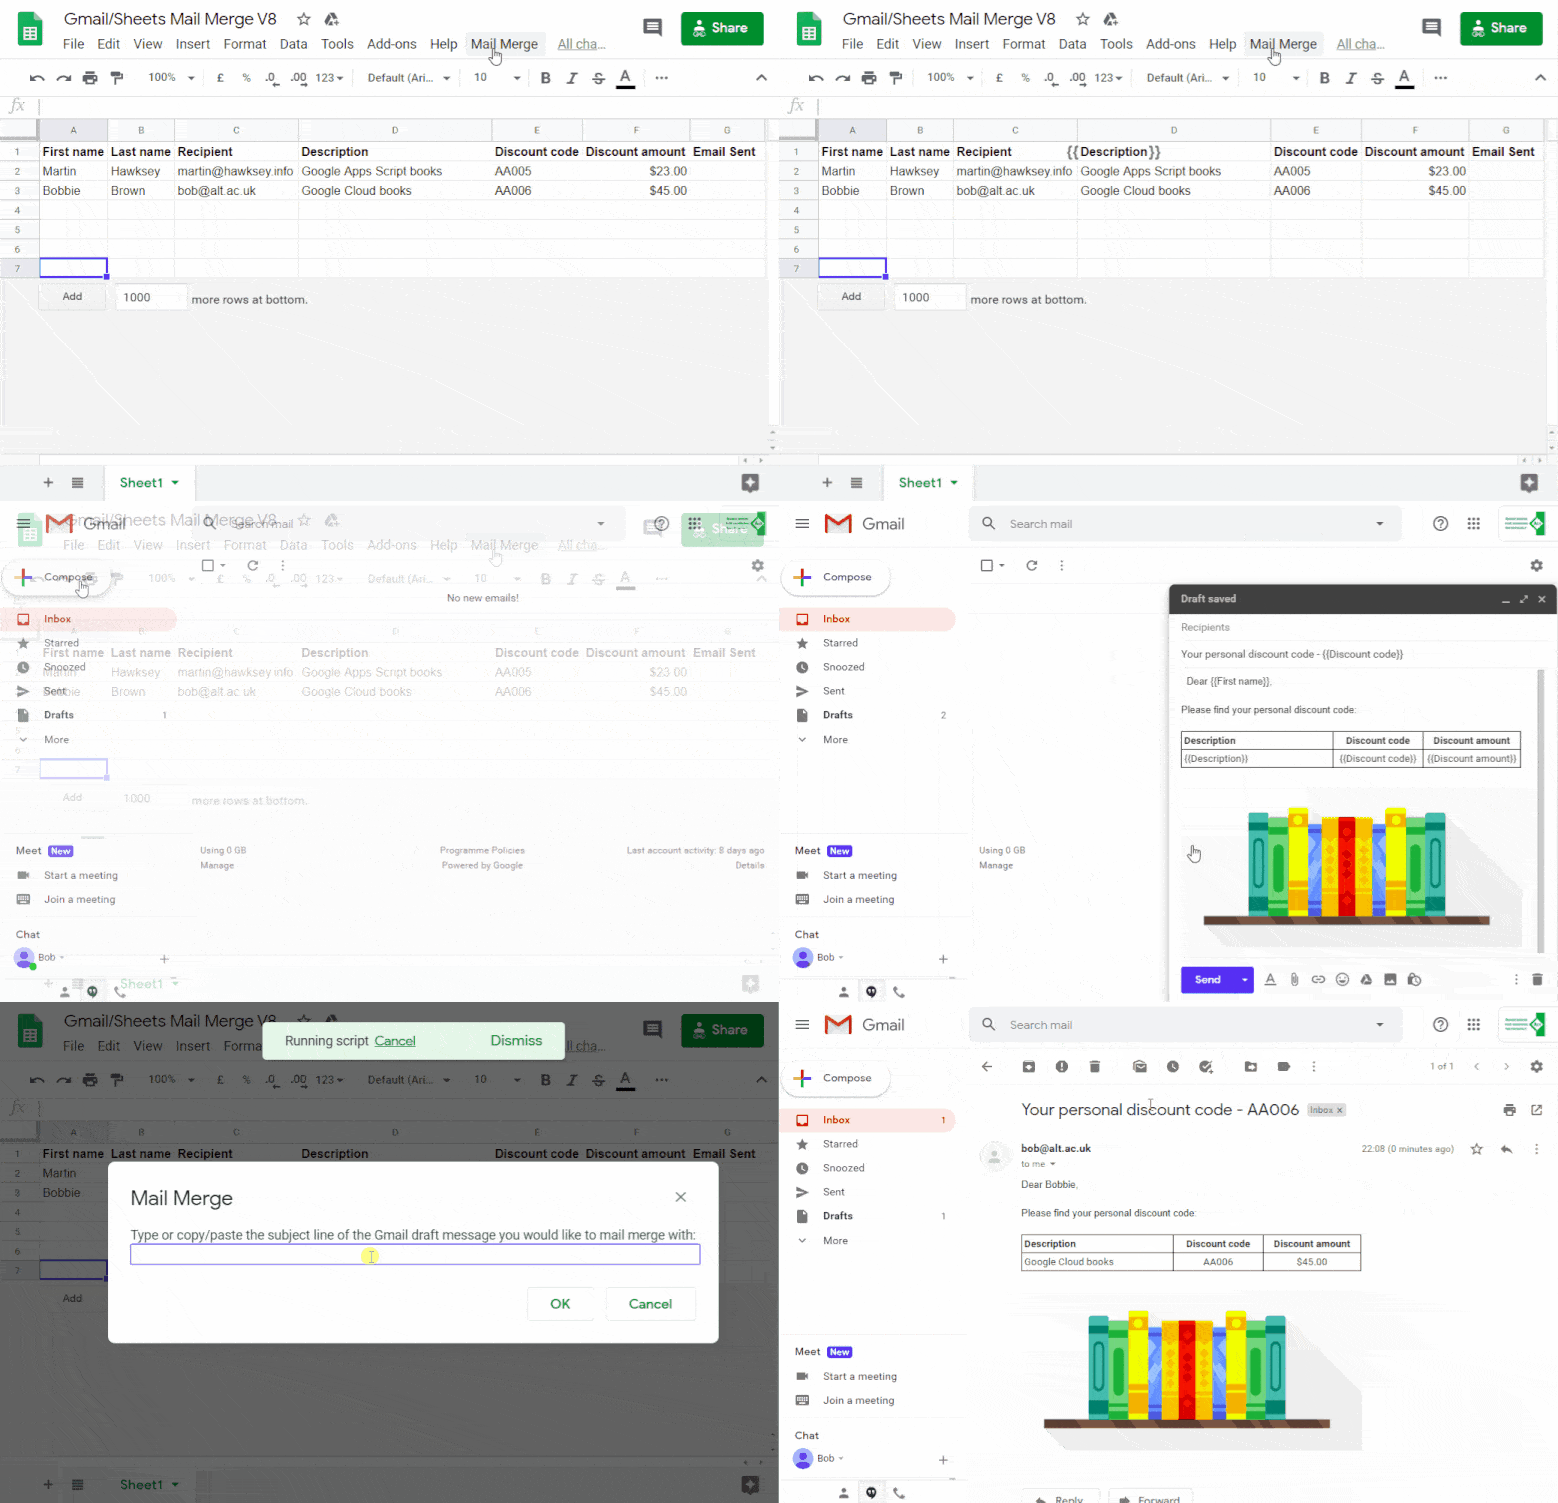
-
Download a sample mail merge spreadsheet
To get to grips with creating your mail merge tool, you’ll need to download a sample mail merge spreadsheet to work from. You can make a copy of this demonstration spreadsheet.
-
Add your mail merge email address to the spreadsheet
You’ll want to add in the email addresses of your recipients into the spreadsheet at this point. Add the email addresses into the recipients column.
-
Create a draft email with personalization variables
Open up Gmail here and write the email you want to send to your recipients. Add in personalization variables using double brackets in the same way you would do for the Mailmeteor add-on – for example: {{ firstname }} for the information in the First Name column. This will allow the mail merge script to draw its variable information from your spreadsheet.
-
Begin the mail merge through the Apps Script
You’ll need to start the mail merge process here by heading back into the spreadsheet and clicking on the new menu dropdown named Mail Merge. This is the Apps Script menu, which is what you’ll be using to send the merge.
-
Check the authorization and proceed
A note should appear as you go through the mail merge process, asking for you permission for the script to proceed. It’s important to carefully read all of the information given to you, to ensure the script isn’t malicious or faulty. When you get a prompt, enter the subject line from your Gmail template message, and click OK.
-
Send off your emails
If you’ve followed the above guidelines correctly, your email should have been sent off, and the ‘Email Sent’ column will update. If you want to see the emails you’ve dispatched, you can check the sent folder of your Gmail account to find out what they looked like.
There you have it! That’s our brief guide into building a mail merge in Gmail without an add-on using Google Apps Scripts.
Conclusion: how to properly mail merge in Gmail?
Using a script is inherently riskier than sending through an add-on, simply because if anything is wrong with the script, it can cause problems with your authenticity as a sender. Sending large numbers of emails through a script can cause alarm bells with Gmail, who might pin you down as a spam sender.
Because of this, opting to send emails with a highly-rated mail merge add-on like Mailmeteor is safer and faster. Using Mailmeteor, you will be able to send personalized emails that stand out in crowded inboxes.
Learn more about the features and benefits of Mailmeteor here.
![How to mail merge in Gmail [2025 Tutorial]](/assets/img/blog/mail-merge-gmail/mail-merge-for-gmail-guide.png)


