Did you know you can mail merge using Google Sheets, one of the world’s most popular pieces of spreadsheet software?
Whether you need to send personalized emails to a large number of recipients, create customized messages for your clients, or send out mass notifications to your network, mail merge is the go-to solution to automate and personalize your correspondence, saving you valuable time and effort.
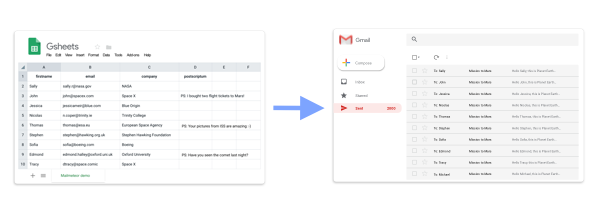
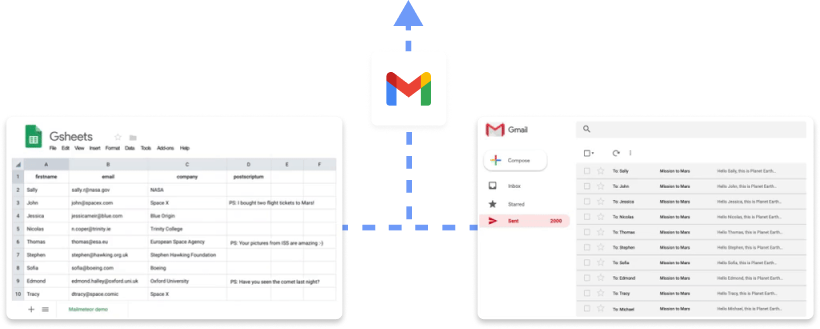
Done correctly, a mail merge can make your life a lot easier by drawing up a list of contacts from a Google spreadsheet you already have and letting you send each contact a message at the same time from Gmail.
Here’s what we’ll cover:
- What is a Mail Merge?
- How to Do a Mail Merge using Google Sheets
- Is Google Sheets the best option to mail merge?
So first of all:
What is a Mail Merge?
Mail merge solves the common problem of sending mass emails or documents with customized information to multiple recipients. Instead of manually crafting each email with personalized data, mail merge automates this process by merging a template with a data source, such as a spreadsheet.
By doing so, it allows for the insertion of unique recipient information, like names or addresses, resulting in a personalized output for every individual. Ultimately, mail merge streamlines communication efforts, saves time, and ensures that recipients receive tailored content, enhancing engagement and connectivity.
How to Do a Mail Merge in Google Sheets
There are three popular methods to execute a great mail merge using Google Sheets: using an add-on, Apps Script, or the Mailmeteor Dashboard. In this section, we’ll walk you through each of them. Step-by-step.
With an extension
Mailmeteor is a powerful extension that integrates directly into your Google services and provides mail merging directly in Google Sheets, maximizing convenience and efficiency for clients and businesses of all sizes. With a 4.9 Star rating and 6M+ installs, it’s one of the best add-ons you can have for your email marketing and is on the list of recommended apps for Google Workspace.
If you are interested in learning how to use MailMeteor’s add-on effectively, here is a step-by-step guide:
1. Get Mailmeteor up and running
Begin by installing Mailmeteor from the Google Workspace Marketplace. This add-on seamlessly integrates with your Gmail account and Google Suite setup, making it incredibly user-friendly.
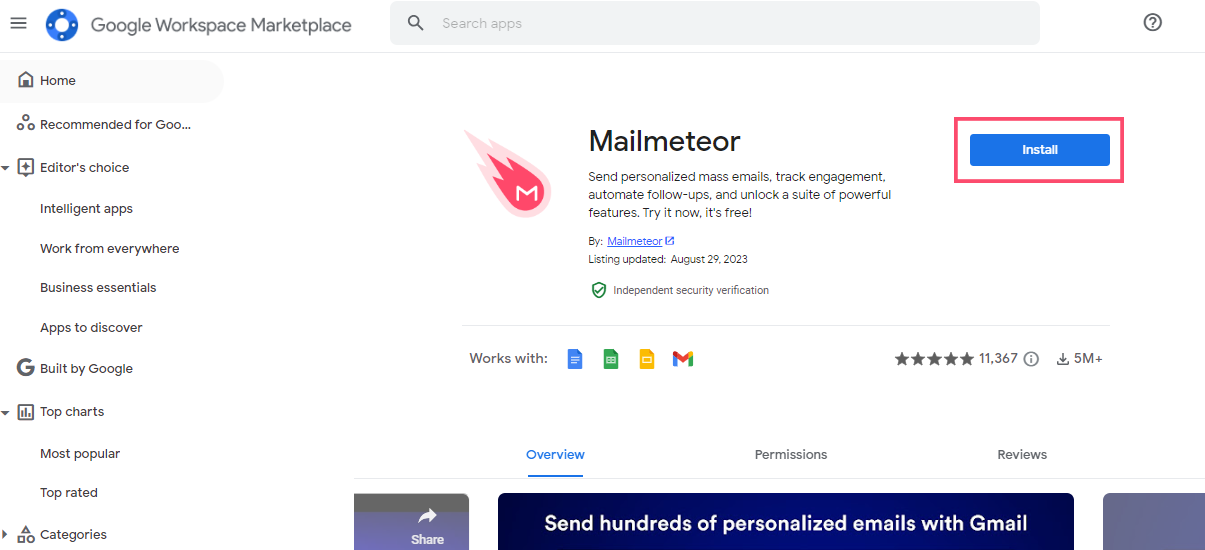
The Google Workspace Marketplace is a platform where users can discover and install a wide range of trusted apps and add-ons. These can enhance your productivity and customize your Google Workspace experience.
2. Create a contact list on Google Sheets
Now that you have Mailmeteor installed, open a new Google Sheets spreadsheet. This will serve as the foundation for your mailing list. You can either manually create a table with all the necessary contact information or import an existing list from your computer.
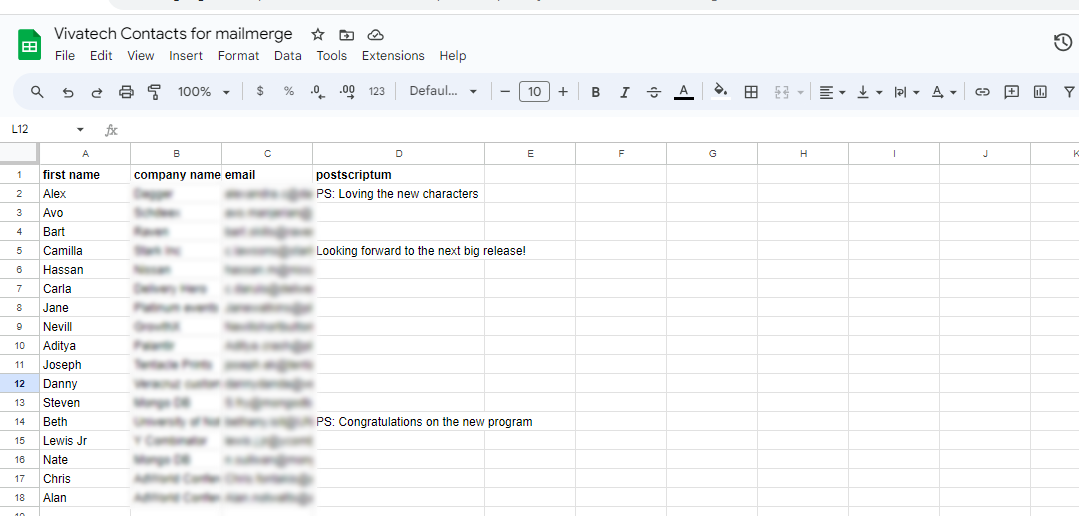
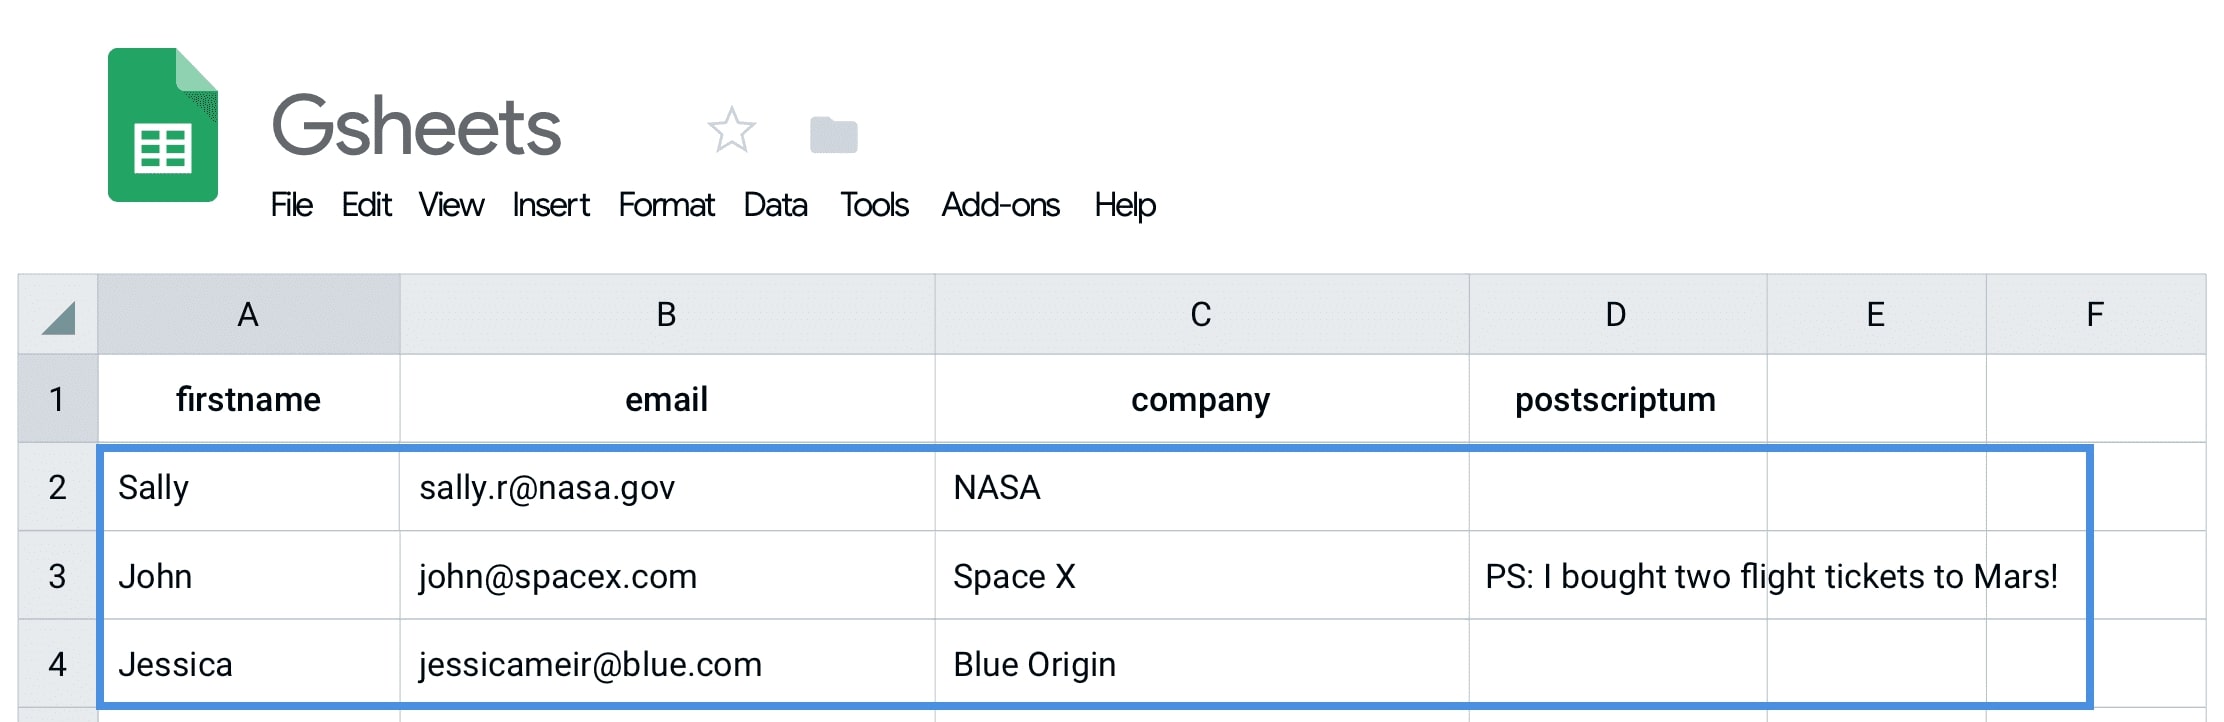
Remember to create column headers for your contact list. Each column represents a specific field, enabling Mailmeteor to personalize your mail merge emails. Also make sure you have a column labeled ‘email’ that contains the email addresses of your contacts.
3. Open the Mailmeteor Extension in Sheets
To access Mailmeteor in Sheets, click on Extensions in the top bar, and scroll down to Mailmeteor. From there, select Open Mailmeteor. A new popup window will appear. You might need to allow and enable some permissions at this point.
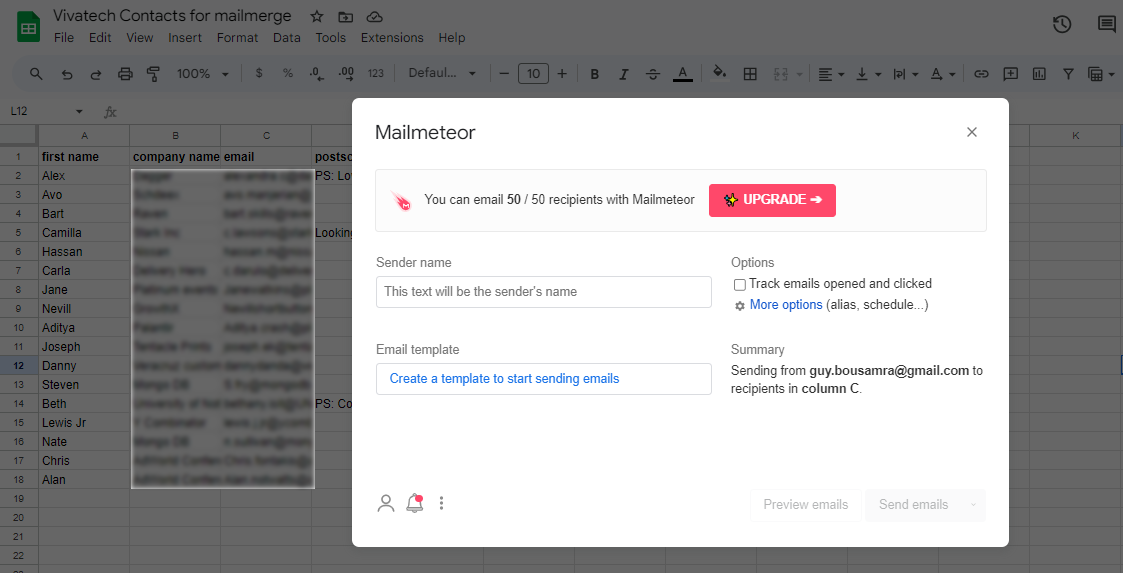
This new window contains additional information fields about the email you’re about to send. Add your subject and sender name, and make sure to go over additional options if needed.
4. Create your email template
Now it is time to create your email template. Click on Create a new template in Mailmeteor, and you will be presented with an interface like the Gmail editor. Write your email as you would normally, keeping in mind that some sections will be personalized using Mailmeteor’s service, like in this example.
Hello [First Name],
It was a pleasure meeting you in person at Vivatech. Alas, we both know how intense these conferences are!
Would love to discuss further and develop how we can help you achieve your business goals at [Their Company]?
See you soon,
[Your Name]
5. Double-check & send
Mailmeteor offers a handy preview option that allows you to review how your personalized emails will appear to recipients. This step ensures that your email is well-written and that all variables are correctly filled out.
Additionally, take the opportunity to send test emails to various devices and platforms to ensure that your email looks great across different environments.
Using Apps Script
This is (by far) the slowest and most complicated method we’ve explored for performing a mail merge in Google Sheets. It requires you to set up extensively with scripts and go through a bunch of steps that feel like you’re arming a nuclear arsenal. So we don’t really recommend it, unless you’re (very) tech-savvy. Still want to give this a go? Here’s how it works.
1. Create the sample spreadsheet
For starters, click here to make a copy of the sample spreadsheet. The Apps Script project is attached to this spreadsheet.
2. Update the recipients column
In your copied spreadsheet, update the Recipients column with the email addresses you want to use in the mail merge. You can also add, edit, or remove columns to customize your email template.
3. Create an email template
Sign in to your Gmail account, and click Compose to create an email draft. To insert data from the spreadsheet in your email, use placeholders that exactly match the column headers of your spreadsheet. The placeholders are case-sensitive and must be surrounded by curly braces. Here’s an example: {{ firstname }}.
4. Run the script
Go back to your spreadsheet, refresh the page, and click Mail Merge > Send Emails. Then authorize the script.
If the script doesn’t run and you get saying that This app isn’t verified, select Advanced > Go to {Project Name} (unsafe), then try again.
Enter the subject line of your email template. Then click OK to send personalized messages at scale using Google Sheets, Gmail, and Apps Script.
From the Mailmeteor Dashboard
Granted, it’s not directly from your Google Sheets interface. But this method is excessively easy and practical and all you need is a URL of your Google Sheet document. So make sure to give it a try.
1. Log in to your Mailmeteor Dashboard
To get started, create a Mailmeteor account, and go to your dashboard.

2. Start a new campaign
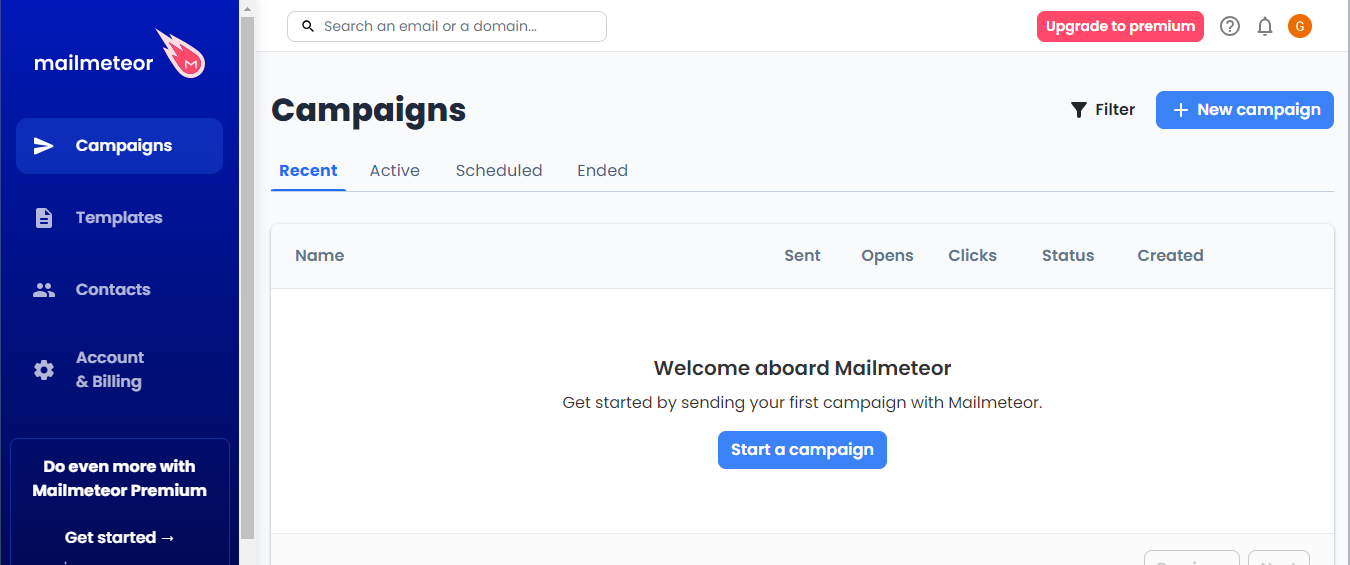
Either go through Campaigns on your left menu, then Start Campaign, or simply click on the New Campaign button.
3. Select Recipients
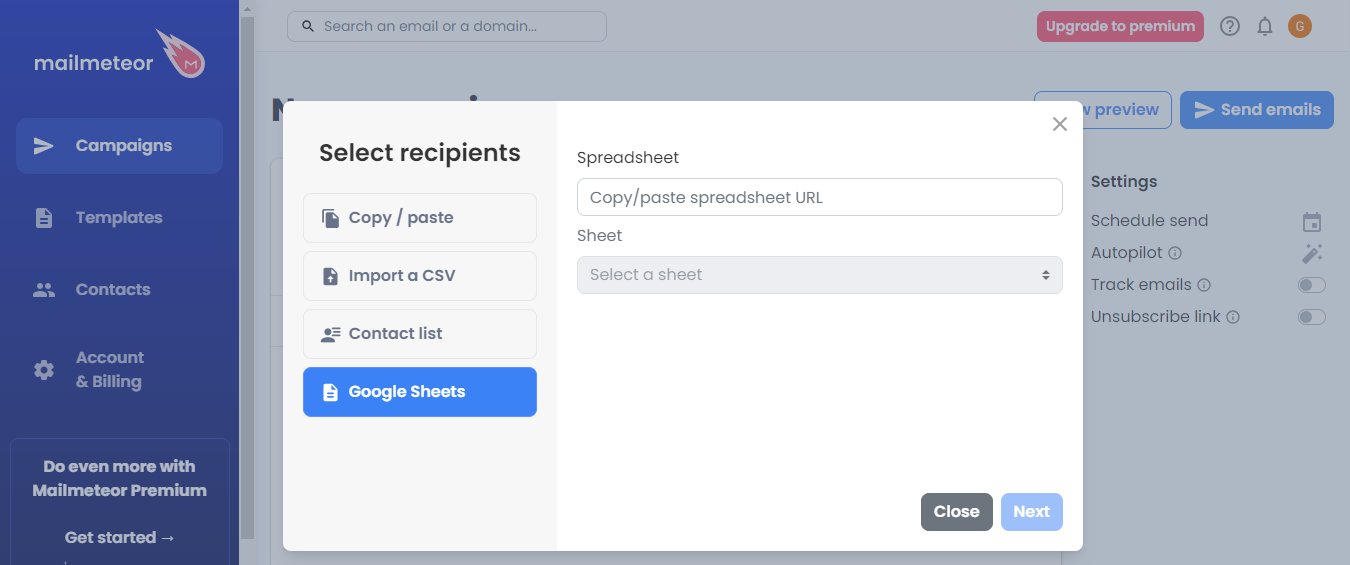
In the To: field, tap on Select Recipients, then select Google Sheets and paste in your spreadsheet URL.
4. Personalize your template
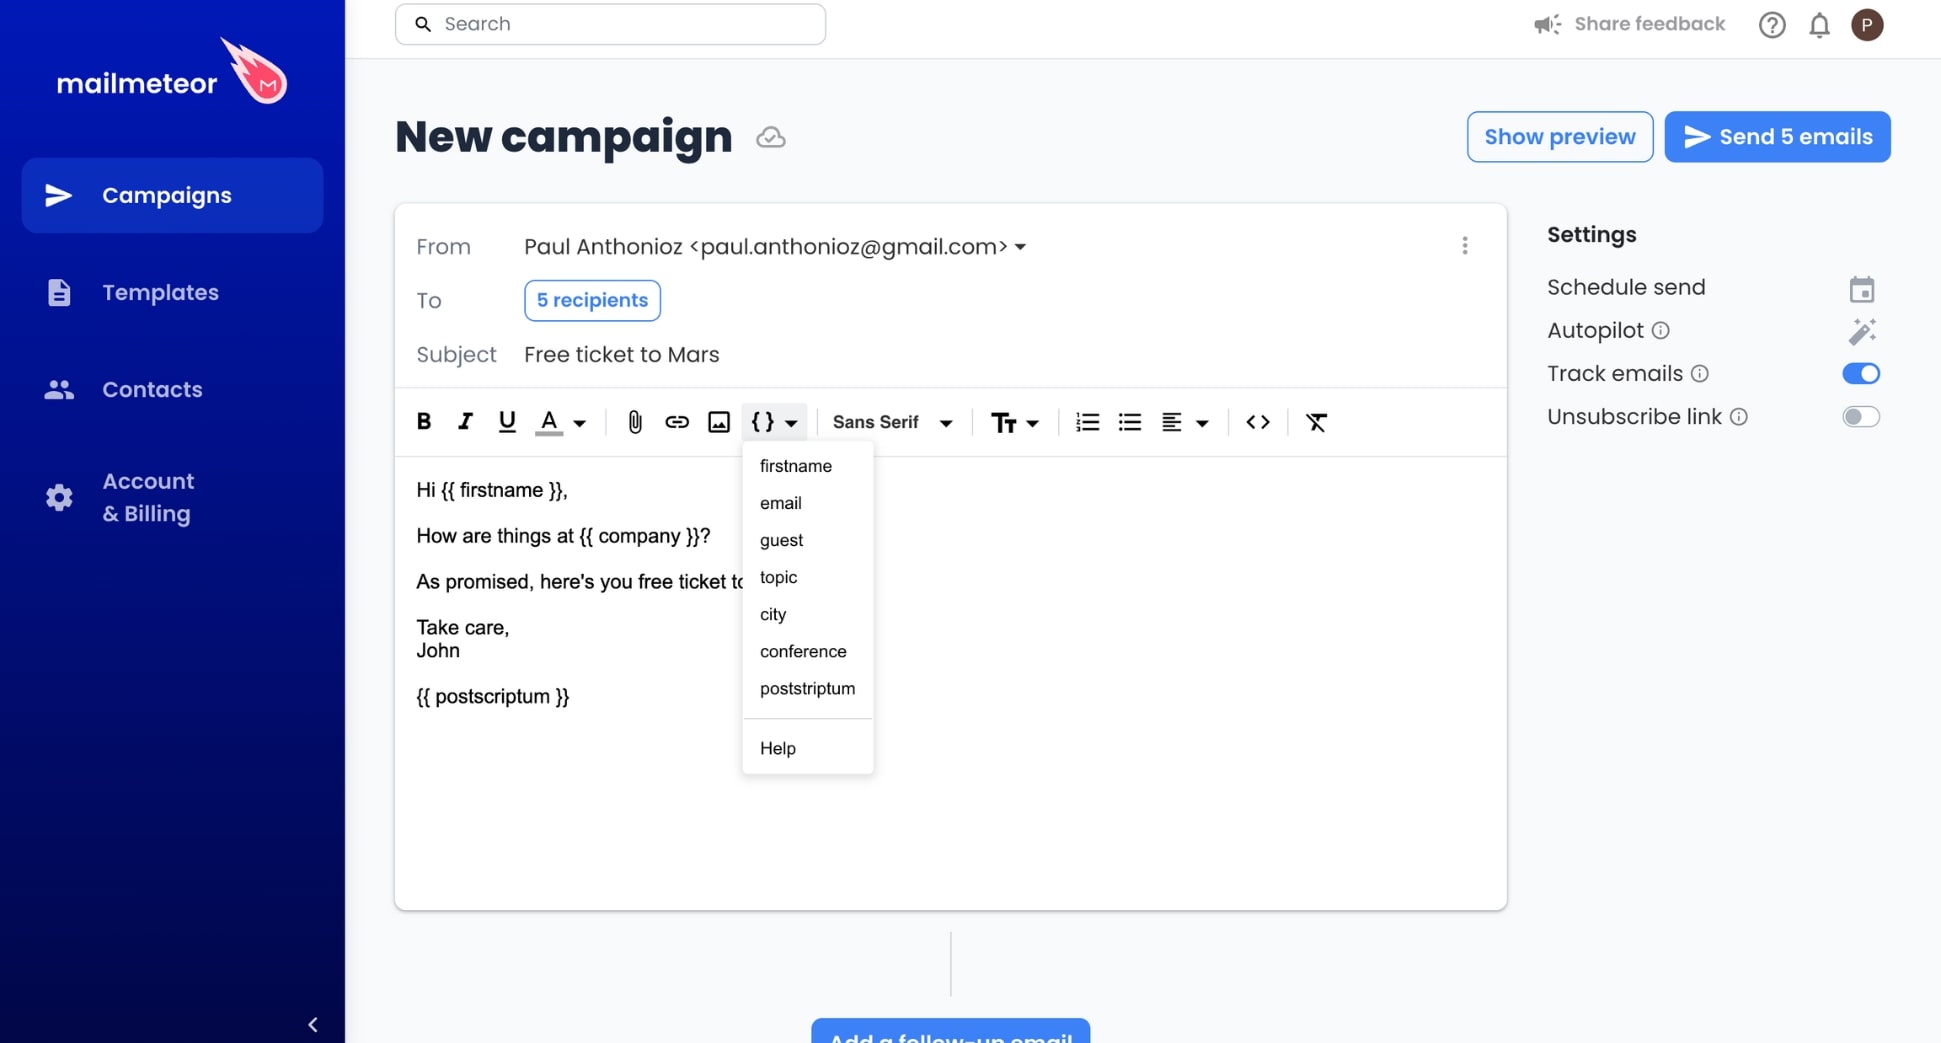
Now that you’ve uploaded your contact list from Google Sheets, click Insert variable to start customizing your message directly from the Mailmeteor Dashboard.
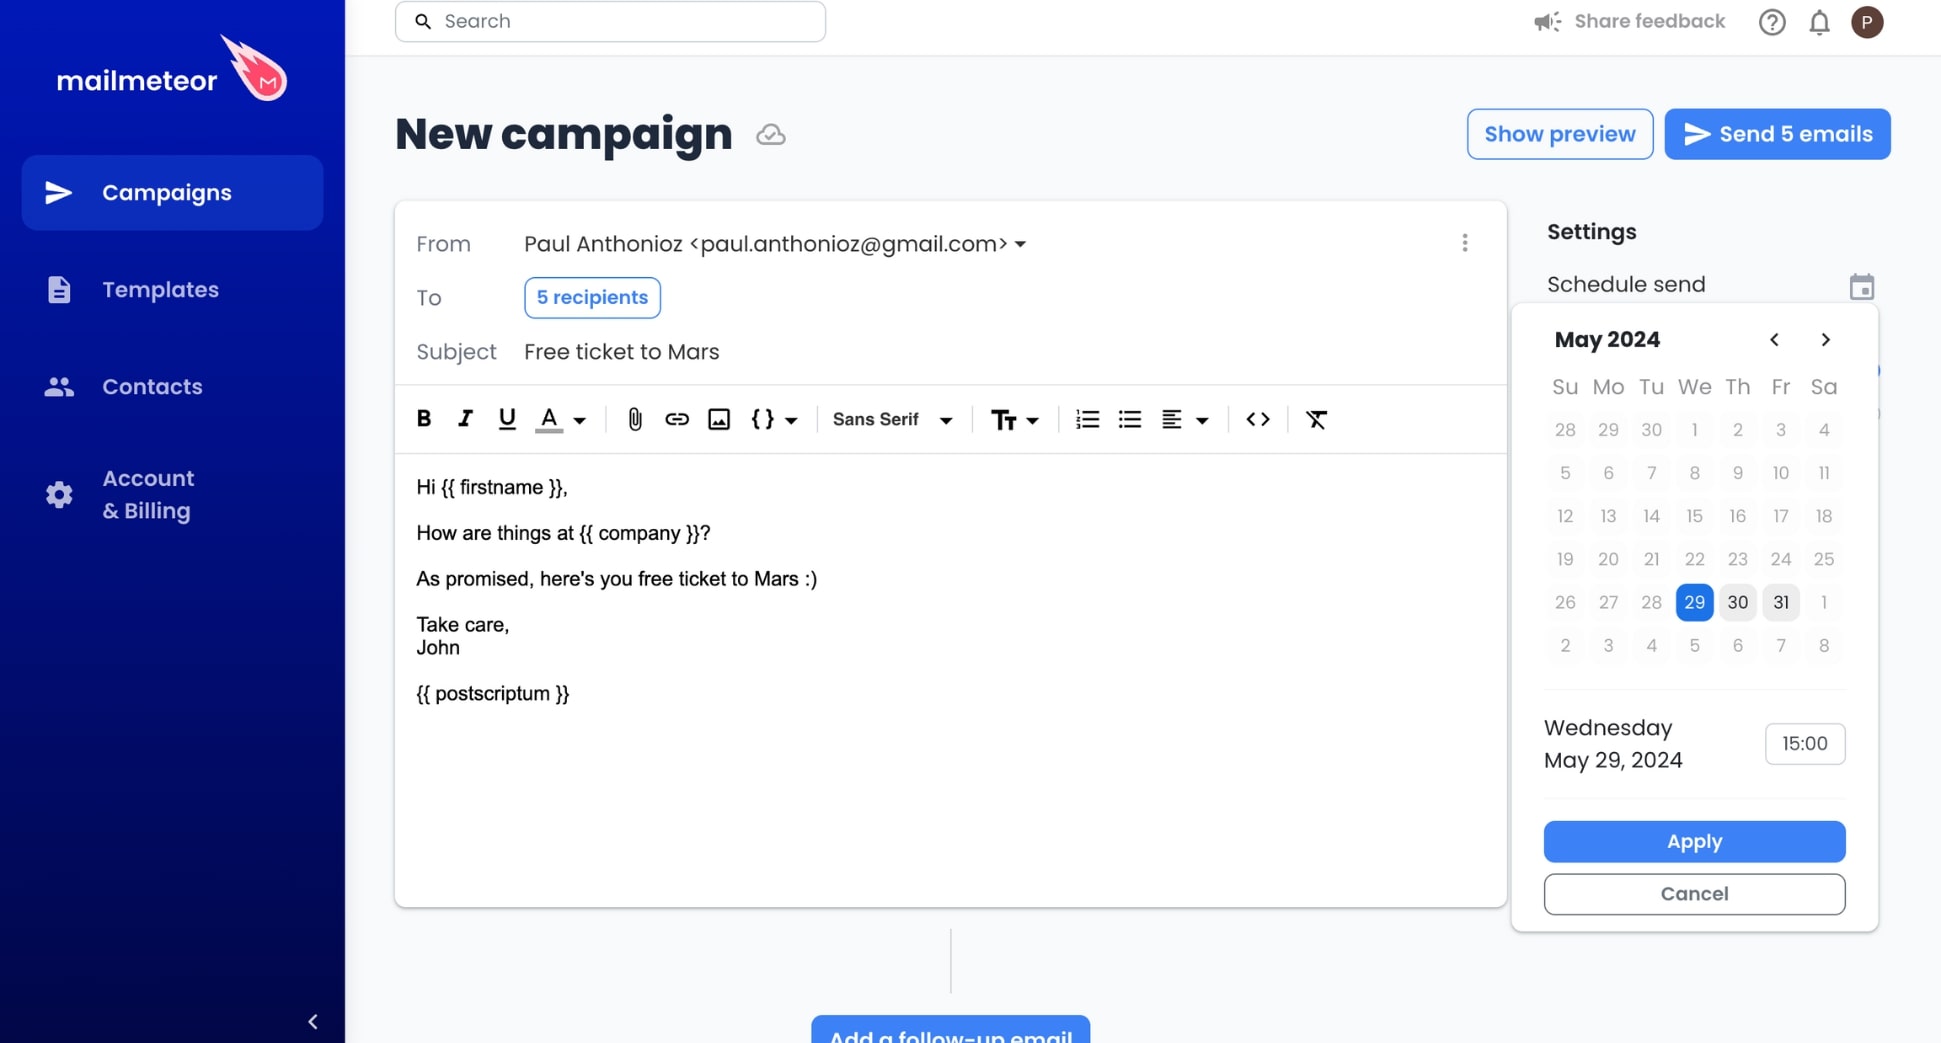
5. Preview & Schedule
Lastly, click Preview to get a sneak peek of what your mail merge will look like in your recipients’ inboxes. Check that your merge fields are working properly. Then click Schedule emails, pick a date and time, and press Send.
Is Google Sheets the best option to mail merge?
Perhaps the best thing about mail merging using Google Sheets is that you can install add-ons like Mailmeteor to unlock special features, designed to help you get the most out of every mail merge you create.
Pros
Here are some concrete examples of what you can achieve by combining the power of Google Sheets and Gmail:
- Personalizing emails: Once you have your email template, you can personalize all of your emails with Mailmeteor variables stored in your Google Sheets spreadsheet, letting you add a human touch to every message in the mail merge to foster new relationships and improve your open rates.
- Tracking in Google Sheets: After you’ve sent your emails, the Mailmeteor real-time tracking feature can provide you with a complete report for every mail merge directly within your Google spreadsheet, letting you know who opened your emails and who’s clicked on an included link.
![]()
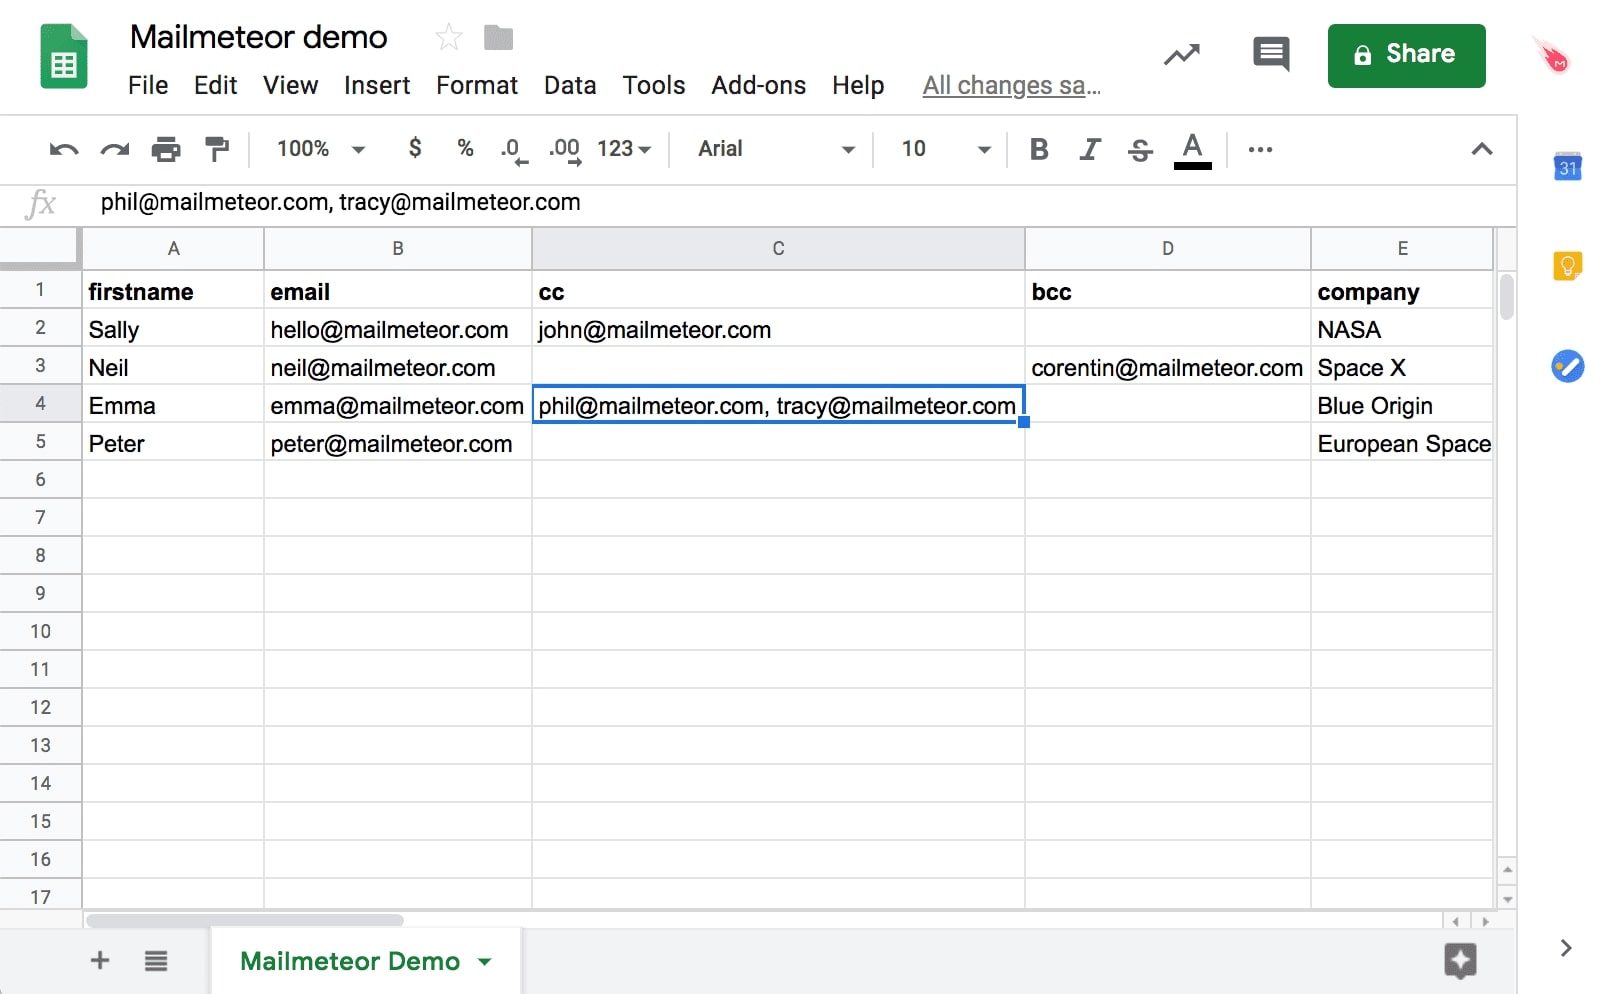
- Add CC or BCC recipients: Get more people involved in your email conversations by adding CC ( Carbon Copy) or BCC (Blind Carbon Copy) recipients to your mail merge, provided automatically through data drawn from Google Sheets - all done simply by adding a column named Cc or Bcc to your spreadsheet.
- Attach files: Need to send media files or extra documents to multiple recipients at once? Mailmeteor lets you mail merge with attachments in Google Sheets, helping you share important photo, video, text and audio files just like that. You can even add a column in your spreadsheet to mail merge personalized attachments.

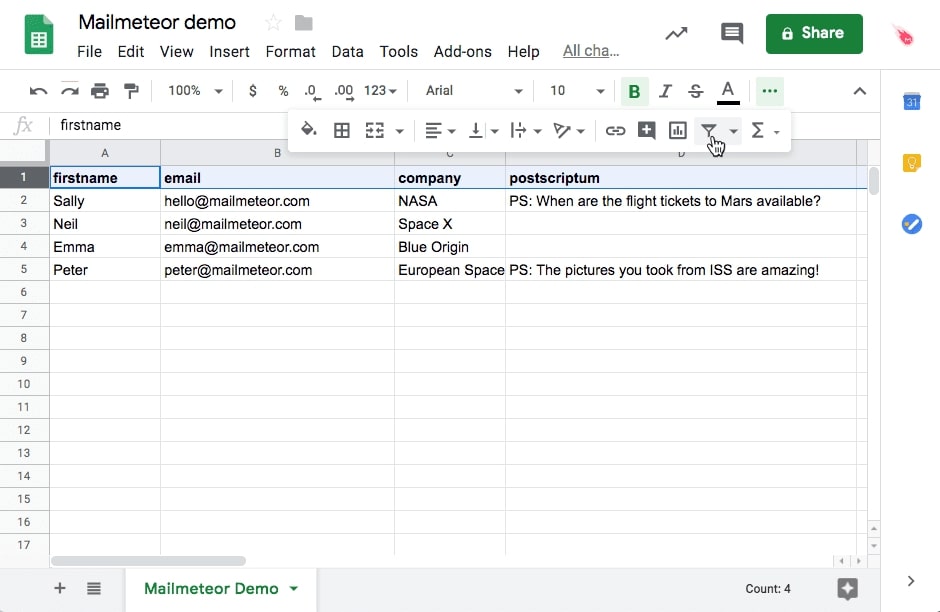
- Segmented contact mail merges: By filtering your Google Sheets spreadsheet, you can split up and mail merge to different segments of your contact list according to different metrics, such as people who didn’t open your last mail merge email, or those who took the time to respond.
-
Simple unsubscribe function: The unsubscribe feature makes unsubscriptions from your mail merge lists easy for your contacts, helping you improve your standing with Gmail and reduce the chances of your emails being labeled as spam. Your Google Sheet will keep track of each person that unsubscribes from your email.
-
Scheduled mail merges: If you’re setting up your email campaign in advance, being able to schedule your mail merge can take a lot of work off your back. Mailmeteor lets you schedule your Gmail mail merge from Google Sheets to the exact date and time you want your emails to be sent.
-
CRM integration: Mailmeteor’s CRM integration lets you effortlessly connect your Google Sheets mail merges with all of the most popular CRMs on the market, such as Salesforce or Hubspot.
-
HTML template integration: Your brand, whether personal or professional, is an important part of your email campaigns. Our add-on has a Developer Mode designed to let you import your HTML design template onto every mail merge email that goes out.
-
Email aliases: If you’re working from a number of email addresses and you want to send your Sheets mail merge from a specific one, Mailmeteor has you covered. Whether it’s from Gmail, Outlook or Yahoo, Mailmeteor lets you choose the right alias for the right email.
Want to learn more about the full Mailmeteor feature list? Find out what we can do for your mail merge.
Cons
Mail merging with Google Sheets has many advantages. But there also some drawbacks to consider:
-
Email limits: Google imposes daily sending limits, which can restrict the number of emails you can send in a single mail merge. For free accounts, the limit is 500 emails per day, and for Google Workspace accounts, it’s 2,000 emails per day.
-
No native tool: Google Sheets doesn’t have a built-in mail merge tool, requiring users to rely on third-party extensions or scripts, which may lead to security or privacy concerns. Make sure to pick a reputable add-on.
-
Data management: Keeping your data updated and accurate in Google Sheets is a painstaking process if you do it manually, and can result in errors, especially with large contact lists.
Alternatives
If you find Google Sheets mail merge too limiting or complex, here are 5 simple alternatives for you to consider:
-
Microsoft 365: You can mail merge in Excel (or Word) if you’re used to working with the Microsoft Office suite.
-
Mailmeteor Dashboard: You can send mass personalized emails and follow-ups directly from your dashboard if you want to save time.
-
Email marketing platforms: You can create your mail merge in Mailchimp, Sendinblue, or Constant Contact to get advanced features.
-
Third-party add-ons: You can install a free extension, like Yet Another Mail Merge, if you have (very) basic needs.
-
Email service providers: Lastly, you can mail merge from Outlook, or other popular email clients, such as Gmail.
Conclusion
Google Sheets is a powerful way to mail merge and send personalized emails at scale. You can use an add-on, Apps Script, or the Mailmeteor Dashboard to streamline your communication process and save time.
Some limitations include daily email quotas, a steep learning curve, and the lack of a native feature. But the benefits of using Google Sheets for mail merging often outweigh the drawbacks.
For those of you looking for a cost-effective and integrated solution, your best option is to pair Google Sheets with a mail merge extension like Mailmeteor to unlock advanced features, such as email tracking, and automations.
To get started, try out Mailmeteor for free, and see how it can transform your email campaigns. Our free plan lets you send up to 50 emails a day. Why not give it a shot? No strings attached.
Happy merging 💌
FAQs – Mail merge from Google Sheets
Can you do a mail merge in Google Sheets to make labels?
You can mail merge labels in Google Sheets. To do so, combine Google Sheets with Google Docs and Apps Script to automatically populate label templates with data from your spreadsheet. You can simplify this process even further with specific add-ons, like Labelmaker and Avery Label Merge.
Does Google have a mail merge tool?
Google Sheets and Google Docs don’t have a built-in mail merge tool. But you can still perform a Google mail merge using Apps Script, or third-party add-ons, such as Mailmeteor. These tools integrate seamlessly with Google Sheets and Gmail, allowing you to send personalized emails, create customized documents, and more.
What is the best mail merge add-on for Google Sheets?
At Mailmeteor, we’ve run 10,000+ mail merge campaigns using various tools. And the best mail merge add-on for Google Sheets we’ve tried (so far) are:
-
Mailmeteor – Easy to use, supports up to 2,000 emails per day, with powerful features, such as live tracking and scheduling.
-
Yet Another Mail Merge – Integrates with Gmail, plans are affordable, supports email tracking and follow-ups.
-
Mergo – No steep learning curve, works with Google Sheets, Google Docs, and Gmail.


